Peer Approval for Remote Worker Access with NetBird
For organizations embracing remote work, ensuring secure network access for distributed teams is a paramount challenge. Traditionally, VPNs and remote desktop solutions have been the standard for granting access to company resources. However, these methods often fall short in today's dynamic work environment, especially when dealing with freelancers and temporary workers.
The conventional approach to remote worker access presents several security and operational challenges:
- Increased Security Risks: Granting blanket access to network resources can expose sensitive data to potential breaches, especially when dealing with external collaborators.
- Device Management Complexity: Ensuring that only authorized and secure devices connect to the network becomes increasingly difficult as the number of remote workers grows.
- Lack of Granular Control: Traditional solutions often lack the flexibility to implement fine-grained access policies based on user roles and device trust levels.
- Scalability Issues: As teams expand and contract, managing access for a fluctuating workforce can become a time-consuming and error-prone process.
This guide introduces NetBird's Peer Approval as a robust solution for secure remote worker access by:
- Implementing Zero-Trust Principles: Ensuring that every device and user is verified before granting network access, regardless of their location.
- Simplifying Device Trust Management: Providing a streamlined process for approving and managing trusted devices within the network.
- Enhancing Access Control: Offering granular control over network resources, allowing organizations to tailor access based on user roles and device status.
- Improving Scalability: Facilitating easy onboarding and offboarding of remote workers, including freelancers, without compromising network security.
Let's explore the step-by-step process of implementing Peer Approval with NetBird to ensure that only trusted devices can access your network.
Prerequisites
To replicate this use case, you'll need the following prerequisites:
- An main NetBird account with administrative privileges.
- A secondary email address not linked to any NetBird account to simulate the freelancer's email.
- NetBird installed on the main device.
With these prerequisites in place, you're ready to simulate granting network access to a temporary remote worker using NetBird's Peer Approval feature by:
- Setting up NetBird's access control policies for enhanced security
- Enabling peer approval
- Inviting users to join your network
- Installing NetBird on the remote worker device
- Approving peers
- Automating peer approval with EDR integration (optional)
1. Setting Up NetBird's Access Control Policies For Enhanced Security
Before onboarding remote workers, ensure your organization has appropriate access control policies in place. Adhering to zero-trust principles, create or modify policies to grant new users access only to necessary resources.
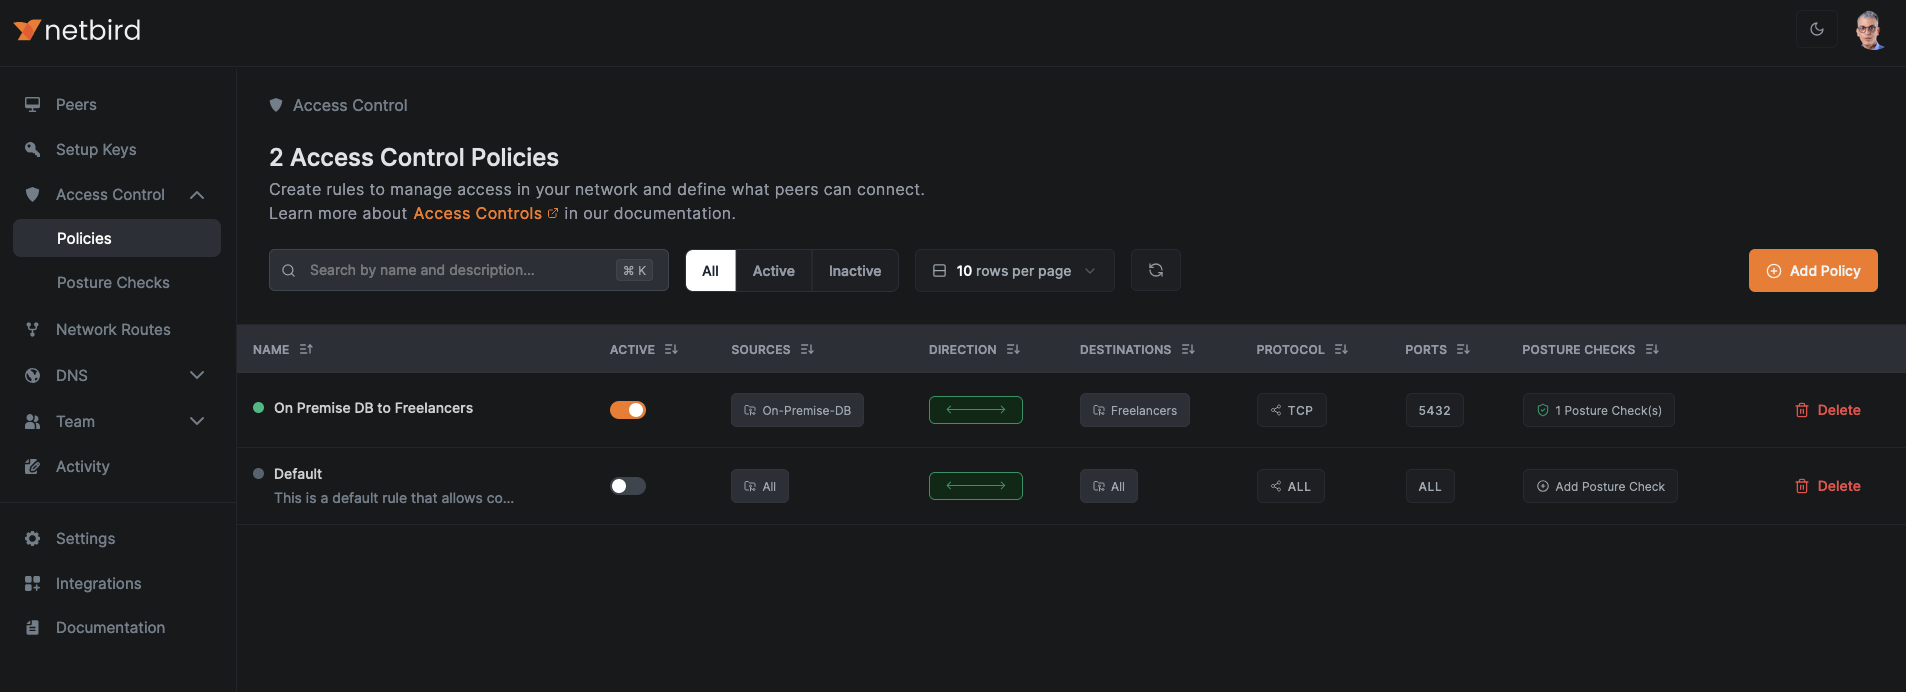
Navigate to Access Control > Policies in the NetBird admin console, then click Add Policy or edit an existing one to define these restrictions. Here's a sample policy that grant any member of the Freelancers group access to the resources in the group On-Premise-DB.
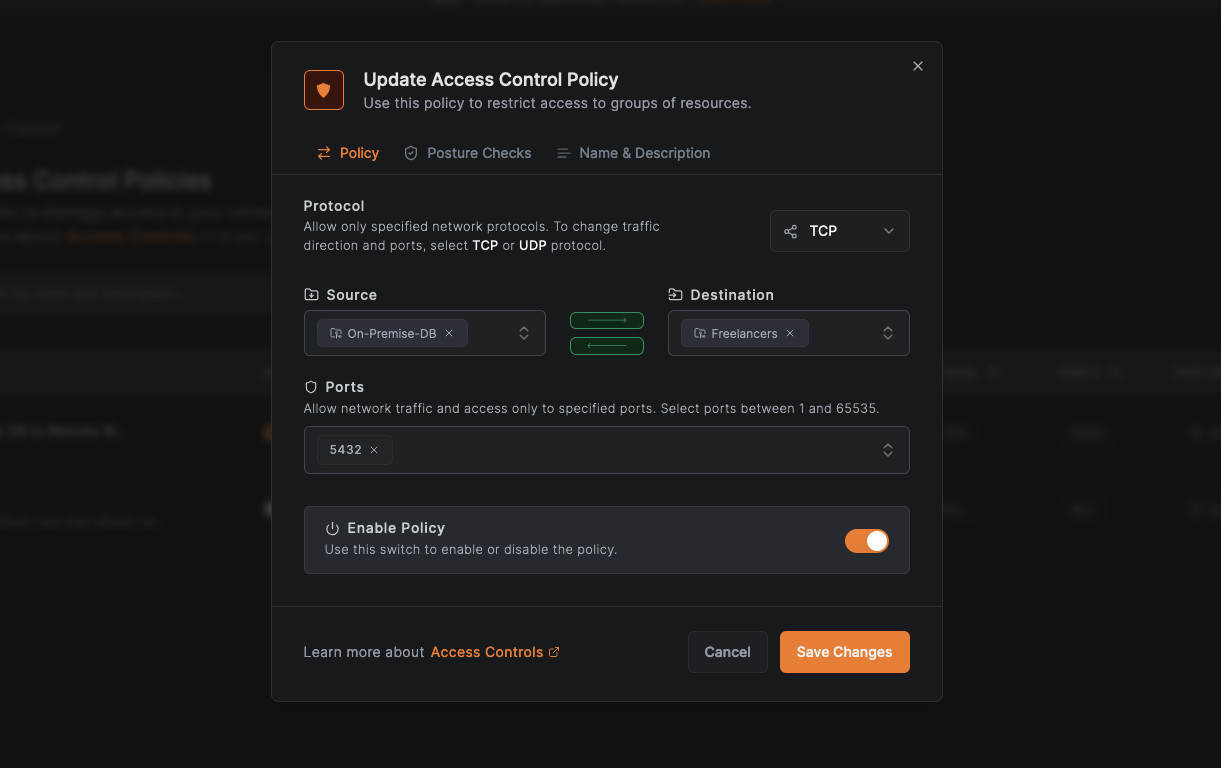
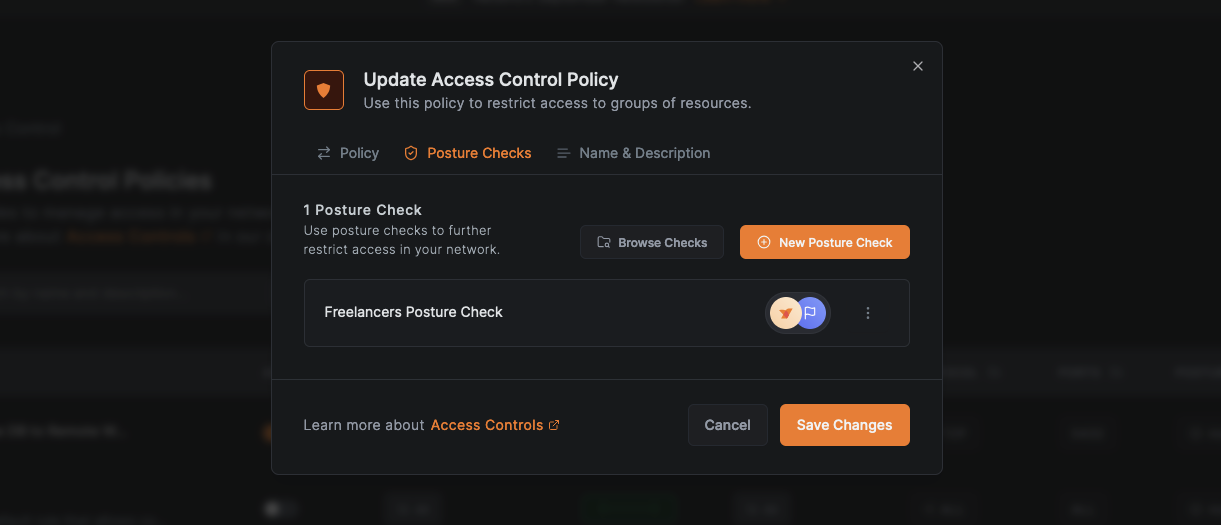
If necessary, you can also set posture checks for this policy.
Moreover, it is a best practice to disable the Default policy to enforce only restrictive, custom-defined access controls.
With appropriate access policies in place, you're ready to enable NetBird's Peer Approval feature.
2. Enabling Peer Approval
To enable peer approval, go to Settings > Authentication and activate the Peer approval toggle, then click Save Changes.
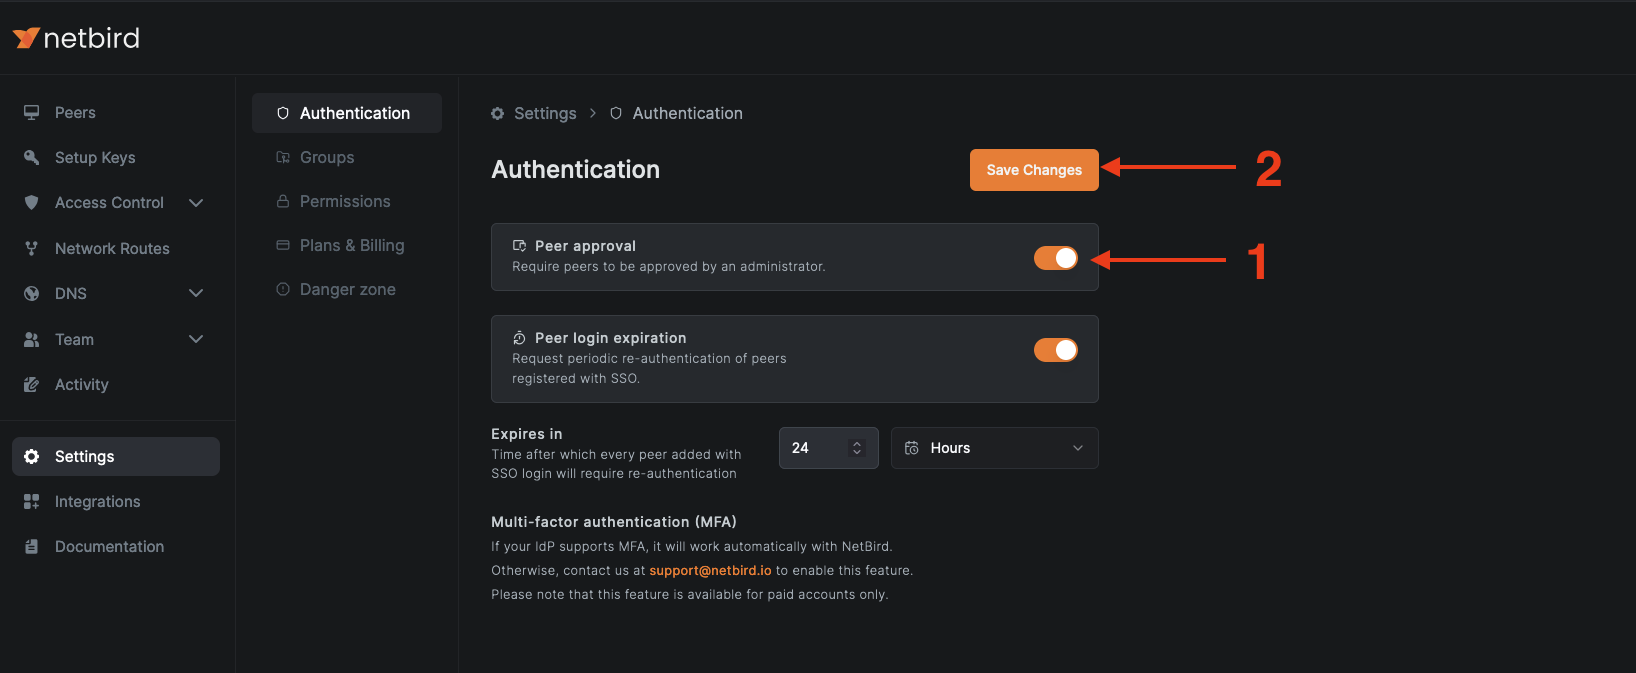
With Peer Approval activated, new members will see an Approval required message when joining. Administrators must grant access, ensuring only vetted users enter the NetBird network, thus enhancing overall security.
3. Inviting Users to Join Your Network
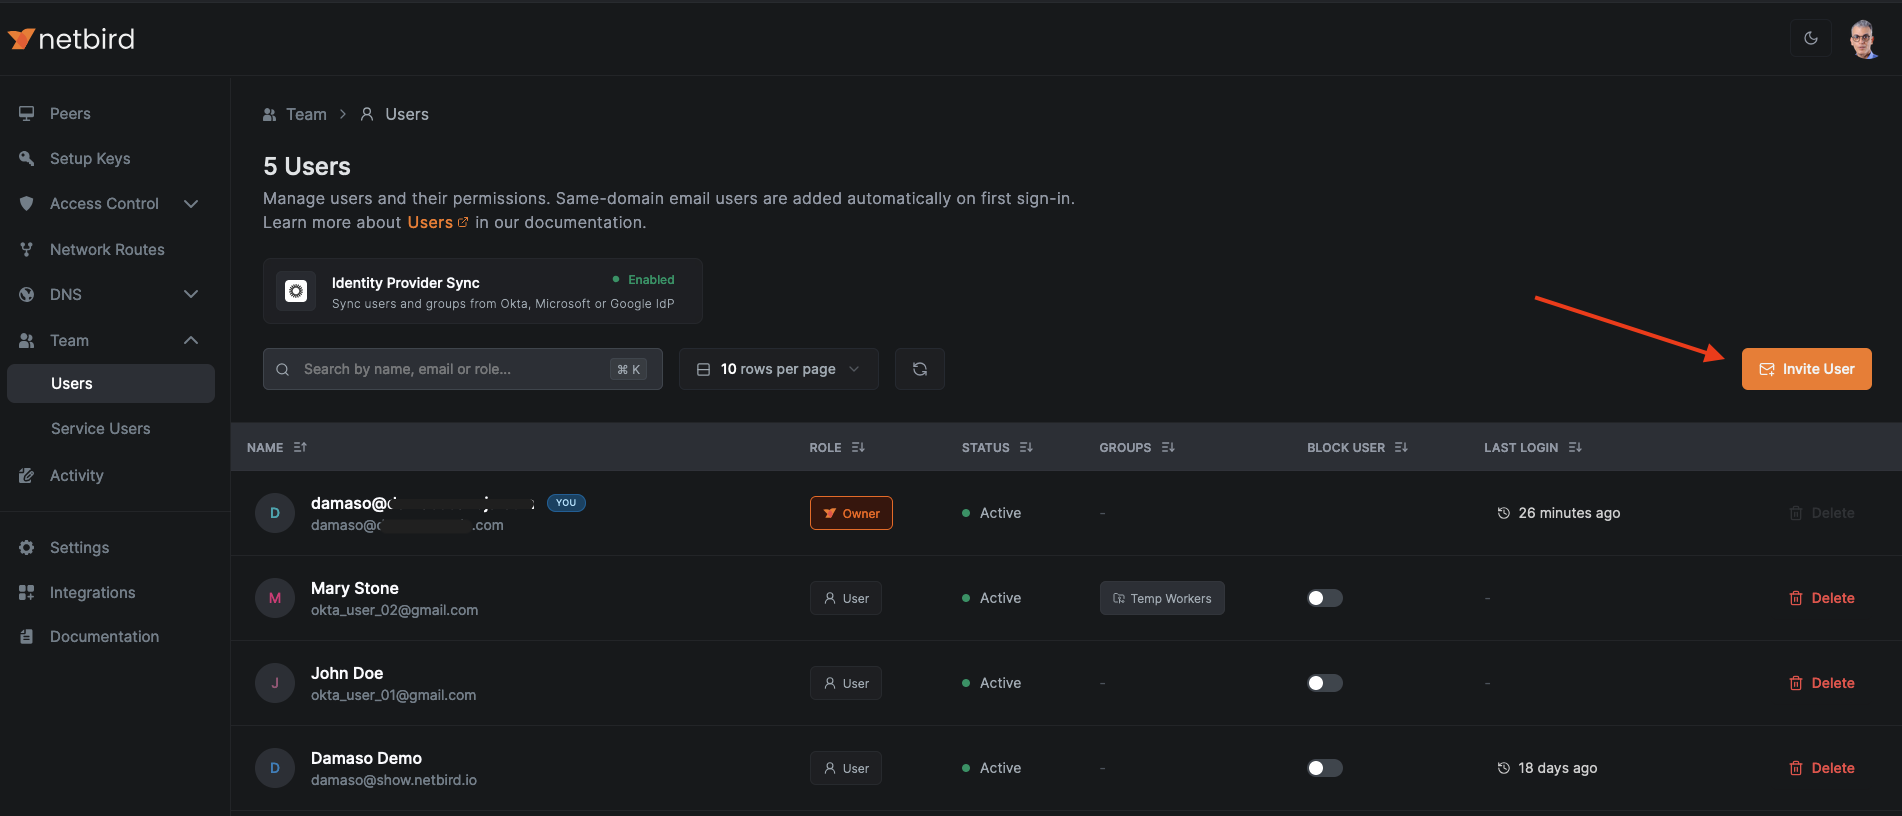
To invite a new user to join your NetBird network, go to Team > Users and click the Invite User button.
A pop-up window appears for new user registration. Enter the user's name, email address, and select the Freelancers group from the dropdown menu. NetBird's auto-assignment feature instantly links the new user to the Freelancers group upon network entry, automatically applying the associated access policy you just created.

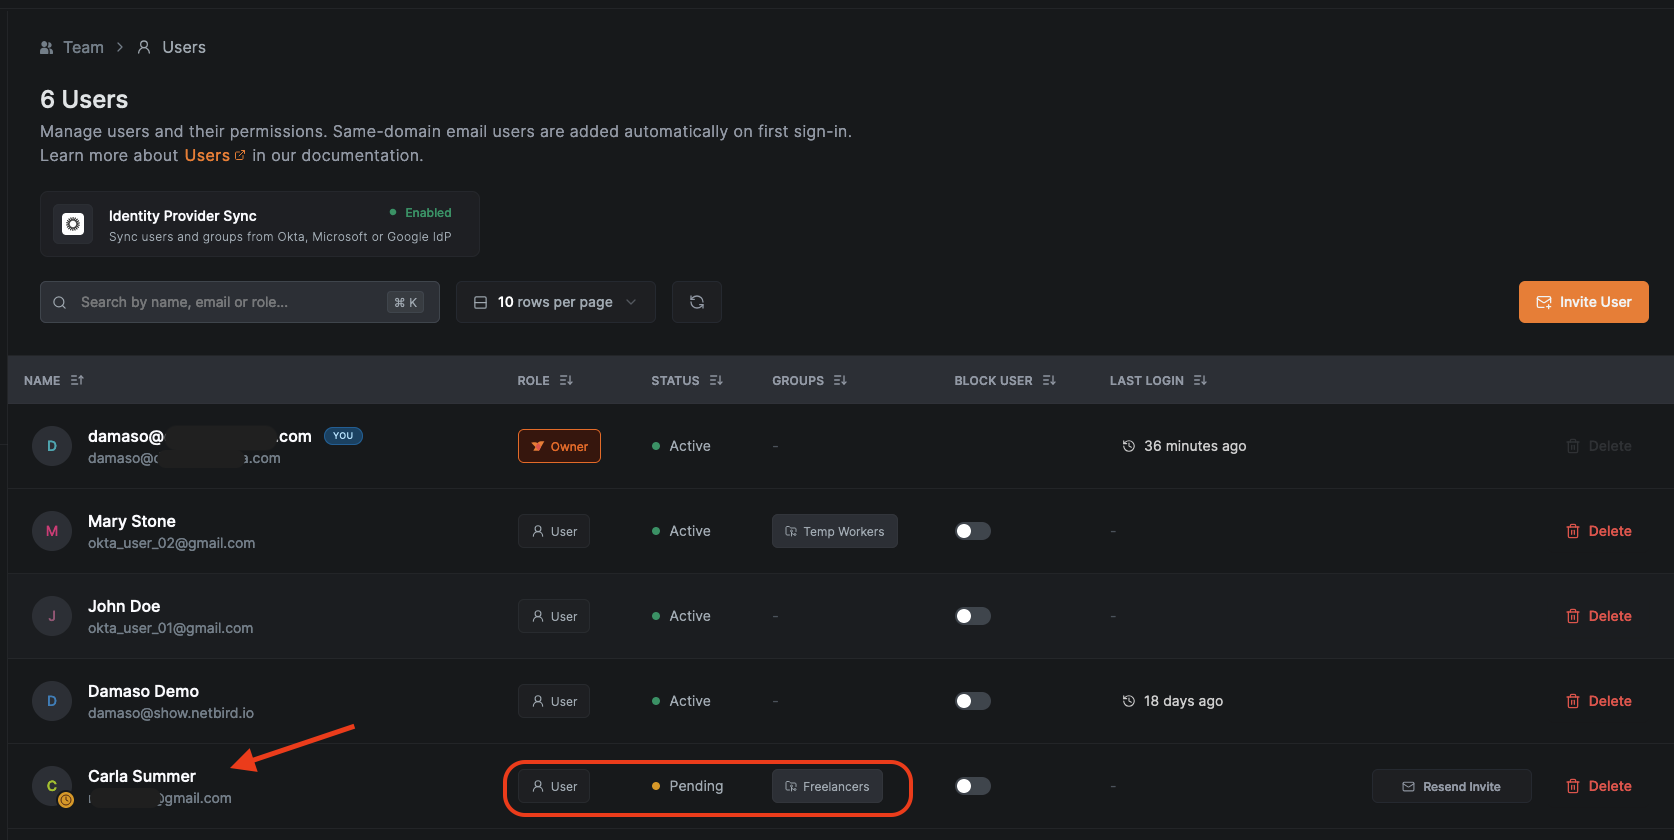
After clicking Send Invitation, you'll return to the Users dashboard. Here, the new user appears with a Pending status, awaiting their acceptance of the invitation and any required approvals.
4. Installing NetBird On The Remote Worker Device
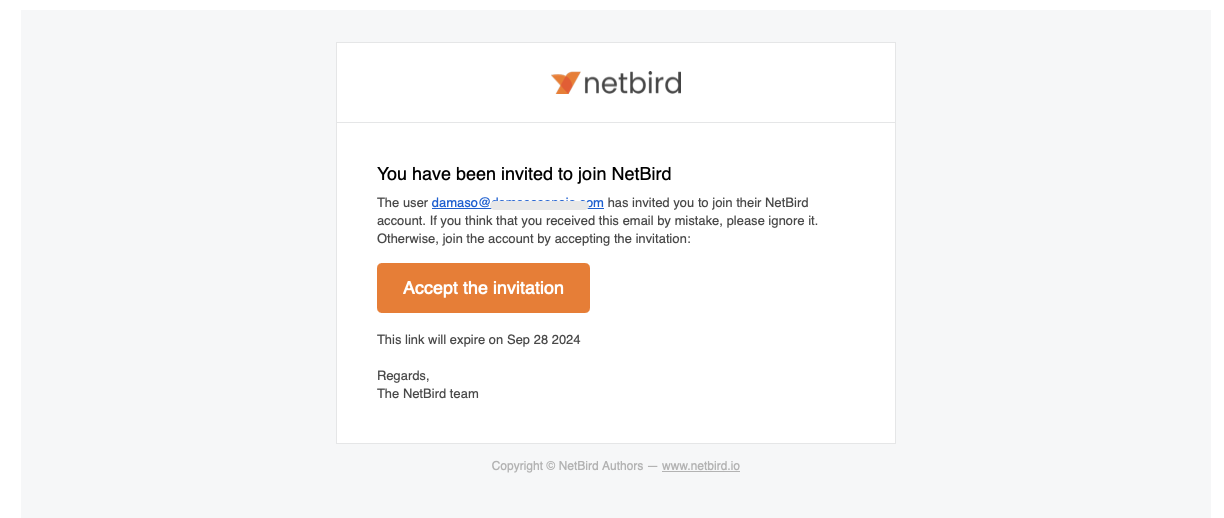
Access the secondary email account used to mimic the freelancer. In the inbox, locate the invitation email from NetBird. This email contains a secure link to join your organization's NetBird network, initiating the freelancer's onboarding process.
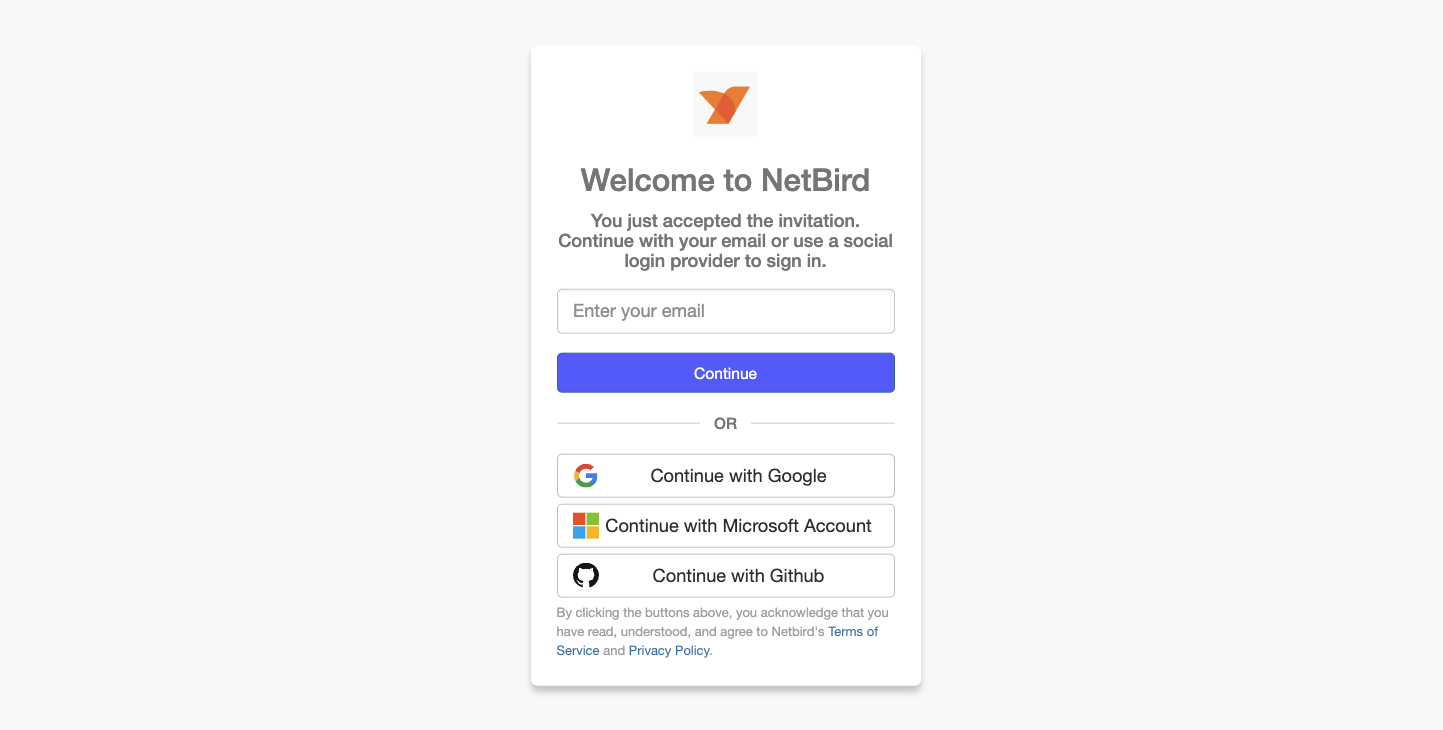
After clicking the invitation link, you'll be directed to NetBird's secure account creation page. Follow the on-screen instructions to create a new password.
Upon logging in, you'll arrive at NetBird's Peers dashboard. Locate and click the Add Peer button to initiate the Getting Started Wizard, which guides you through the process of adding a new device to the network.

The wizard will detect your operating system and provide detailed step-by-step instructions on how to install NetBird.

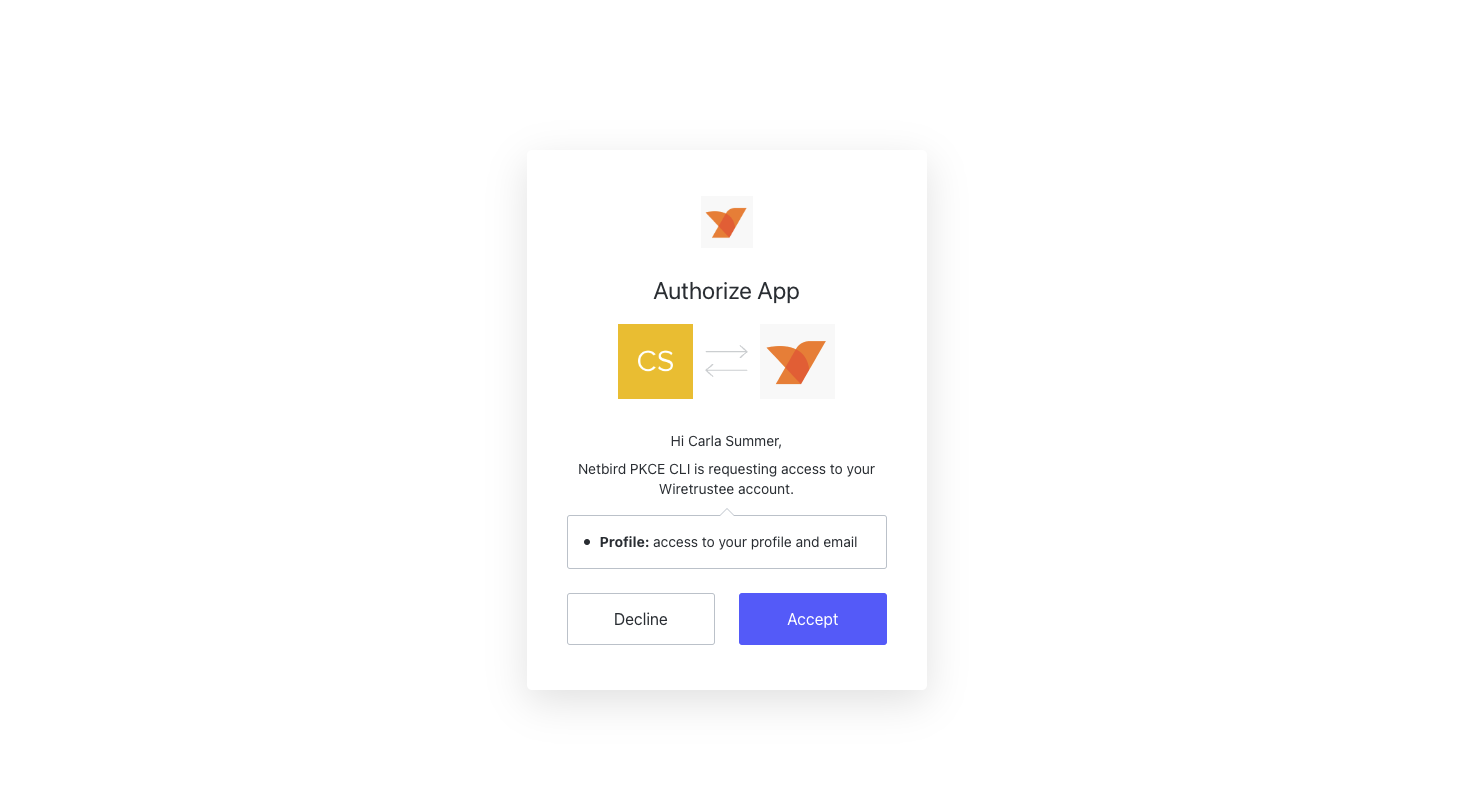
During your initial connection to NetBird, a system dialog will appear requesting authorization. This prompt asks for permission to access your profile and email information, which is necessary for NetBird to establish your account and network access.
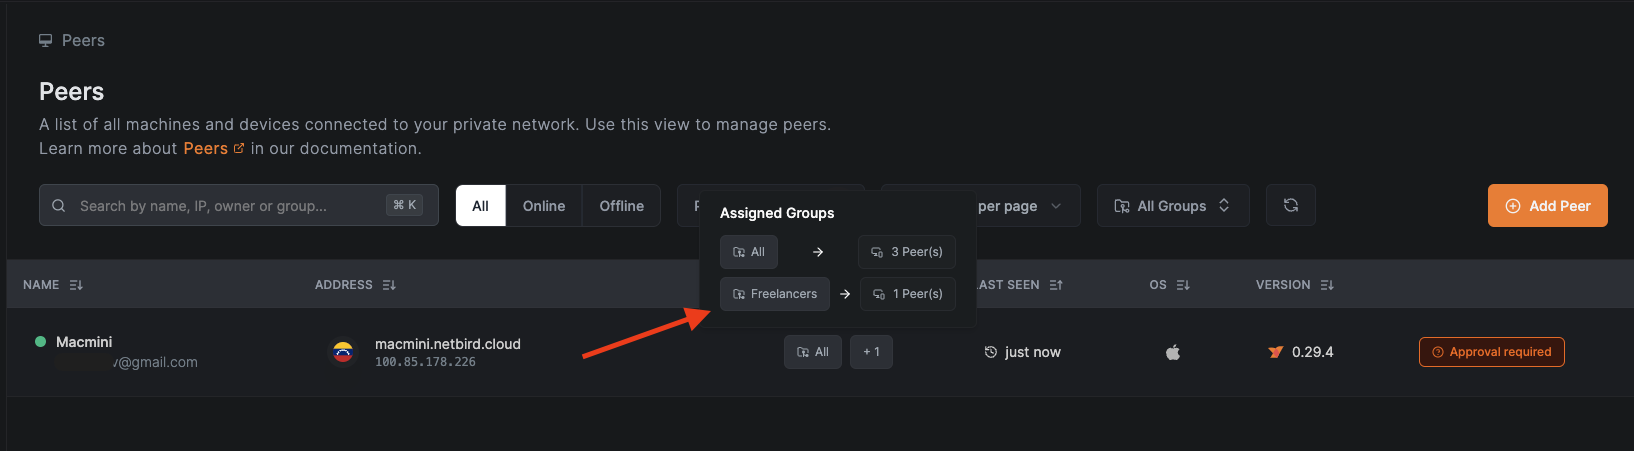
After completing the installation, your device will appear in the Peers dashboard. Hover over the +1 in the Assigned Groups column to confirm the device has automaticaclly assigned to the Freelancers group as expected.
5. Approving Peers
Back to your primary account, you'll notice the newly added user's status is now displayed as Active in the Users dashboard. This status update confirms that the device has successfully added to the NetBird network and is ready for secure communication.

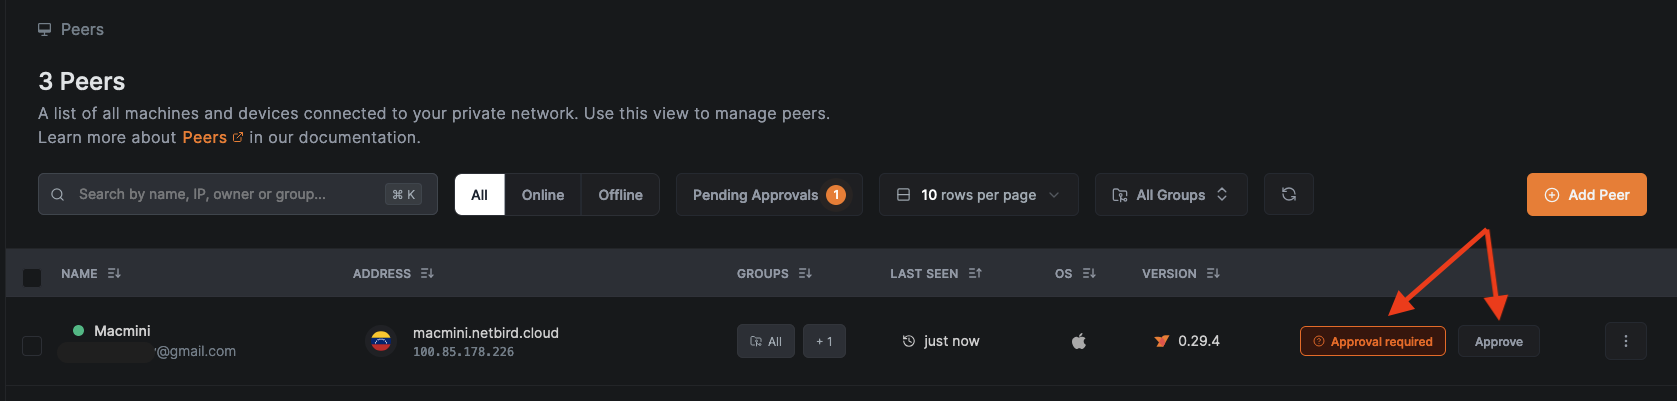
However, your approval is required before the user's device can fully connect to the NetBird network. To grant network access:
- Navigate to the
Peersdashboard - Locate the newly added device
- Click the
Approvebutton next to the device - Confirm the action when prompted
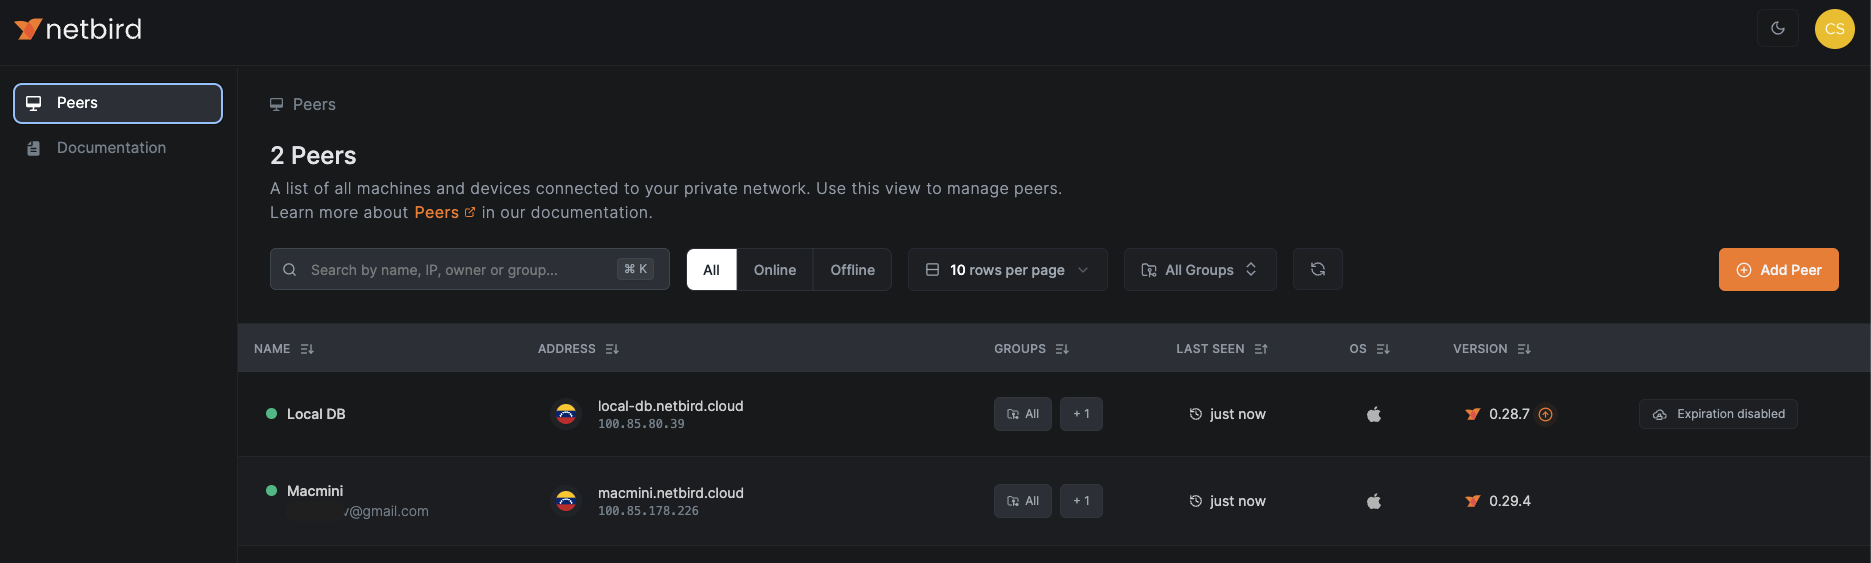
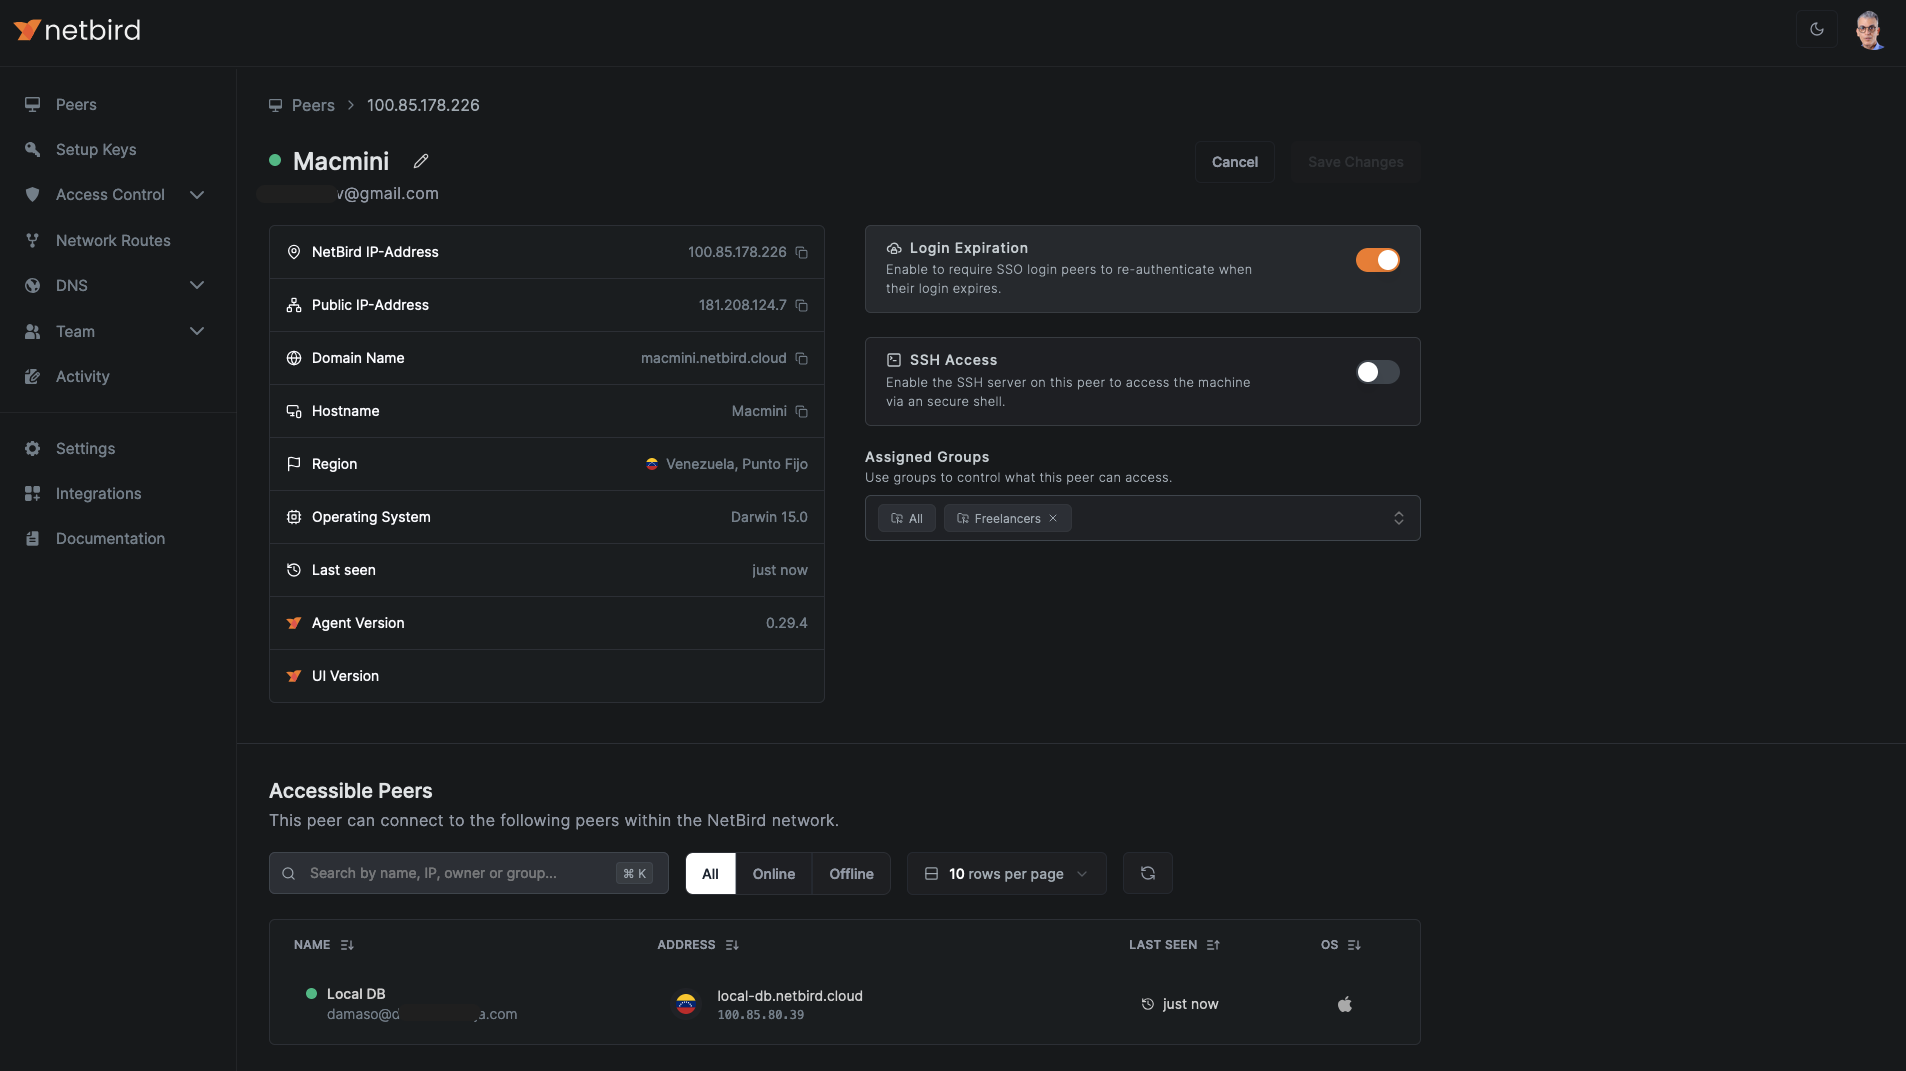
After approval, the device is granted full access to network resources allocated to the Freelancers group. The freelancer can now view all accessible network resources in their Peers dashboard:
Likewise, as an administrator, you can click on the user's device to see which resources and peers the freelancer has access to.
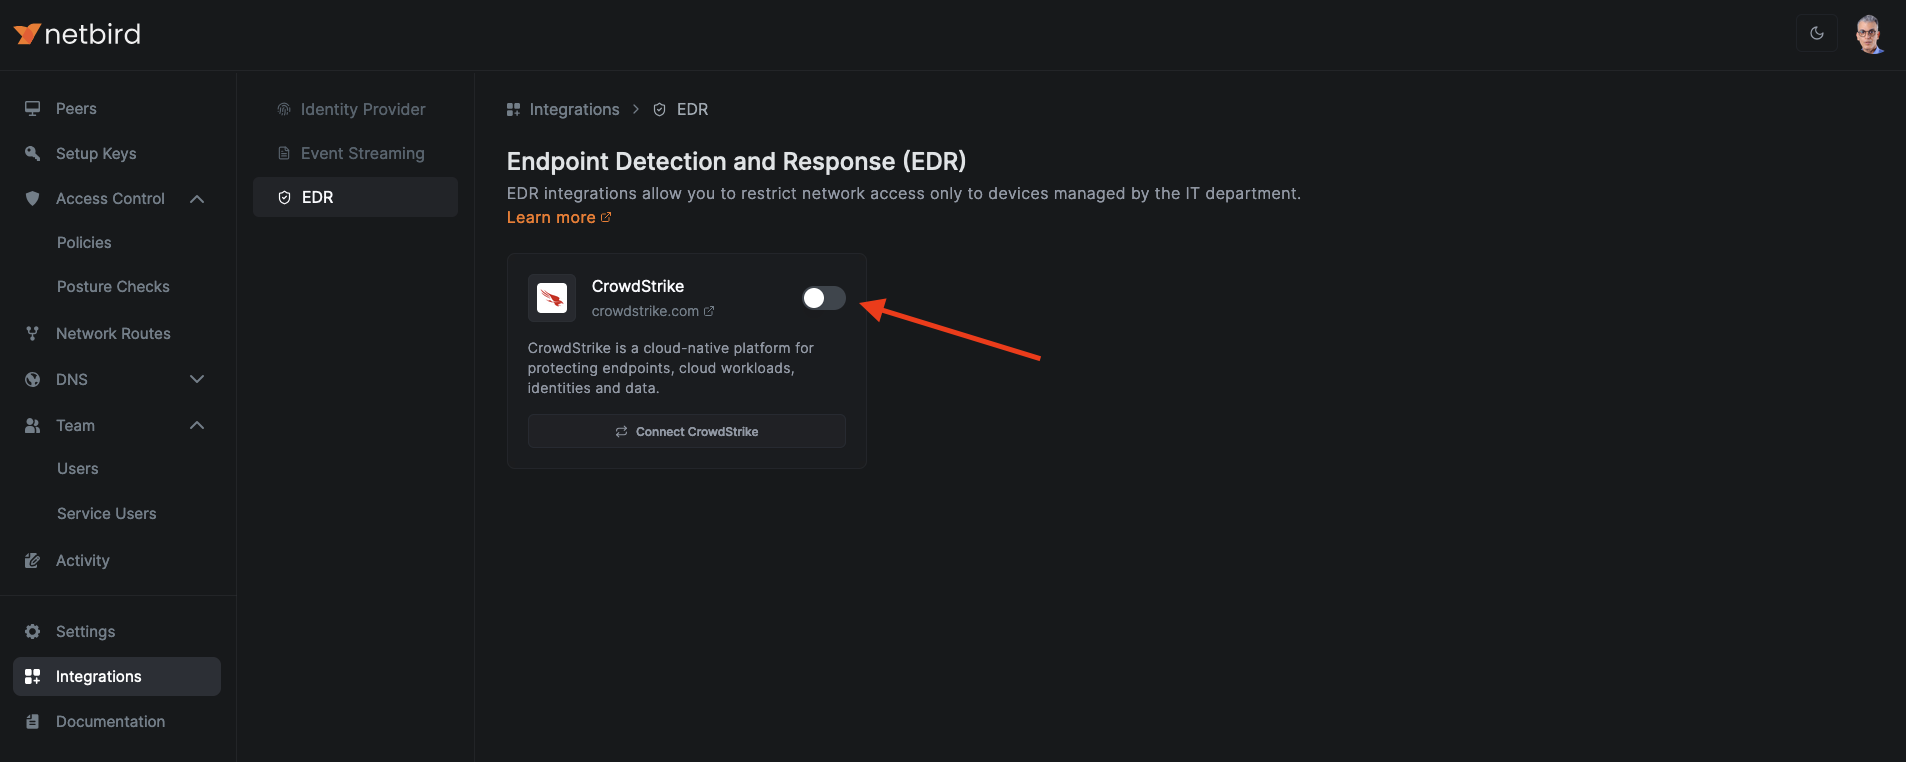
6. Automating Peer Approval with EDR Integration (optional)
NetBird's EDR (Endpoint Detection and Response) integration enhances network security by restricting access to devices managed by your organization's IT department. This feature synchronizes the list of devices managed by the EDR platform via API and verifies the presence of the EDR agent on each device. If the agent is not installed, access to the network is blocked.
Key aspects of NetBird's EDR integration:
- Supports CrowdStrike Falcon
- Allows selective application of EDR checks to specific device groups
- Automates peer approval process for trusted devices
- Available only in the cloud version of NetBird
To activate this feature, navigate to Integrations > EDR and activate the CrowdStrike integration toggle.
For more information regarding NetBird's EDR integration, refer to the documentation