Site-to-Site: Cloud Environments
This guide shows how to connect cloud VPCs across providers or bridge cloud and on-premise networks using Network Routes.
What You'll Achieve
After following this guide, workloads across different cloud providers (AWS, GCP, Azure) or between cloud and on-premise can communicate without exposing traffic to the public internet.
AWS VPC ────► Routing Peer ────► NetBird ────► Routing Peer ────► GCP VPC
(10.0.0.0/16)   (peer)                           (peer)         (10.1.0.0/16)
Multi-cloud Site-to-Site requires Network Routes because the Networks feature doesn't yet support this scenario.
Prerequisites
- A NetBird cloud account or self-hosted instance
- Access to deploy VMs in your cloud environments
- Network configuration permissions in your cloud VPCs
Example: Multi-Cloud Connectivity
Connect workloads across AWS and GCP:
- AWS VPC:
10.0.0.0/16 - GCP VPC:
10.1.0.0/16
Step 1: Create Setup Keys with Groups
Before deploying routing peers, create setup keys with auto-assigned groups:
- Go to Setup Keys in the NetBird dashboard
- Click Create Setup Key
- For AWS:
- Name: "AWS Routing Peer"
- Auto-assigned groups: Create and add
aws-routing-peers - Click Create
- For GCP:
- Name: "GCP Routing Peer"
- Auto-assigned groups: Create and add
gcp-routing-peers
You can also add groups to peers manually after setup. Go to Peers, select the peer, and add groups under Assigned Groups.
Step 2: Deploy Routing Peers in Each Cloud
AWS:
Launch an EC2 instance in your VPC with NetBird installed. Use the following user data:
#!/bin/bash
curl -fsSL https://pkgs.netbird.io/install.sh | sh
netbird up --setup-key YOUR_AWS_SETUP_KEY
GCP:
Launch a Compute Engine instance in your VPC:
#!/bin/bash
curl -fsSL https://pkgs.netbird.io/install.sh | sh
netbird up --setup-key YOUR_GCP_SETUP_KEY
Step 3: Create Network Routes
For AWS VPC:
- Go to Network Routes
- Click Add Route
- Network range:
10.0.0.0/16 - Routing Peer: Select your AWS instance (or use "aws-routing-peers" Peer Group)
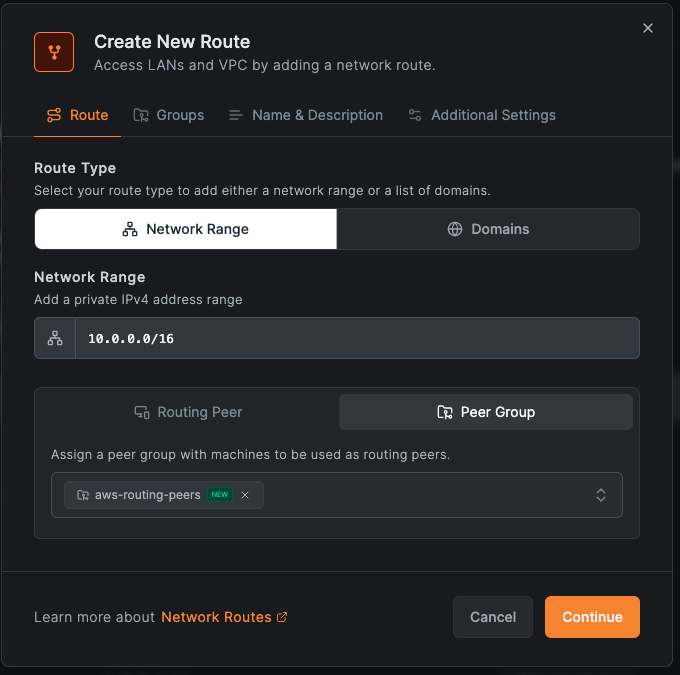
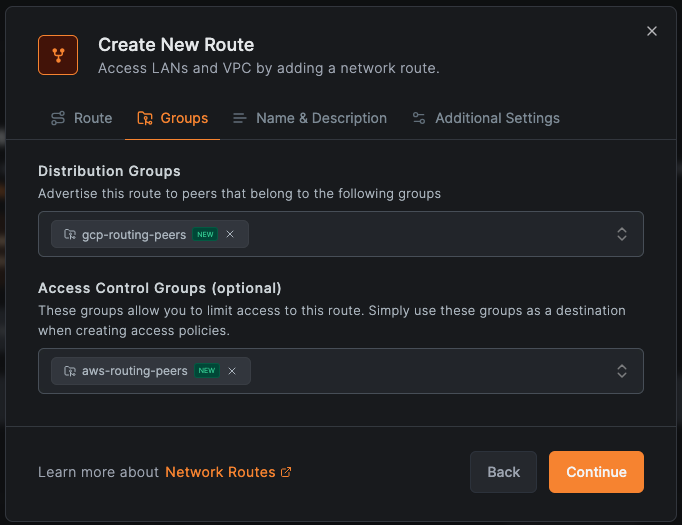
- Distribution Groups: "gcp-routing-peers"
- Access Control Groups: "aws-routing-peers" (required for route-level policies—this group becomes the destination in access policies; without it, policies targeting this route won't apply)
- Network Identifier:
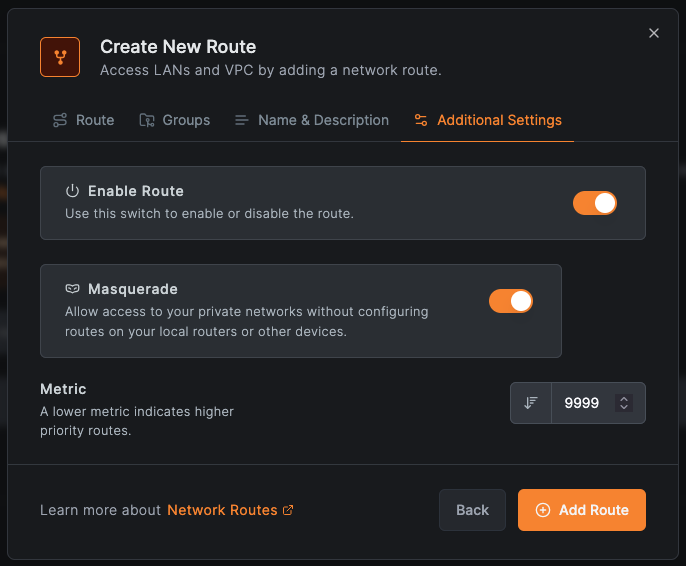
aws-vpc - Enable Masquerade (in Additional Settings)
- Click Add Route
For GCP VPC:
- Click Add Route
- Network range:
10.1.0.0/16 - Routing Peer: Select your GCP instance (or use "gcp-routing-peers" Peer Group)

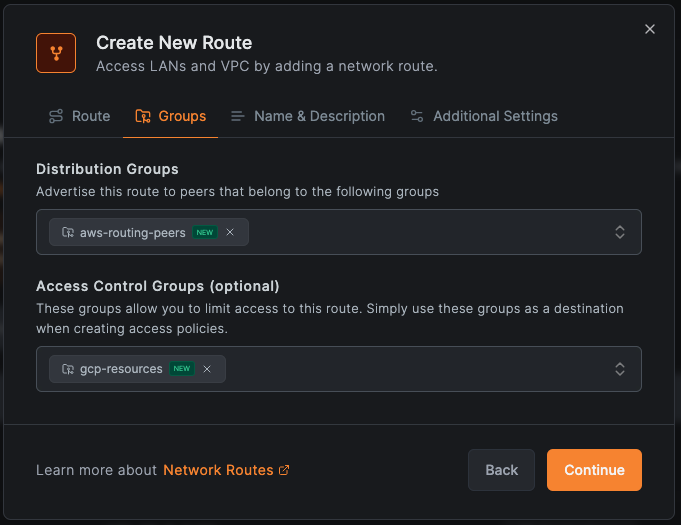
- Distribution Groups: "aws-routing-peers"
- Access Control Groups: "gcp-routing-peers" (required for route-level policies—this group becomes the destination in access policies; without it, policies targeting this route won't apply)
- Network Identifier:
gcp-vpc - Enable Masquerade (in Additional Settings)
- Click Add Route
Step 4: Create Access Policies
Create two policies allowing the routing peers to communicate in both directions:
- Go to Access Control > Policies
- Create policies between the routing peer groups:
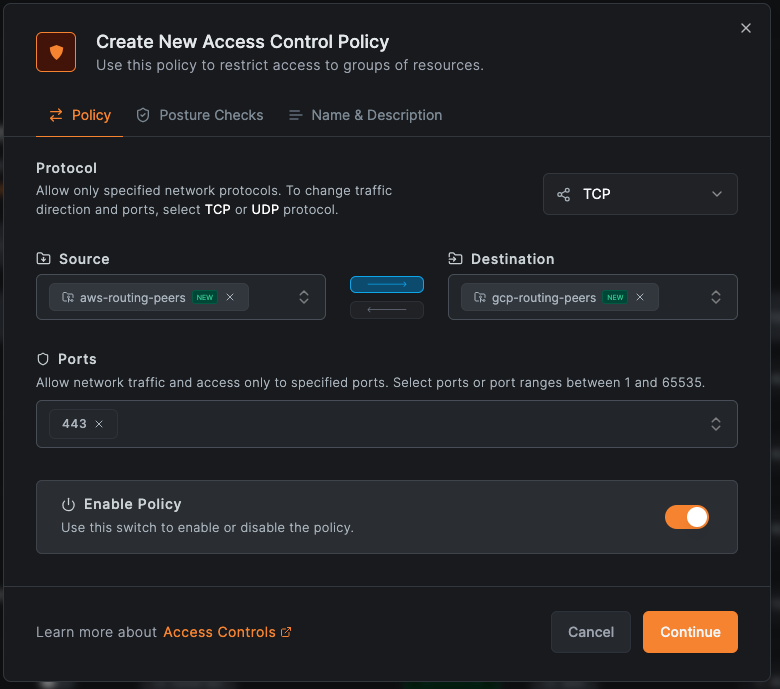
Source: aws-routing-peers → Destination: gcp-routing-peers (All)
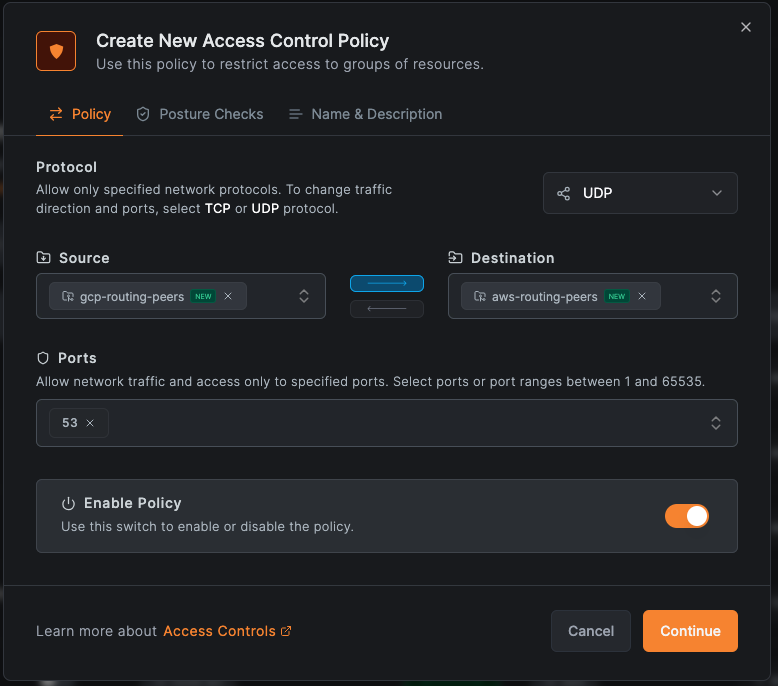
Source: gcp-routing-peers → Destination: aws-routing-peers (All)
For route-level access control (if Access Control Groups configured), you can restrict by protocol and port:
Source: aws-routing-peers → Destination: gcp-routing-peers (specific protocols)
Source: gcp-routing-peers → Destination: aws-routing-peers (specific protocols)
Step 5: Configure VPC Routing
AWS VPC:
Add a route in your route table:
- Destination:
10.1.0.0/16(GCP CIDR) - Target: Your NetBird routing peer instance (ENI)
GCP VPC:
Add a custom route:
- Destination:
10.0.0.0/16(AWS CIDR) - Next hop: Your NetBird routing peer instance
Enable IP forwarding on routing peer instances in both clouds.
Step 6: Test Connectivity
From an AWS instance:
ping 10.1.0.100 # GCP instance
From a GCP instance:
ping 10.0.0.100 # AWS instance
Cloud-Specific Considerations
AWS
- Security groups must allow traffic from the NetBird routing peer
- Enable source/destination check disabled on the routing peer instance
- Consider using an Auto Scaling group for the routing peer with a static ENI
GCP
- Firewall rules must allow traffic from the routing peer's internal IP
- Enable IP forwarding on the routing peer instance
- Use managed instance groups for high availability
Azure
- Network security groups must allow traffic from the routing peer
- Enable IP forwarding on the routing peer NIC
- Consider using a Virtual Machine Scale Set for HA
Secure Workload Migration
Use Site-to-Site connectivity for migrating workloads between environments:
Example: Migrating from On-Premise to Cloud
- Before migration: Application and database both on-premise
- During migration: Application in cloud, database still on-premise (use VPN-to-Site via Networks)
- Cutover: Switch traffic to the cloud application
- After migration: Once database is also migrated, update connection strings and remove NetBird if no longer needed
Best Practices
Security
- Use dedicated setup keys per environment (dev, staging, production)
- Restrict access policies to specific ports and protocols
- Enable activity logging for compliance
High Availability
- Deploy multiple routing peers and configure failover
- Monitor routing peer health with your existing tools
- Use cloud-native load balancing where appropriate
Performance
- Place routing peers close to the resources they serve
- Use direct peering where possible (NetBird will automatically optimize paths)
- Monitor latency and throughput between environments
Troubleshooting
Multi-cloud connectivity issues:
- Confirm both routing peers are connected to NetBird
- Check VPC routing tables have correct entries
- Verify security groups/firewall rules allow traffic
High latency:
- Check routing peer placement and network connectivity
- Verify traffic is using direct peer-to-peer connections (not relays)
- Review cloud network configuration for bottlenecks
Advanced Configuration
For masquerade options, ACL Groups, and detailed troubleshooting, see Advanced Configuration.