Getting Started
Updated
Welcome to NetBird! This guide will walk you through our new onboarding process to create your account, connect your first devices, and build a secure peer-to-peer overlay network in less than ten minutes.
Create Your Account
First, let's create your NetBird account.
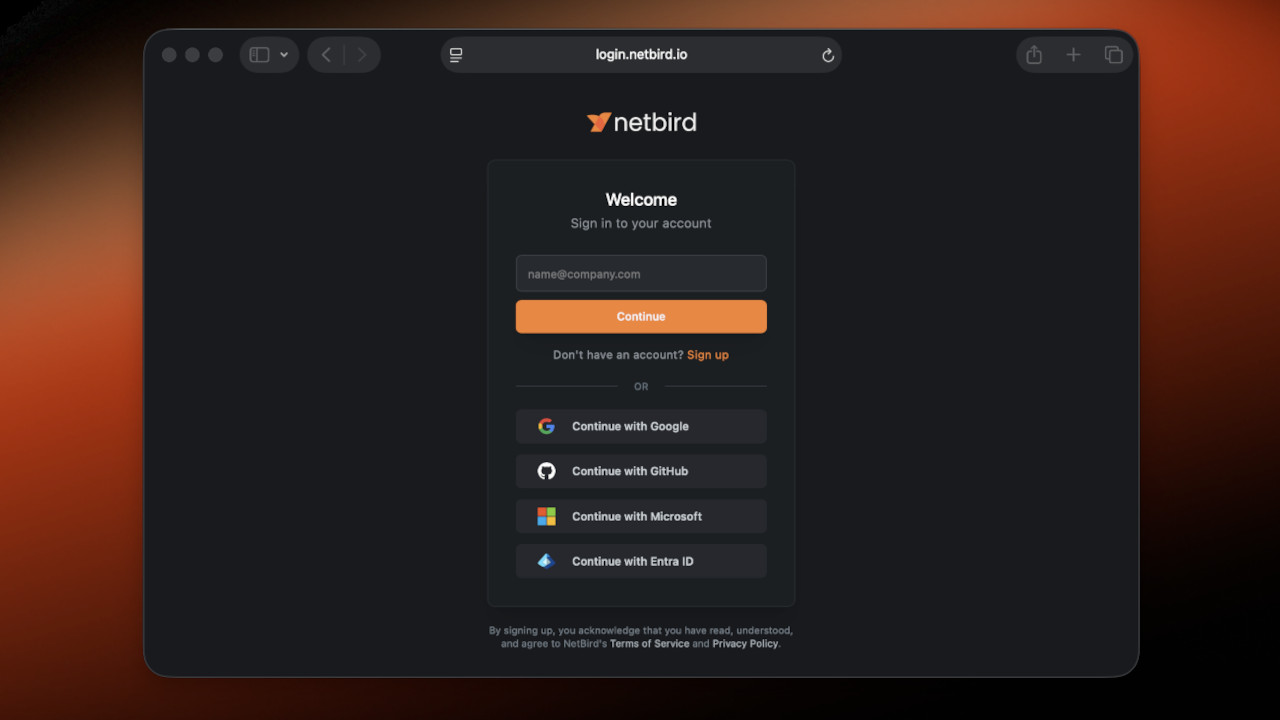
- Navigate to netbird.io and click Get Started in the top-right corner. Or simply click here.
- You’ll be redirected to the sign-in page, where NetBird uses your identity provider (IdP) for secure authentication. It supports any OIDC-compliant provider, including social logins like Gmail and GitHub for personal use.
- Follow the authentication steps for your chosen provider. If you have multi-factor authentication (MFA) enabled on your IdP account, it will work automatically.
Upon your first login, you'll be greeted by a short onboarding survey. This helps us tailor your experience.
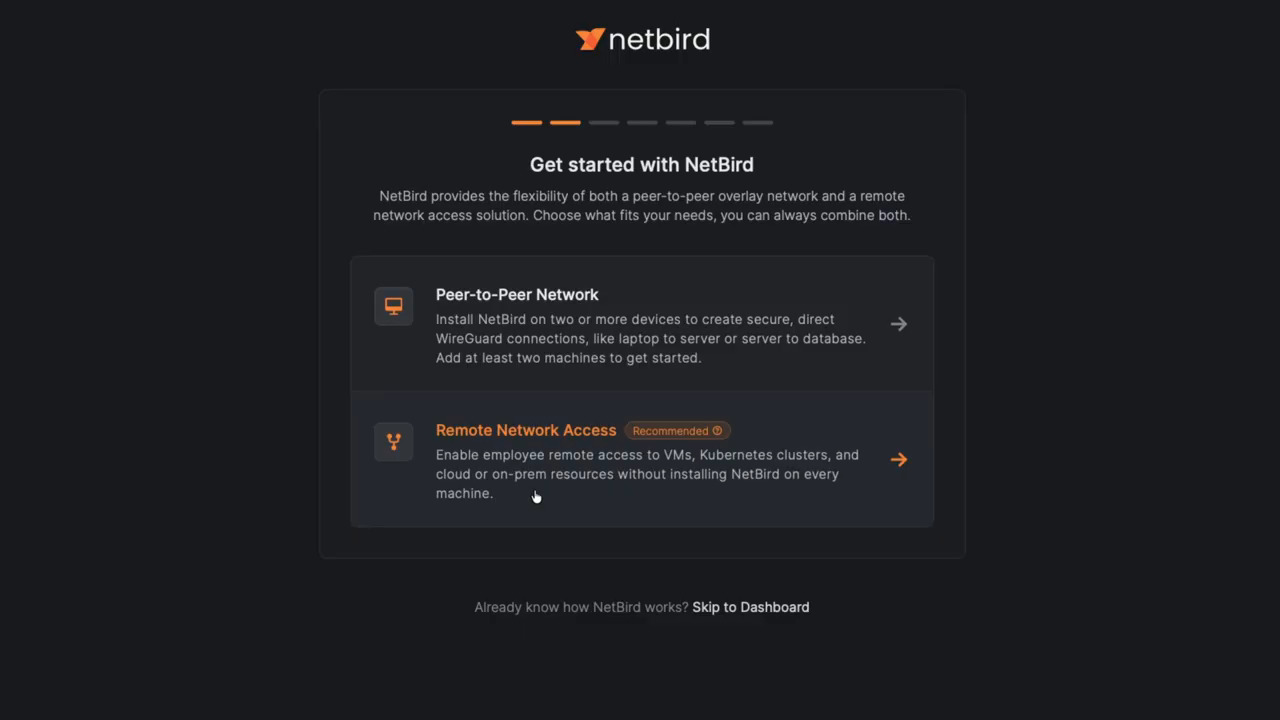
Peer-to-Peer Network
One way of using NetBird is to create a peer-to-peer network, where you run the NetBird client on your devices to connect them directly.
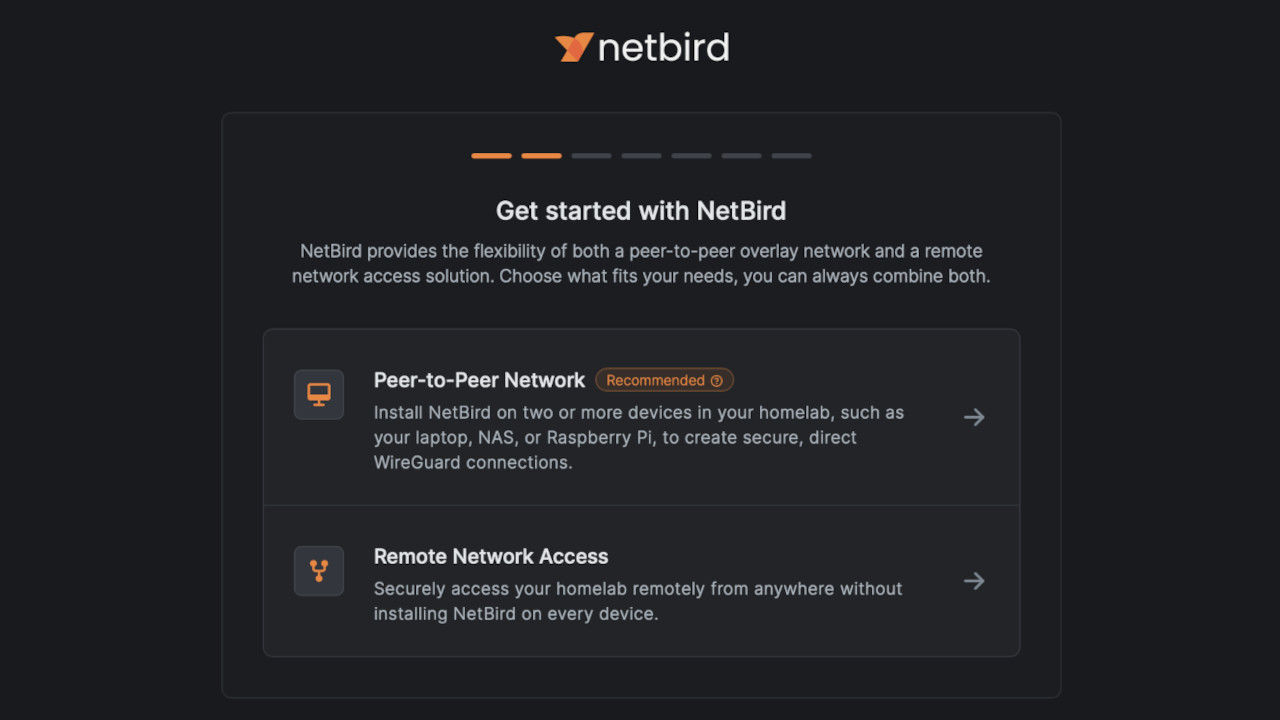
The onboarding process will now guide you to connect your first device, also known as a peer. For this guide, we'll select Peer-to-Peer Network. If you’re selecting the Remote Network Access option, you can see that process here.
Install Your First Peer
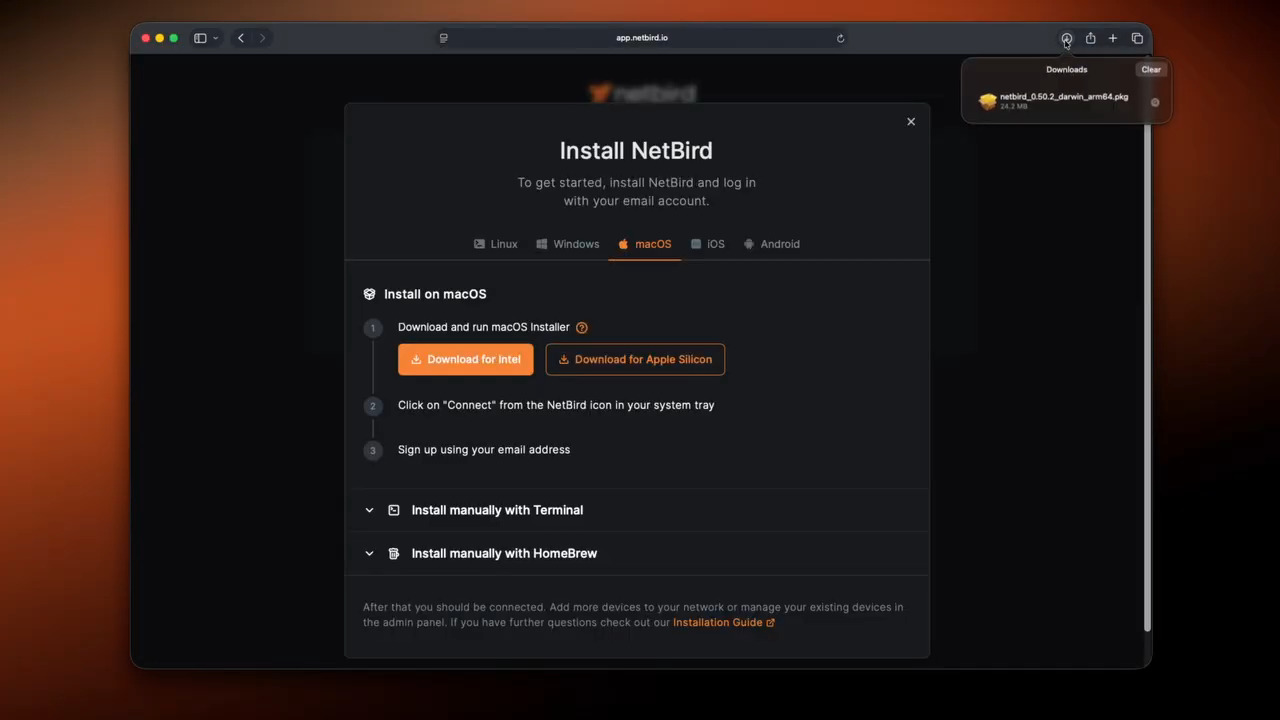
- On the "Let's get your first device online" screen, click the Install NetBird button.
- An installation modal will appear. Select your operating system (e.g., macOS, Windows, Linux). For this example, we're installing it on a macOS machine.
- Download the installer and run it. Follow the on-screen prompts to complete the installation.
Connect Your First Peer
With the client installed, you now need to connect it to your network.
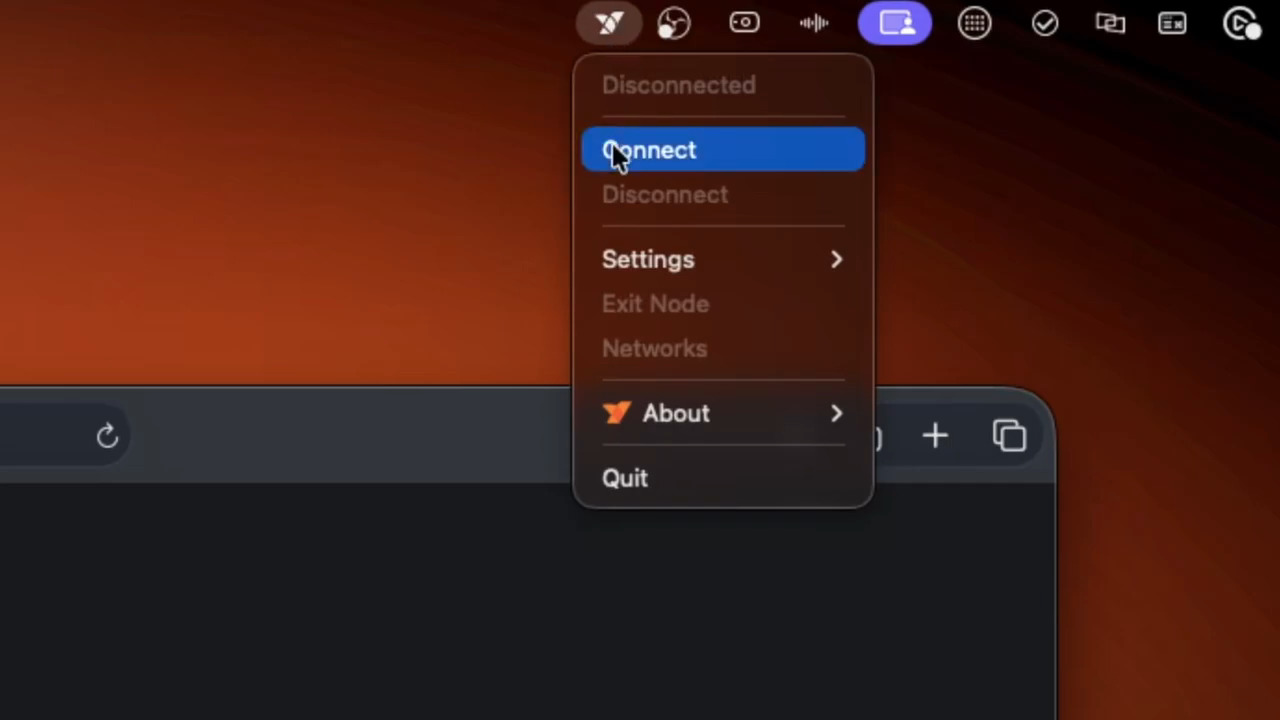
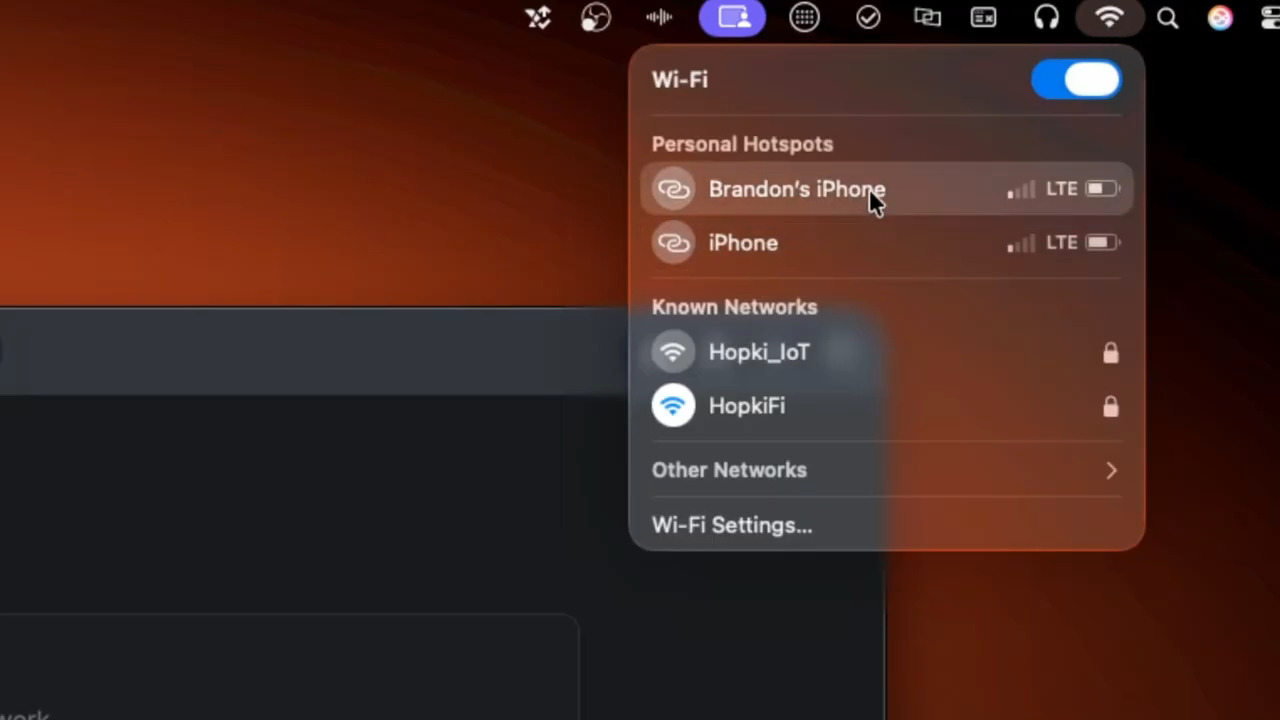
- After installation, find the NetBird icon in your system tray or menu bar.
- Click the icon and select Connect.
- This will open a new browser tab, prompting you to authorize the new device. Authenticate using the same IdP you used to sign up.
- Once authorized, you will see a "Login successful" message. The onboarding UI will update to show that your first peer is connected, displaying its name and assigned NetBird IP address.
Add a Second Peer (Headless Linux Server)
Next, let's add a second, headless peer, like a Linux server or a Raspberry Pi. For devices without a graphical interface, we use a Setup Key.

- In the web UI, the onboarding flow will now prompt you to "bring in your second device." Click the link that says Install with a setup key.
- A pop-up will explain that a one-off setup key will be created, which you can also learn more about here. Click Continue..
- The onboarding UI will now provide two commands to run on your Linux server:
- Install NetBird: A curl command to download and run the installation script.
- Run NetBird: A netbird up command that includes your unique setup key.
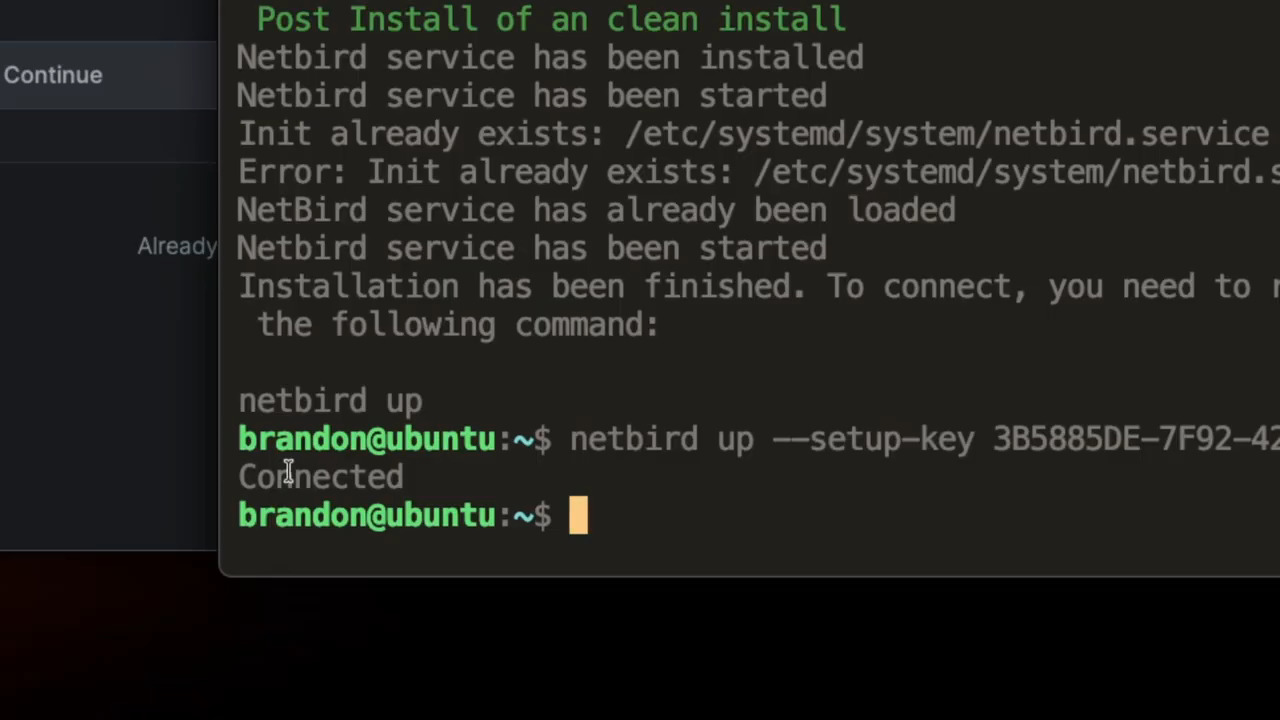
- SSH into your Linux server and run the commands:
First, copy the curl command, paste it into your server's terminal, and press Enter. You may be prompted for your sudo password.
curl -fsSL https://pkgs.netbird.io/install.sh | sh
Next, copy the netbird up --setup-key ... command and paste it into the terminal.
netbird up --setup-key <YOUR_SETUP_KEY>
After running the second command, the terminal will confirm Connected. Your headless device is now part of your NetBird network.
Verify the Connection
The onboarding UI will now display both of your connected peers. The onboarding wizard provides a simple way to test that they can communicate directly.

- Copy the provided ping command from the onboarding UI. This command uses the NetBird IP address of your second peer (the Ubuntu server).
- Open a terminal on your first peer and paste the command. Replace the example below with the NetBird IP for your machine.
ping 100.74.76.17
- You should see successful ping replies, confirming that the two devices are connected over the NetBird network. Click It works! - Continue in the onboarding UI.
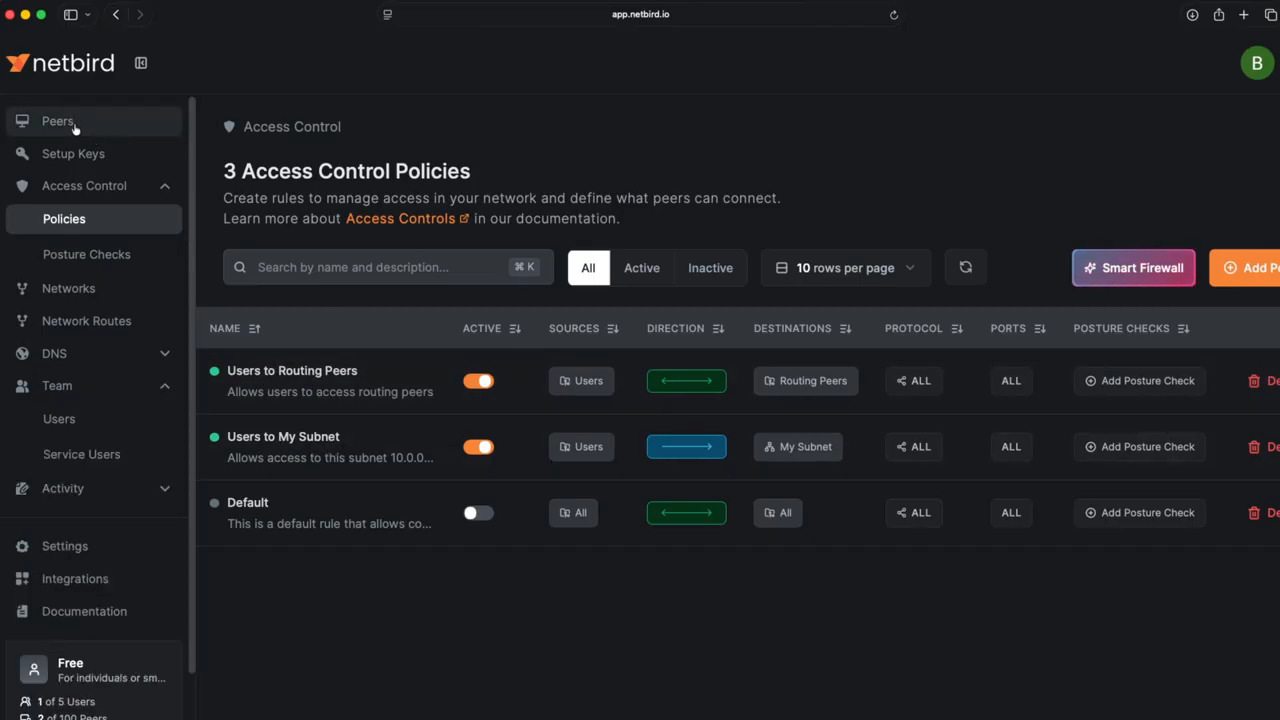
Understanding Access Control
The final onboarding step introduces NetBird's powerful Access Control policies.

- By default, a policy is active that allows connections between all your devices. This is why the ping command in the previous step worked.
- The wizard demonstrates this by allowing you to toggle the policy. If you disable the "Default Policy," the ping between your devices will immediately fail with a "Request timeout" error.
- Re-enabling the policy instantly restores the connection. This gives you a basic understanding of how you can control traffic within your network. You can learn much more about policies here.
- Click Continue to finish.
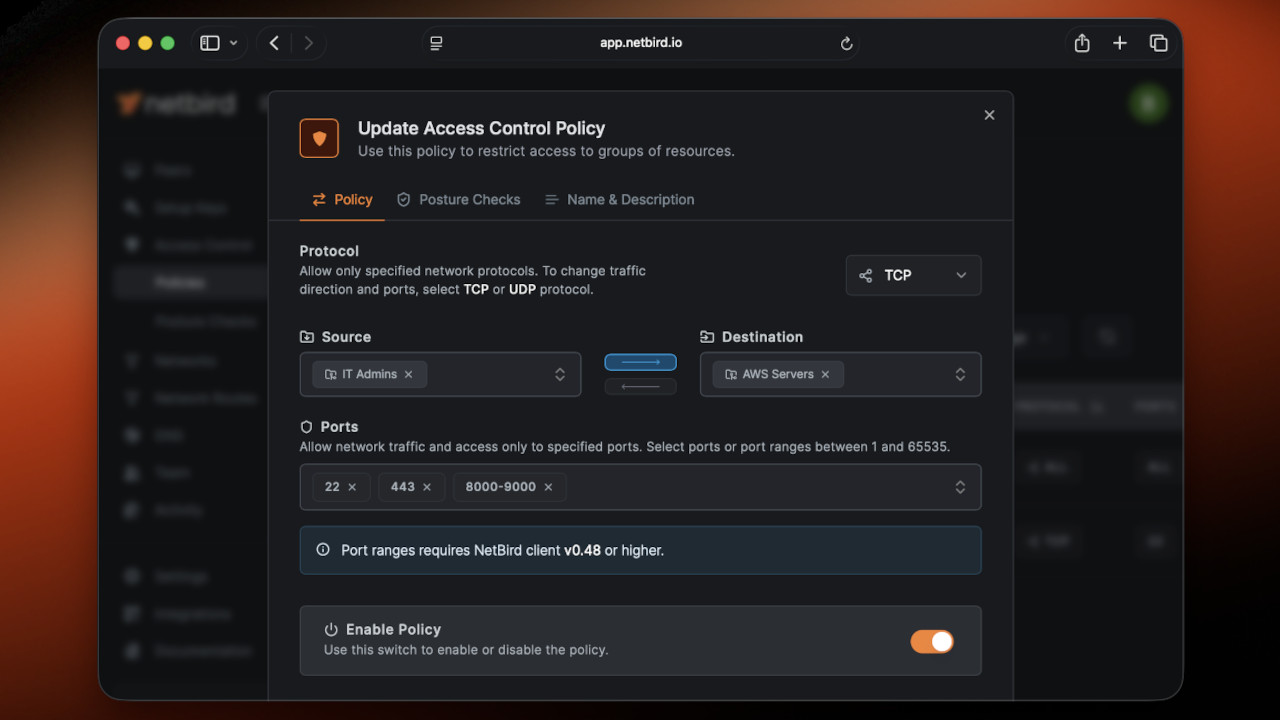 In the policy example above, we allowed IT Admins port specific access to peers under the AWS Servers group. Policies are a key building block to access in NetBird. You can learn more about the power of policies here.
If you manage users and groups with your identity provider, you can provision and sync them with NetBird. Learn more here including the supported platforms.
Remote Network Access
The second way to use NetBird is for remote network access by running NetBird on a single machine within your private network. This machine acts as a routing peer, routing traffic to internal resources that don't have the NetBird client installed.
The onboarding process will now guide you to build our first network resource. For this guide, we'll select Remote Network Access.
Define Your Network Resource
Next, you'll define the private network you want your users to be able to access.
- The onboarding UI will prompt you to "Add your first resource." There are a few options here, but the easiest way to get started is with full access to an entire Network. Select the Entire Subnet option.
- Enter the CIDR range of your private network. For example,
10.0.0.0/32. - Click Create Resource. A "Network" will be created in your dashboard to contain this resource and its access rules.

Add and Configure a Routing Peer
A routing peer is a NetBird peer that lives inside your private network and acts as a gateway, forwarding traffic between your remote users and the internal resources.
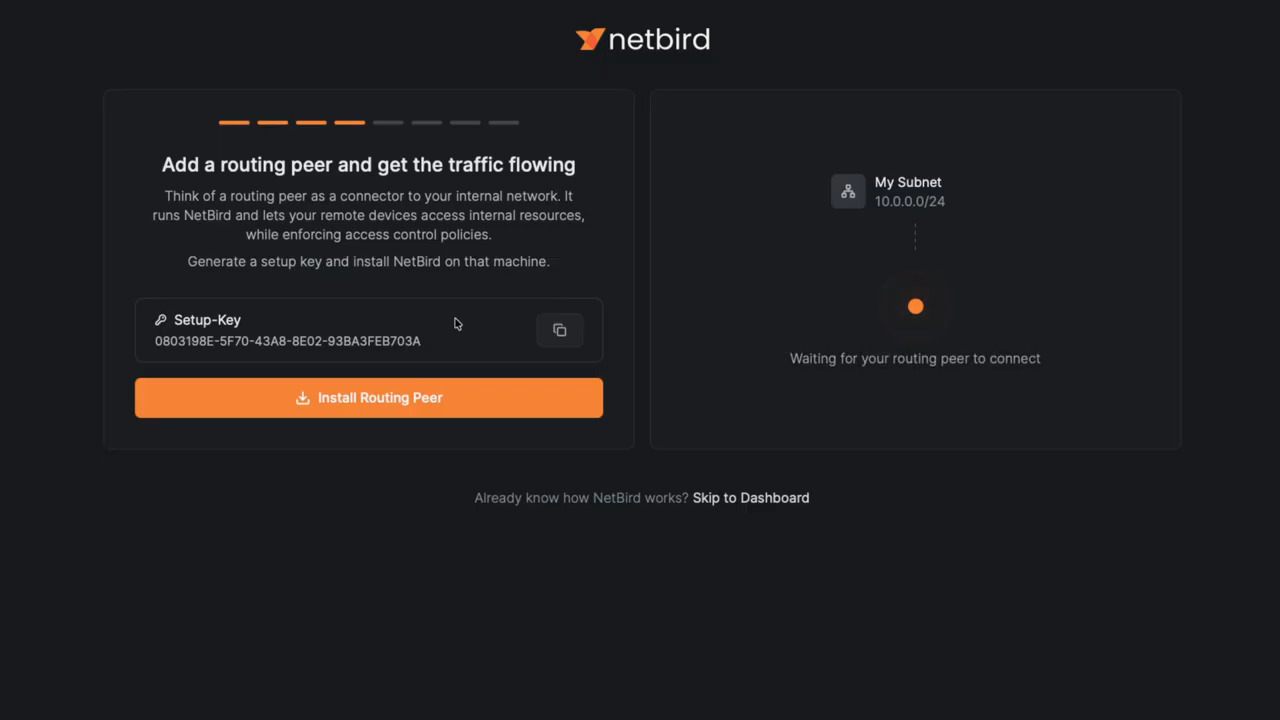
- The dashboard will now prompt you to "Add a routing peer." First, click Generate Setup Key. This creates a one-time key used to enroll the gateway machine into your NetBird account.
- Next, click Install Routing Peer. Select the operating system of your gateway machine (the video uses Linux).
- The installation modal will provide two commands: a curl script to install the NetBird agent and a netbird up command that includes your setup key.
- SSH into your gateway machine (which must be inside the 10.0.0.0/24 subnet) and run the commands:
- SSH into your Linux server and run the commands:
curl -fsSL https://pkgs.netbird.io/install.sh | sh
Next, copy the netbird up --setup-key ... command and paste it into the terminal.
netbird up --setup-key <YOUR_SETUP_KEY>
After running the second command, the terminal will confirm Connected. Your headless device is now part of your NetBird network.
Connect a Client Device
Now, set up the device you will use to connect to your private network.
- Back in the web UI, the wizard will prompt you to "Time to add your client device." Click Install NetBird.
- Download and run the installer for your client machine's OS (e.g., macOS).
- Once installed, find the NetBird icon in your system tray or menu bar, click it, and select Connect.
- Authorize this new device in the browser tab that opens.
Test the Connection
With both the routing peer and your client device online, you can now test your connection to the private network. To properly test connectivity you should move the client device to a different network, for example, connecting the device using your phone's hotspot.
- Open a terminal on your client device and run the test command (e.g.,
ping 10.0.0.100). Due note, the IP you ping needs to be a device on the same network that the routing peer is installed on. - You should see successful replies, confirming that your client device can reach internal resources through the routing peer.
- Click It works! - Continue in the UI.
Understanding Your Access Policy
The final step of the onboarding wizard explains the access rule that was automatically created for you.

- A policy, named "Users to My Subnet," is enabled by default. This policy allows all authenticated users to access the resources within the subnet you define.
- To demonstrate this, you can toggle this policy off. When disabled, the ping from your client device will begin to fail with a "Request timeout" error, showing that the connection is now blocked.
- Re-enabling the policy will immediately restore access.
- Click Continue to complete the setup.
Click Go to Dashboard to access the main NetBird admin panel. From here, you can:
- Control Center: Visualize your network topology and access relationships with an interactive graph.
- Peers: View and manage all connected devices and their properties.
- Setup Keys: Create and manage keys for adding new headless or ephemeral devices.
- Access Control: Define granular firewall rules to control which peers can access what.
- Team: Manage users and create groups for easier policy management.
You are now ready to explore the full capabilities of NetBird.
Support Us
- Star us on GitHub
- Follow us on X
- Join our Slack Channel
- NetBird release page on GitHub: releases