Access Internal Resources From Autoscaled Environments
For DevOps teams managing dynamic, scalable infrastructures, maintaining secure access to internal resources as environments scale up and down is challenging. Traditional network access methods often struggle to keep pace with the rapid changes in autoscaled environments, leading to security vulnerabilities, inefficient resource utilization, and complex management overhead.
Key challenges in managing network access for autoscaled environments like Kubernetes include:
- Dynamic Resource Management: As pods or containers scale up and down, maintaining consistent and secure network access becomes increasingly complex.
- Security Concerns: Ensuring that only authorized resources have access to internal networks, especially in rapidly changing environments, is crucial but often difficult to manage.
- Efficient Resource Utilization: Balancing network access with resource usage, particularly in autoscaled setups, requires careful planning and execution.
This guide introduces NetBird's solution for seamlessly managing network access in autoscaled Kubernetes environments by:
- Automating Secure Access: Demonstrating how NetBird setup keys can automatically provide secure network access to dynamically created resources.
- Enhancing Scalability: Showcasing how NetBird integrates with Kubernetes' Horizontal Pod Autoscaler (HPA) to maintain network integrity during scaling events.
- Optimizing Resource Management: Illustrating how NetBird efficiently manages network peers as resources scale up and down, ensuring optimal resource utilization.
Let's dive into the process of using NetBird to manage network access in an autoscaled Kubernetes environment.
Prerequisites
To replicate this use case, you'll need:
- A NetBird account
- NetBird installed on your local machine
- A Kubernetes cluster (local or cloud-based)
kubectlinstalled and configured on your local machine- Kubernetes metrics server
- The IP address range assigned to the Pods
With these prerequisites in place, you'll be prepared to set up a secure network connection for autoscaled resources using NetBird by:
- Creating a NetBird Setup Key for Kubernetes
- Configuring Network Routes for Internal Resource Access
- Setting Up Access Policies for Secure Communication
- Deploying a Sample Application with NetBird Agent
- Configuring Horizontal Pod Autoscaler (HPA)
- Observing NetBird's Dynamic Peer Management
This process will demonstrate how NetBird simplifies secure network access in autoscaled Kubernetes environments, automatically managing connections and access controls as resources scale up and down.
1. Creating a NetBird Setup Key for Kubernetes
The first step in this process is creating a NetBird setup key for your Kubernetes cluster. This setup key serves as a secure authentication token, allowing your cluster's pods to join your NetBird network seamlessly.
To create an appropriate setup key for this use case:
- Log in to your NetBird dashboard.
- Navigate to
Settings→Setup Keys. - Click on
Add Setup Keyto create a new key. - Provide a descriptive name for your key.
- Enable the
Reusableoption to allow multiple pods to use the same key. - Activate the
Ephemeral Peerstoggle. This crucial setting automatically removes pods from the NetBird network if they've been offline for over 10 minutes, ensuring efficient resource management. - Createthe new setup key by clicking
Create Setup Key - Ensure you take note of the generated setup key, you'll need it shortly.
Here's an example:
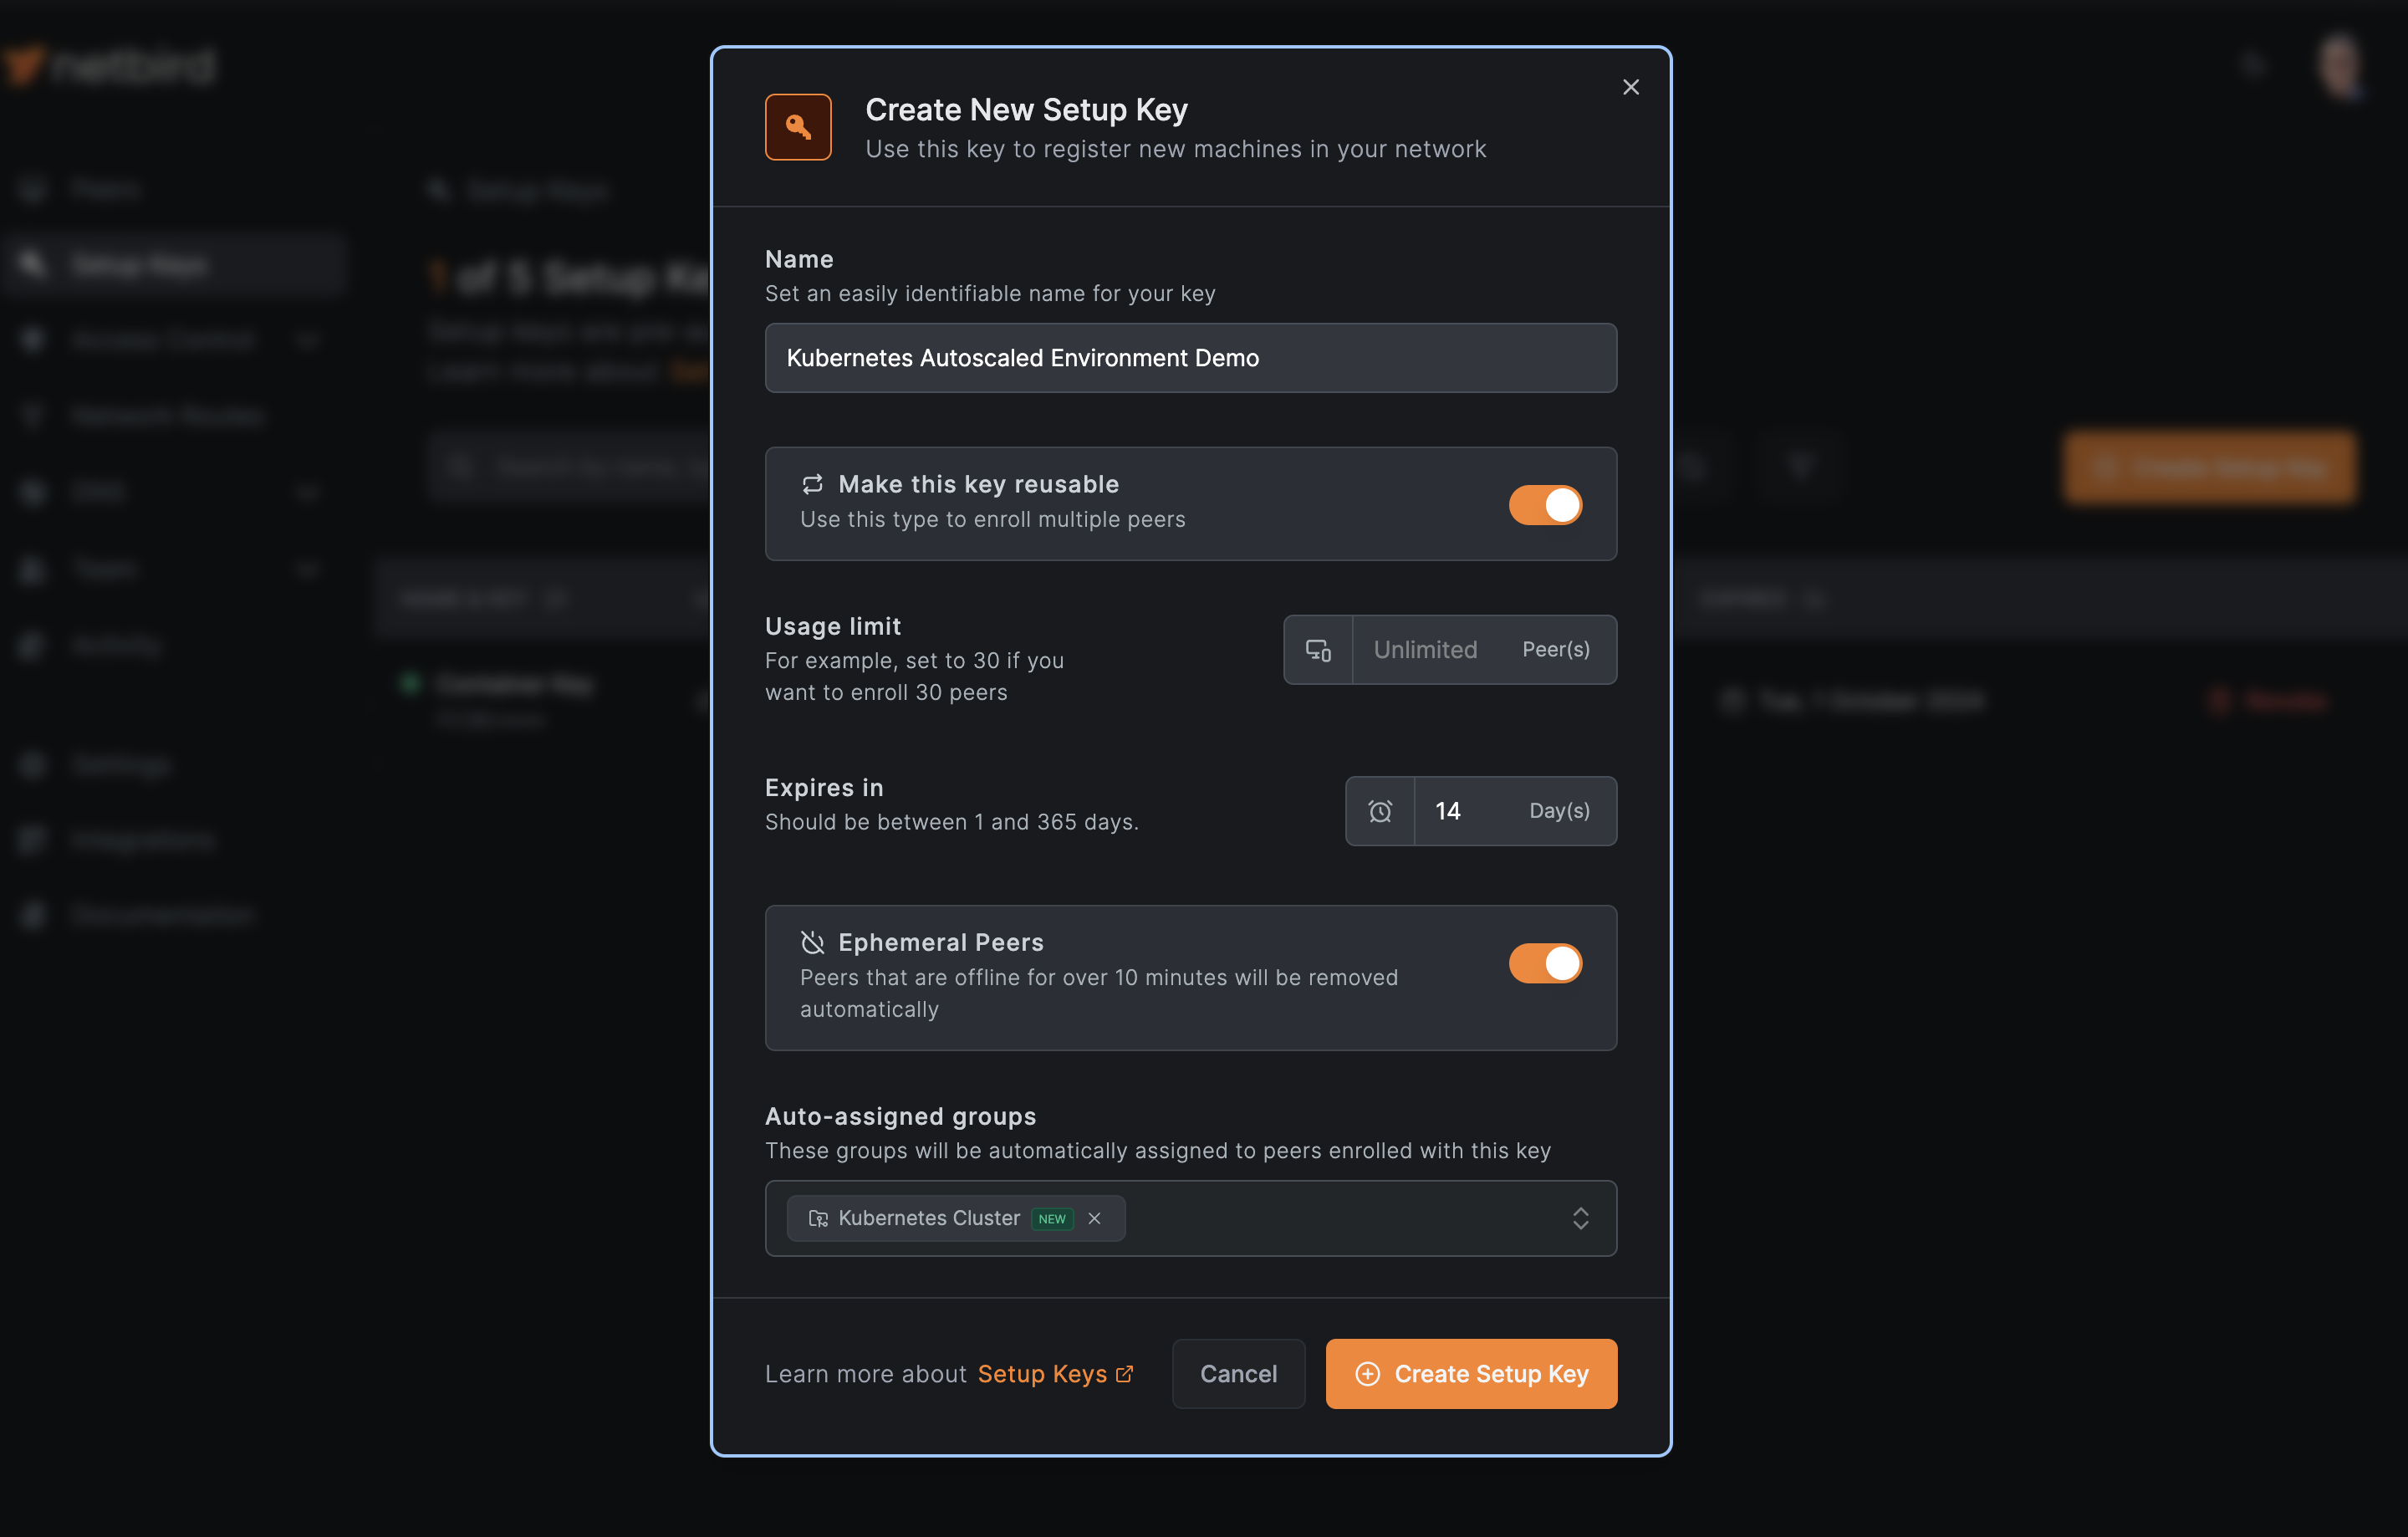
This configuration allows for dynamic management of your Kubernetes pods within the NetBird network. As your cluster scales up, new pods will seamlessly join the network. When pods are terminated or remain offline, they'll be automatically removed, maintaining a clean and efficient network topology.
2. Configuring Network Routes for Internal Resource Access
With the setup key in place, the next crucial step is creating a network route to enable access to the Pods within your Kubernetes cluster. For this tutorial, we'll create a straightforward network route that allows access to the Kubernetes cluster from your local machine.
Follow these steps to configure the network route:
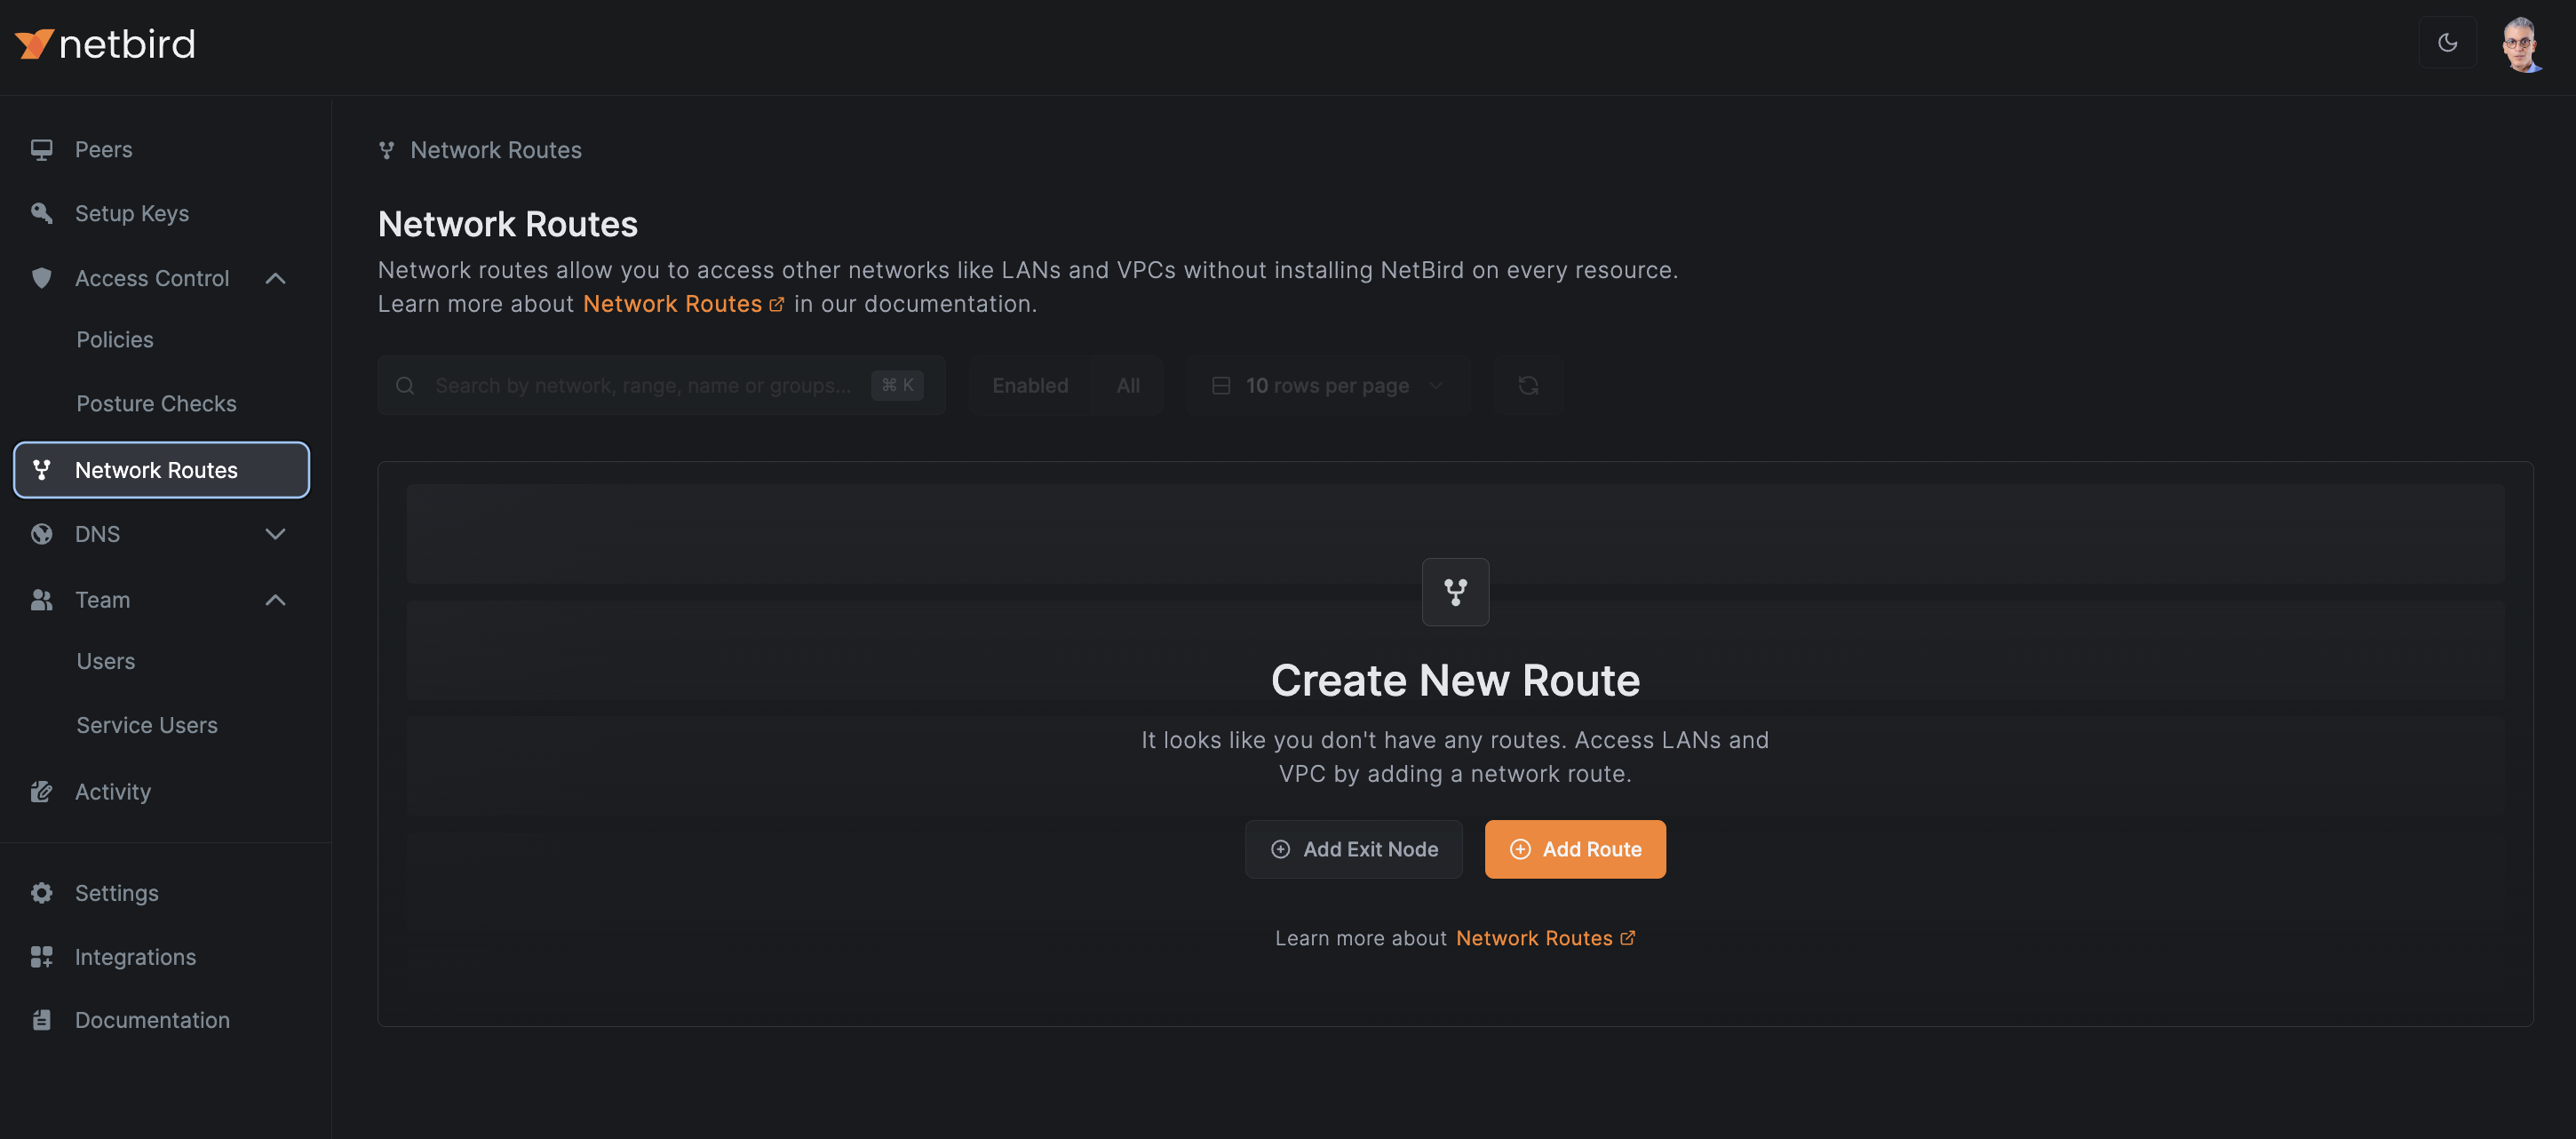
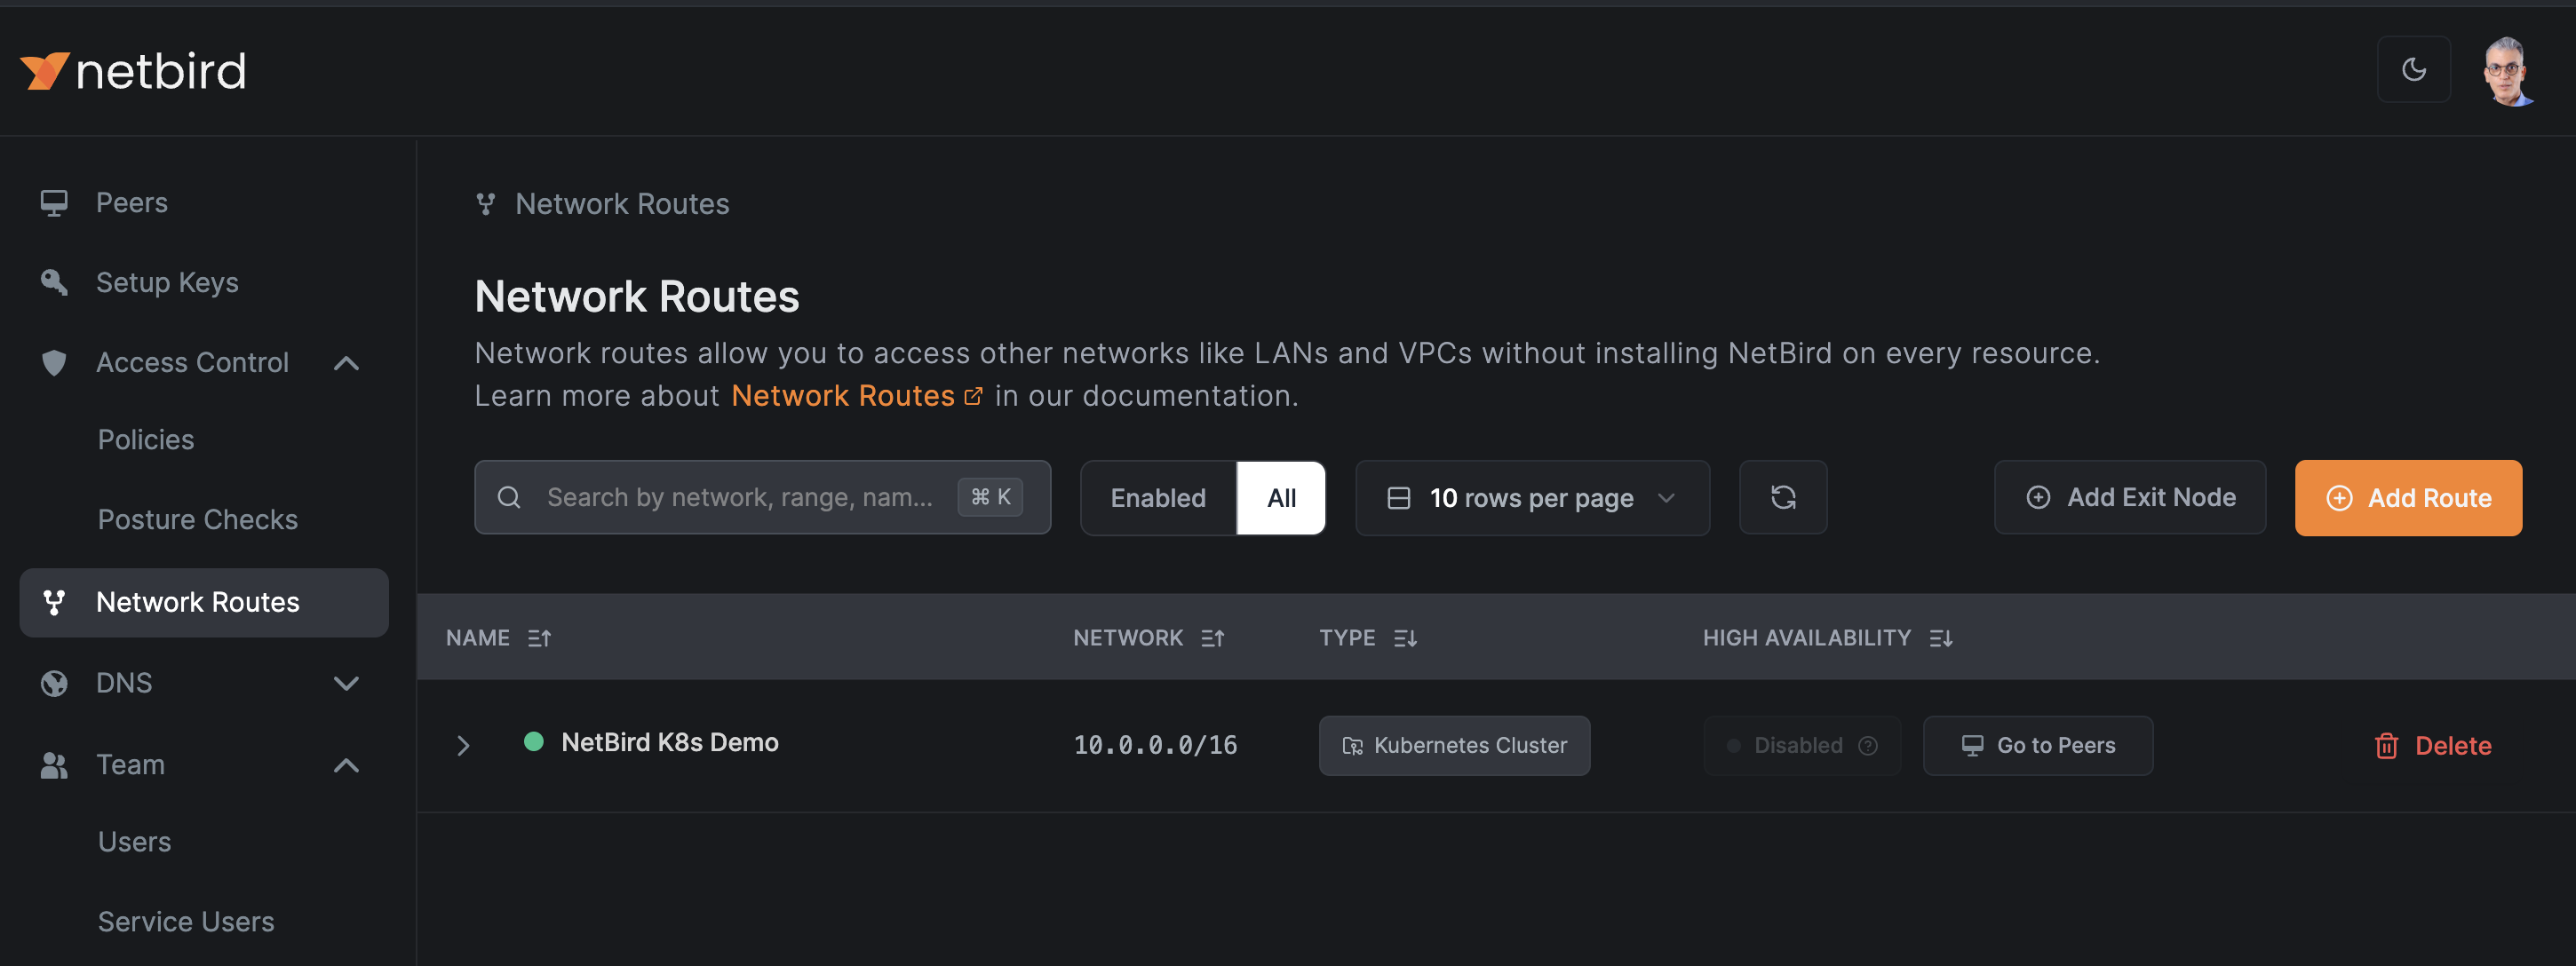
In the NetBird dashboard, navigate to the Network Routes section and click on Add Route to create a new network route.
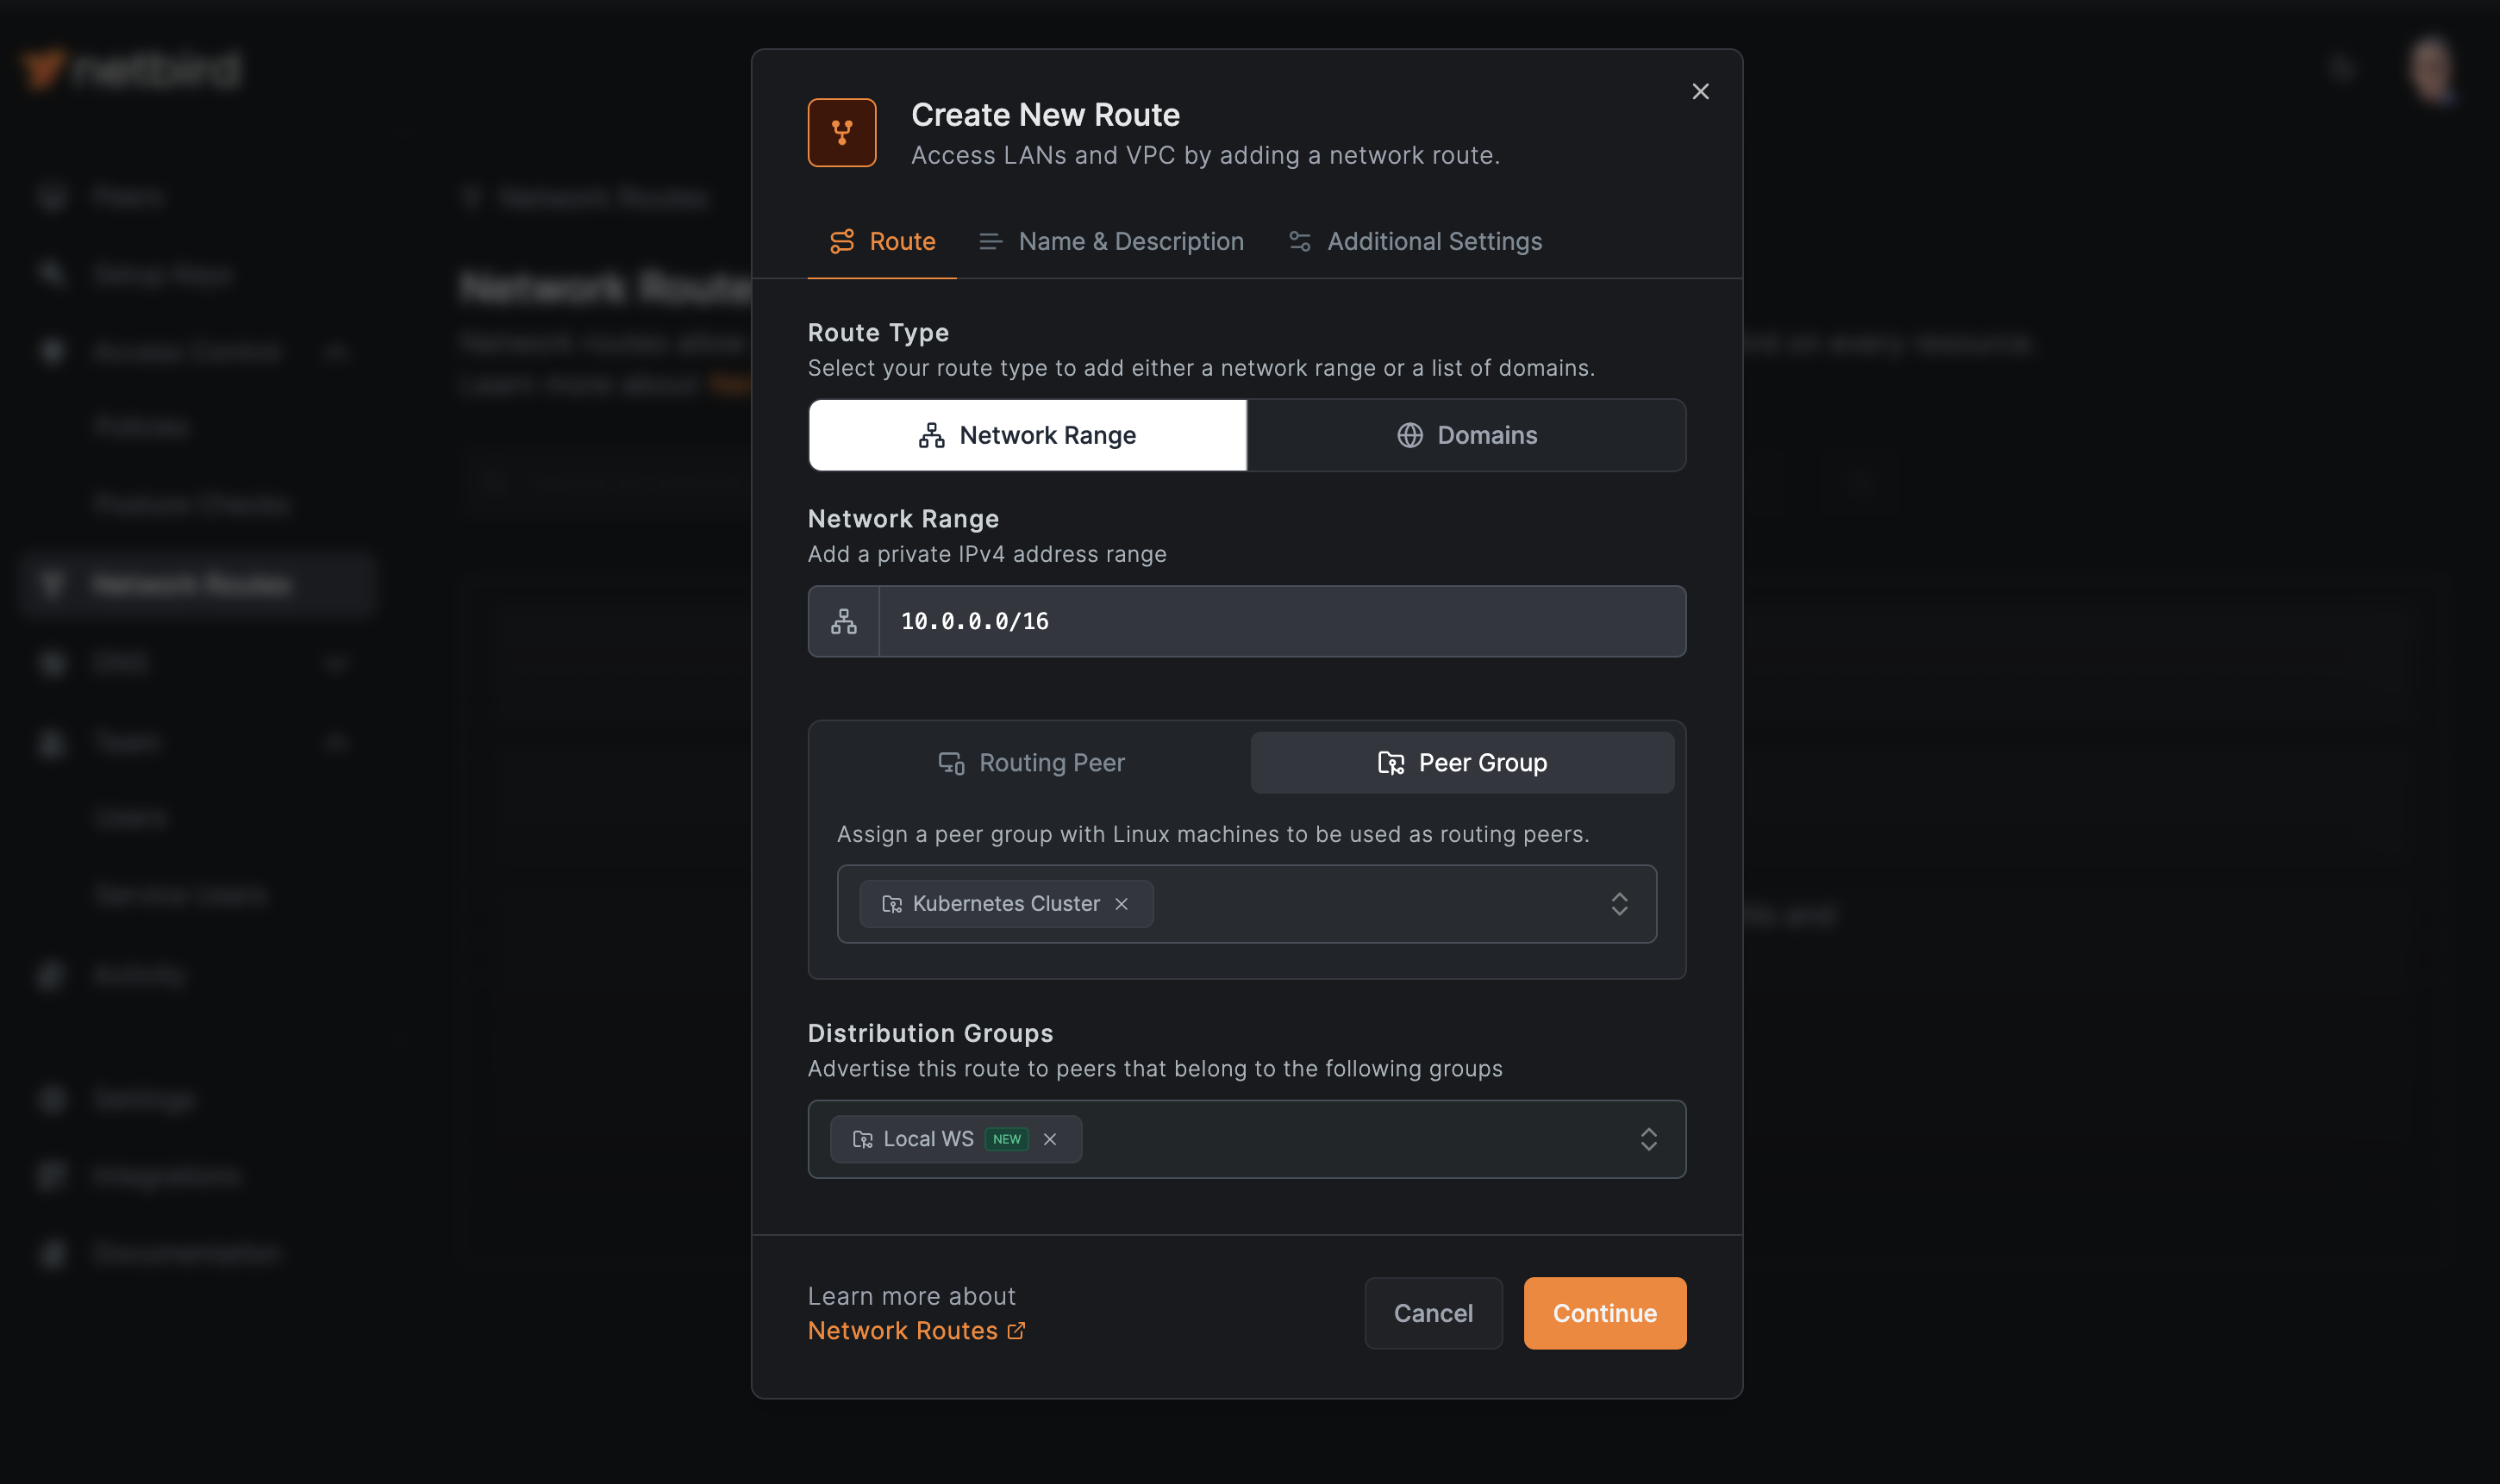
- In the
Network Rangefield, enter the private IP range of your Kubernetes Pods. This is typically something like10.0.0.0/16for many Kubernetes clusters, but it may vary depending on your specific setup. If you're unsure, you can check this range in your Kubernetes configuration or consult your cluster administrator. - Navigate to the
Peer Grouptab and select your Kubernetes cluster's group as the routing peer. This group should contain all your cluster's nodes and will automatically include all the Pods running on these nodes. - In the
Distribution Groupsfield, choose the group to which your local machine belongs. - Review your settings to ensure everything is correct. The route you're creating will allow traffic from your local machine (in the distribution group) to reach the Kubernetes Pods (in the peer group) via the specified network range.
- Once you're satisfied with the configuration, click the
Continuebutton.
Provide a descriptive name for your route, such as NetBird K8s Demo.
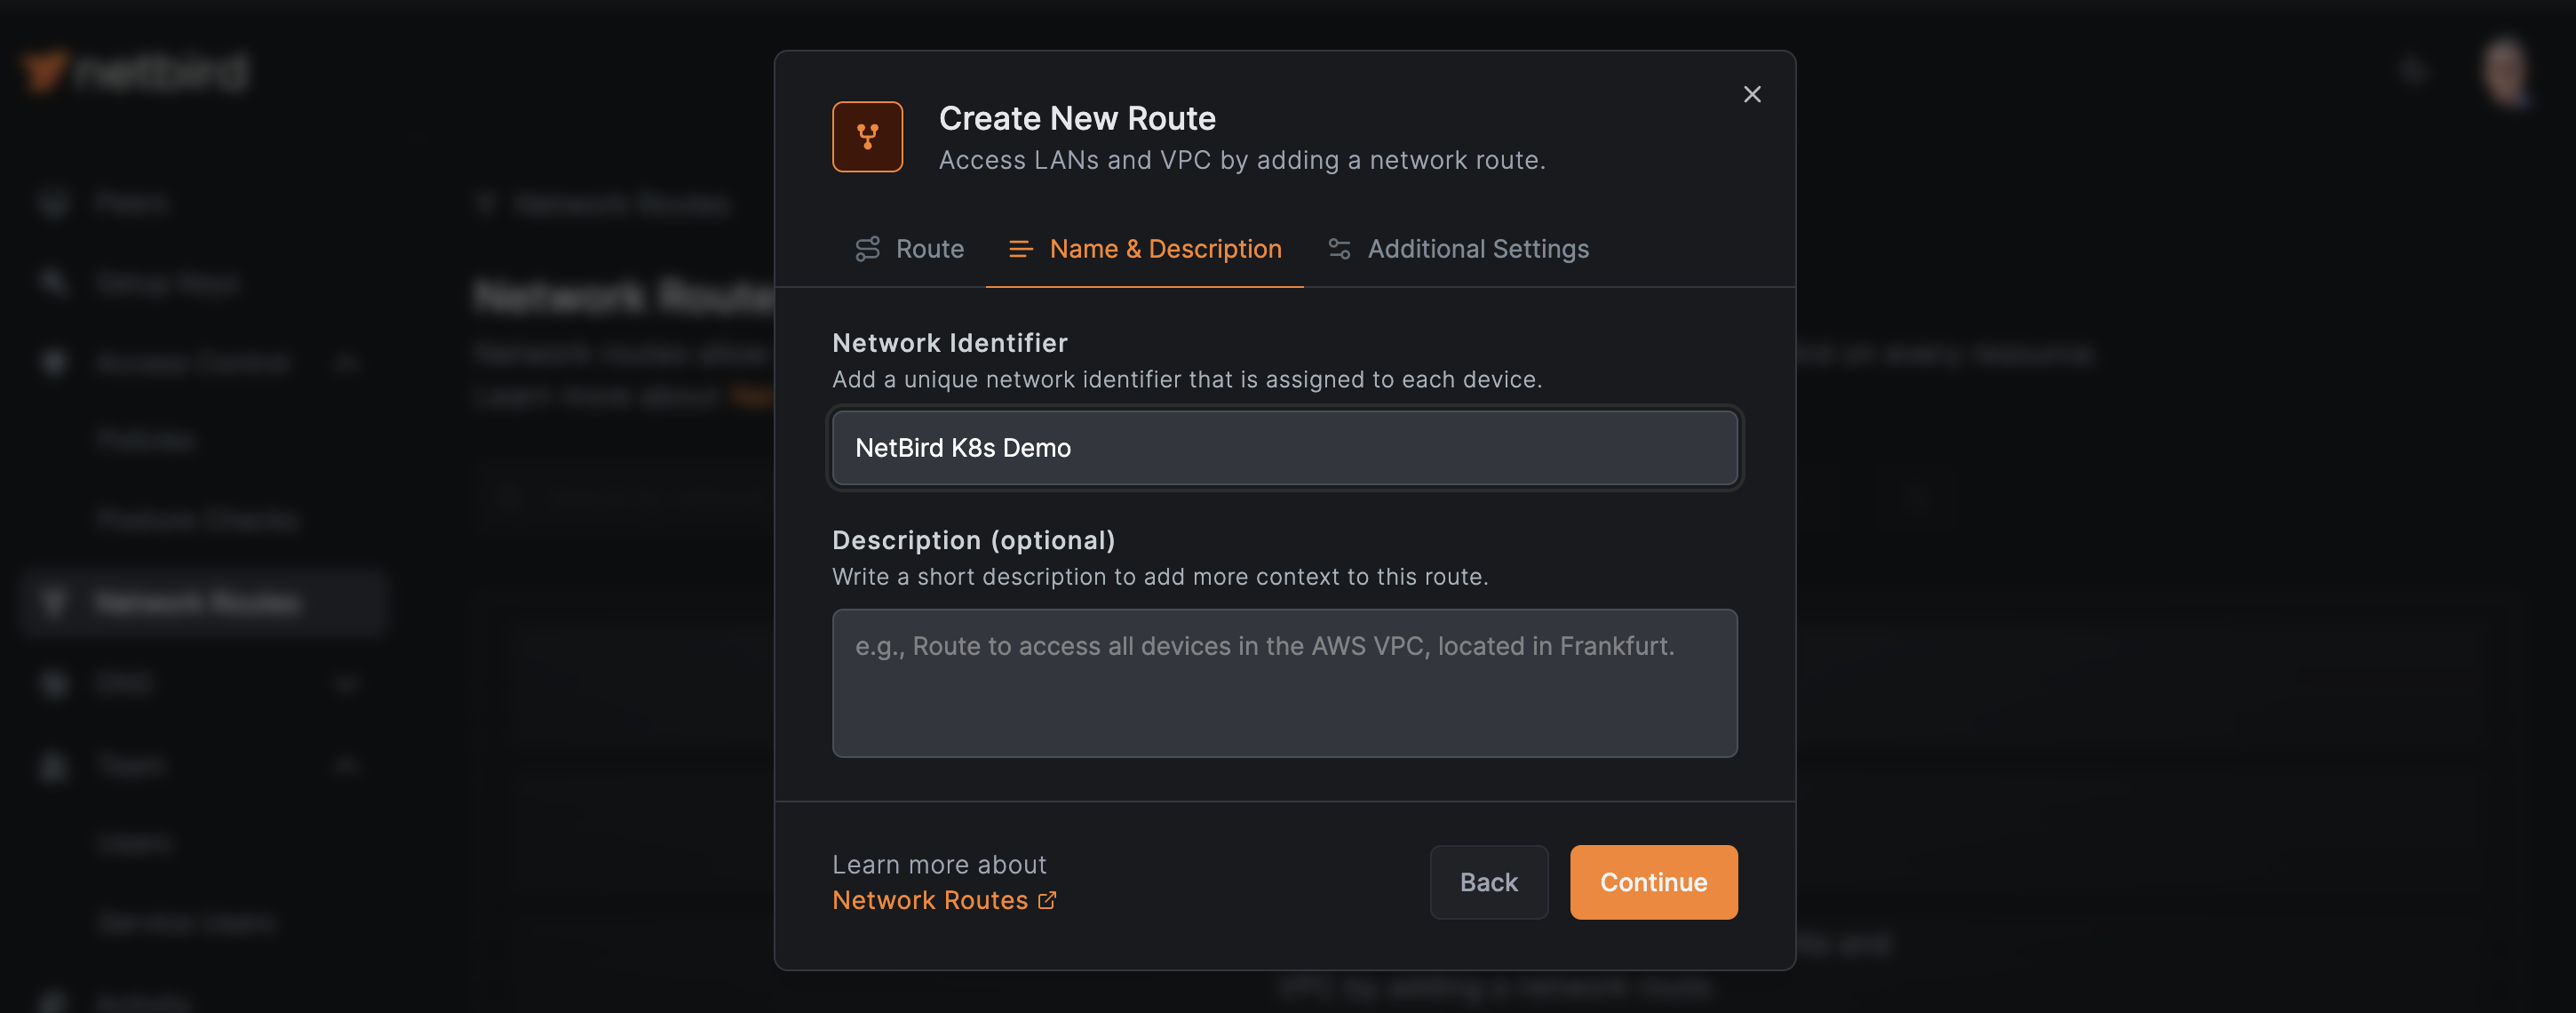
This setup creates a secure pathway for your local machine to communicate with the Pods in your Kubernetes cluster through the NetBird network. As new Pods are created or removed due to autoscaling, they'll automatically be included in or excluded from this route, maintaining seamless access without manual intervention.
3. Setting Up Access Policies for Secure Communication
NetBird's default access control policy automatically assigns all peers to the All group, enabling unrestricted bidirectional access between devices and users. While this default configuration allows immediate connectivity between your Kubernetes cluster and local machine, it's crucial to implement more granular access controls for enhanced security.
To create a new access policy:
- Navigate to the
Access Control > Policiessection in your NetBird dashboard. - Click on
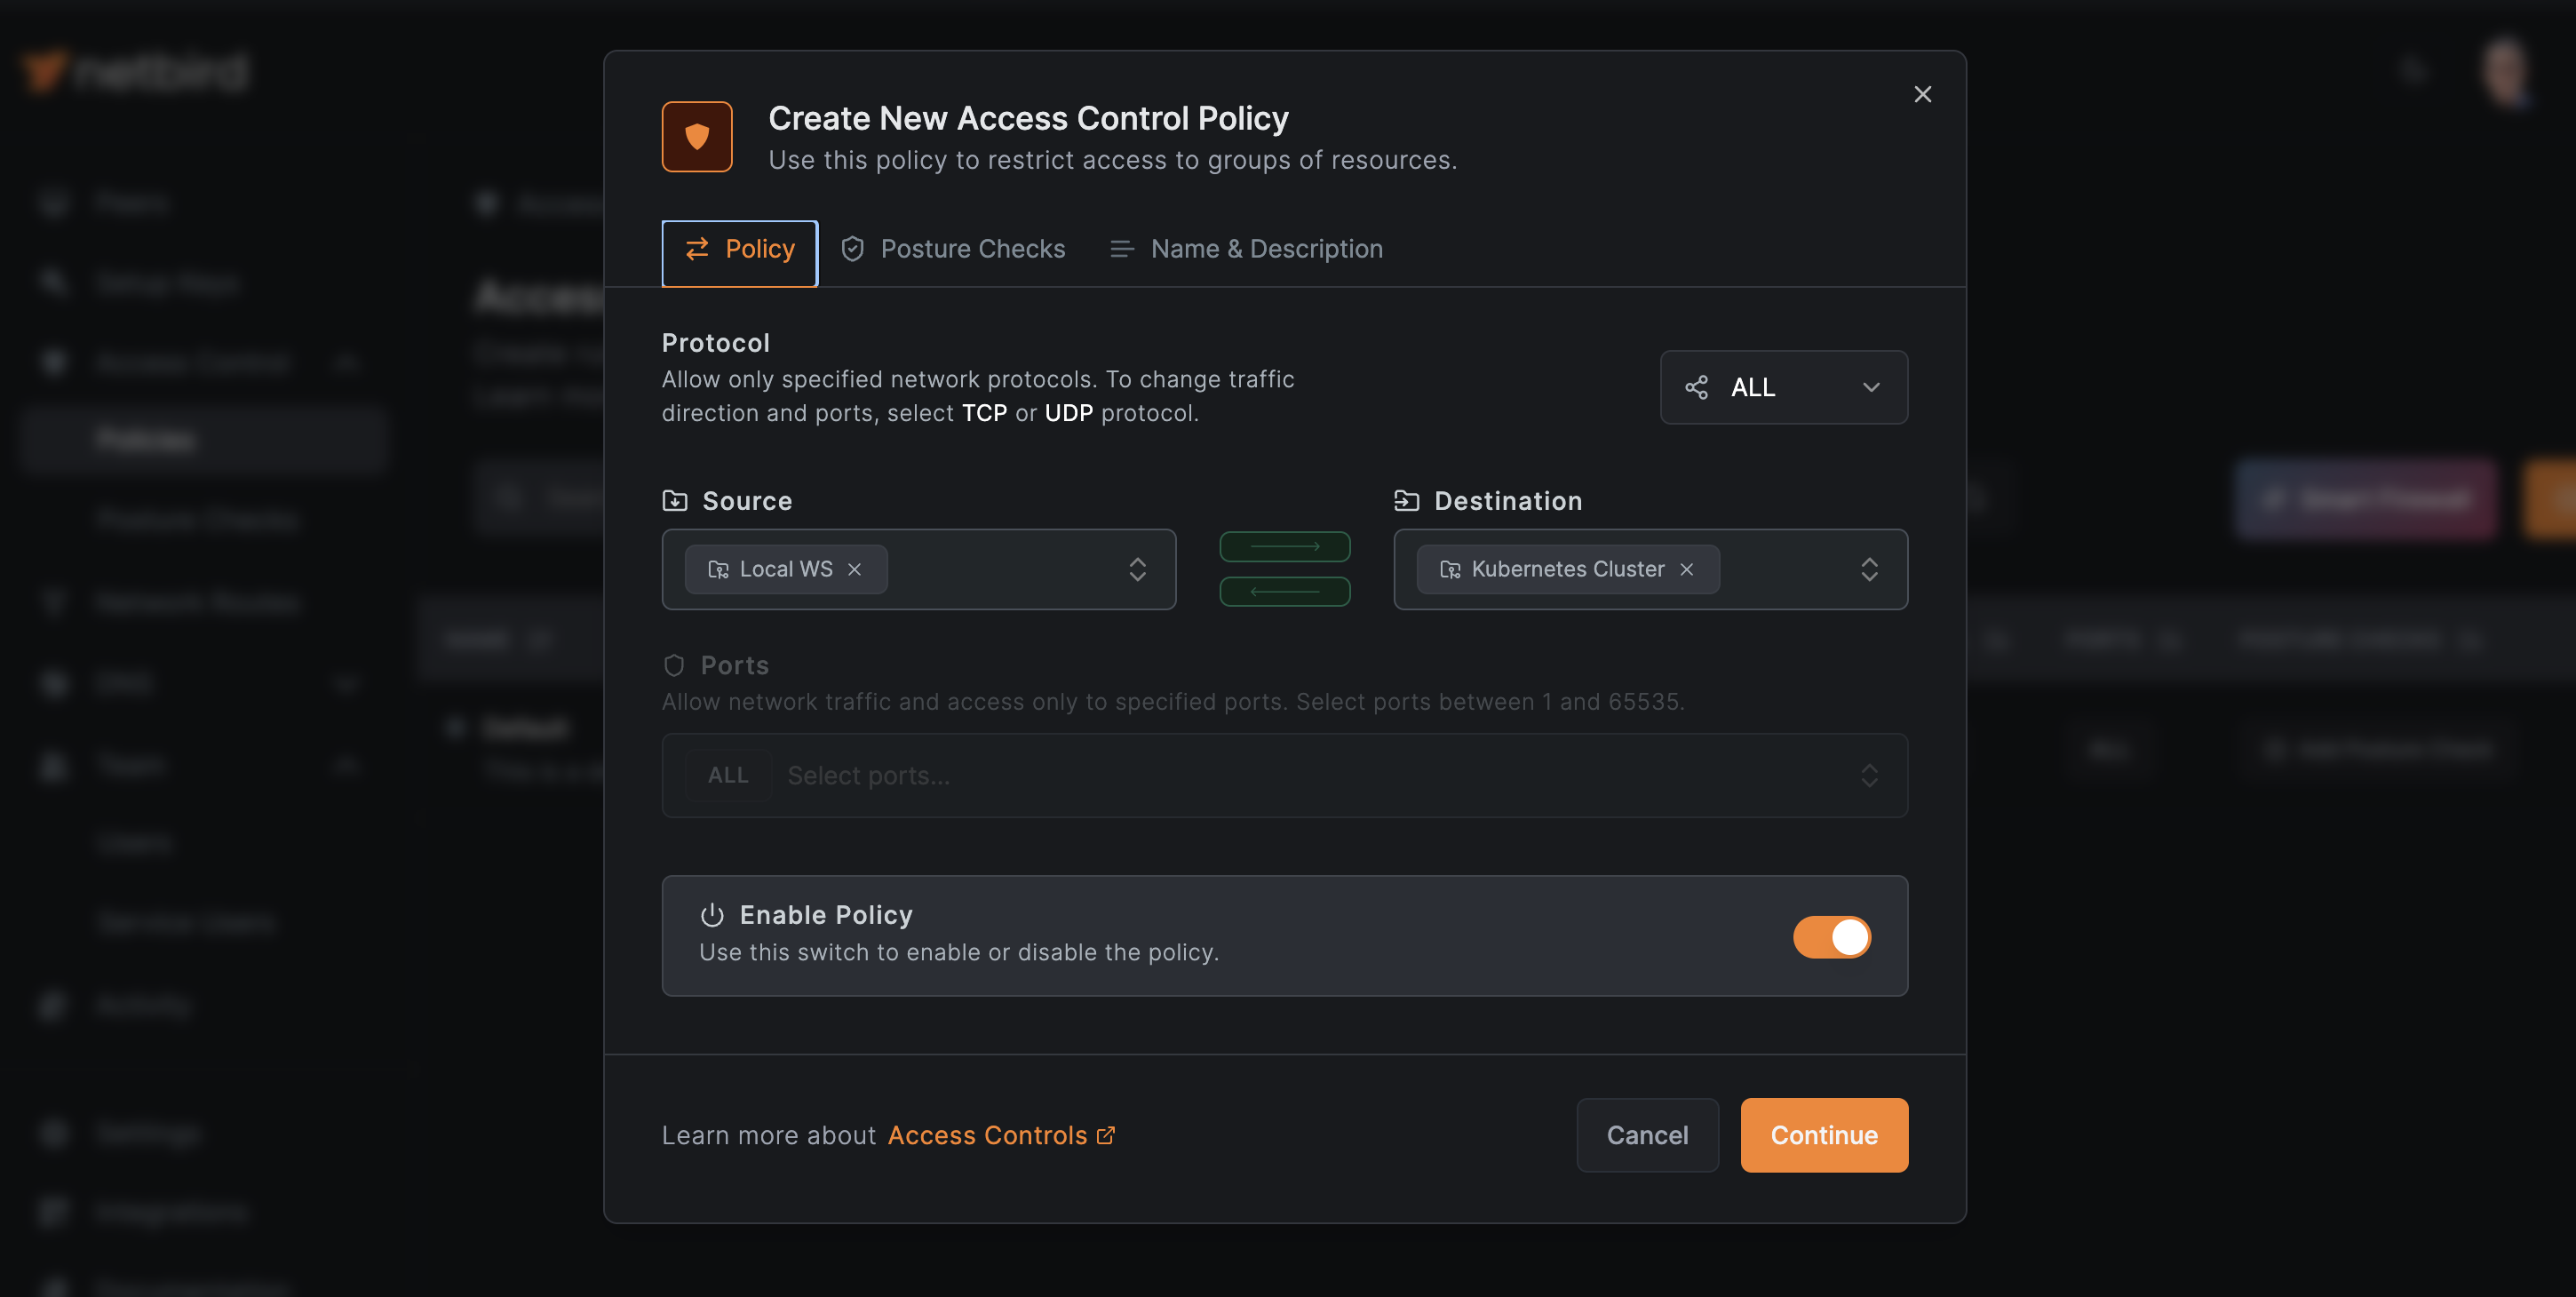
Add Policy. - Create a new policy specifically for Kubernetes access:
- Set the source as your local machine's group (e.g.,
Local WS) - Set the destination as your Kubernetes cluster group (e.g.,
Kubernetes Cluster) - Specify the protocols and ports required for your application if needed.
- Set the source as your local machine's group (e.g.,
Your access policy must look similar to this:
Click Continue and name your policy:
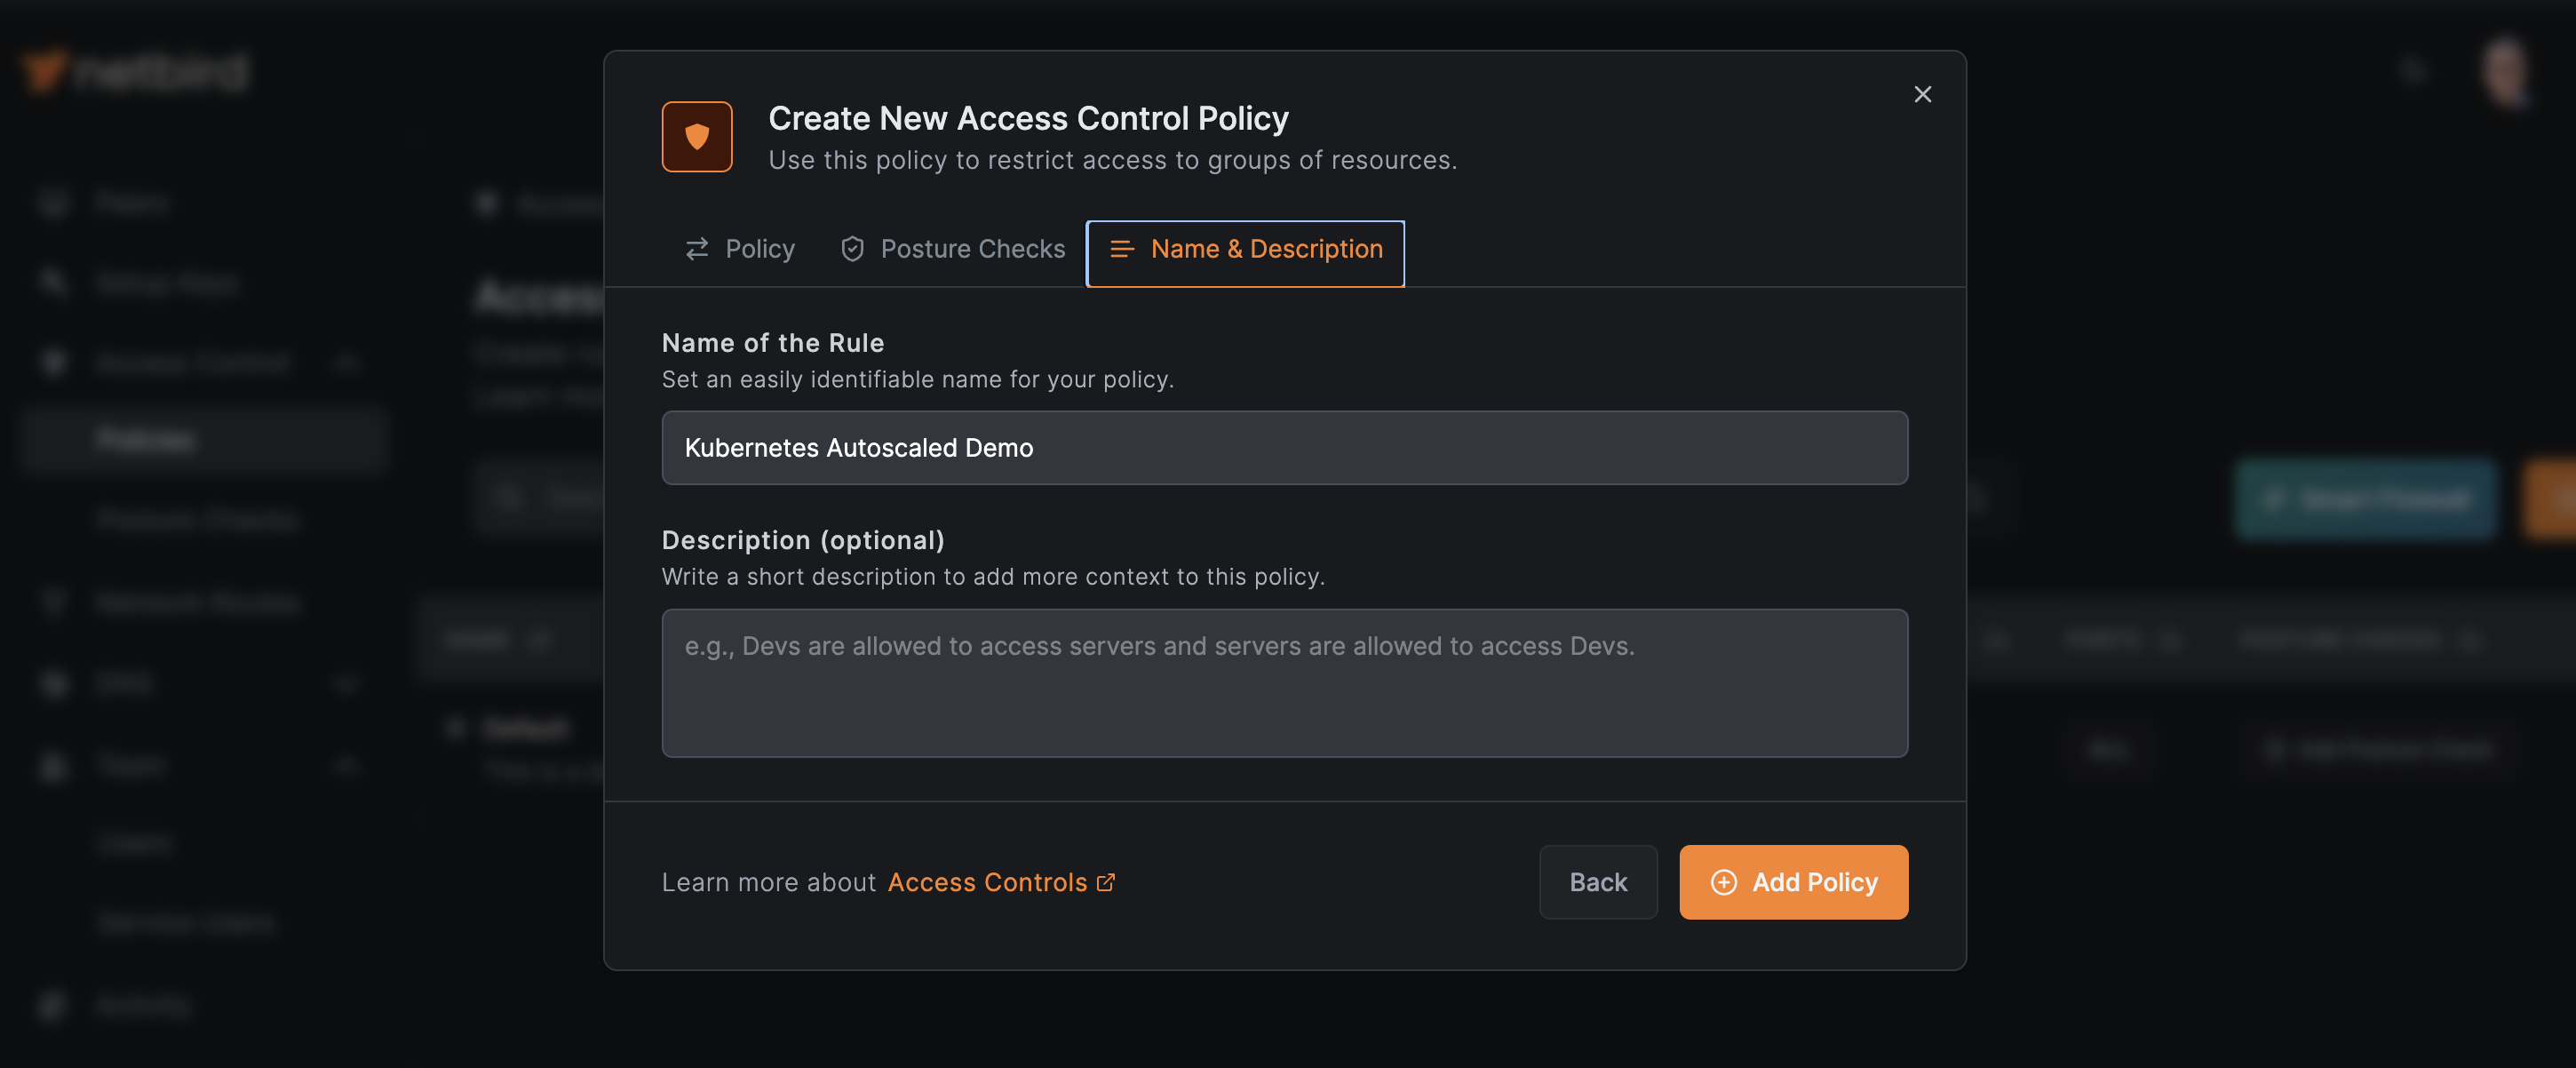
Once you save your policy, it is a good practice to disable or modify the default All group policy to prevent unrestricted access.
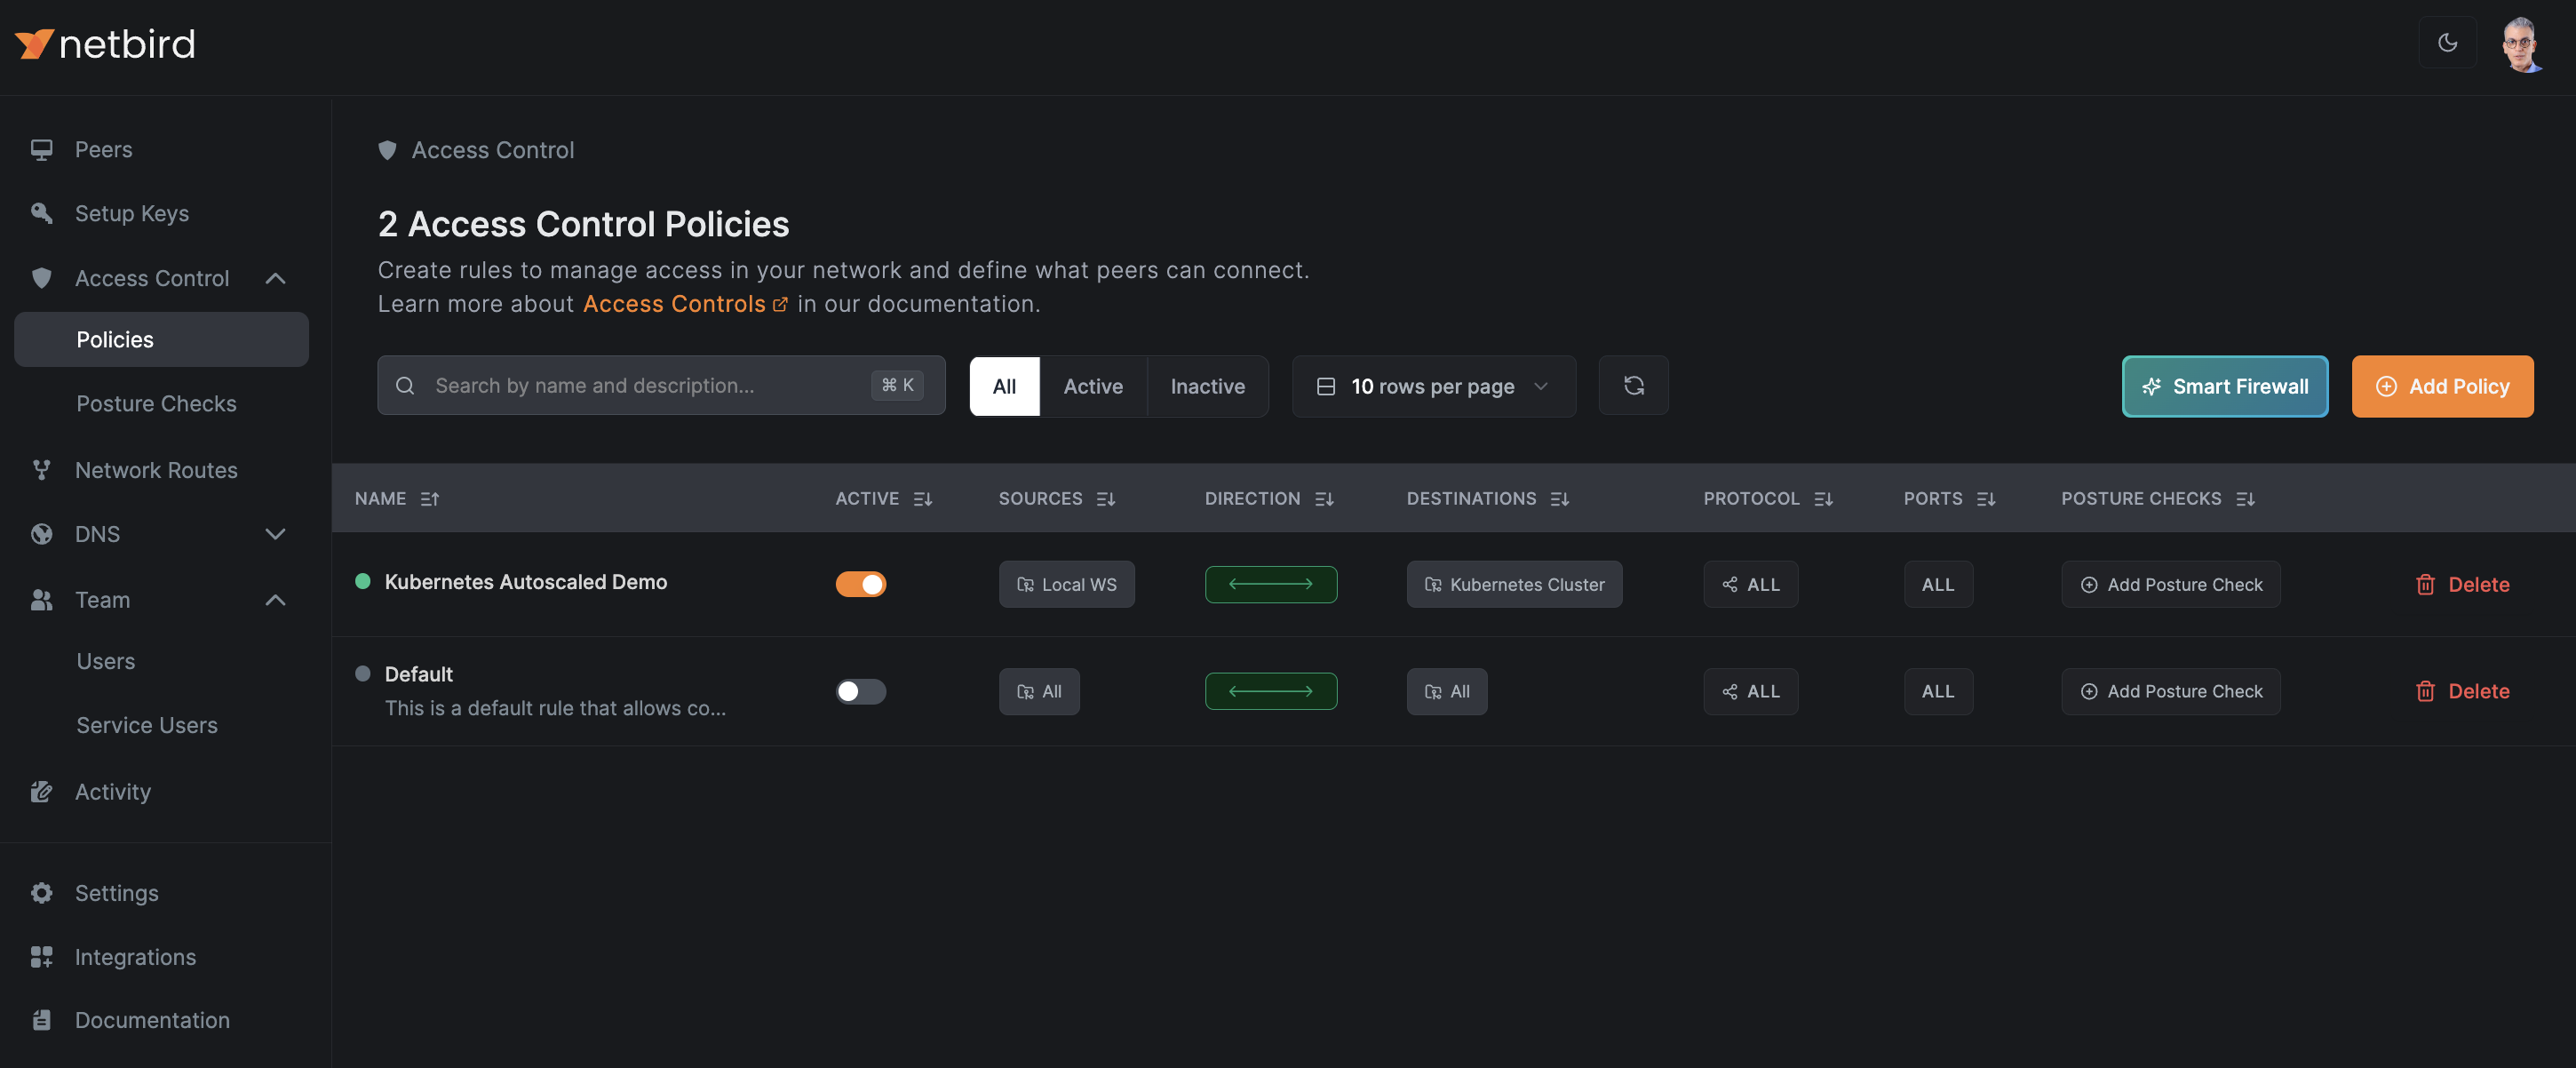
This tailored access policy ensures that only authorized devices (your local machine) can communicate with the Kubernetes cluster, significantly improving your network's security posture. As your environment scales, this policy will automatically apply to new pods, maintaining consistent access control.
For more detailed information on configuring access policies, refer to the NetBird Access Policies documentation.
4. Deploying a Sample Application with NetBird Agent
With NetBird configured, it's time to deploy your application in Kubernetes. This process involves creating a dedicated namespace, securely storing the NetBird setup key, and deploying your application alongside the NetBird agent. Let's walk through each step:
Create a dedicated namespace to keep your NetBird-related resources organized and isolated:
kubectl create namespace netbird
Create a Kubernetes secret for the NetBird setup key:
kubectl create secret generic netbird-setup-key -n netbird --from-literal=setup-key=YOUR_SETUP_KEY
Remember to replace YOUR_SETUP_KEY with the actual setup key you created earlier. This method securely stores your key within Kubernetes.
Next, deploy your application. For this tutorial we'll use a sample app that generates random quotes:
apiVersion: apps/v1
kind: Deployment
metadata:
  name: quote
  namespace: netbird
spec:
  replicas: 1
  selector:
    matchLabels:
      app: quote
  template:
    metadata:
      labels:
        app: quote
    spec:
      containers:
        - name: quote
          image: docker.io/datawire/quote:latest
          ports:
            - name: http
              containerPort: 8080
          resources:
            requests:
              cpu: 100m
              memory: 50Mi
            limits:
              cpu: 200m
              memory: 100Mi
        - name: netbird-agent
          image: netbirdio/netbird:latest
          env:
            - name: NB_SETUP_KEY
              valueFrom:
                secretKeyRef:
                  name: netbird-setup-key
                  key: setup-key
            - name: NB_HOSTNAME
              valueFrom:
                fieldRef:
                  fieldPath: metadata.name
          resources:
            requests:
              cpu: 50m
              memory: 64Mi
            limits:
              cpu: 100m
              memory: 128Mi
          securityContext:
            capabilities:
              add:
                - NET_ADMIN
                - SYS_RESOURCE
                - SYS_ADMIN

---

apiVersion: v1
kind: Service
metadata:
  name: quote
  namespace: netbird
spec:
  ports:
    - name: http
      port: 80
      targetPort: 8080
  selector:
    app: quote
This deployment creates a pod running both the quote app and the NetBird agent as a sidecar. The agent uses the setup key to automatically connect the pod to your NetBird network, enabling secure communication as defined by your routes and access policies.
Deploy the app by running the following:
kubectl apply -f quote-app.yaml
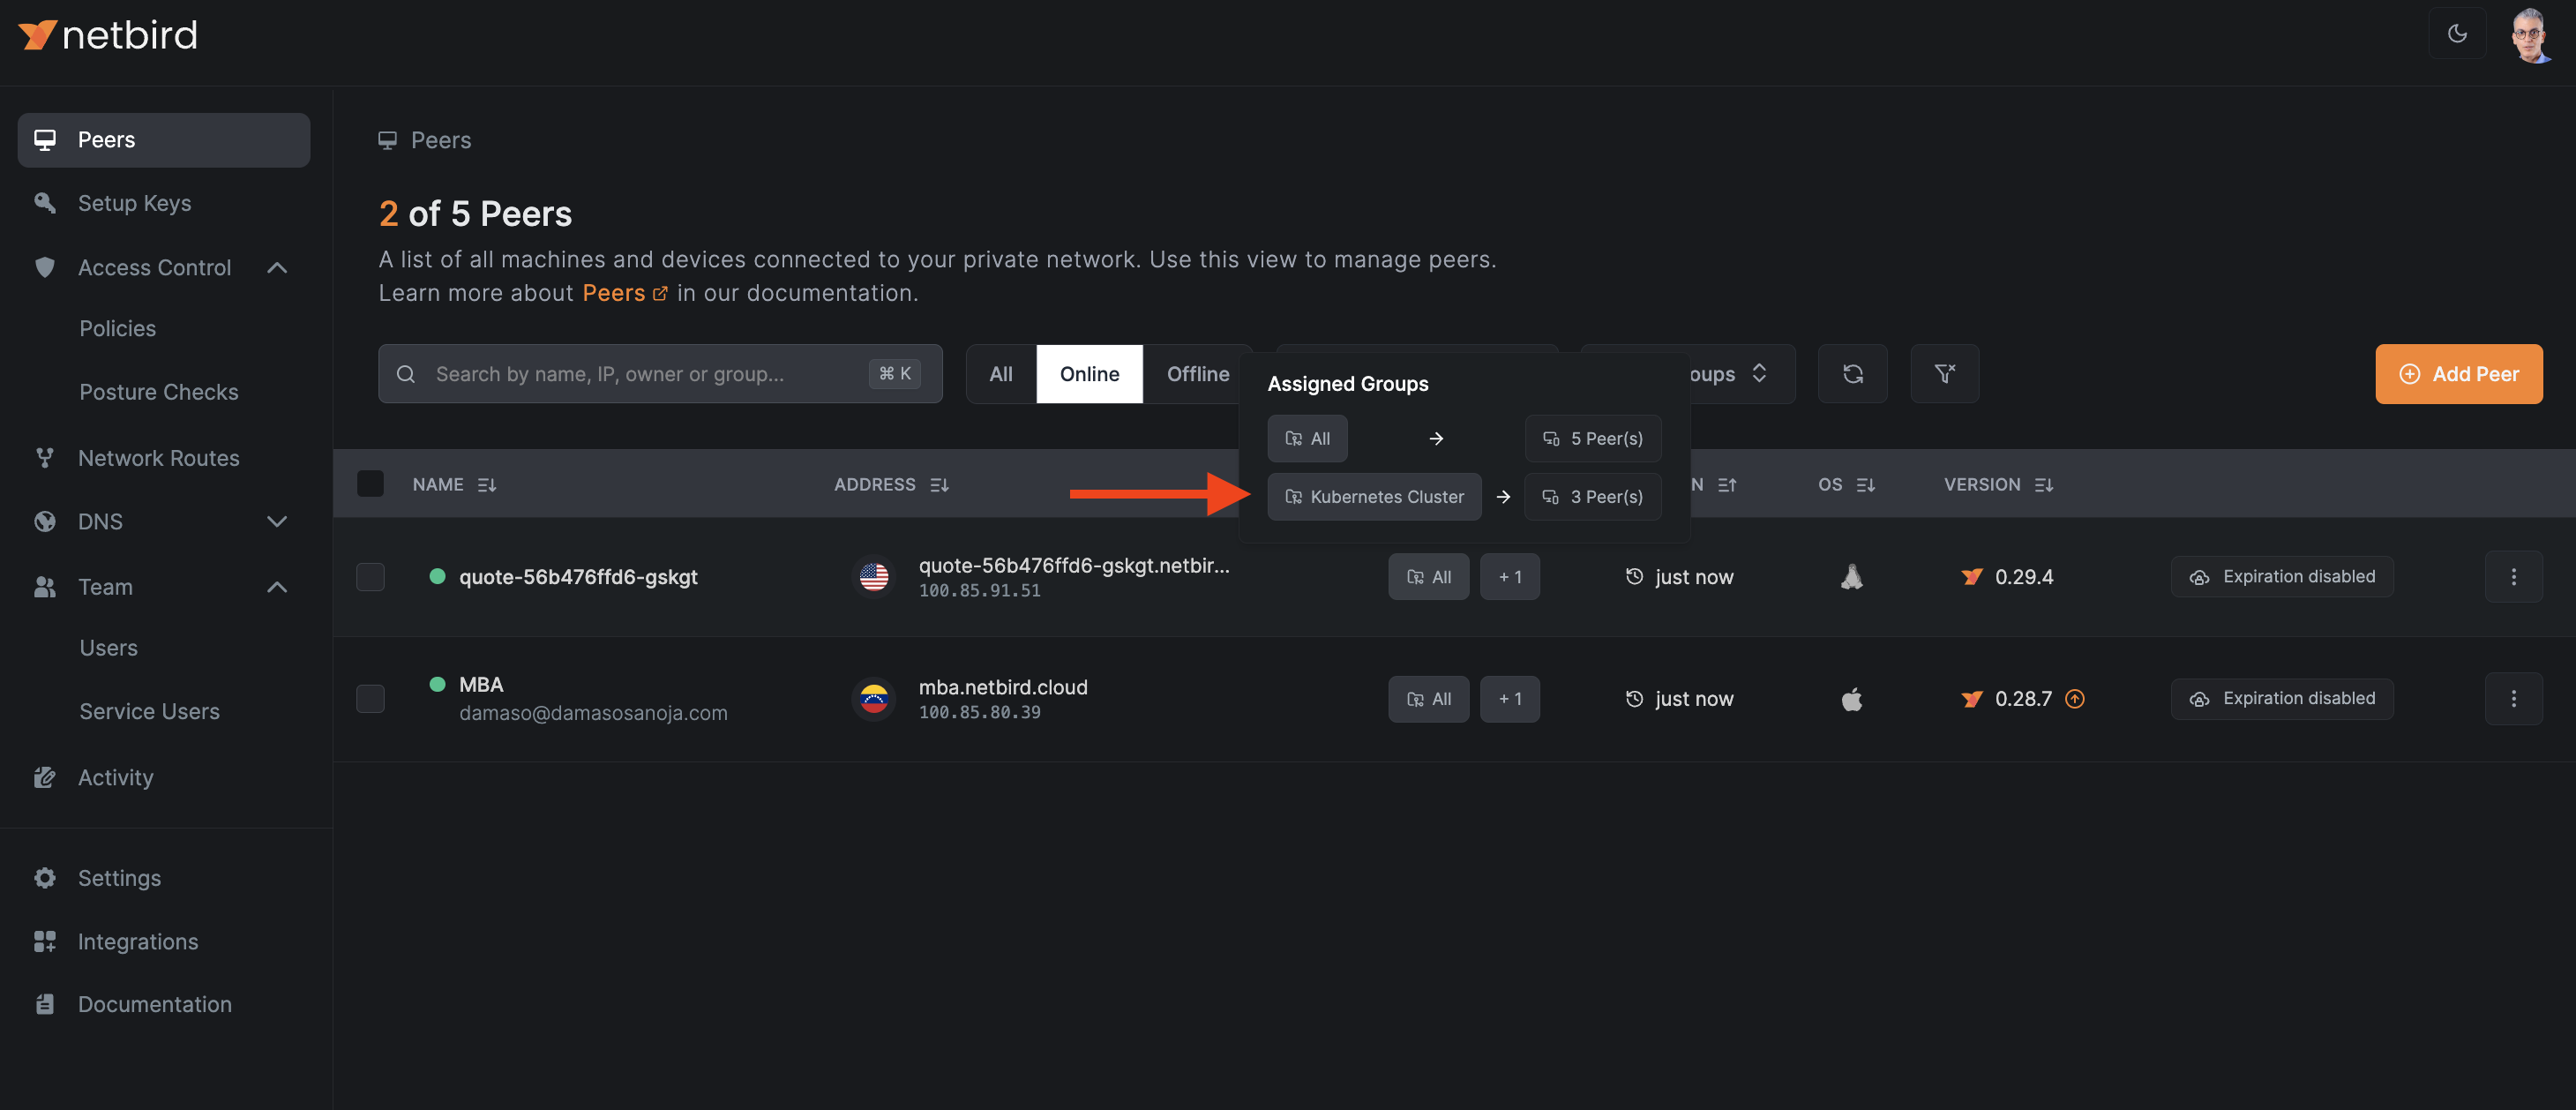
After a few seconds, the app will appear in NetBird's Peers dashboard. If you hover over the Assigned Groups, you'll notice the app automatically joined the group Kubernetes Cluster as expected.
5. Configuring Horizontal Pod Autoscaler (HPA)
To enable dynamic scaling of our application, we'll configure a Horizontal Pod Autoscaler (HPA). This YAML configuration sets up an HPA that scales based on CPU utilization:
apiVersion: autoscaling/v2
kind: HorizontalPodAutoscaler
metadata:
  name: quote-hpa
  namespace: netbird
spec:
  scaleTargetRef:
    apiVersion: apps/v1
    kind: Deployment
    name: quote
  behavior:
    scaleDown:
      stabilizationWindowSeconds: 60
  minReplicas: 1
  maxReplicas: 3
  metrics:
    - type: Resource
      resource:
        name: cpu
        target:
          type: Utilization
          averageUtilization: 20
Key points:
- We've set
minReplicas: 1andmaxReplicas: 3to limit scaling range. averageUtilization: 20triggers scaling at 20% CPU usage, lower than the default for quicker demonstration.stabilizationWindowSeconds: 60reduces the cool-down period for faster downscaling.
Apply this configuration with:
kubectl apply -f quote-hpa.yaml
Verify the resource was created by running:
kubectl get hpa -n netbird
The output should be similar to:
NAME        REFERENCE          TARGETS       MINPODS   MAXPODS   REPLICAS   AGE
quote-hpa   Deployment/quote   cpu: 1%/20%   1         3         1          21m
These settings accelerate scaling for tutorial purposes. In production, adjust these values based on your application's specific requirements and performance characteristics.
6. Observing NetBird's Dynamic Peer Management
Now that we've set up our application with NetBird integration and configured the HPA, we can observe how NetBird dynamically manages peers as the application scales. We'll use a simple load generator to trigger the autoscaling and monitor the results.
Open a new terminal window and run the following command to generate load:
kubectl run -i --tty load-generator \
    --rm \
    --image=busybox \
    --restart=Never \
    -n netbird \
    -- /bin/sh -c "while sleep 0.001; do wget -q -O- http://quote; done" > /dev/null 2>&1
This command creates a temporary pod that continuously sends requests to our application.
Now, in another terminal window, monitor the HPA's activity:
kubectl get hpa -n netbird -w
The -w flag enables watch mode, providing real-time updates on the HPA's status. The output should be similar to this:
NAME        REFERENCE          TARGETS       MINPODS   MAXPODS   REPLICAS   AGE
quote-hpa   Deployment/quote   cpu: 2%/20%    1         3         1          23m
quote-hpa   Deployment/quote   cpu: 26%/20%   1         3         1          24m
quote-hpa   Deployment/quote   cpu: 29%/20%   1         3         2          24m
quote-hpa   Deployment/quote   cpu: 41%/20%   1         3         2          24m
quote-hpa   Deployment/quote   cpu: 63%/20%   1         3         3          25m
quote-hpa   Deployment/quote   cpu: 38%/20%   1         3         3          25m
quote-hpa   Deployment/quote   cpu: 17%/20%   1         3         3          25m
quote-hpa   Deployment/quote   cpu: 1%/20%    1         3         2          30m
quote-hpa   Deployment/quote   cpu: 1%/20%    1         3         1          31m
quote-hpa   Deployment/quote   cpu: 1%/20%    1         3         1          32m
If you go to NetBird Peers dashboard, you will see new peers automatically joining the network as pods scale up.
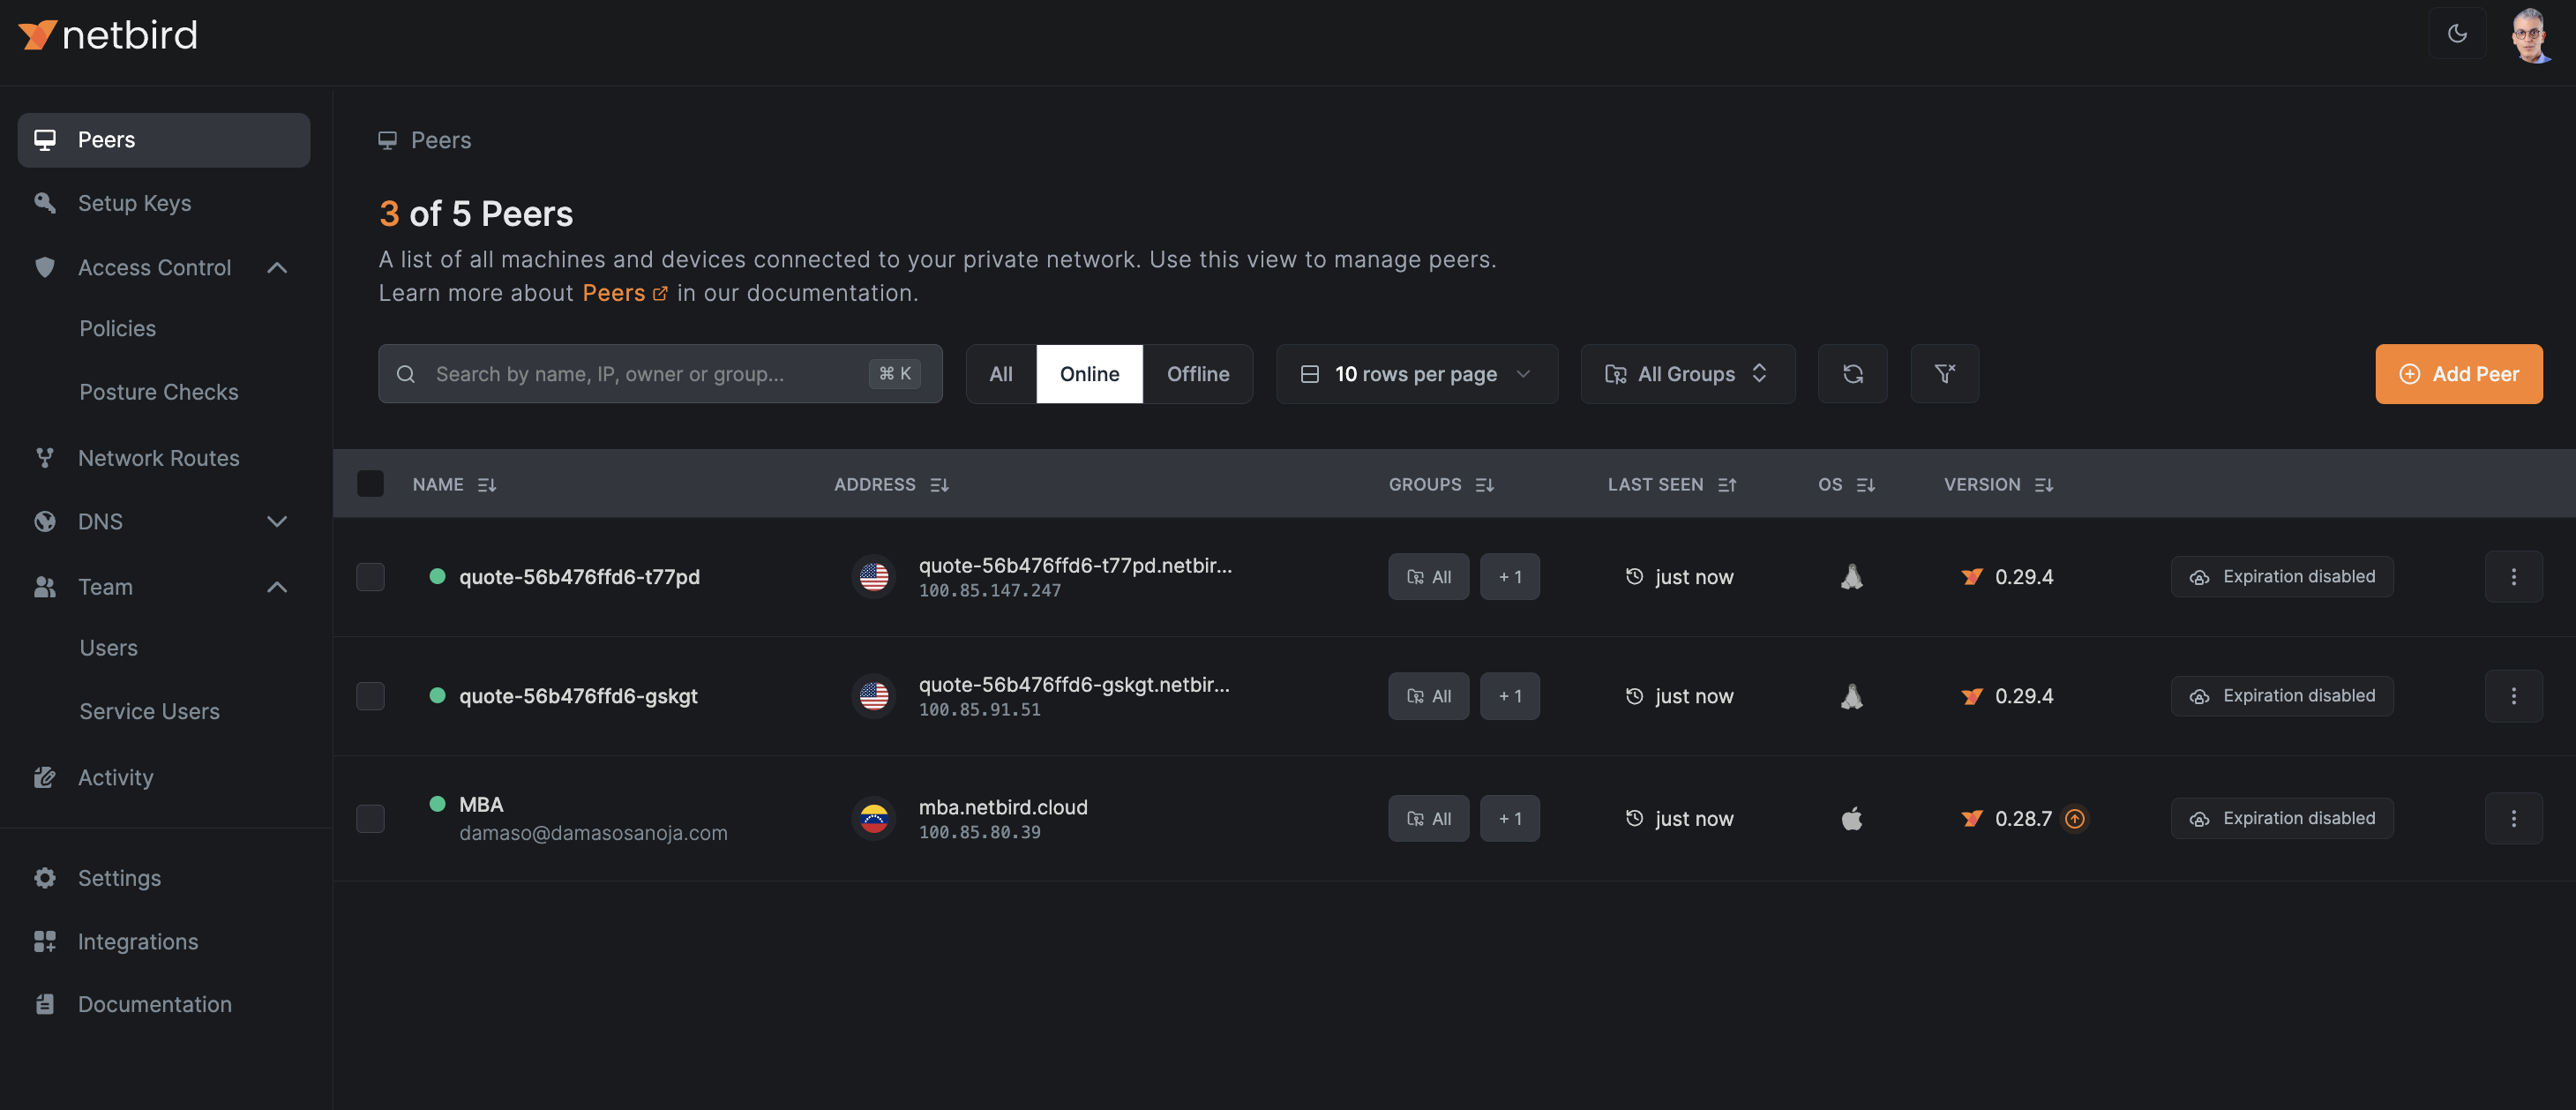
As you can see, all peers join the same group, meaning all share the same access policy you defined.

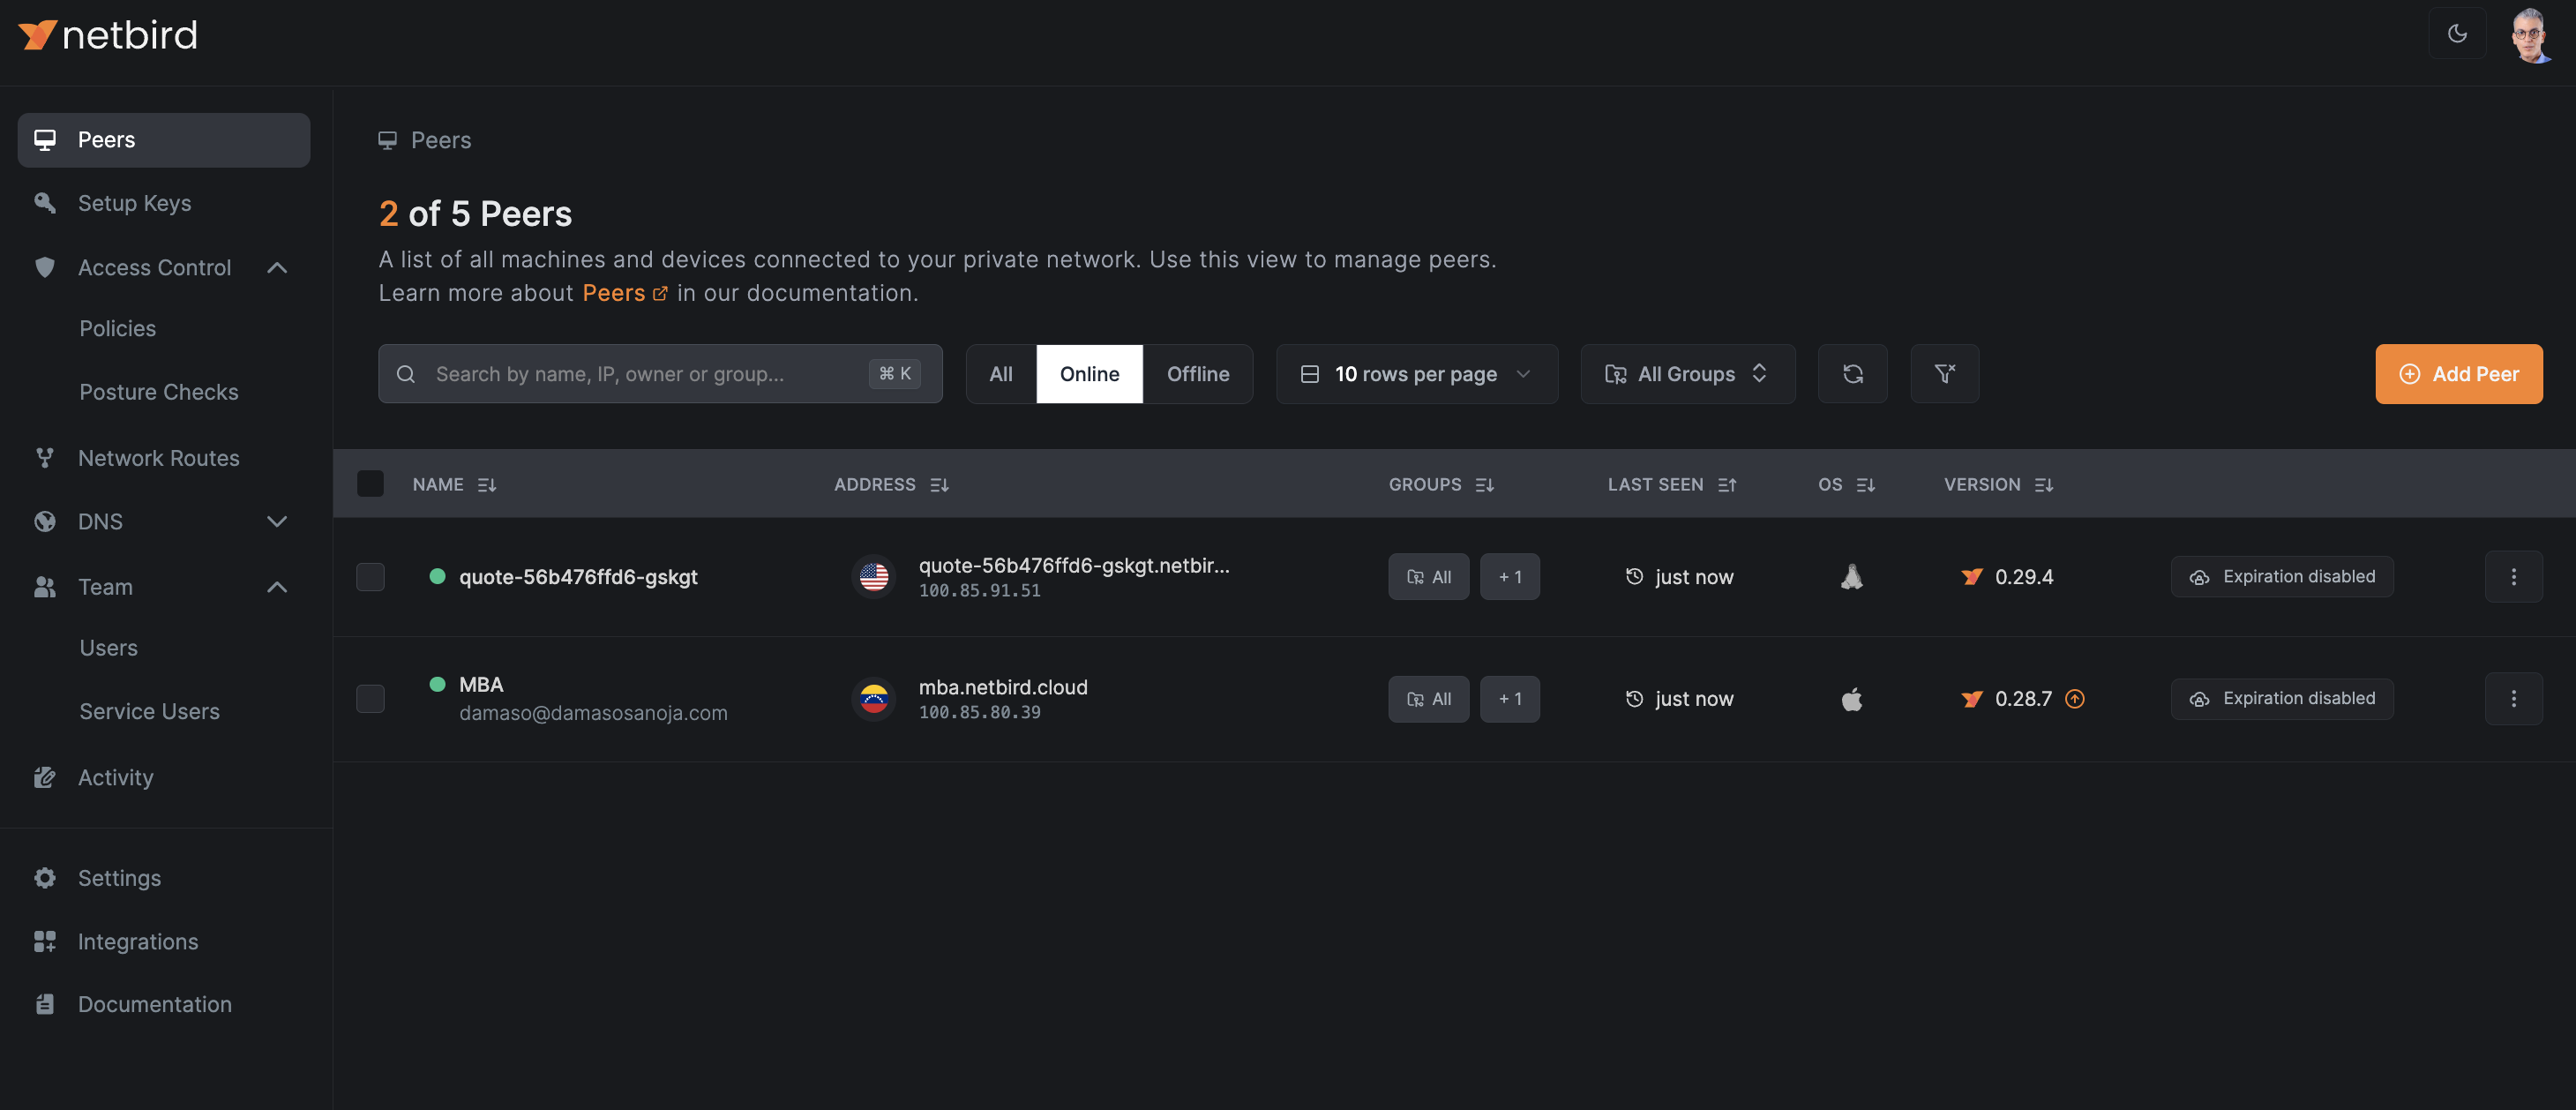
Conversely, when scaling down, peers are removed from the group and then terminated.

When ready, stop the load generator by pressing Ctrl+C in its terminal window; eventually, you will see only one app peer in the dashboard.
This demonstration showcases NetBird's powerful capabilities in seamlessly managing network connections within a dynamic, autoscaling Kubernetes environment. NetBird automatically adapts to your cluster's changing topology without any manual intervention, ensuring secure and efficient connectivity as pods scale up or down. This automation saves significant time and effort in network management and enhances your environment's security posture. By integrating NetBird, you're implementing a robust, scalable networking solution that keeps pace with your application's demands while maintaining strict access controls.