Deploy routing peers to a Kubernetes cluster
Updated
This guide provides instructions on how to use NetBird agent within a Kubernetes cluster to establish secure, peer-to-peer networking between your Kubernetes pods and external services or other clusters.
For the mental model — see How Routing Peers Work — Requirements.
Prerequisites
- Access to a Kubernetes cluster
- Kubernetes CLI (kubectl) installed and configured
- Access to the NetBird management dashboard
Use Case Scenario
Imagine you're running a multi-cloud Kubernetes environment where your application components are distributed across different cloud providers, including on-premise Kubernetes clusters. Your goal is to securely access your kubernetes services from hosts running on a Hetzner without exposing them to the public internet.
Step-by-Step guide
Step 1: Create a setup key
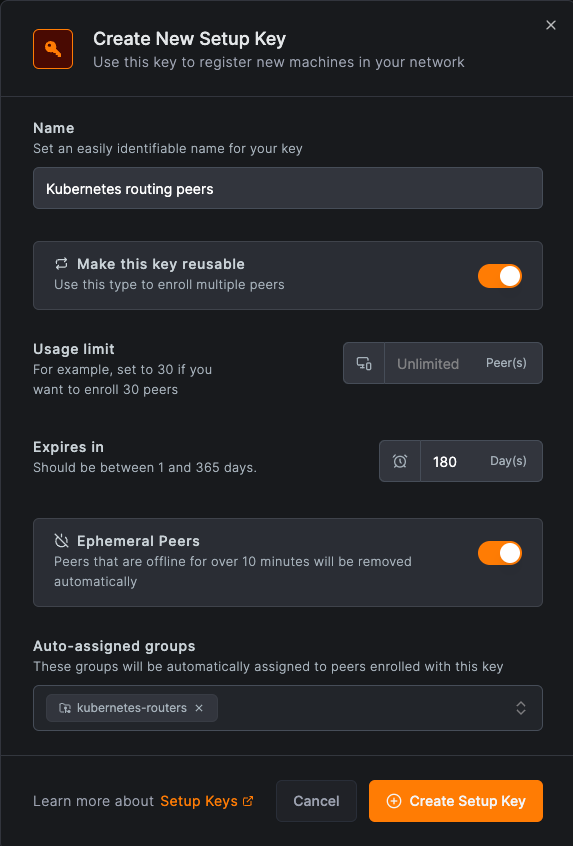
Navigate to Settings → Setup Keys in the NetBird management dashboard and click on "Create setup key".
Choose a name, e.g. Kubernetes routing peers, mark the key as reusable and enable Ephemeral peers. This option is
ideal for stateless workloads like containers, where peers that are offline for over 10 minutes are automatically removed.
Create or add group called kubernetes-routers to the Auto-assigned groups list. This designation can be adjusted to
suit your needs.
See the screenshot below for reference:
With your setup key created, note it down for the next steps.
Step 2: Add a network route
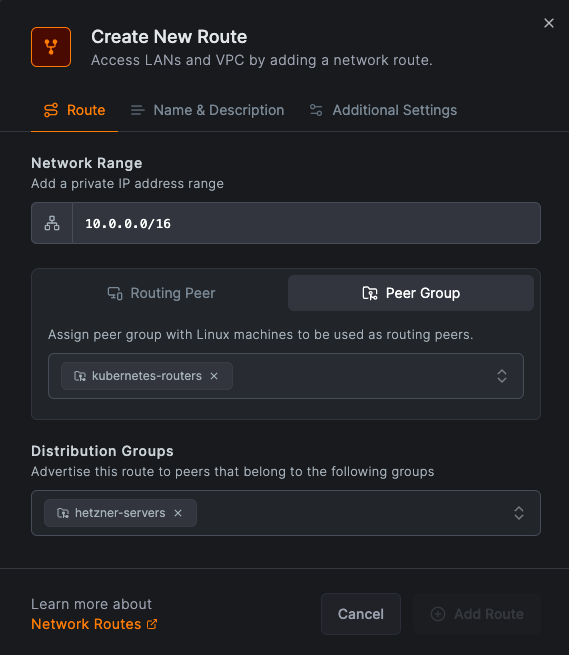
Navigate to Network Routing → Routes in the NetBird management dashboard and click on Add Route.
Set your kubernetes pod range as the destination network, and select the Peer group option, choosing the
"kubernetes-routers" group. This configuration allows for scaling pods as necessary within your Kubernetes cluster.
Set the distribution group to hetzner-servers. This group is used to distribute the route to all servers in the group.
See the screenshot below for reference:
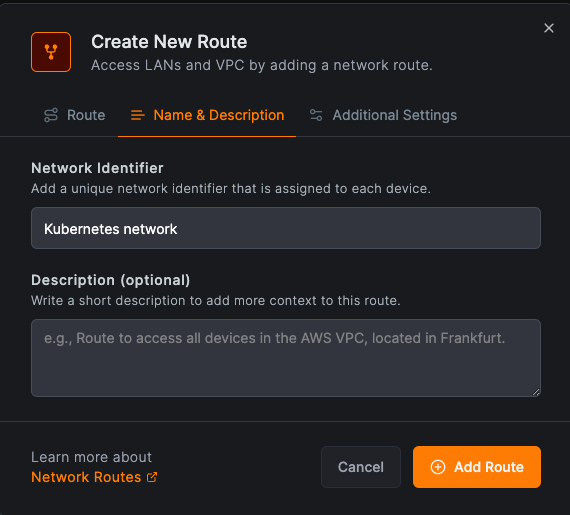
Click on Name & Description to give your route a name and description. Then click on Add Route to save your changes.
Step 3: Create an access control policy
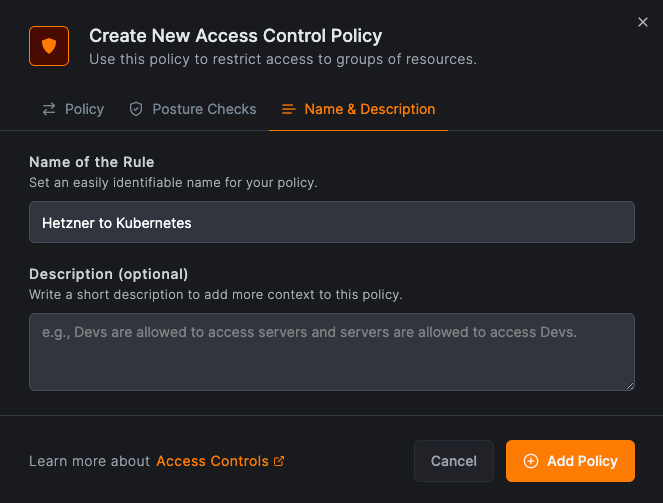
Navigate to Access Control Policies in the NetBird management dashboard and click on Add Policy.
Set the source group to hetzner-servers and the destination group to kubernetes-routers. This configuration allows
the Hetzner servers to access the kubernetes pods.
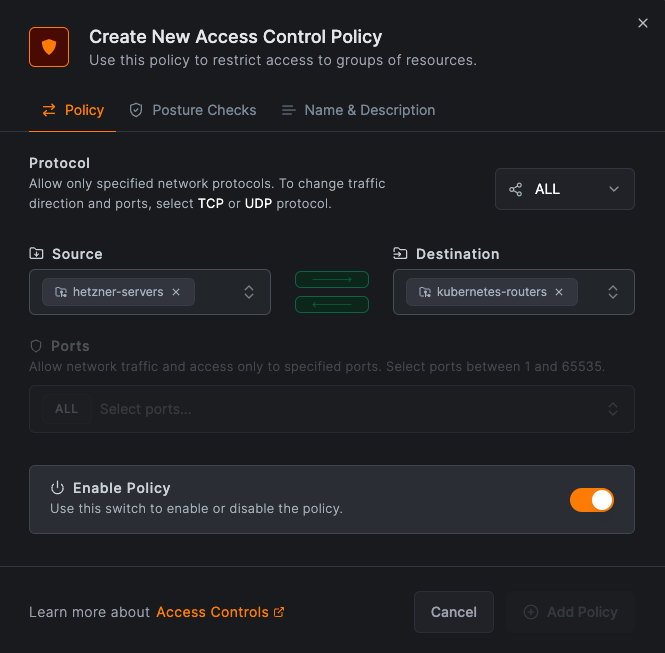
Click on Name & Description to give your policy a name and description. Then click on Add Policy to save your changes.
Step 4: Deploy the NetBird agent
You can deploy the NetBird agent using a daemon set or a deployment. Below is an example of a deployment configuration with 1 replica.
---
apiVersion: apps/v1
kind: Deployment
metadata:
  name: netbird
  namespace: default
spec:
  replicas: 1
  selector:
    matchLabels:
      app: netbird
  template:
    metadata:
      labels:
        app: netbird
    spec:
      containers:
        - name: netbird
          image: netbirdio/netbird:latest
          env:
            - name: NB_SETUP_KEY
              value: "0000000000-0000-0000-0000-0000000000" # replace with your setup key
            - name: NB_HOSTNAME
              value: "netbird-k8s-router" # name that will appear in the management UI
            - name: NB_LOG_LEVEL
              value: "info"
          securityContext:
            capabilities:
              add:
                - NET_ADMIN
                - SYS_RESOURCE
                - SYS_ADMIN
          livenessProbe:
            exec:
              command: ["netbird", "status", "--check", "live"]
            initialDelaySeconds: 5
            periodSeconds: 10
            timeoutSeconds: 5
            failureThreshold: 3
          readinessProbe:
            exec:
              command: ["netbird", "status", "--check", "ready"]
            initialDelaySeconds: 5
            periodSeconds: 10
            timeoutSeconds: 5
            failureThreshold: 3
          startupProbe:
            exec:
              command: ["netbird", "status", "--check", "startup"]
            periodSeconds: 2
            timeoutSeconds: 10
            failureThreshold: 30
The health probes use netbird status --check to verify the client state:
- live: checks that the daemon process is responsive
- ready: checks that the client is not in an authentication-required state (NeedsLogin, LoginFailed, SessionExpired)
- startup: checks that management and signal are connected, and that at least one relay server is available if any are configured
Edit your deployment.yml file, incorporating the setup key into the relevant sections.
Apply the updated deployment file to your Kubernetes cluster using the following command:
kubectl apply -f deployment.yml
In this example the setup key is passed as an environment variable. You should use a secret to pass the setup key.
Step 5: Make the deployment highly available
NetBird Routes support multiple routing peers running in a fail-over mode, where one routing peer will be select as gateway for a network and when this peer becomes unavailable other routing peer will be select for the role, proving a highly available network route.
To make the deployment highly available, you can increase the number of replicas in the deployment configuration to 3 or more.
---
...
spec:
  replicas: 3
...
Apply the updated deployment file to your Kubernetes cluster using the following command:
kubectl apply -f deployment.yml
Step 6: Verify the deployment
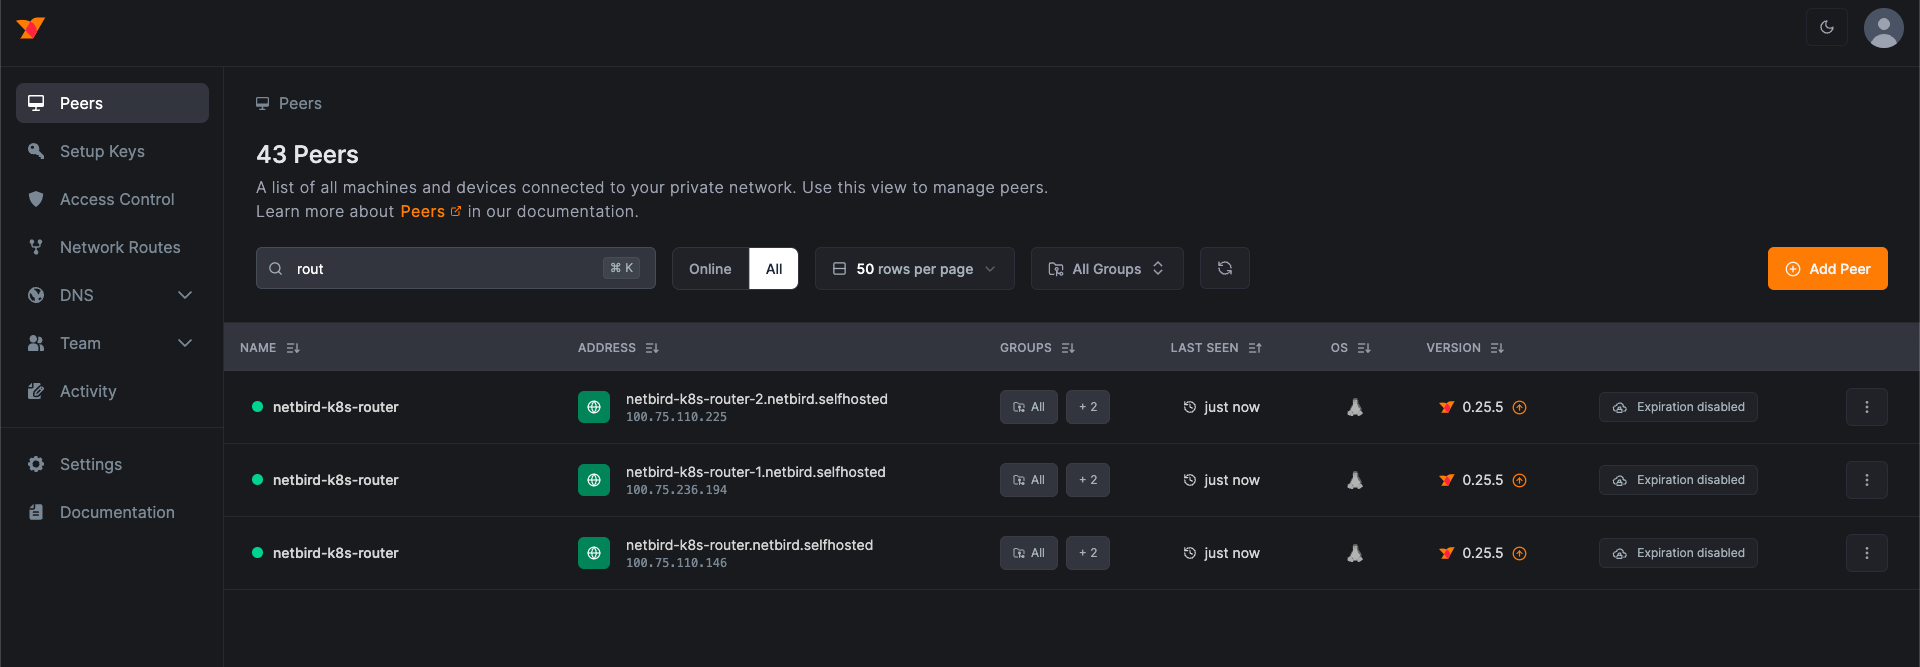
After deploying the NetBird agent, you can verify that the agent is running by checking the logs of the pods.
kubectl logs -l app=netbird
You can also verify that the agent is connected to the NetBird management dashboard by checking the dashboard.
Conclusion
By following these steps, you've successfully integrated Netbird within your Kubernetes cluster, enabling secure, peer-to-peer networking between your Kubernetes pods and external services. This setup is particularly beneficial for hybrid, multi-cloud environments and remote access, ensuring seamless connectivity and security across your infrastructure.