OPNsense Installation
The NetBird client (agent) allows a peer to join a pre-existing NetBird deployment. If a NetBird deployment is not yet available, there are both managed and self-hosted options available.
The NetBird package is officially included starting from OPNsense 25.7.3.
Prerequisites
- Shell or Web UI access to your OPNsense system
- A setup key to authenticate and register the OPNsense device
Installation
-
Log in to your OPNsense system
You can use the Web UI or SSH.
-
Install the NetBird package
In the OPNsense Web UI, navigate to
System>Firmware>Plugins. Make sureShow community pluginsis checked, then search for theos-netbirdpackage and click the install button next to it. -
Verify the installation
Once installed, the NetBird configuration interface will be available under
VPN>NetBirdin the OPNsense menu
Configuration
Enable the service
Navigate to VPN > NetBird > Settings and ensure the toggle Enable is turned on in the General section.
This will enable us to continue with the next steps.
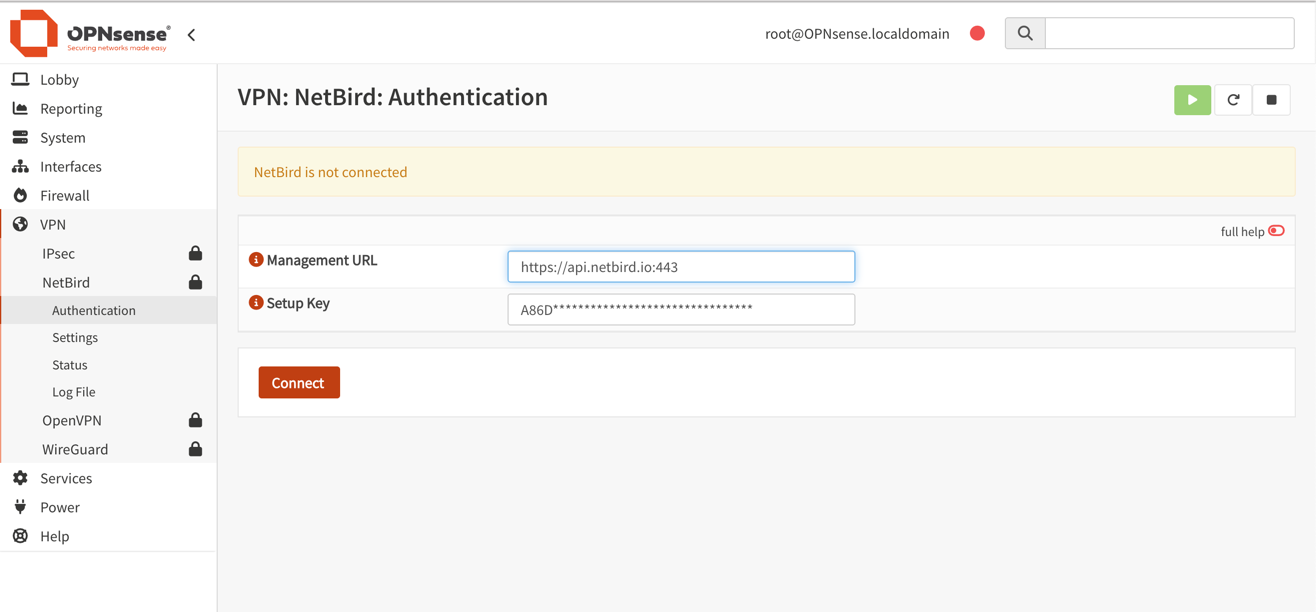
Authenticate the machine
Fill out the authentication form with the following values and click Save:
- Management URL: Default is
https://api.netbird.io:443. If self-hosting, enter your custom management server URL. - Setup Key: Paste the setup key from your NetBird account.
Verify Connection Status
The Status page shows detailed information about connected peers and control services, helping you monitor your deployment.
Access it via VPN > NetBird > Status in the OPNsense menu.
Use this section for diagnostics and troubleshooting common connection or setup issues.

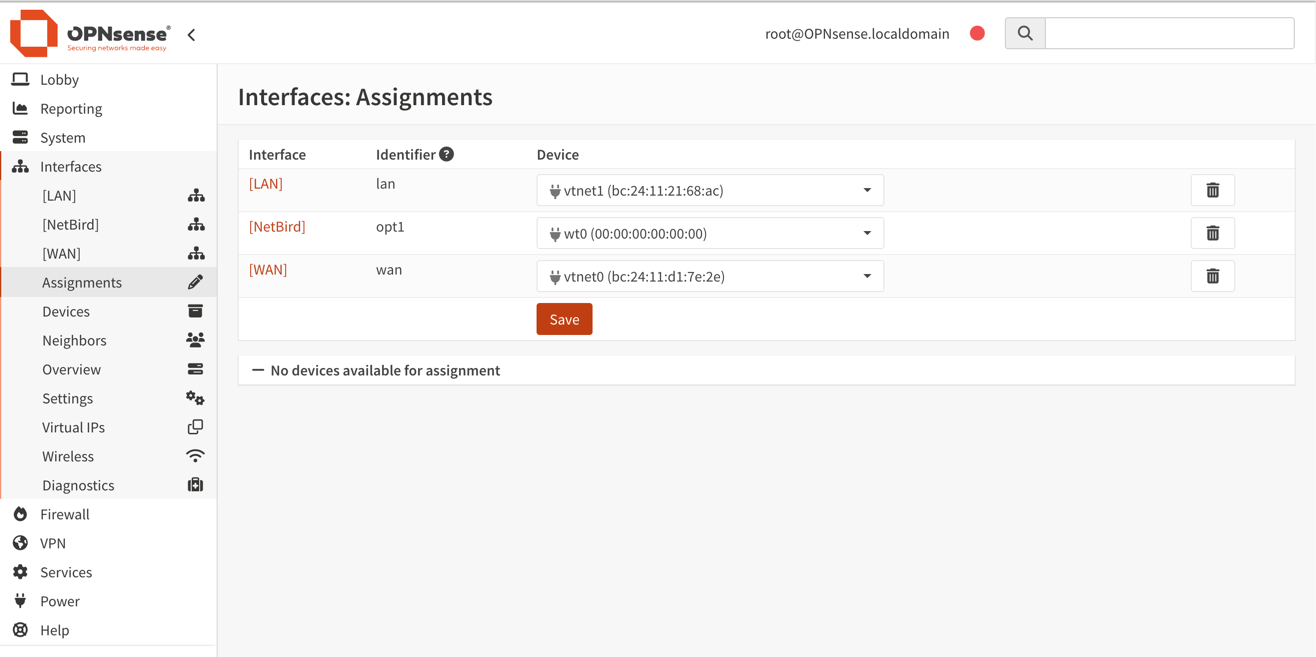
Assign NetBird interface
After installation, a new interface named wt0 will be available but unassigned. To assign it go to Interfaces >
Assignments. Under Assign a new interface, set the following values:
- Device:
wt0 - Description:
NetBird

Click Add to assign the interface.
Enable the NetBird interface
Now that the NetBird interface has been added, you need to enable it. Go to Interfaces > [NetBird], then configure
the following options and click Save, then Apply changes to activate the interface:
- Enable:
✓ Enable Interface - Lock:
✓ Prevent interface removal
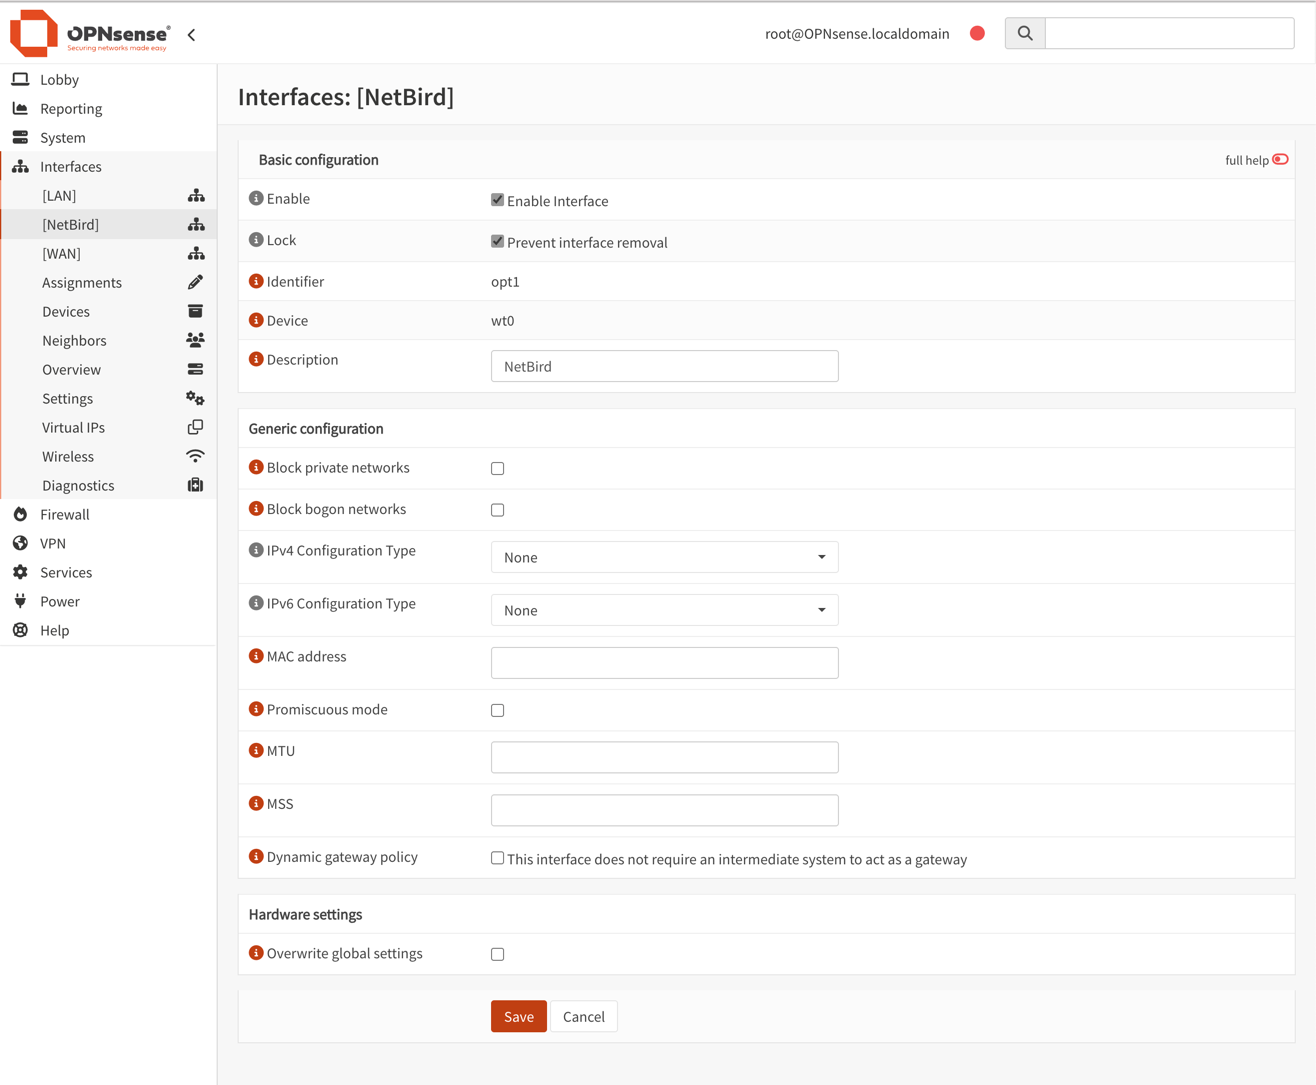
OPNsense includes native WireGuard support, however do not configure or manage the NetBird interface (wt0) via the OPNsense WireGuard UI. NetBird fully manages the WireGuard interface and keys.
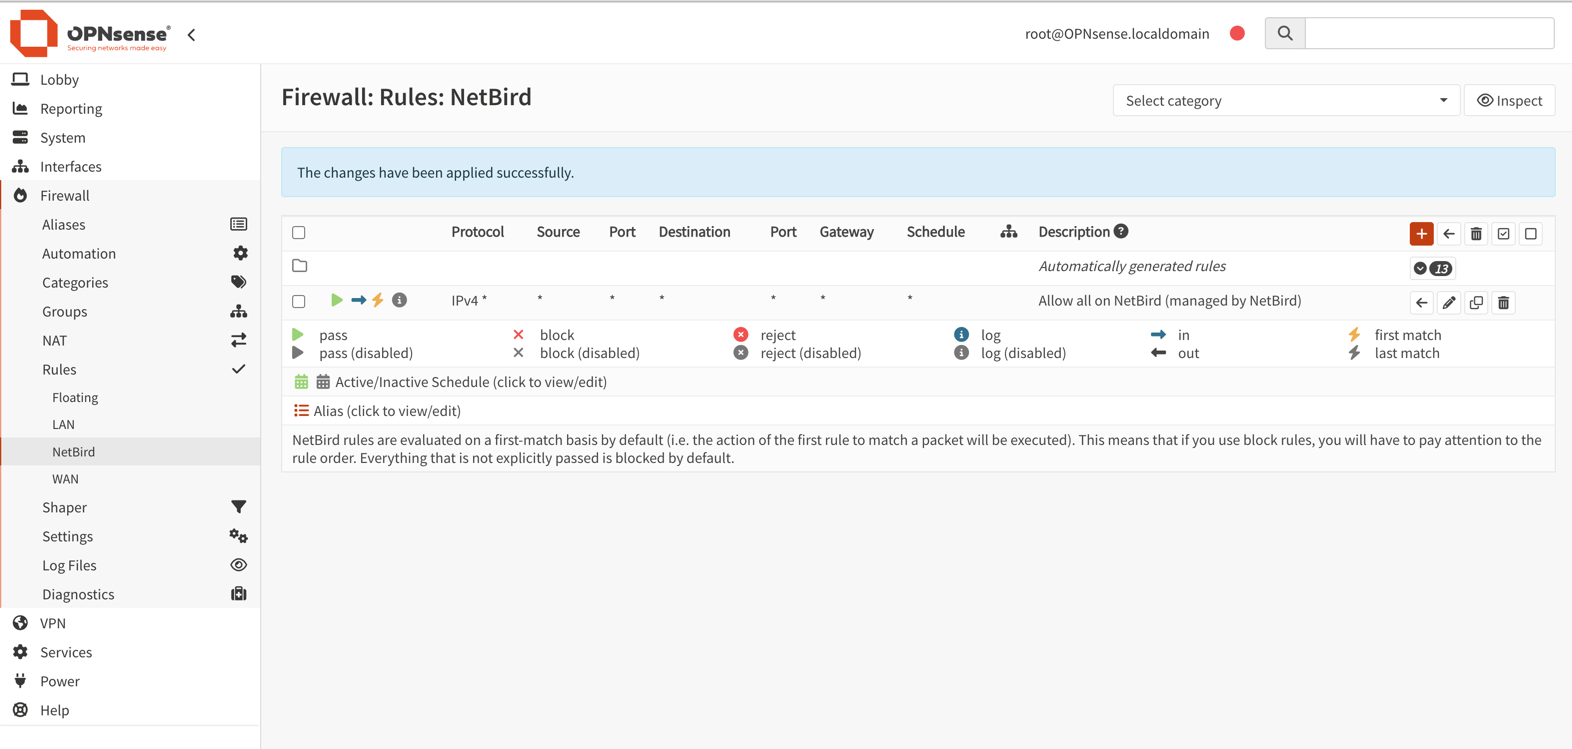
Configure Firewall Rules for the NetBird interface
To allow NetBird to handle all access control, permit all traffic on the NetBird interface in OPNsense. This ensures traffic flows freely, while NetBird’s own policies (ACLs) govern the access restrictions.
- Navigate to
Firewall>Rules>NetBird. - Click
+ Addto create a new rule. - Configure the rule:
- Action:
Pass - Interface:
NetBird - Direction:
in - TCP/IP Version:
IPv4 - Protocol:
any - Source:
any - Destination:
any - Description:
Allow all on NetBird (managed by NetBird)
- Action:
- Click
Save, thenApply changes. - Ensure this rule is at the top of the
NetBirdrules list so it isn’t shadowed by other rules.
Config for Troubleshooting Relayed Connections
By default, OPNsense uses automatic outbound NAT which randomizes source ports. This can cause issues with NetBird's NAT traversal (hole punching). To ensure reliable direct connections, you must configure a Static Port mapping.
-
Change Outbound NAT Mode:
- Navigate to
Firewall>NAT>Outbound. - Select
Hybrid outbound NAT rule generation. - Click
Save.
- Navigate to
-
Add Static Port Rule:
- Click
+to add a new rule. - Interface:
WAN - TCP/IP Version:
IPv4 - Protocol:
UDP - Source address:
Single host or Network(enter the IP address of your NetBird host) - Destination address:
any - Translation / Static-port: Check
Static-portbox - Description:
NetBird Static Port - Click
Saveand thenApply changes.
- Click
-
Reset States:
- Go to
Firewall>Diagnostics>States. - Filter by the NetBird host IP.
- Delete the states.
- Go to
-
Restart NetBird:
- Run
netbird service restarton the device. - Run
netbird status -dto verify the connection.
- Run
Get started
- Make sure to star us on GitHub
- Follow us on X
- Join our Slack Channel
- NetBird latest release on GitHub