Authentication and Identity Providers (IdPs)
NetBird's self-hosted implementation uses the OpenID Connect (OIDC) protocol for authentication, an industry-standard identity layer built on top of OAuth 2.0. OIDC is used both for user authentication to access the Management Service Dashboard and for user device authorization when accessing internal resources.
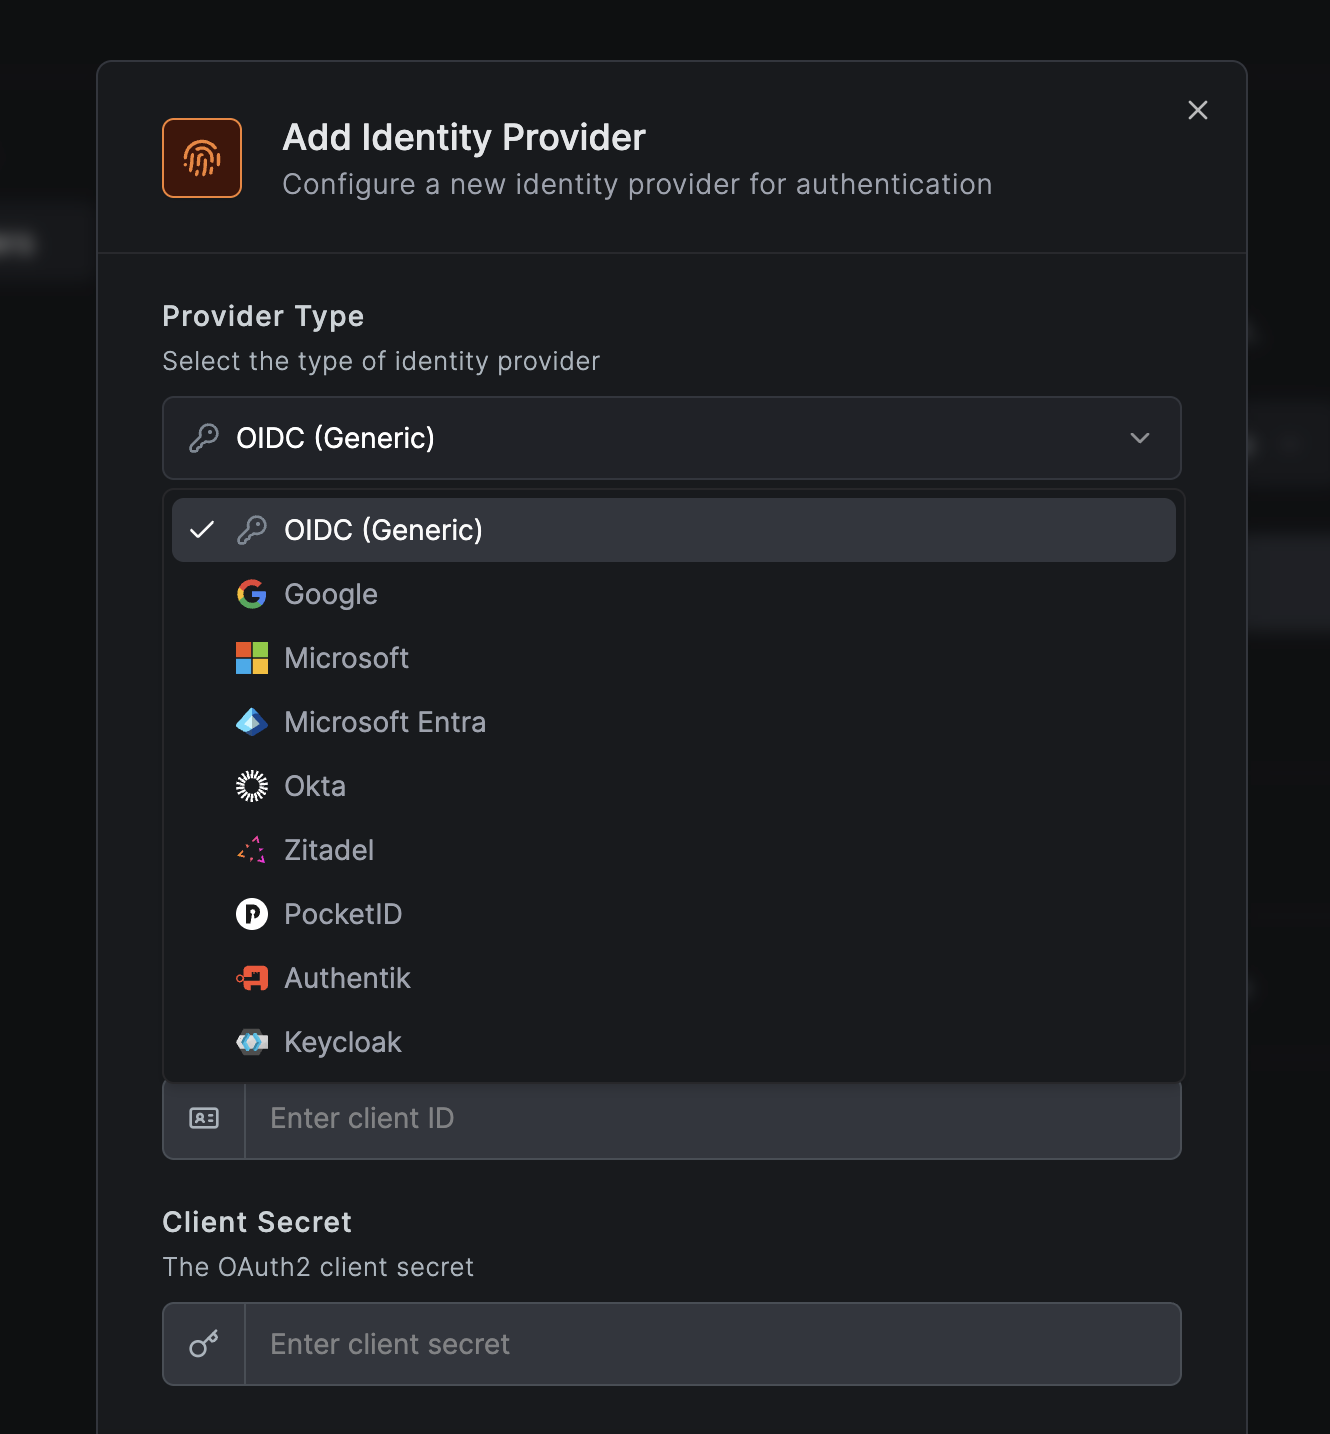
While we maintain a list of 'supported' (tested) IdPs, any OIDC provider should work with NetBird's 'OIDC (Generic)' connector.
How Authentication Works in NetBird
When a user attempts to access the NetBird dashboard from a web browser or an internal resource from their device, authentication is handled by the configured identity provider. Upon successful authentication, the identity provider issues a JSON Web Token (JWT) containing the user's identity and claims. The Management Service validates this token to verify the user's identity and grant access.
By default, NetBird does not require an external identity provider. New installations include a built-in authentication system that lets you create and manage users directly through the Dashboard using local username and password authentication. External identity providers are entirely optional. Add them when you need SSO integration with Google, Microsoft, Okta, or self-hosted identity providers like Keycloak or Authentik, and more.
Local User Management
Refer to the Local User Management page for detailed instructions on using local users authentication.
External Identity Providers
NetBird supports connecting multiple external identity providers alongside local user management. This allows users to sign in with their existing accounts from services like Google, Microsoft and your corporate or self-hosted identity provider, while still maintaining the option for local username/password authentication.
NetBird supports any OIDC-compliant identity providers. Here are some popular providers and their setup instructions:
| Provider | Type | Best For |
|---|---|---|
| Generic OIDC | oidc | Any OIDC-compliant provider (custom/unsupported IdPs) |
google | Google Workspace, personal Google accounts | |
| Microsoft | microsoft / entra | Personal accounts, Azure AD / Entra ID |
| Okta | okta | Enterprise SSO |
| Zitadel | zitadel | Open-source IAM with multi-tenancy and passwordless auth |
| Keycloak | keycloak | Popular open source IAM with extensive enterprise features |
| Authentik | authentik | Flexible open source IdP with SSO, MFA, and policy engine |
| Pocket ID | pocketid | Lightweight OIDC provider with passkey authentication |
| Duo SSO | oidc | Provides secure one-login access with MFA |
Any identity provider that supports OpenID Connect can be integrated with NetBird. If your provider isn't listed above, use the generic OIDC configuration.
Adding an Identity Provider
Via Dashboard
- Log in to your NetBird Dashboard
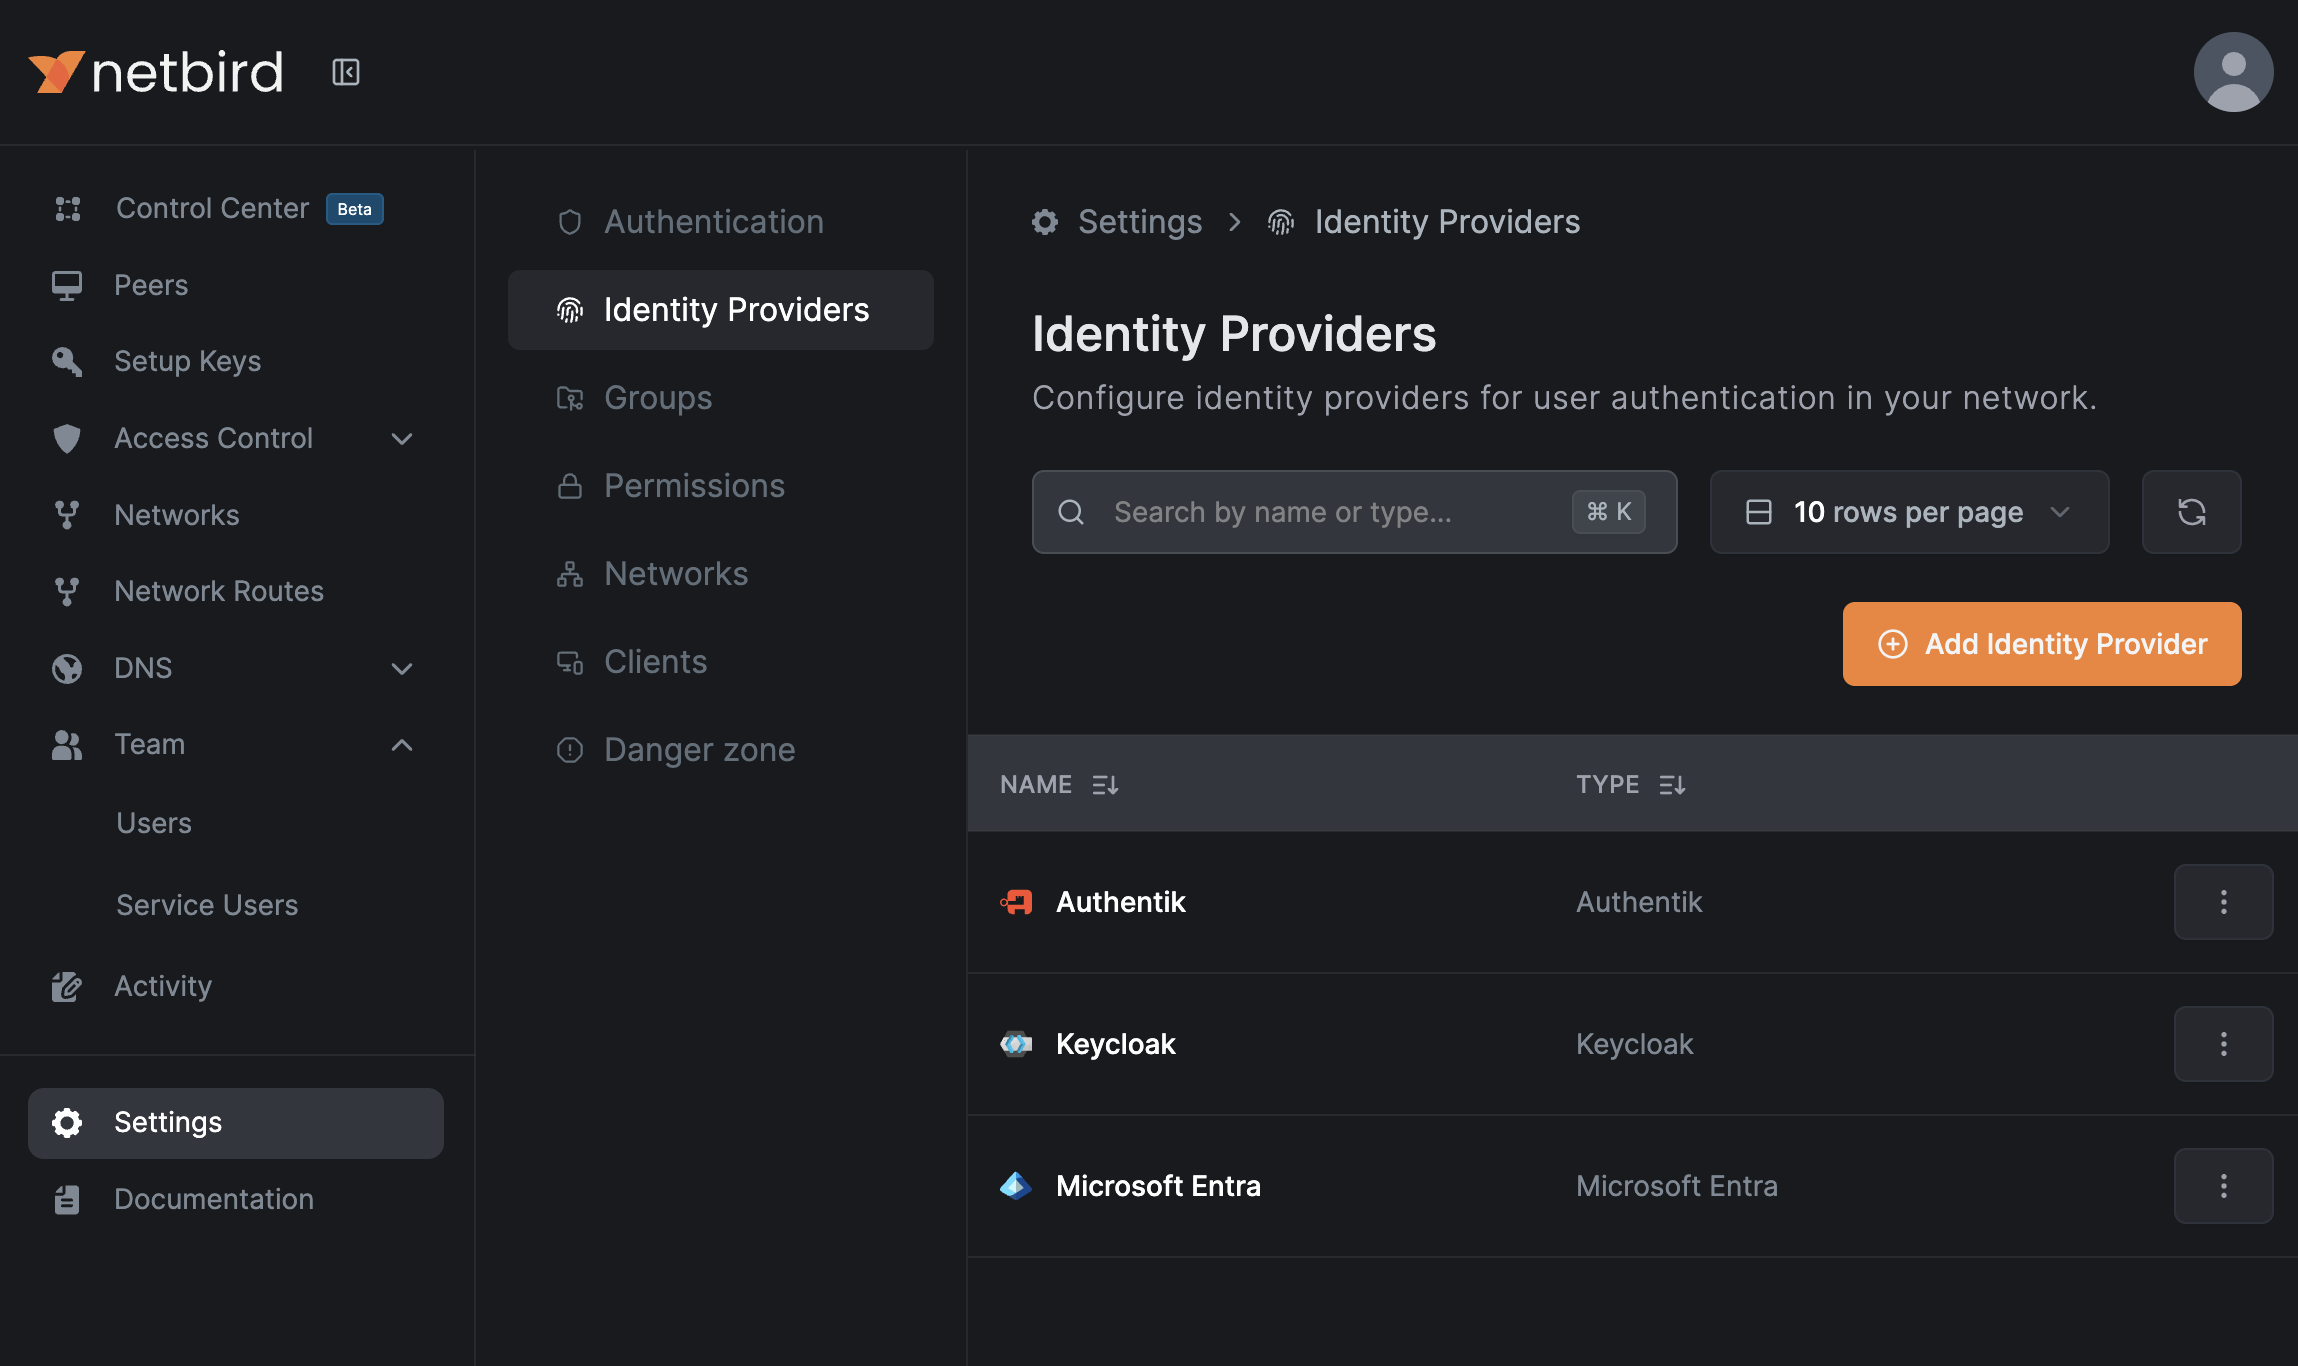
- Navigate to Settings → Identity Providers
- Click Add Identity Provider
- Select your provider type from the dropdown
- Configure the required fields:
- Name - Display name for the login button
- Client ID - From your identity provider
- Client Secret - From your identity provider
- Issuer - From your identity provider
- Copy the Redirect URL and configure it in your identity provider
- Click Save
Make sure you are creating a confidential OIDC client in your identity provider. The secret will be stored privately in your NetBird installation and will never be exposed to the public.
If you plan to use the Reverse Proxy SSO feature with an external identity provider, you also need to register the reverse proxy callback URL with your IdP. See Configure SSO for external identity providers for details.

Via API
curl -X POST "https://netbird.example.com/api/identity-providers" \
  -H "Authorization: Bearer ${TOKEN}" \
  -H "Content-Type: application/json" \
  -d '{
    "type": "oidc",
    "name": "My SSO Provider",
    "client_id": "your-client-id",
    "client_secret": "your-client-secret",
    "issuer": "https://sso.example.com"
  }'
For instance setup endpoints, see Accounts API. For user creation with embedded IdP, see Users API.
Managing Identity Providers via API
# List configured identity providers
curl "https://netbird.example.com/api/identity-providers" \
  -H "Authorization: Bearer ${TOKEN}"

# Update an identity provider
curl -X PUT "https://netbird.example.com/api/identity-providers/{id}" \
  -H "Authorization: Bearer ${TOKEN}" \
  -H "Content-Type: application/json" \
  -d '{
    "name": "Updated Name"
  }'

# Delete an identity providers
curl -X DELETE "https://netbird.example.com/api/identity-providers/{id}" \
  -H "Authorization: Bearer ${TOKEN}"
How It Works
- User clicks the provider button on the login page
- User is redirected to the identity provider to authenticate
- After successful authentication, user is redirected back to NetBird
- NetBird validates the token and creates/updates the user account
- User is logged in and can access the Dashboard
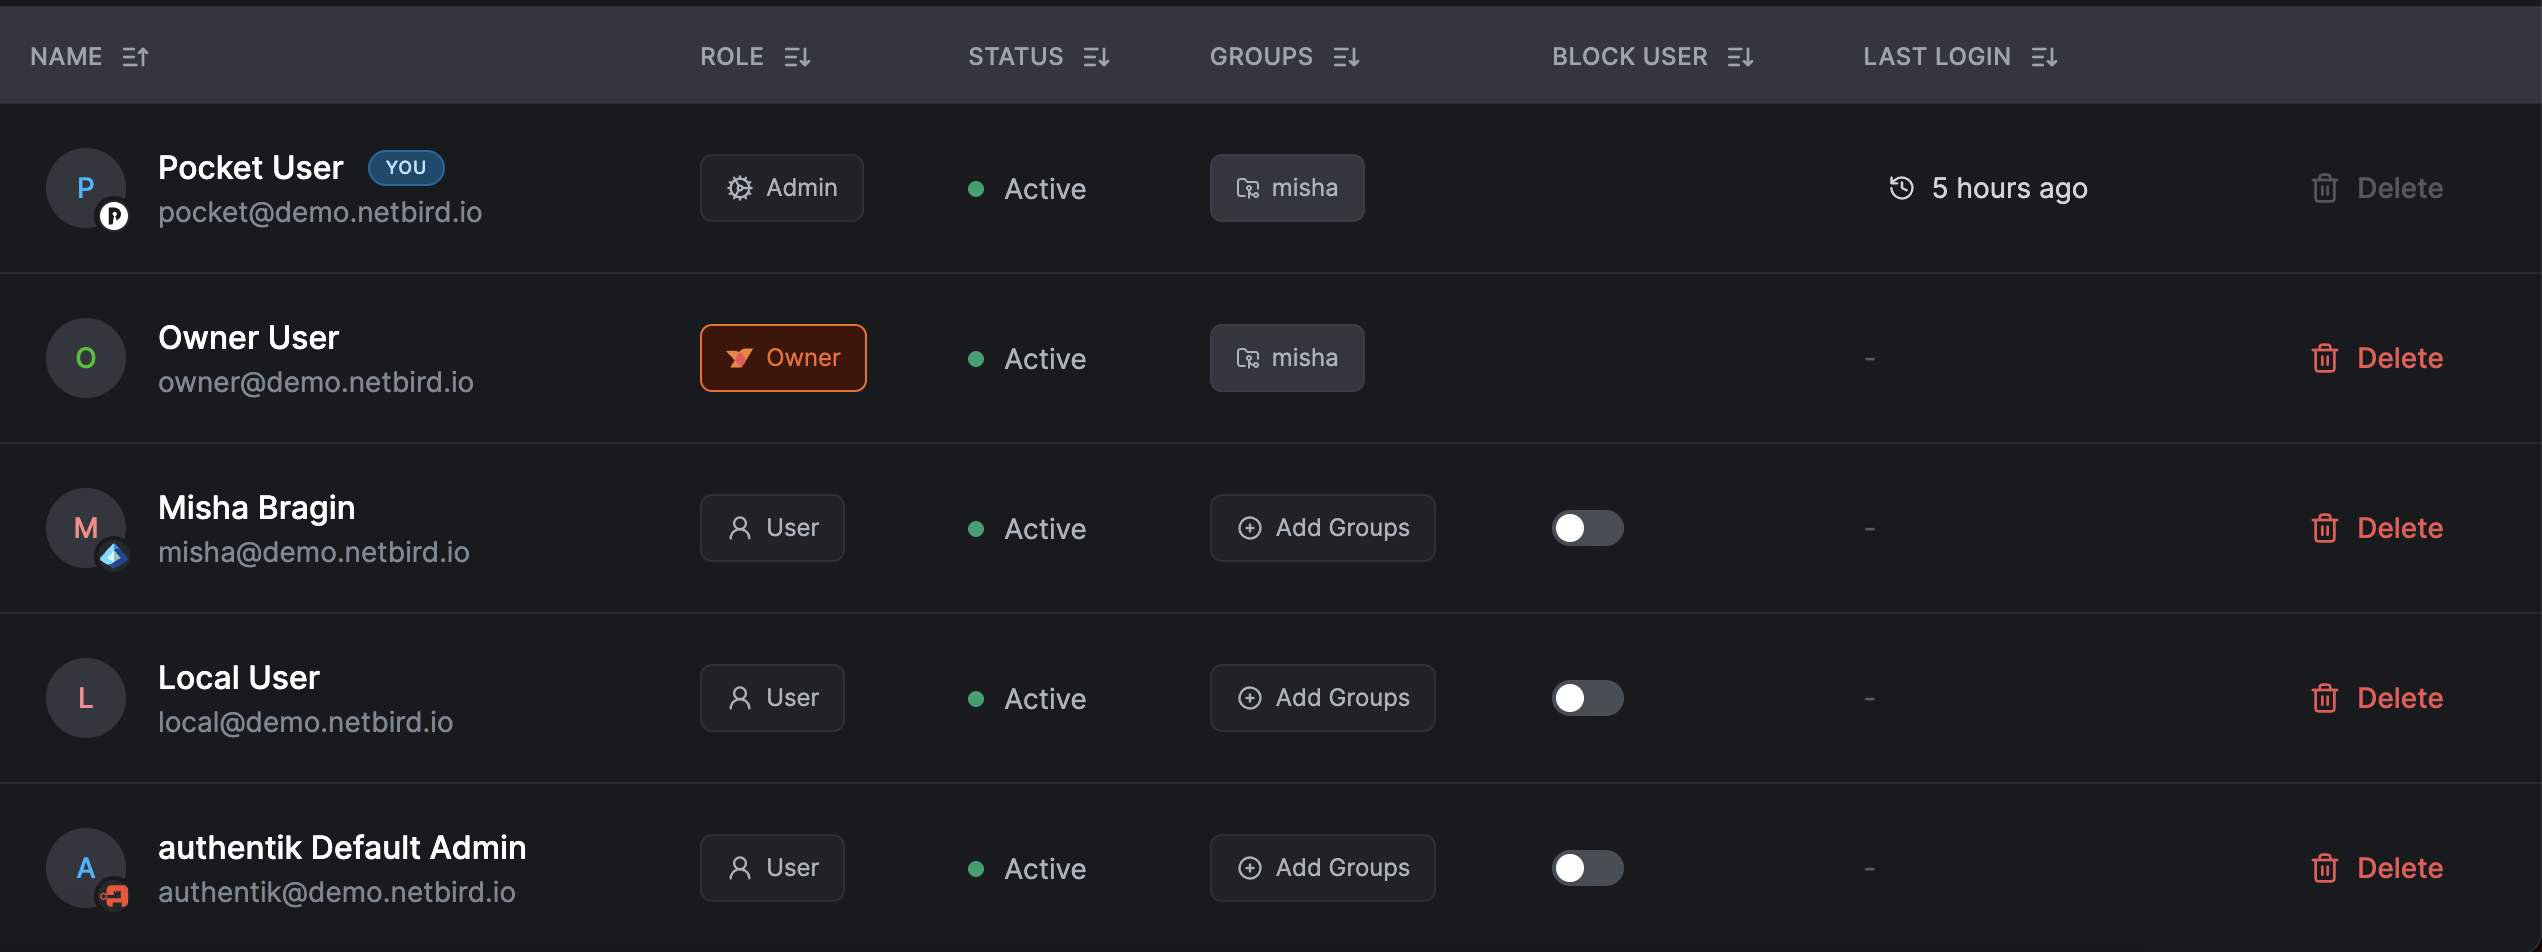
Users who authenticate via an external identity provider appear in your Users list with a badge showing their identity provider.
Multiple Identity Providers
You can configure multiple identity providers simultaneously:
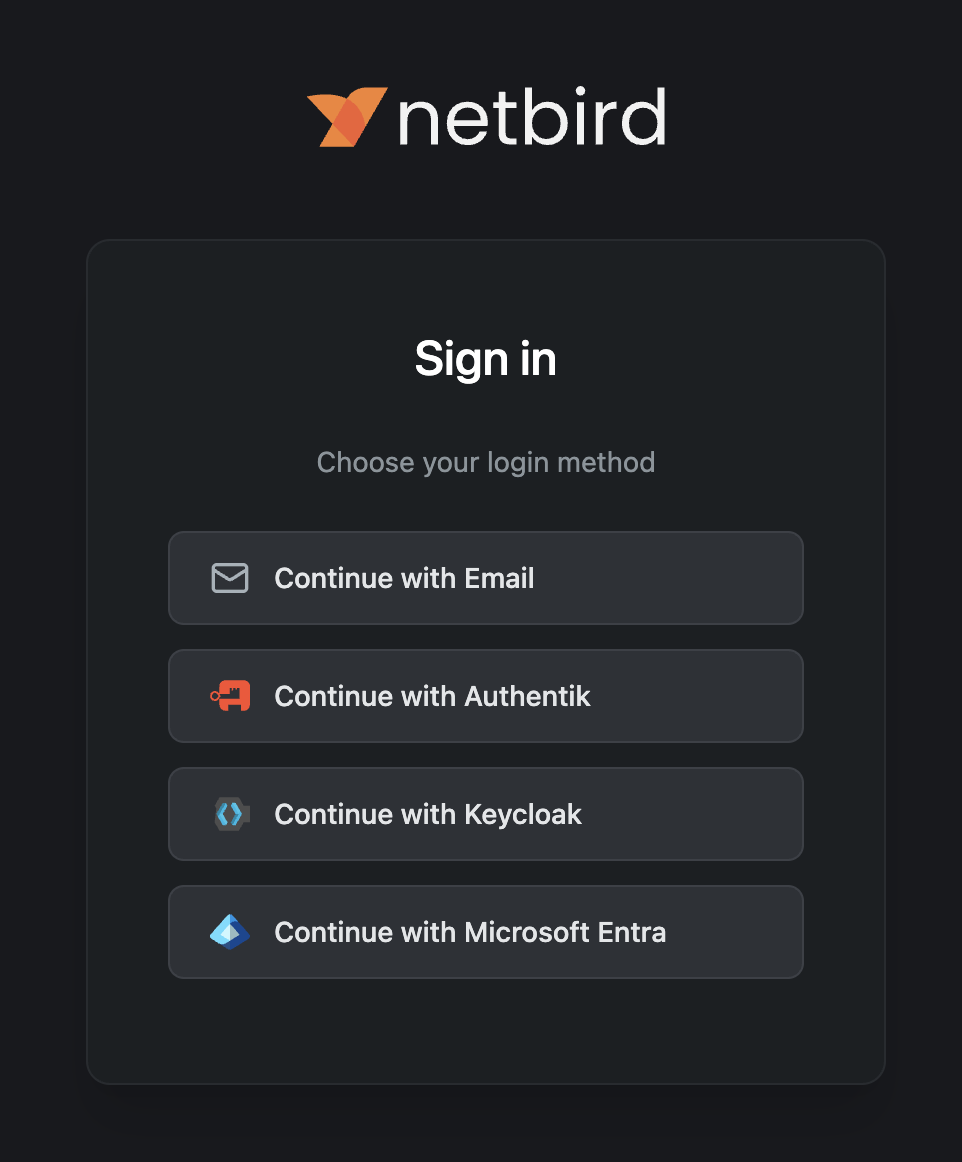
- All configured providers appear as buttons on the login page
- "Continue with Email" (local authentication) is always available first
- Users can authenticate with any configured provider
- Each user's provider is tracked and displayed in the Dashboard
This allows you to support different authentication methods for different user groups.
User Provisioning
JWT Group Sync
If you've connected an external IdP, NetBird can optionally fetch a user's groups via JWT claim. These groups automatically obtain representations within NetBird and will be applied to the corresponding NetBird user. To enable JWT group sync, navigate to Settings > Groups and toggle 'Enable JWT group sync'.
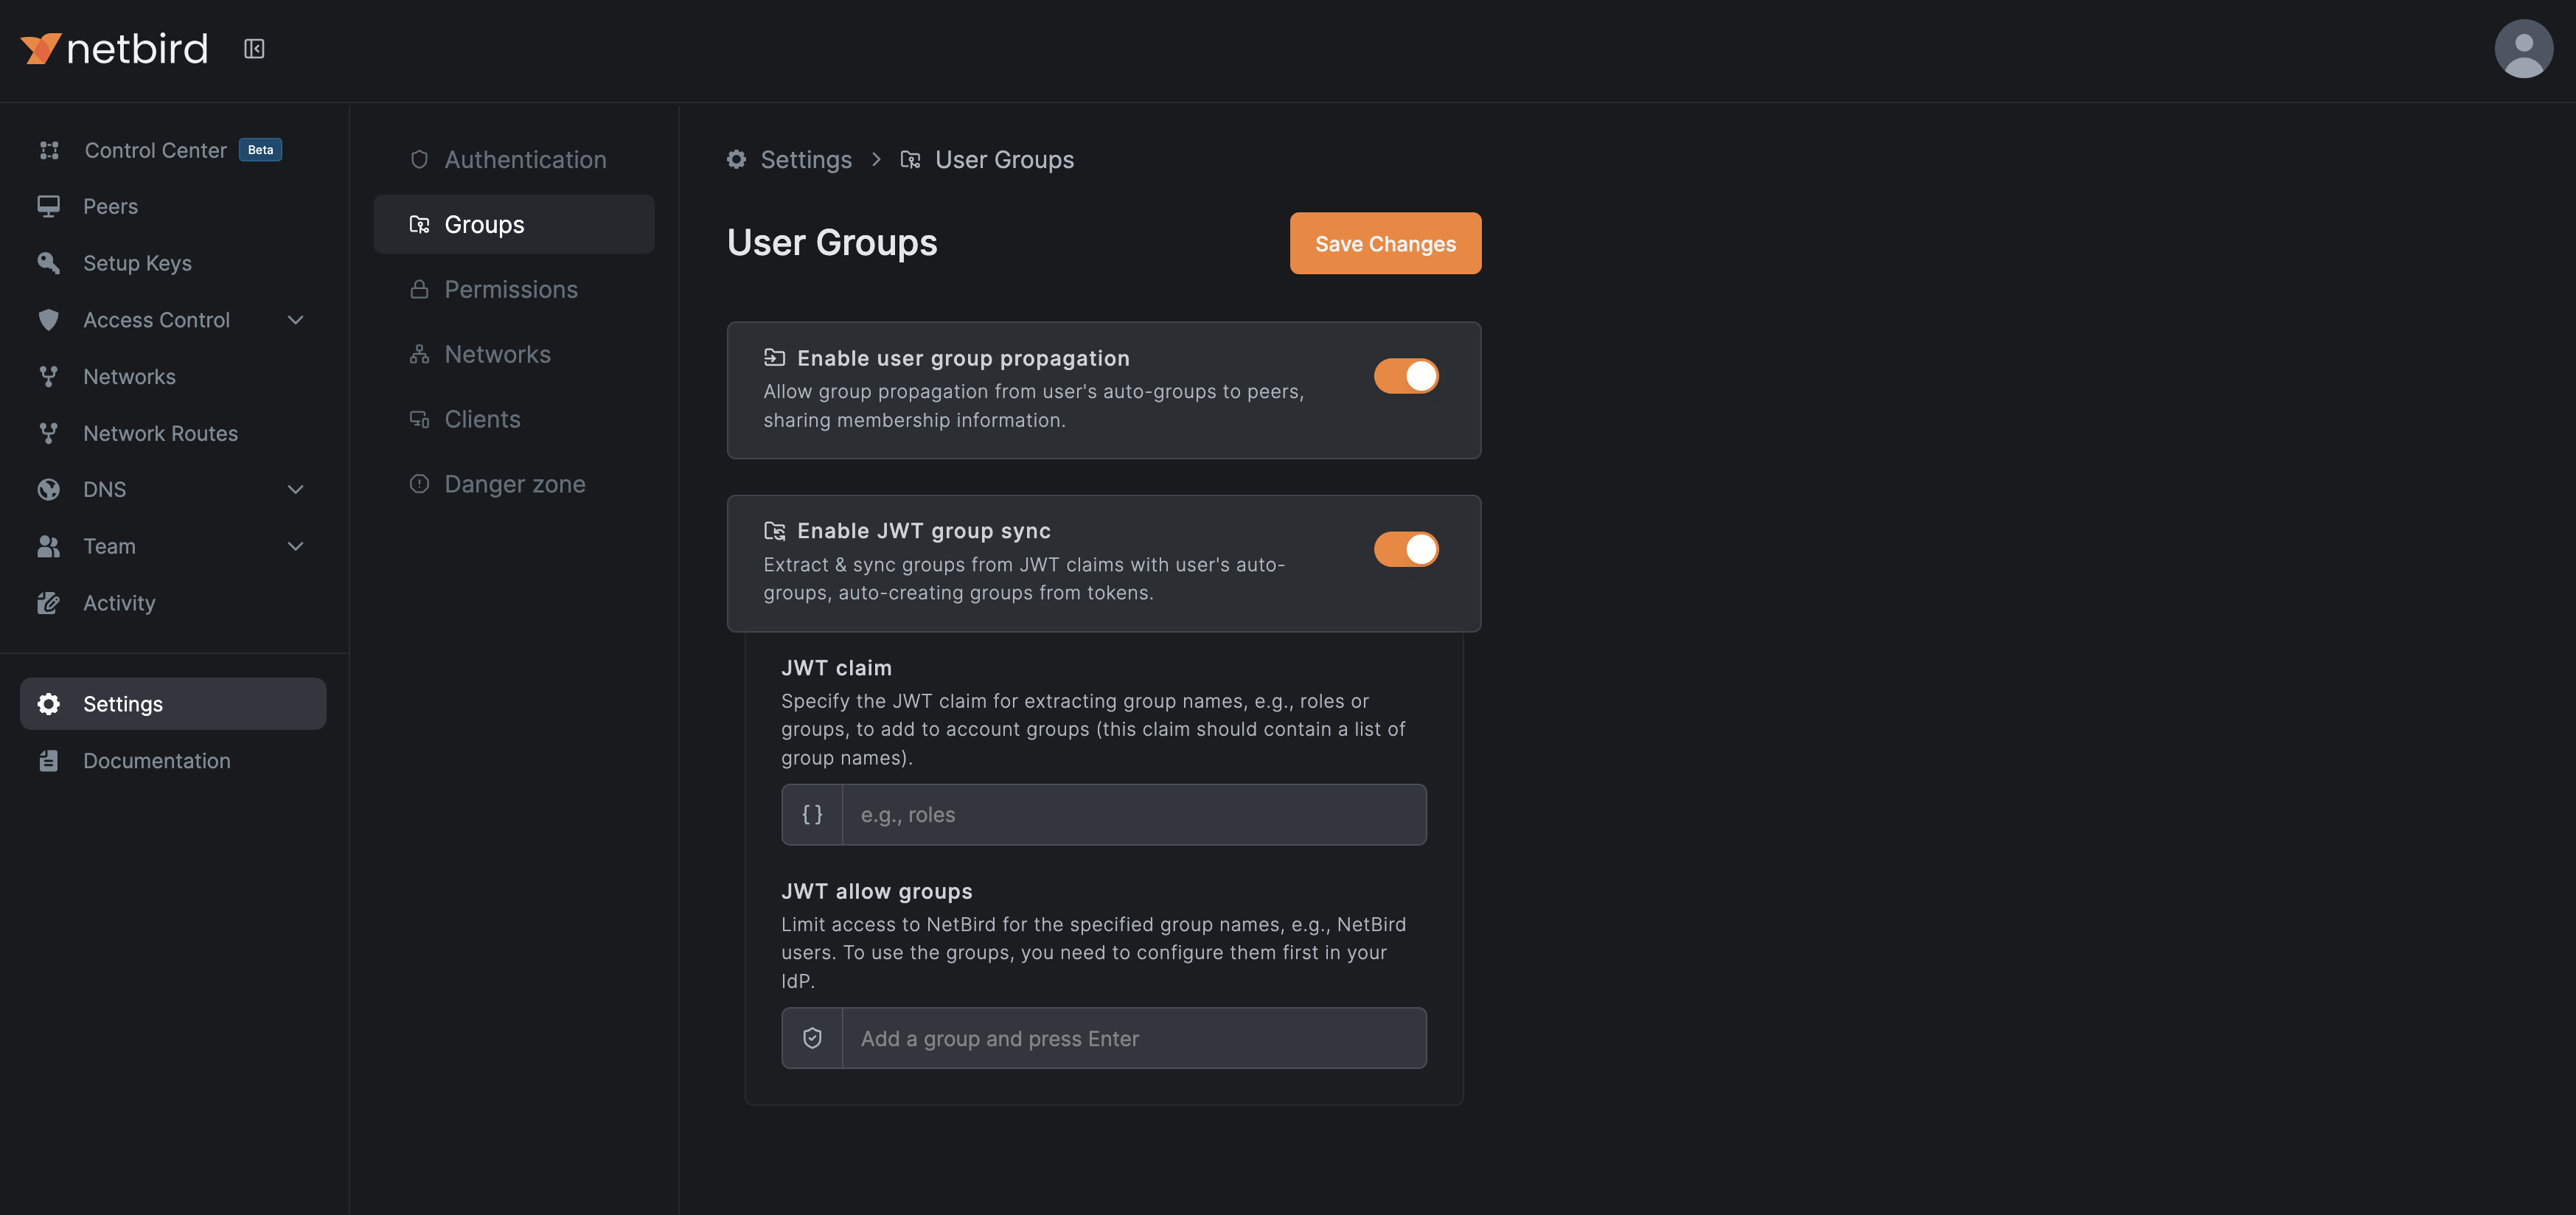
Specify the JWT claim to be used as the user's groups list (normally 'groups'). You can optionally specify a 'JWT allow groups' - this group will need to exist in your chosen claim for the user in order for that user to be granted access to NetBird. Your IdP may require specific configuration in order to pass a groups claim to NetBird. For detailed per-IdP implementation steps, see below. If your IdP isn't on the list, refer to the project's documentation.
Groups with matching names in NetBird and your IdP will not sync. To import a group from your IdP, first delete the existing group with that name in NetBird.
SCIM
NetBird supports provisioning users and groups through SCIM. However, this functionality is not available in the open source Community Edition. It is offered only in the cloud-managed version of NetBird or through a Commercial License for enterprise self-hosted deployments.
Best Practices
- Start simple - Begin with local users, add external providers as needed
- Test thoroughly - Verify the provider works before announcing to users
- Communicate changes - Let users know about new login options
- Keep a fallback - Local authentication remains available if an external provider has issues
Troubleshooting
Provider not appearing on login page
- Verify the provider was saved successfully in Settings → Identity Providers
- Check that the provider is enabled
- Clear browser cache and reload the login page
"Invalid redirect URI" error
- Copy the exact Redirect URL from NetBird after creating the provider
- Ensure no trailing slashes or typos
- Some providers are case-sensitive
Authentication succeeds but user not created
- Check Management service logs for errors
- Verify the token contains required claims (email, name)
- Ensure the user's email domain is not blocked by any policies in your IdP. Some providers like Pocket ID block all users by default unless you unrestrict groups in the OIDC client configuration.
External connector not working
- Verify Client ID and Secret are correct
- Check redirect URIs are properly configured in the external IdP
- Review Management logs for OIDC/SAML errors
For provider-specific troubleshooting, see the individual provider pages.
Migration Guide and Backwards Compatibility
If you have an existing NetBird deployment using a standalone IdP (like Zitadel from the previous quickstart), you have several options:
- Keep using your standalone IdP - No changes required, your setup continues to work
- Add your IdP as an external provider - Keep your IdP but add it as an OIDC provider alongside local users. This option requires a migration as user IDs have a different format. See below.