Connecting from the office
A typical scenario administrators have is accessing their office networks remotely. With Network routes, NetBird makes this easy. Still, administrators often want to avoid routing their users’ traffic via NetBird when they are in the office. To solve this, administrators can leverage the power of Posture Checks and create policies that allow connection to the routing peers only if they are outside the office by using a Peer Network Range posture check with a block action.
Example
In the following scenario, our office network is on the subnet 192.168.1.0/24. Let's assume all users will be part of the group route-users, and the routing peer for our office will be inside the group route-nodes.
With this in mind, the goal is to create a Posture Check, create a Policy and assign a Posture Check to it, and finally create a Network Route that will expose the office subnet.
Create a Posture Check
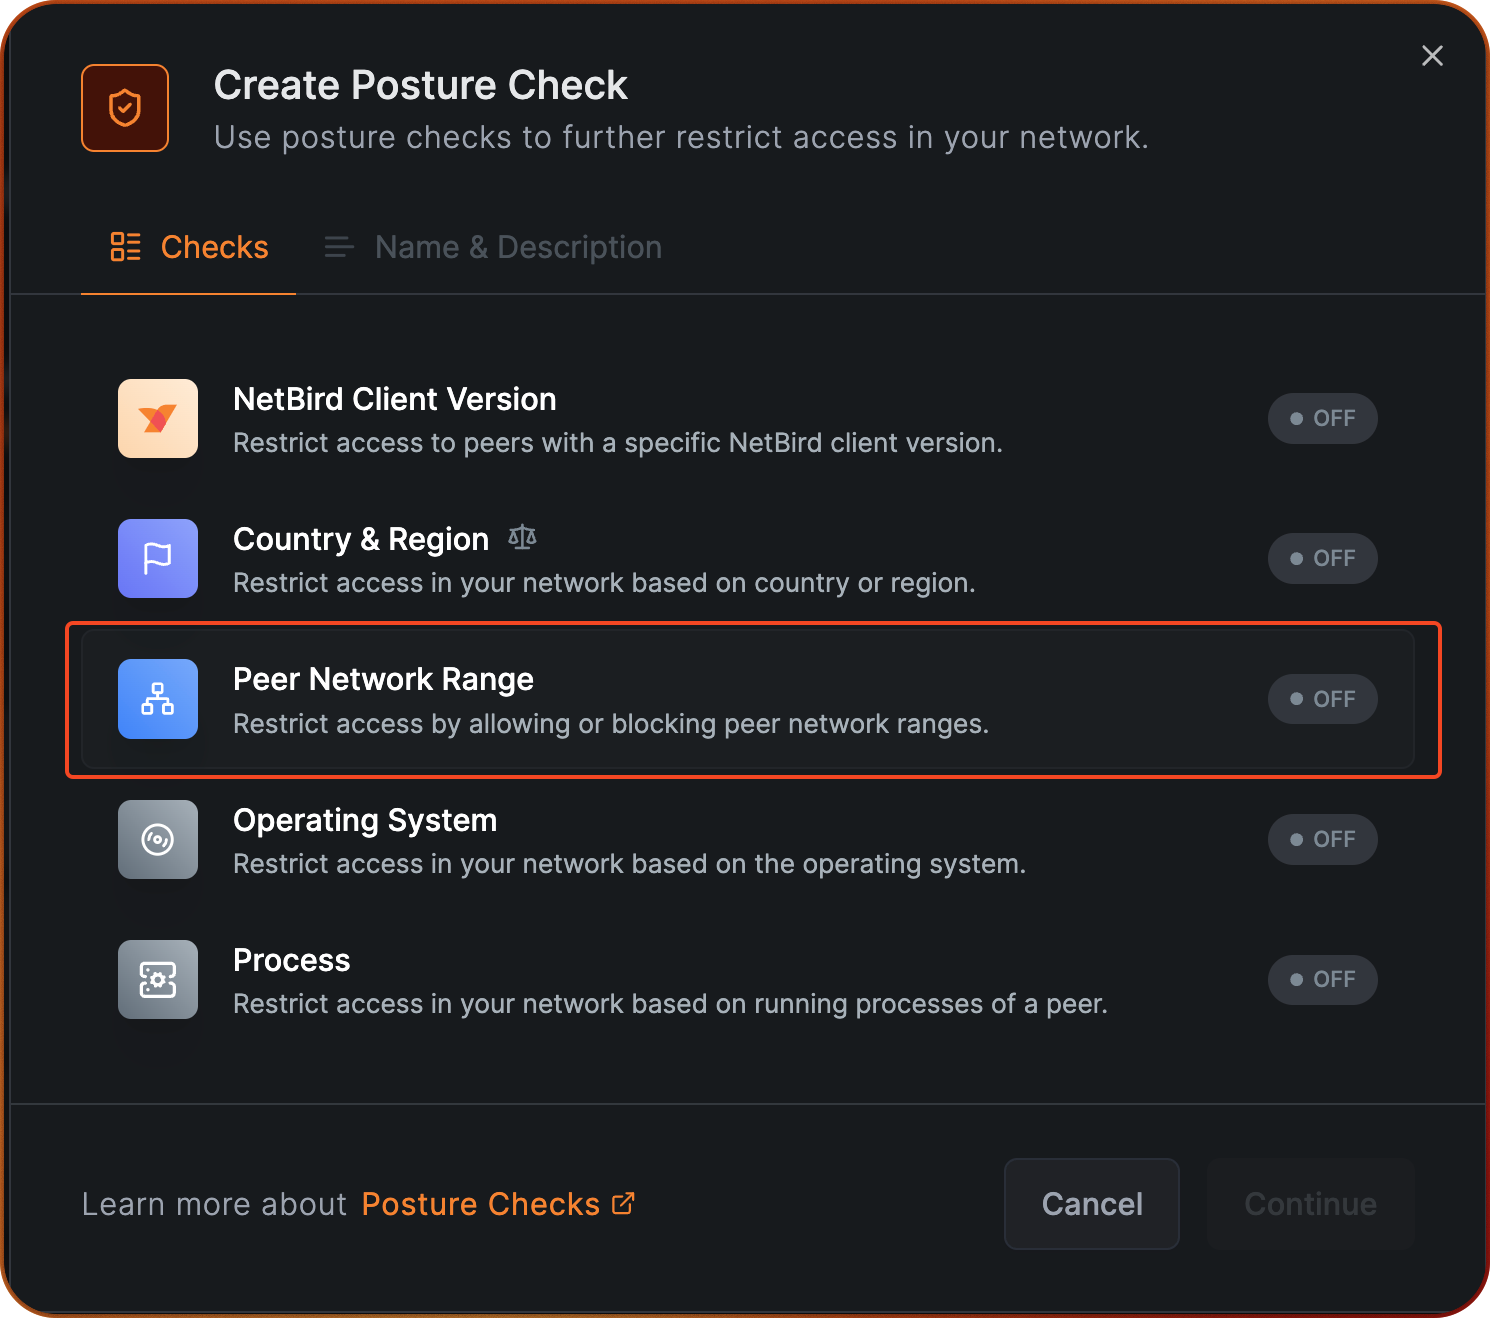
To create a Posture Check, navigate to the Access Control -> Posture Checks section in the NetBird dashboard and click on Add Posture Check.
Select Peer Network Range.
Select the Block action and click on Add Network Range to input your office subbnet 192.168.1.0/24.
Note that if you have multiple locations that you want to see excluded, you can add multiple network ranges.
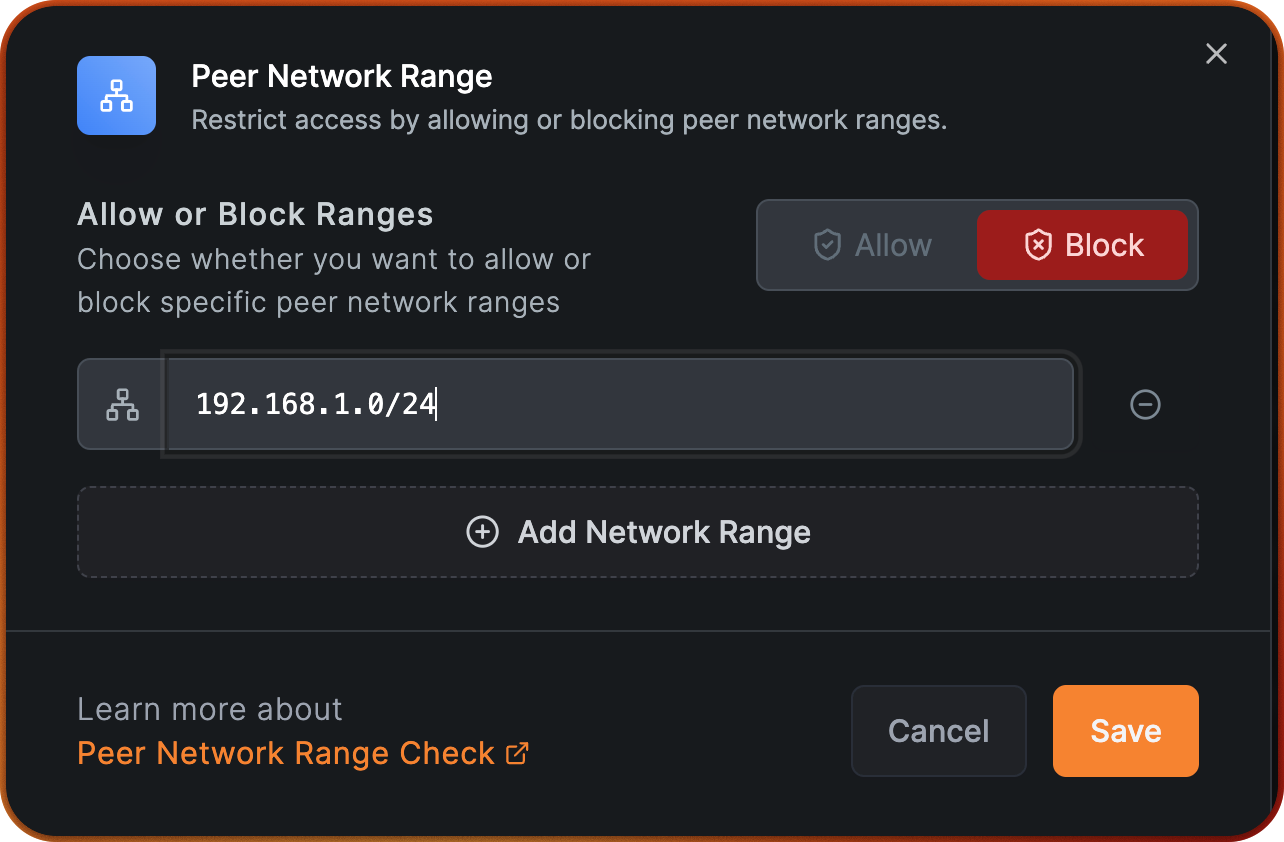
Click Save, then click Continue and fill out Name of the Posture Check with "Exclude Office subnet”.
After we conclude this step, we are ready to create a policy and assign this posture check.
Create a Policy
We start by creating a simple policy that will allow access from group route-users to group route-nodes.
This is needed to establish the connection between the users and the routing peer.
Navigate to the Access Control -> Policies section in the NetBird dashboard and click on Add Policy.
On the Source field, select the group route-user, and on the Destination field, select the group route-nodes.
Choose UDP for the protocol and type 1on Ports. Click Continue.
Note that the protocol and port are arbitrary and can be changed according to your needs. An usual choice is to allow ICMP traffic for troubleshooting purposes.

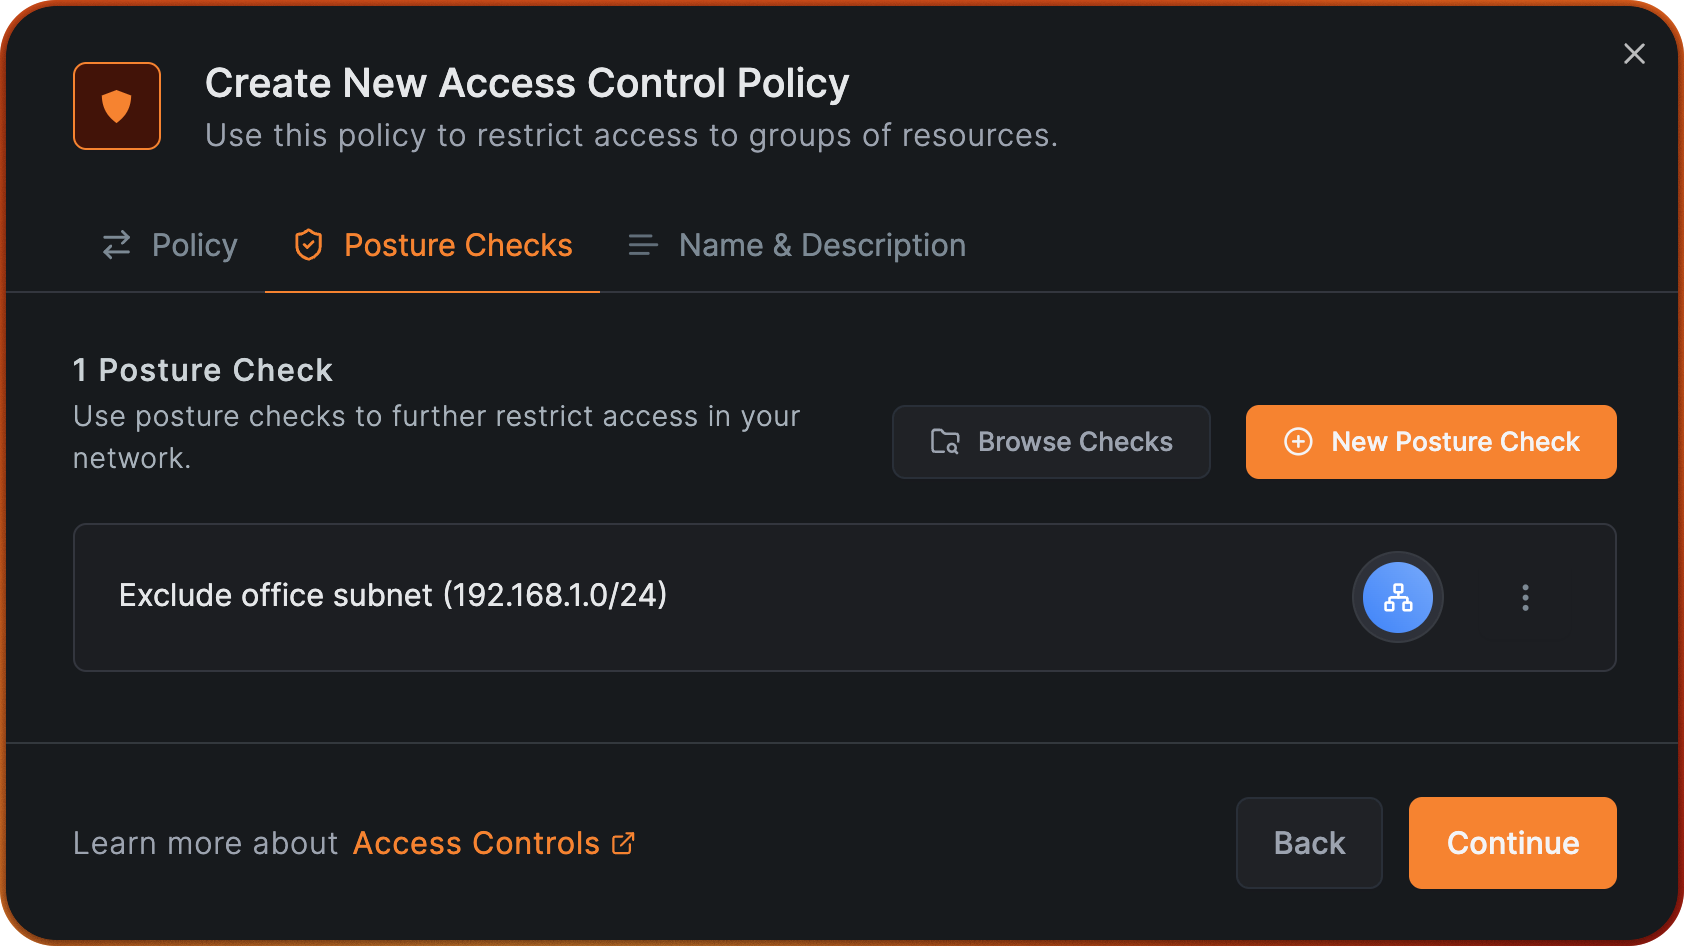
In this step, we'll click Browse Checks and select the posture check we created earlier, Exclude Office subnet.
Click Add Posture Checks and then click Continue.
Give your policy the name "Allow users to route-nodes" and click on Add Policy.
We are now ready for the final step of creating the office route.
Create a Network Route
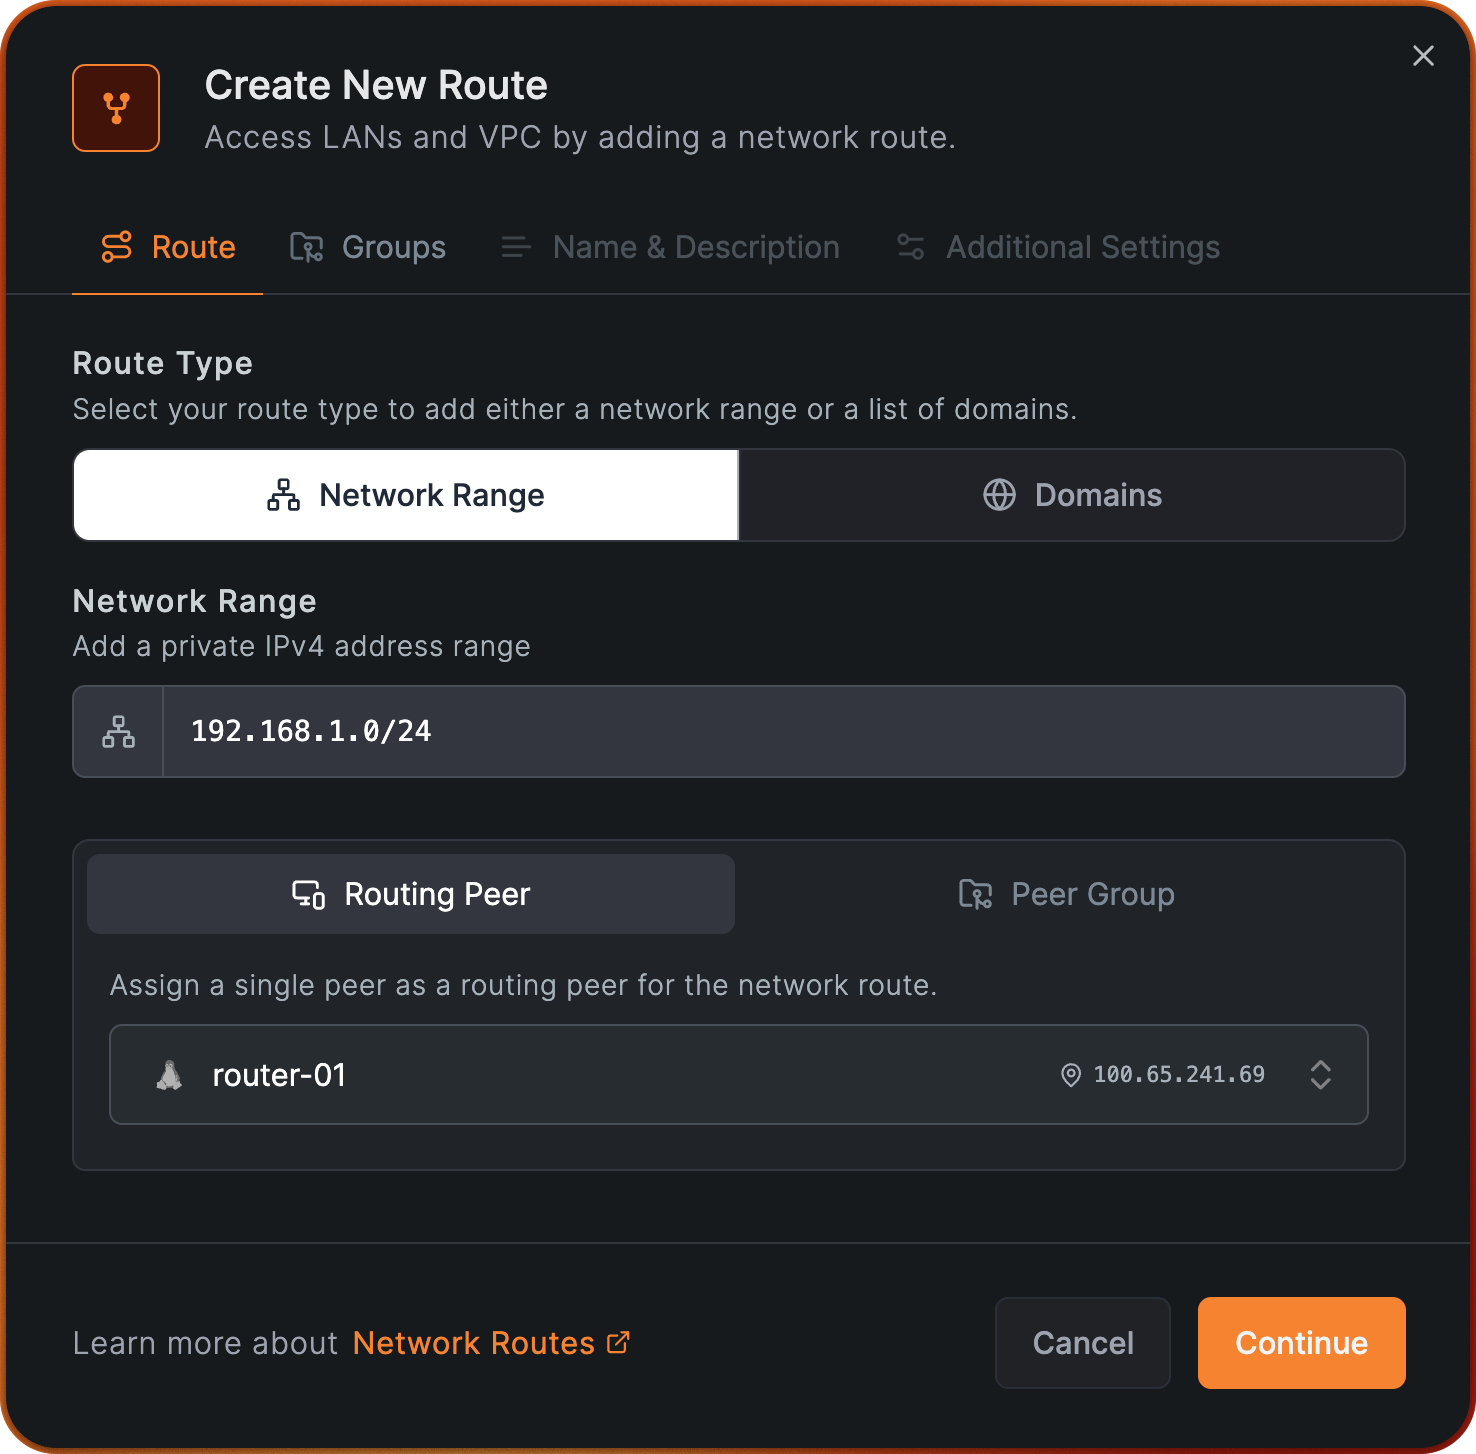
Now, let's create a Network Route that will expose the local office subnet 192.168.1.0/24,
which will be distributed to all peers members of the group route-users. In this example, we will be using a routing peer named router-01,
which is a member of the group route-nodes, this way, the policy we just created goes into effect, and all peers from the group route-users will be able to reach
router-01 only if they are not in the office network, due to our posture check.
To get started navigate to the Network Routing → Routes menu on the NetBird dashboard and click on Add Route. Fill out the fields as shown in the image below, and click Continue:
Next assign route-users do Distribution Groups.
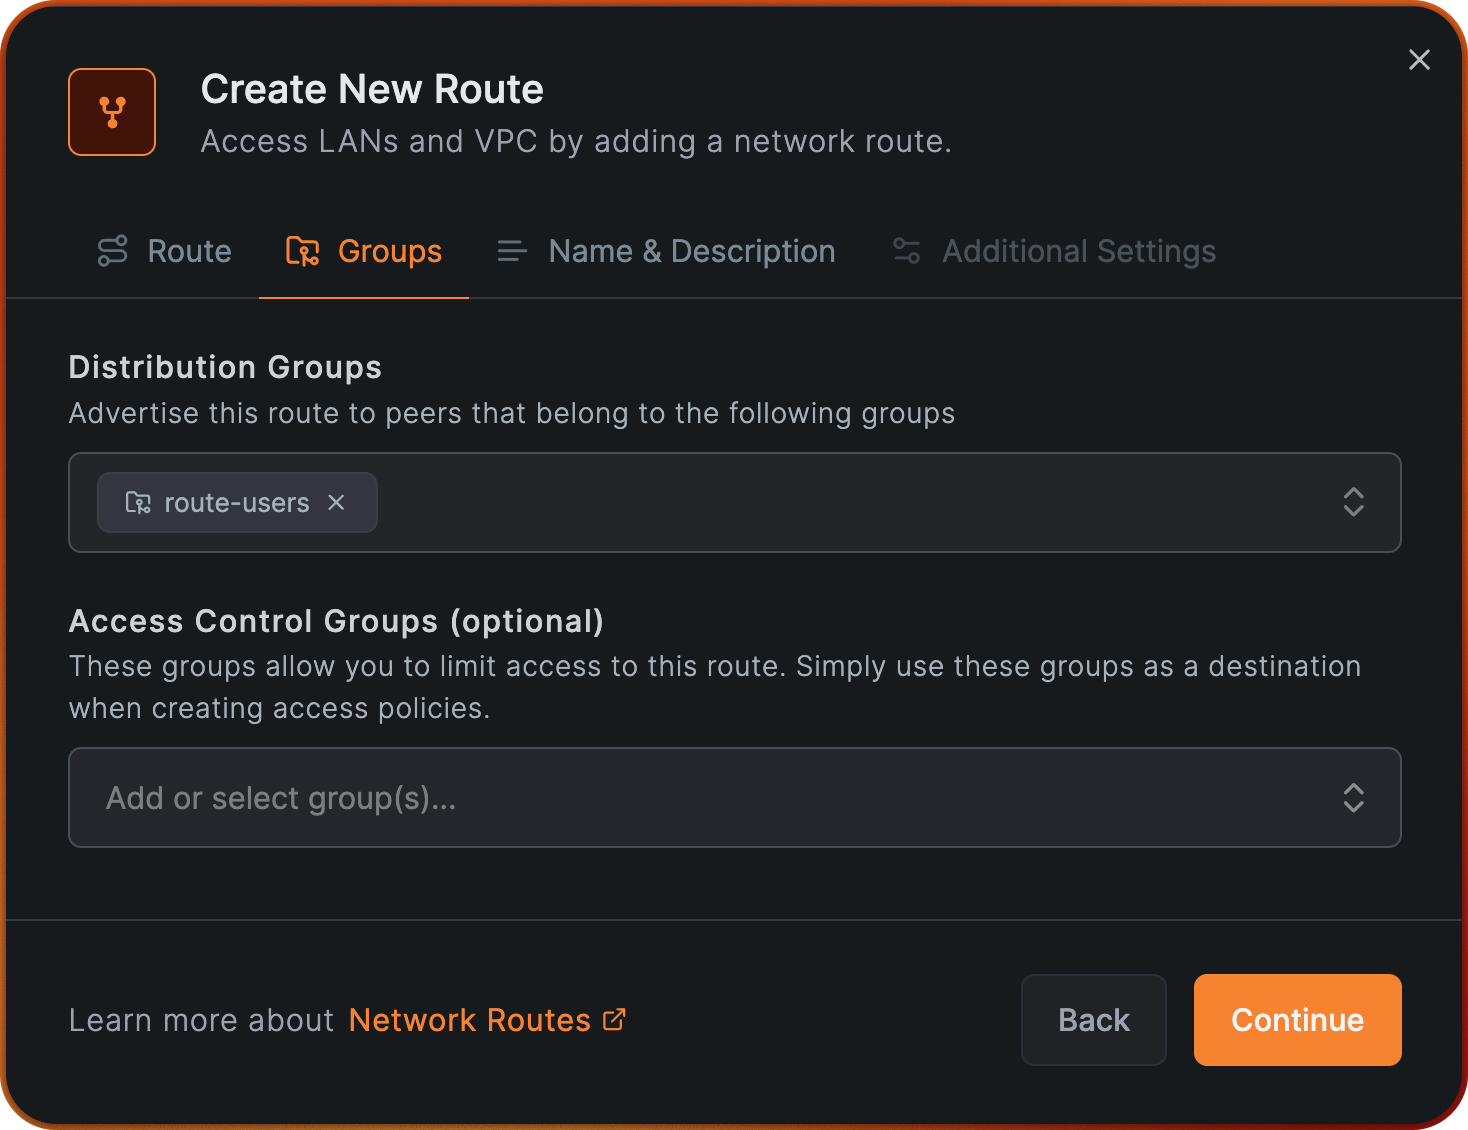
Click Continue and assign the name "Office network access" to Network Identifier, click Continue again and in the final step, finish this process by clicking Add Route.
Testing Posture Check
Now that we have created the Posture Check, the Policy, and the Network Route, we can test this configuration. In the following example, we will be testing this Posture Check from a macOS client named client-01, and as stated earlier, it belongs to the group route-users.
While connect from inside our office:
Our local connection shows that we are connected to local office WiFi and and we are part of that subnet.
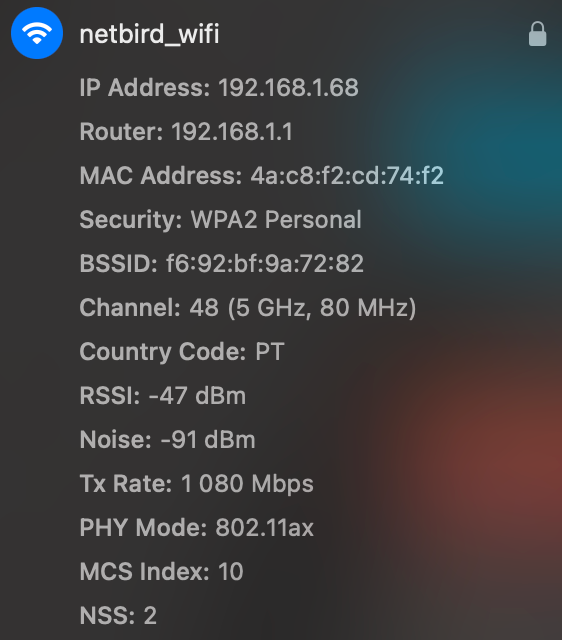
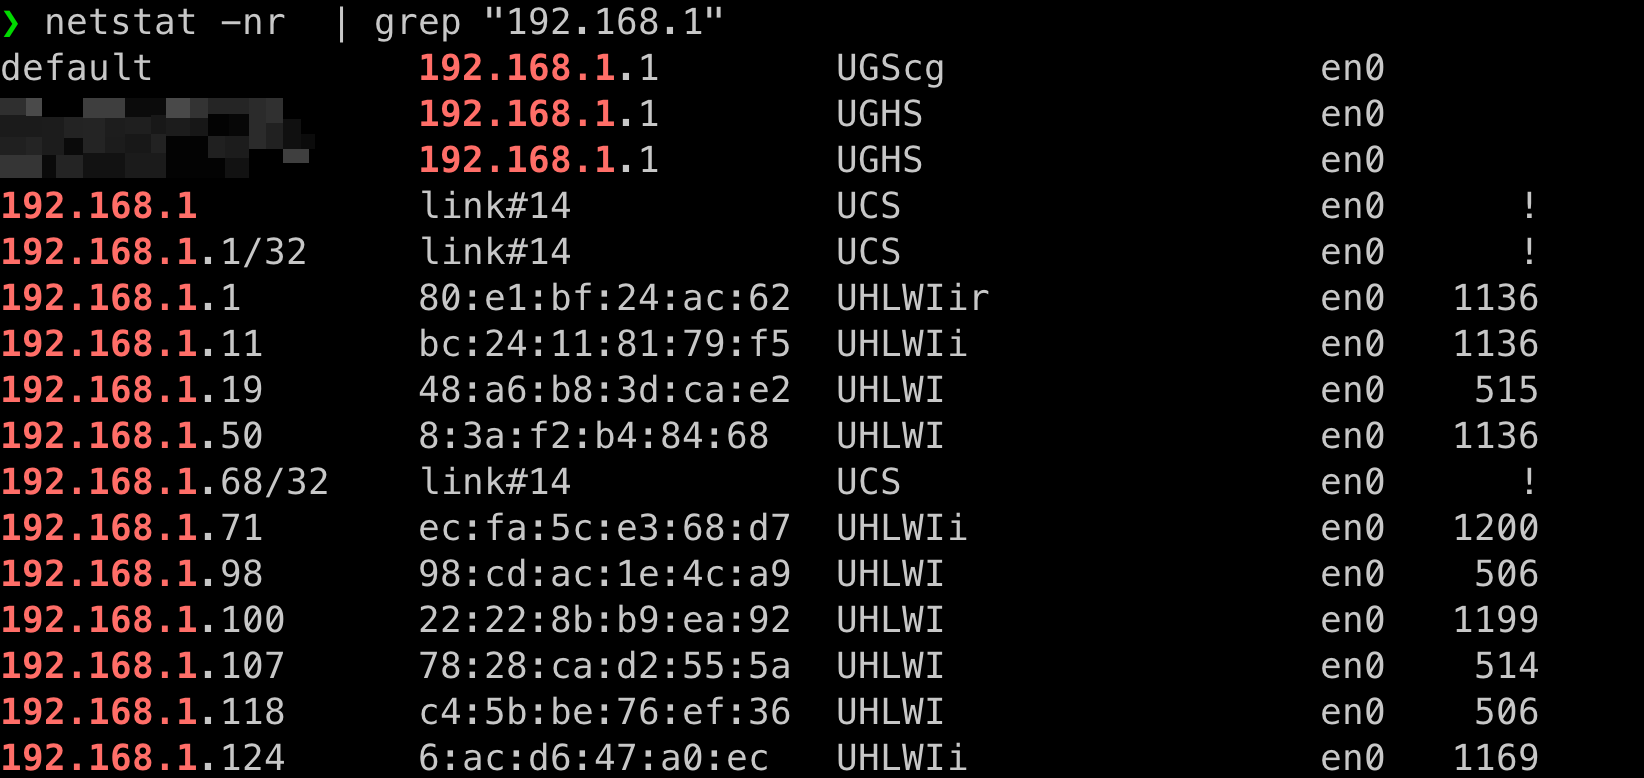
When we are connected from inside the office, we can observe that the NetBird route is not available and that the subnet 192.168.1 is using local network interface en0 to route traffic.

When connected outside the office, we can observe:
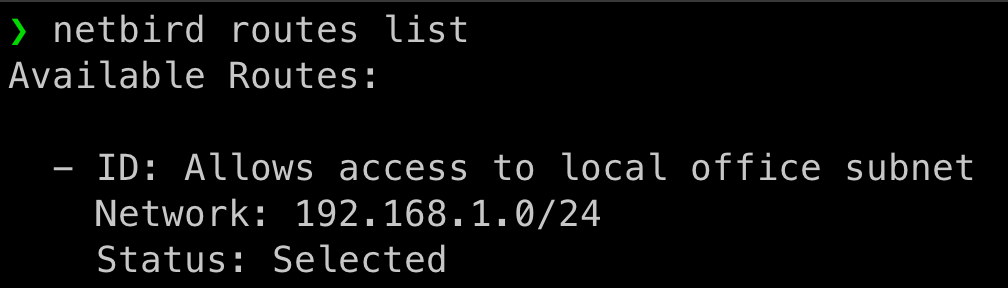

Notice that subnet 192.168.1.0/24 is routed through our Wireguard interface (utun100).
As you can see, the Posture Check is working as expected, and the traffic is being routed through NetBird only when the client is outside the office network.
Matching by office public IP
The example above relies on the office LAN subnet showing up on the peer's local network interface. In some deployments this isn't practical — for example, when the office hands out an opaque DHCP range that overlaps with common home-network subnets, or when peers connect through a guest network that doesn't expose the production LAN on the device.
In these cases you can match the peer's public egress IP instead — the source IP the NetBird management server observes when the peer connects. The Peer Network Range posture check evaluates this IP automatically against any range in the list and matches when the IP is contained in the range, so you can use a single-host prefix for one address or a CIDR for a whole block.
IPv4 example
If your office's public IPv4 address is 203.0.113.10, create a Peer Network Range posture check with the Block action and add 203.0.113.10/32 to the list. Peers connecting from that egress IP will be blocked from the route, while peers connecting from anywhere else will reach it.
If your office (or your ISP) hands out an entire public block, you can add the block directly — for example 1.0.0.0/24 or 3.0.0.0/23. Any peer whose connection IP falls in that range will match.
IPv6 example
If your office also (or only) has an IPv6 egress, add the address as a /128, for example 2001:db8::1/128, or a wider IPv6 prefix such as 2001:db8::/48. You can include IPv4 and IPv6 entries in the same posture check; a peer matches if its connection IP falls into any of them.
For this to work, the NetBird management server must see the peer's real source IP. When running self-hosted behind a reverse proxy or load balancer, ensure the proxy is configured to forward the client IP (PROXY protocol or X-Forwarded-For). The country and city shown on the peer in the dashboard are a quick sanity check — if they reflect your proxy's datacenter rather than the peer's actual location, the source IP isn't being forwarded correctly.
Mobile peers connecting through cellular networks normally have a different egress IP than your office, so they will not be matched. However, if a phone joins the office Wi-Fi, its egress IP becomes the office IP and the block will apply — usually the desired behavior.
This concludes this Posture Check example.