Secure Remote Web Server Access: SSH Without Port Exposure
For DevOps teams, secure remote web server access is a critical challenge. Traditionally, remote SSH access has been the go-to solution since it uses the SSH (Secure Shell) protocol to create encrypted network connections, ensuring data confidentiality and integrity while authenticating users and devices.
The problem is that conventional remote SSH access introduces security and operational challenges:
- Increased Attack Surface: Exposing SSH ports to the internet creates potential entry points for attackers, increasing the risk of unauthorized access and security breaches.
- Complex Network Configuration: Configuring firewall rules and VPN setups for each server becomes unmanageable as the infrastructure scales.
- Cumbersome User Access Management: Lack of centralized management makes enforcing consistent access policies and maintaining audit trails difficult.
This guide introduces NetBird as a secure solution for remote SSH access into a server without compromising safety by:
- Enhancing Security: Creating a secure overlay network that implements zero-trust principles, eliminating the need for exposed inbound ports.
- Simplifying Network Management: Simplifying network architecture and removing the need for complex firewall rules or VPN configurations.
- Centralizing Access Control: Providing a unified platform for managing user access across all servers, simplifying policy enforcement and auditing.
This approach enhances security, simplifies operations, and improves scalability - key benefits for DevOps teams managing diverse environments and requiring frequent SSH into a server.
Let's dive into the step-by-step process of setting up this secure remote access solution with NetBird.
Prerequisites
For this use case, you'll need the following prerequisites:
- A NetBird account
- Single Sign-On (SSO) authentication set up with your preferred identity provider (optional but recommended for enhanced security).
- NetBird installed on your local machine.
- A virtual machine running your target web server, configured to accept incoming SSH connections.
With prerequisites in place, you'll be prepared to establish an encrypted point-to-point connection between your local machine and the remote web server by:
- Installing NetBird on the cloud VM hosting the web service
- Configuring NetBird's access control to manage permissions
- Establishing a secure SSH connection to access the internal web service
1. Installing NetBird on the Remote Server
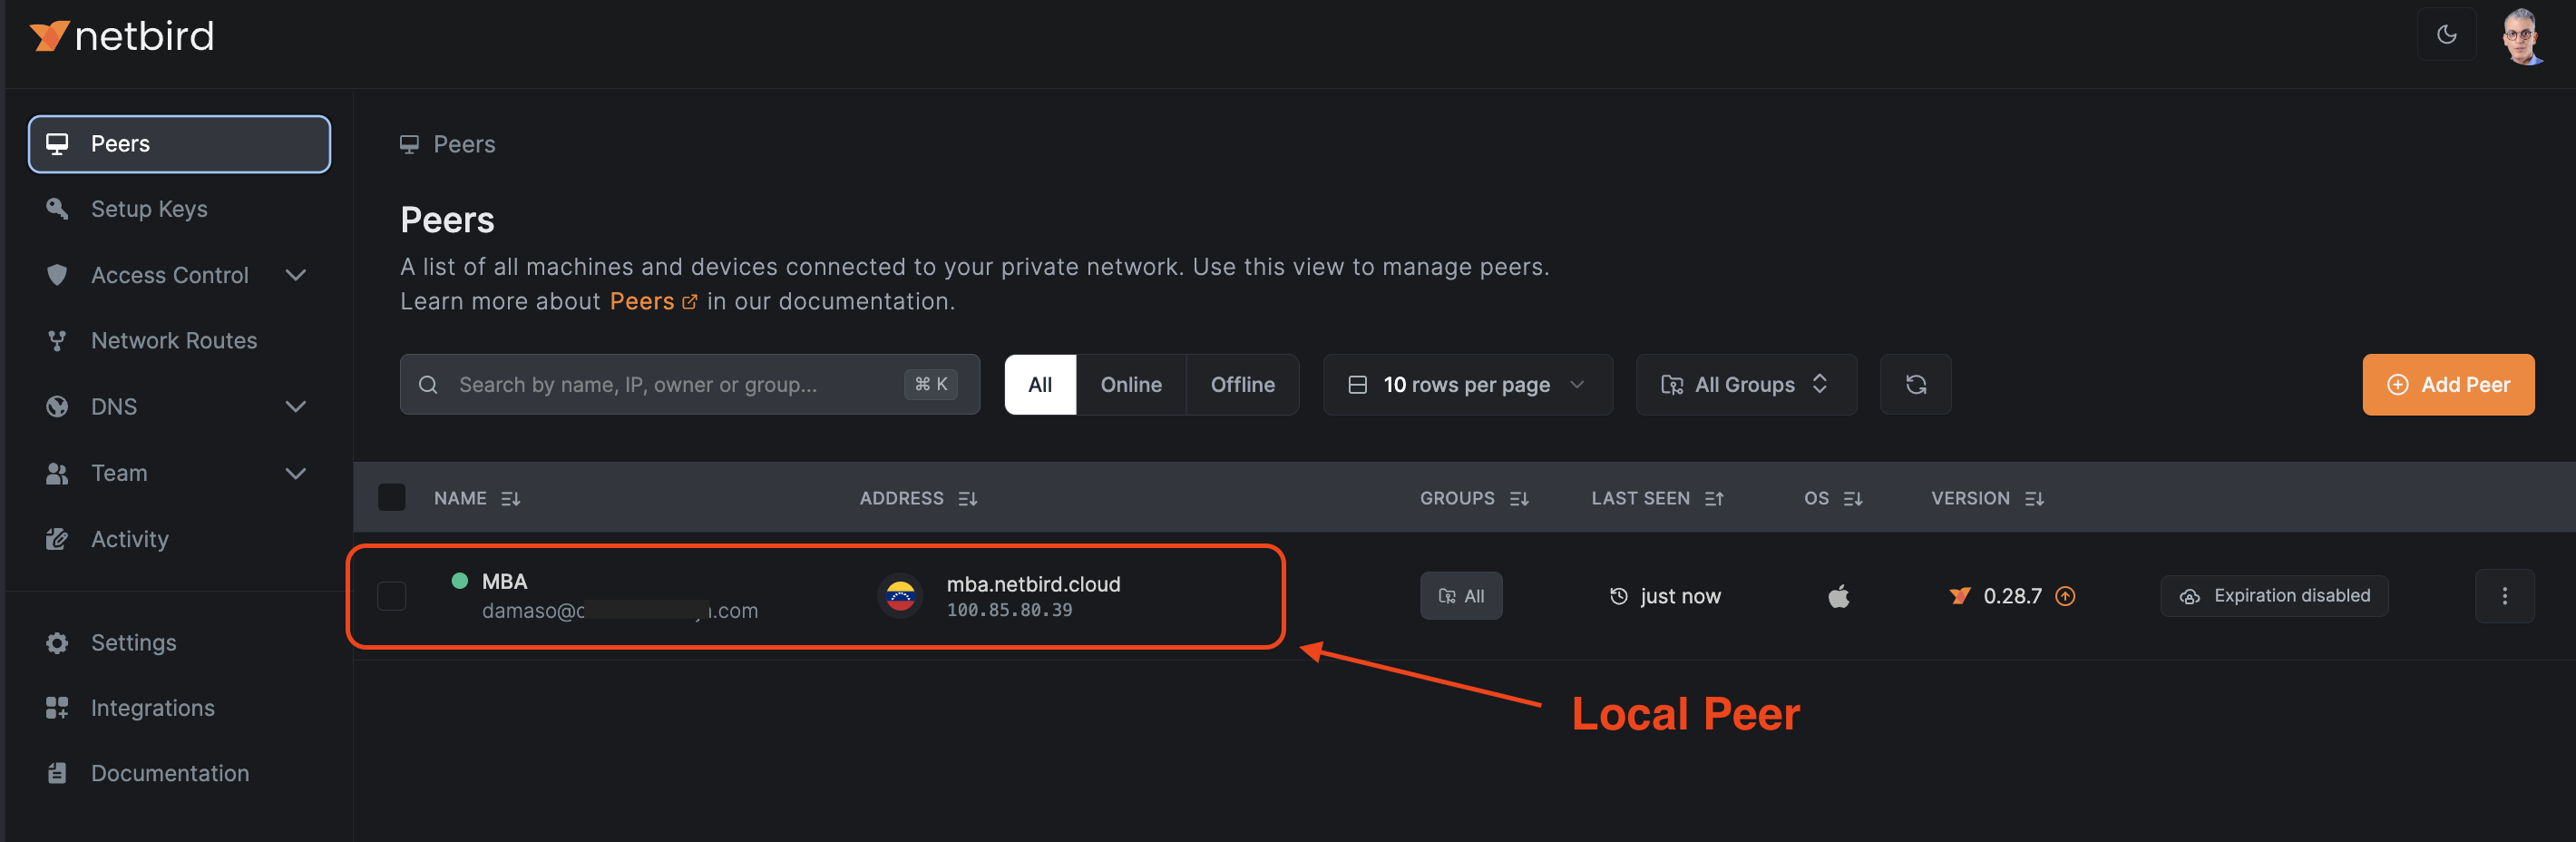
Login to NetBird and navigate to Peers. Ensure you see your local peer connected.
To add your remote web server to NetBird's peer network, first you need to generate a setup key:
- Navigate to
Setup Keysin the left menu - Click
Create Setup Key - Configure the key by assigning it a descriptive name (e.g., "Remote Web Server"), setting an expiration date, and defining auto-assigned groups (if required). Read the documentation for detailed setup key configuration.
- Copy the generated key to a secure location as you'll need it shortly

Next, install the NetBird agent on the VM.
- SSH into the remote server
- Execute the following command:
curl -fsSL https://pkgs.netbird.io/install.sh | sh
The script downloads and installs the NetBird agent and starts the NetBird service. After installation, you'll see:
Netbird service has been started
Installation has been finished. To connect, you need to run NetBird by executing the following command:

netbird up
However, since you'll use a setup key, you'll need to run the following command instead, replacing <YOUR_SETUP_KEY> with the key you generated::
netbird up --setup-key <YOUR_SETUP_KEY>
Check NetBird status by running:
sudo netbird status
The expected output is similar to the following:
OS: linux/amd64
Daemon version: 0.29.0
CLI version: 0.29.0
Management: Connected
Signal: Connected
Relays: 2/2 Available
Nameservers: 0/0 Available
FQDN: webserver.netbird.cloud
NetBird IP: 100.85.105.240/16
Interface type: Kernel
Quantum resistance: false
Routes: -
Peers count: 0/0 Connected
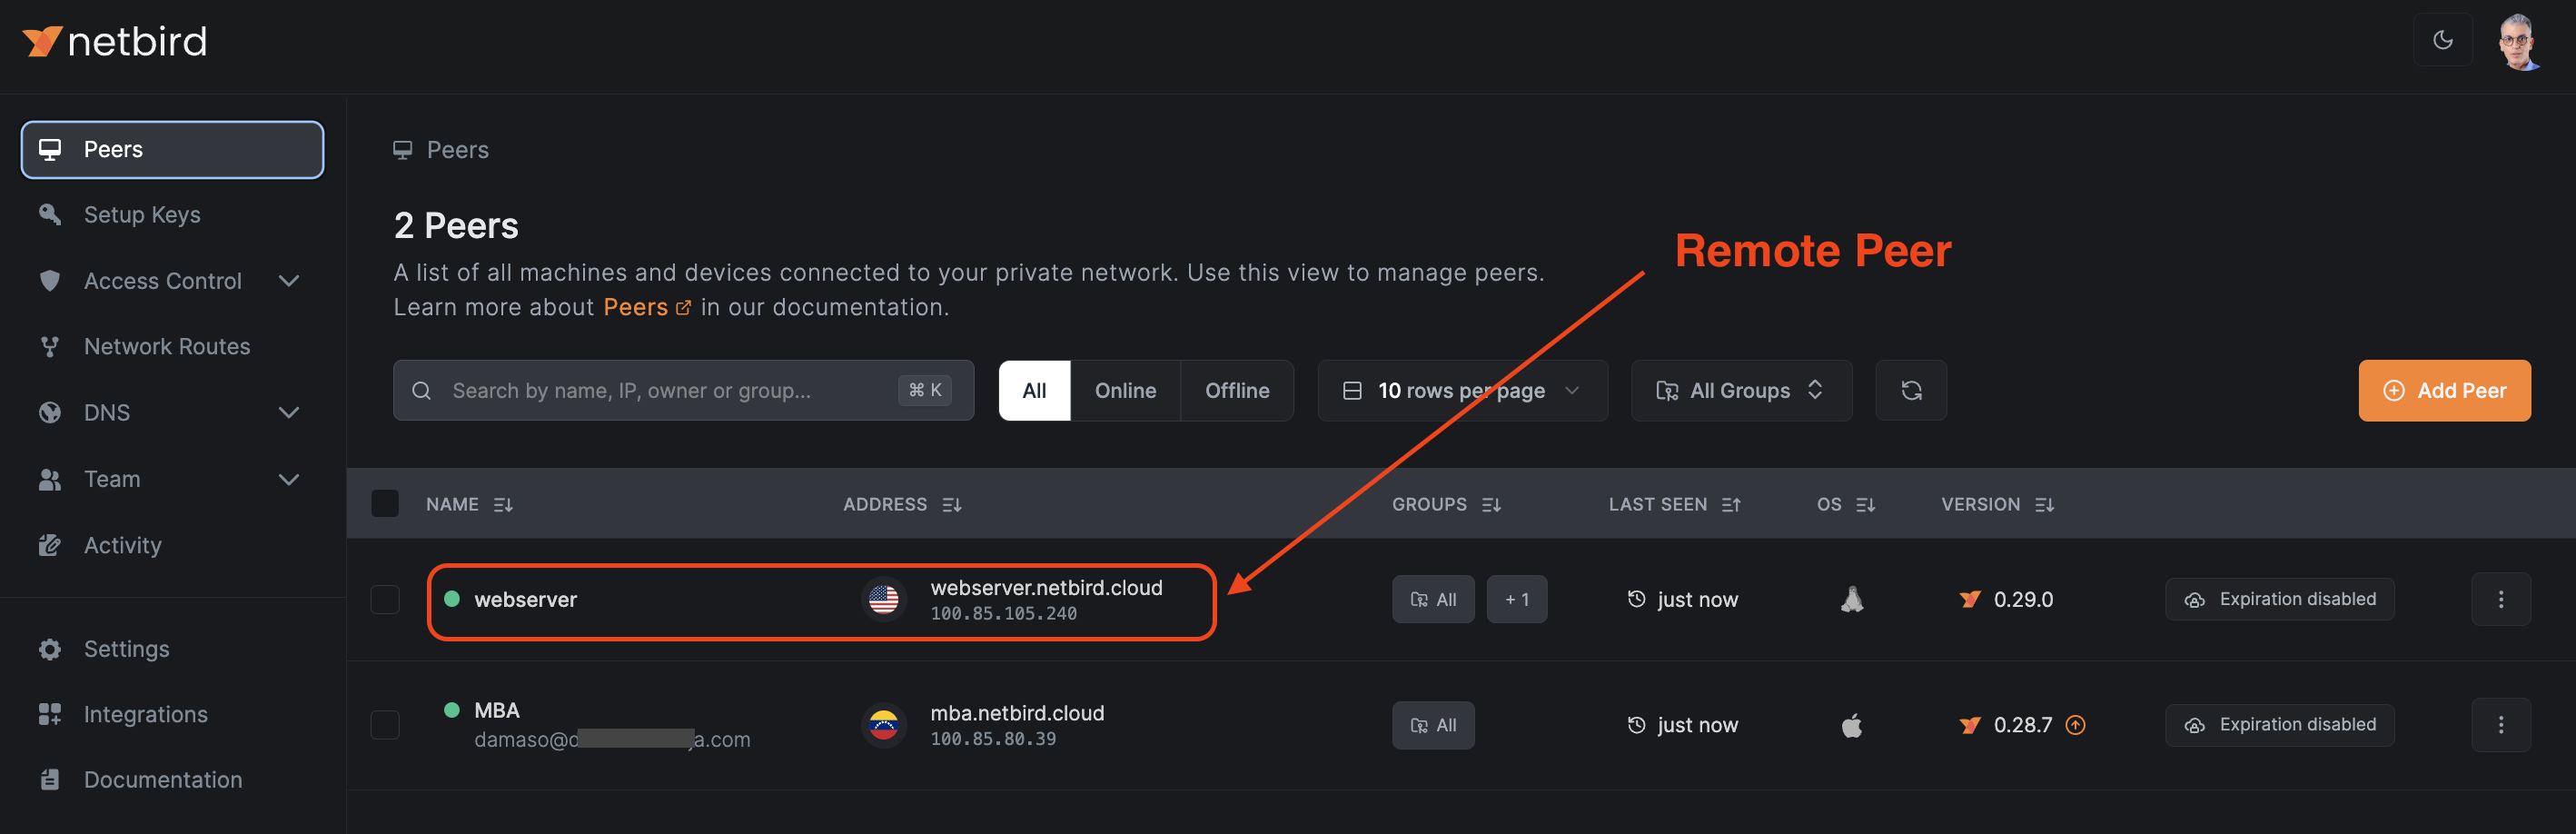
Now, go back to NetBird's Peers dashboard and ensure your remote web server is connected.
2. Configuring NetBird Access Control Policies
With both peers now connected to NetBird, the next step is to configure access control rules. This step is essential to define and restrict who can access the remote server, enhancing security by limiting connections to authorized users or devices only.
- In NetBird's left menu, navigate to
Access Control > Policies - Click
Add Policyto create a new one.
NetBird offers a range of options for peer access control. For comprehensive details on configuring groups and access policies, refer to the official documentation: Managing Access with NetBird: Groups and Access Policies.
For this specific use case, we've implemented a simple access policy:
- Source Group:
Freelancers - Destination Group:
Testing Environment - Protocol: TCP
- Port: 22 (SSH)
- Action: Allow
This policy restricts SSH access to the Testing Environment, permitting only authorized members from the group Freelancers to connect.

After establishing the policy, assign peers to their respective groups. To add the remote web server to the Testing Environment group:
- Navigate to
Peersin the left menu - Click on the name of the peer you want to edit, in this case,
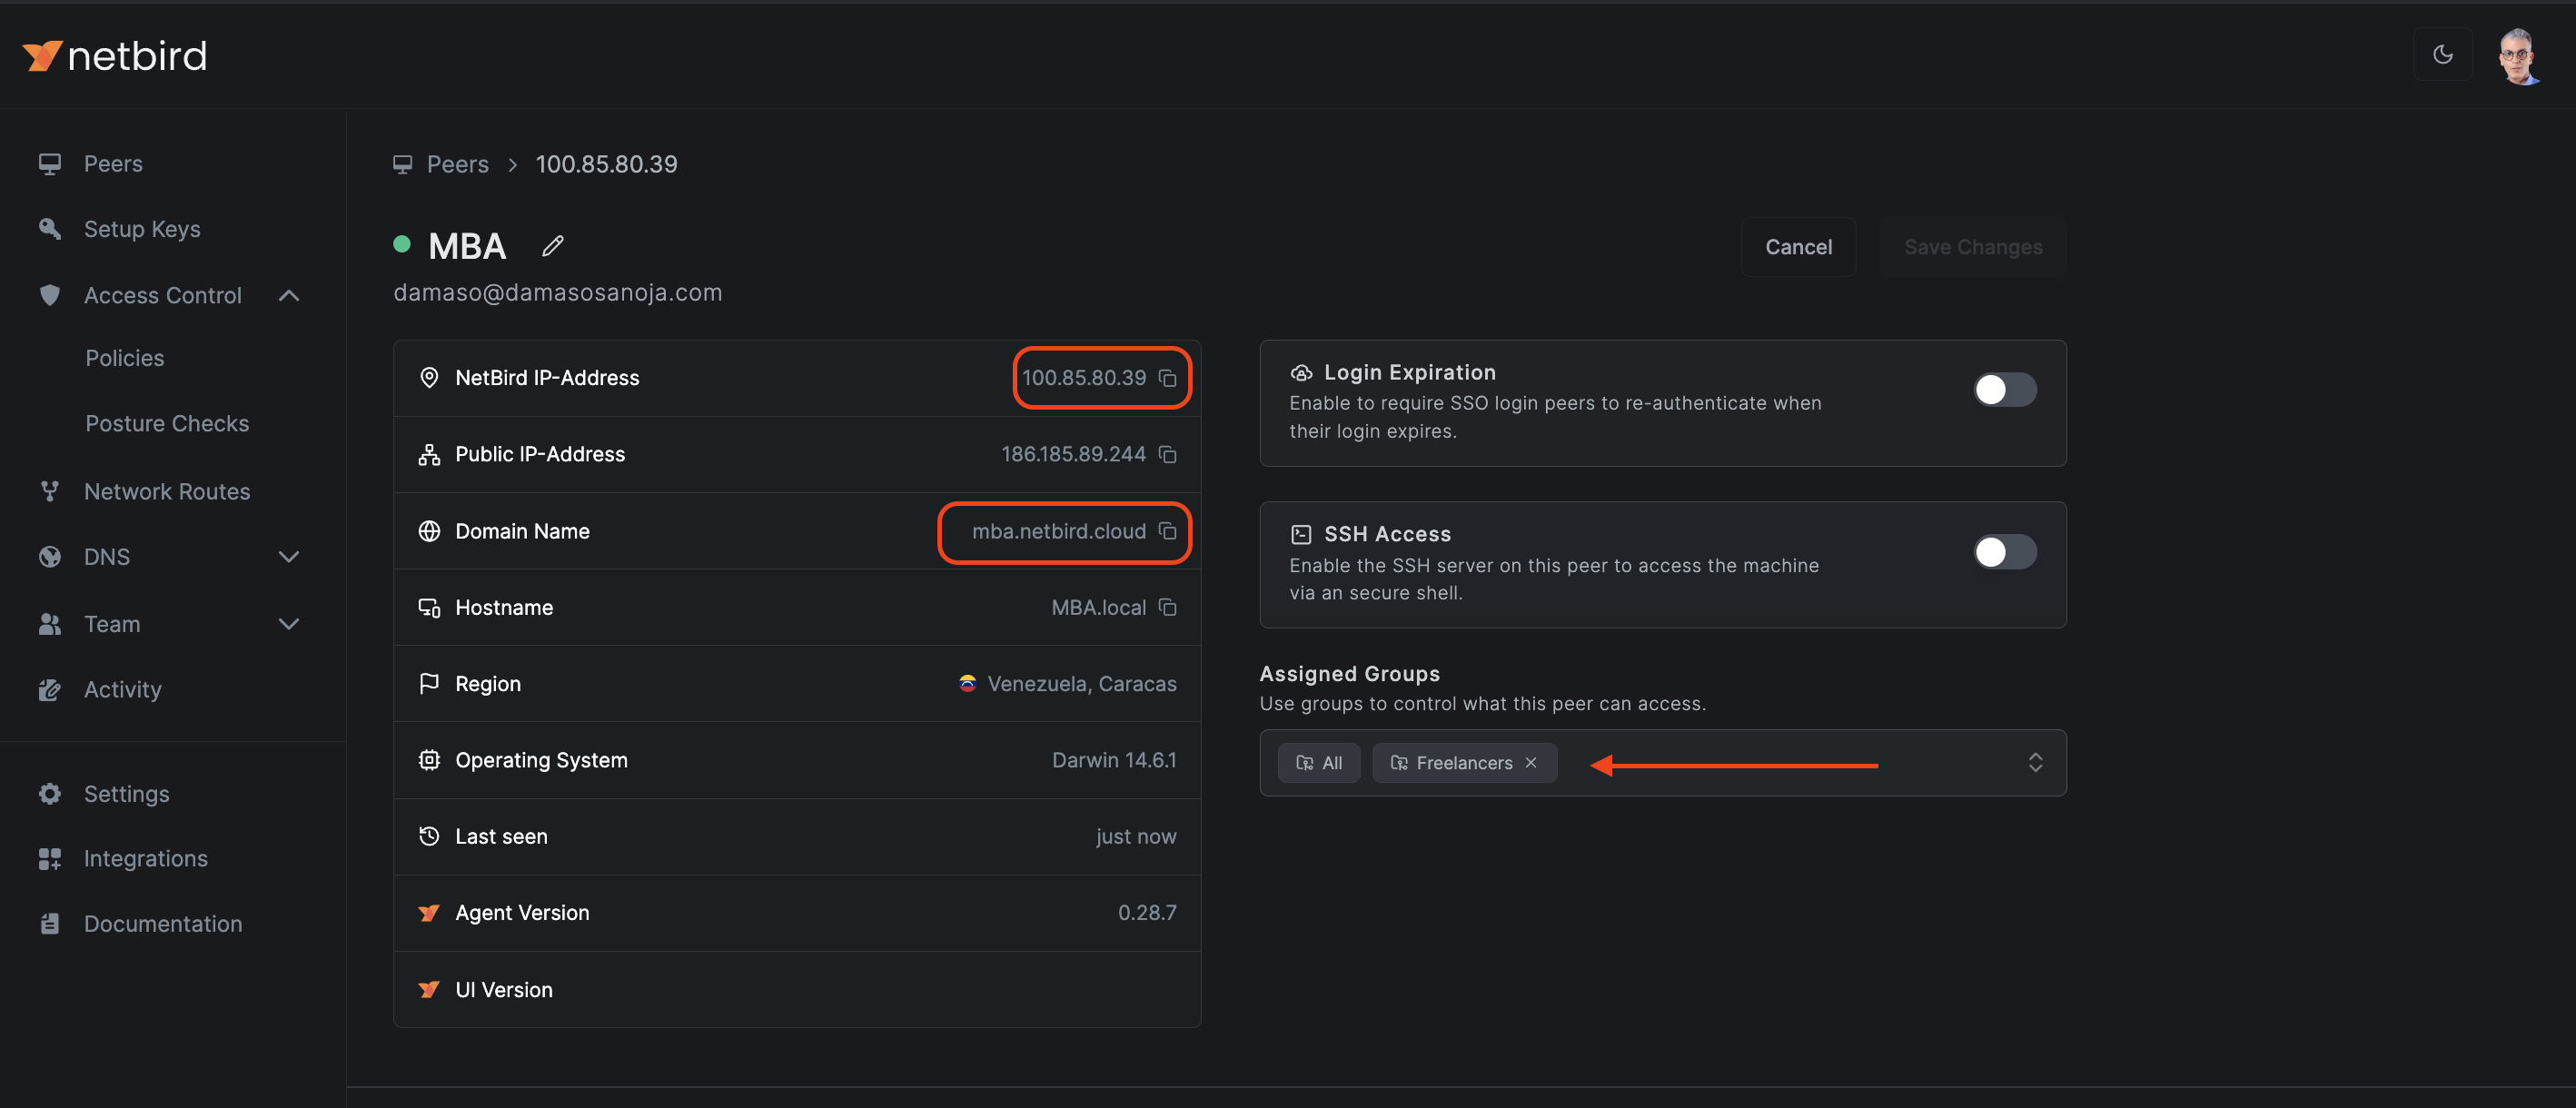
webserver - Find the
Assigned Groupsfield and selectTesting Environmentfrom the dropdown list.

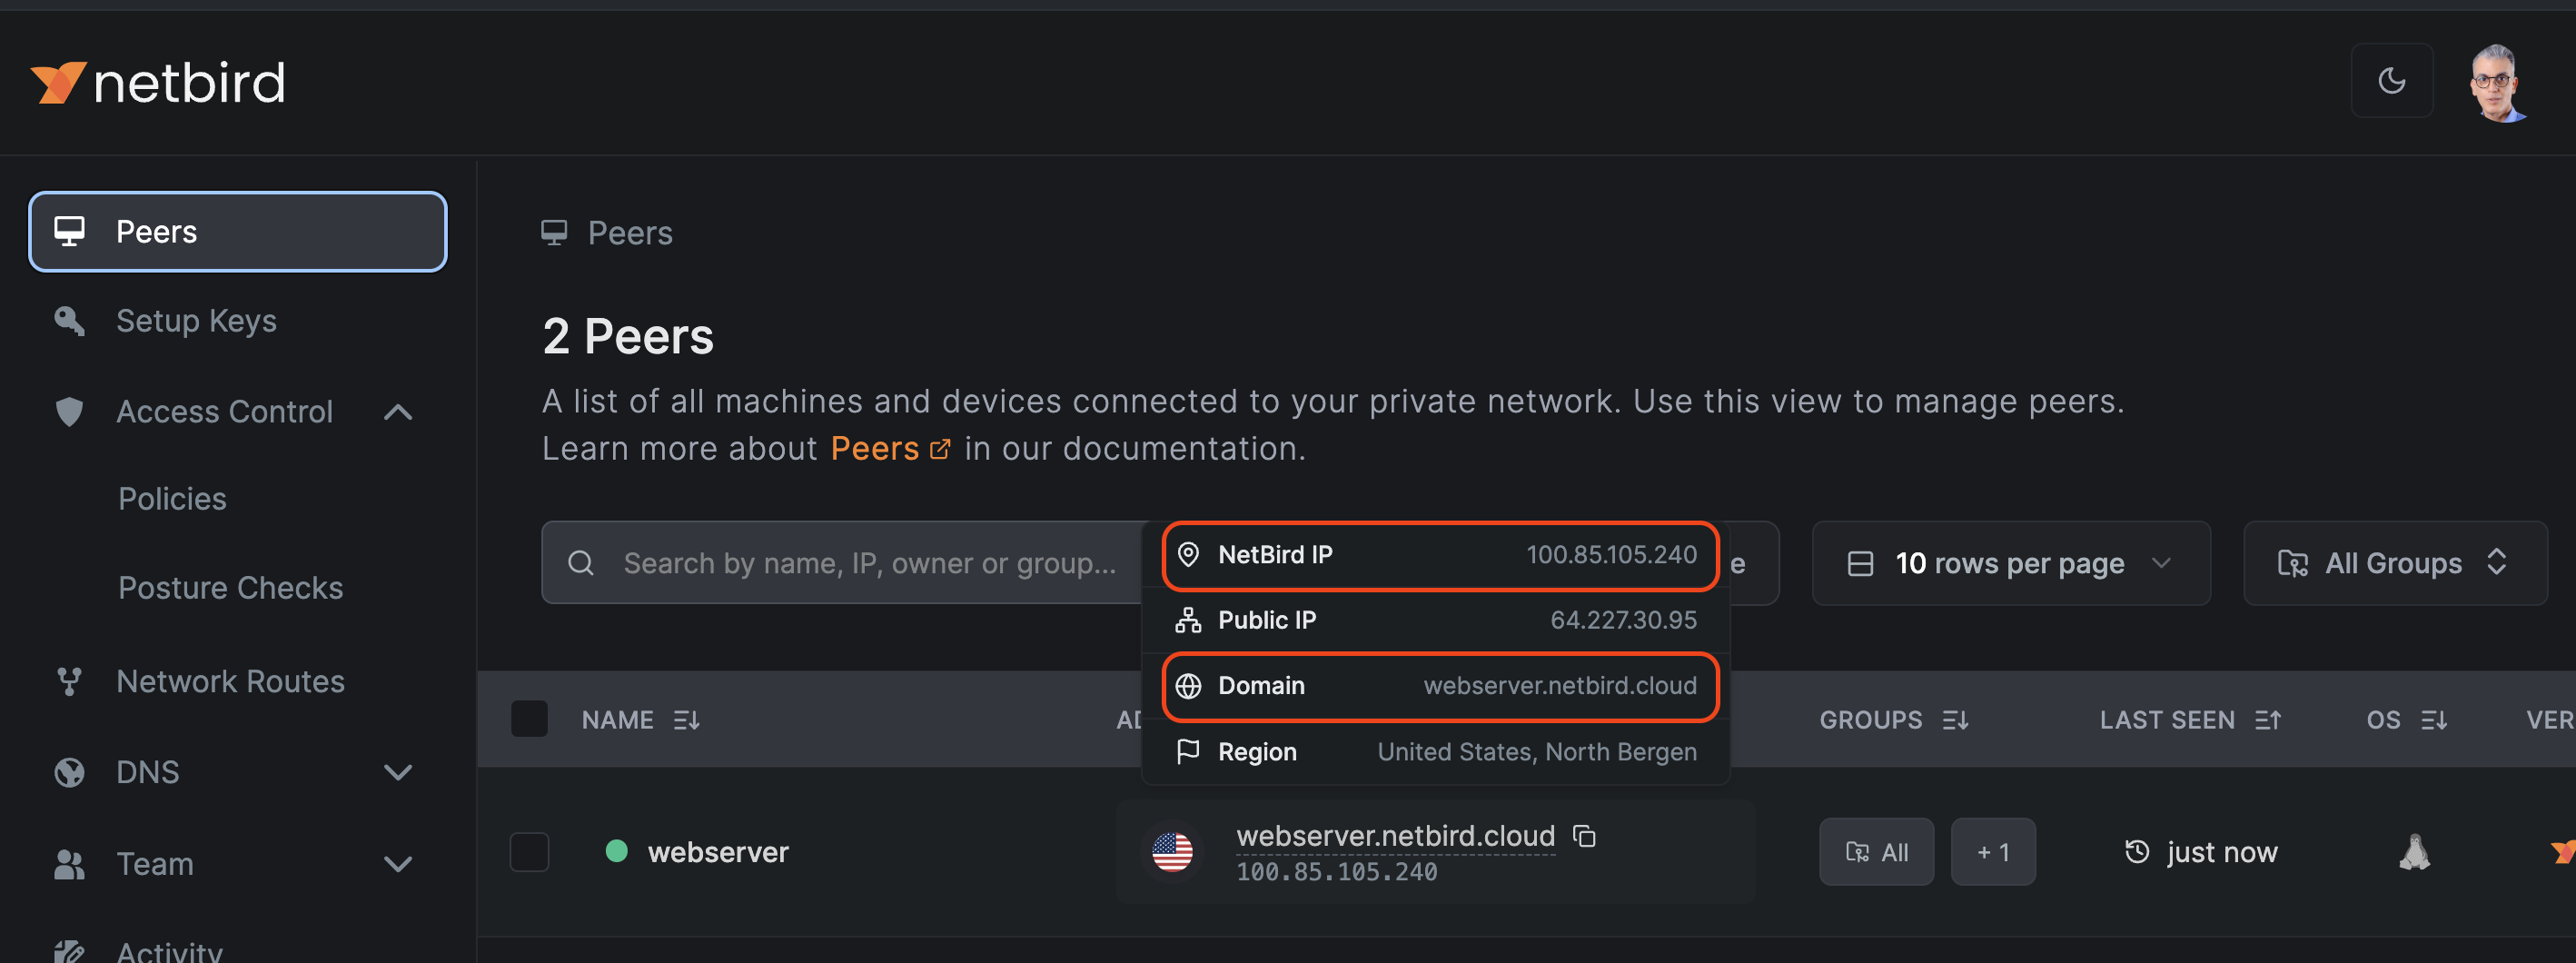
While you're there, take note of the IP addresses listed on the left. Use the quick copy buttons to get NetBird IP-Address and Domain Name. Alternatively, you can hover over the peer in the peers' list and copy the IP addresses as shown below:
With your remote server configured and the corresponding access policy enabled, the final step is to assign users to the appropriate group:
- Locate your user in the peers' list and click on it
- Find the
Assigned Groupsfield and selectFreelancersfrom the dropdown list.
3. Establishing a Secure SSH Connection to Access the Internal Web Service
NetBird streamlines secure connections without traditional firewall complexities. Throughout this setup, you've implemented access controls without configuring a single firewall rule on any endpoint. This simplicity doesn't compromise security; instead, it enhances it through intuitive, group-based policies.
To verify your setup, simply ping the web server from a third-party device outside of the NetBird network using the web server's NetBird-assigned IP:
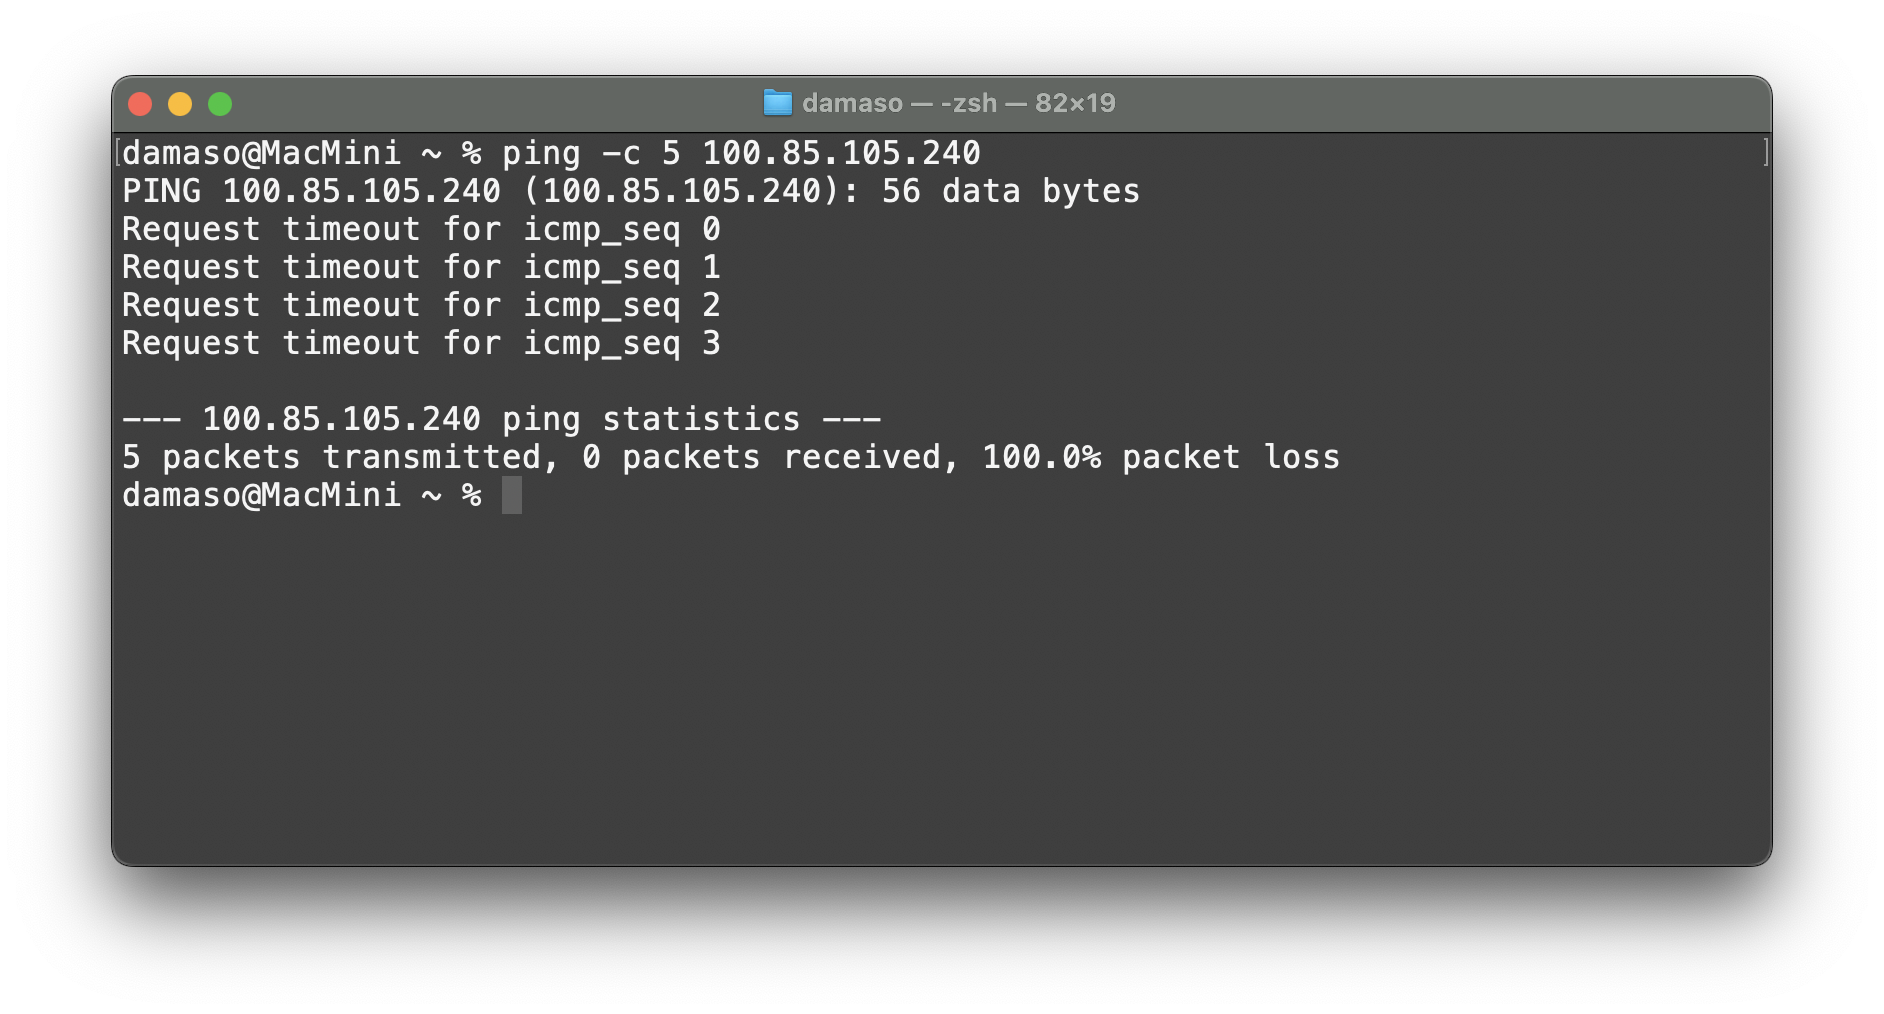
There is no response from the host. Now, ping the web server from your configured local machine:

As expected, all packets were transmitted. Now, you can securely SSH into your remote web server from your local peer, either using the NetBird-assigned domain name or IP address:
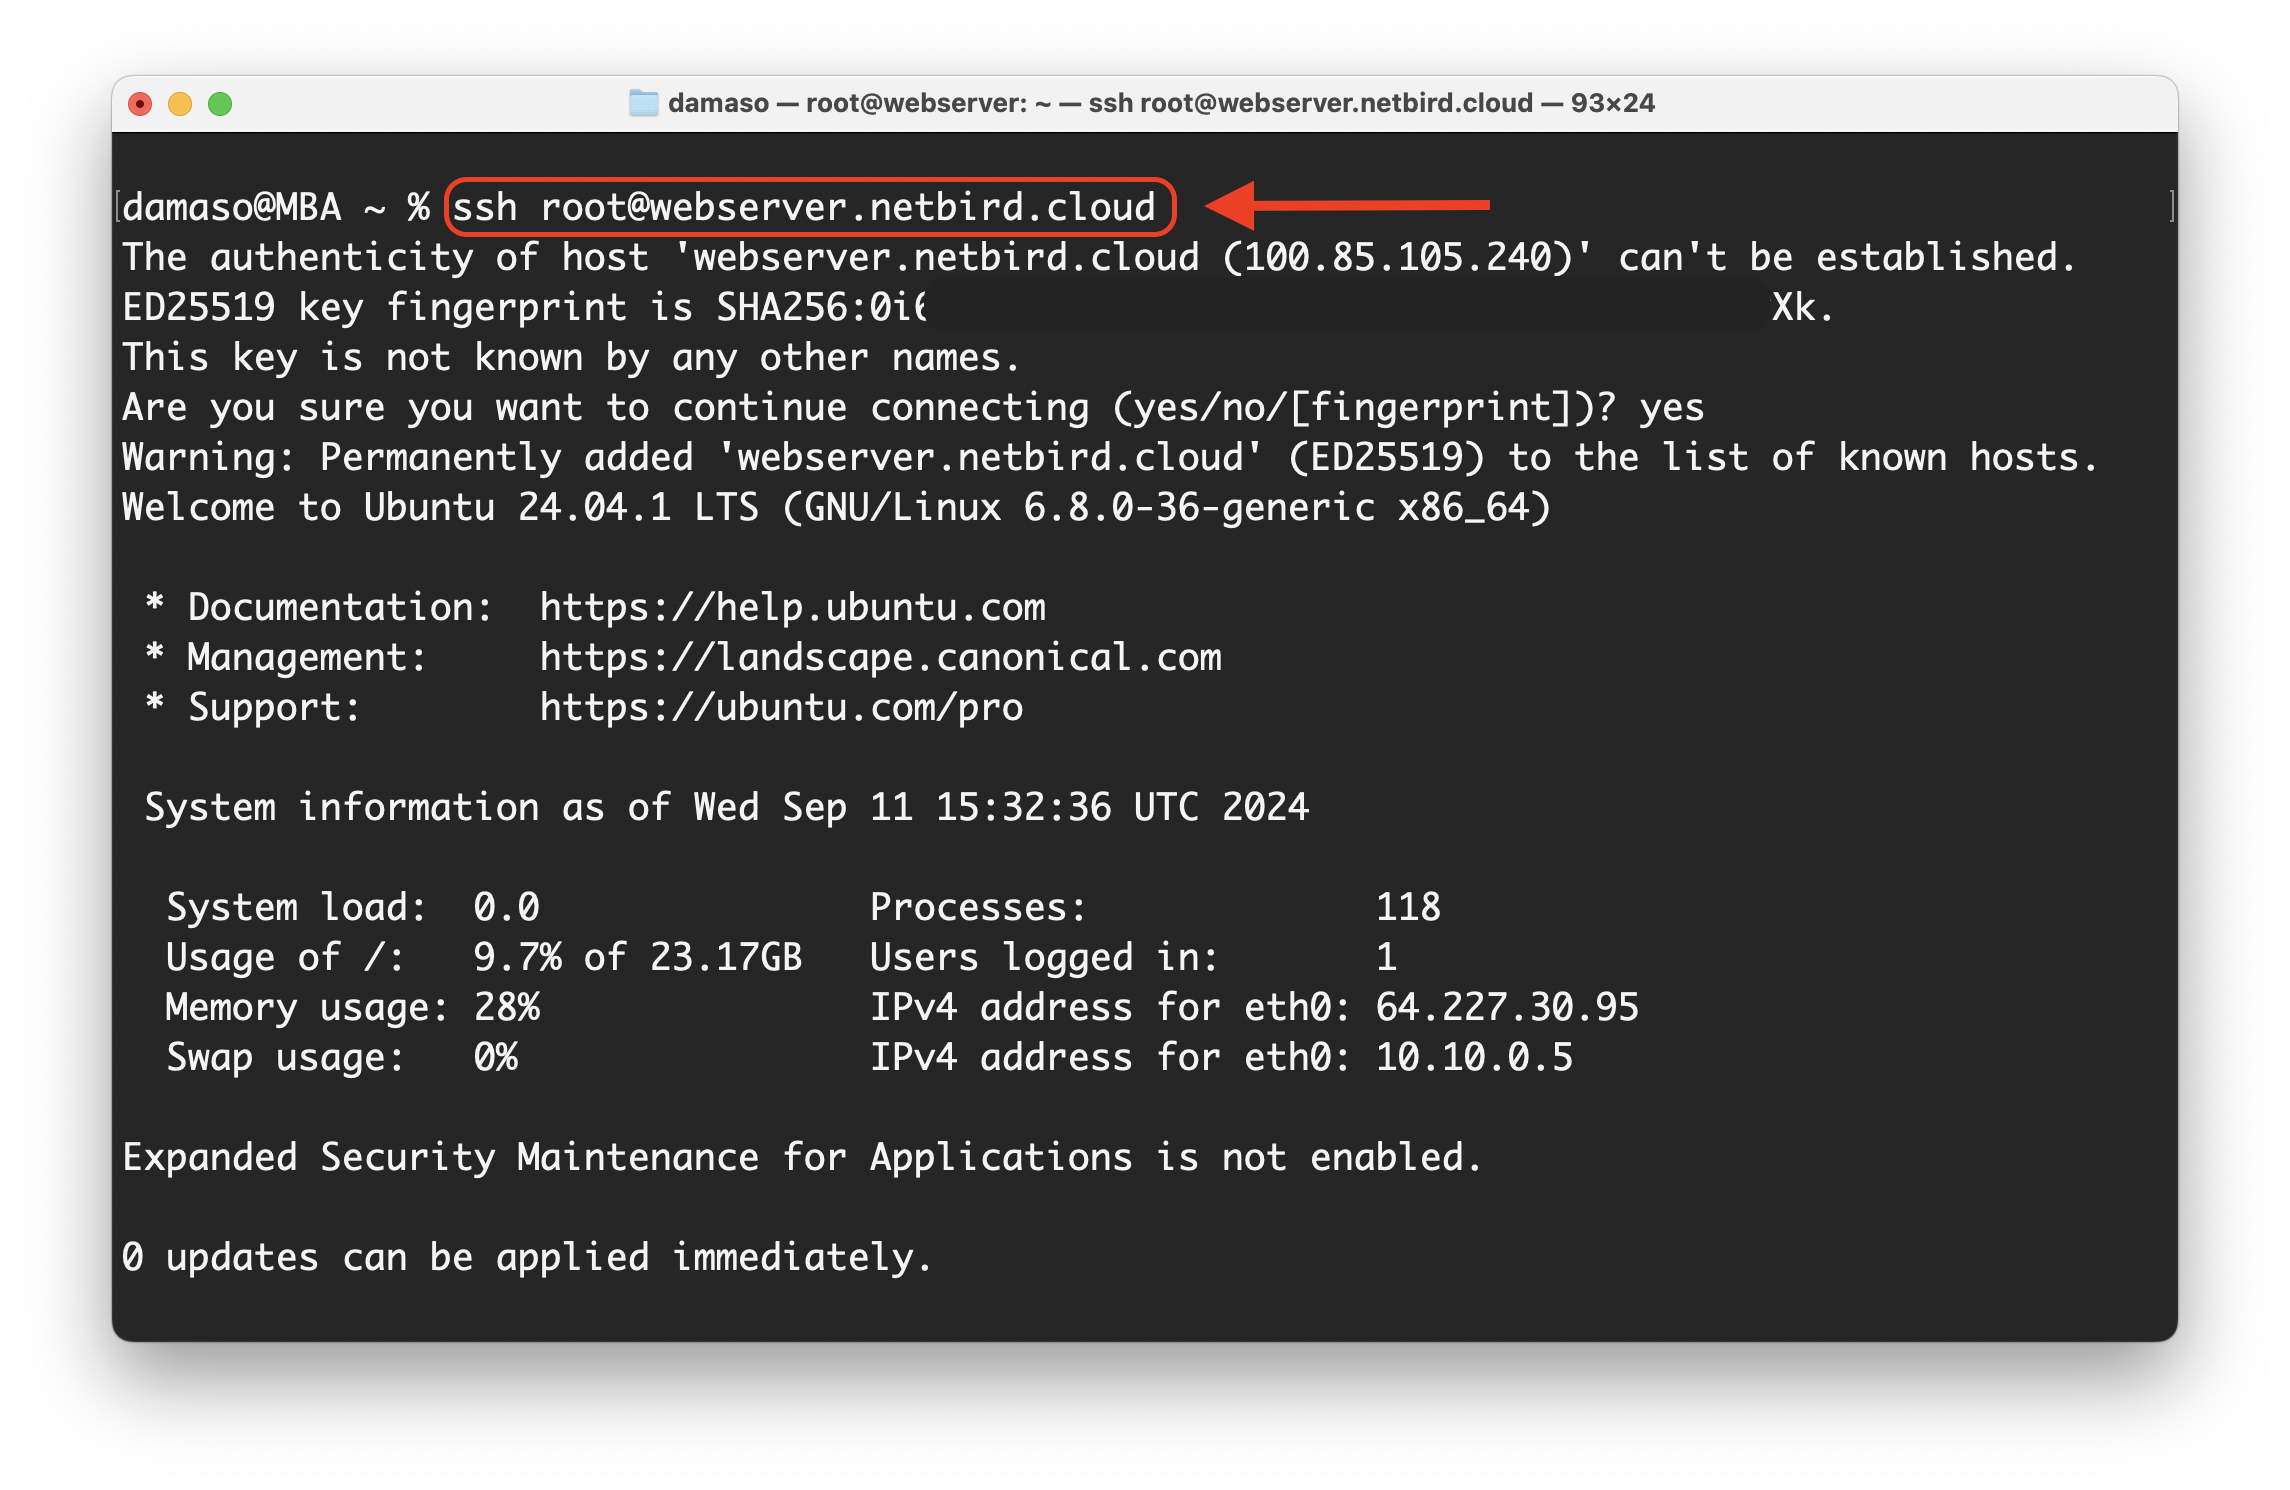
This straightforward test confirms your successful implementation of a secure, firewall-free connection to your remote web server via NetBird, demonstrating its power in simplifying robust network security.

Get Started
- Make sure to star us on GitHub
- Follow us on X
- Join our Slack Channel
- NetBird latest release on GitHub