Provision Users and Groups From Microsoft Entra ID via API
Microsoft Entra ID, formerly known as Azure Active Directory (Azure AD), is a cloud-based identity and access management service that provides organizations with secure authentication, single sign-on, and user management capabilities. In the context of network security, it can be effectively used to control network access based on organizational structure, such as groups and individual user accounts.
NetBird's Microsoft Entra ID integration allows you to synchronize users and groups from Entra ID to NetBird. You can then use these synchronized groups to configure your network, create network access policies, and automate onboarding and offboarding processes.
If you are running a self-hosted deployment with a Commercial License and the embedded IdP, see the Embedded IdP version of this guide instead.
The NetBird dashboard supports only one identity provider sync integration at a time. If you want to use both the API integration and SCIM, you can configure a second integration via the NetBird API, but it must sync from a different Entra tenant to avoid identity conflicts.
Get Started with NetBird-Entra ID Integration
To get started, navigate to Integrations in the left menu, which will take you to the
Identity Provider integration. Click the Entra ID (Azure AD) button. This action will trigger a pop-up window that will
present you with a user-friendly wizard, guiding you through the synchronization process between NetBird and Azure AD.
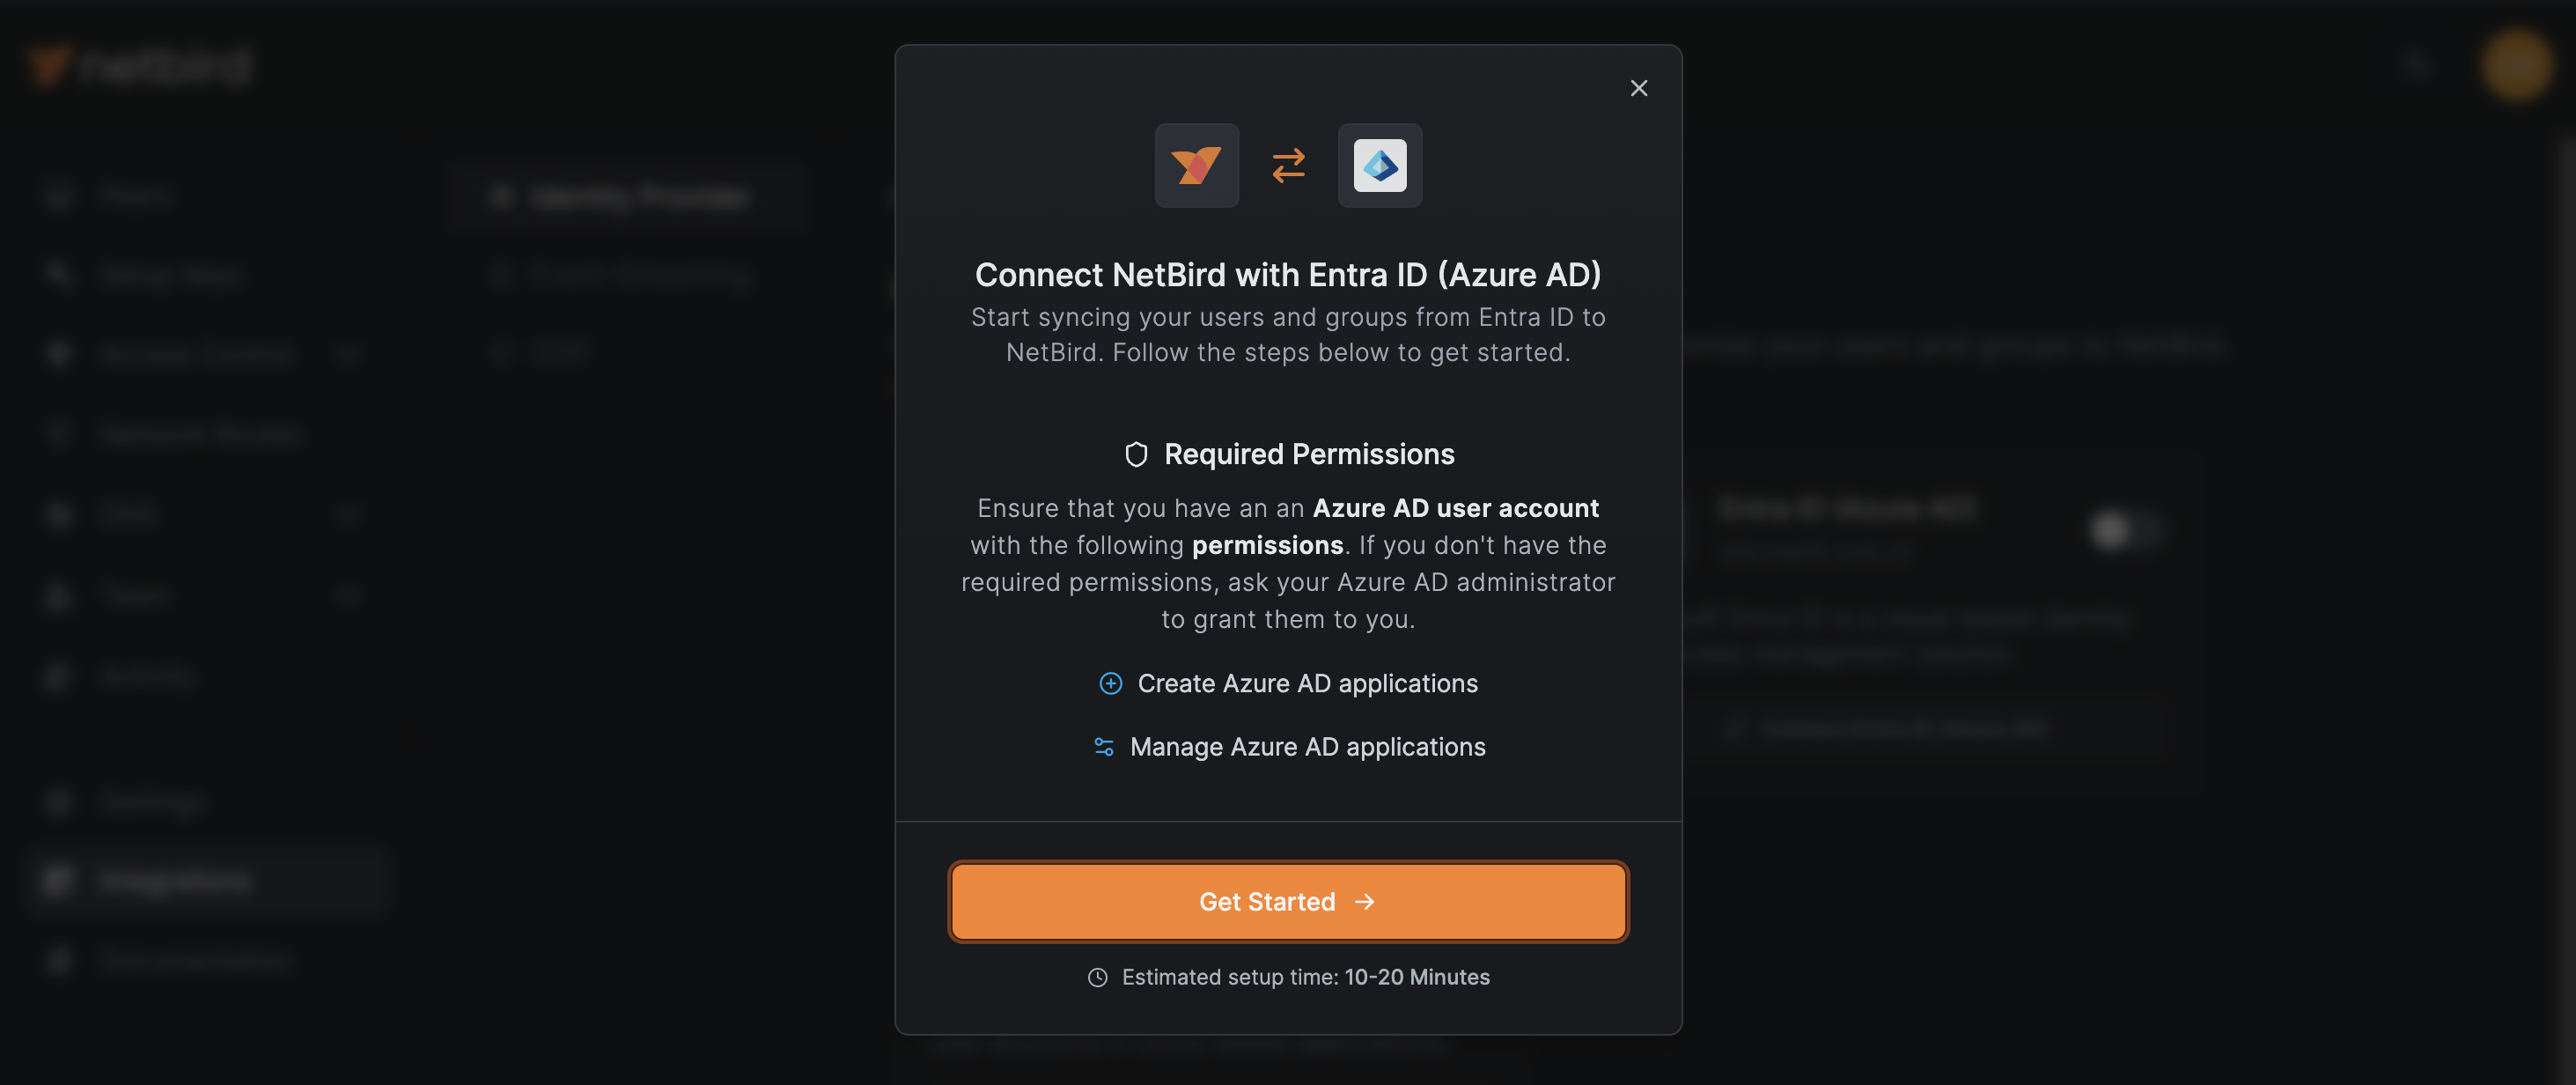
Prerequisites
Before starting the integration process, verify that you have the required permissions in Microsoft Entra ID (Azure AD). Specifically, you will need an Azure user account with at least one of these roles:
- Application Administrator
- Cloud Application Administrator
- Global Administrator
To check your permissions:
- Log in to the Azure portal.
- Navigate to Manage Microsoft Entra ID and click
View. - Expand the
Managetab and click onRoles and administratorsin the left menu. - Look for your username and verify if you're assigned any of the above roles.
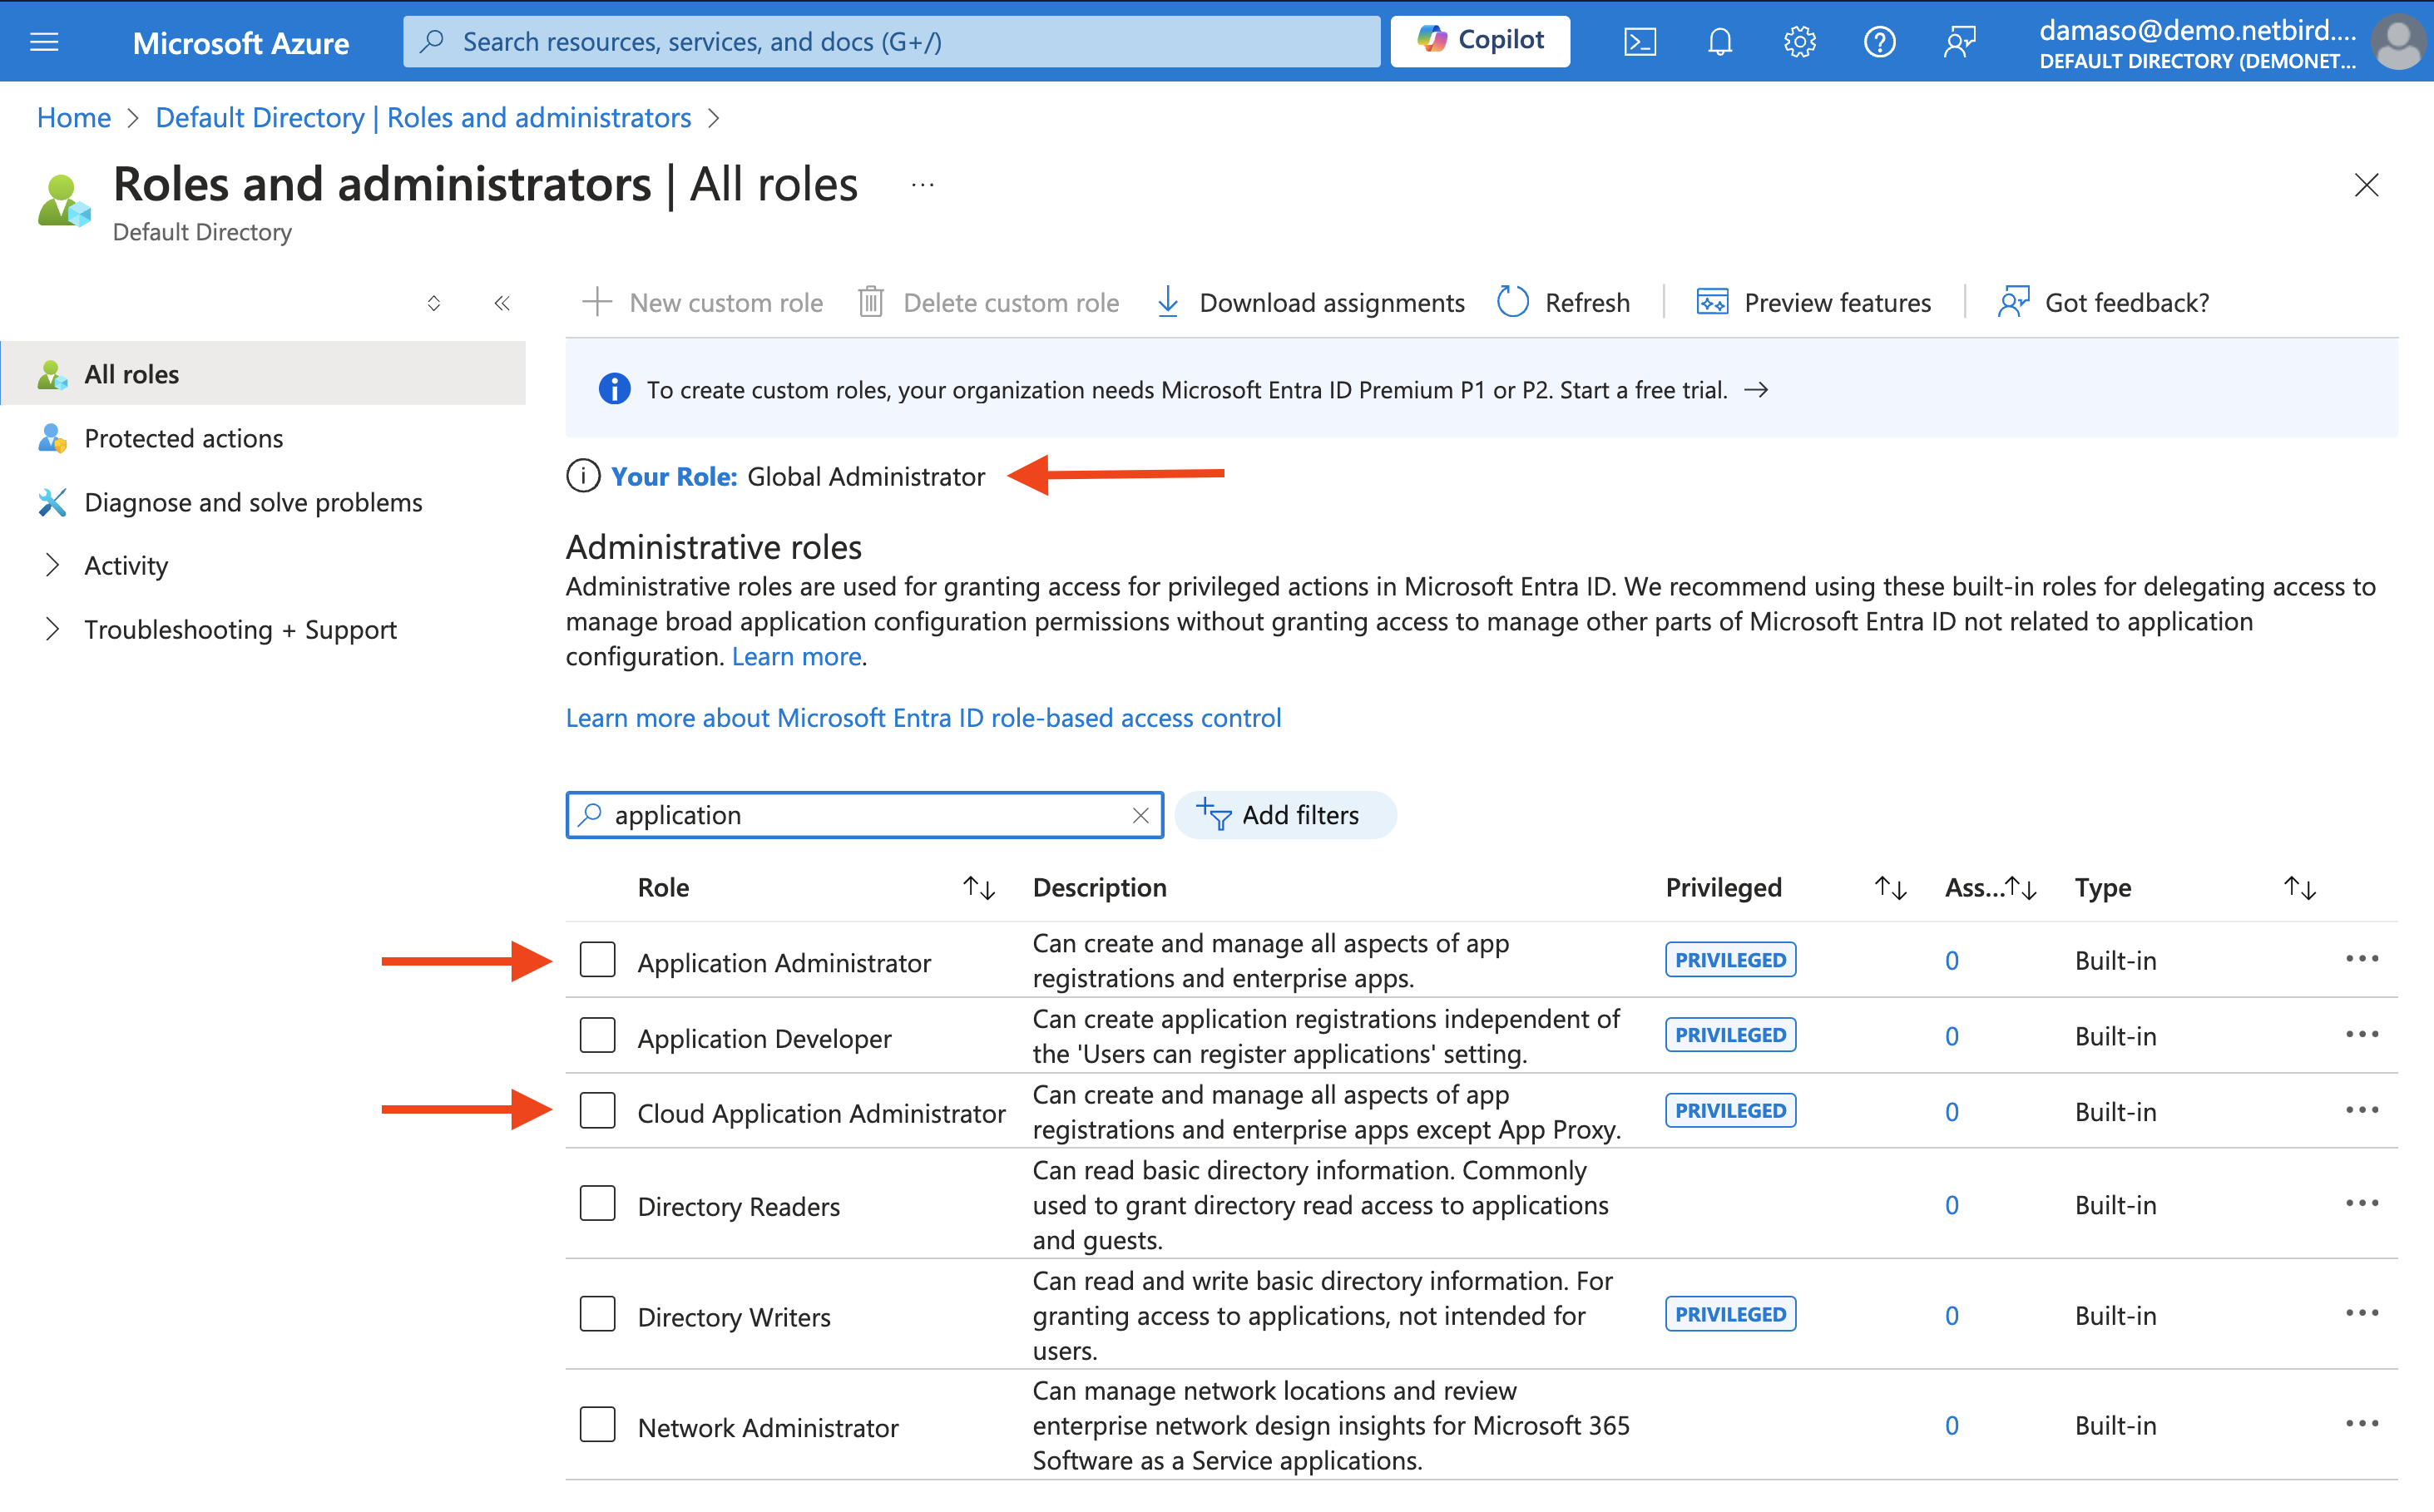
If you don't have the required permissions, contact your Azure AD administrator to grant you the appropriate role before proceeding with the NetBird integration.
Create and Configure a Microsoft Entra ID Application for NetBird Integration
Now that you have the required permissions, return to the NetBird dashboard. Click on the Get Started button to initiate the integration process.
A new wizard screen will appear, offering step-by-step instructions for creating and configuring your Microsoft Entra ID application. To simplify the process, the wizard also provides quick-copy buttons for essential information:
- Name
- Account Type
- Redirect Type
- Redirect URI
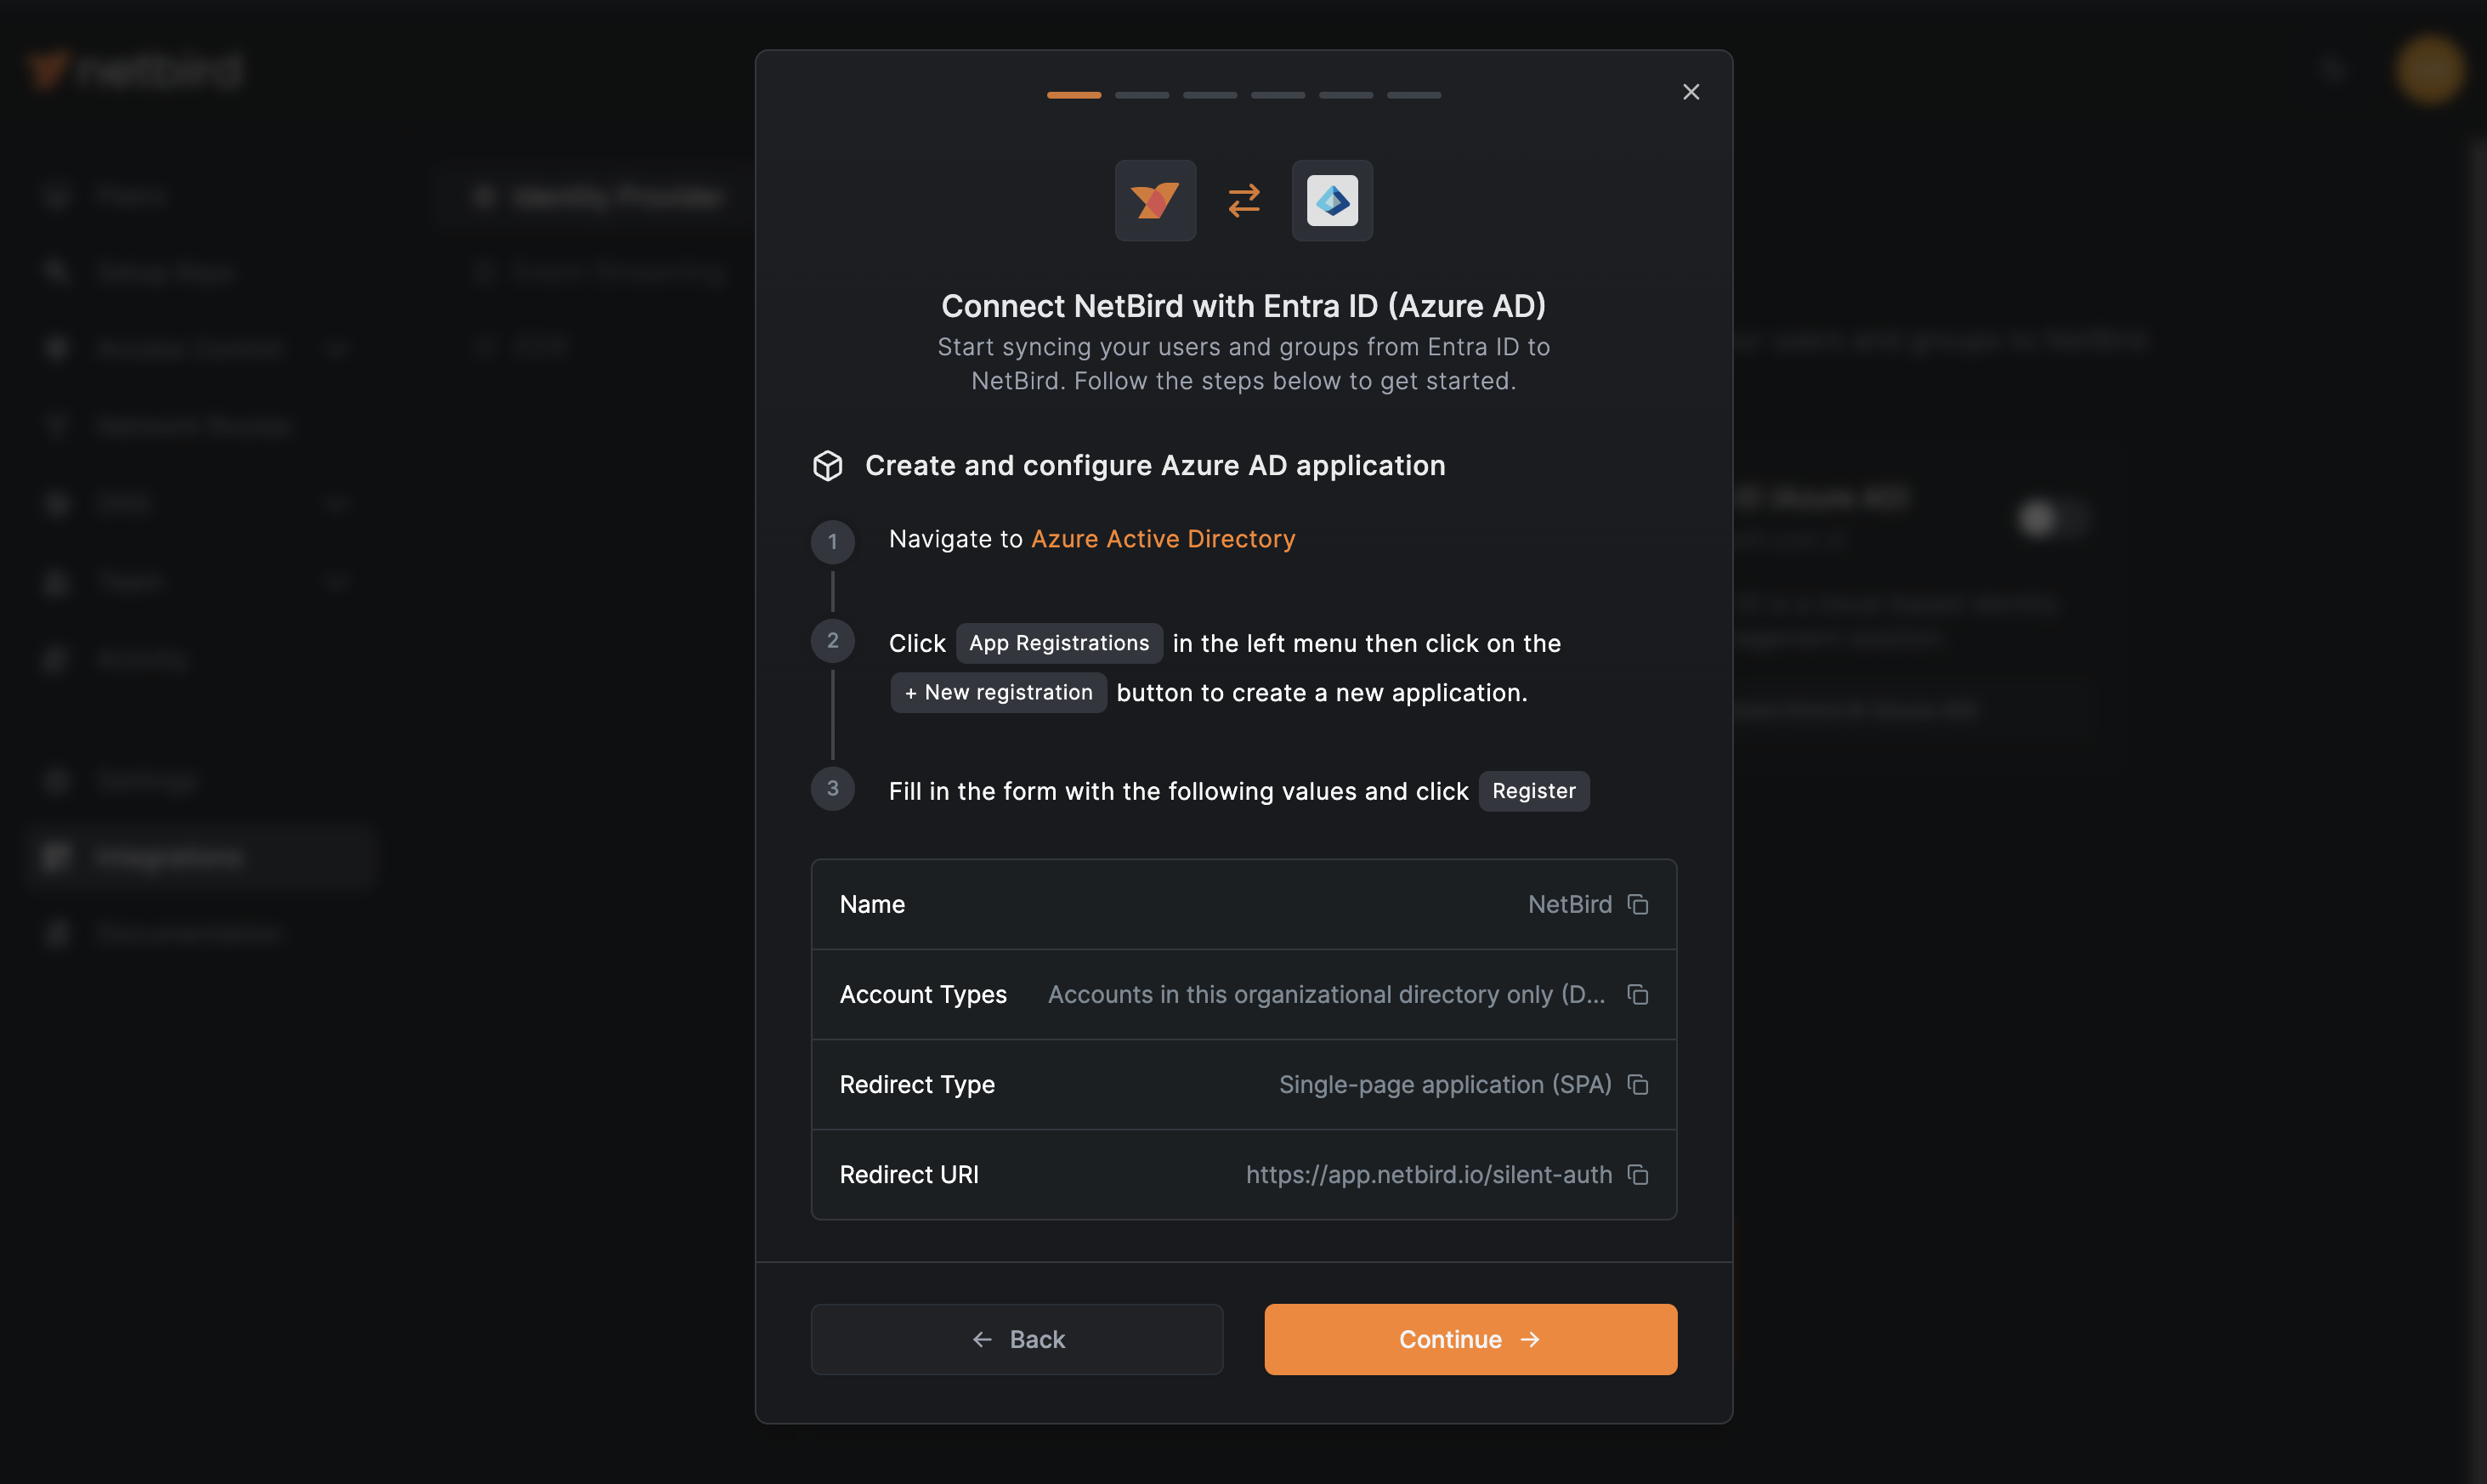
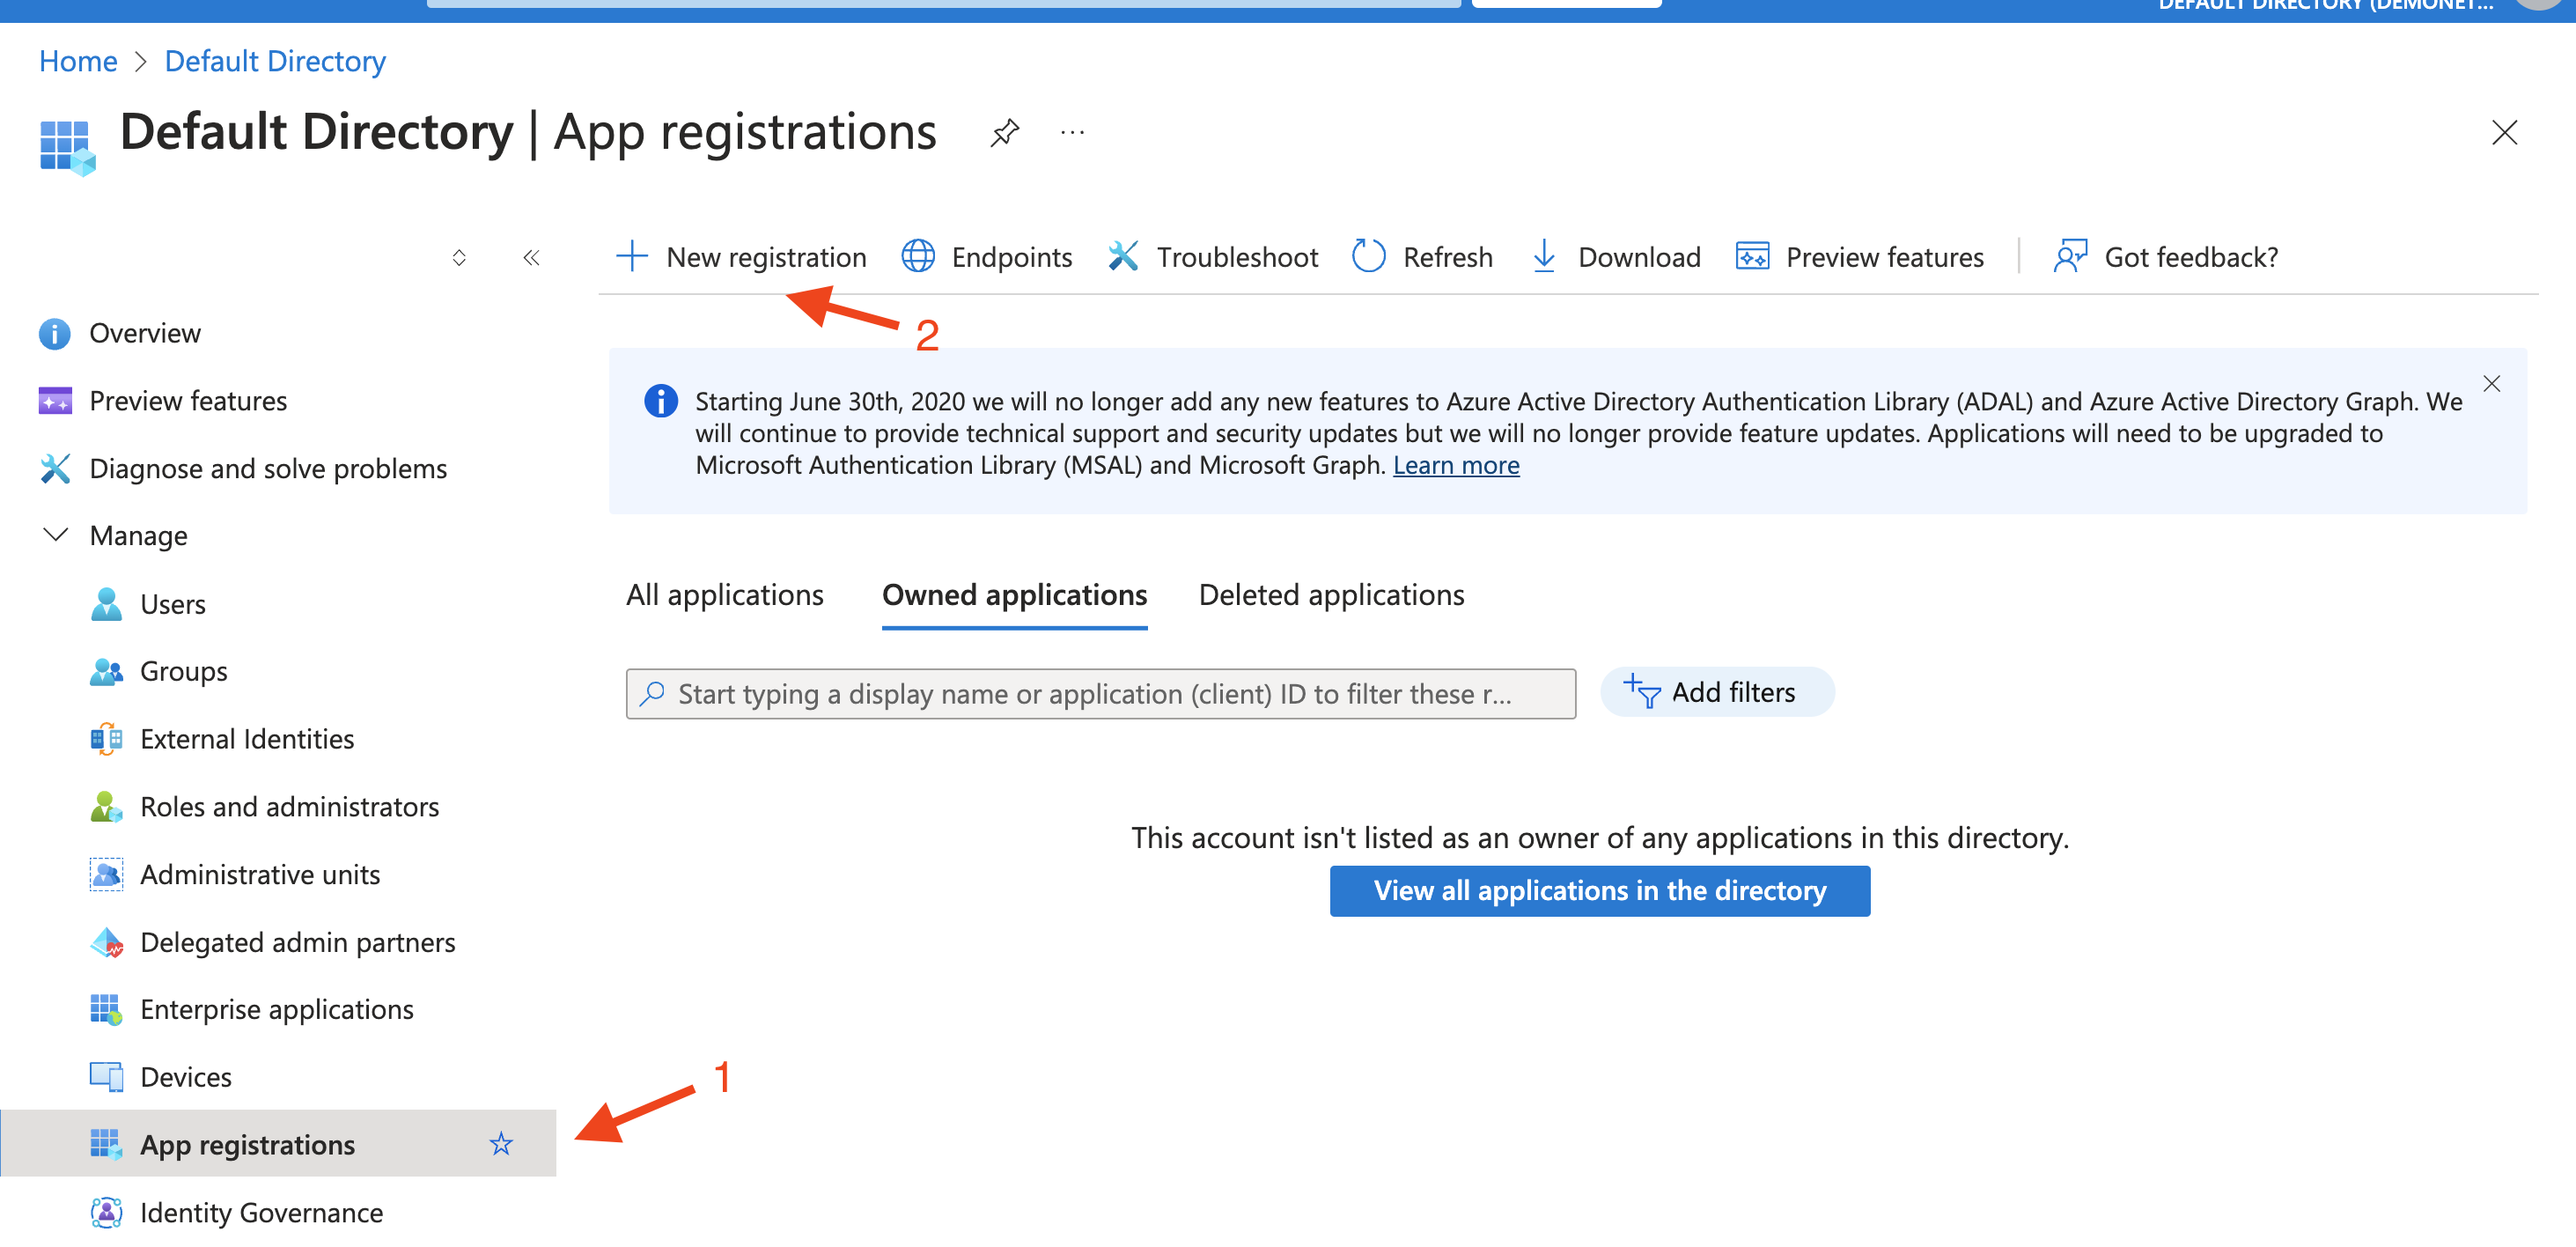
For convenience, click on Azure Active Directory (step 1). That will open the Azure dashboard. Navigate to App registrations in the left menu and then click +New registration as indicated below:
Fill in the required information:

After entering all required information, click the Register button at the bottom of the form to finalize the application registration process.
Upon successful registration, you'll be redirected to a confirmation screen similar to the following:
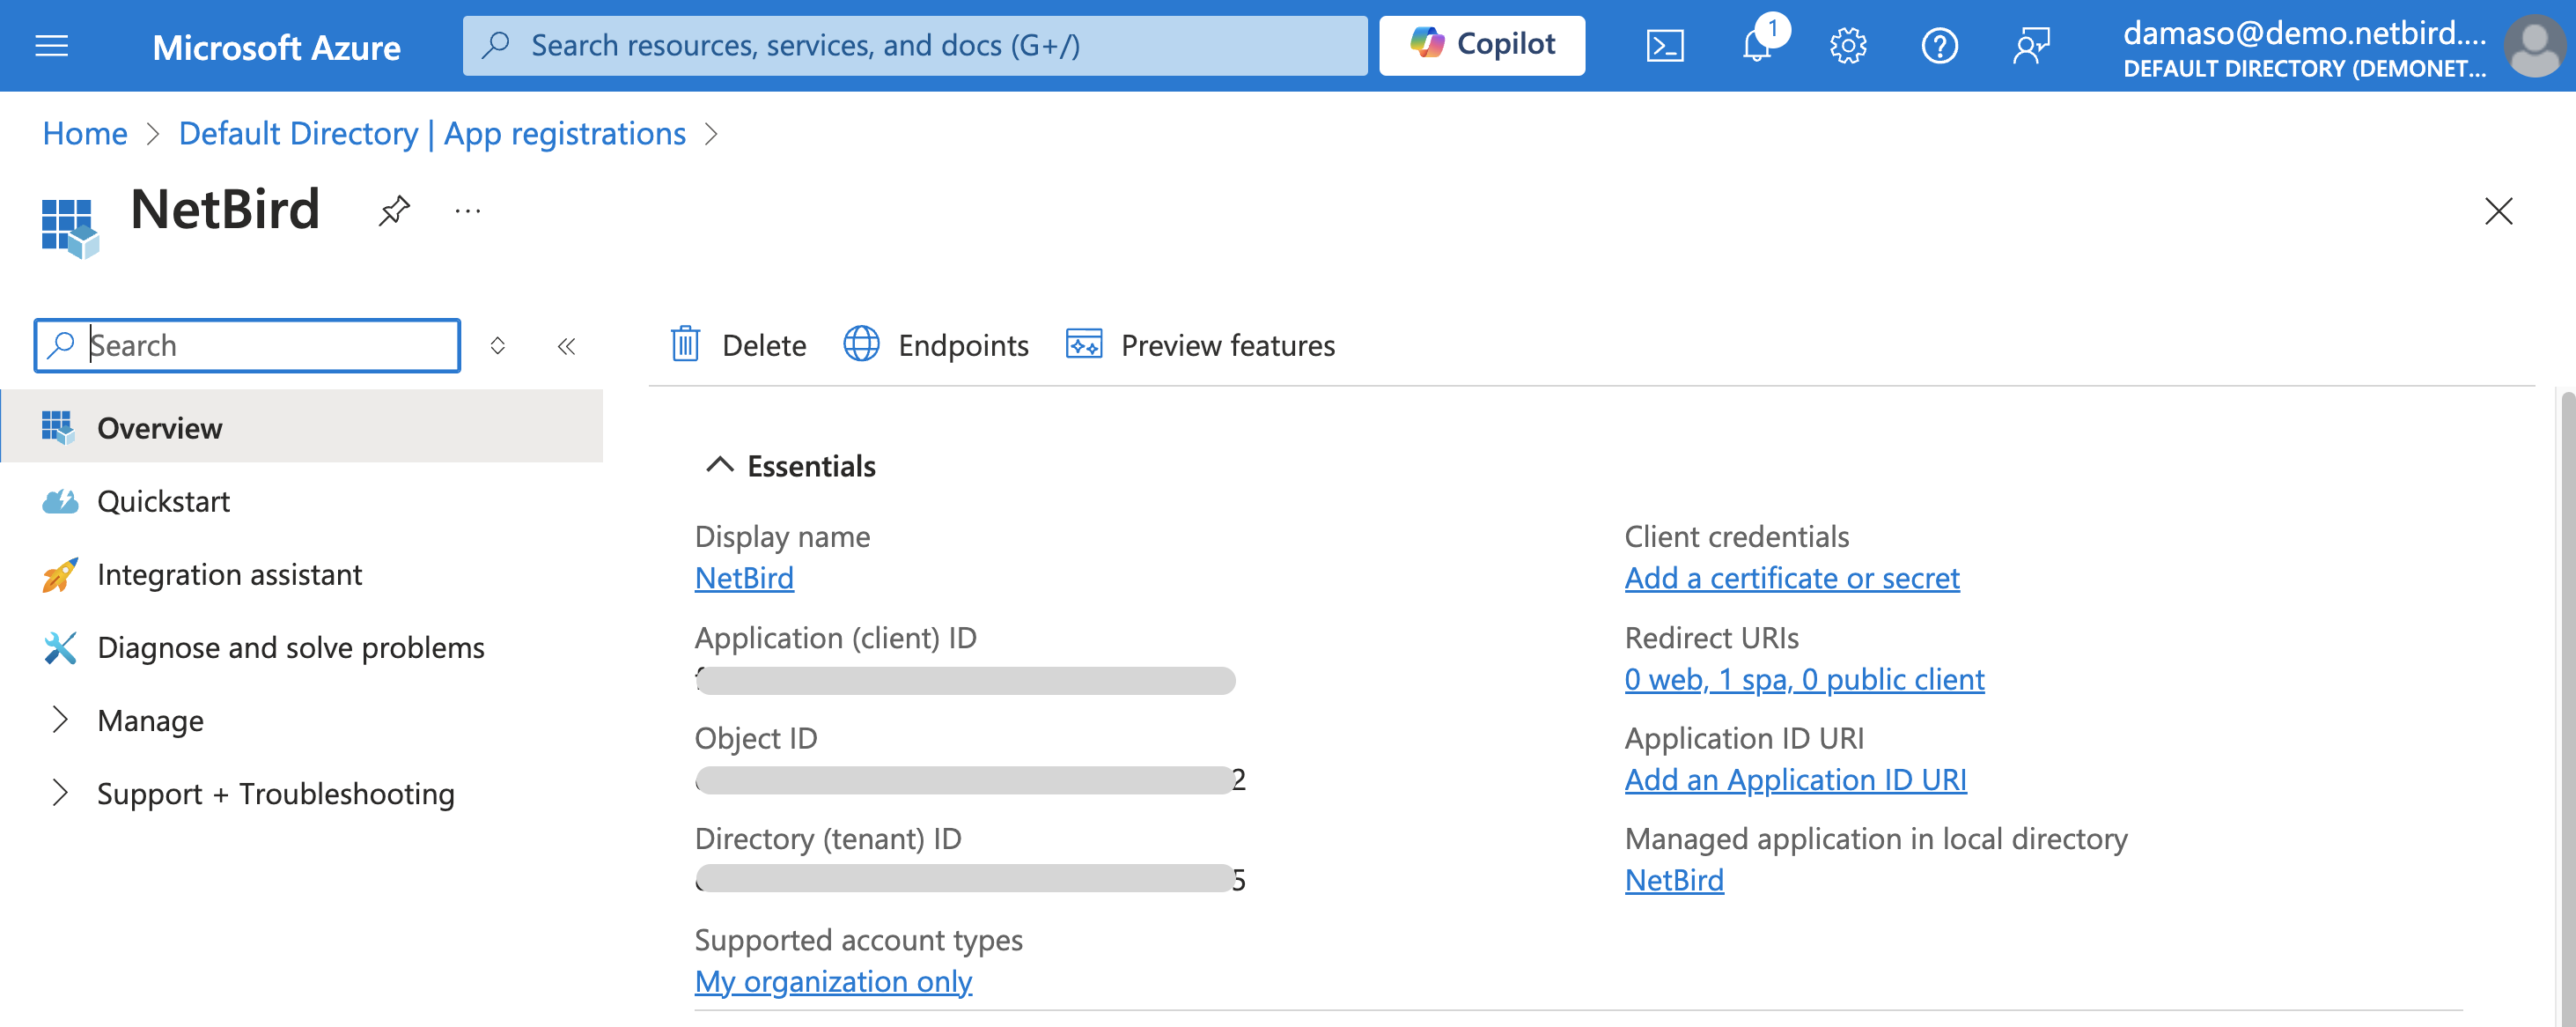
Copy and securely store the generated Application (client) ID and Directory (tenant) ID as you will need them shortly.
Configure API Permissions for NetBird-Entra ID Integration
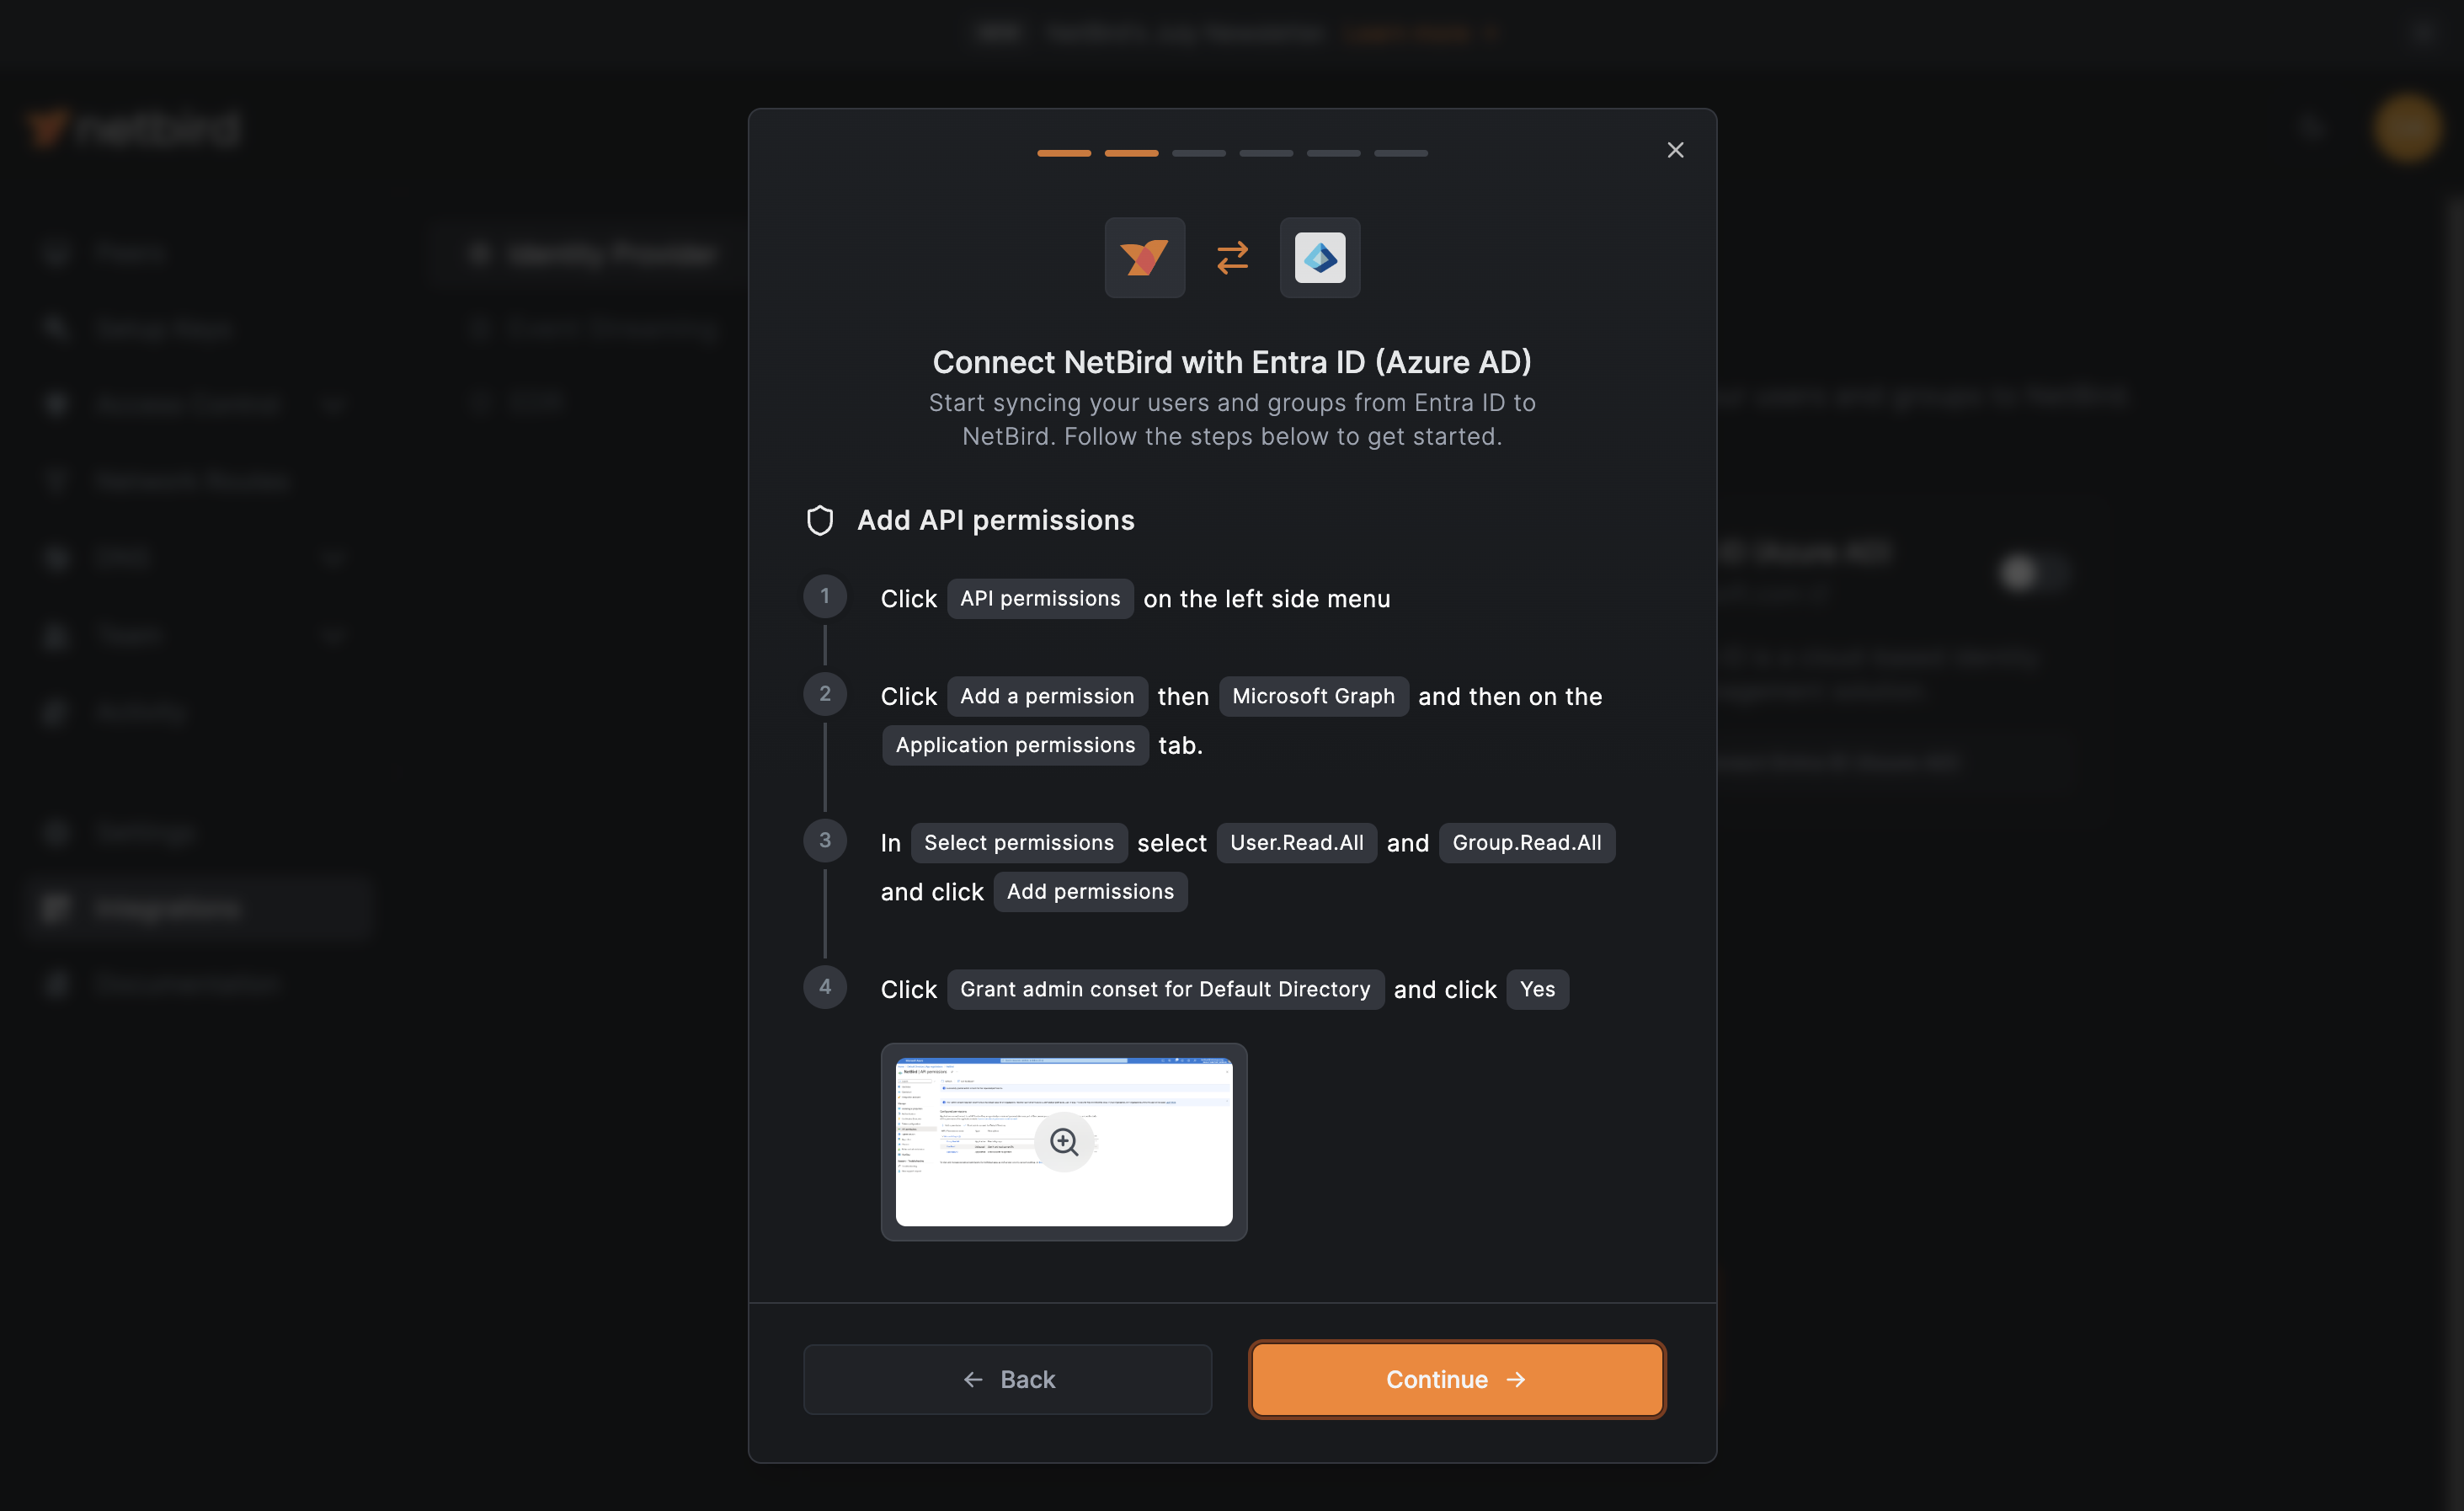
On the NetBird dashboard click the Continue → button. A new wizard screen will appear, this time, offering step-by-step instructions for setting up API permissions.
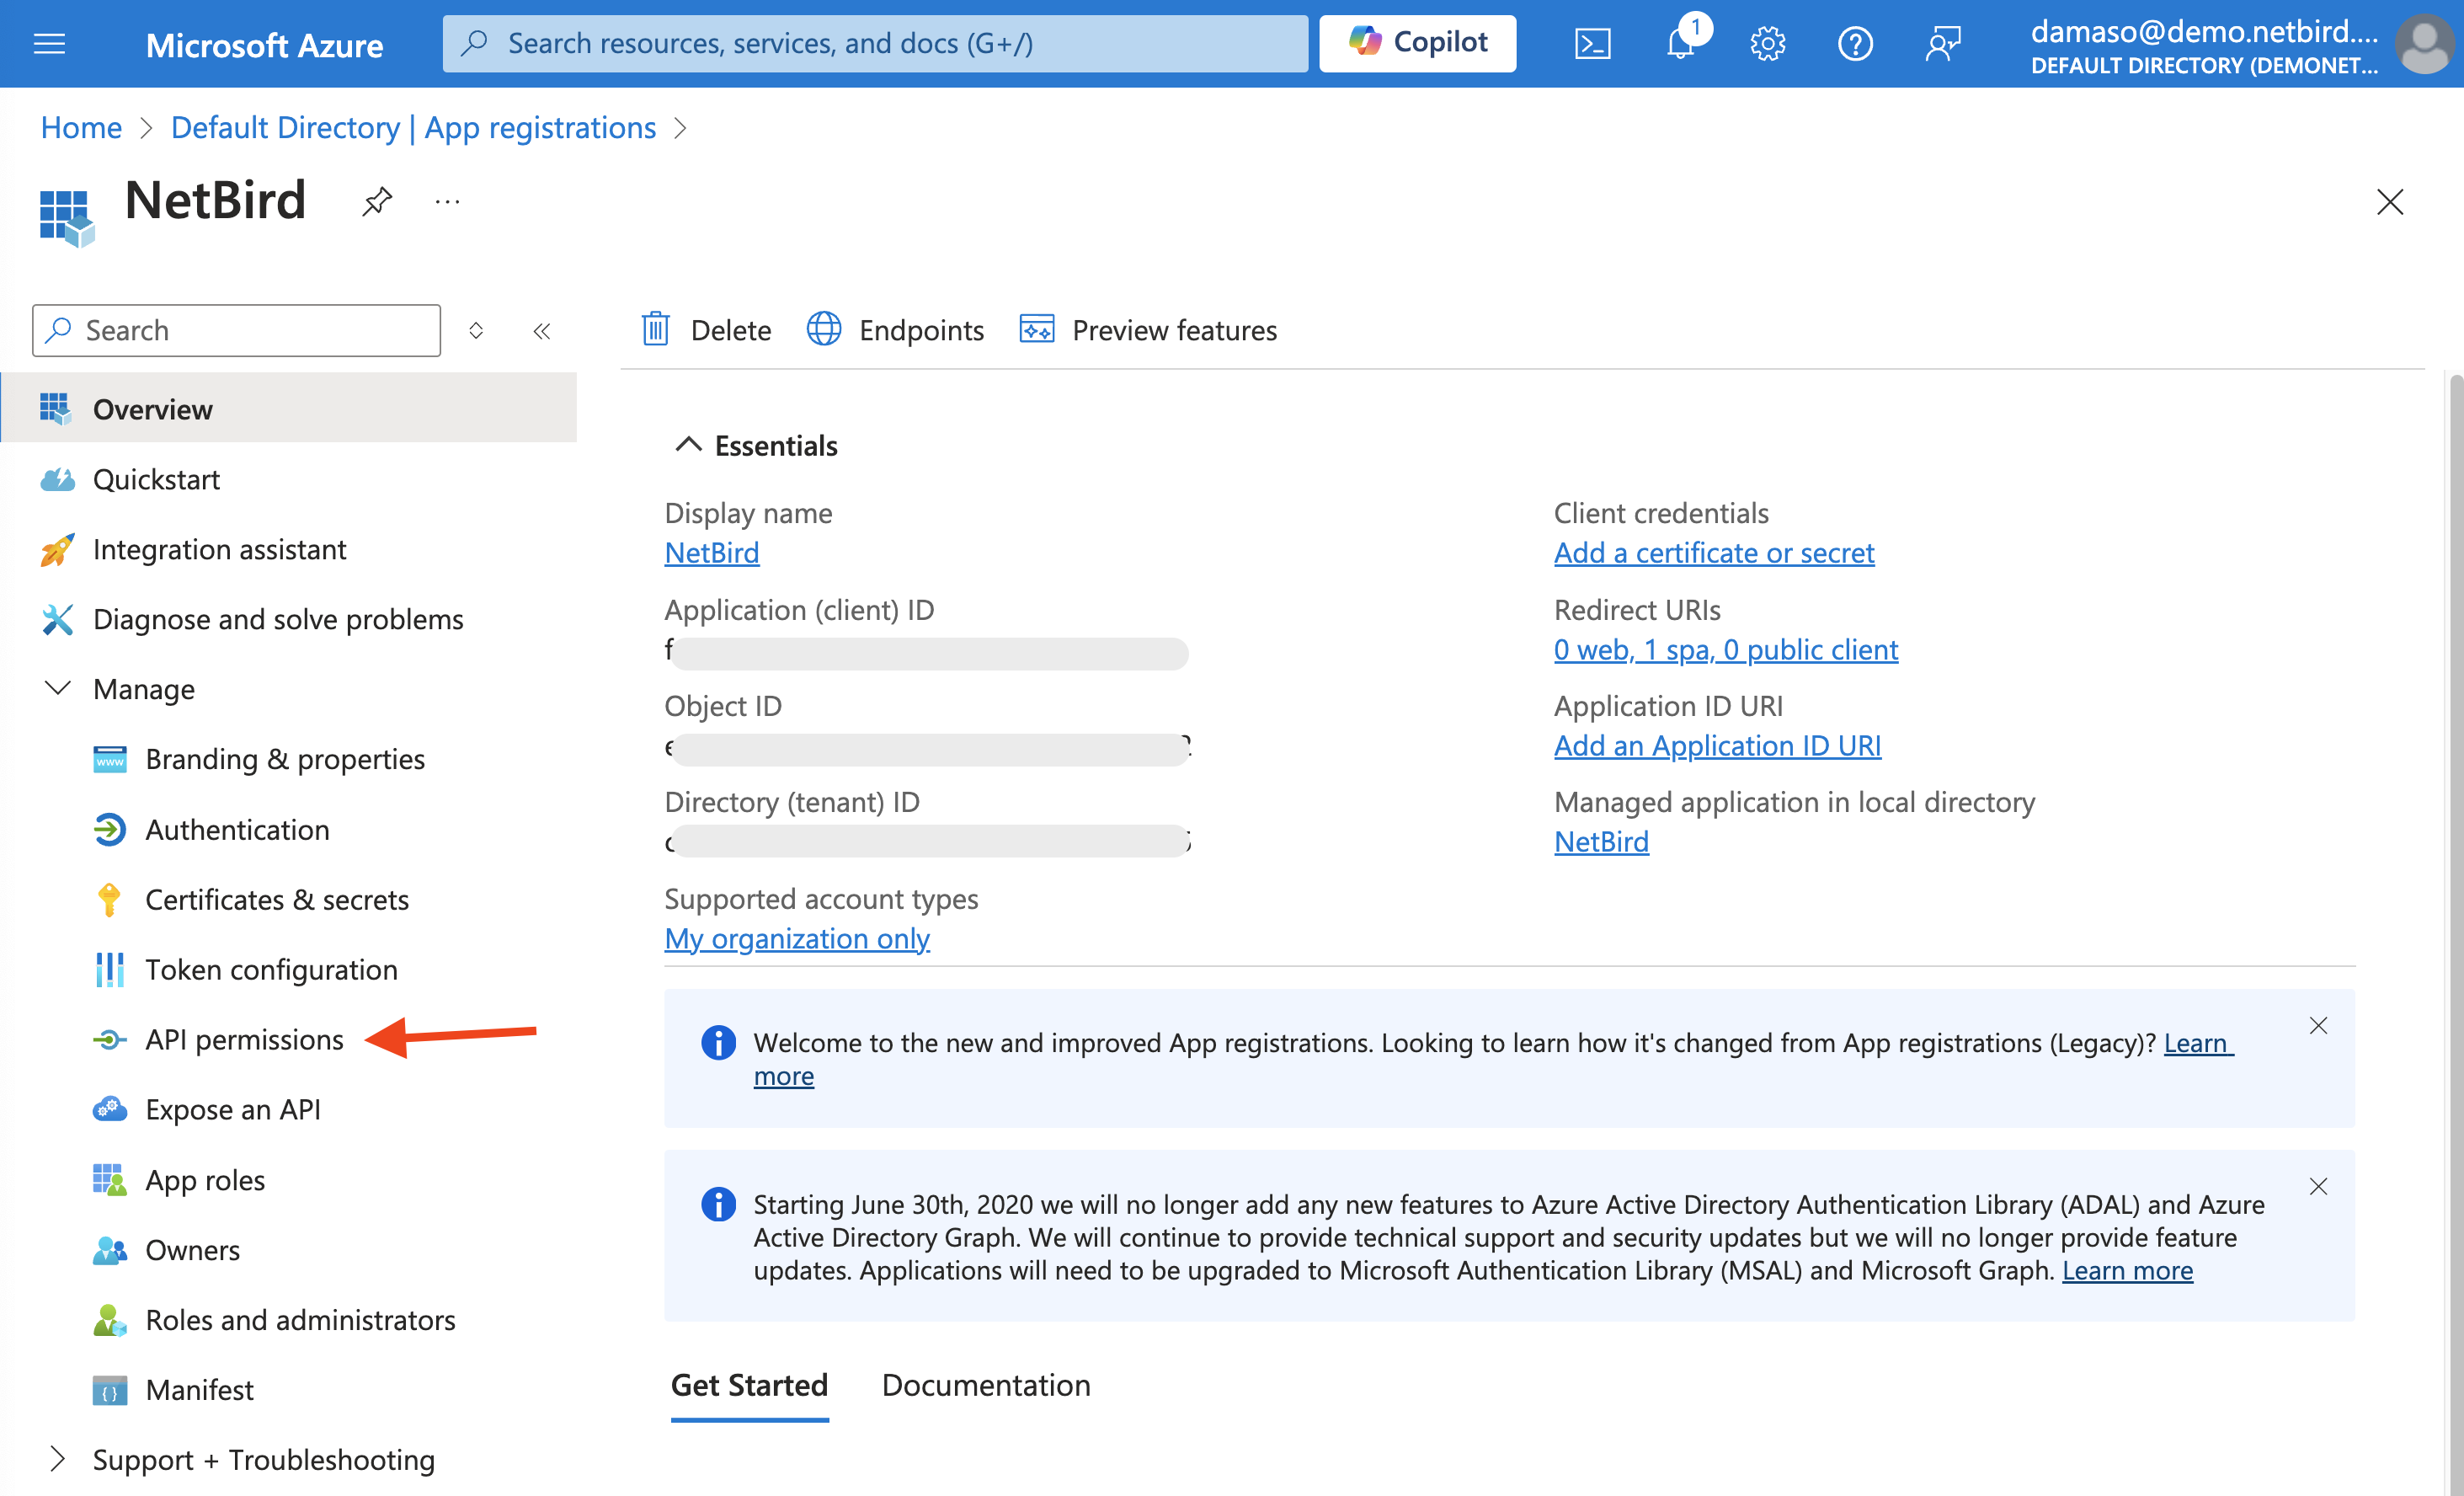
Back to Azure, in the App registrations screen, click on Manage in the left menu to expand it and then click on API permissions:
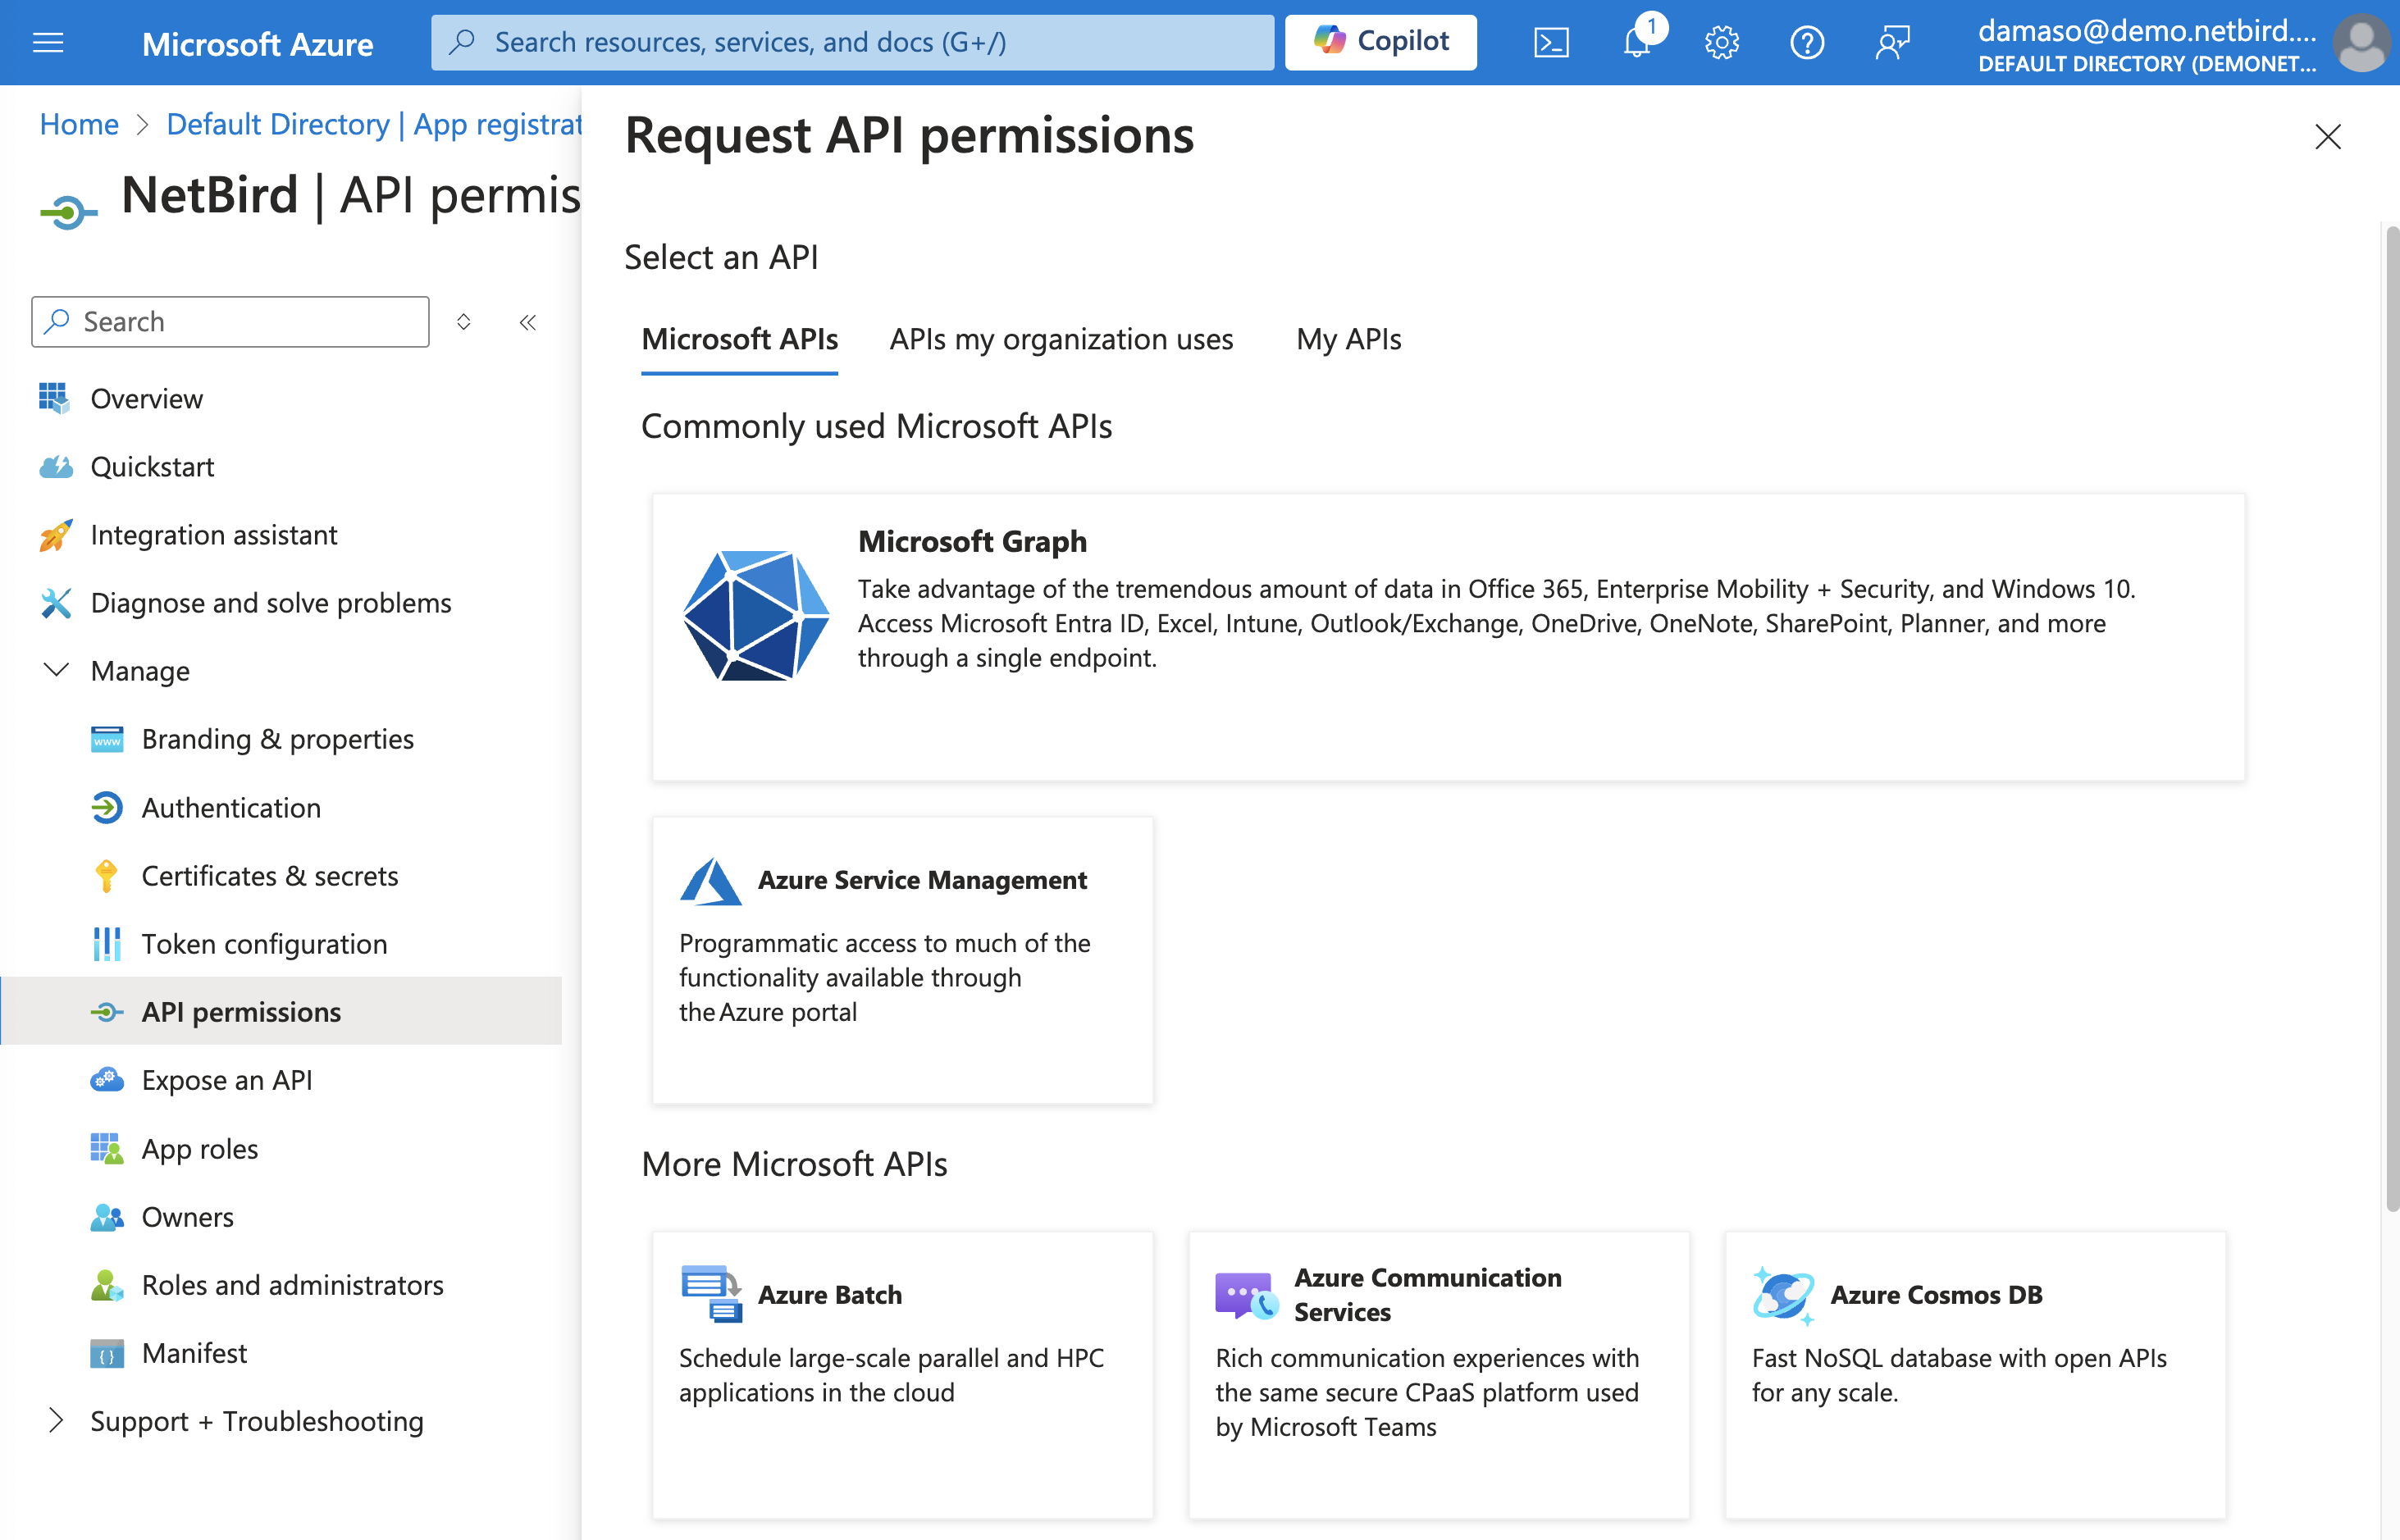
Look for the + Add a permission button, located near the top of the permissions list and click on it.
A new pop-up window will appear, asking you to select an API. Click on Microsoft Graph.
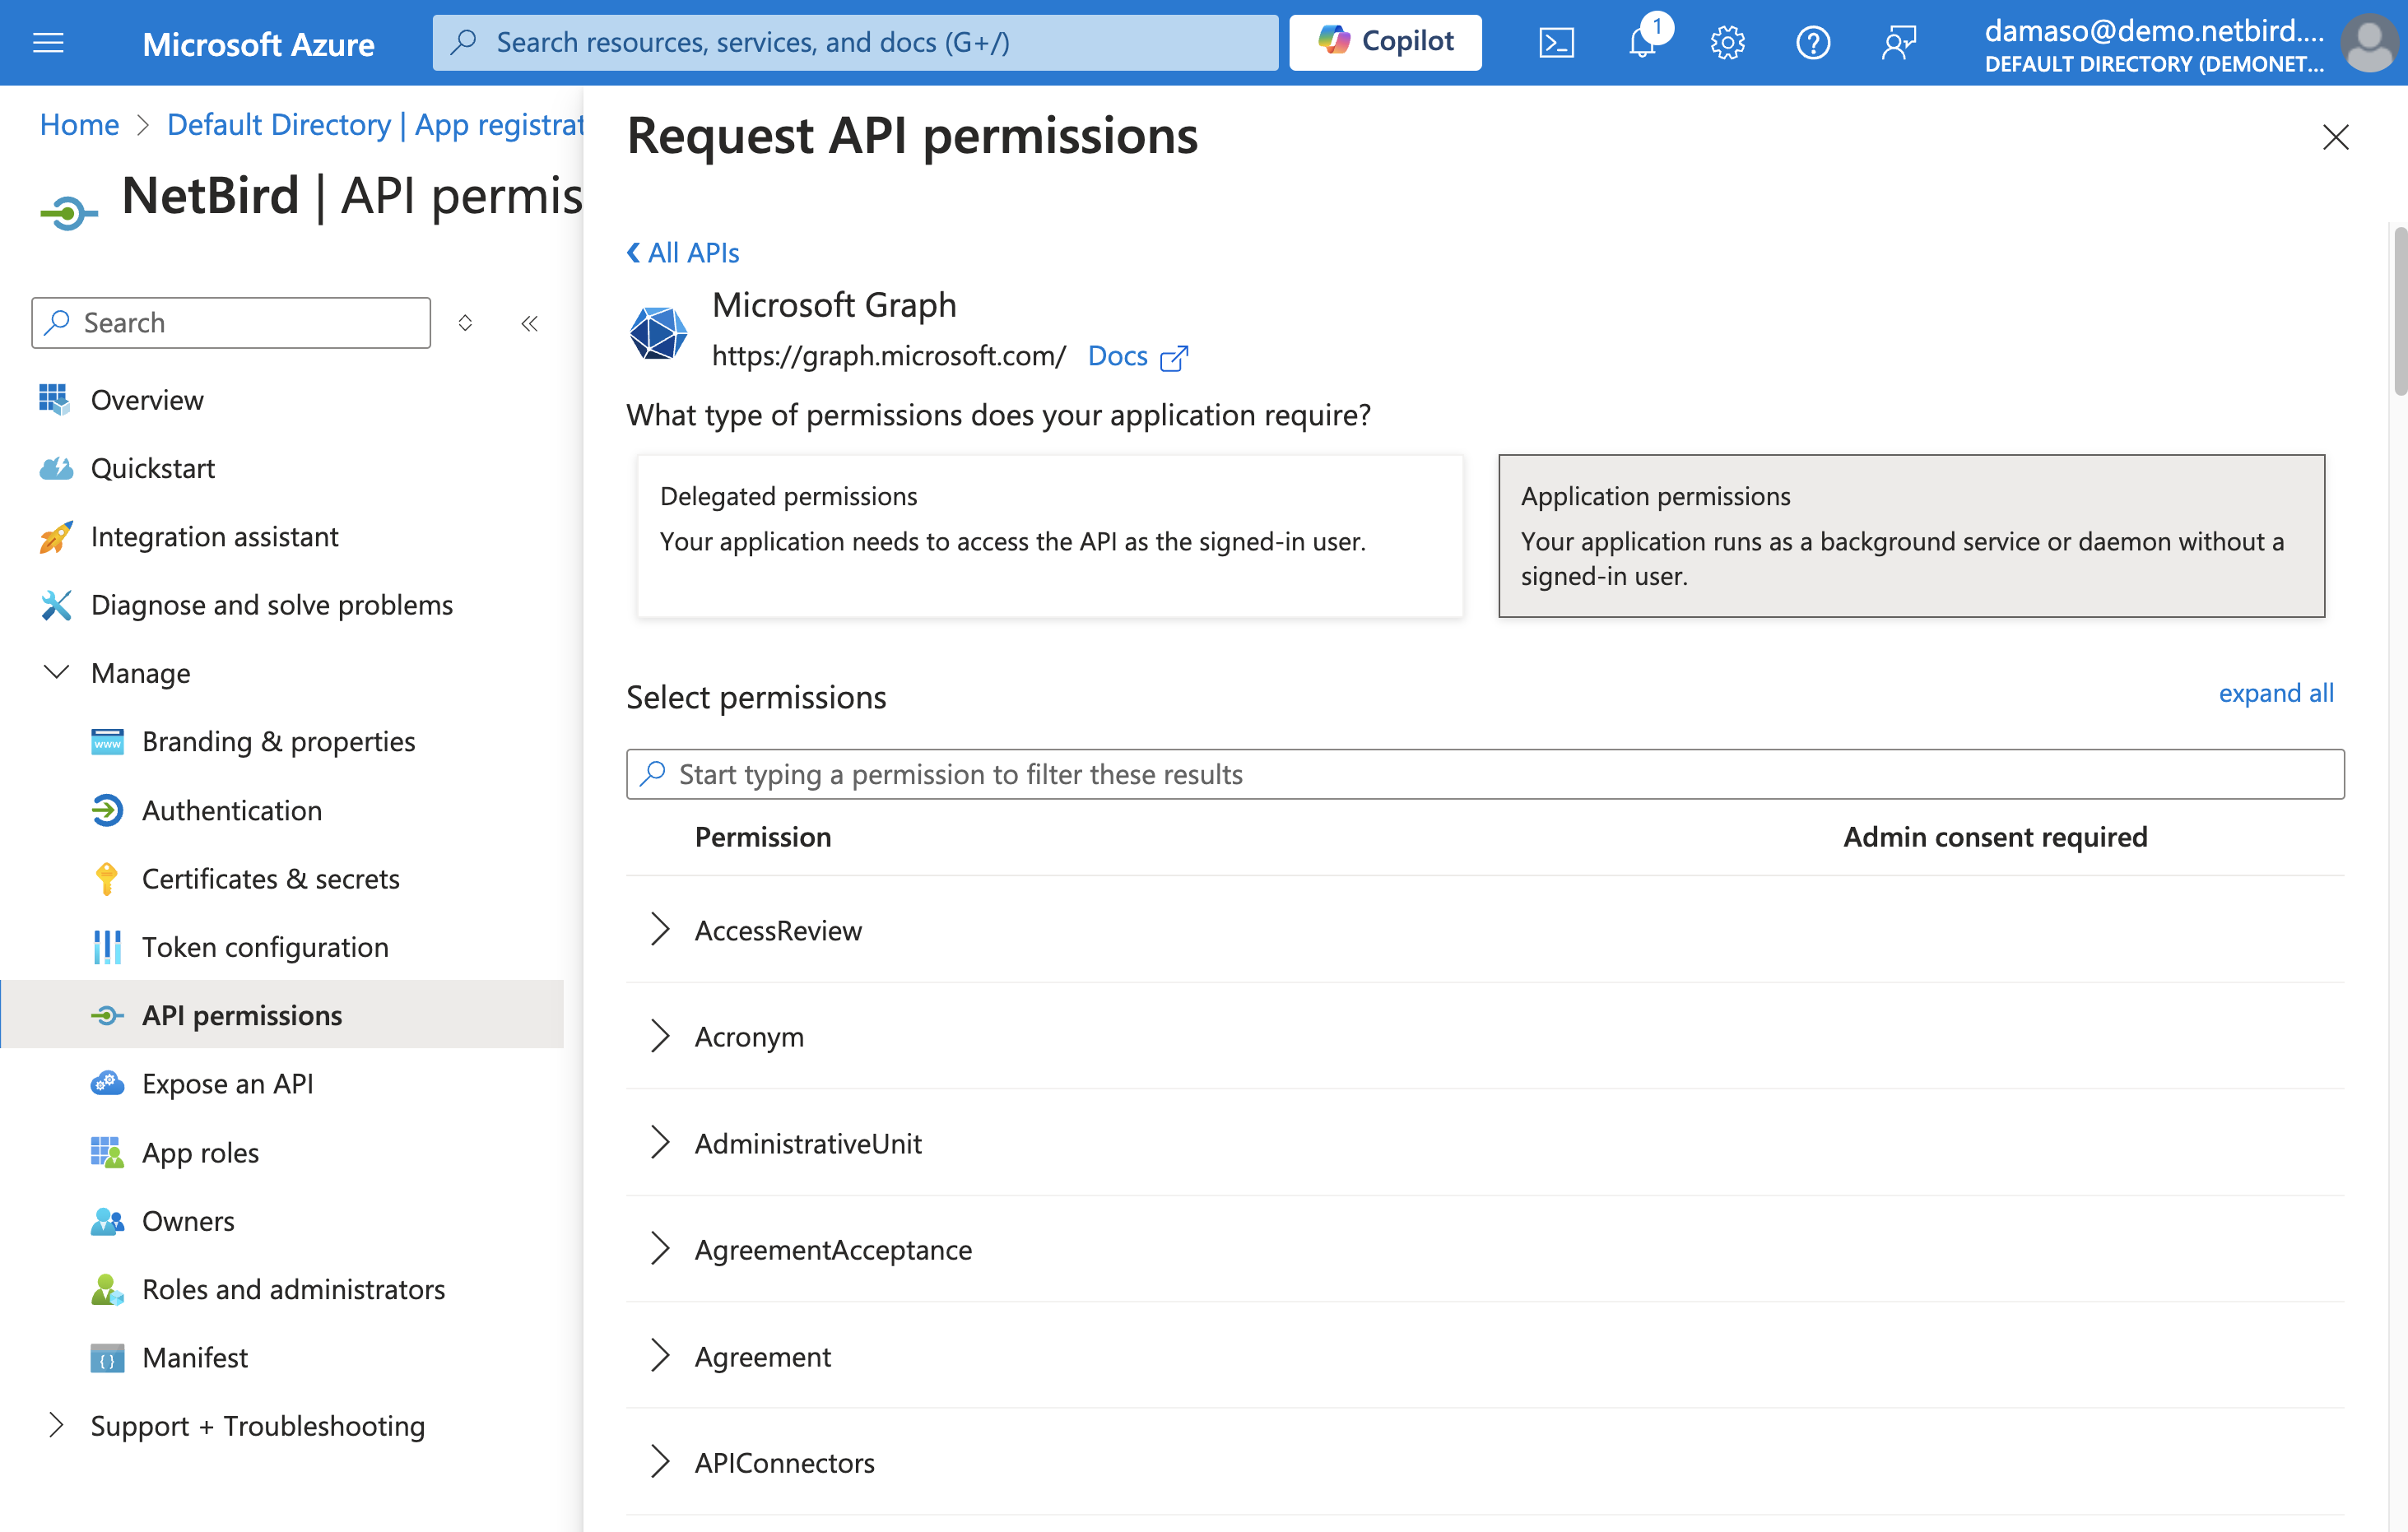
On the next screen, click on the Application permissions button, which will let you select the appropriate permissions for NetBird to function correctly with your Microsoft Entra ID environment.
To assign user permissions:
- Locate the search bar at the top. Type
User.Read.Allinto the search bar and pressEnter. - In the search results, click on the
Usertab to expand it and view the available permissions. - Click on the checkbox to select and enable the
User.Read.Allpermission.
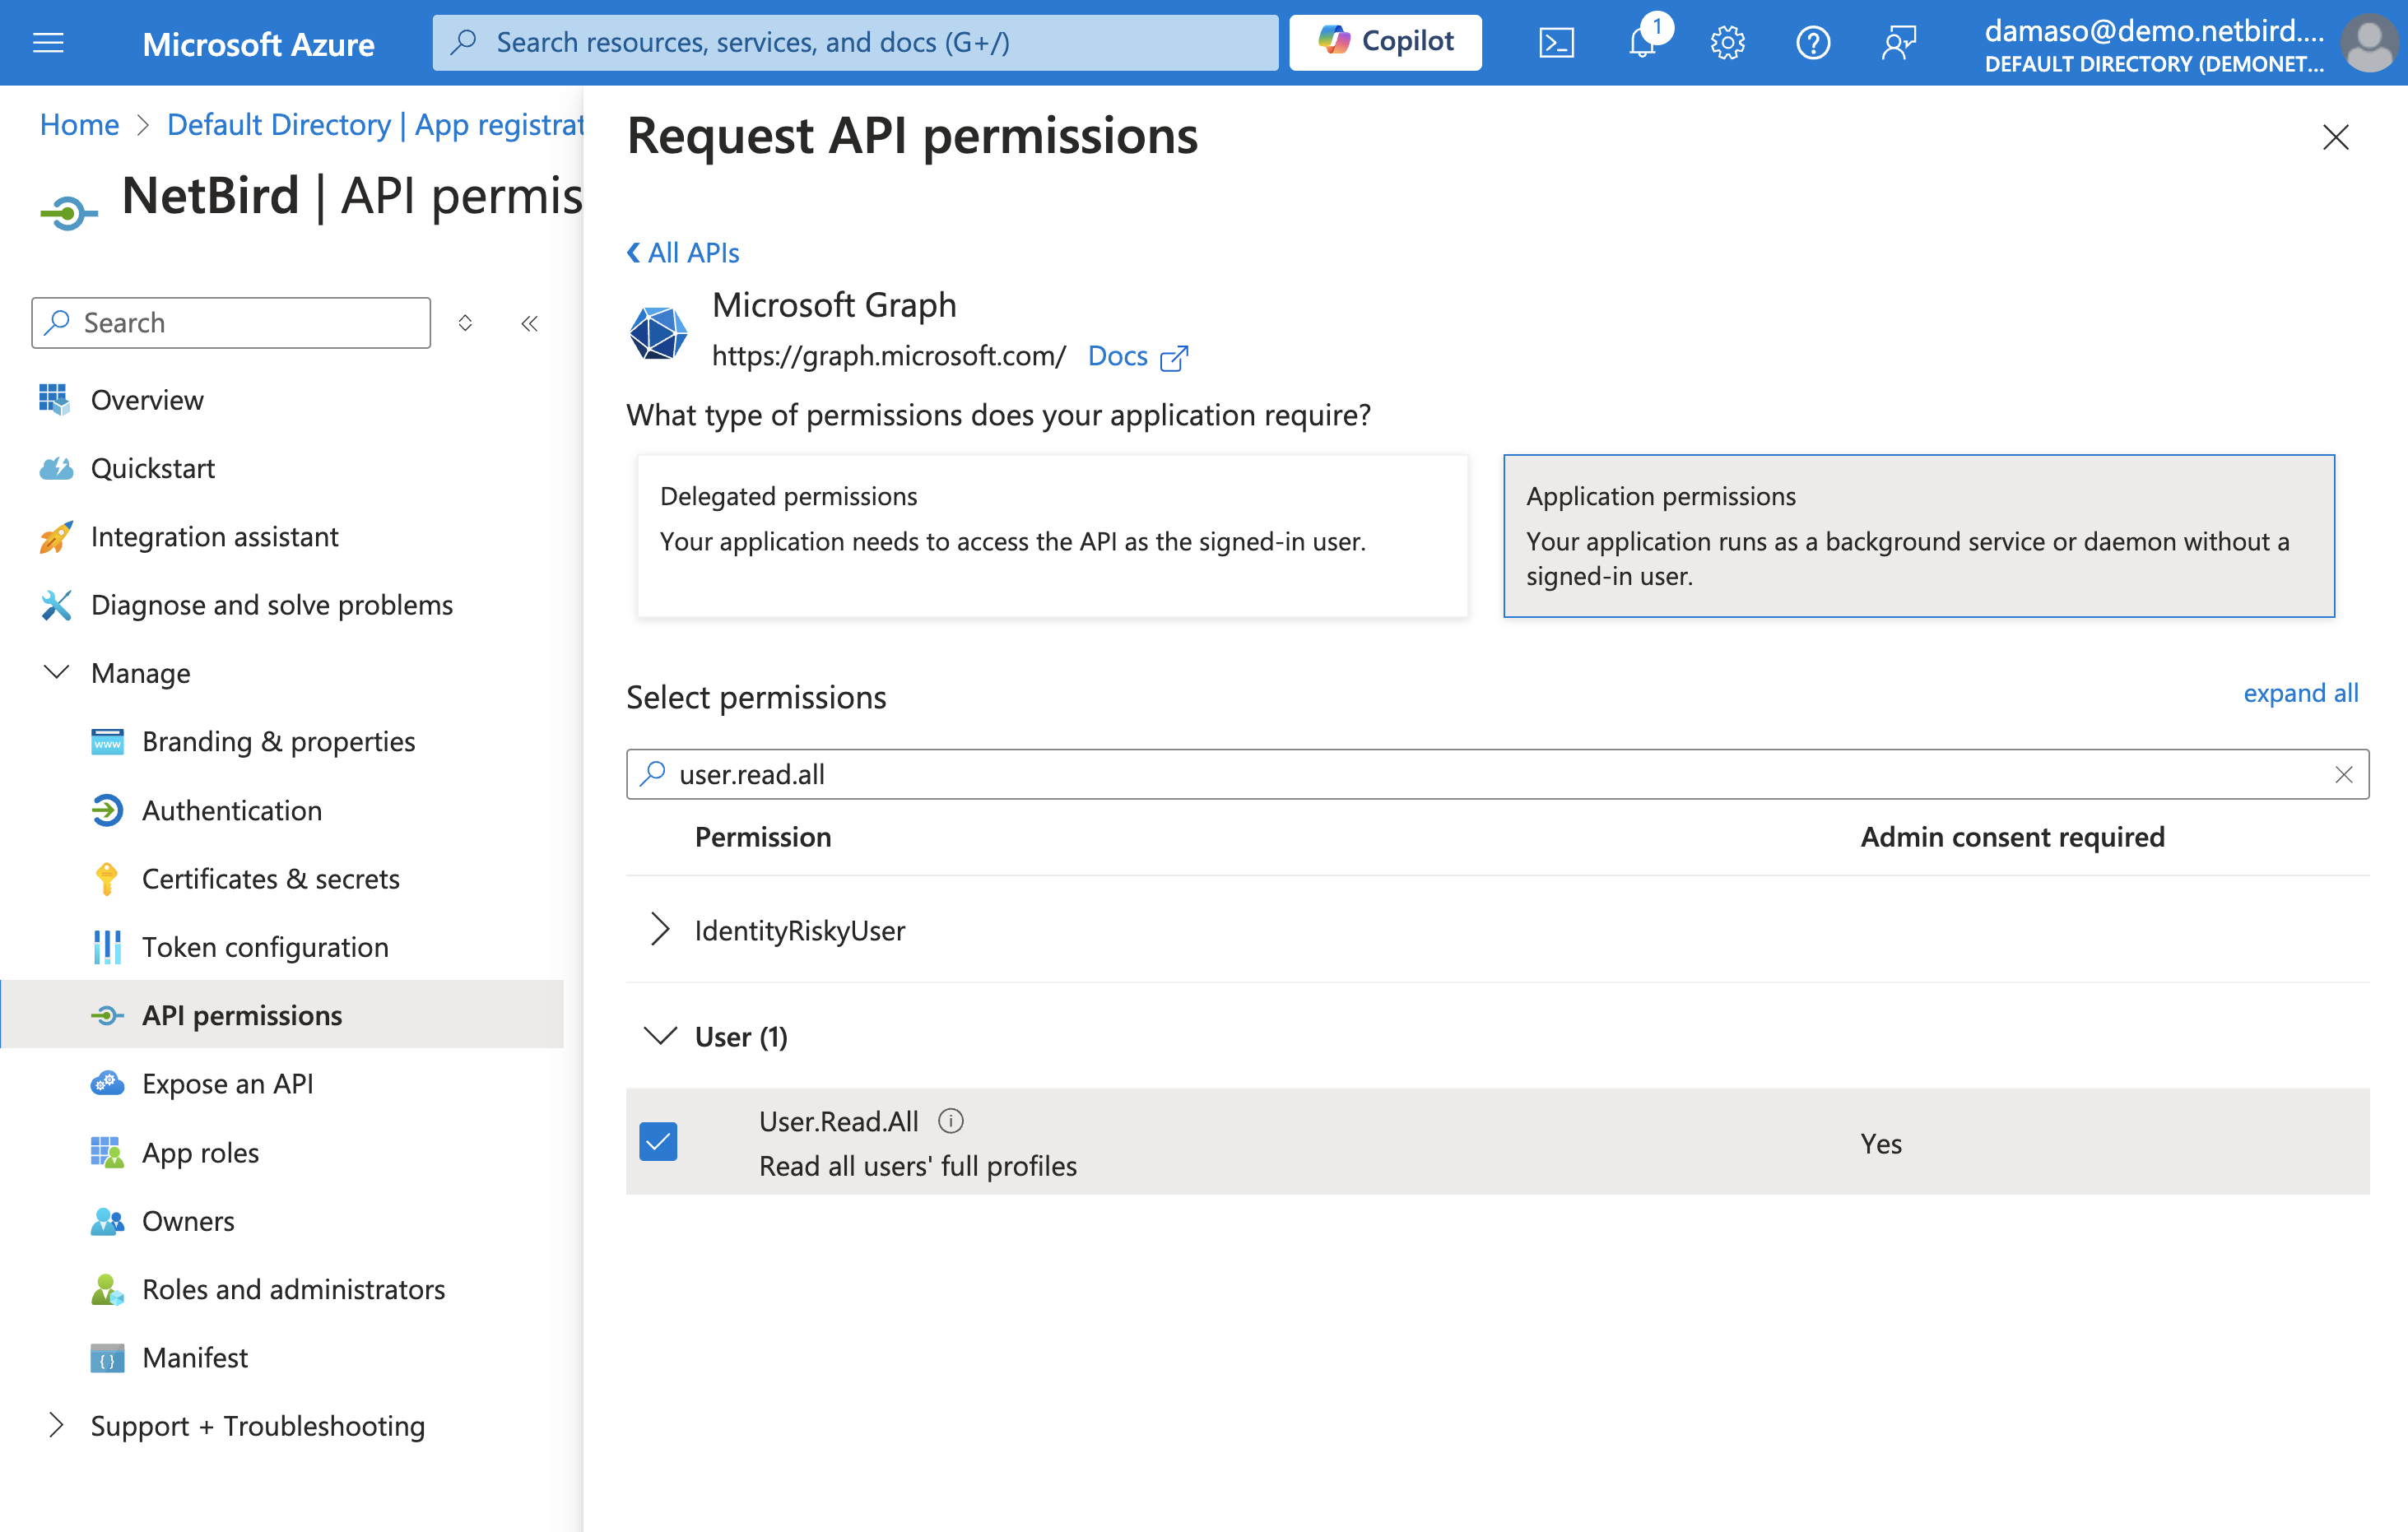
The User.Read.All permission allows NetBird to read the full set of profile properties, group memberships, and reports of the signed-in user and other users in your organization.
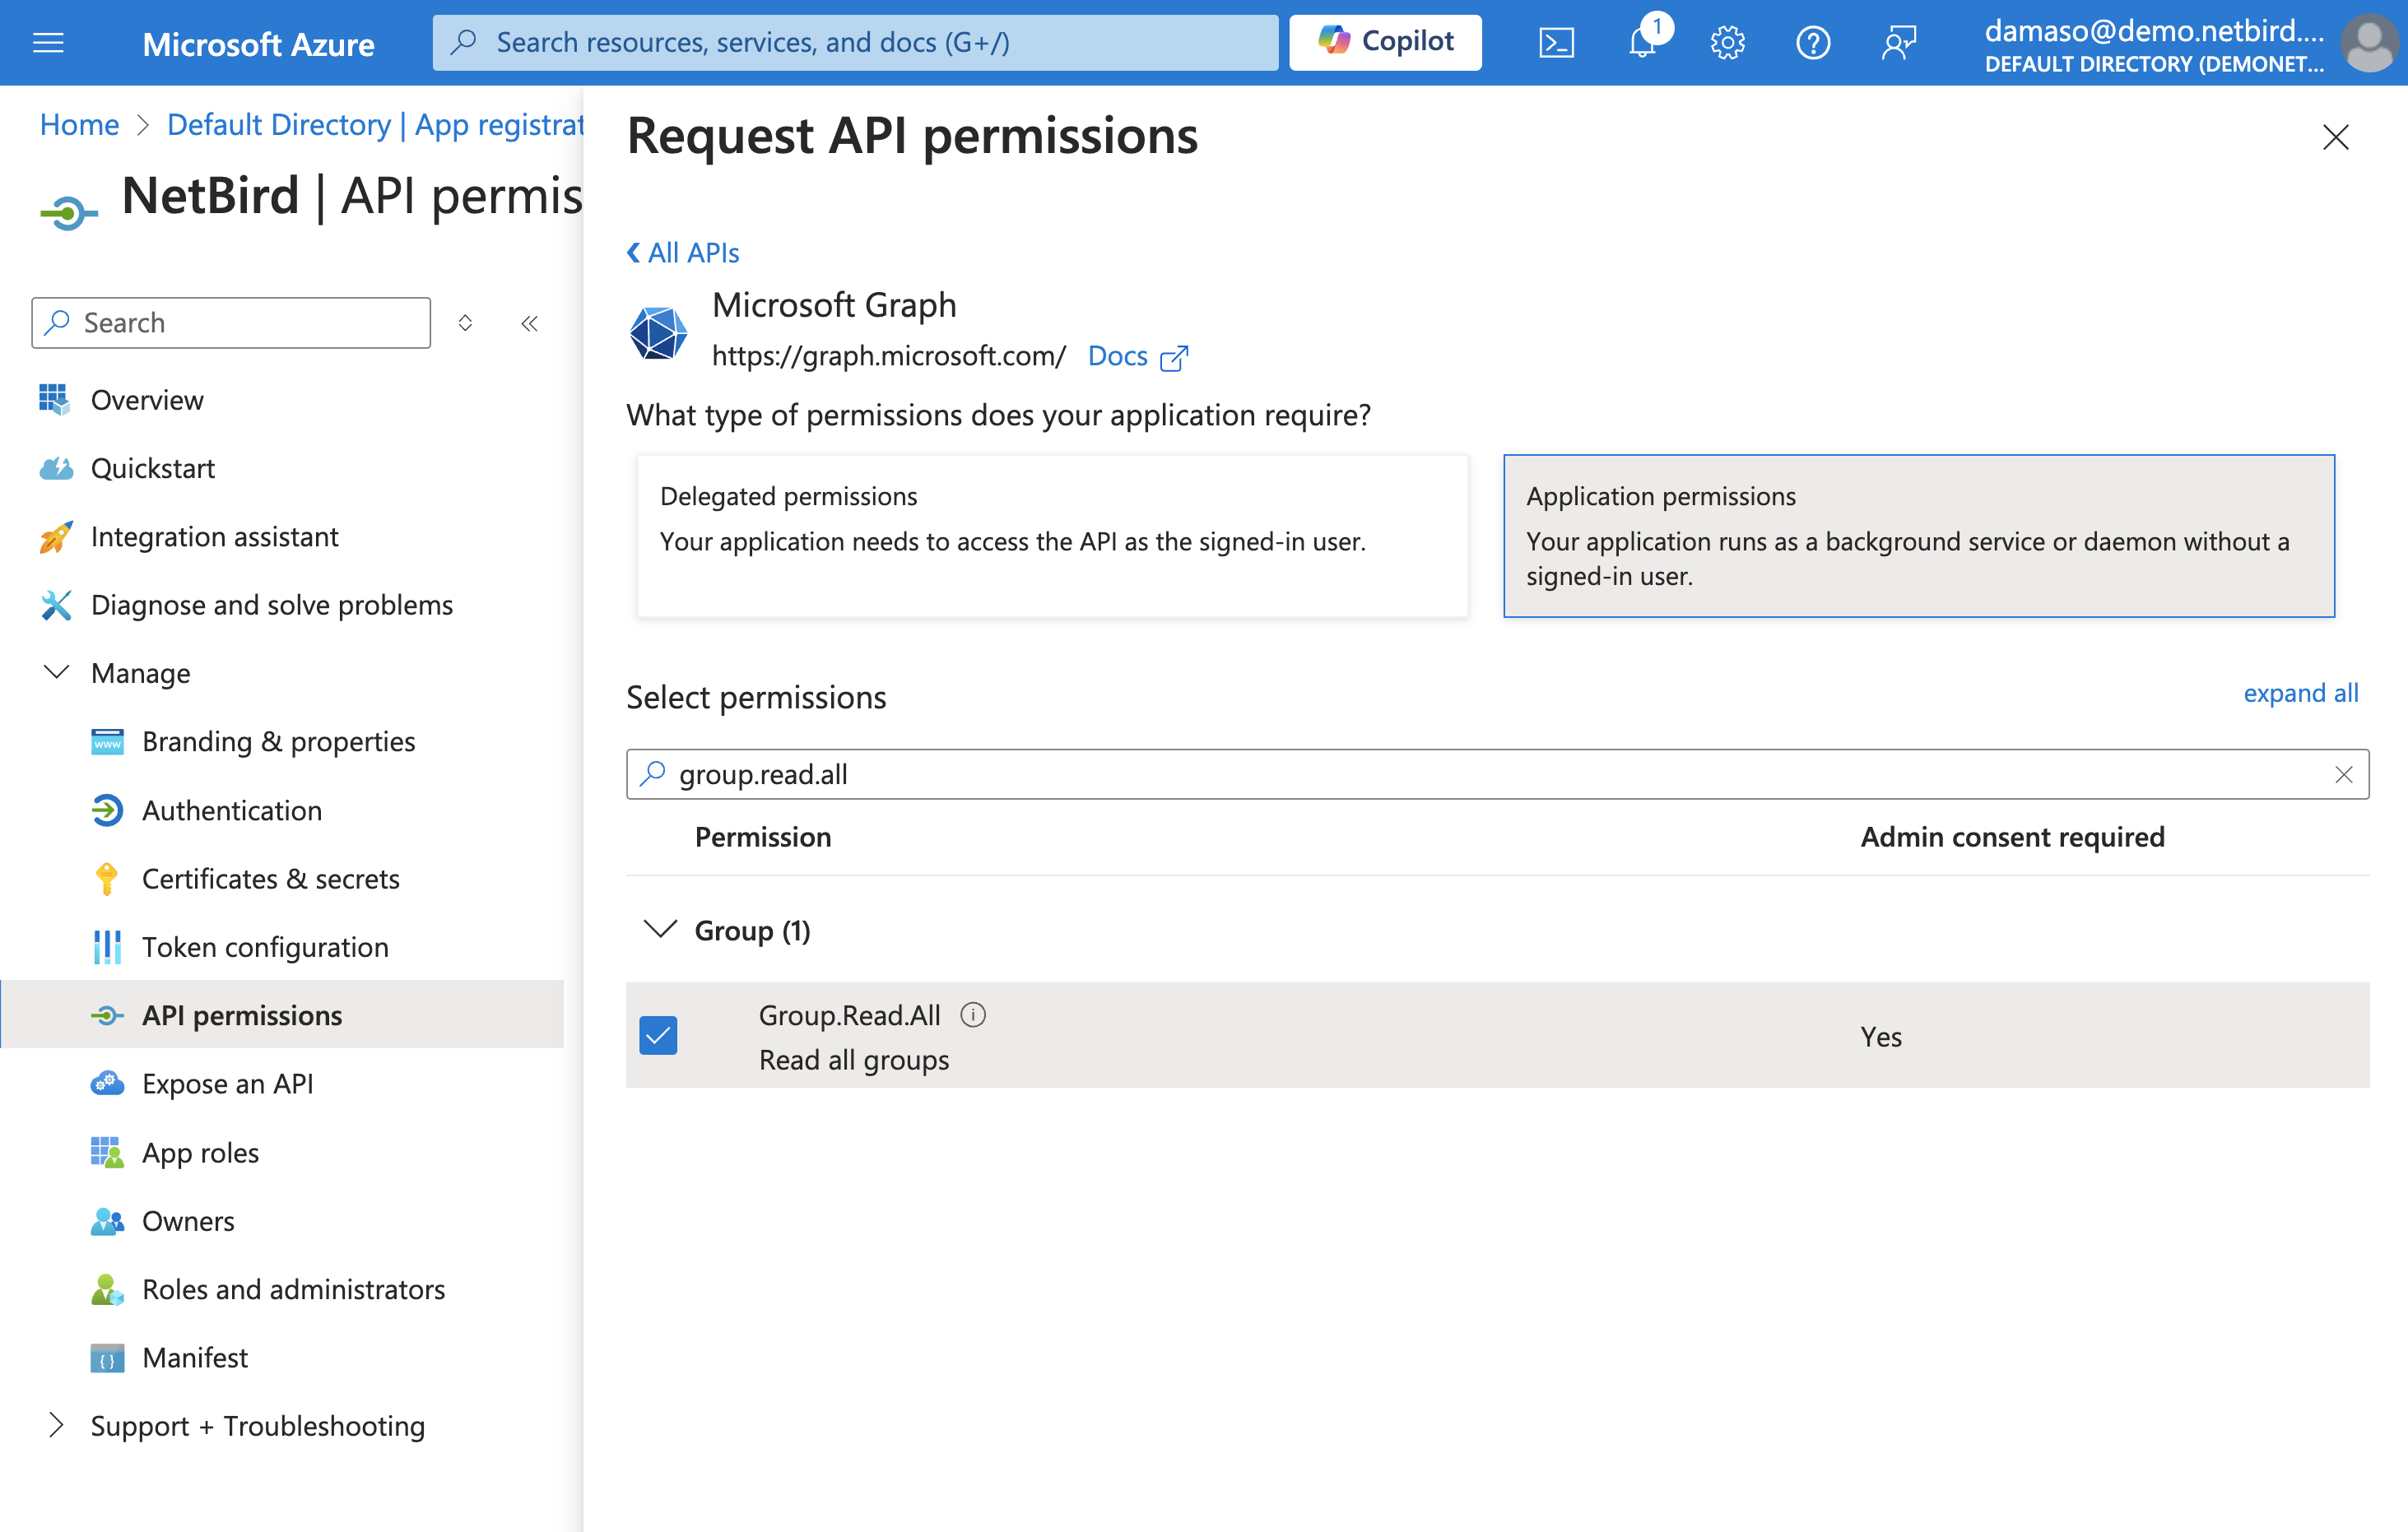
Next, repeat the procedure. This time, search for Group.Read.All and click on the checkbox to enable it as shown below:
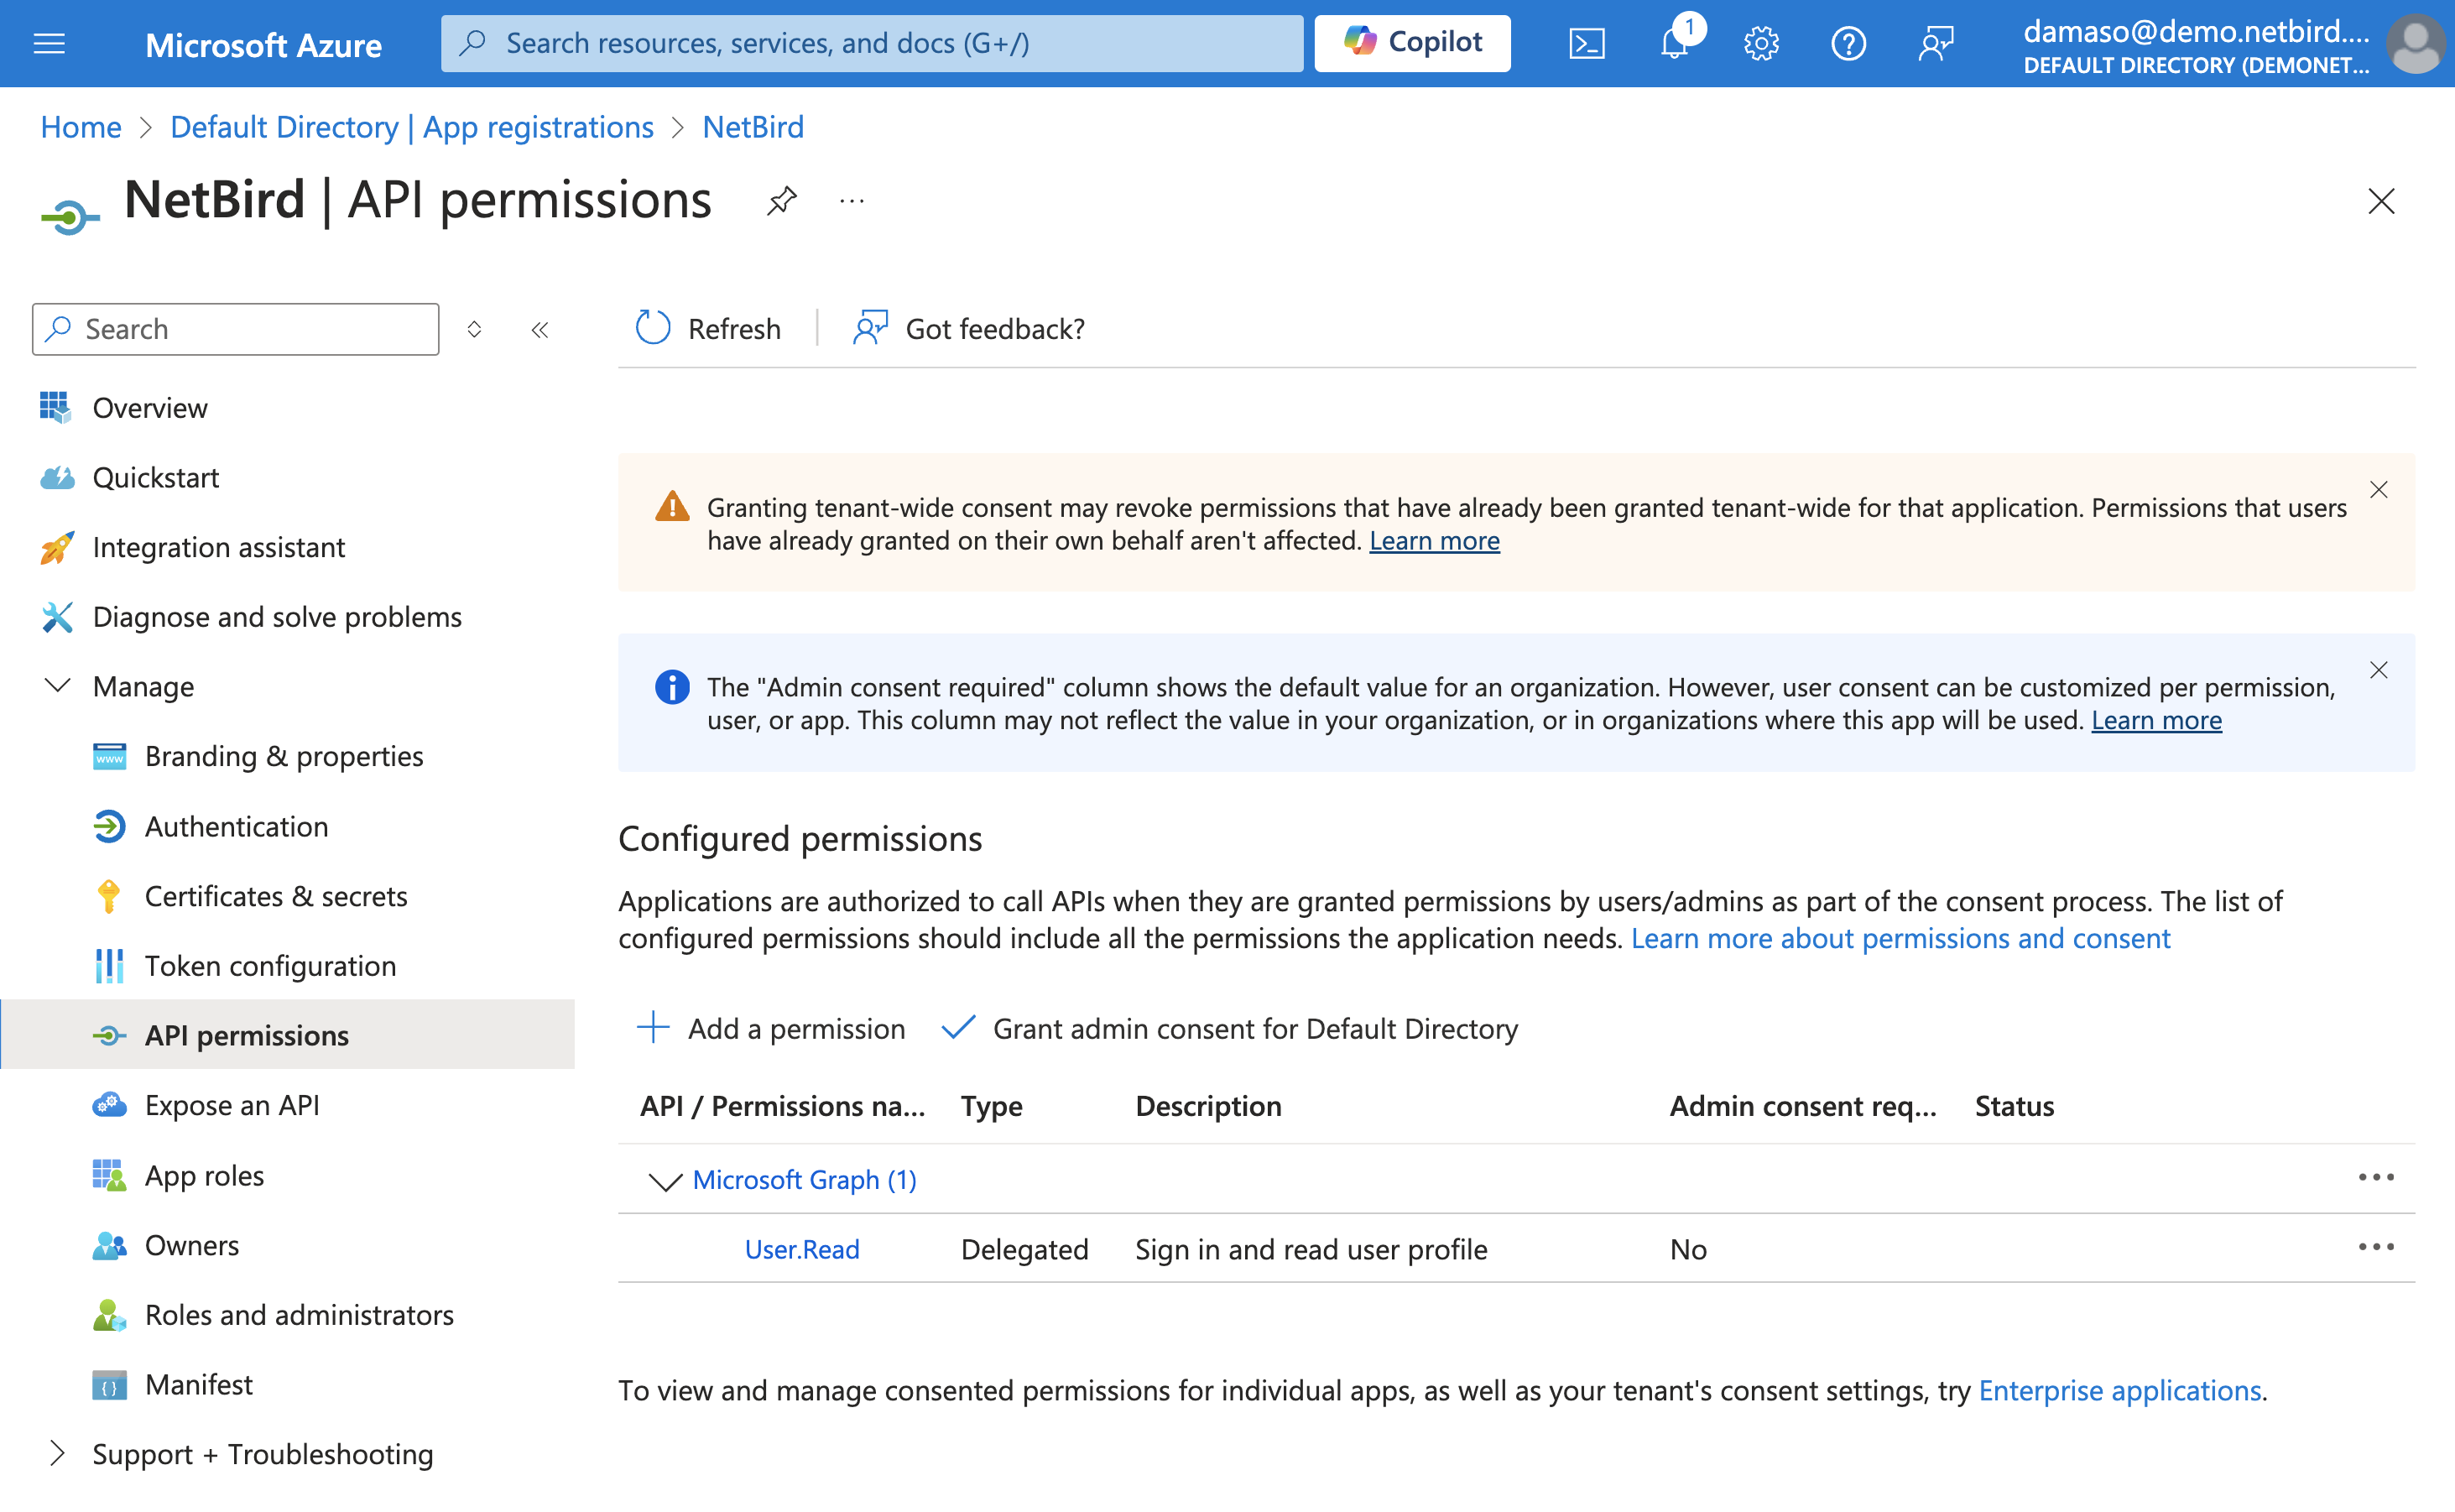
Once done, click the Add permissions button. You will see a few warnings:
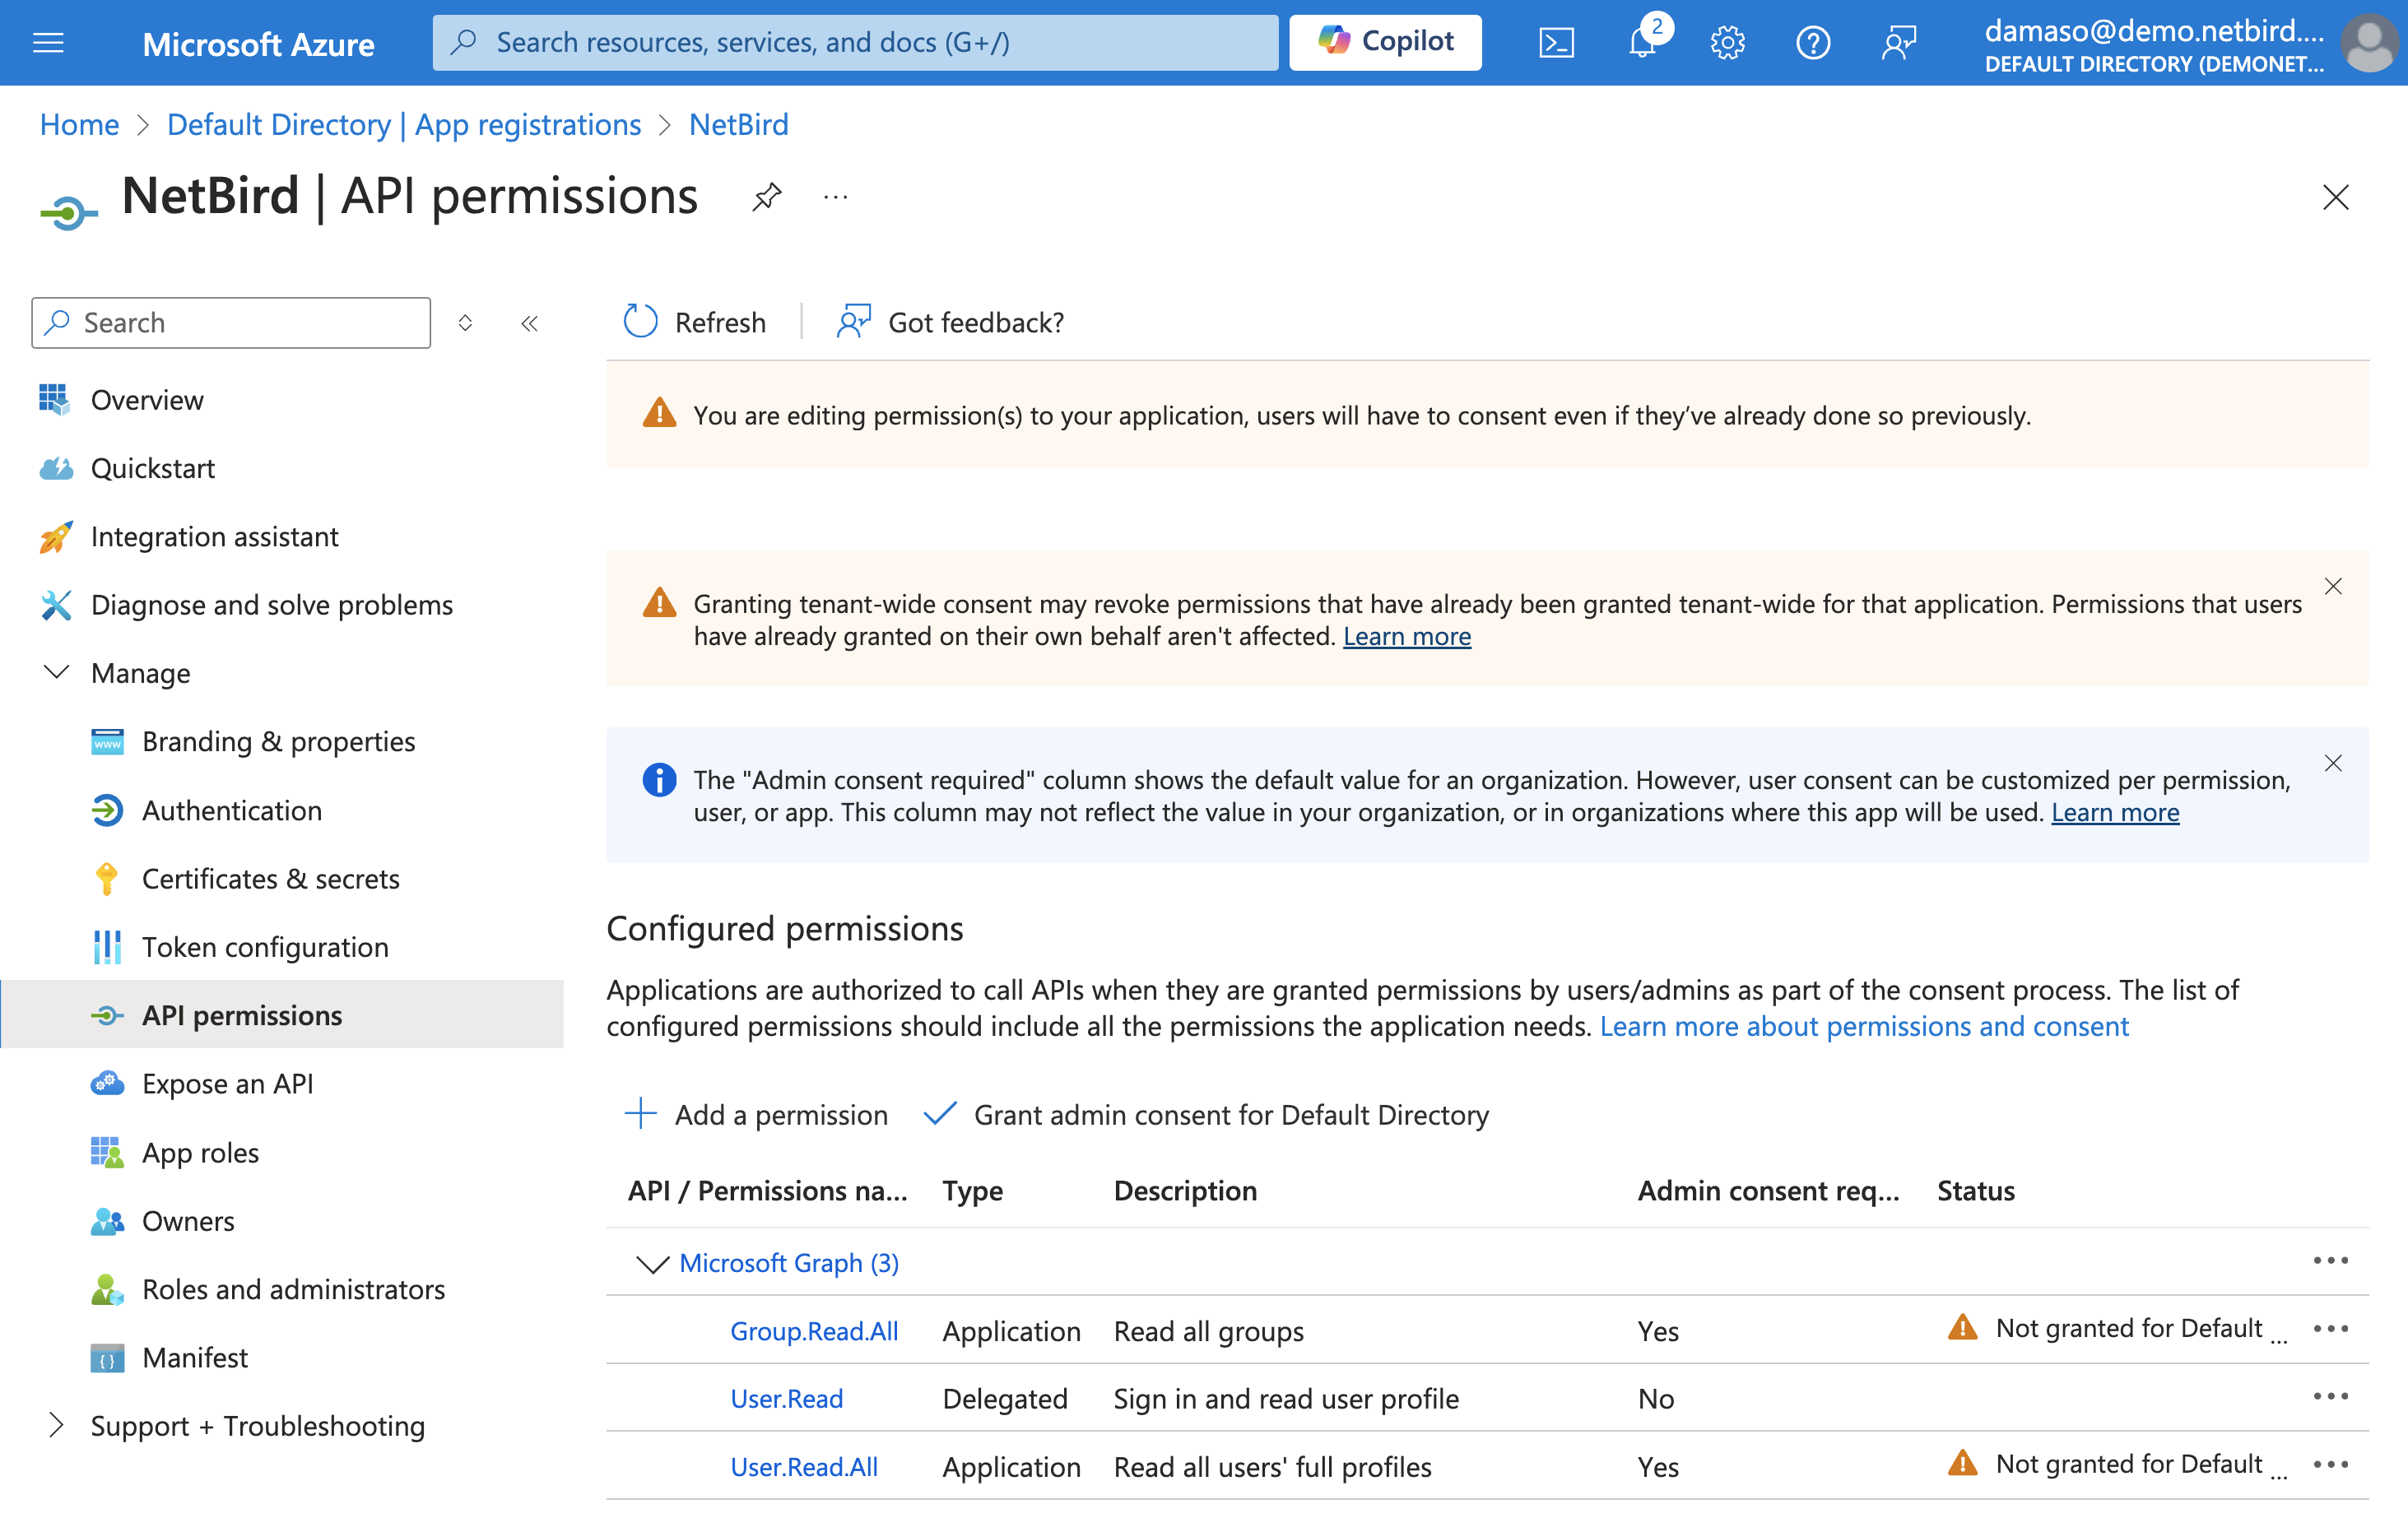
Locate the Grant admin consent for [Your Organization Name] button (you’ll find it next to +Add a permission button). Click on it to grant the required permissions.
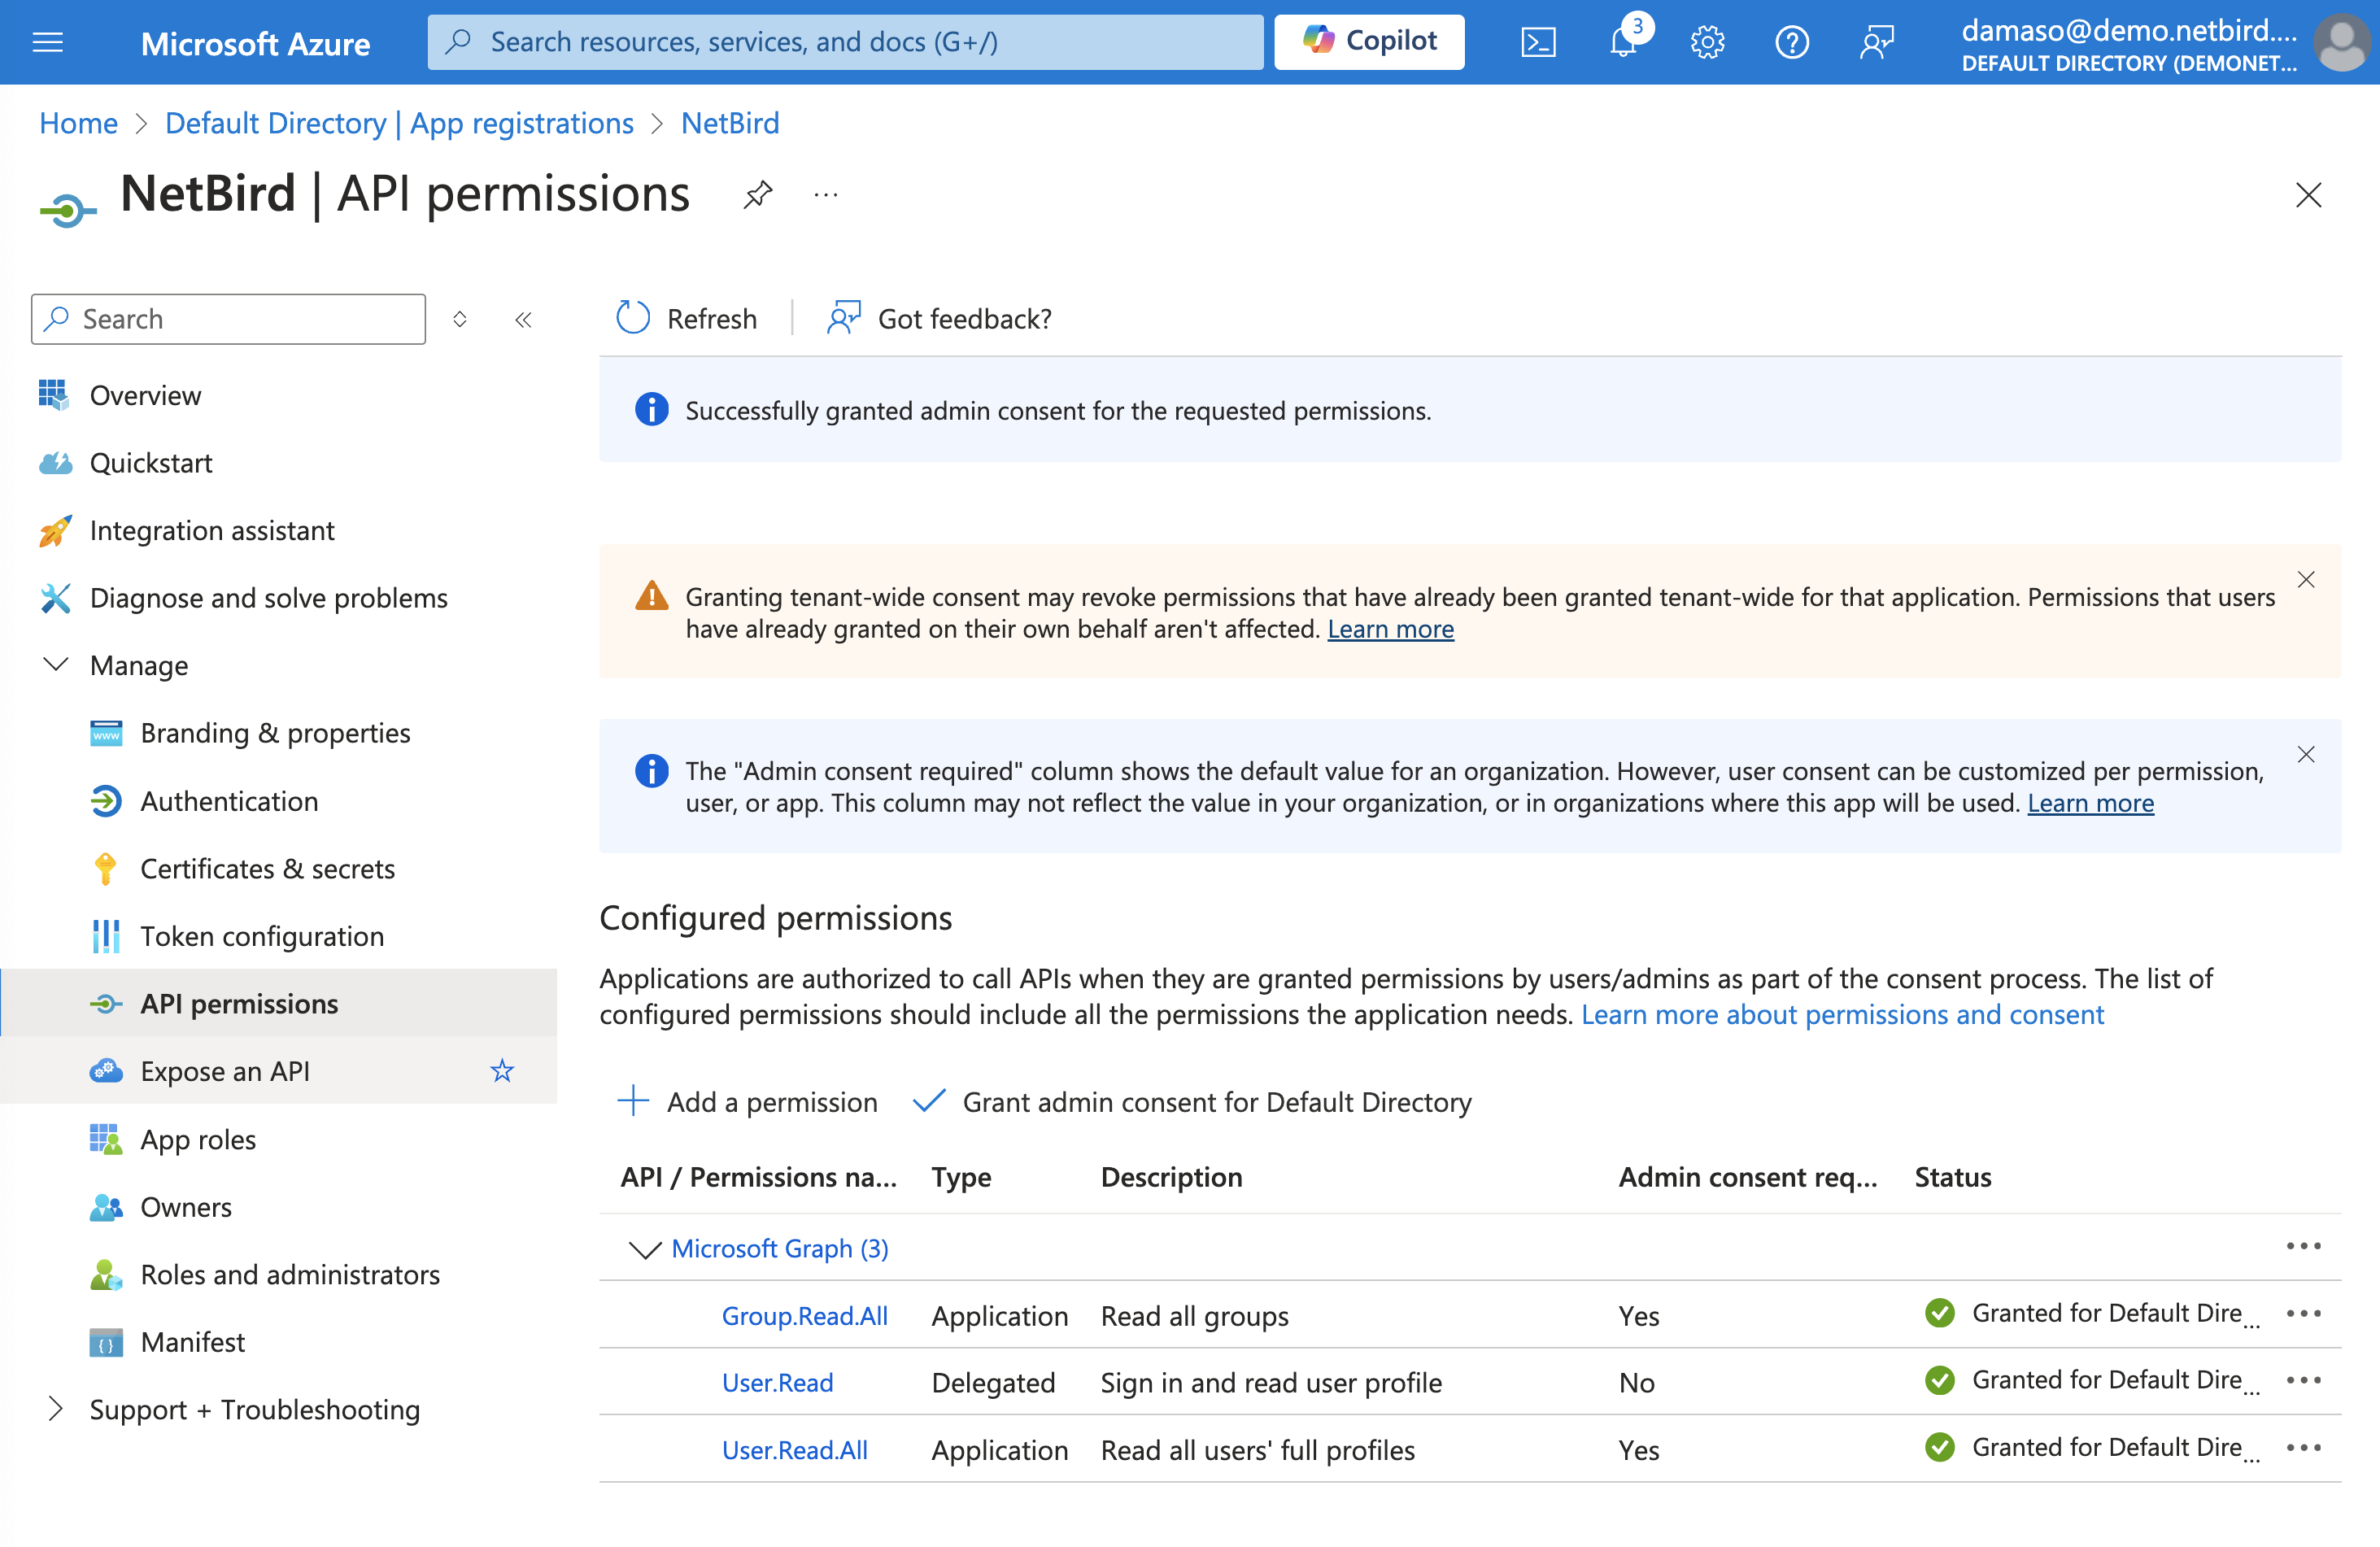
A confirmation dialog will appear, asking you to verify this action. Review the permissions listed in the dialog and click Yes to confirm. Wait for the process to complete, this may take a few seconds.
Once finished, the status of the permissions should change to Granted for [Your Organization Name]. Verify that all selected permissions now show a green checkmark, indicating they've been successfully granted:
Create a Client Secret for Secure NetBird-Entra ID Authentication
Back to the NetBird dashboard, click the Continue → button. A new wizard screen will appear, showing instructions for generating a client secret in Entra ID.
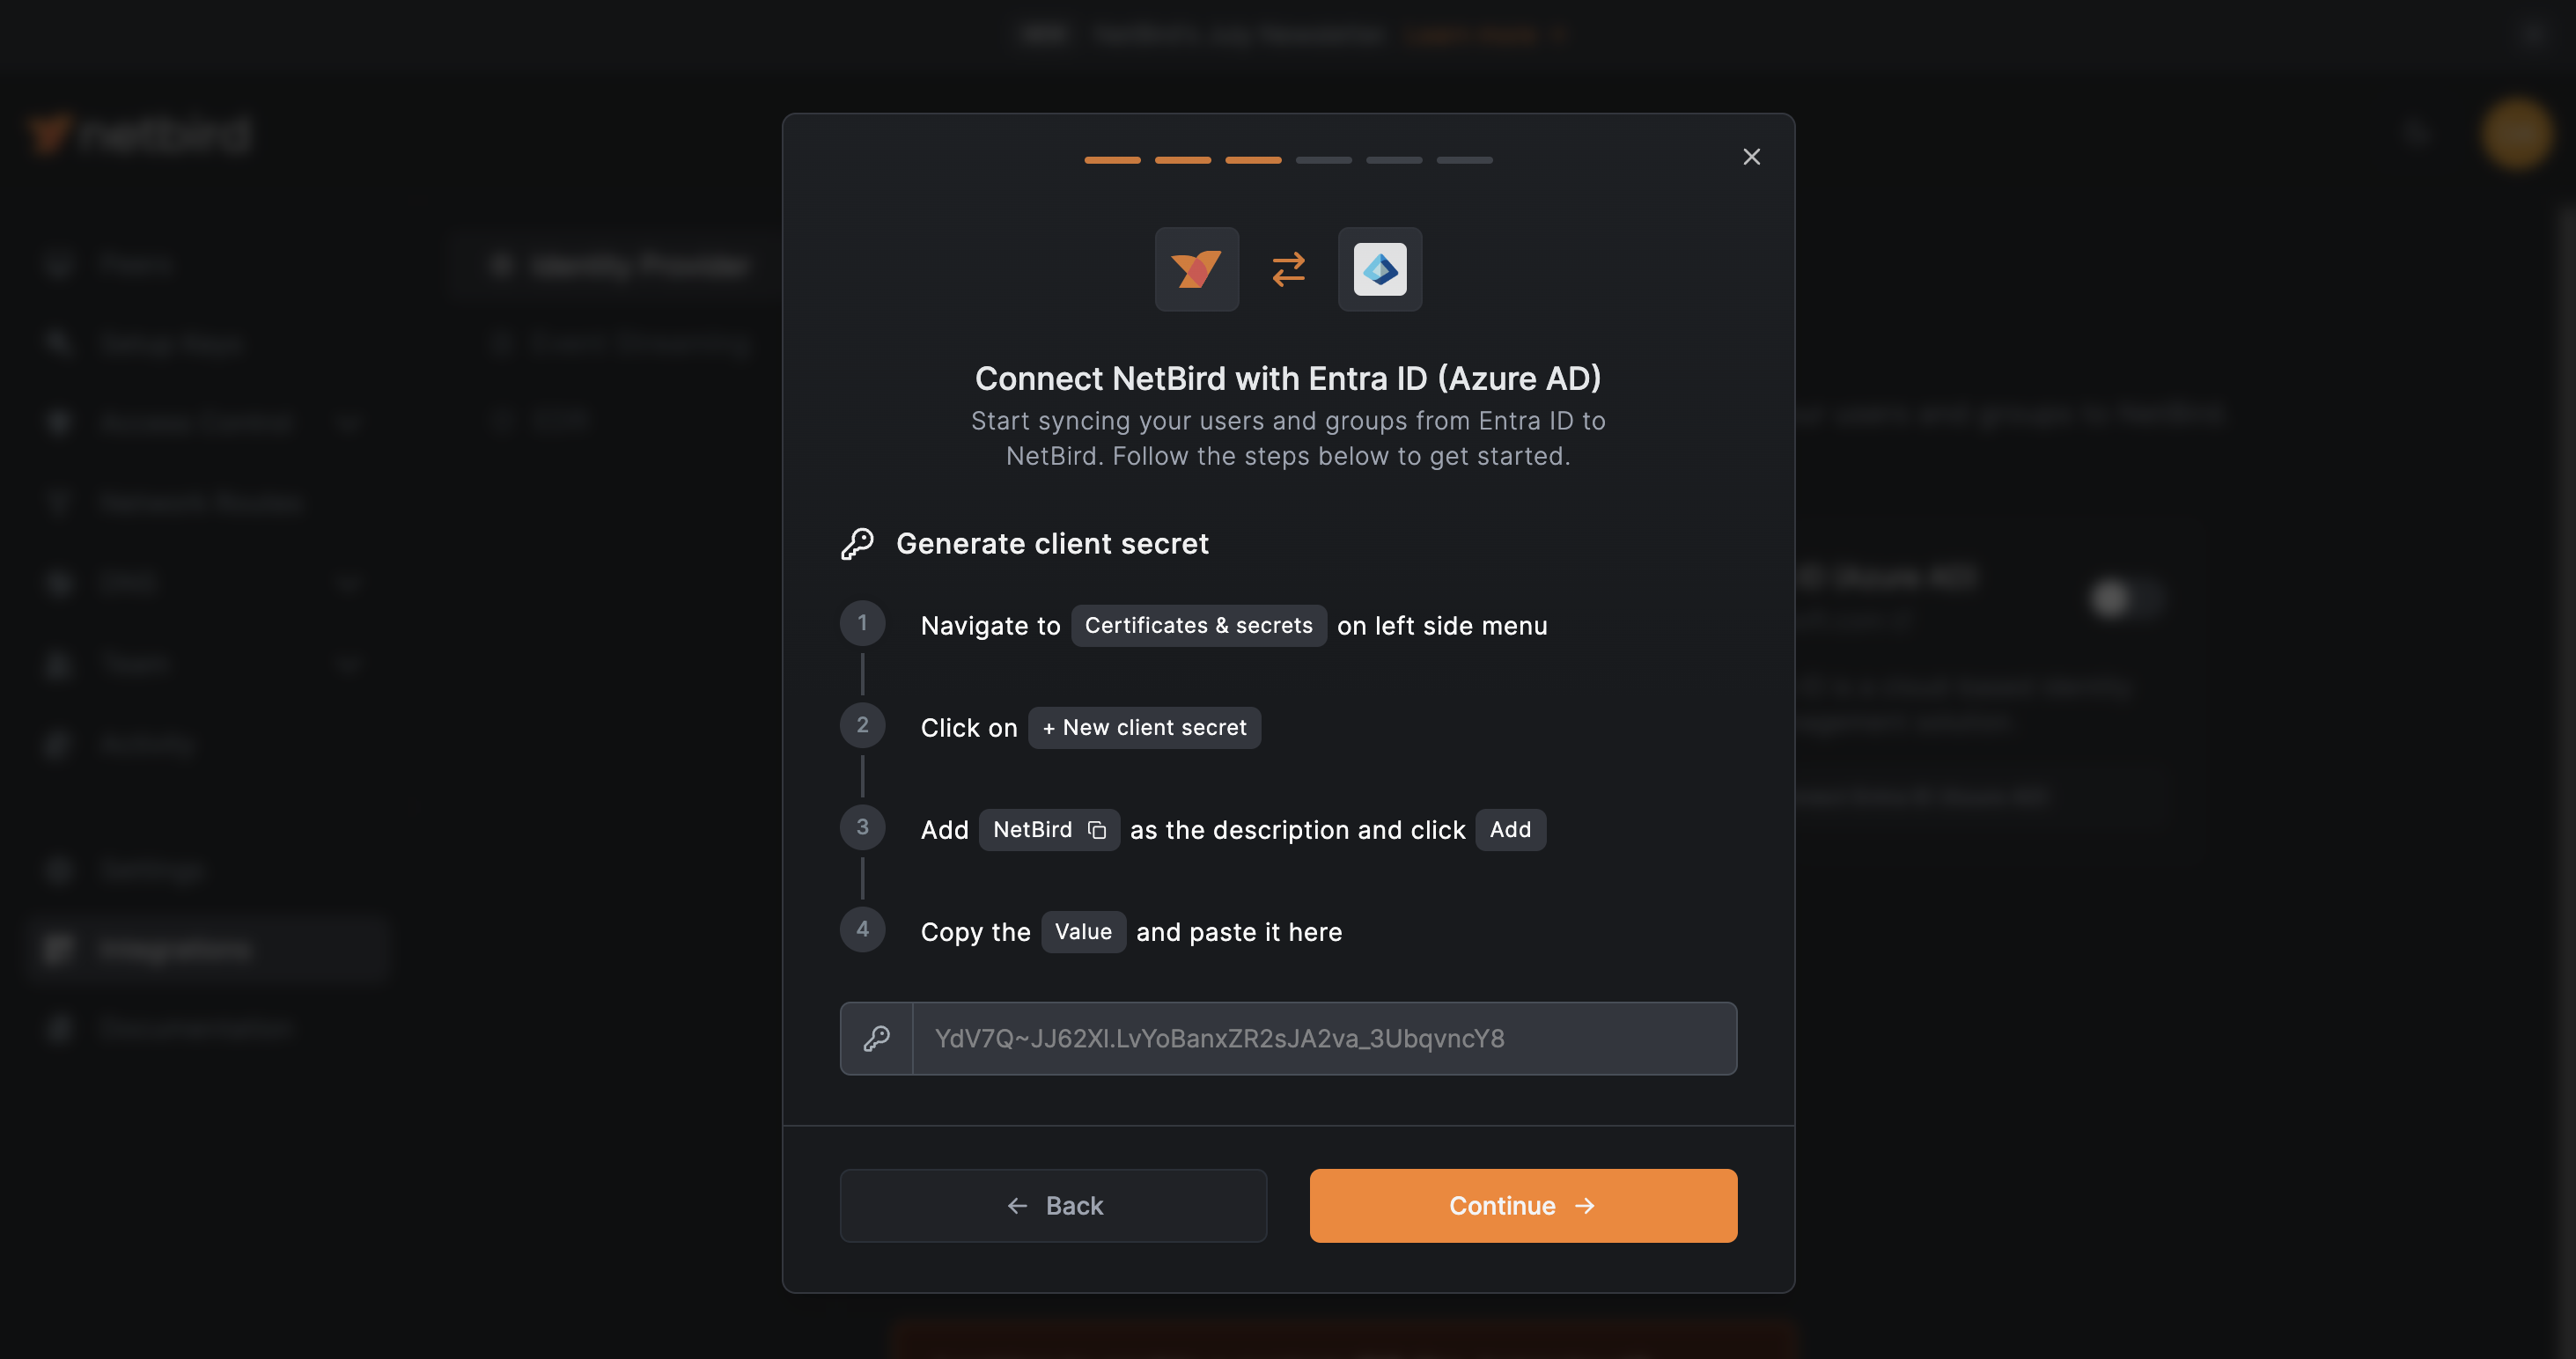
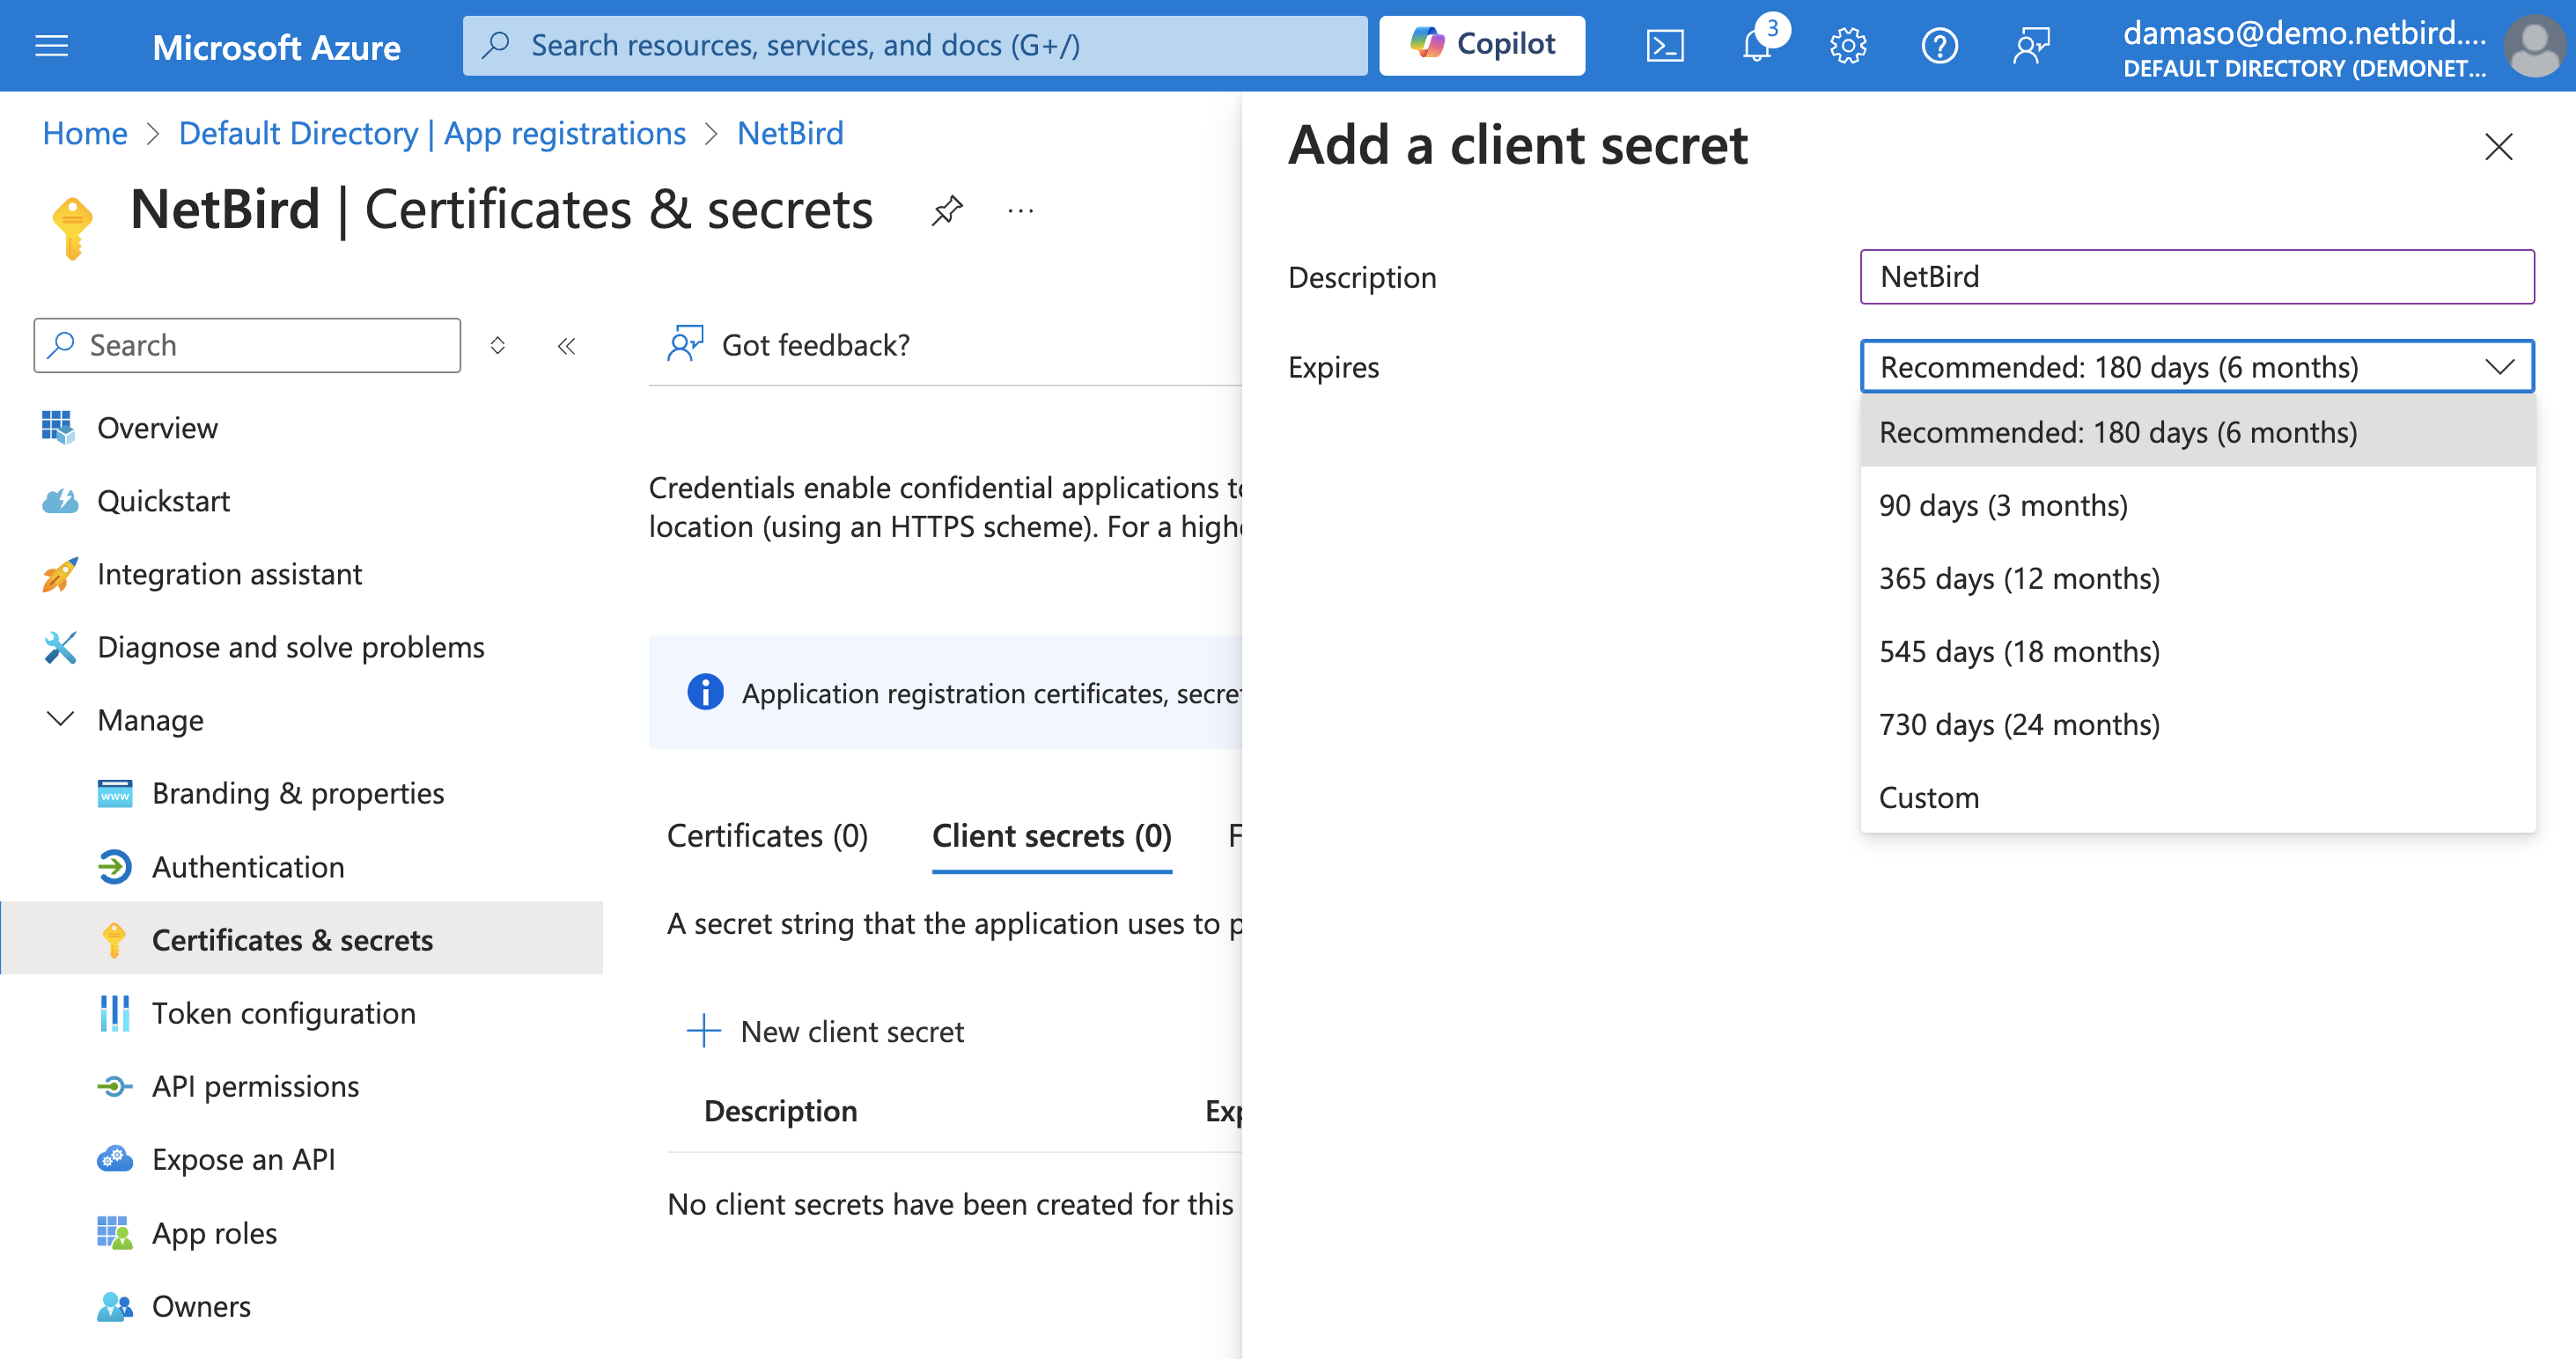
On Azure, click on the Certificates & secrets button in the left menu to open the management page. Click on +New client secret as shown below. Choose an expiration time that suits your security needs and click the Add button.
A new client secret will be generated and displayed on the screen. Copy and securely store the Value field immediately, as you will needed in the next step.

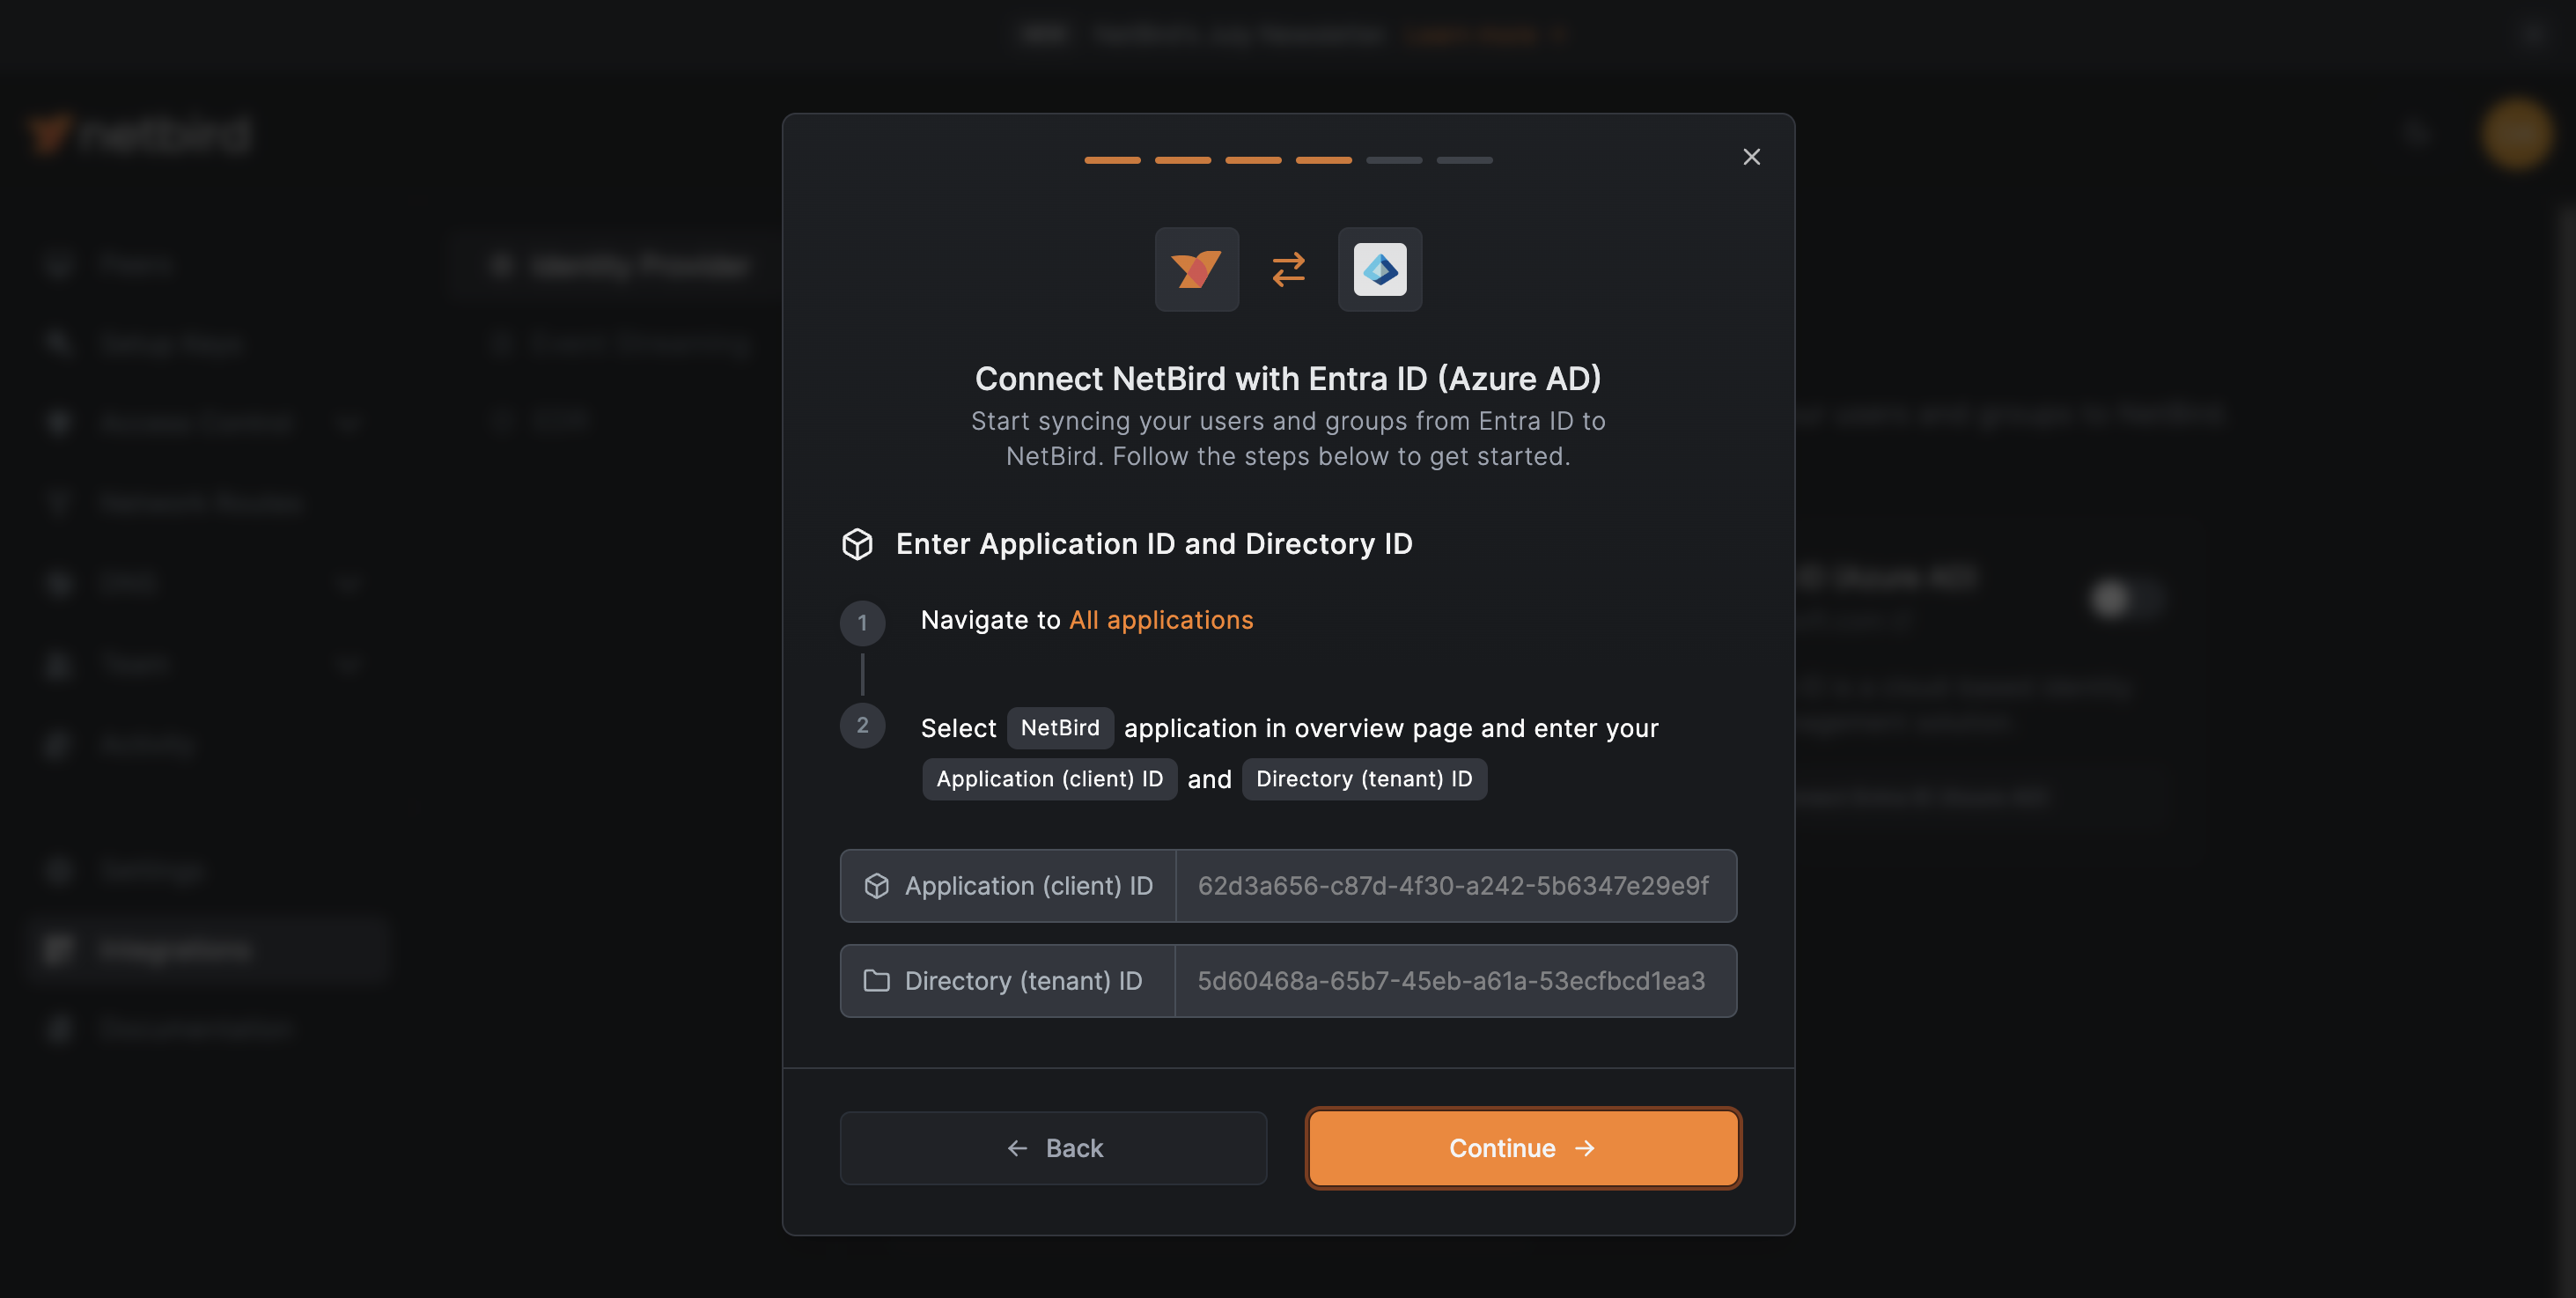
Enter Application ID and Directory ID in NetBird
Paste the secret Value from the previous step into NetBird and click the Continue → button. A new wizard screen will appear, asking for the Application (client) ID and the Directory (tenant) ID credentials generated previously.
Paste the values and click the Continue → button.
Choose Groups to Synchronize from Entra ID
At this stage, NetBird is set to synchronize all groups from your Microsoft Entra ID by default. You have two options:
- If you want to synchronize all groups, simply click the
Continue →button. - To synchronize only specific groups, click the
+ Add group filterbutton, which will open a new panel where you can set criteria to include or exclude groups.

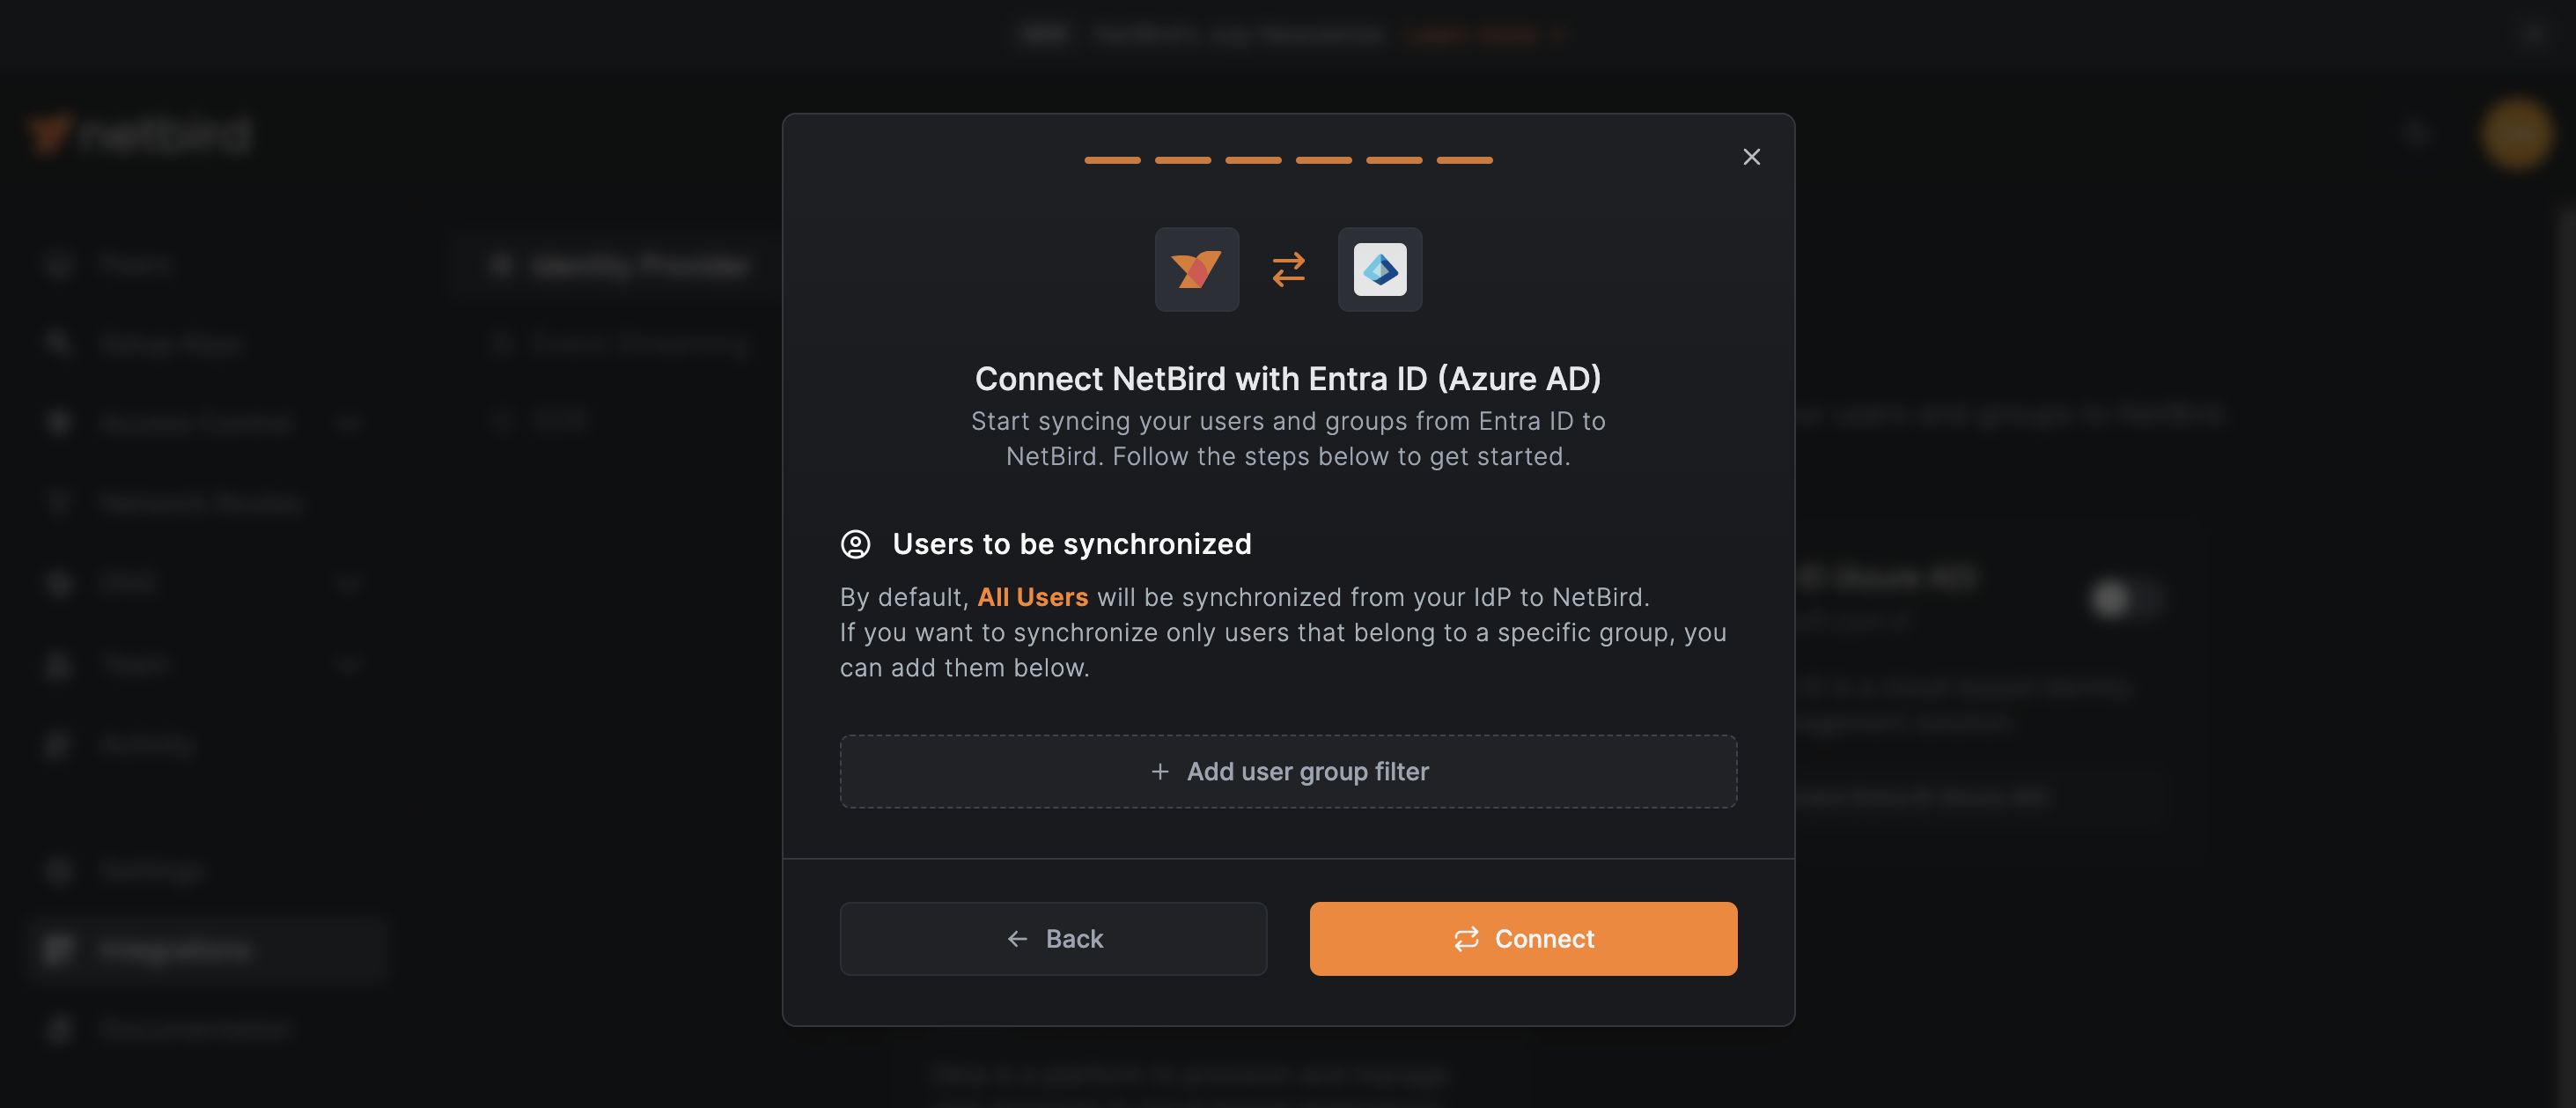
Choose Users to Synchronize from Entra ID
After configuring group synchronization, you'll now set up user synchronization. Similar than before, NetBird is configured to synchronize all users from your Microsoft Entra ID by default.
- If you want to synchronize all users, you don't need to take any action, simply click the
Continue →button. - To synchronize only specific users, click the
+ Add user filterbutton. This opens a new panel where you can set criteria to include or exclude users.
You can modify these synchronization settings later if necessary.
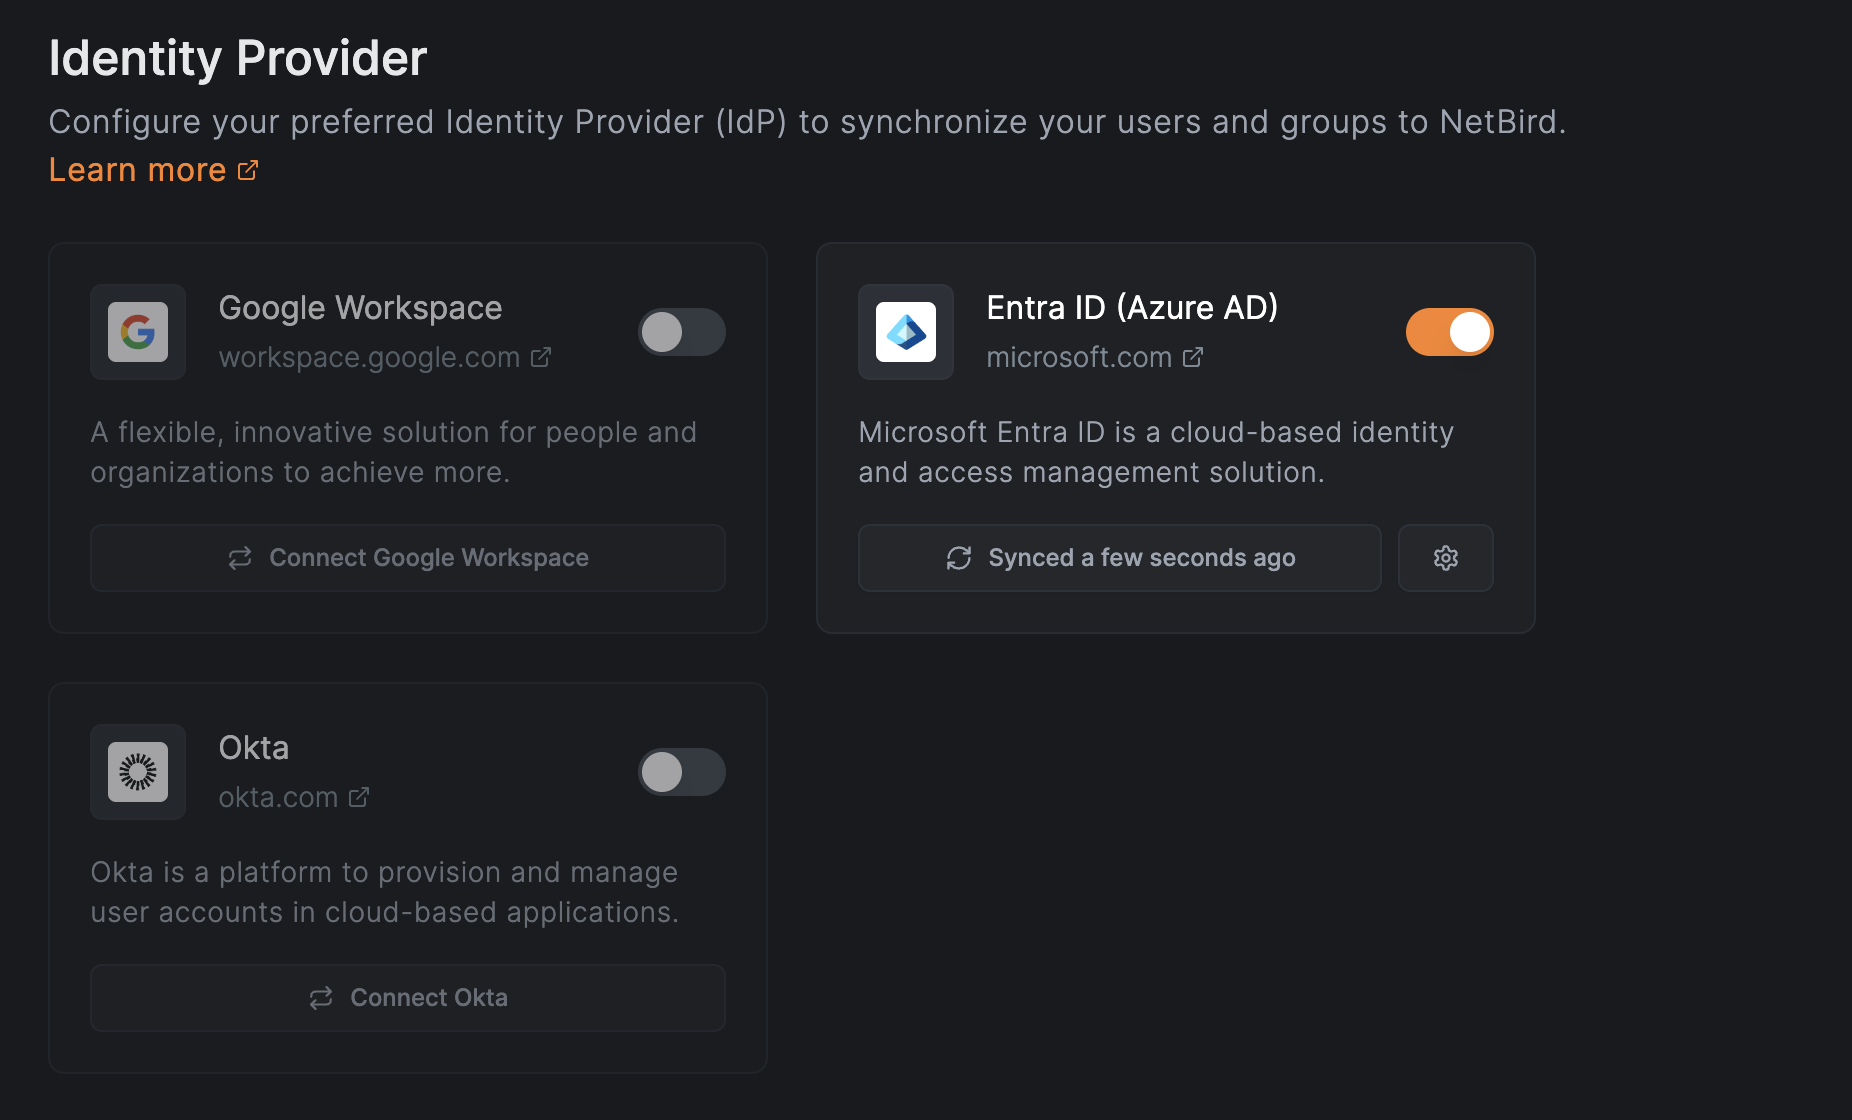
After configuring user and group synchronization, the setup wizard will finalize the process and you'll automatically return to the main Identity Provider screen.
On this screen, you'll see two key indicators of successful integration:
- The Microsoft Entra ID toggle will be switched on (enabled).
- Next to the toggle, you'll see a button with a status message saying
Synced a few seconds ago.
These indicators confirm that:
- The integration between NetBird and Microsoft Entra ID is active.
- The initial synchronization has been completed successfully.
- NetBird will now automatically sync with your Microsoft Entra ID at regular intervals.
You can manually trigger a sync or adjust settings by clicking on the Microsoft Entra ID section in the Identity Provider screen
Verify the Integration
To verify the synchronization, navigate to Teams > Users in the left menu.
You should see all the users and groups from your Microsoft Entra ID environment listed in the NetBird dashboard.
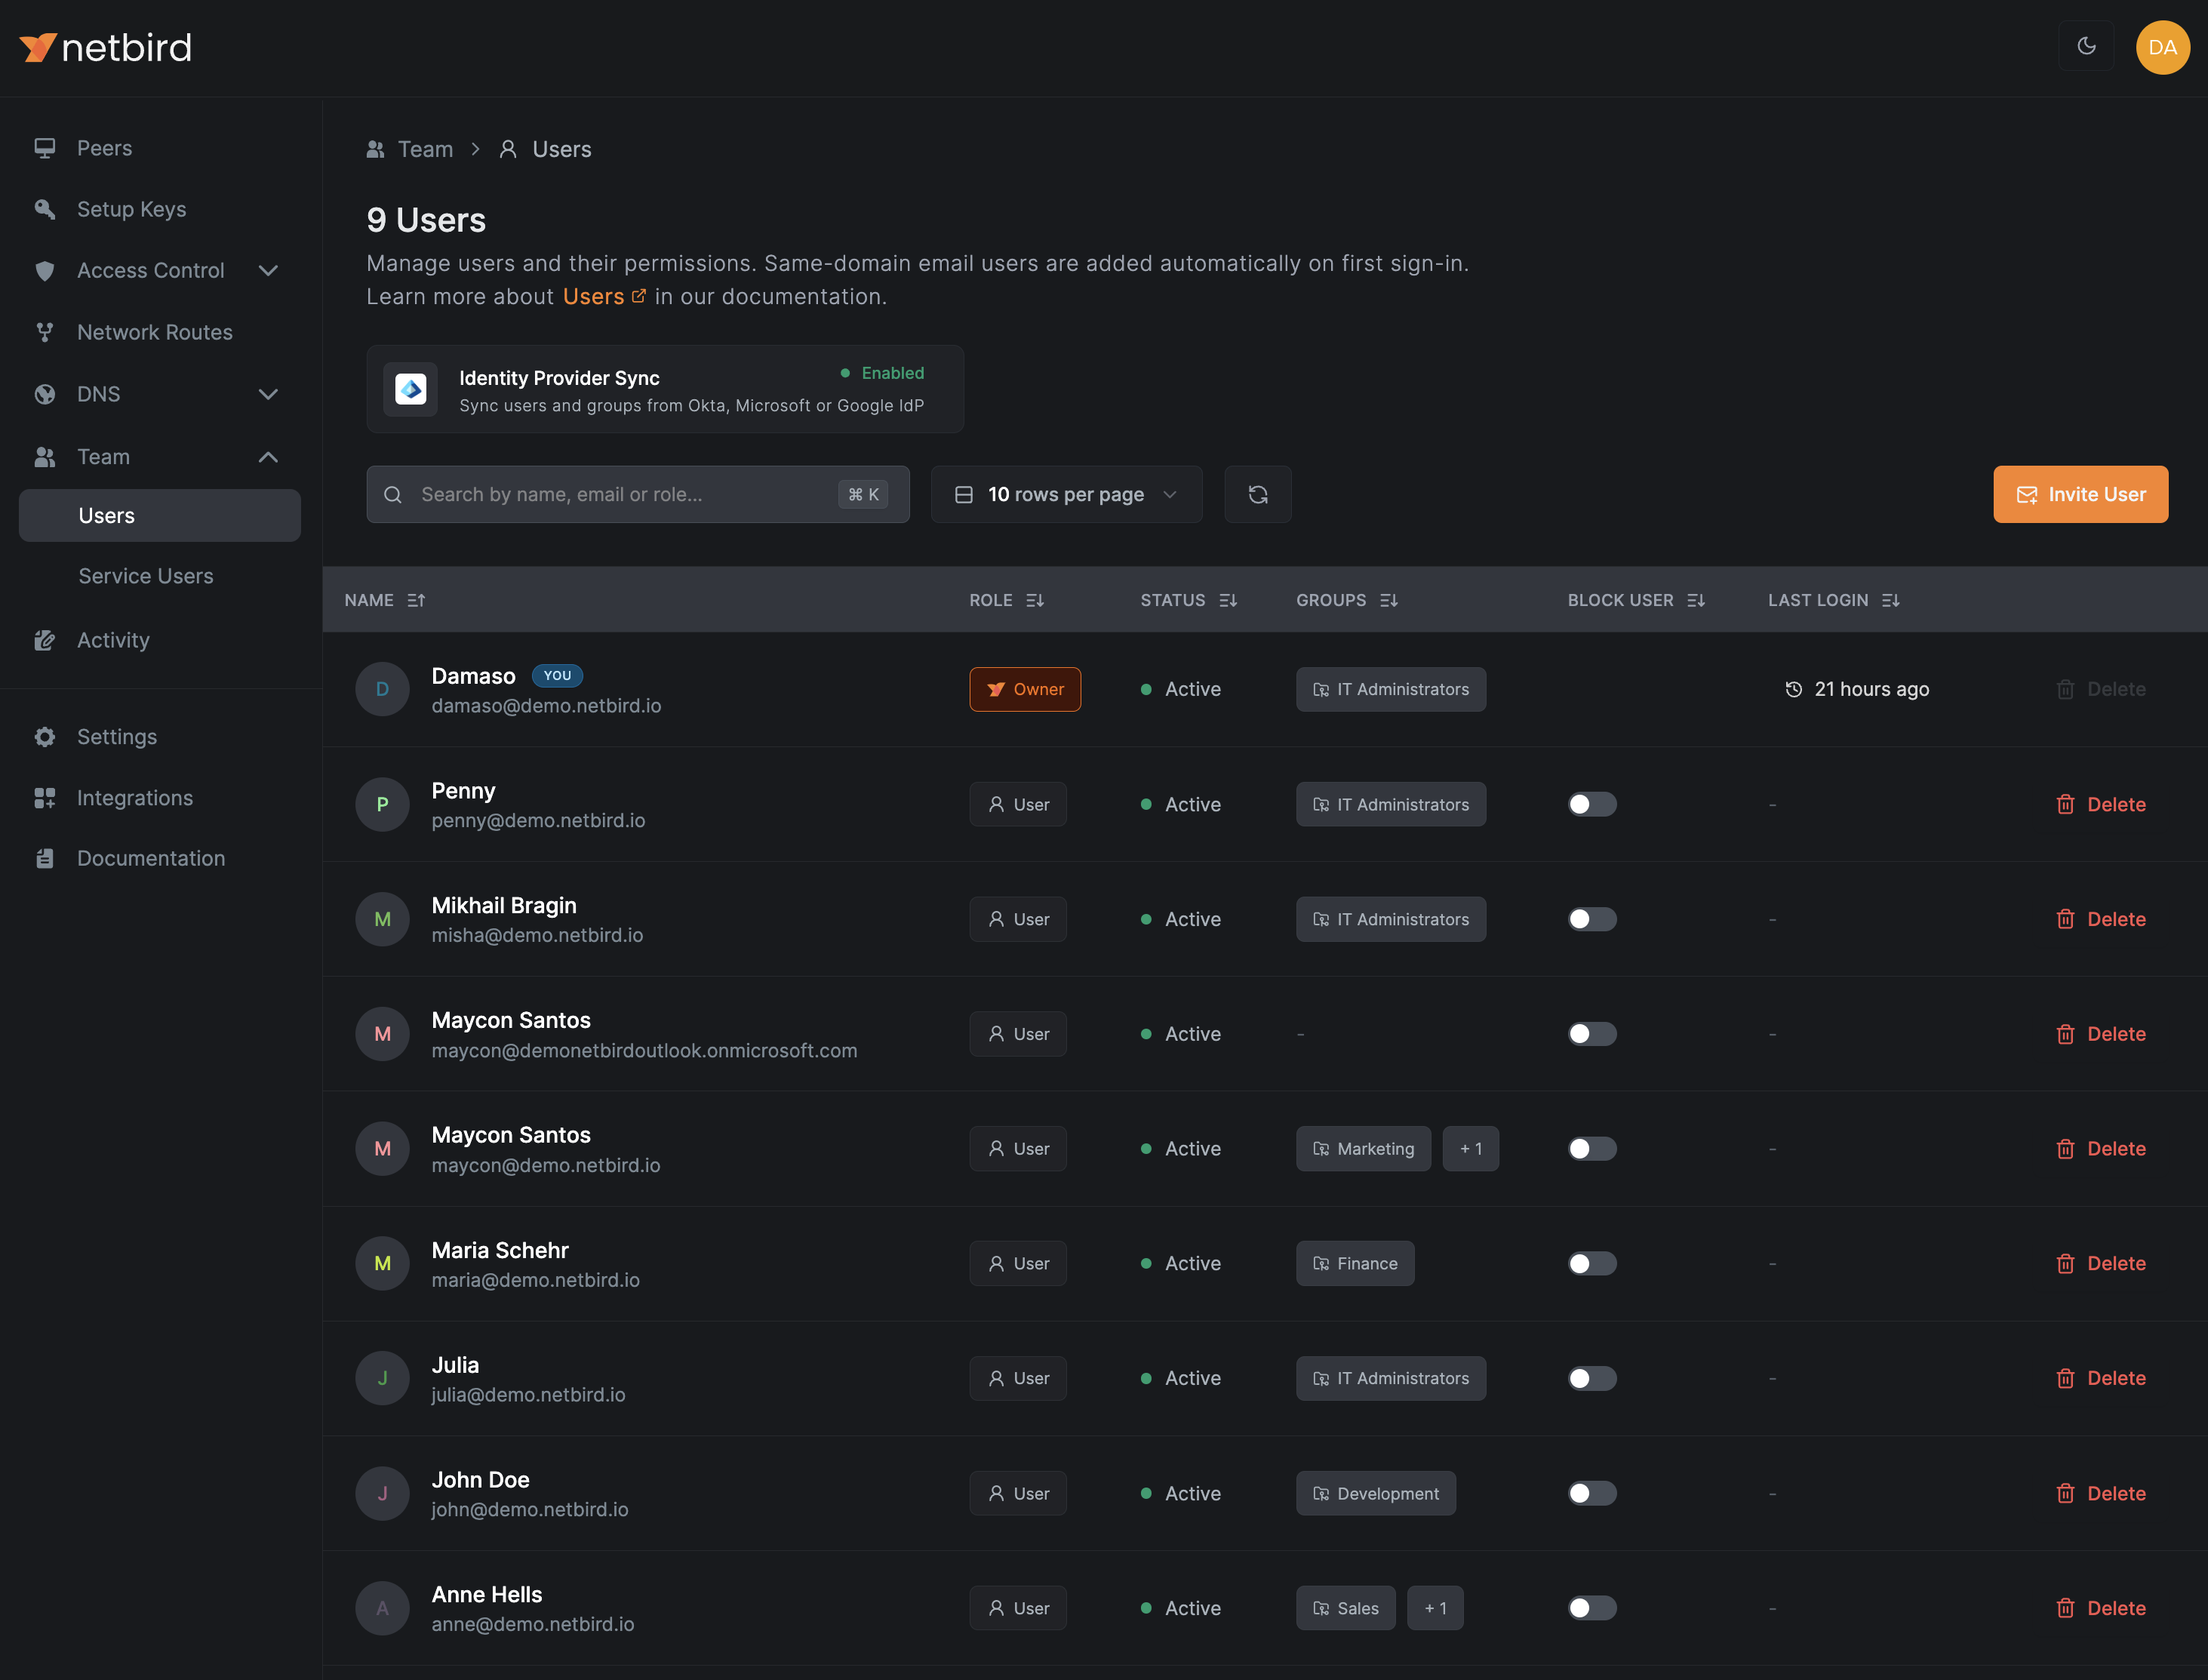
You can now proceed to configure access control policies using the synchronized groups to allow or deny access to the synchronized users.
Sync Behavior
The NetBird API integration polls Microsoft Graph approximately every 5 minutes. NetBird controls this interval and actively fetches users and groups from your Entra tenant on each cycle.
This differs from the SCIM integration, which is event-driven from Entra. Entra pushes changes to NetBird on its own schedule (typically every 40 minutes), and you can use Provisioning on Demand for immediate syncs of individual users or groups.