Deploying NetBird with Kandji MDM
Combining NetBird's with Kandji's orchestration capabilities creates a powerful solution for securing and managing access across your entire Apple ecosystem, from mobile devices to desktops.
In this hands-on guide, you'll learn how to deploy NetBird on Apple devices using Kandji MDM to grant tailored access permissions for different teams by:
- Configuring NetBird Access Policies for Team-Specific Permissions
- Creating Kandji MDM Blueprints for Automated NetBird Deployment
- Testing and Verifying the Automated Provisioning Pipeline
Following these steps, you'll set up an automated pipeline that simplifies network security management, reduces manual configuration errors, and ensures appropriate access levels for each team.
Prerequisites
To successfully integrate NetBird with Kandji MDM, ensure you have the following prerequisites in place:
- Active NetBird account with administrative access.
- Kandji MDM subscription with administrative privileges.
- At least one Apple device (Mac, iPhone, iPad) enrolled in Kandji MDM.
Configuring NetBird Access Policies for Team-Specific Permissions
NetBird plays a crucial role in this integration by providing granular access control through its Access Control Policies. These features allow you to define and enforce specific permissions for different user groups, ensuring that team members can only access the resources necessary for their roles.
For instance, let's suppose you want to create a policy that allows the Support team to access the Servers group:
- In NetBird, navigate to
Access Control > Policiesand clickAdd Policy. - Set the source group to
Supportand the destination group toServers. - Choose the appropriate protocol and port settings (e.g., TCP 22).
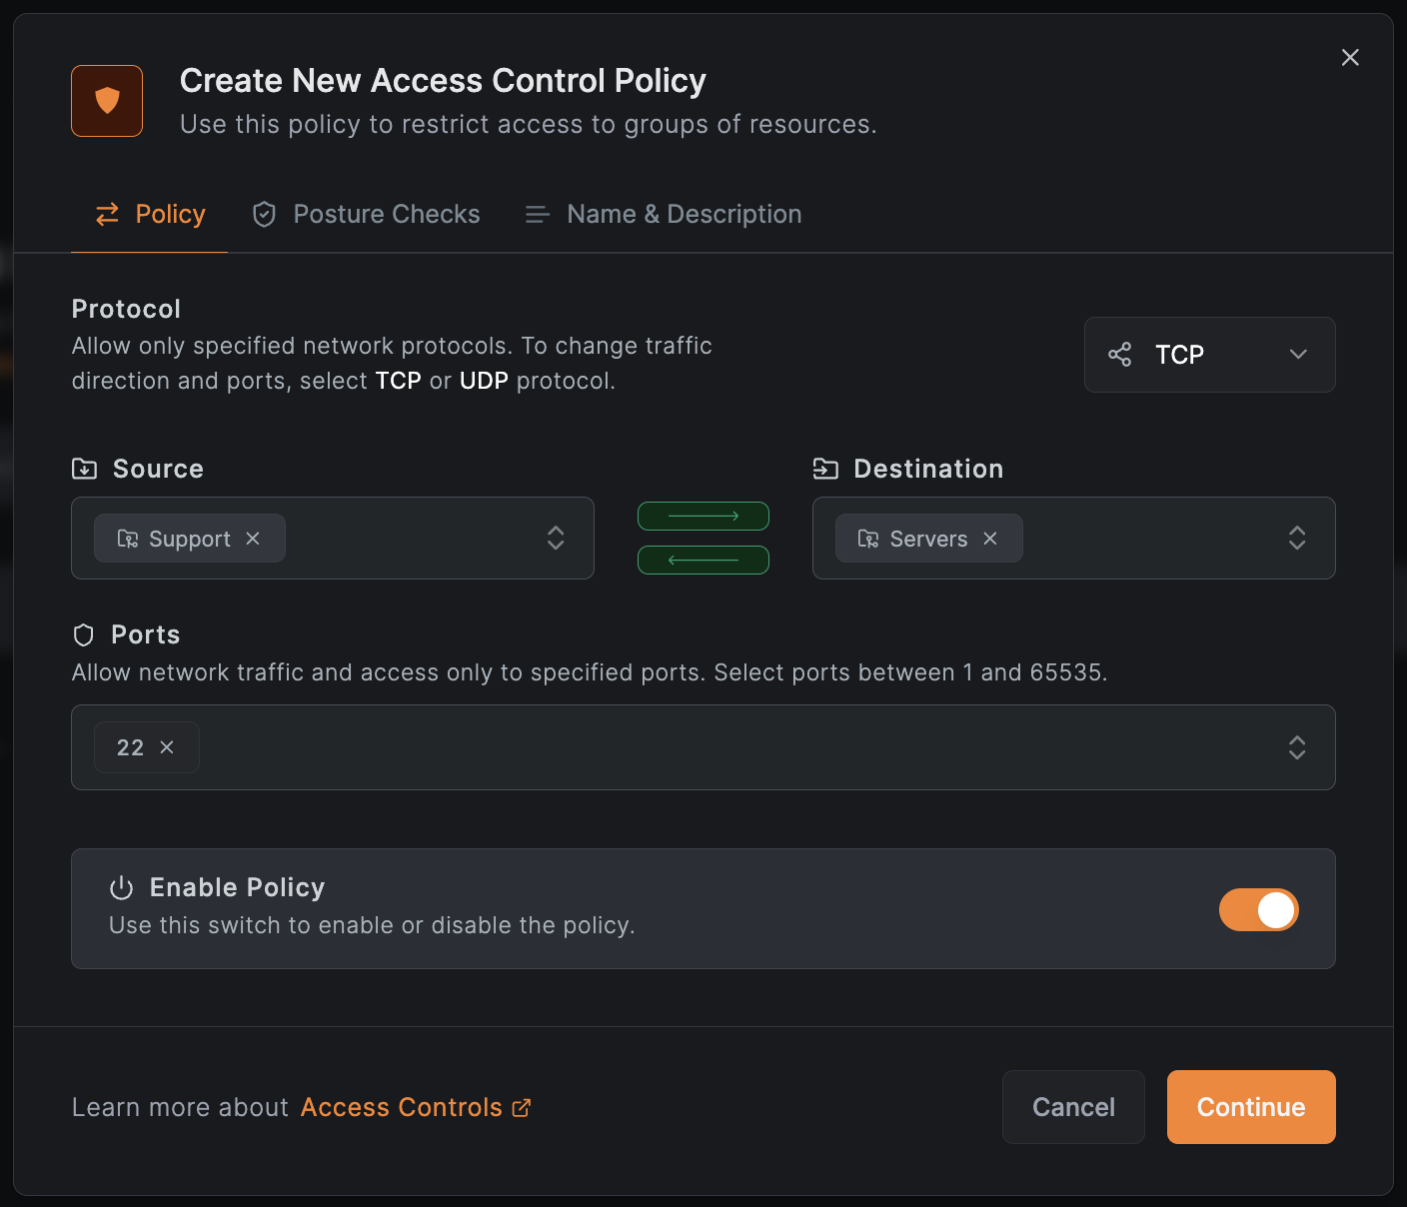
Give the policy a descriptive name (e.g., Support team remote access) and click Save to create the policy.
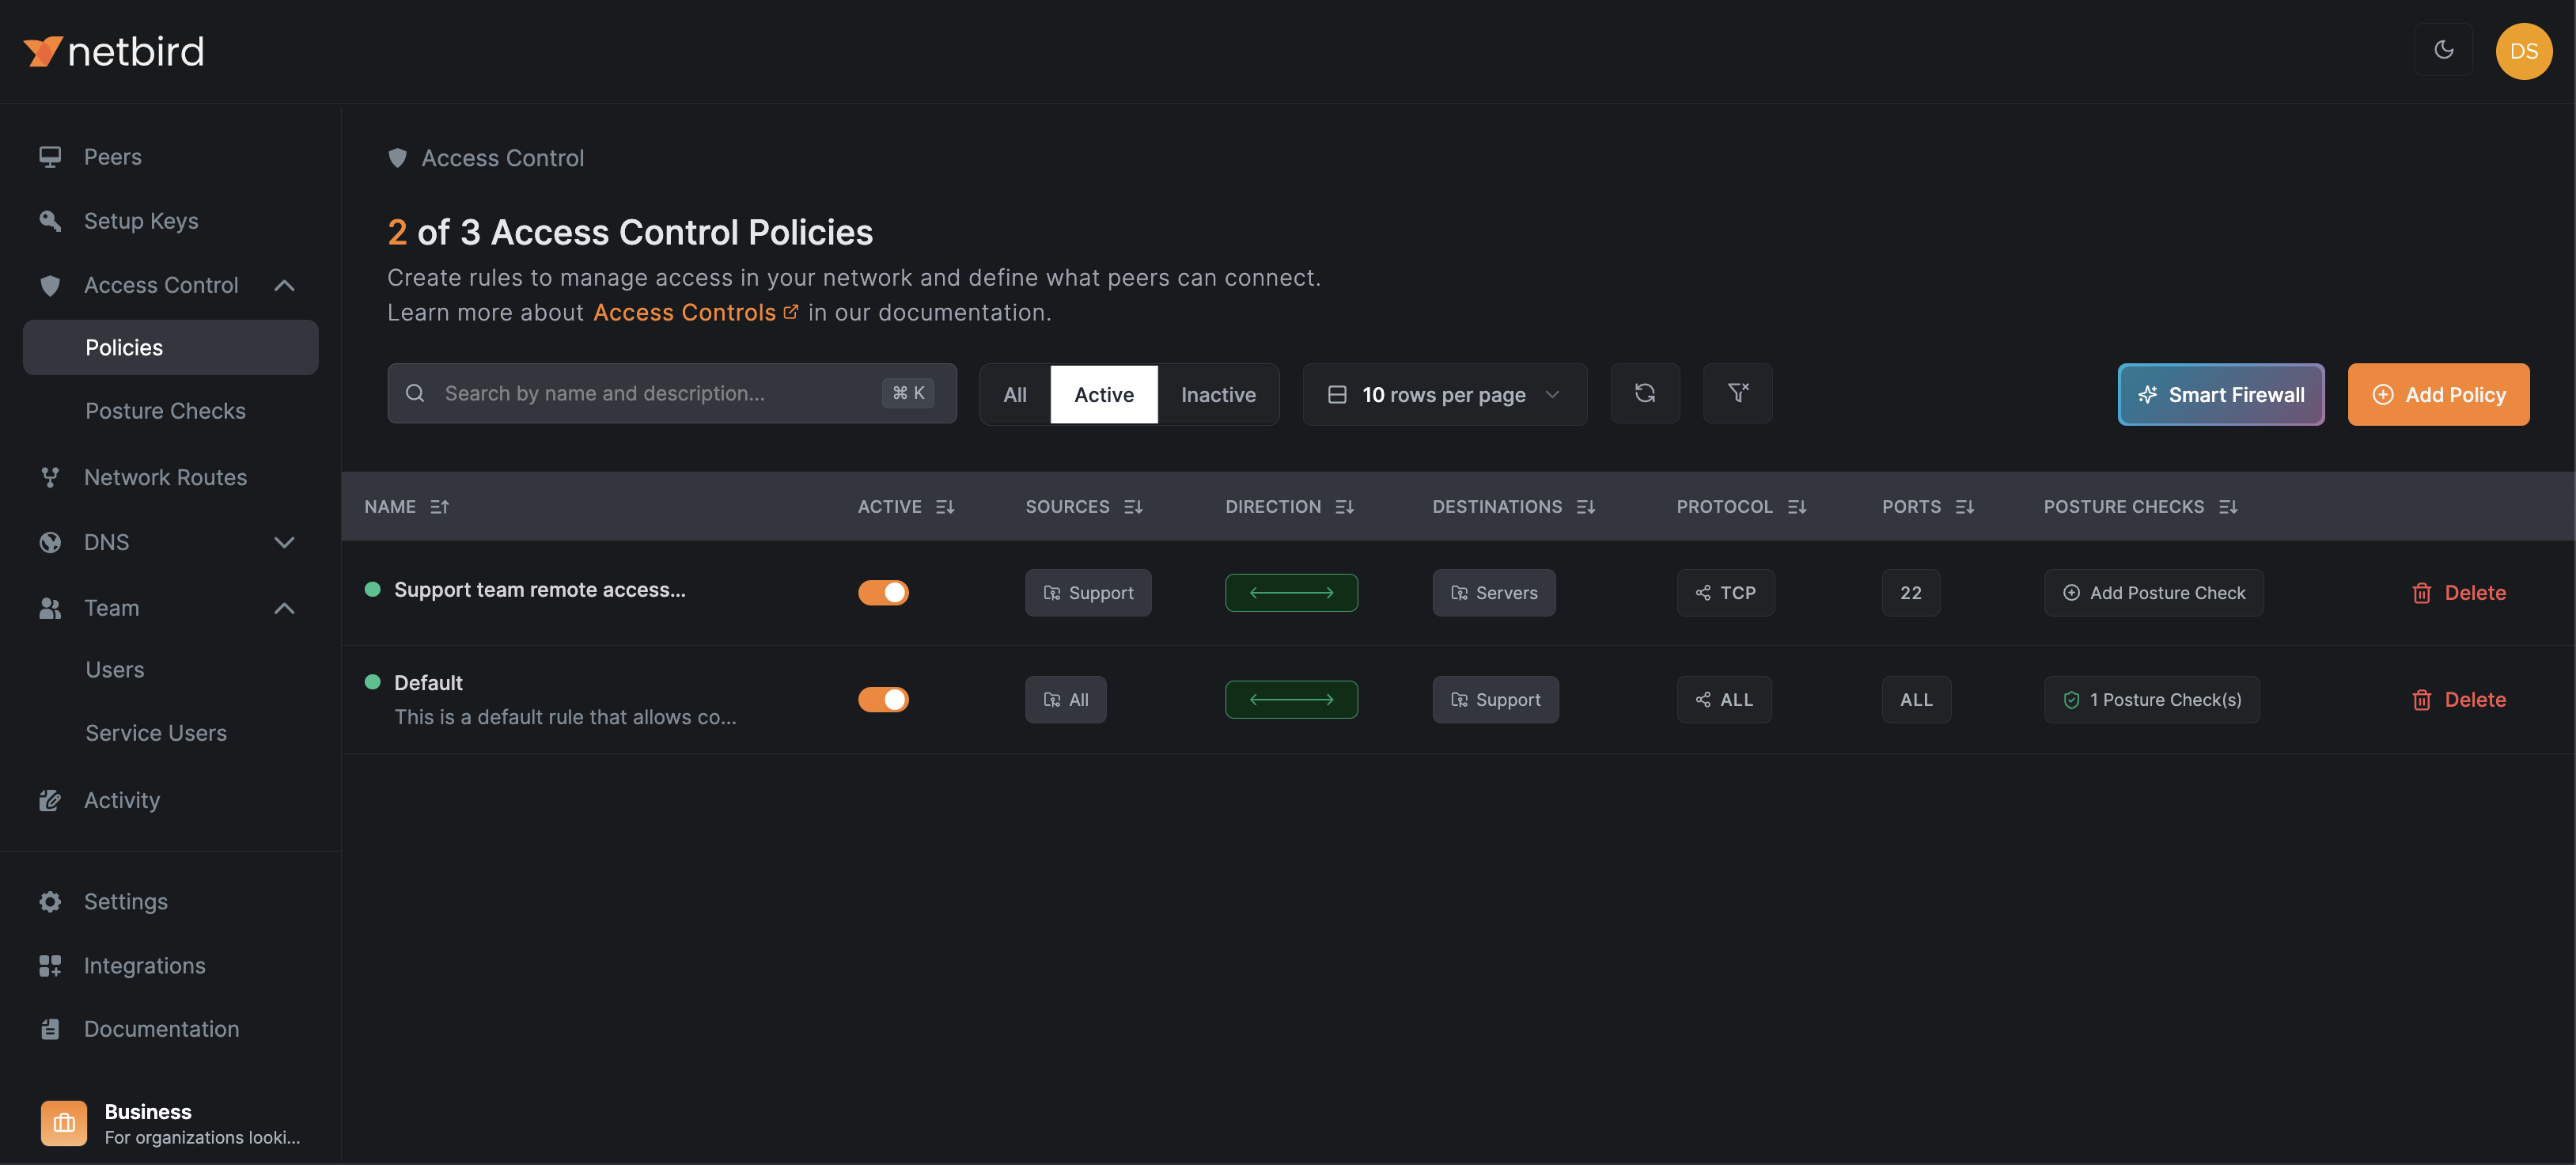
Now that you've configured NetBird, let's shift the focus to Kandji MDM integration and set up the automated deployment of NetBird on support team devices.
Integrating NetBird with Kandji Custom Apps
Navigate to Library and click Add new. Then, find and select Custom Apps and click Add & Configure to deploy a new Custom App.
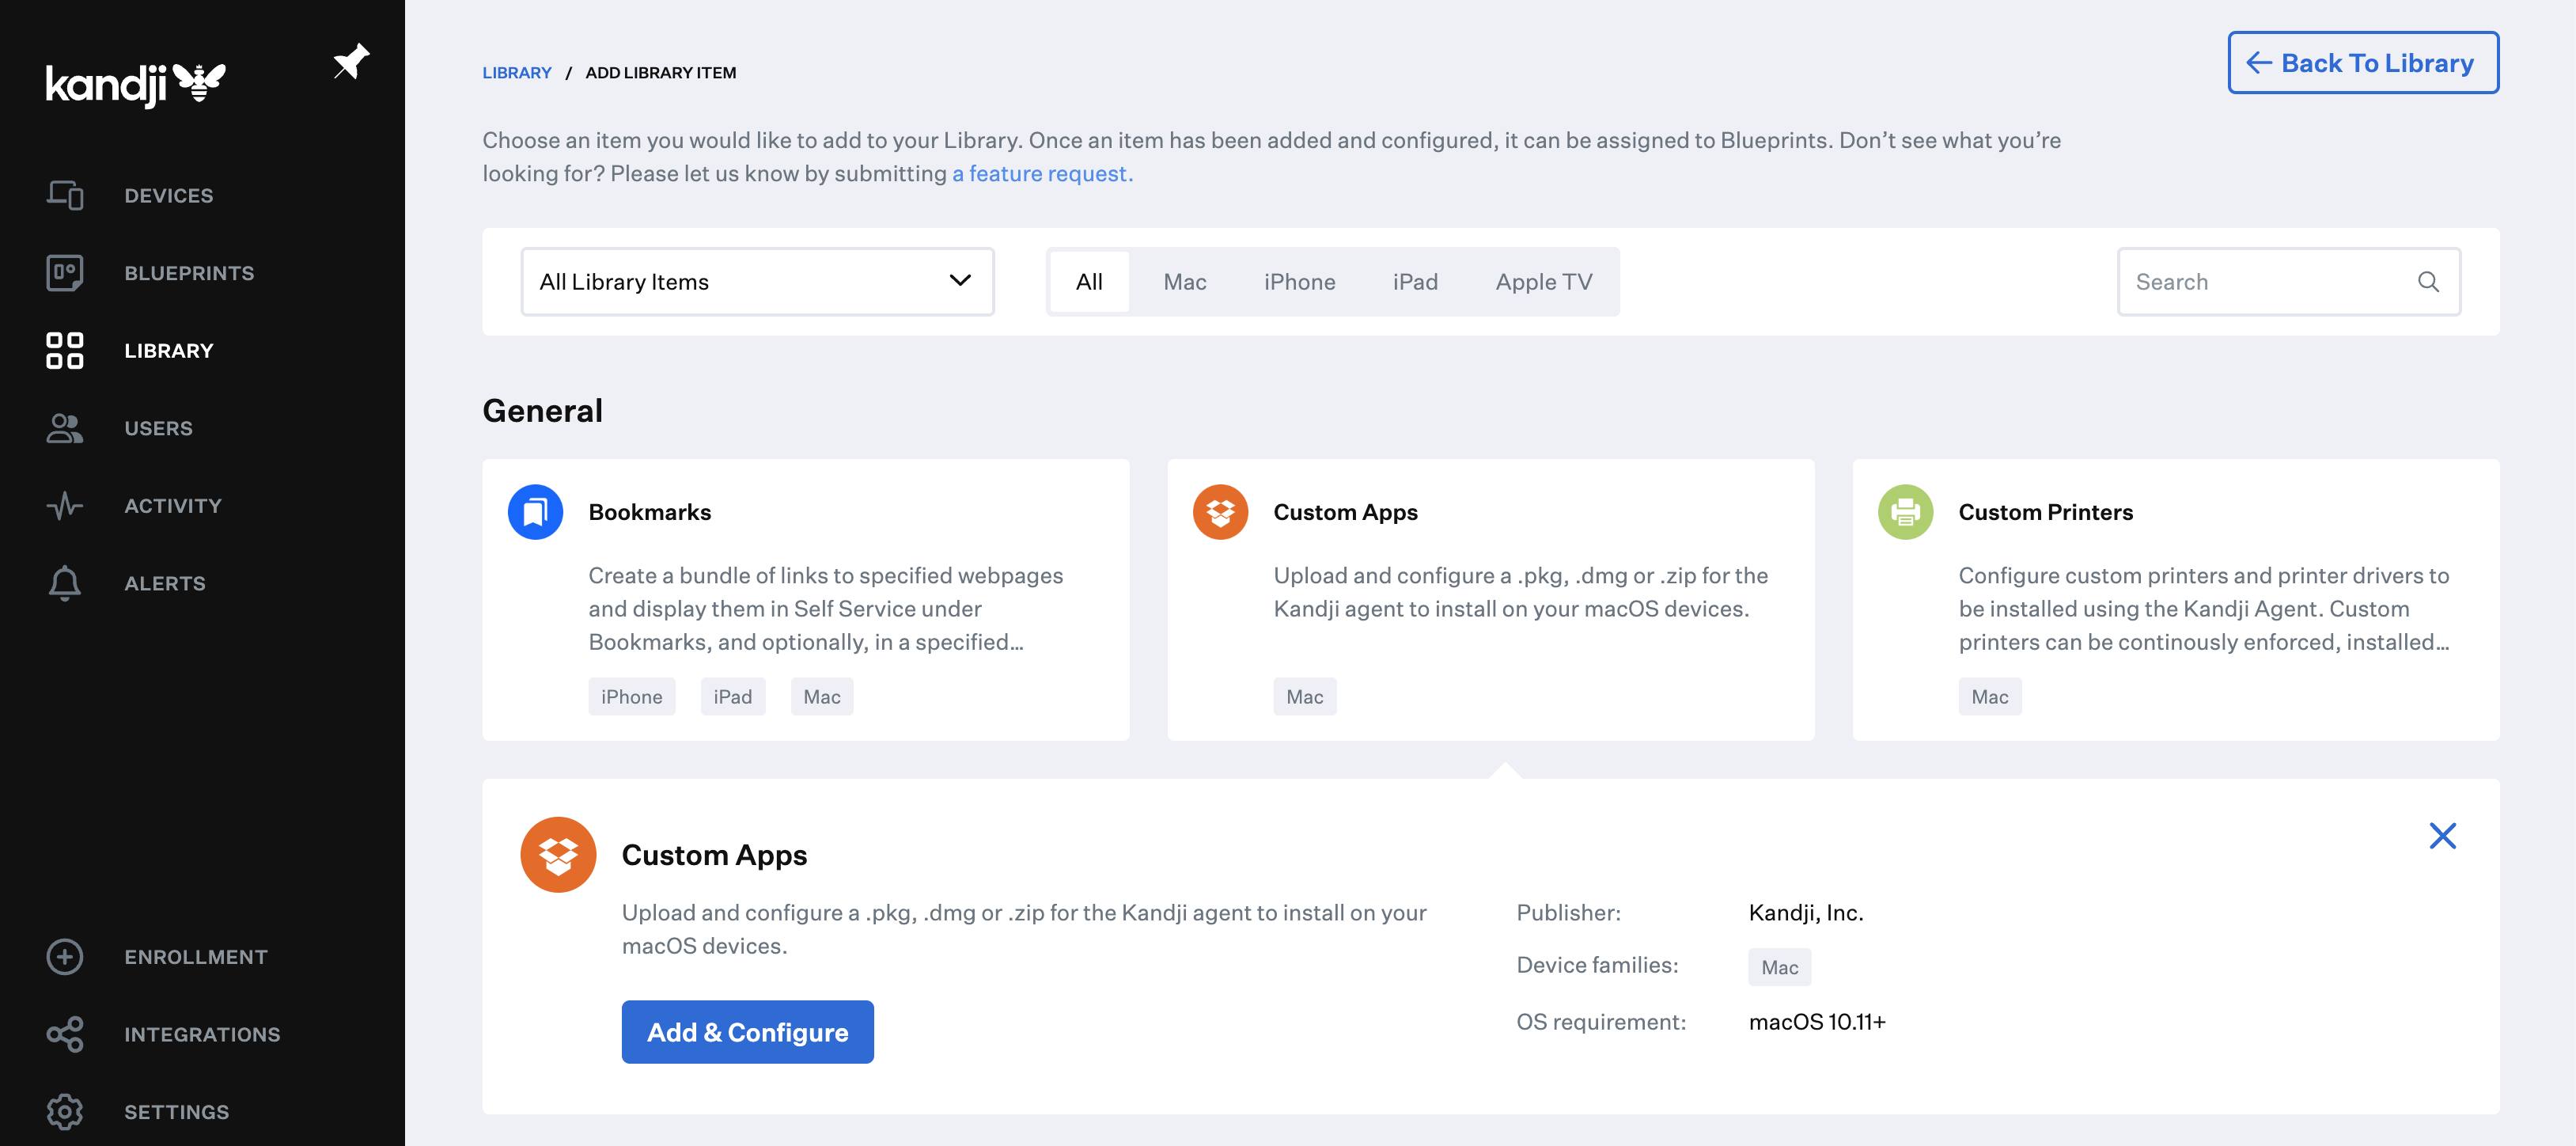
Give the Custom App a descriptive name (e.g., NetBird_vX.XX_Support_Team, where X.XX is the current version of NetBird being deployed). Scroll down to Install Details, where you'll see different options.
Select Installer Package to install NetBird using the official macOS package. Using a package ensures you're installing the exact same version on all devices. This example uses the Apple Silicon package that you can download here. Drag the file to the Installer Package field box to upload it to Kandji MDM.
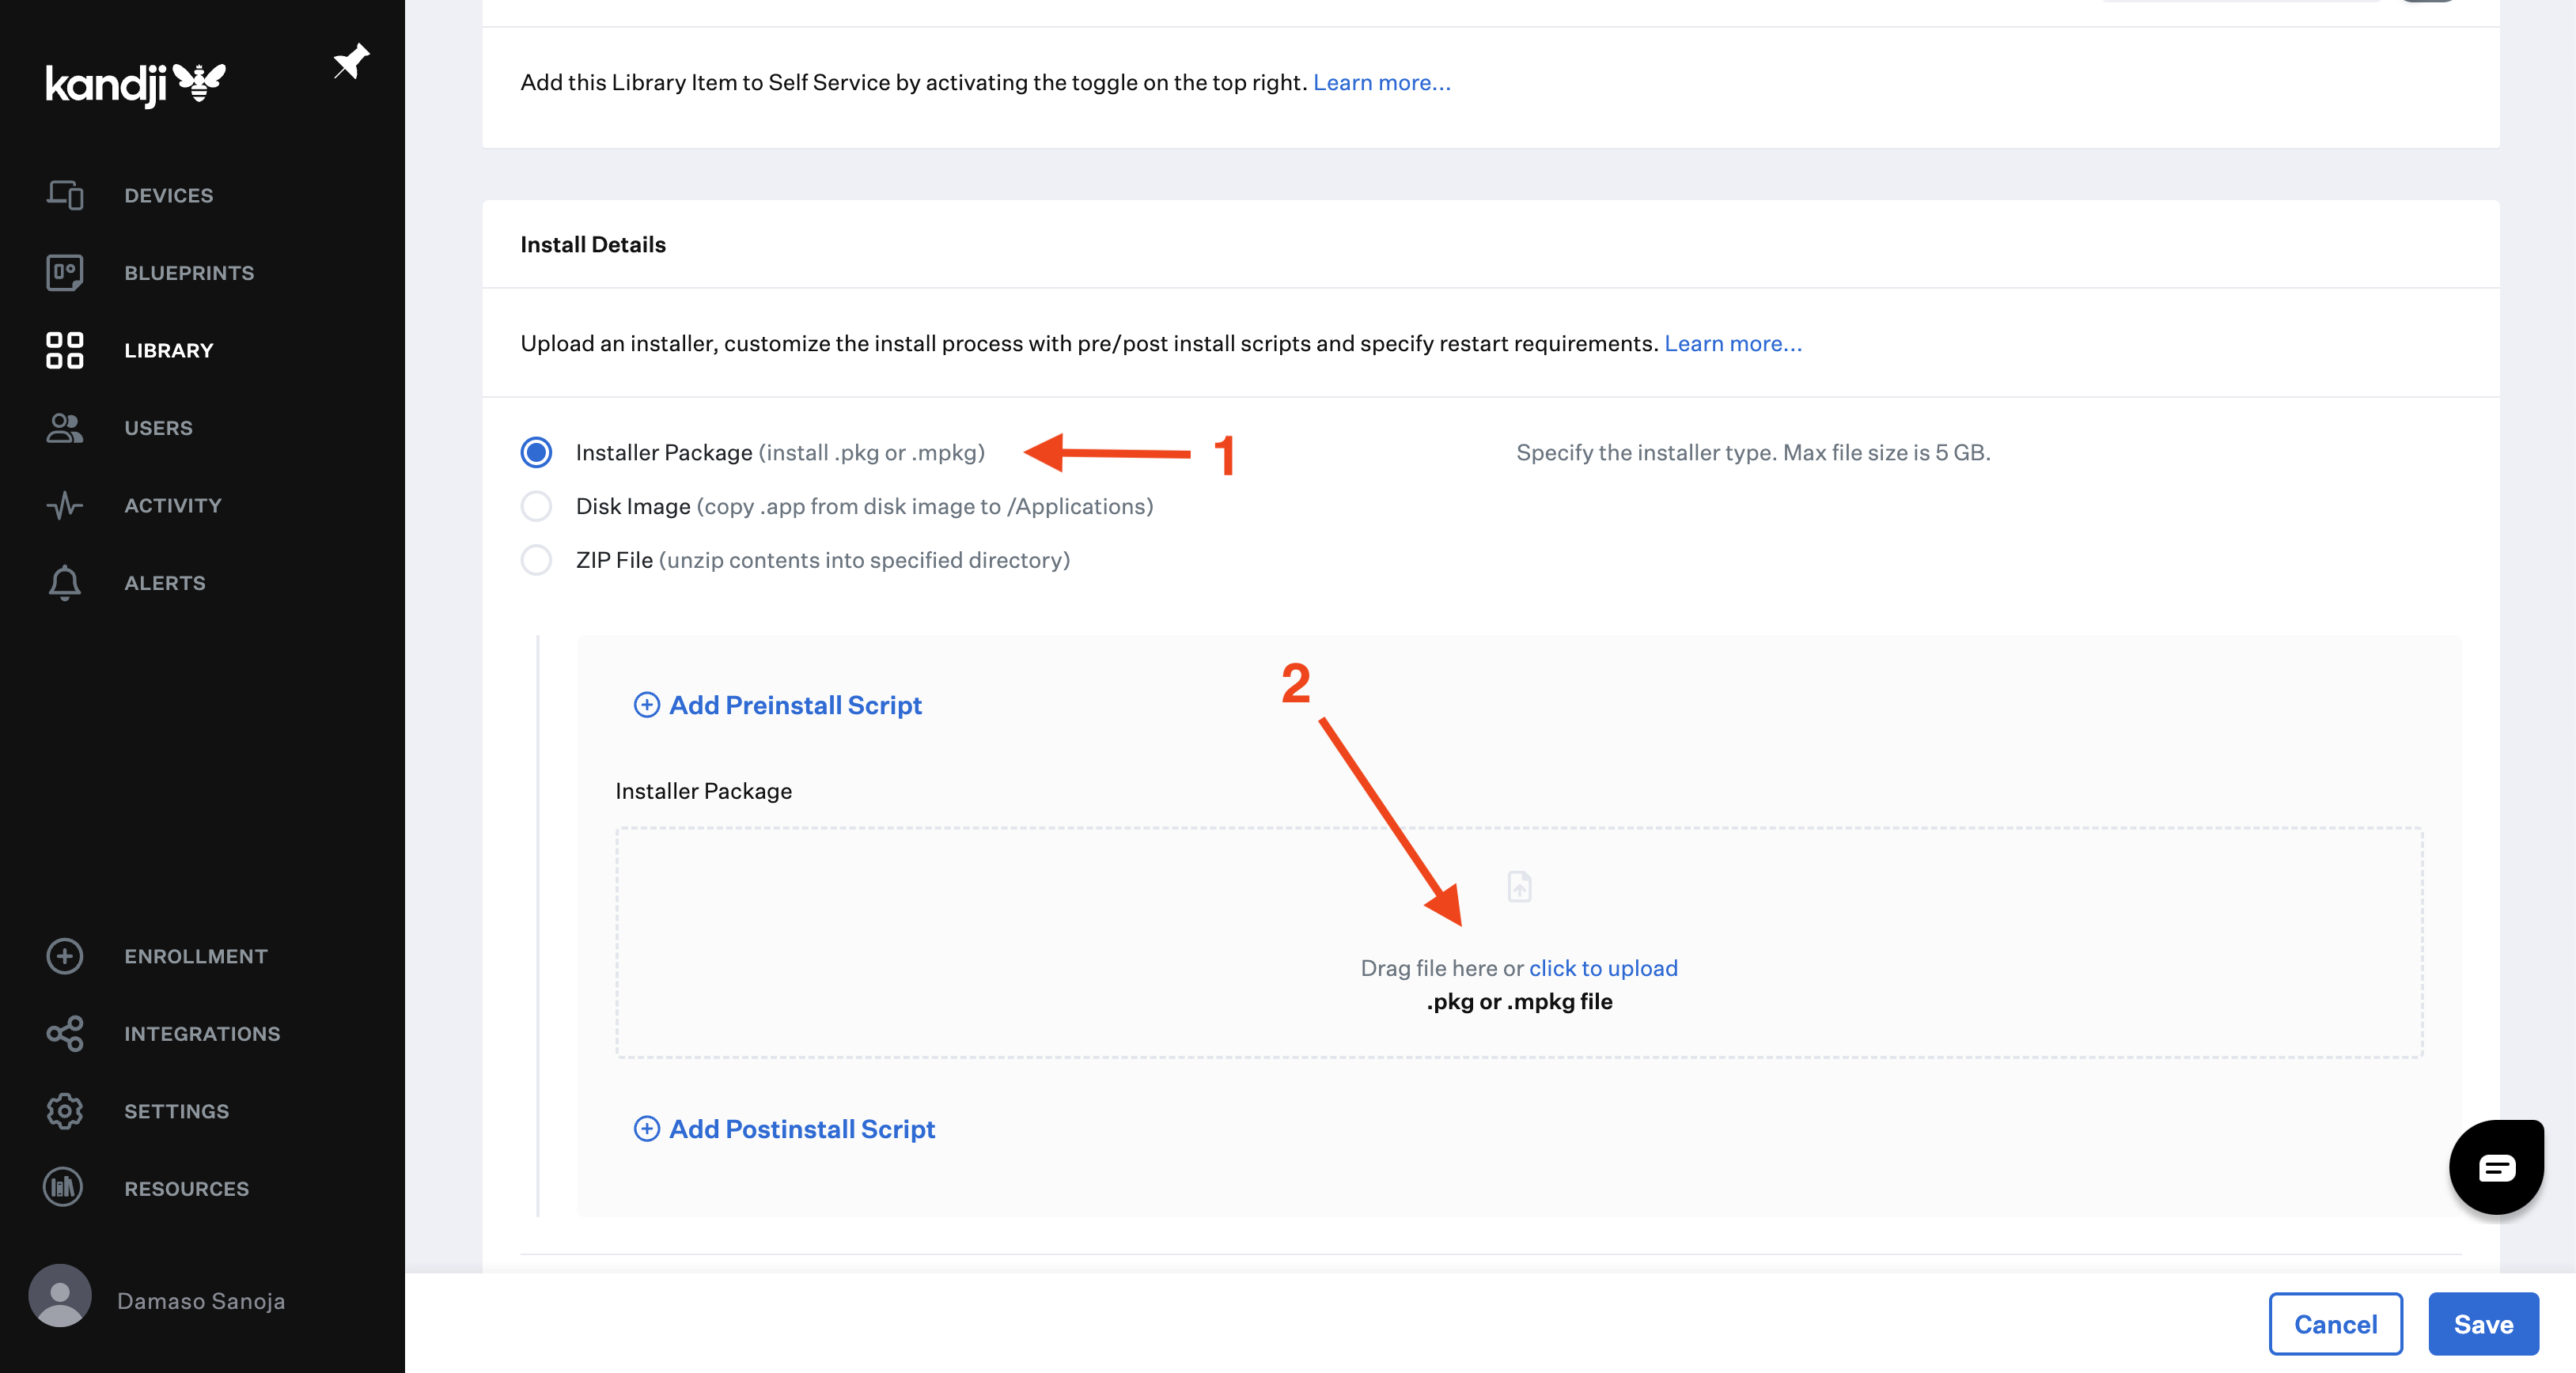
Next, click on Add Preinstall Script and paste the following code:
#!/bin/sh

set -x

LOG_FILE=/var/log/netbird/client_pre_install.log
AGENT=/usr/local/bin/netbird

mkdir -p /var/log/netbird/

{
    # check if it was installed with brew
    brew list --formula | grep netbird
    if [ $? -eq 0 ]
    then
        echo "NetBird has been installed with Brew. Please use Brew to update the package."
        exit 1
    fi
    osascript -e 'quit app "Netbird"' || true
    $AGENT service stop || true

    echo "Preinstall complete"
    exit 0 # all good
} &> $LOG_FILE
This preinstall script prepares the system for a smooth NetBird installation by setting up logging, checking for previous Homebrew installations, and stopping any running NetBird instances. It ensures a clean slate, preventing conflicts and maintaining consistency across deployments, ultimately reducing potential errors during installation.
Now, click on Add Postinstall Script and paste the following code:
#!/bin/sh

set -x

APP=/Applications/NetBird.app
AGENT=/usr/local/bin/netbird
LOG_FILE=/var/log/netbird/client_post_install.log

mkdir -p /var/log/netbird/
mkdir -p /usr/local/bin/

{
    echo "Installing NetBird..."

    if test -d $APP; then
        echo "NetBird app copied successfully."
    else
        echo "NetBird app could not be copied to the Applications folder."
        exit 1
    fi

    ln -fs $APP/Contents/MacOS/netbird $AGENT
    if test -f $AGENT; then
        echo "NetBird binary linked successfully."
    else
        echo "NetBird could not create symlink to /usr/local/bin"
        exit 1
    fi

    $AGENT service install || true
    $AGENT service start || true
    $AGENT up --hostname YOUR_CUSTOM_HOSTNAME_HERE
    open $APP

    echo "Finished Netbird installation successfully"
    exit 0 # all good
} &> $LOG_FILE
The post-install script completes the NetBird installation through a series of steps:
- It begins by verifying the app's presence in the Applications folder, creating necessary symlinks, initiating the NetBird service, and configuring NetBird with the provided hostname.
- For first-time devices, when the script executes the
netbird upcommand, it automatically triggers the Single Sign-On (SSO) login flow. This seamless process combines connection setup and authentication, establishing both network connectivity and user verification in one streamlined step. - This approach ensures secure and efficient user authentication by integrating with your organization's identity management system.
- Throughout the process, the script logs its actions for troubleshooting purposes.
- Upon successful completion, NetBird is launched, marking the end of a smooth, automated deployment process.
Keep in mind that you can use these scripts as customizable templates, which can be tailored to meet the specific requirements of your organization's NetBird deployment process.
Creating Kandji Blueprints for Automated NetBird Deployment
Creating a Blueprint (Assignment Map) for NetBird deployment ensures consistent and automated installation across designated devices. Moreover, Kandji Blueprints allow you to define specific configurations and apps that should be installed on devices based on certain criteria, which is ideal for targeting particular teams or device groups with your NetBird deployment.
For instance, you can create tags for different teams (e.g., support, finance, marketing) in Kandji's device management interface. These tags can then be used in the Blueprint logic to assign the appropriate NetBird configuration to the right user groups, ensuring each team receives the correct access permissions.
To create a tag in Kandji MDM, go to DEVICES, click on the hamburger menu at the top right, and select Manage tags:

A new pop-up window will appear; click + Add tag, enter a name for the tag (e.g., Support), and click Save.
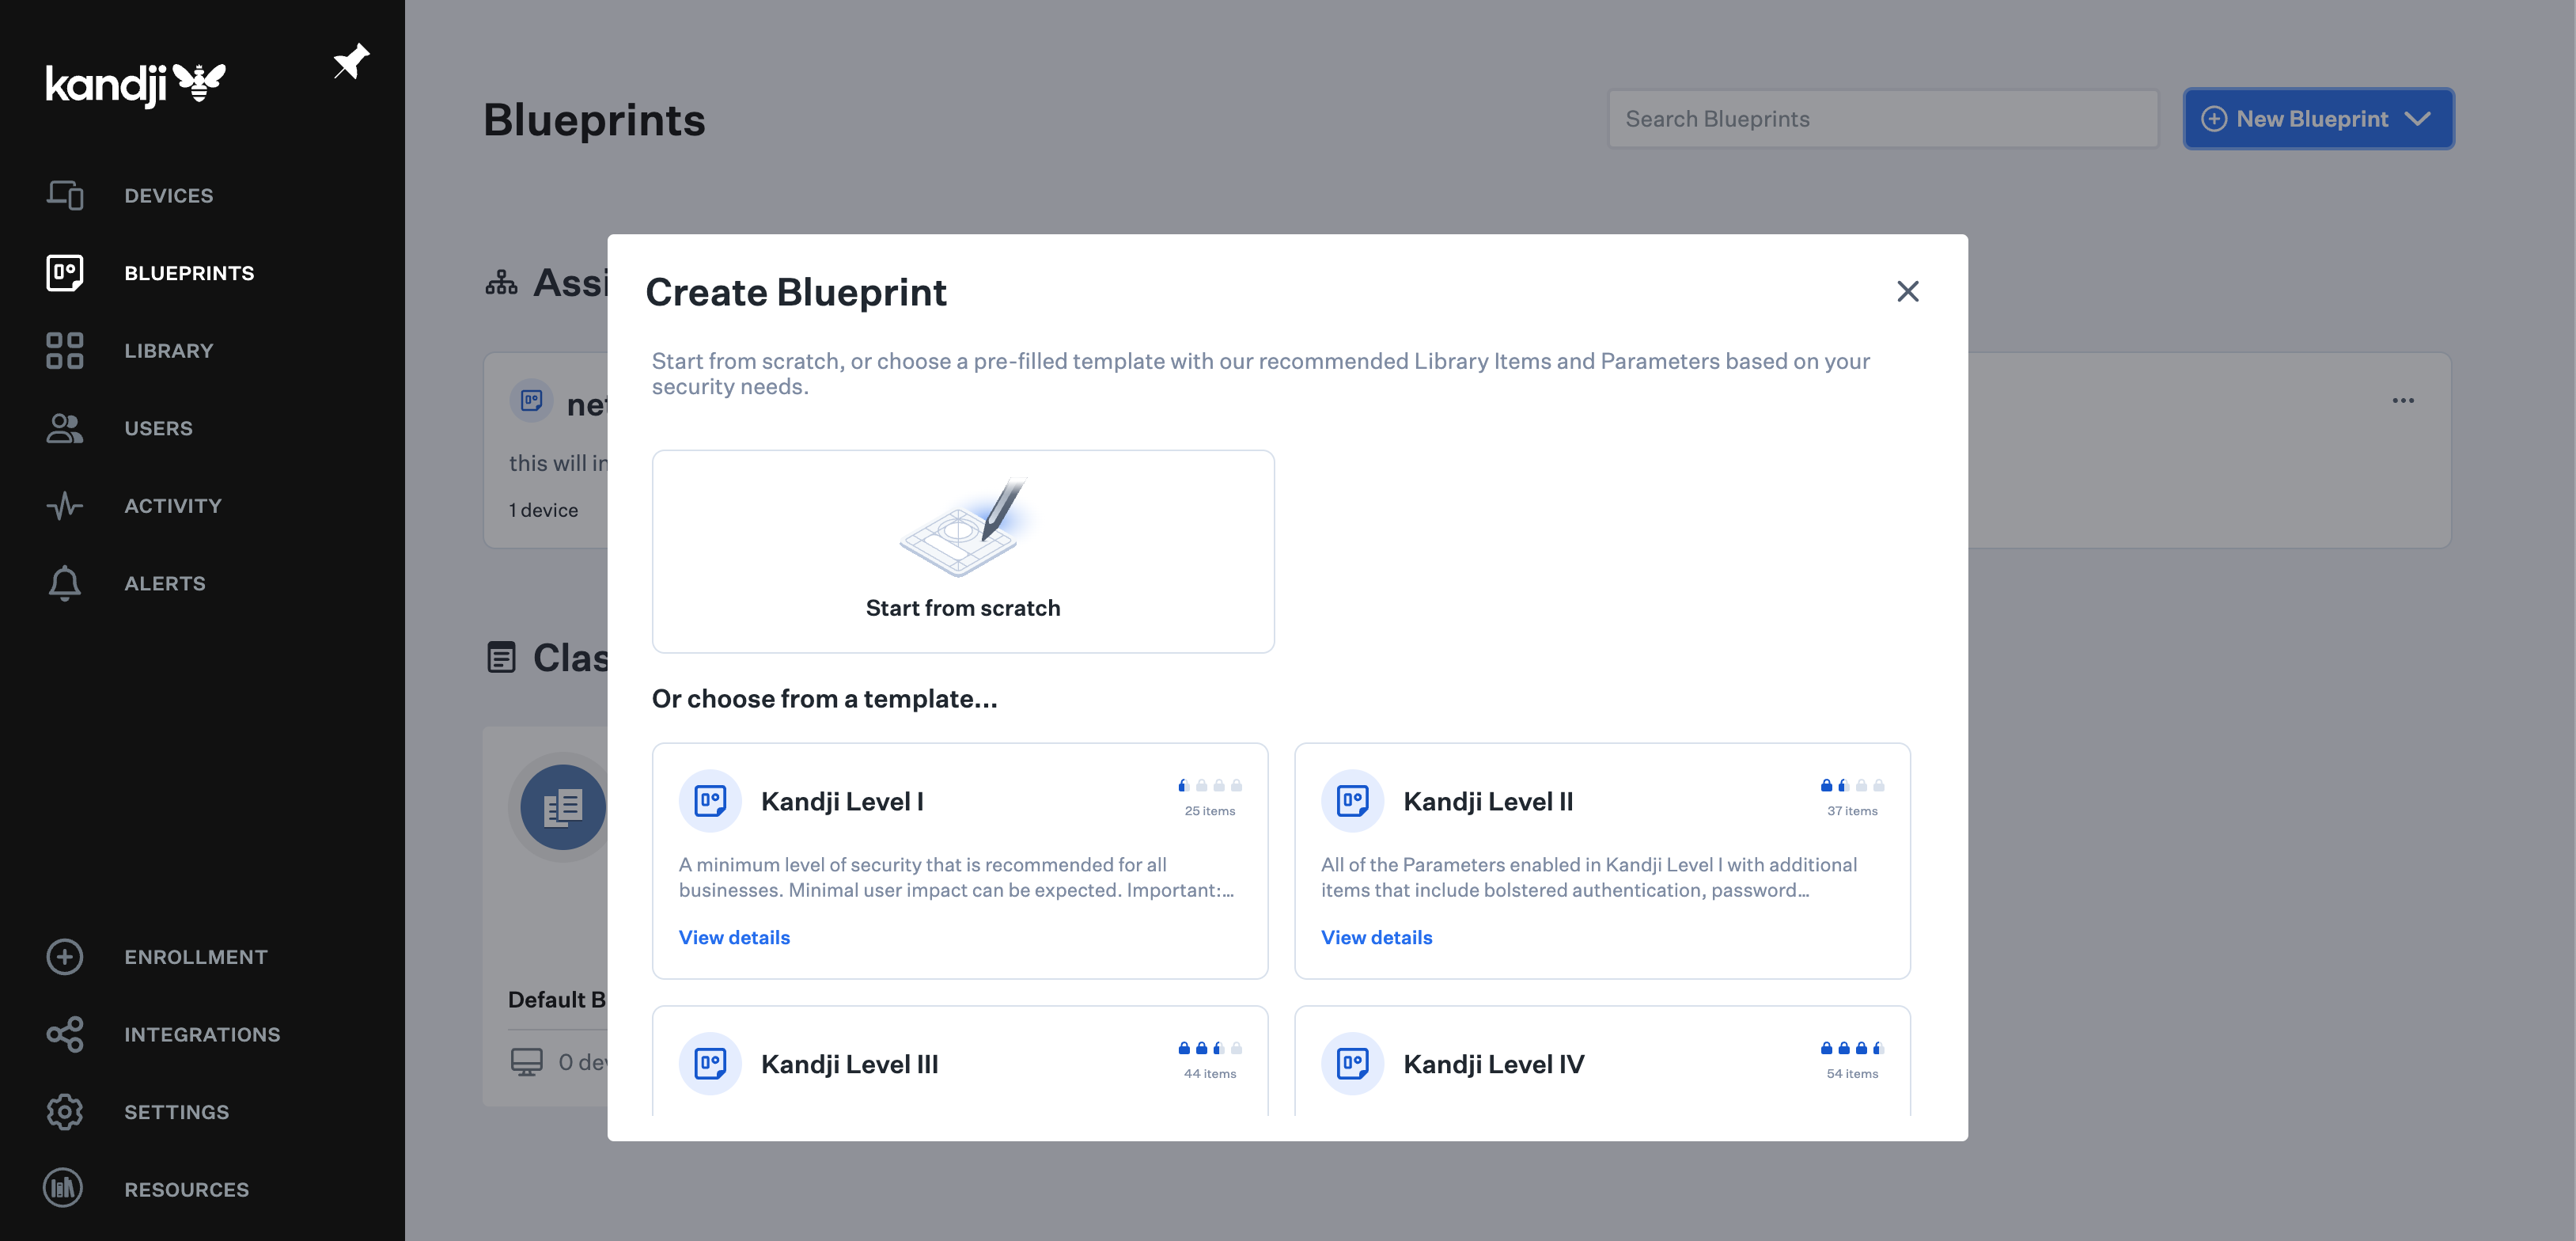
Navigate to the BLUEPRINTS section in Kandji and click the New Blueprint dropdown. Select New Assignment Map from the options. In the new window, you'll be presented with preconfigured templates or the option to start a new Blueprint from scratch. For this custom NetBird deployment, choose to start a new Blueprint from scratch.
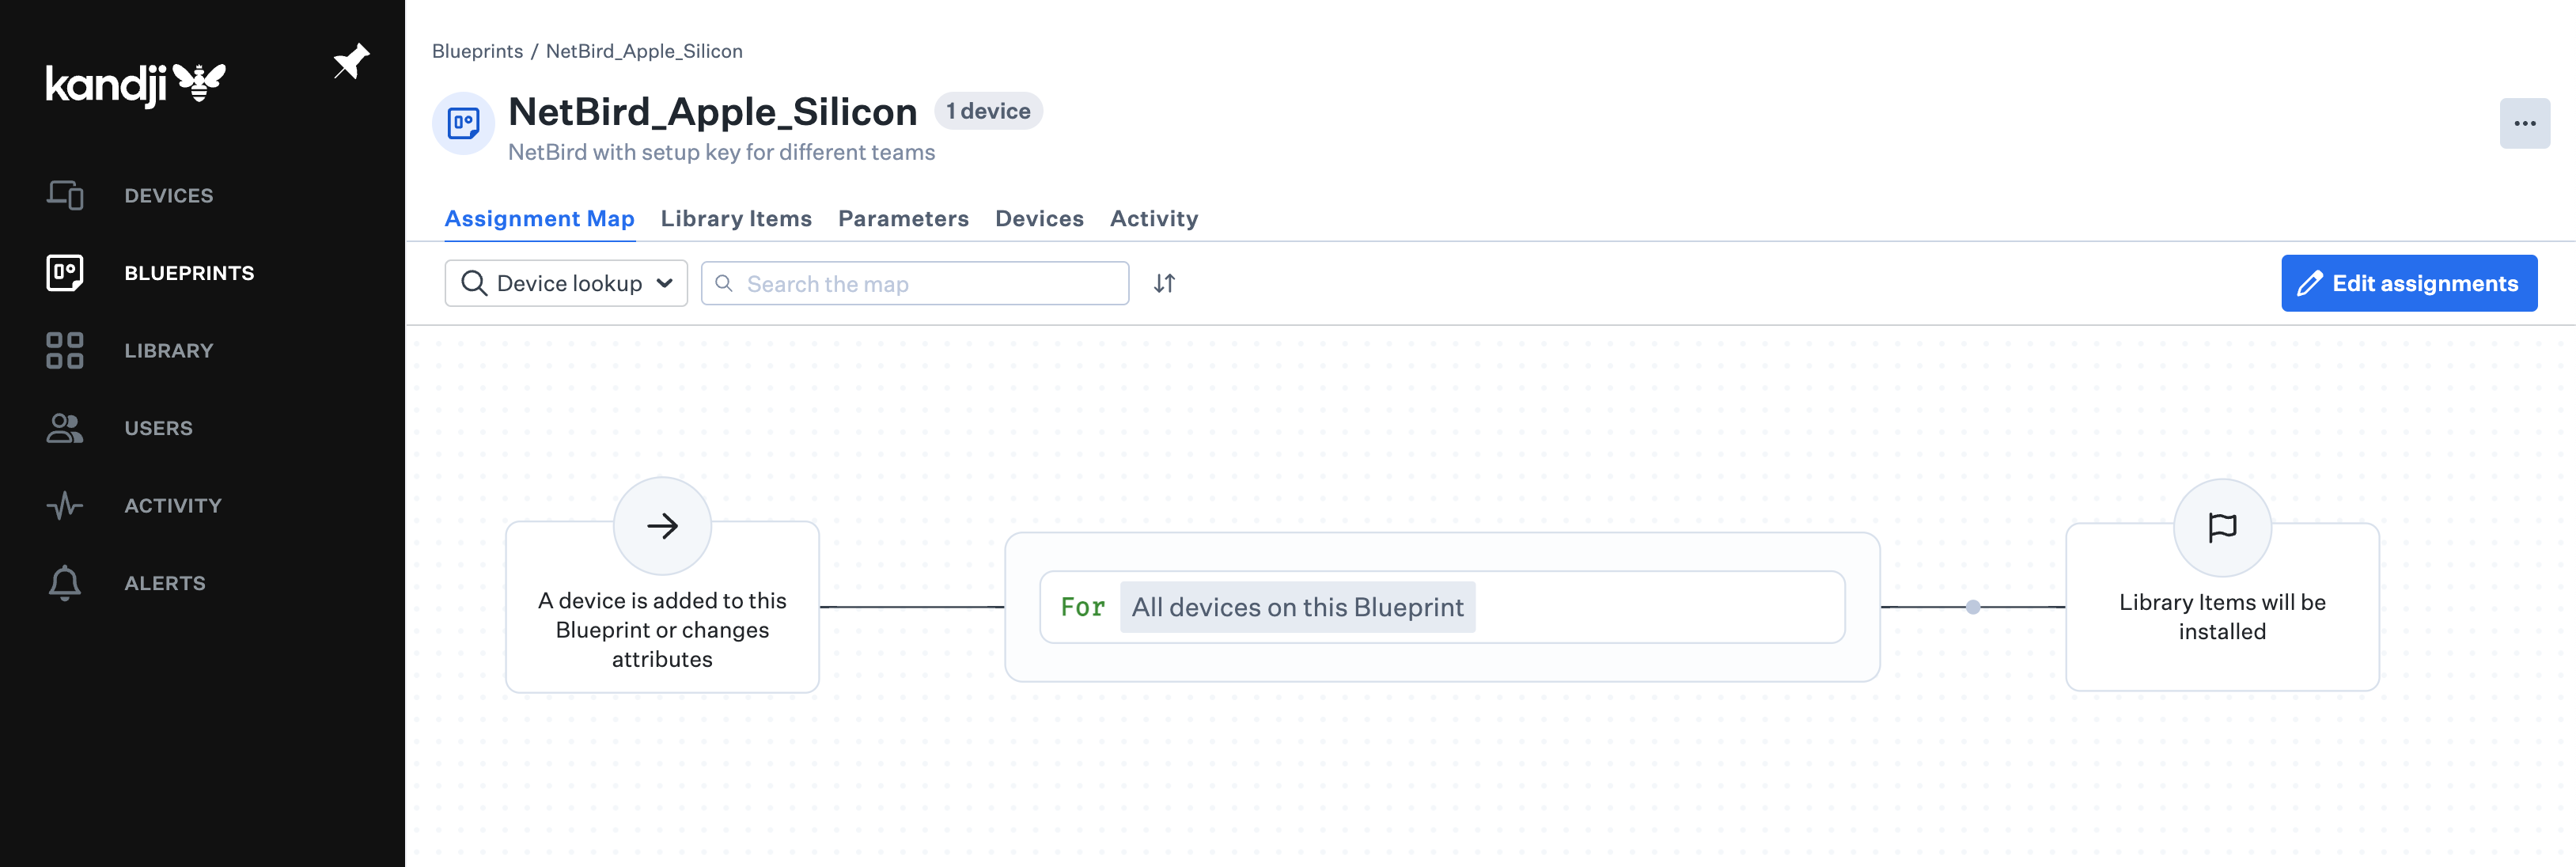
Give the Blueprint a descriptive name (e.g., NetBird_Apple_Silicon) and click Create Blueprint. This action will open Kandji's visual Blueprint builder, where you'll configure the deployment logic for NetBird.
Click Edit assignments to start editing the Blueprint.
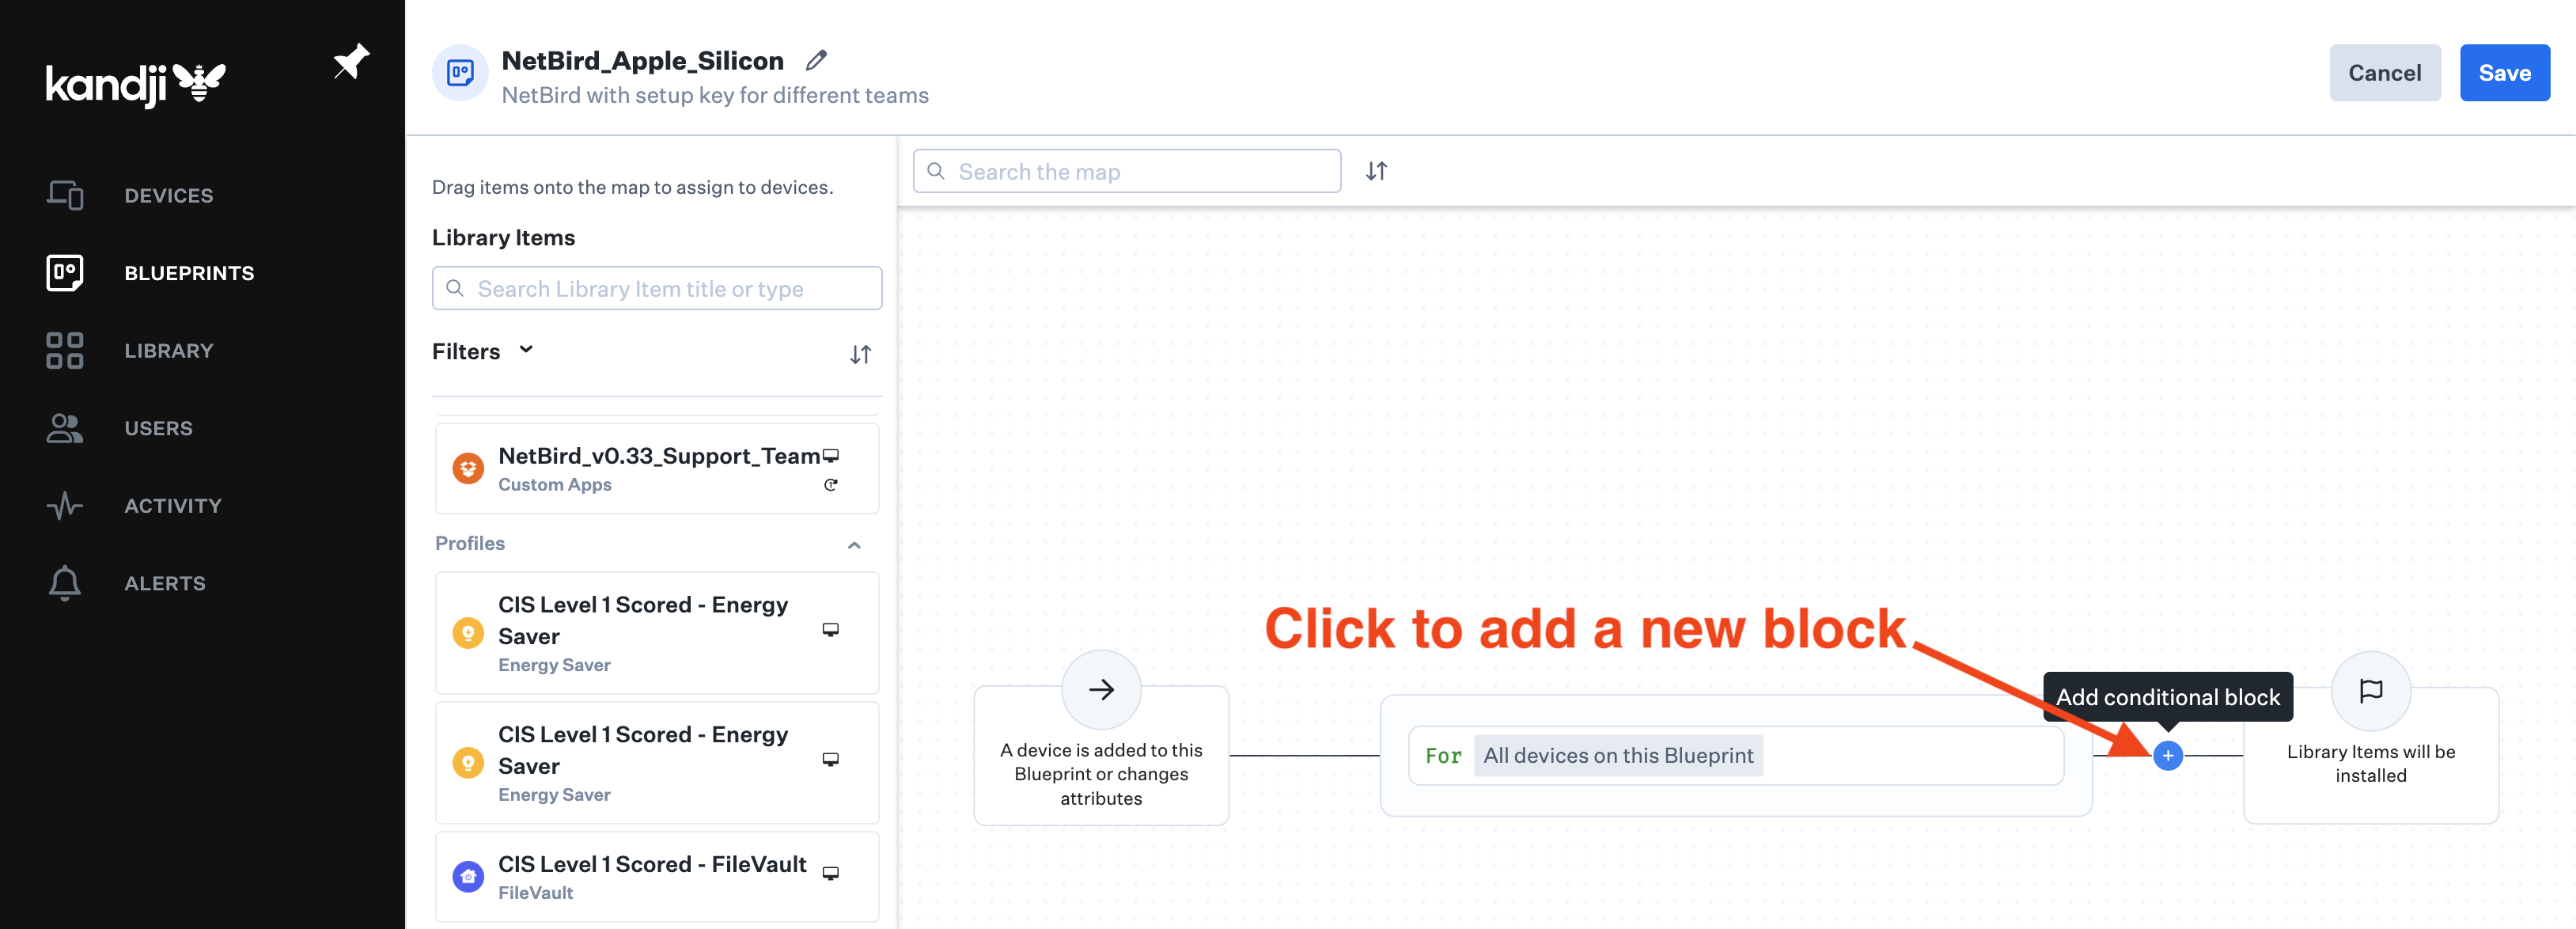
You'll see a list of apps from the library on the left, including the recently created NetBird custom app. To implement the deployment logic, hover over the + sign and click it to add a new conditional block. This block will determine which devices receive the NetBird installation based on specific criteria.
Next, click the pencil icon to edit the rules.
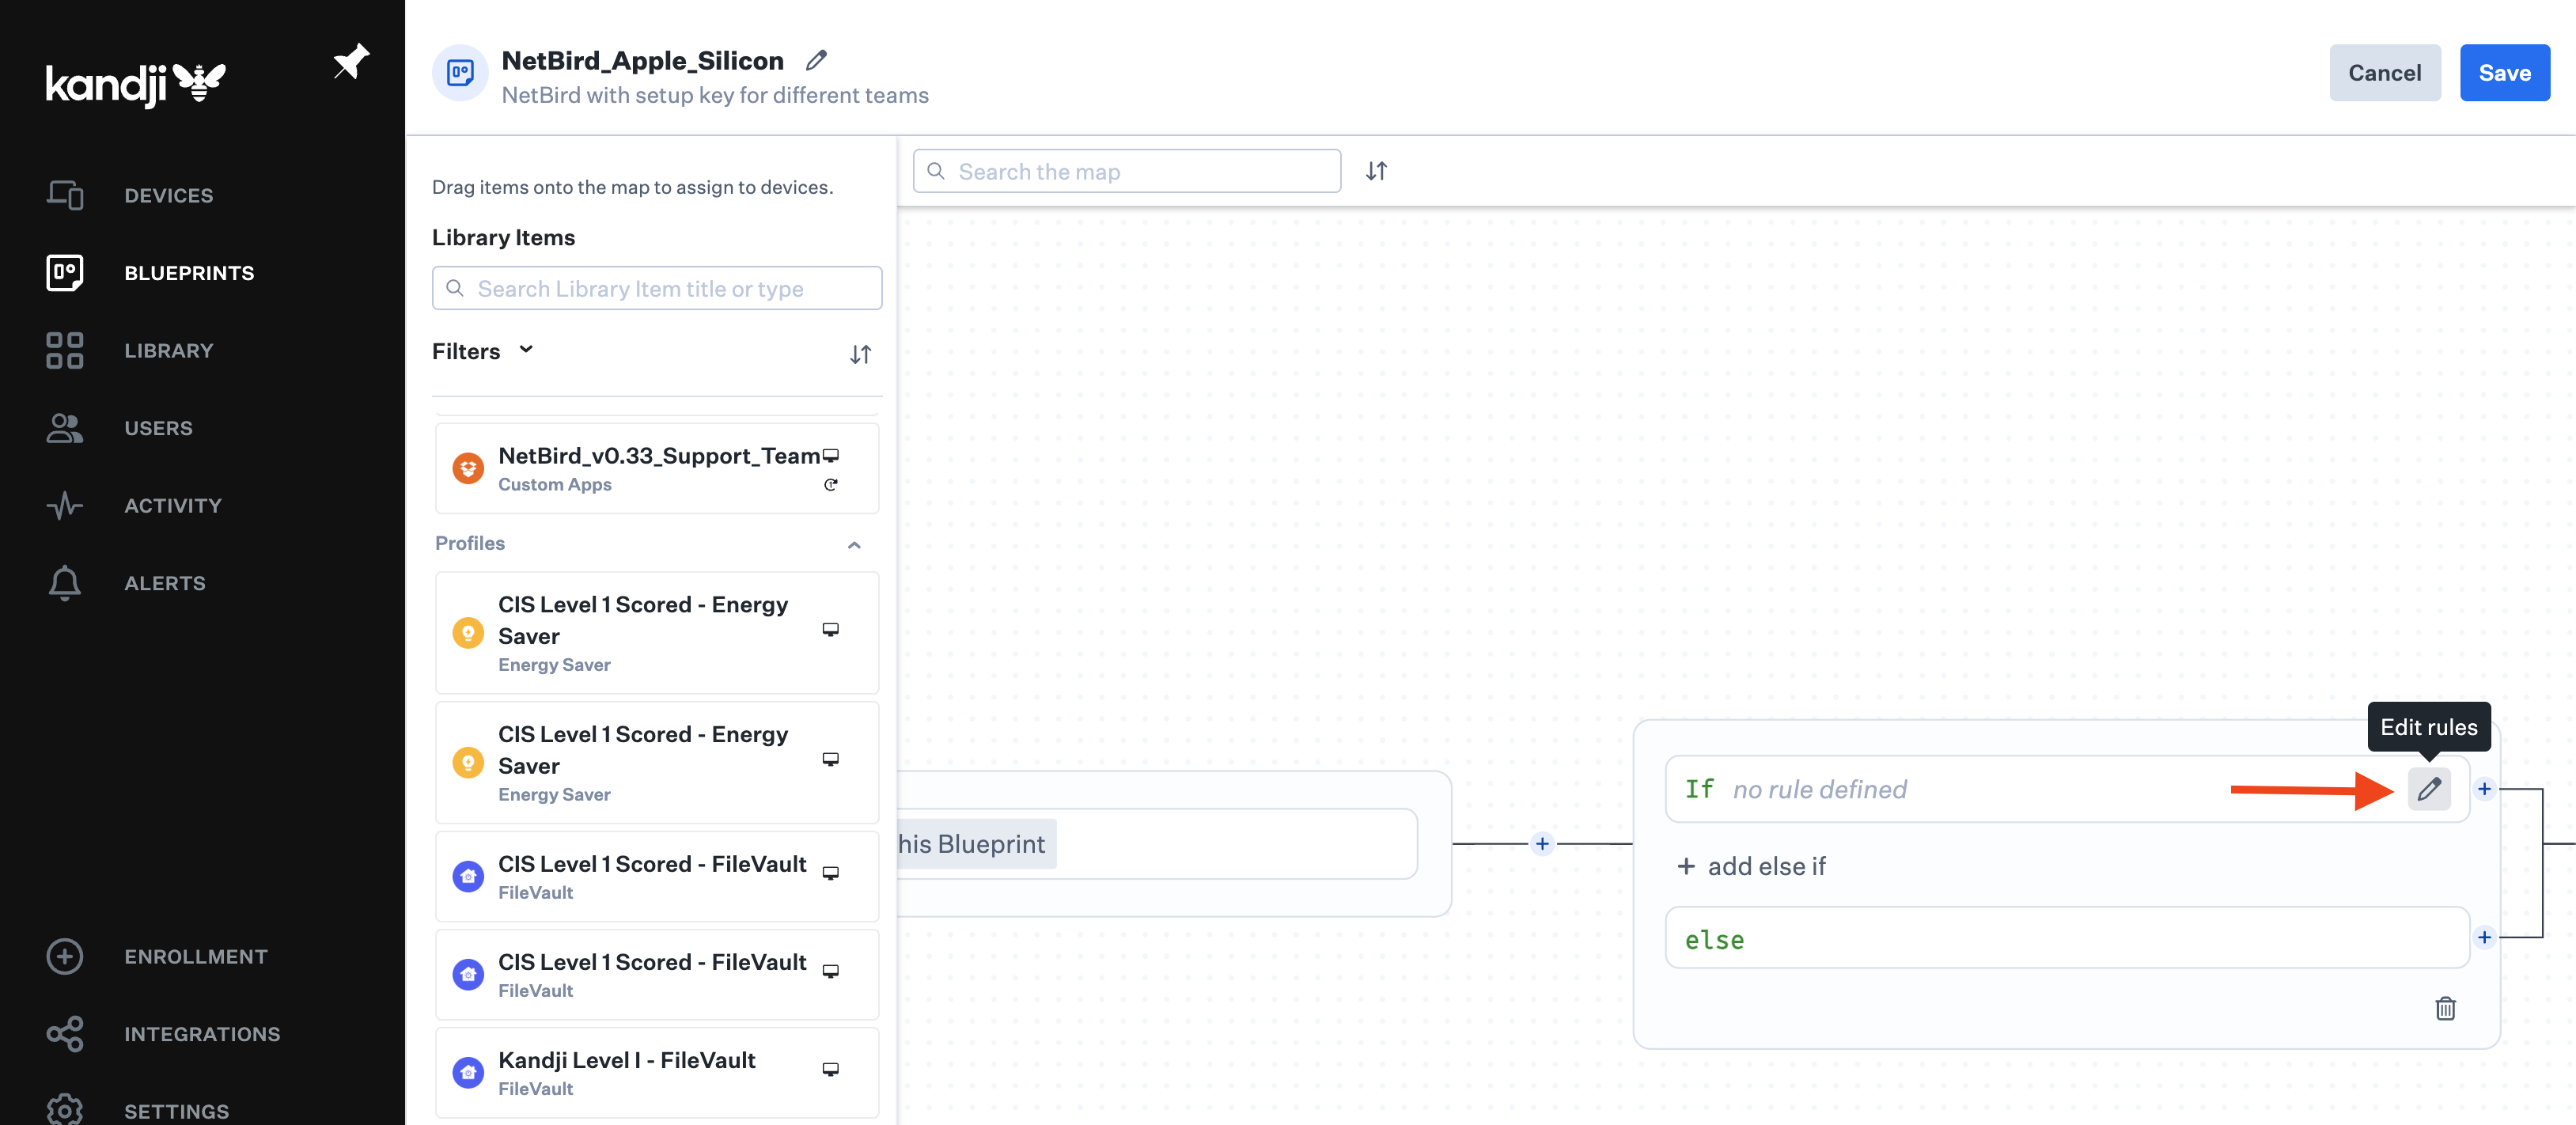
In the Assignment Rules window, configure the conditions for NetBird installation. Use the Support tag to trigger the deployment, ensuring NetBird is installed only on devices assigned to the support team. Press Confirm to continue.

Back to the visual Blueprint builder, locate the NetBird custom app and drag it into the newly created conditional block. This action associates the NetBird installation with the specified deployment criteria for the support team.
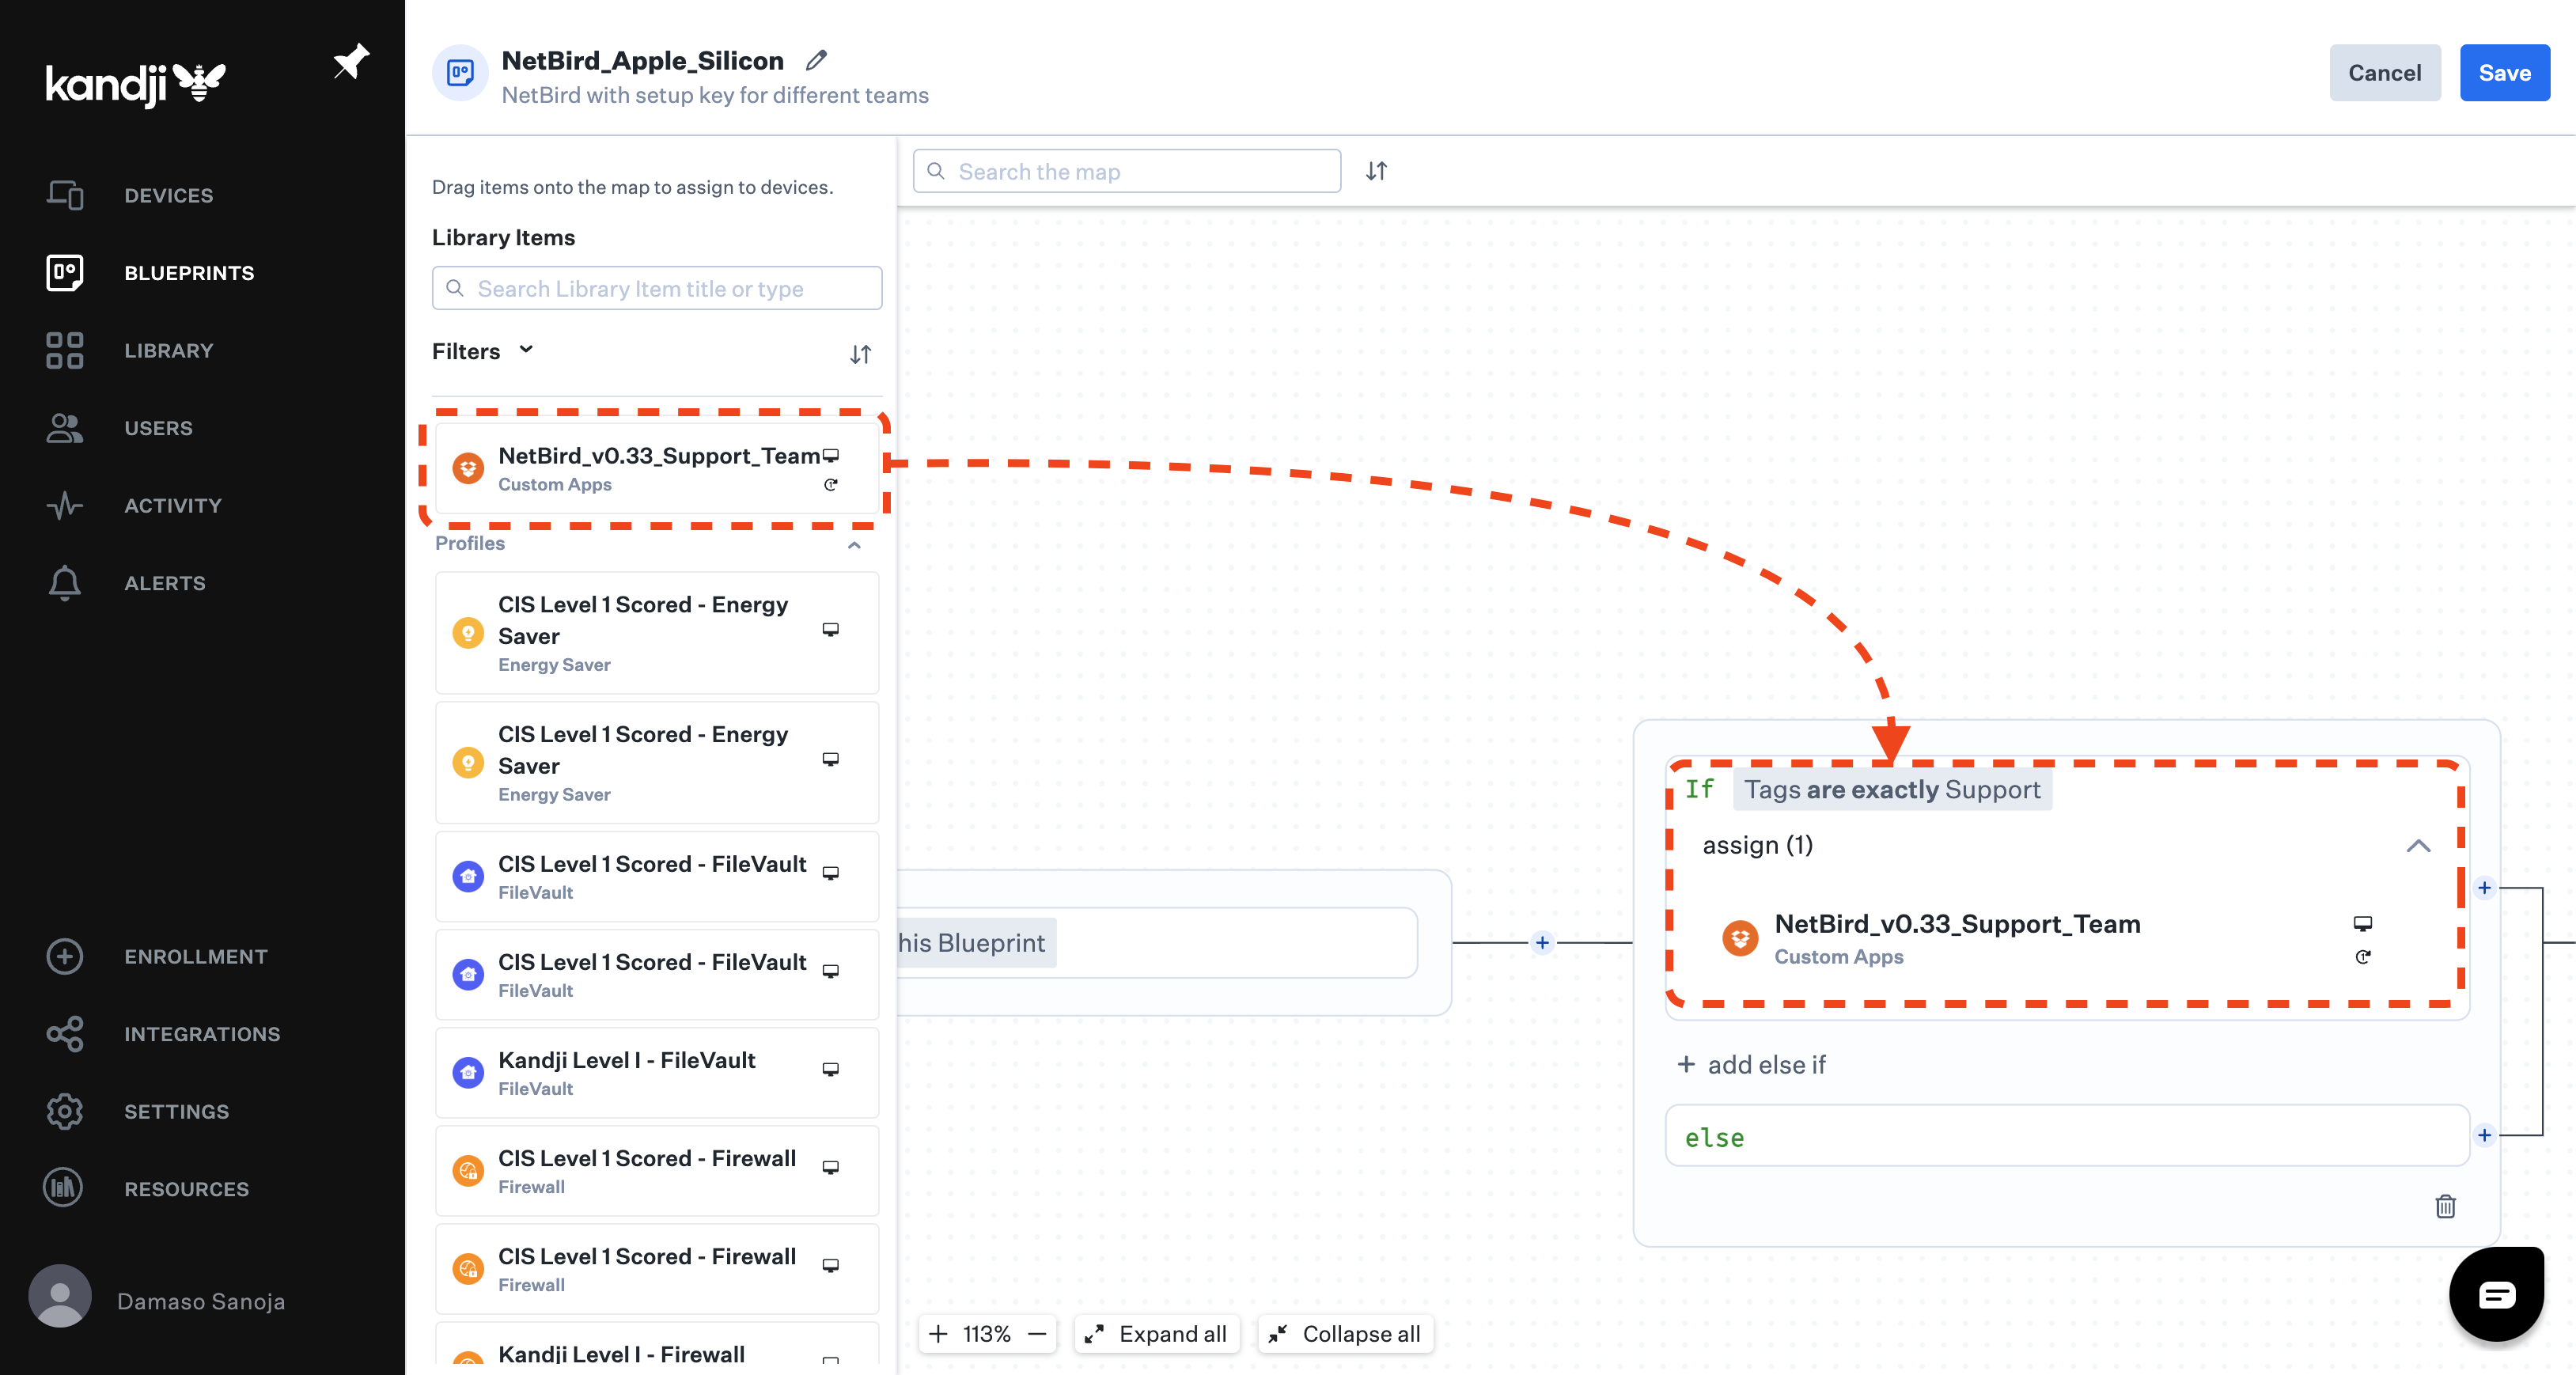
Click Save to update the Blueprint with the new logic. This action also assigns the Blueprint to the NetBird custom app, finalizing the deployment pipeline configuration.
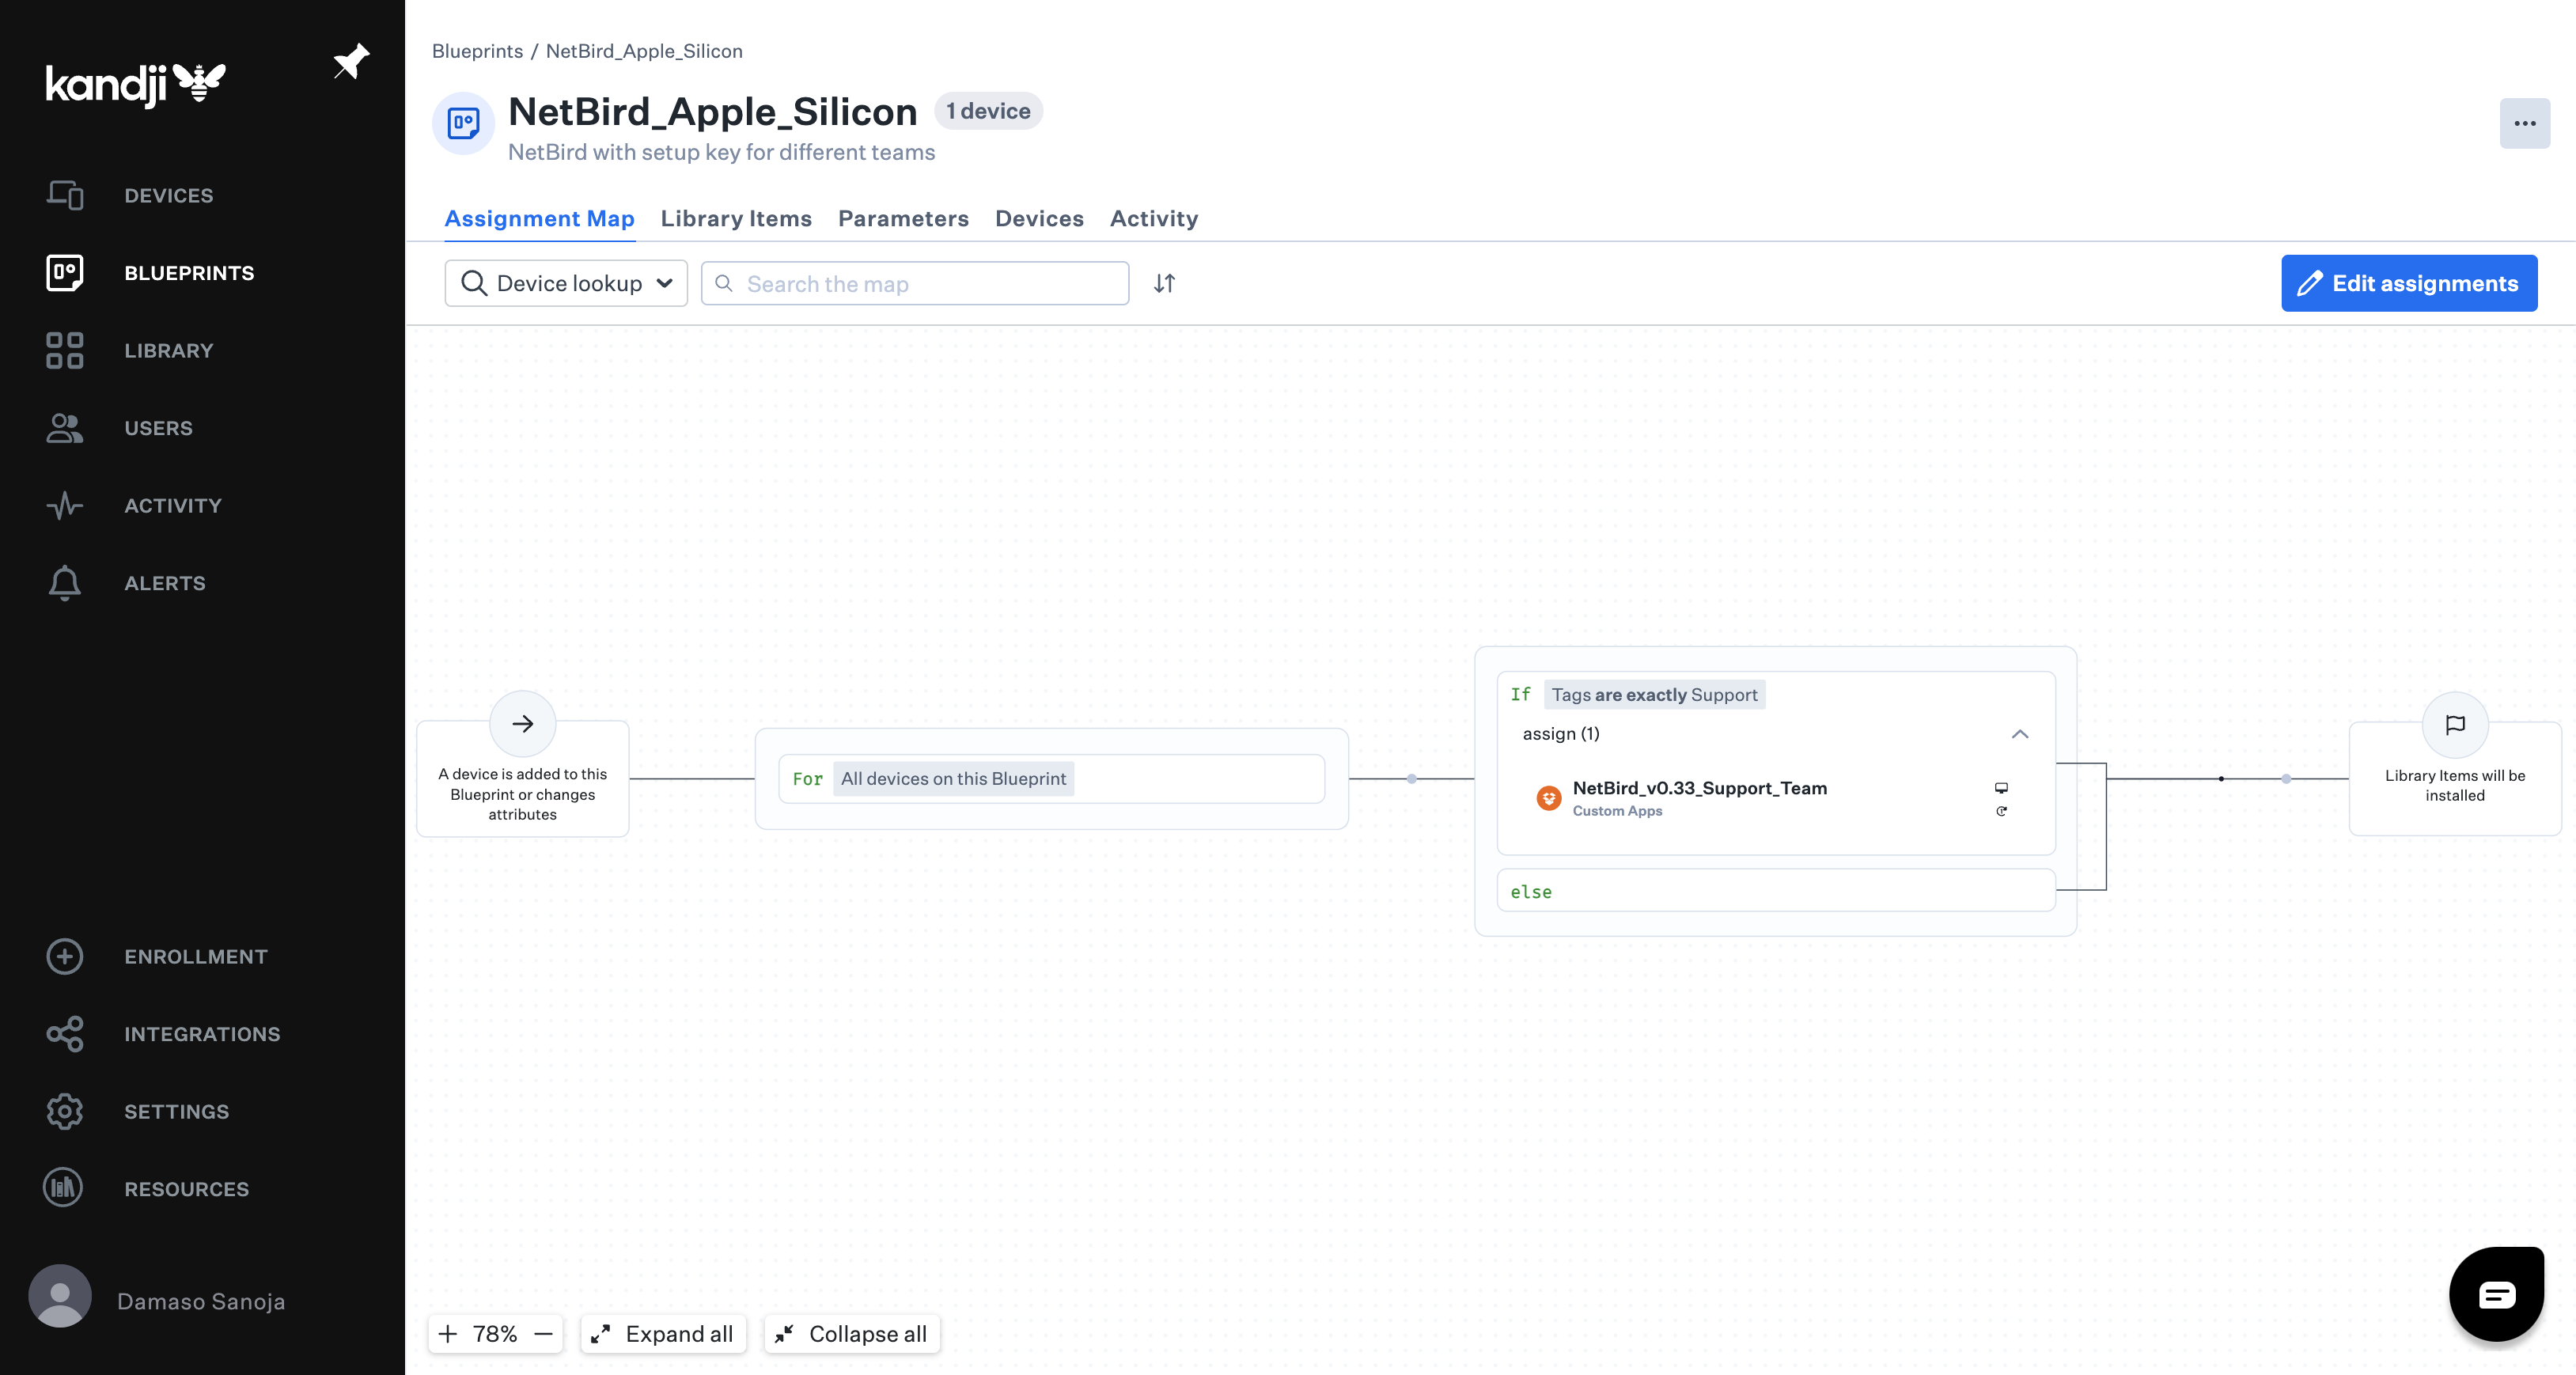
Testing and Verifying the Automated Provisioning Pipeline
Kandji checks devices every 15 minutes by default, so any device tagged with Support will automatically trigger the NetBird installation based on this Blueprint.
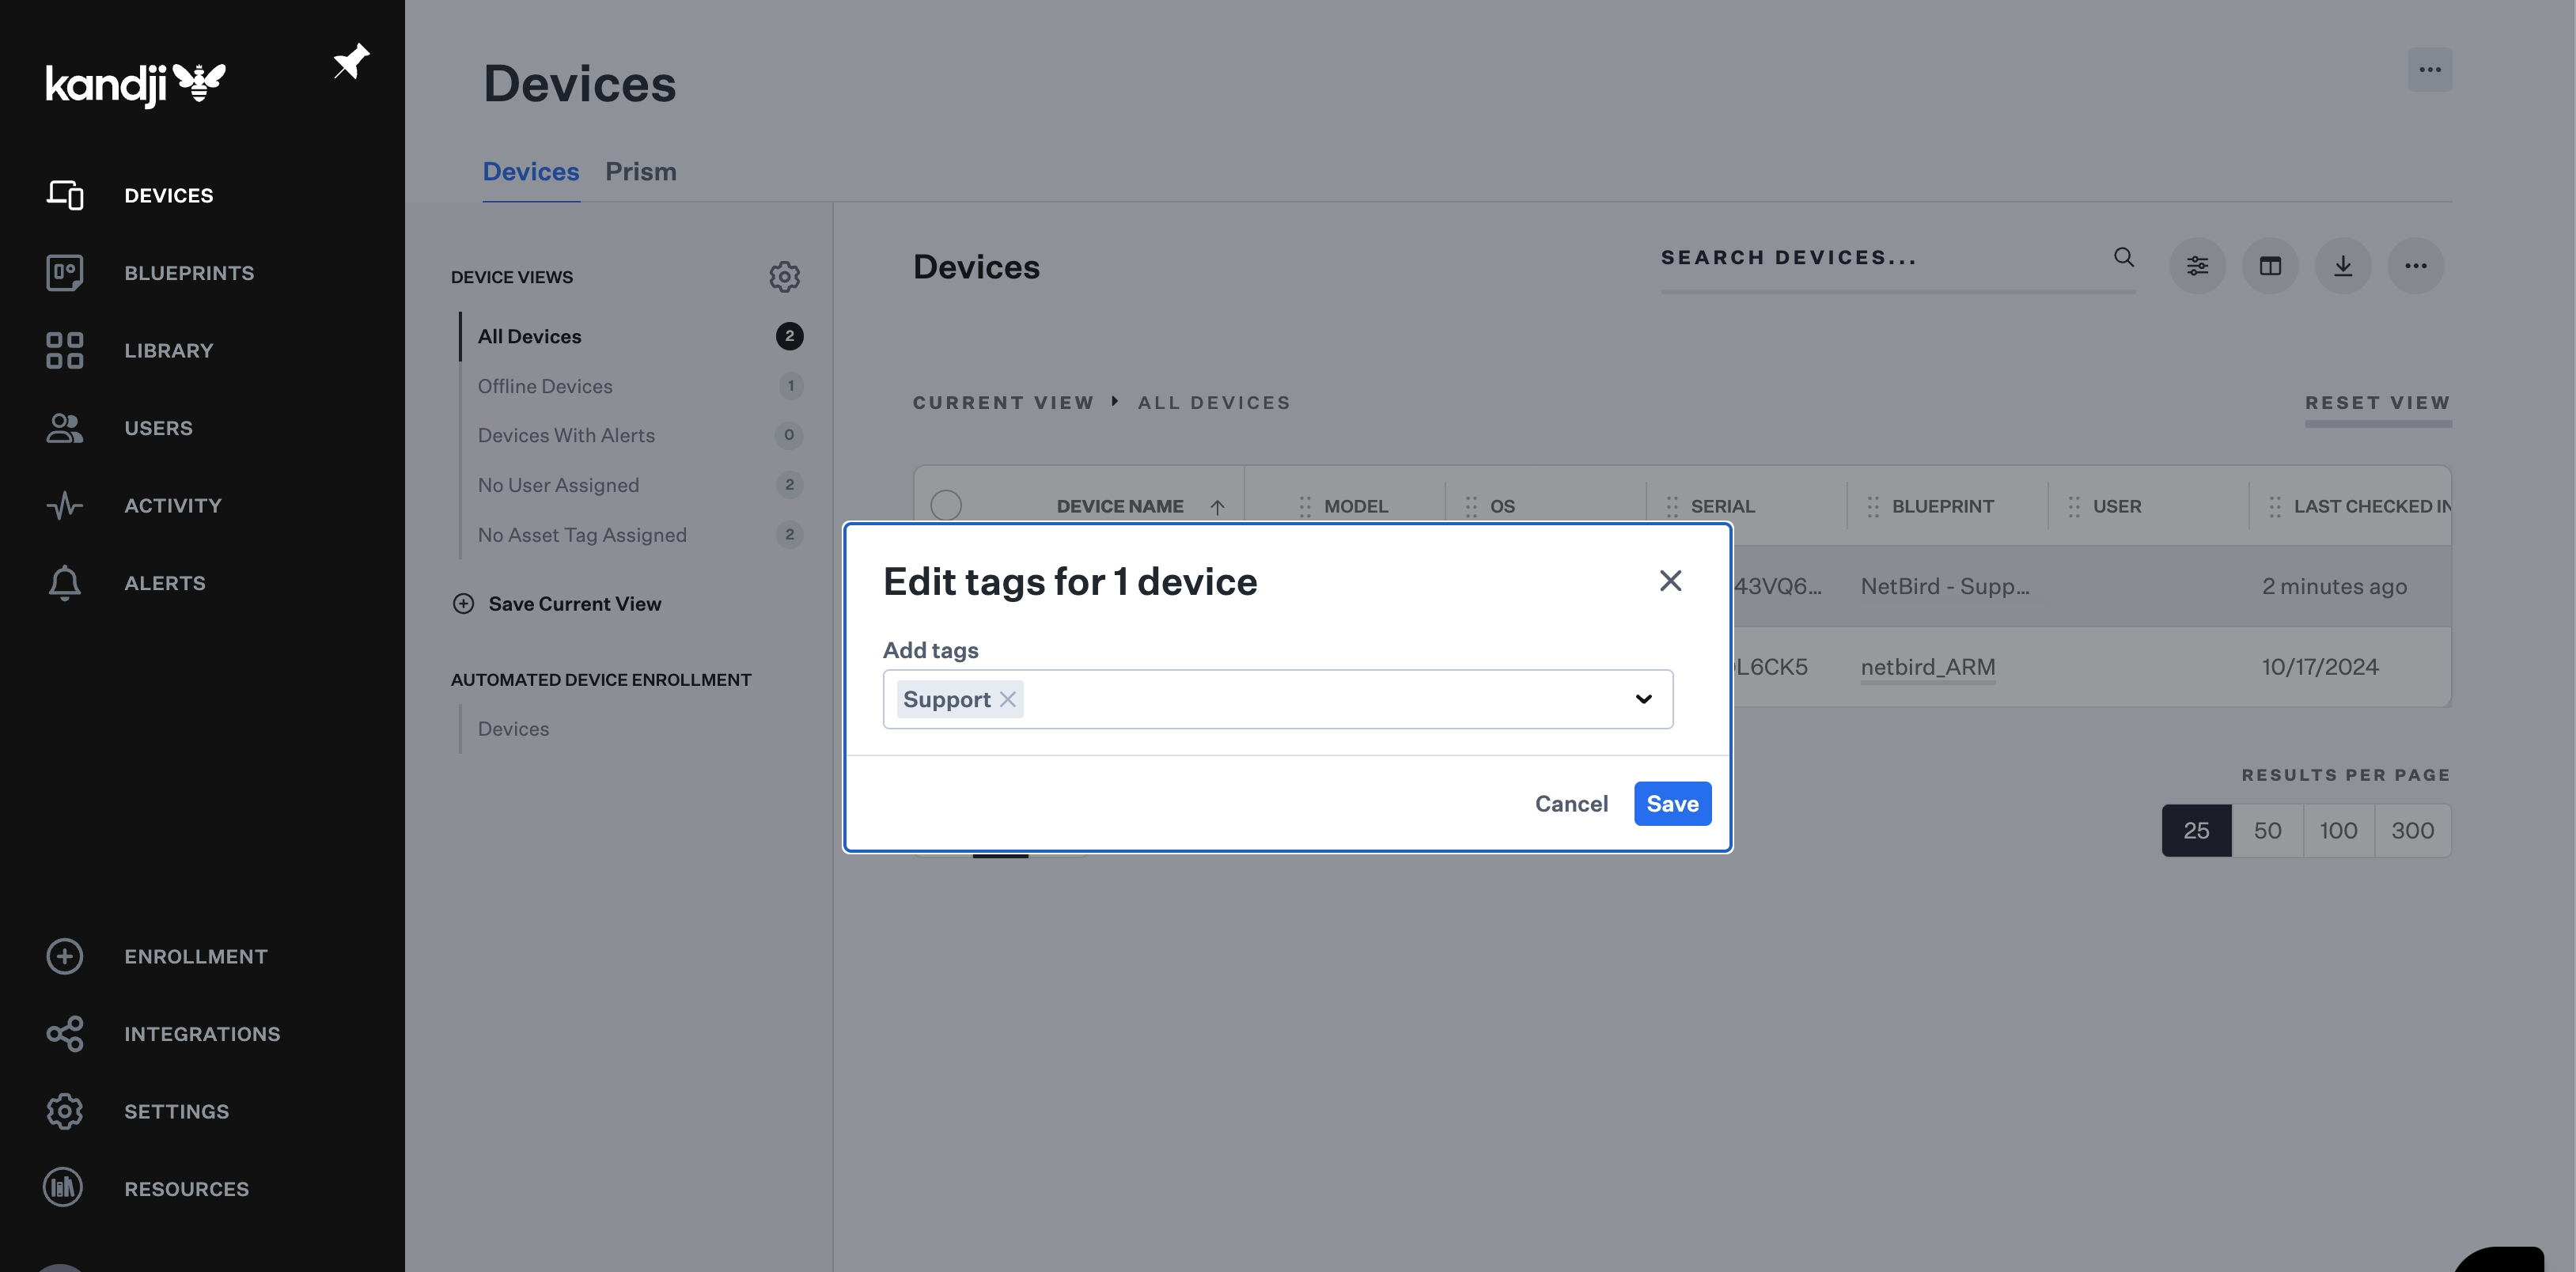
To verify the deployment pipeline, navigate to DEVICES in Kandji, select an enrolled device, and click Edit device details > Edit tags. Assign the Support tag to trigger the NetBird installation.

You can also confirm the process in NetBird. Log in to a NetBird account with administrative privileges, navigate to the Peers section, and look for the new device.

In this tutorial, you've learned how to integrate NetBird's VPN solution with Kandji MDM for Apple devices. By configuring NetBird Access Policies, creating Kandji MDM Blueprints, and setting up an automated deployment pipeline, you've established a robust system for managing network access across your organization.

