Routing traffic to multiple IP resources
Adding routes to resources within on-premises or cloud is a common scenario for DevOps and Platform teams. In this guide, we will show you how to route traffic to multiple IP resources using NetBird's Networks using IP resources.
Example
In the following scenario, we will cover the case where all users have restricted access to internal DNS servers in the internal network, and the DevOps team has full access to the entire network.
The network address is 172.16.0.0/15 and DNS servers has the IPs 172.16.30.2 and 172.17.100.2.
These IP ranges will be routed using Routing peers running in the network.
Create a Network
To create a Network, navigate to the Networks > Networks section in the NetBird dashboard:

Click on Add Network to follow a Wizard that will guide you through the steps to create a network and add resources to it.
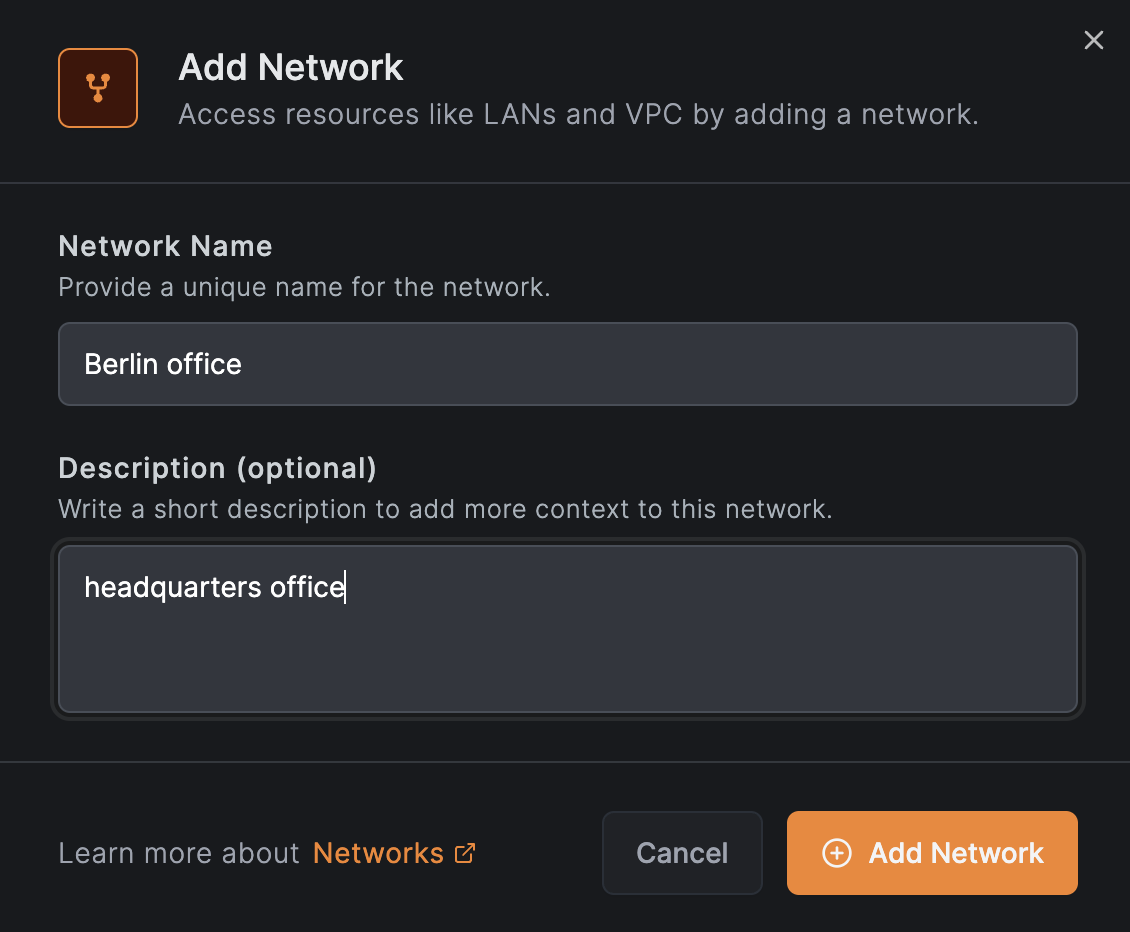
First, we fill out the network Name and Description as shown in the image below and click Continue:
Add a routing peer
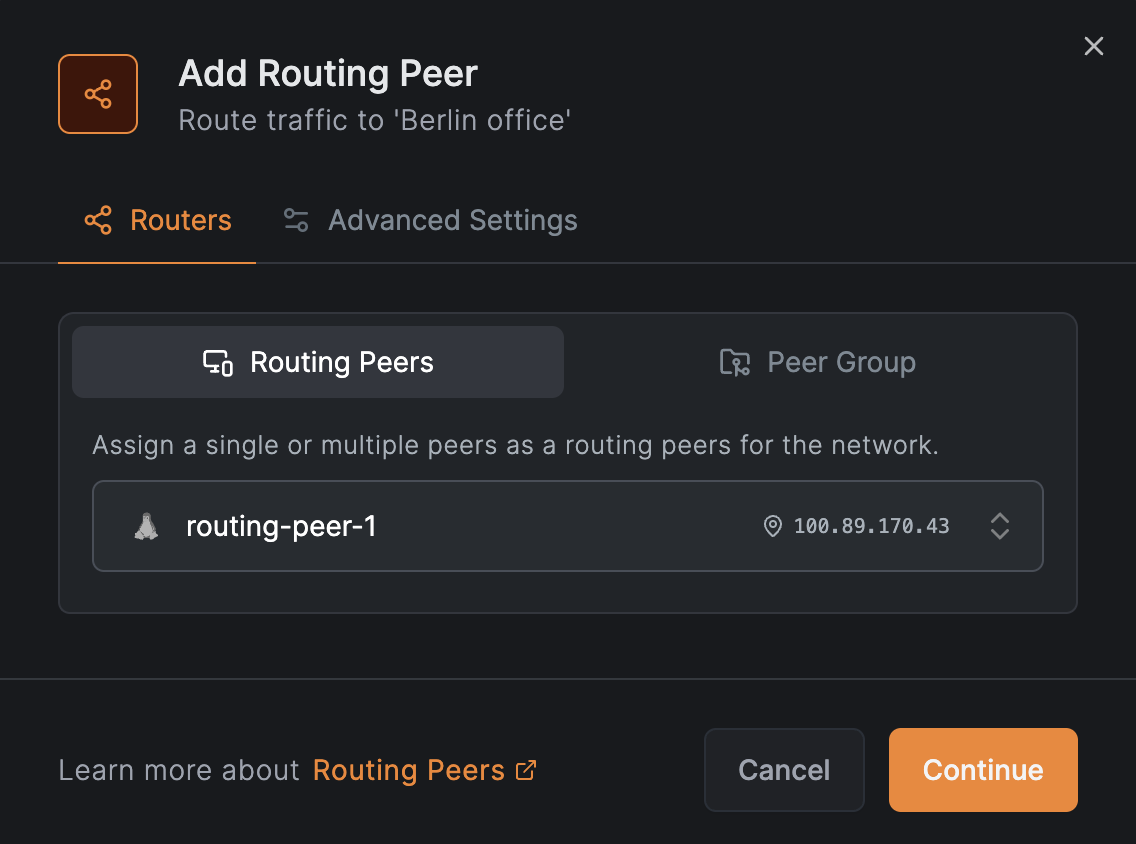
Next we are asked to add a routing peer to the network. Let's click on Add routing peer and select a node from that VPC:
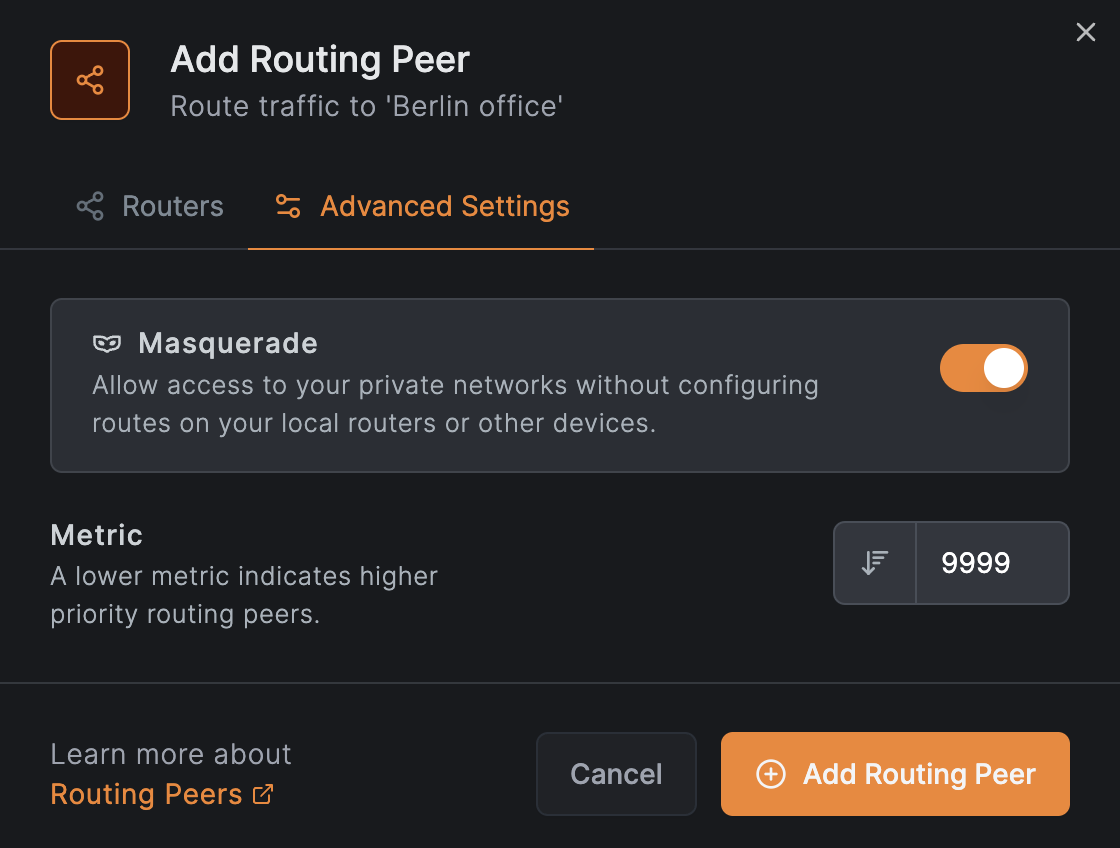
Click on Continue and then accept the defaults to add a routing peer by clicking on Add Routing Peer:
Add the network resource
Following the guide, we are asked to add a new resource.
Click on Add Resource and enter the Office network name and use the IP range 172.16.0.0/15 as the address:
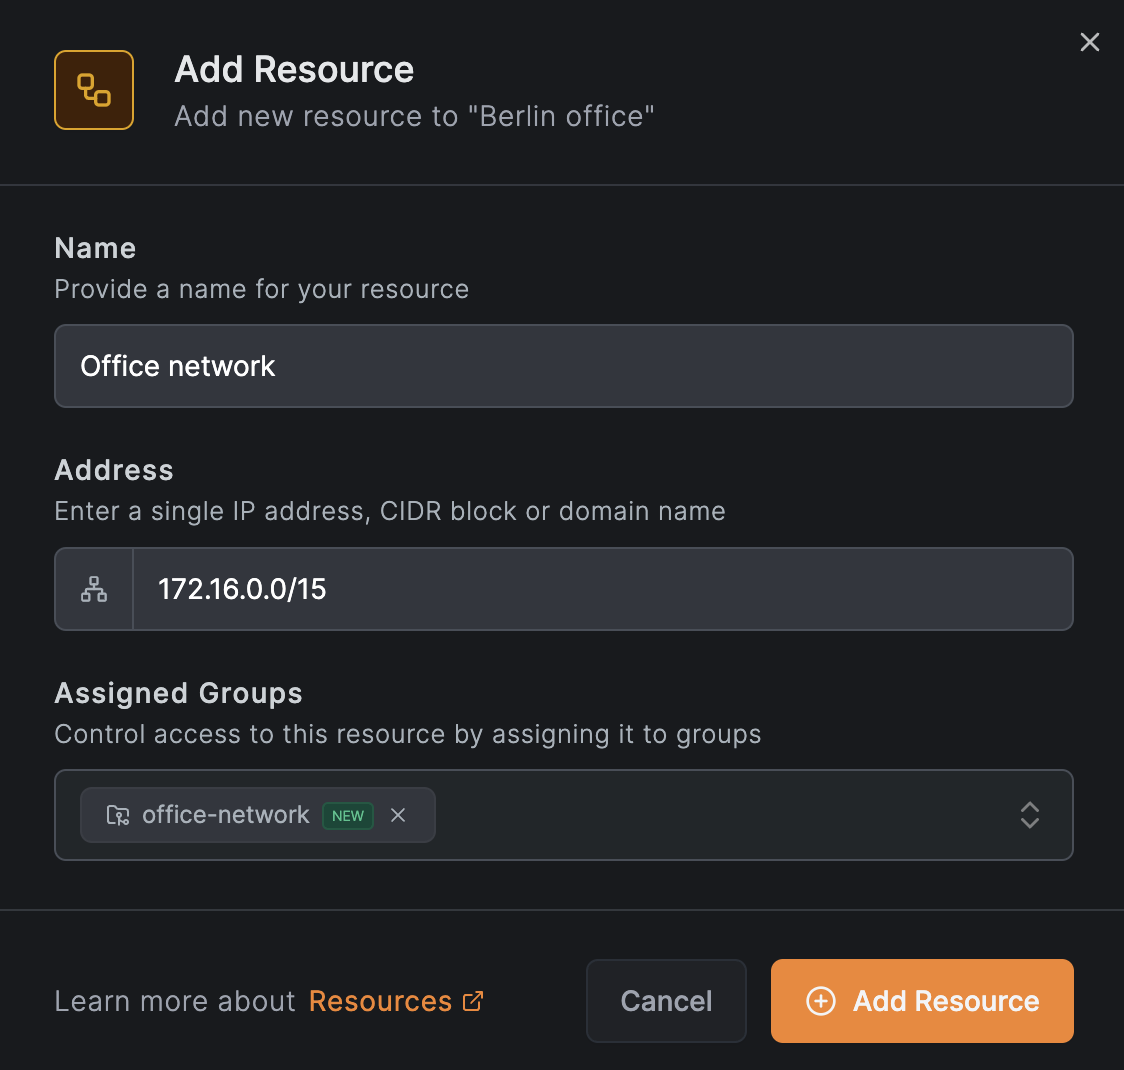
We can also assign a group to this resource; in this example, we will assign the group office-network to it. This way, we can create a policy that allows the DevOps team to access the entire IP range.
Add an access control policy for the network resource
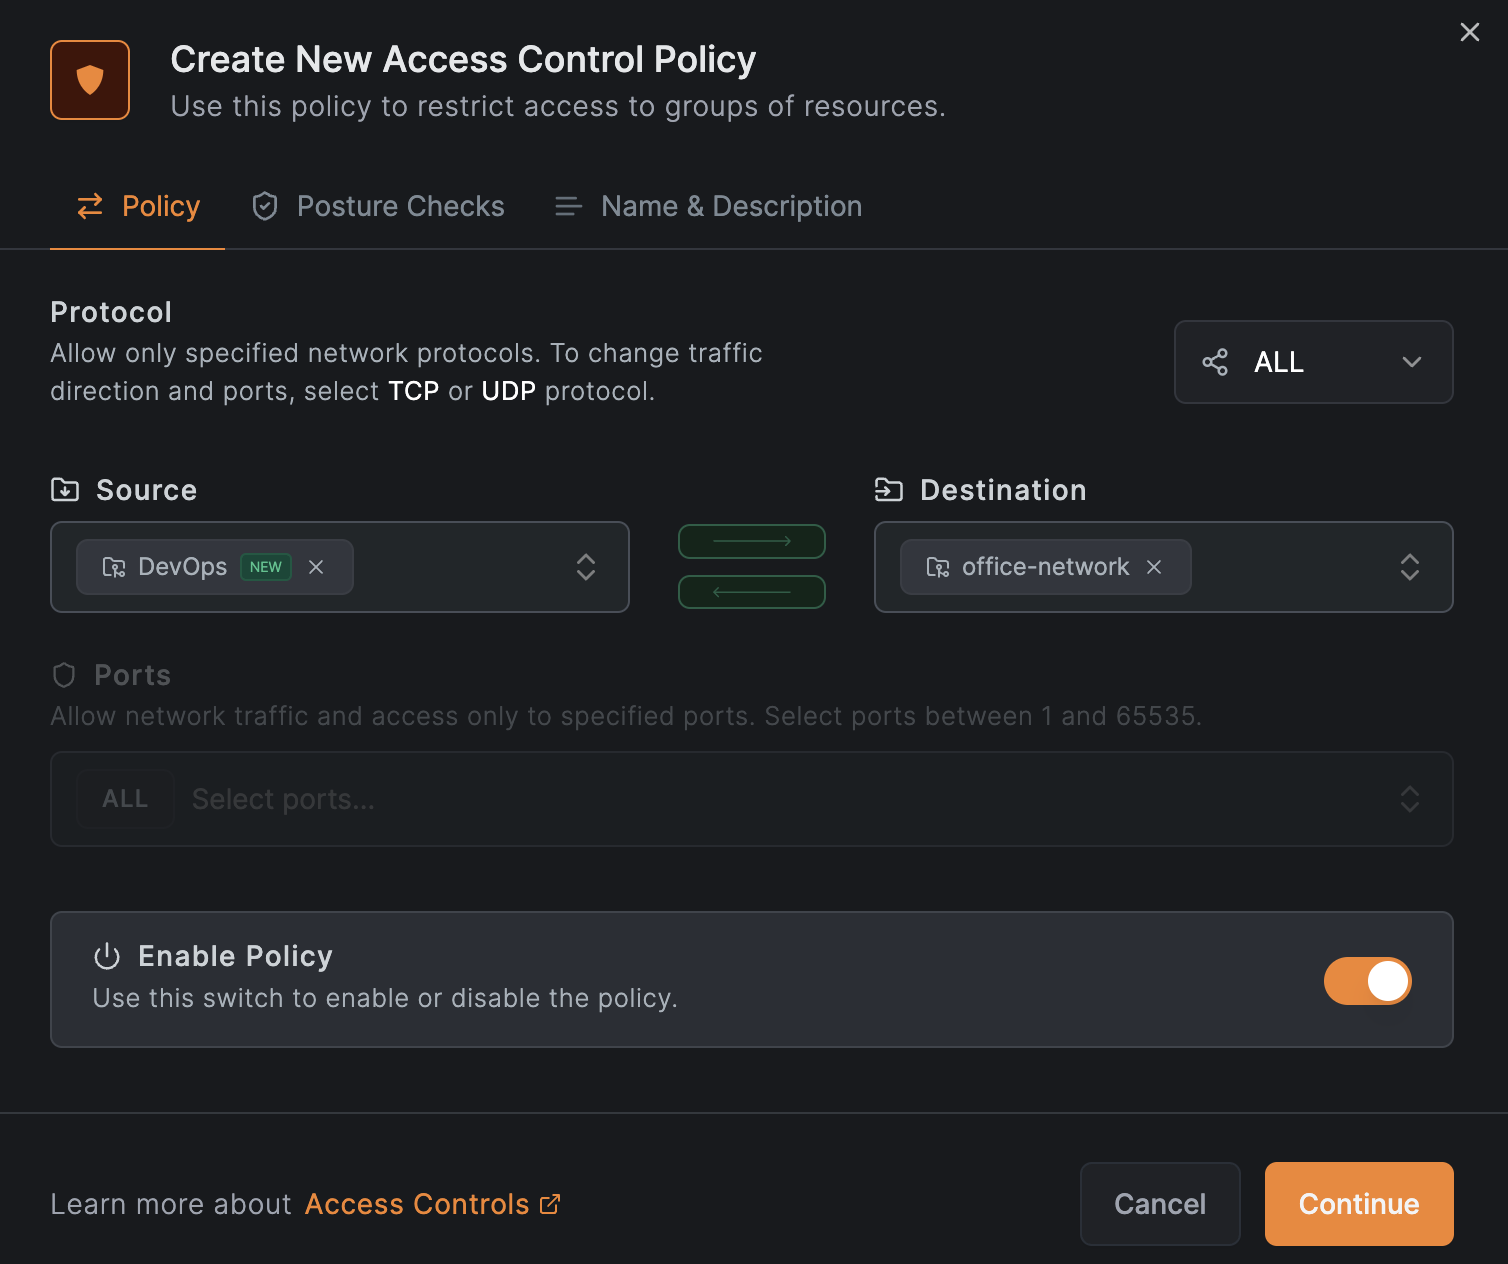
Next, in the guide, we will be asked to create an access control policy. Here, we will create a policy that allows all access to the office-network group of the IP range 172.16.0.0/15
resource to peers in the DevOps group.
Click on Create Policy and fill out the fields as shown in the image below:
Click on Continue 2 times and then click on Add Policy to save the policy:
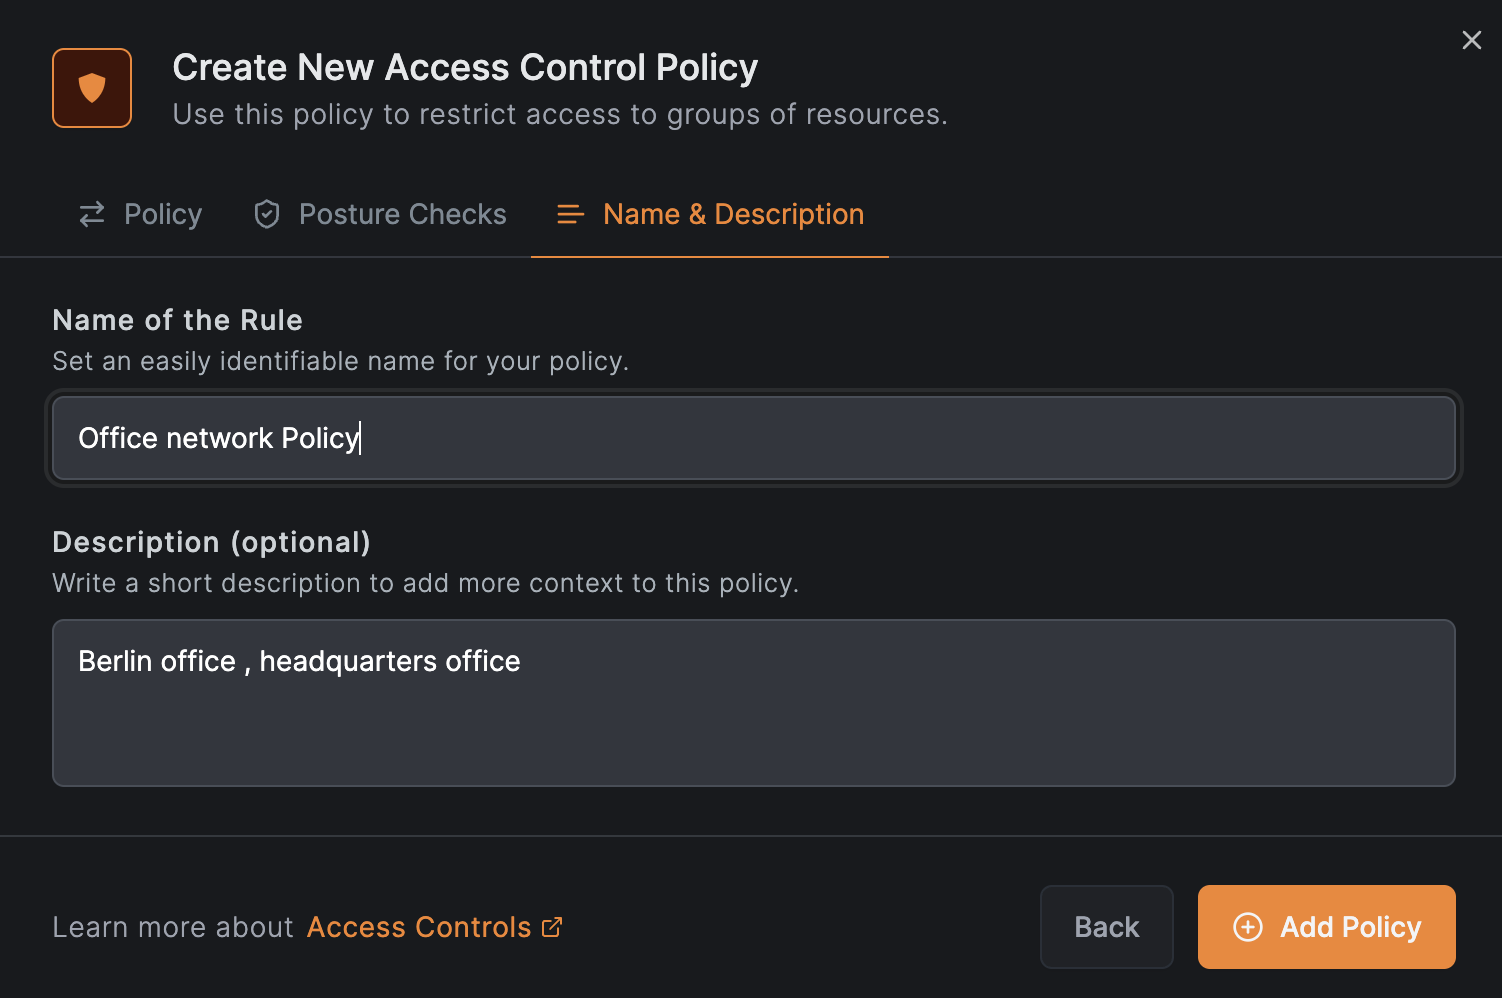
Add the DNS server resources
Now, let's add the DNS servers resources to the network. Click on Add Resource and enter the IP address of the first DNS server:
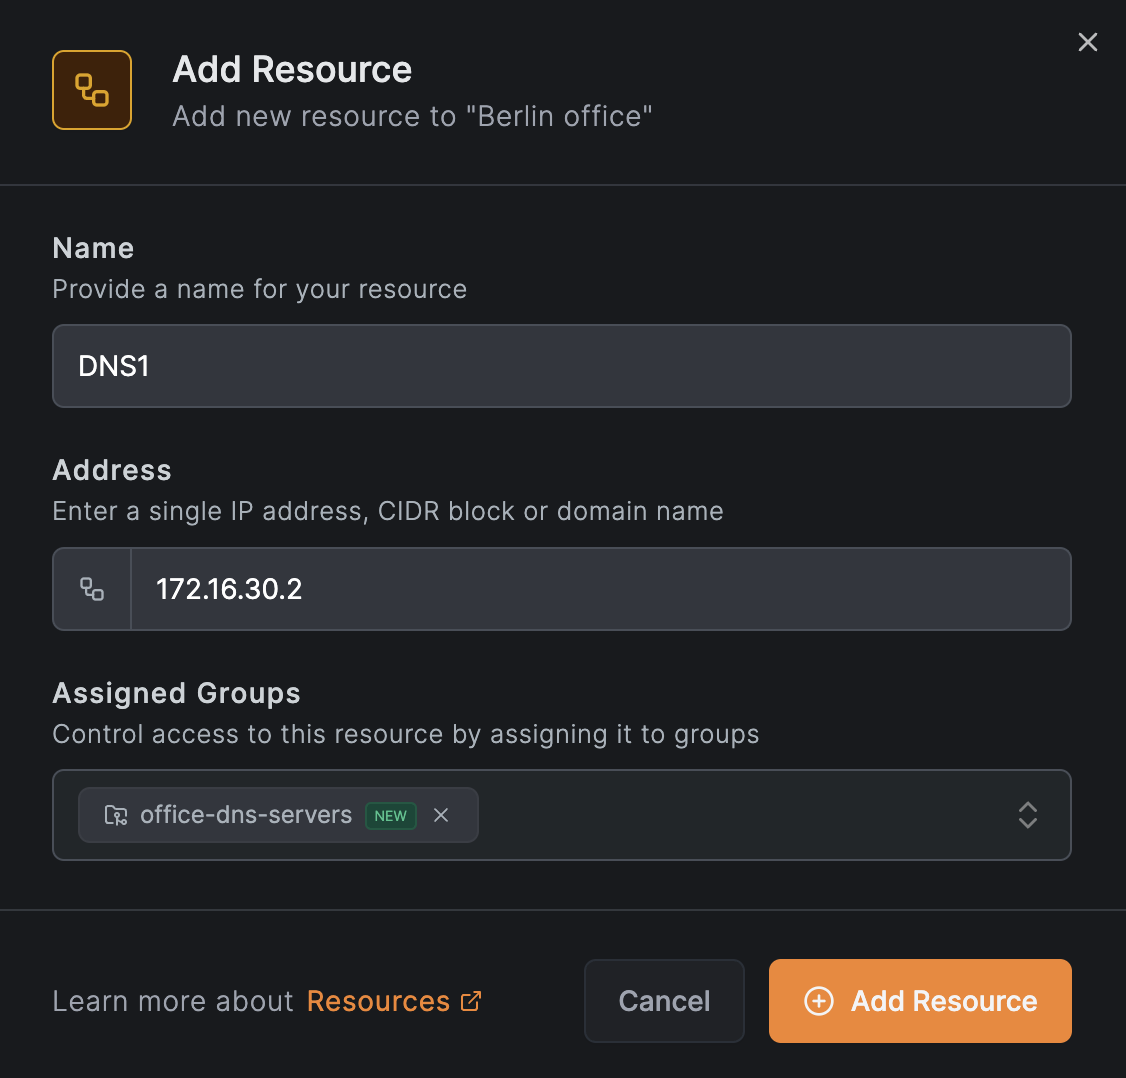
We will use the same group, office-dns-servers, for both resources, allowing all users to access the DNS servers.
This time, when asked to create a policy, we will click on Later to skip it since we will create one more resource for this configuration.
Now, let's add another resource for the second DNS server:
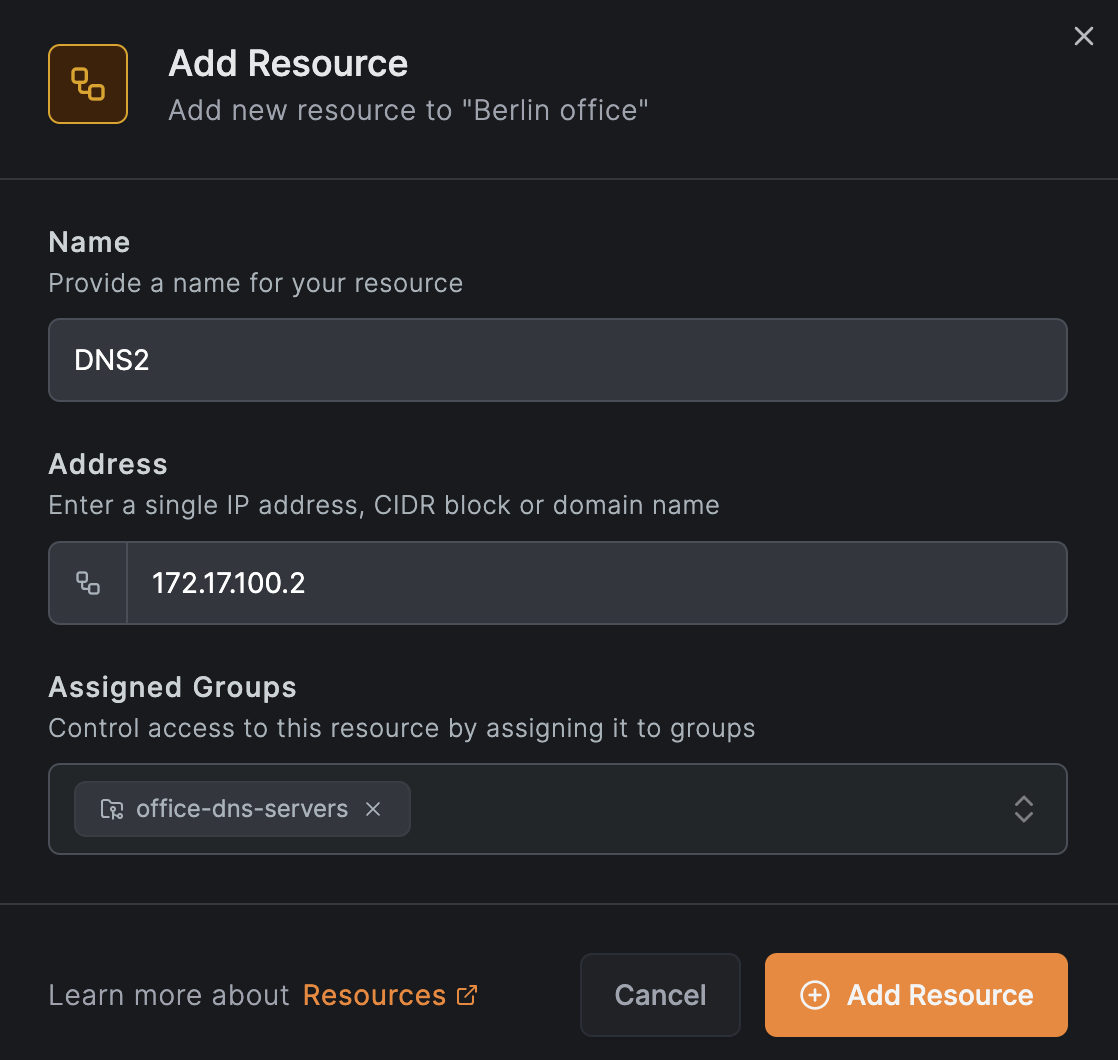
Add an access control policy for the DNS server resource
This time, we will create a policy that allows access to the office-dns-servers group of DNS IP resources to peers in
the All users group. They will be granted access only to the UDP port 53 of these servers.
Click on Create Policy and fill out the fields as shown in the image below:
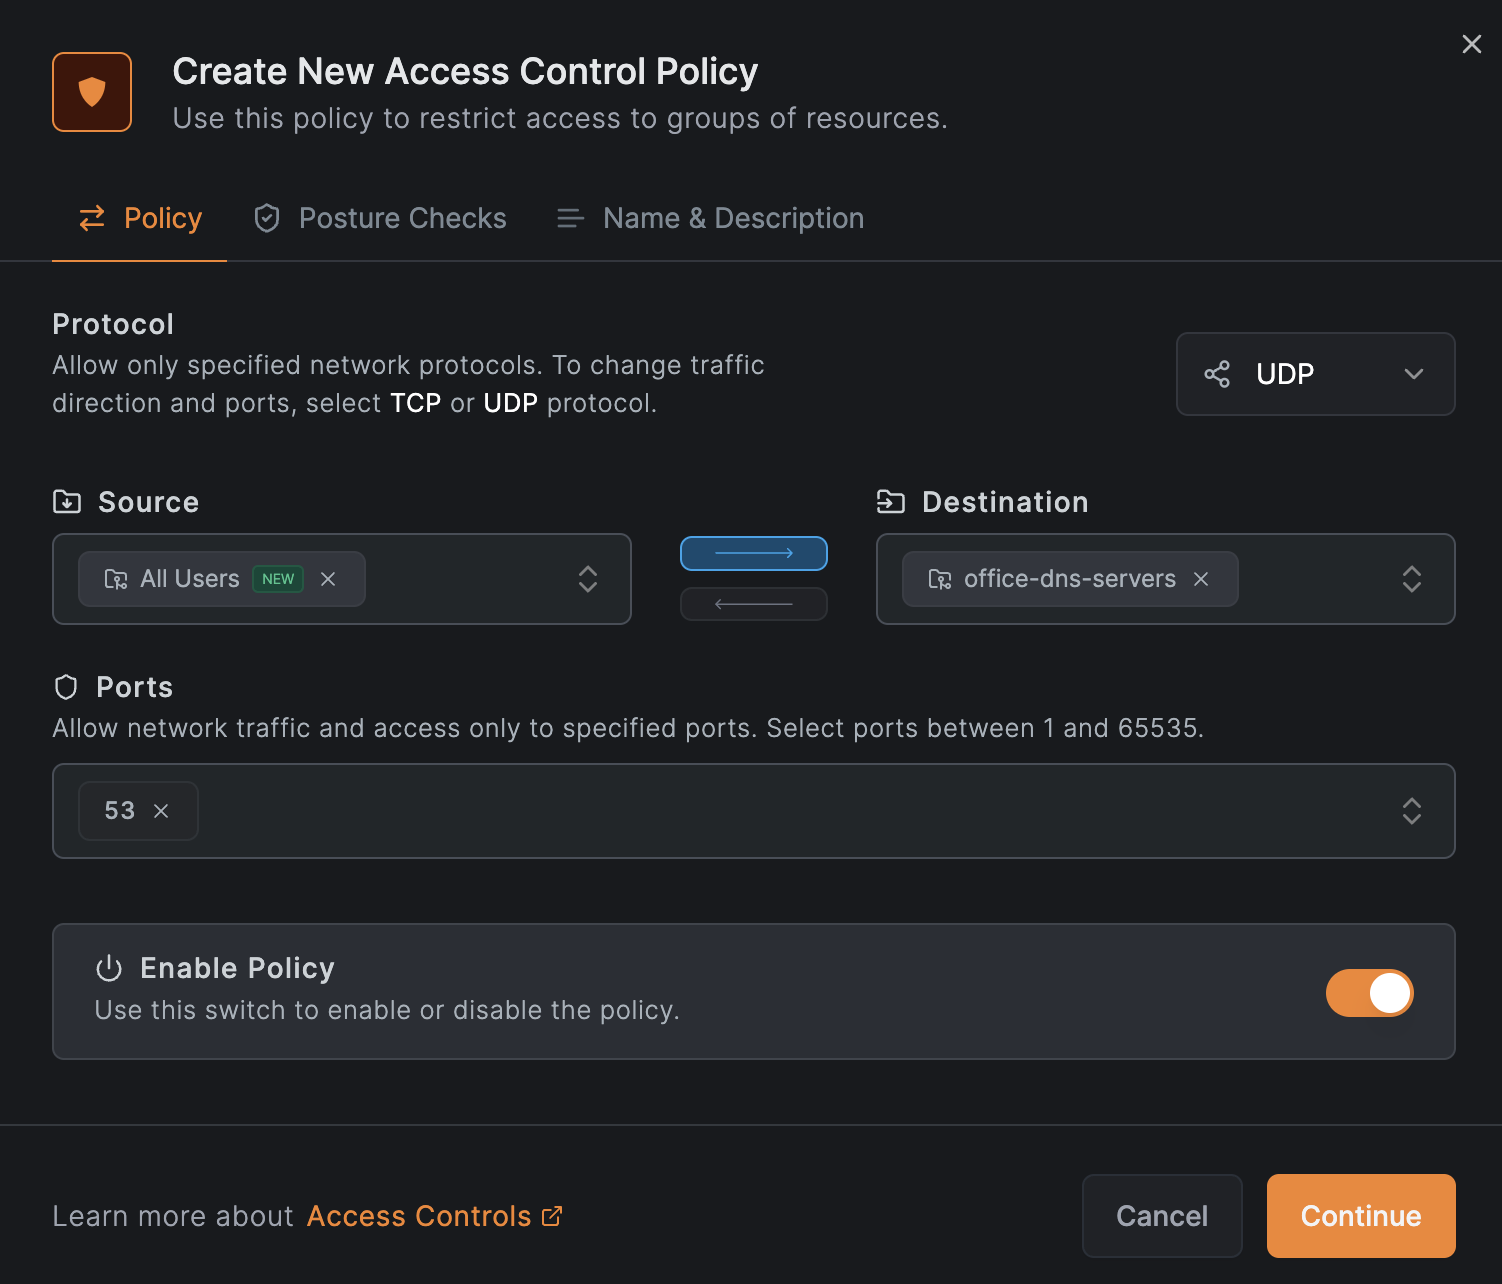
Click on Continue 2 times and then click on Add Policy to save the policy:
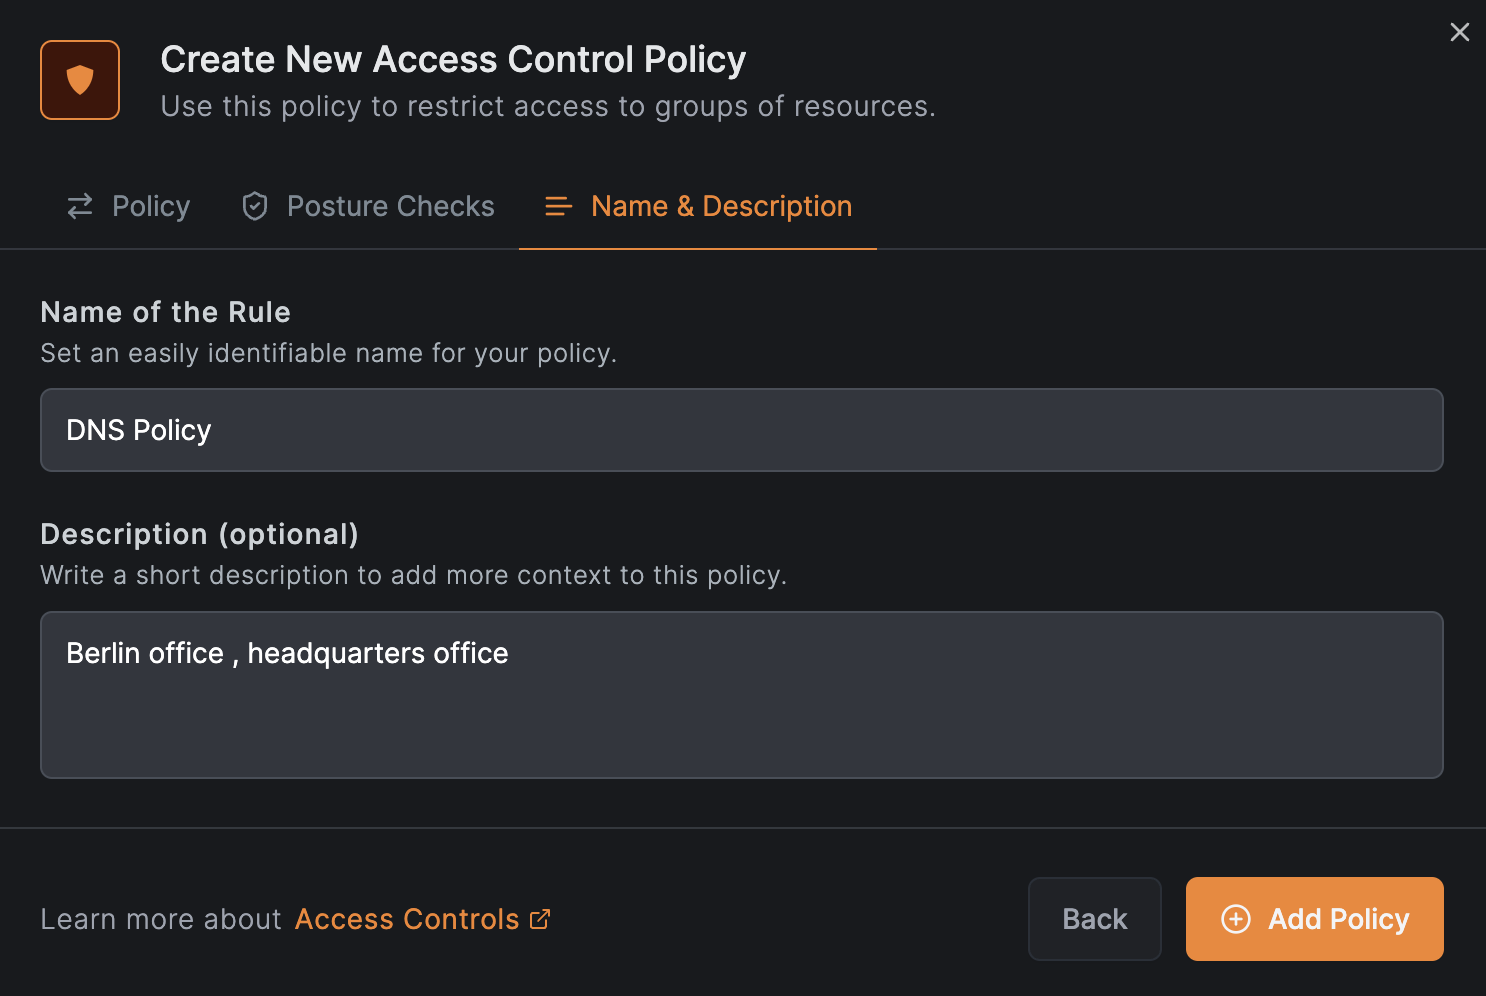
This time, we made the Policy name a bit more generic to cover both DNS server addresses.
View the network
After completing the wizard, you will be able to see the network you just created in the Networks list:

To access a detailed view of the network, click on the network name:
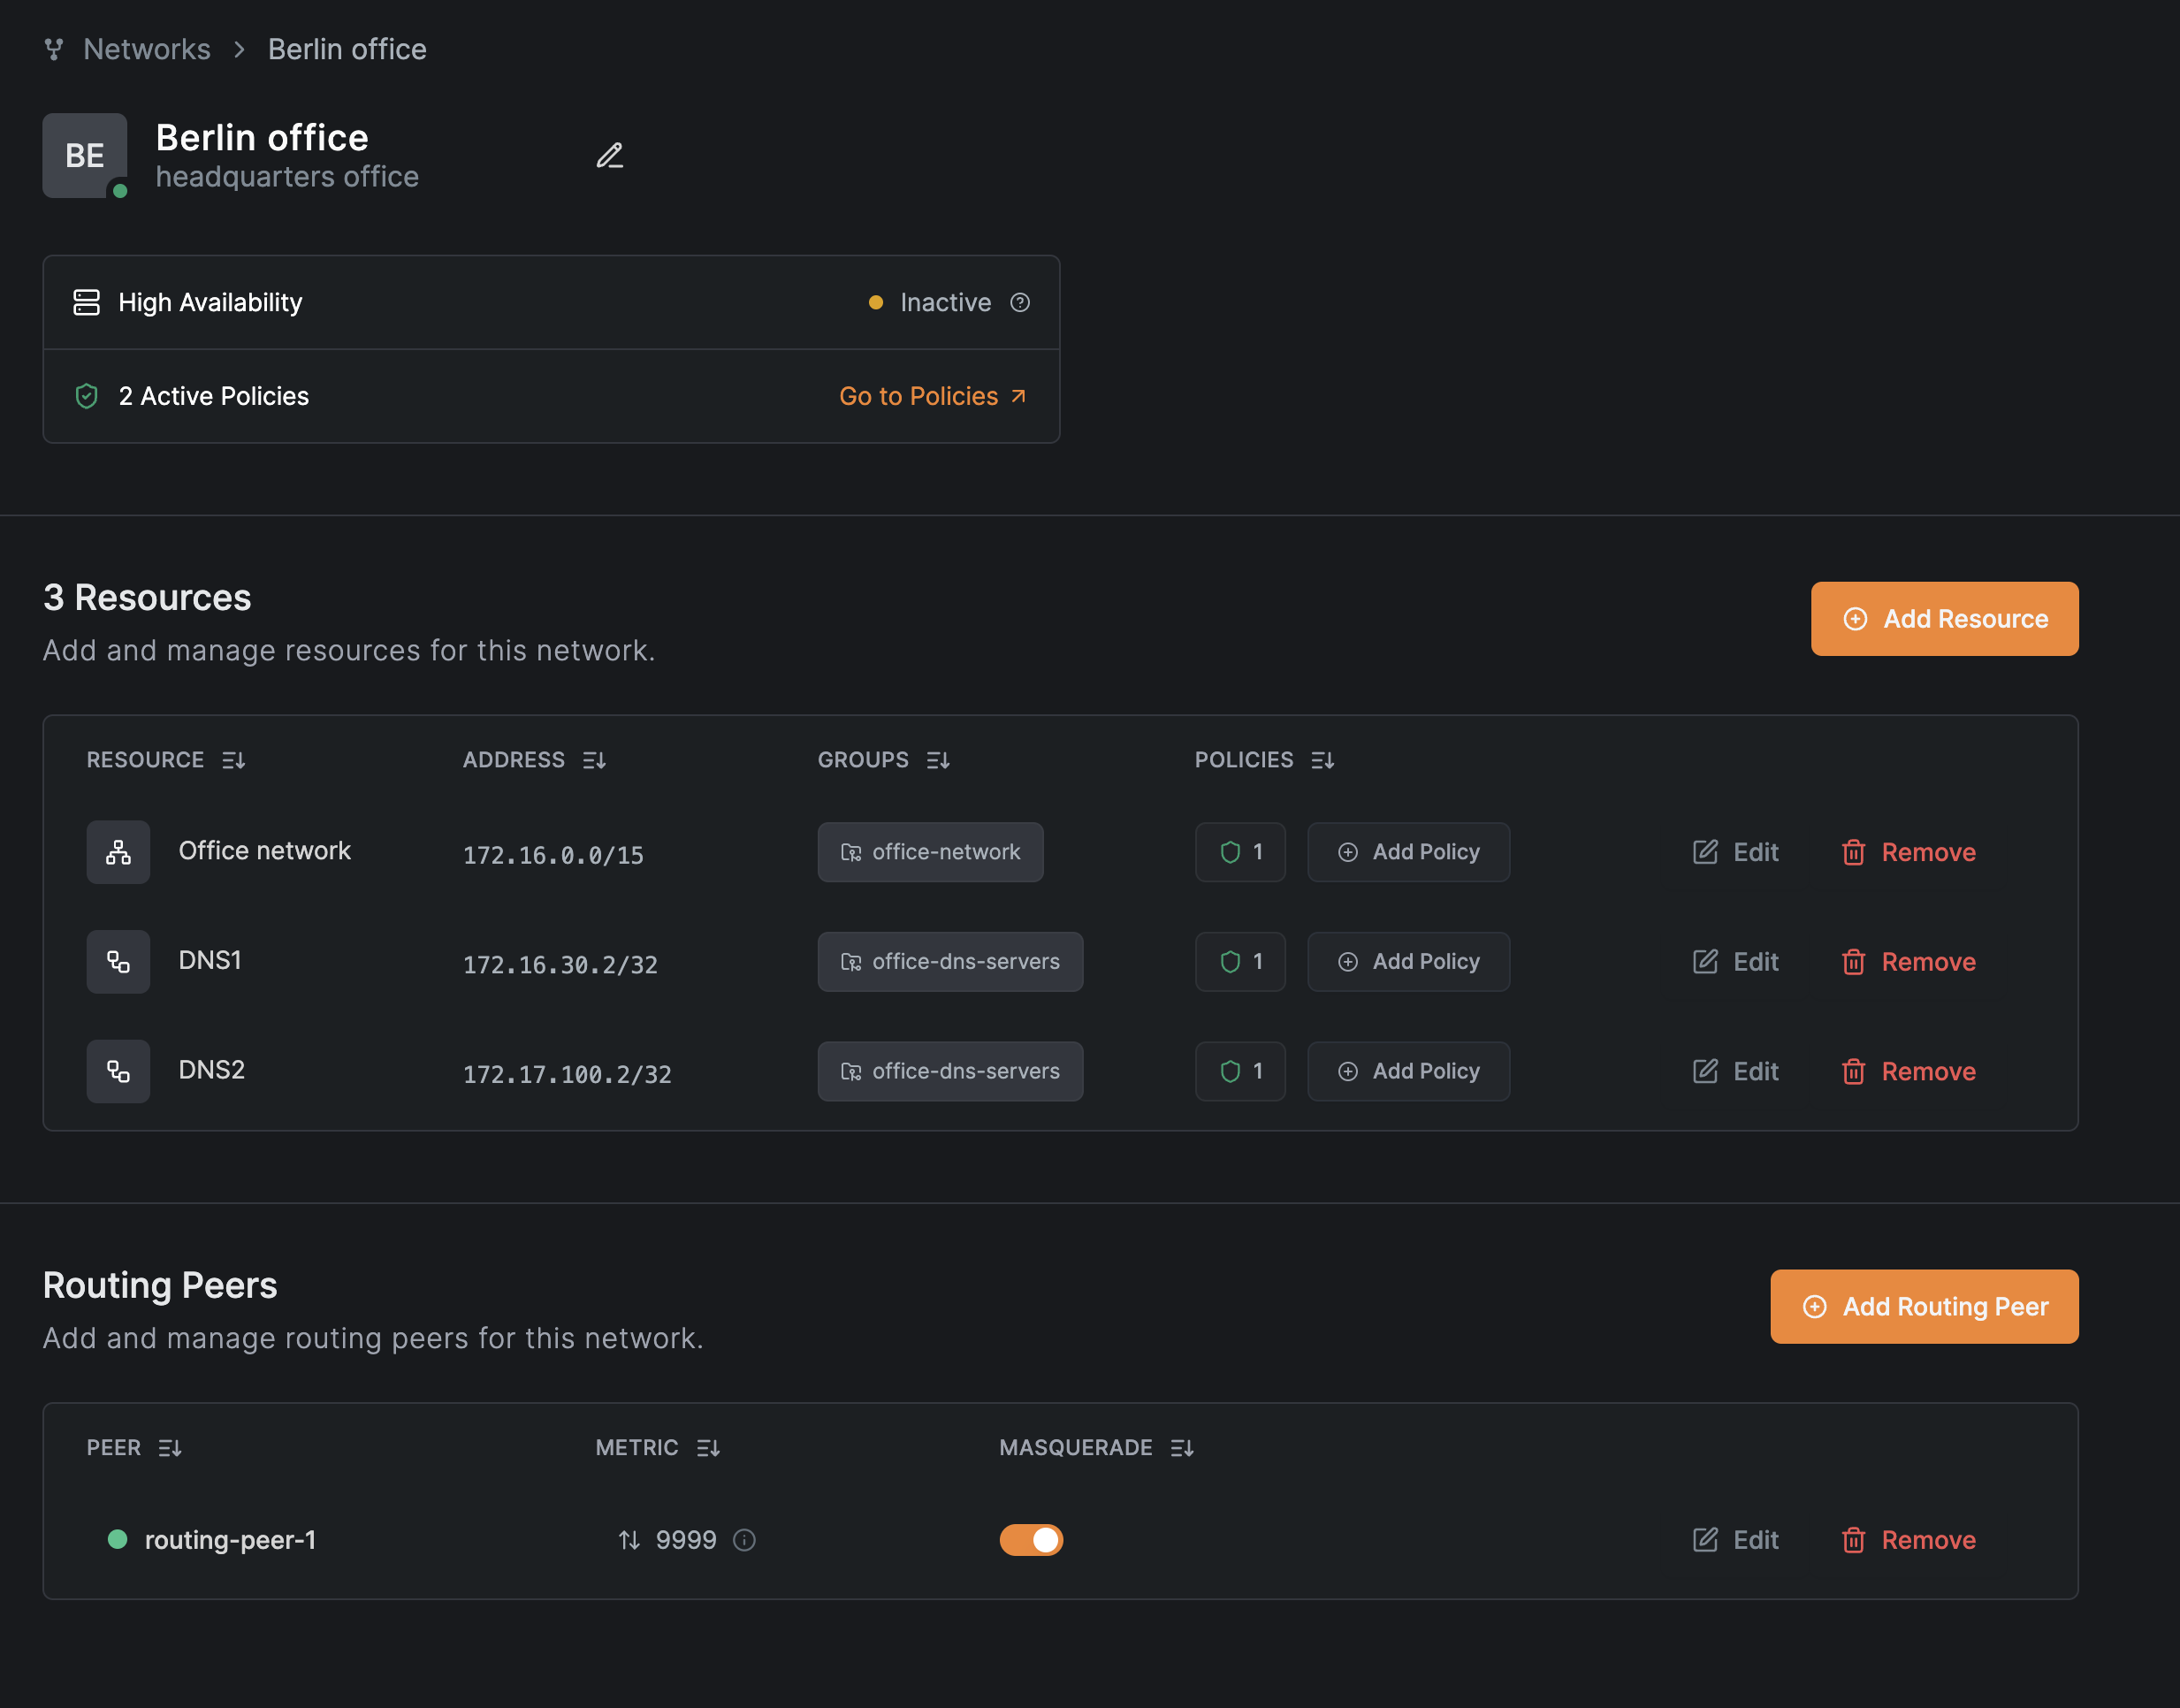
You can edit or add more resources or routing peers to the network by clicking on the Edit buttons of each section in the detailed view.
With the steps above, we created resources that allow different levels of access to multiple user groups within a single organization network.
Get started
- Make sure to star us on GitHub
- Follow us on X
- Join our Slack Channel
- NetBird latest release on GitHub

