Google Workspace SSO with NetBird Self-Hosted
Updated
Use Google accounts for authentication with NetBird. This supports both personal Google accounts and Google Workspace (formerly G Suite) organizations.
Management Setup (Recommended)
Add Google as an external IdP directly in the NetBird Management Dashboard. This is the simplest approach and recommended for most deployments.
Prerequisites
- NetBird self-hosted with embedded IdP enabled
- Access to Google Cloud Console
Step 1: Start Creating OAuth Credentials
- Go to Google Cloud Console
- Select or create a project
- Navigate to APIs & Services → Credentials
- Click Create Credentials → OAuth client ID
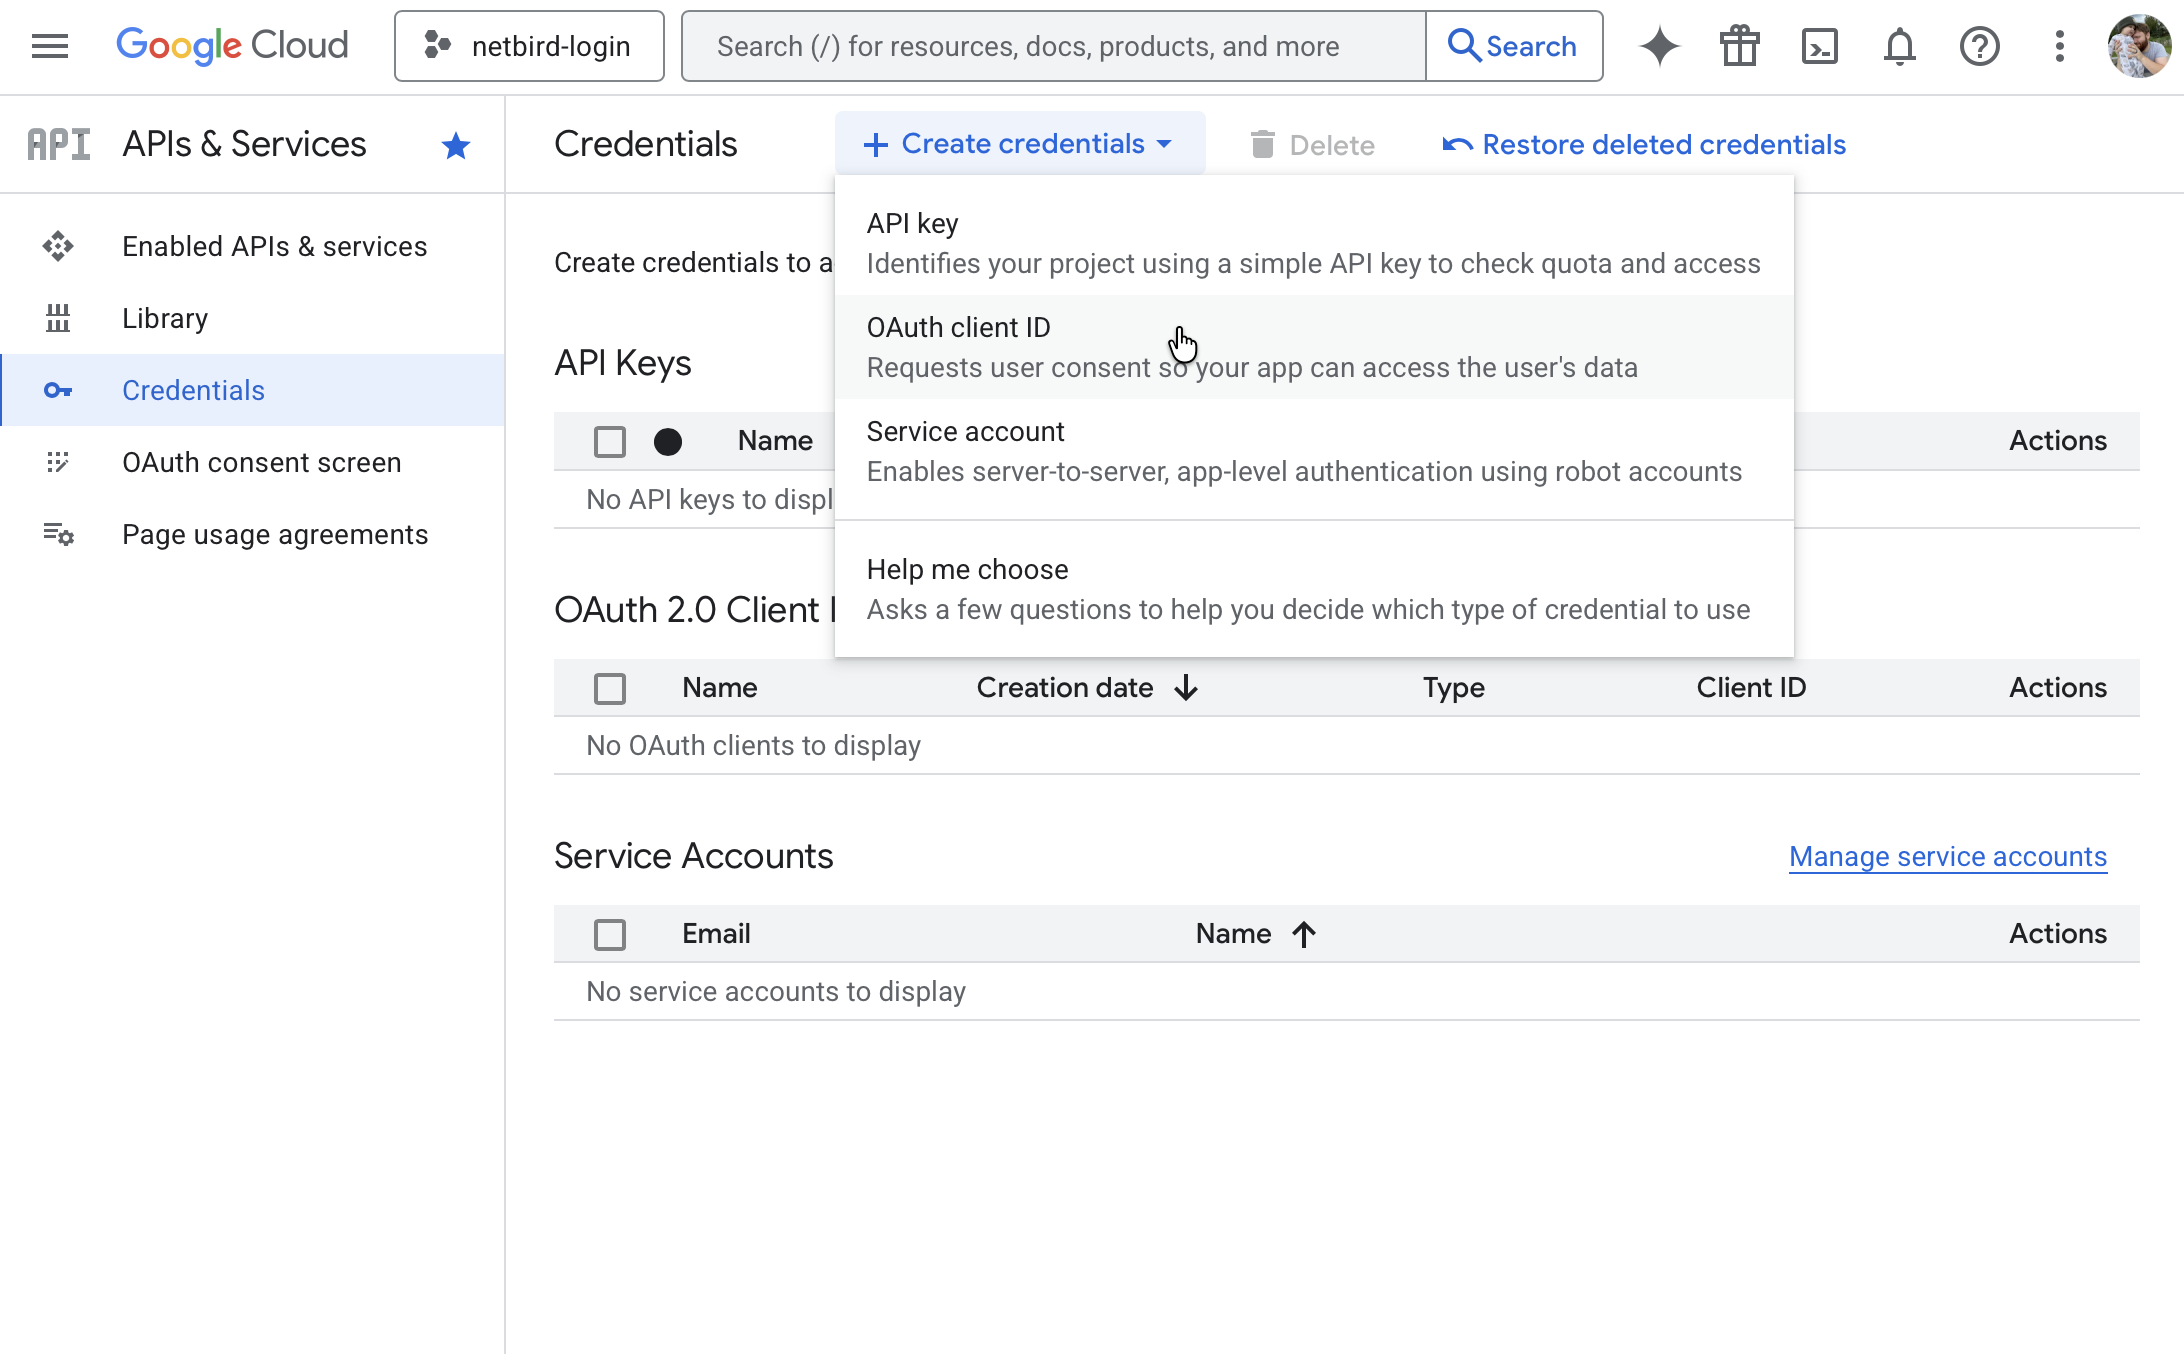
-
If prompted, configure the OAuth consent screen first:
- Choose Internal (for Workspace) or External (for any Google account)
- Fill in required fields (app name, support email)
- Add scopes:
email,profile,openid - Save and continue
-
Back in Credentials, create the OAuth client:
- Application type:
Web application - Name:
NetBird - Leave redirect URIs empty for now (you'll add this in Step 3)
- Application type:
-
Don't click Create yet — keep this tab open and proceed to Step 2
Step 2: Get Redirect URL from NetBird
- Open a new tab or window and log in to your NetBird Dashboard
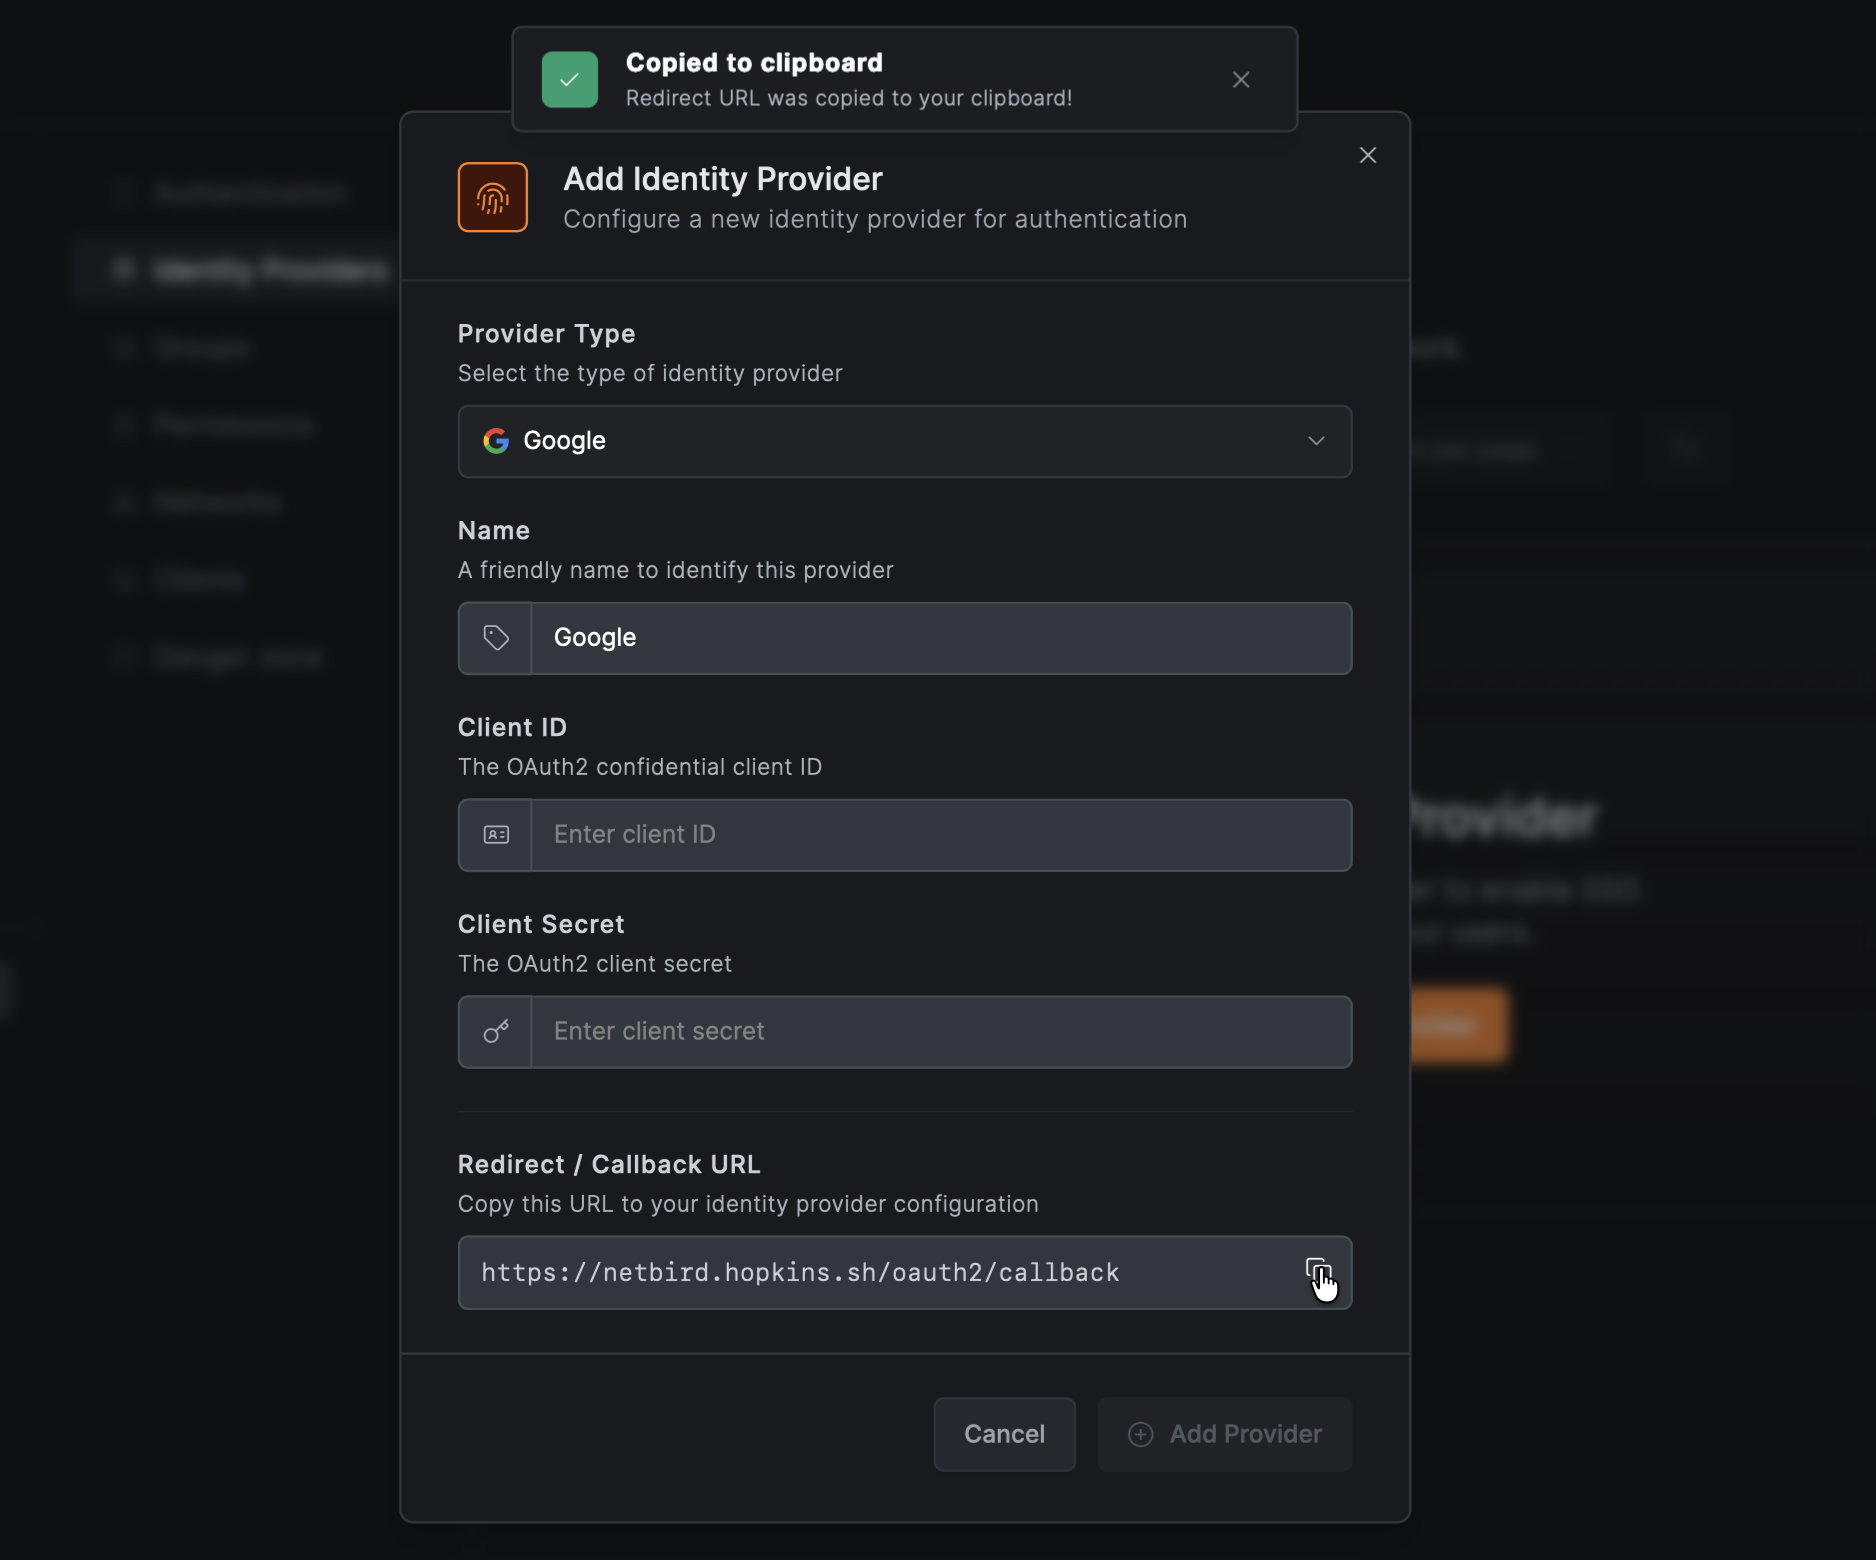
- Navigate to Settings → Identity Providers
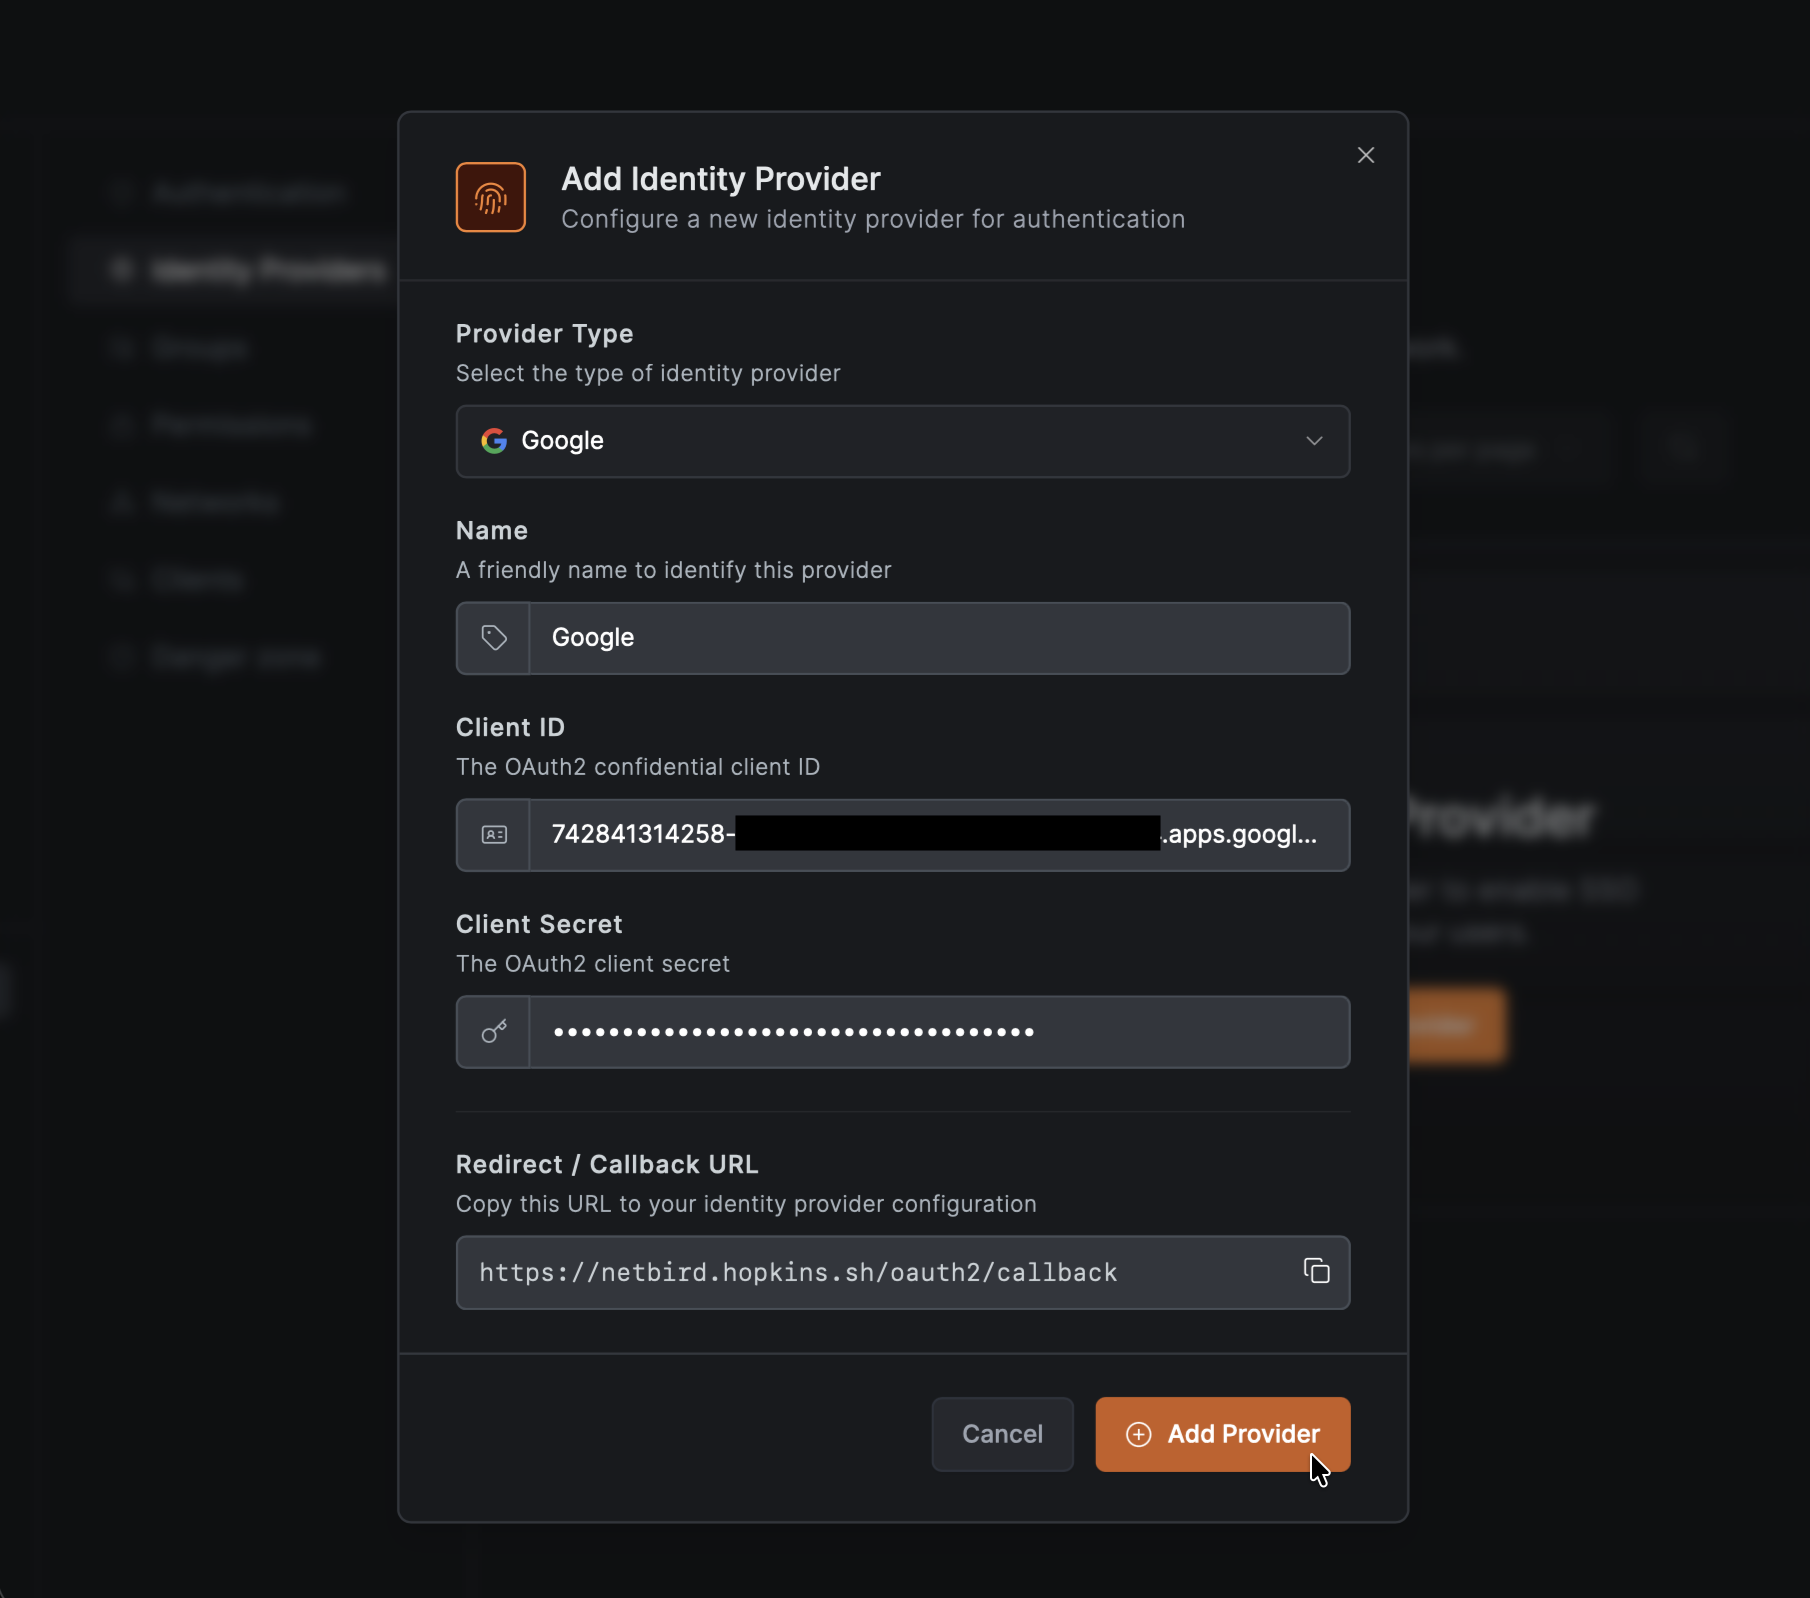
- Click Add Identity Provider
- Fill in the fields:
| Field | Value |
|---|---|
| Type | |
| Name | Google (or your preferred display name) |
| Client ID | From Google Cloud Console (will fill after Step 3) |
| Client Secret | From Google Cloud Console (will fill after Step 3) |
- Copy the Redirect URL that NetBird displays (but don't click Add Provider yet)
Step 3: Complete Google OAuth Client Setup
- Return to the Google Cloud Console tab
- Under Authorized redirect URIs, click Add URI
- Paste the redirect URL you copied from NetBird
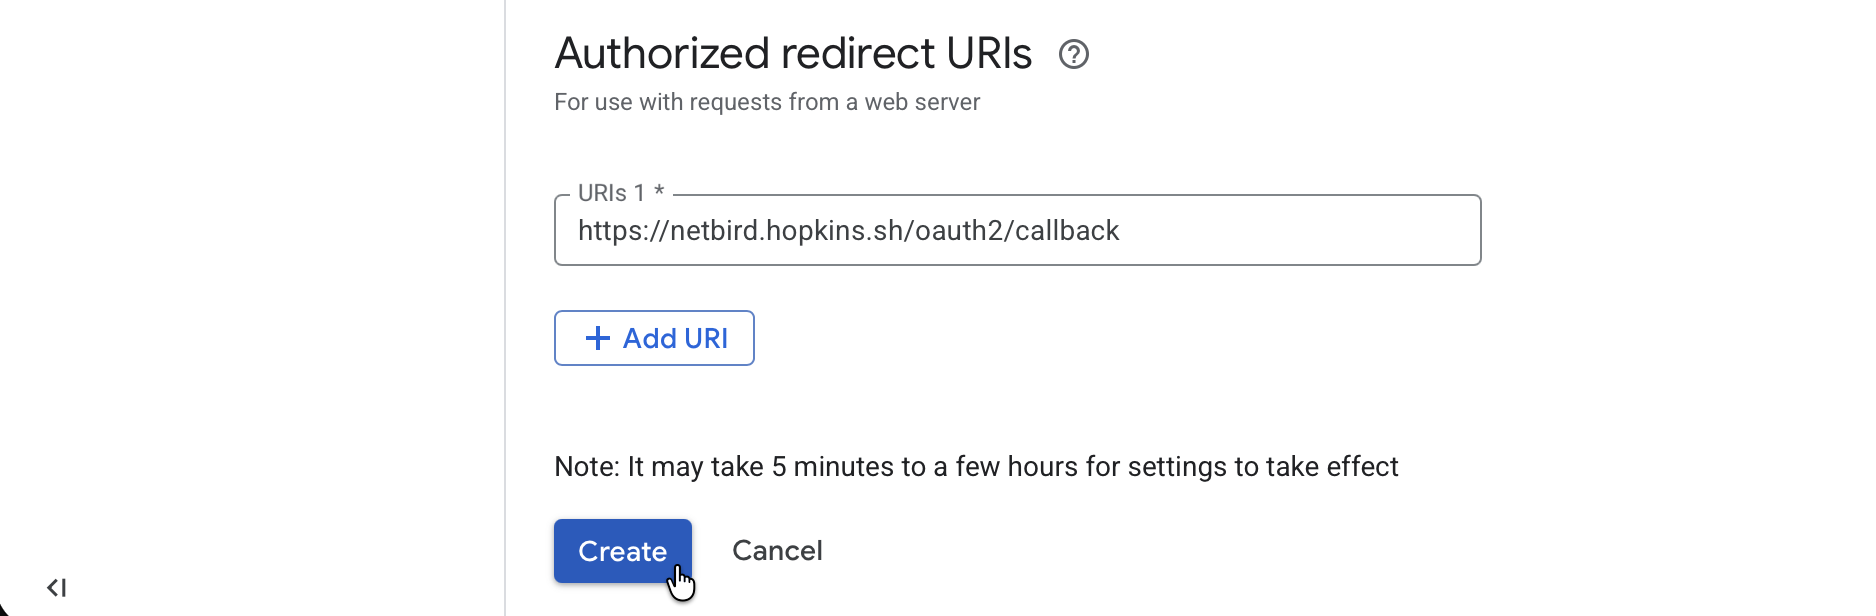
- Click Create
Google's OAuth 2.0 client only supports Authorized redirect URIs — it has no separate logout/sign-out redirect field, so there is no logout URL to configure here.
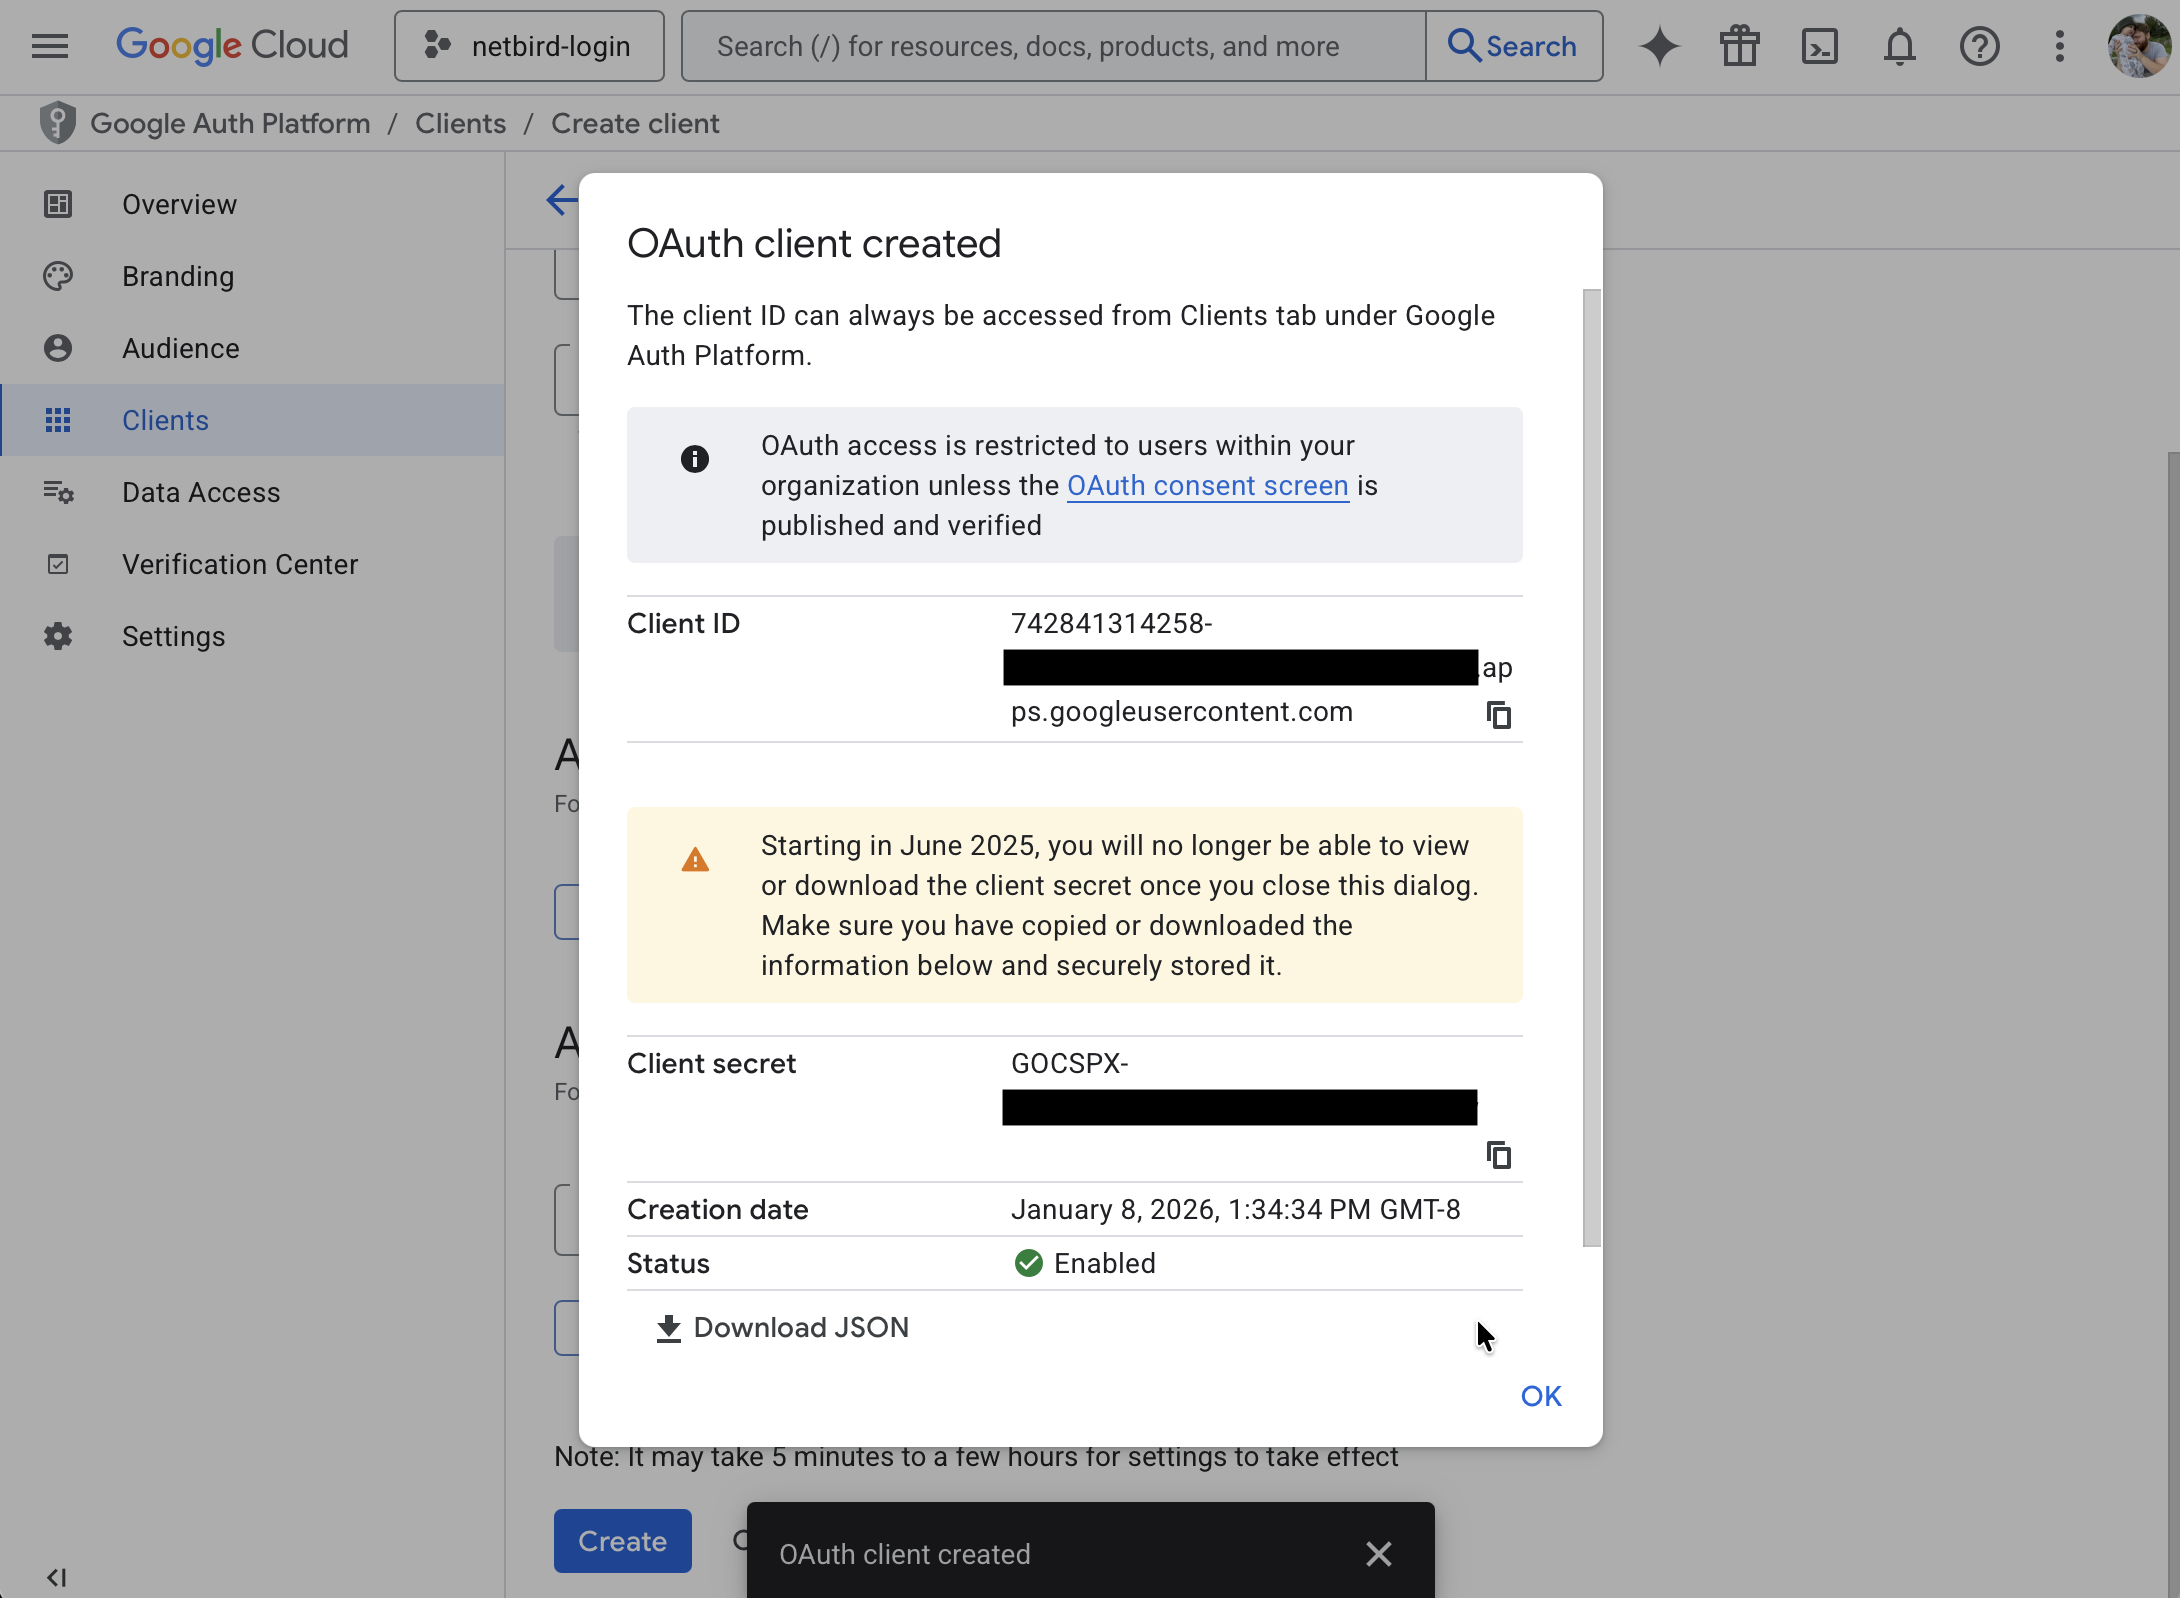
- Note the Client ID and Client Secret — you'll need these for Step 4
Step 4: Complete NetBird Setup
- Return to the NetBird tab
- Fill in the Client ID and Client Secret from Step 3
- Click Add Provider
Step 5: Test the Connection
- Log out of NetBird Dashboard
- On the login page, you should see a "Google" button
- Click it and sign in with your Google account
- You should be redirected back to NetBird and logged in. Unless your user approval setting were changed you will need to log back into your local admin account to approve the user.
Restricting to Google Workspace Domains
To limit authentication to specific Google Workspace domains:
- Go to APIs & Services → OAuth consent screen
- Under User type, select Internal (Workspace only)
- For external apps, verify your domain to restrict access
Configuring JWT 'groups' Claim
Limitation: Google's standard OIDC implementation does not include a groups claim in the JWT token. Unlike other identity providers, Google only provides minimal OIDC claims (email, name, profile) and does not expose group membership through the standard OIDC flow.
To sync Google Workspace groups with NetBird, you have two options:
Option 1: Use a Different Identity Provider (Recommended)
If group-based access control is important for your deployment, consider using an identity provider that natively supports the groups claim:
- Keycloak - Can federate with Google and add groups claims
- Authentik - Supports Google as a source with group mapping
- Zitadel - Full OIDC support with groups
These providers can authenticate users via Google while adding proper group claims to the JWT.
Option 2: Manual Group Management in NetBird
If you don't need automatic group synchronization:
- Authenticate users via Google as configured above
- Manually assign users to groups in NetBird Dashboard under Team → Users
- Use NetBird's built-in groups for access control policies
This approach works well for smaller teams where group membership doesn't change frequently.
Domain restrictions are configured in Google Cloud Console, not in NetBird.
Standalone Setup (Advanced)
Use Google Workspace as your primary identity provider instead of NetBird's embedded IdP. This option gives you full control over authentication and user management, is recommended for experienced Google Workspace administrators as it also requires additional setup and ongoing maintenance.
For most deployments, the embedded IdP is the simpler choice — it's built into NetBird, fully integrated, and requires minimal configuration to get started. For this implementation, go back up to the Management Setup (Recommended) section above.
For detailed instructions on the standalone setup, see the Google Workspace SSO with NetBird Self-Hosted (Legacy) documentation.
If you prefer to have full control over authentication, consider self-hosted alternatives like PocketID.
Troubleshooting
"Access blocked" error
- Ensure OAuth consent screen is configured correctly
- For external apps, you may need to submit for verification or add test users
- Check that required scopes are added
"Invalid redirect URI" error
- Verify the redirect URI exactly matches what's in Google Cloud Console
- Check for trailing slashes or HTTP vs HTTPS mismatches
- Google is case-sensitive for redirect URIs
Users from wrong domain signing in
- For Workspace, use Internal user type in OAuth consent screen
- Verify domain restrictions in consent screen settings