Keycloak with NetBird Self-Hosted
Updated
Keycloak is an open-source Identity and Access Management solution maintained by Red Hat. It provides single sign-on, social login, user federation, fine-grained authorization, and supports OpenID Connect, OAuth 2.0, and SAML 2.0 protocols.
Management Setup (Recommended)
Add Keycloak as an external IdP directly in the NetBird Management Dashboard. This is the simplest approach and recommended for most deployments.
Prerequisites
- NetBird self-hosted with embedded IdP enabled
- Keycloak instance running with SSL
Step 1: Create Realm in Keycloak
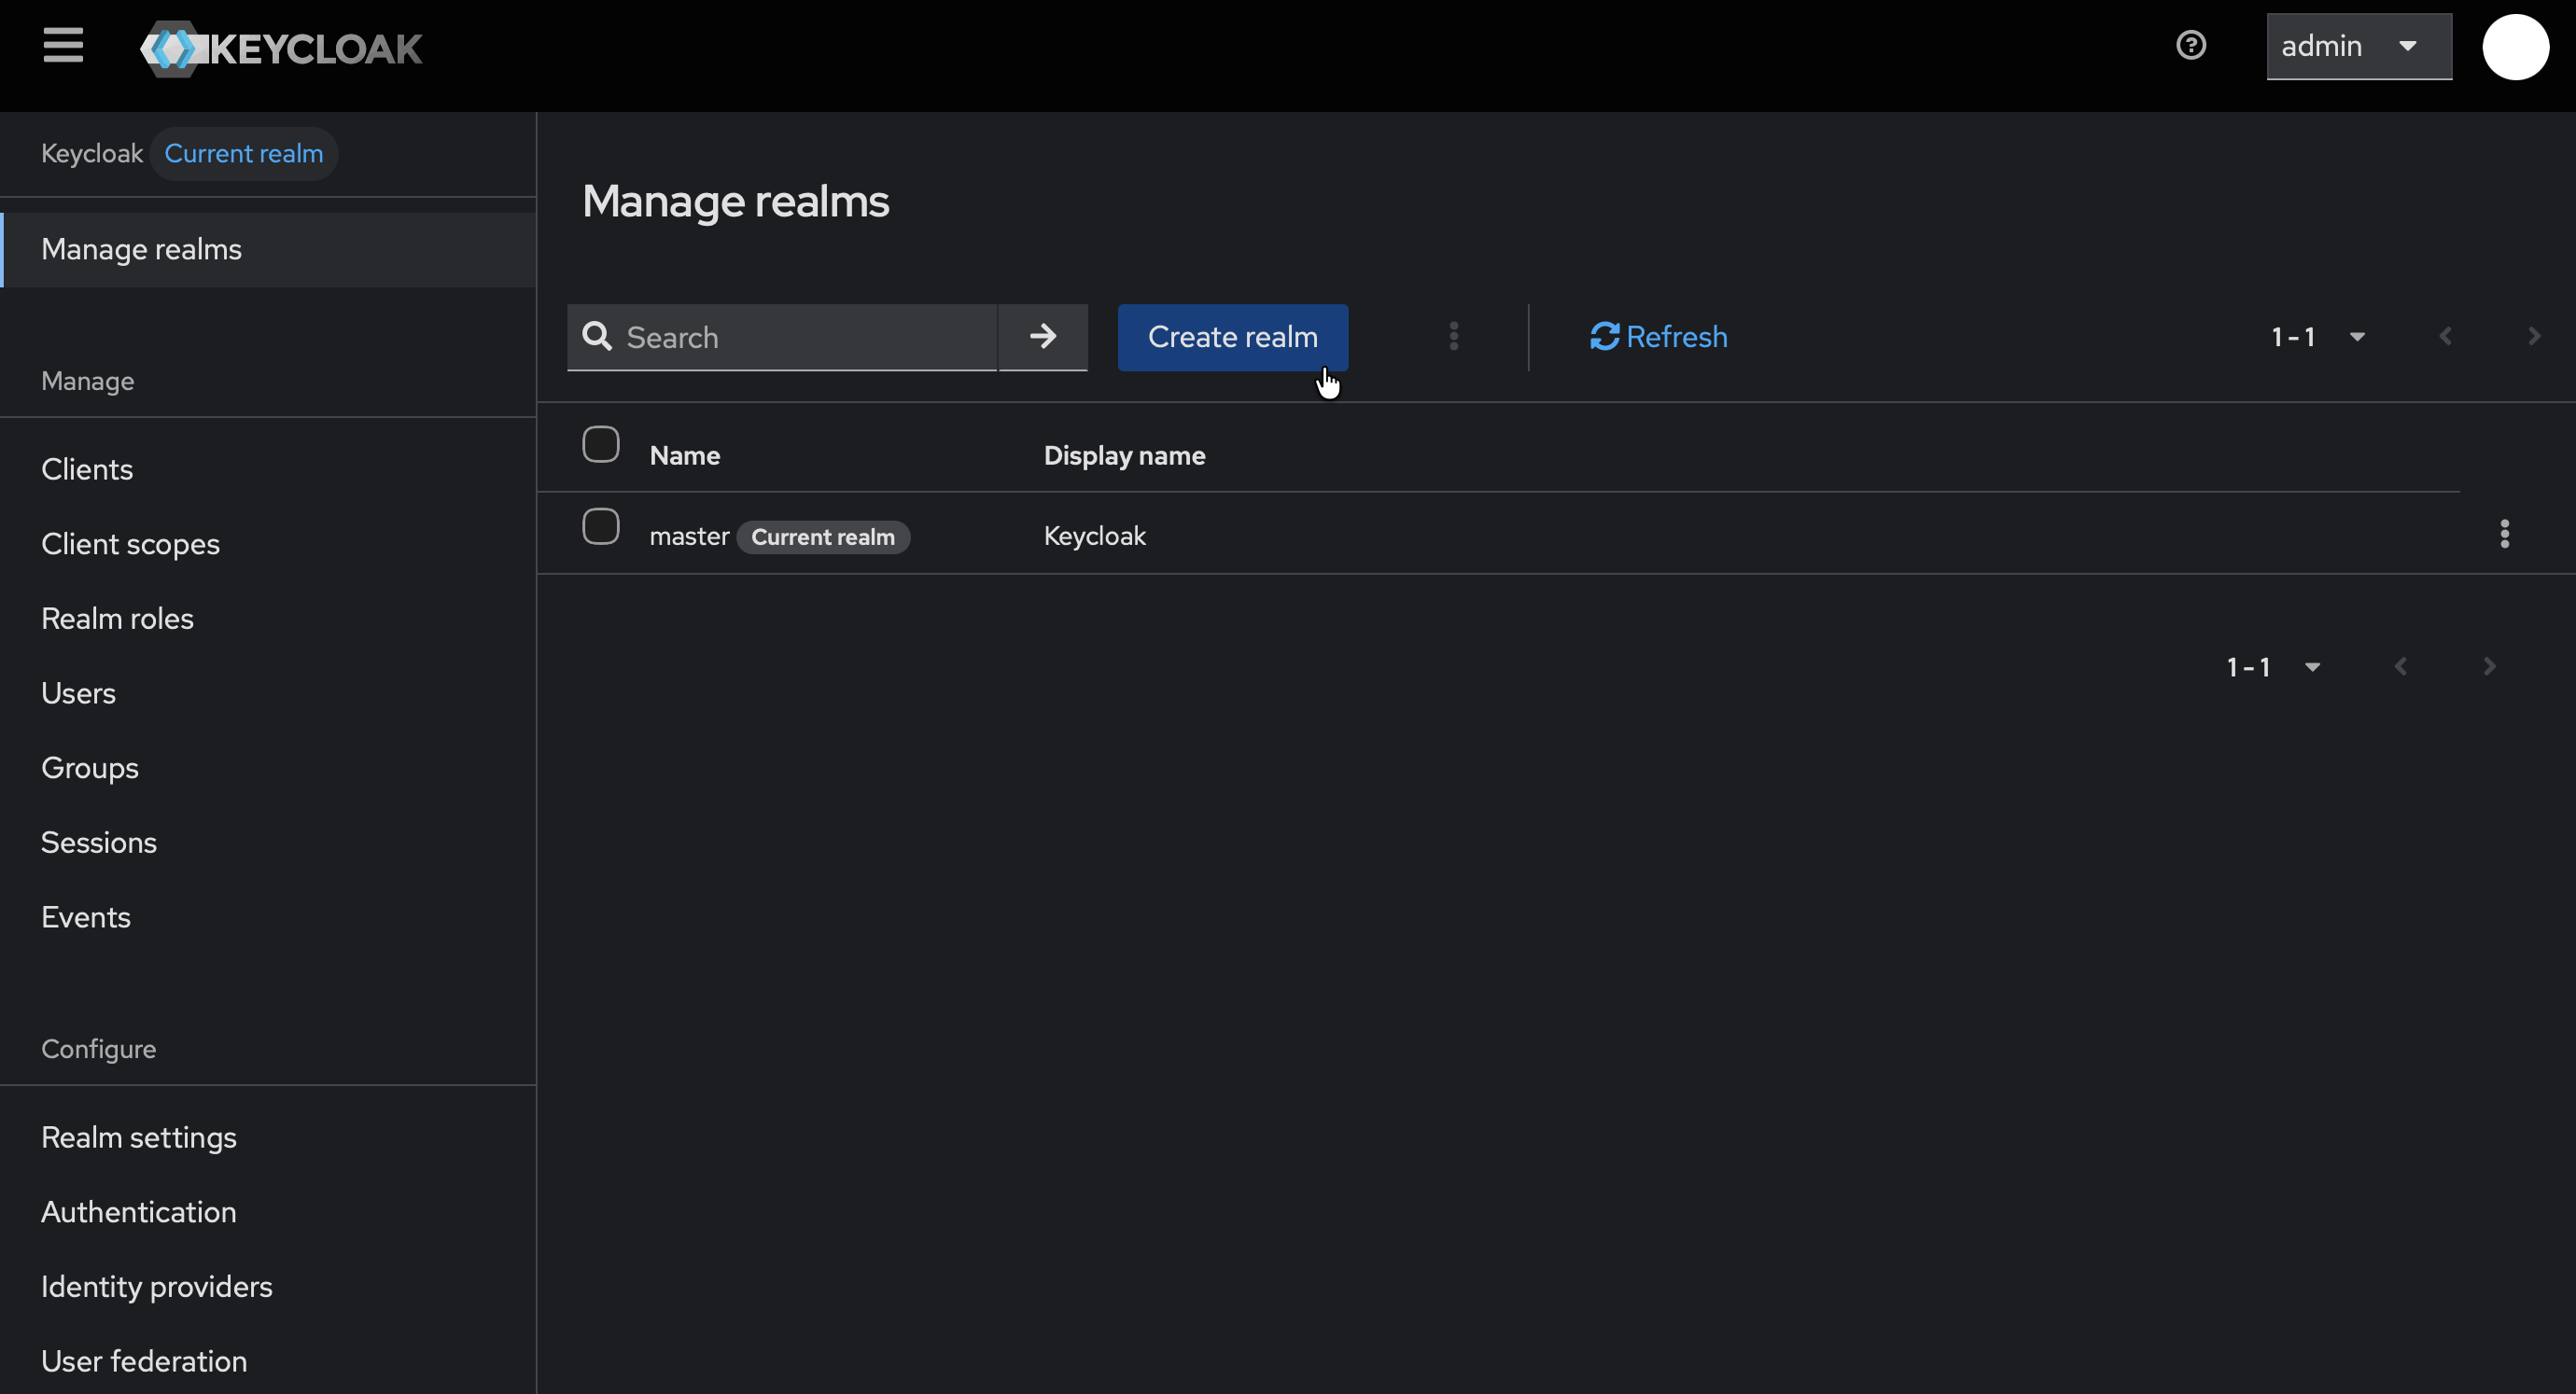
- Open the Keycloak Admin Console
- Hover over the realm dropdown in the top-left corner (where it shows
Masteror your current realm) - Click Create Realm
- Fill in:
- Realm name:
netbird
- Realm name:
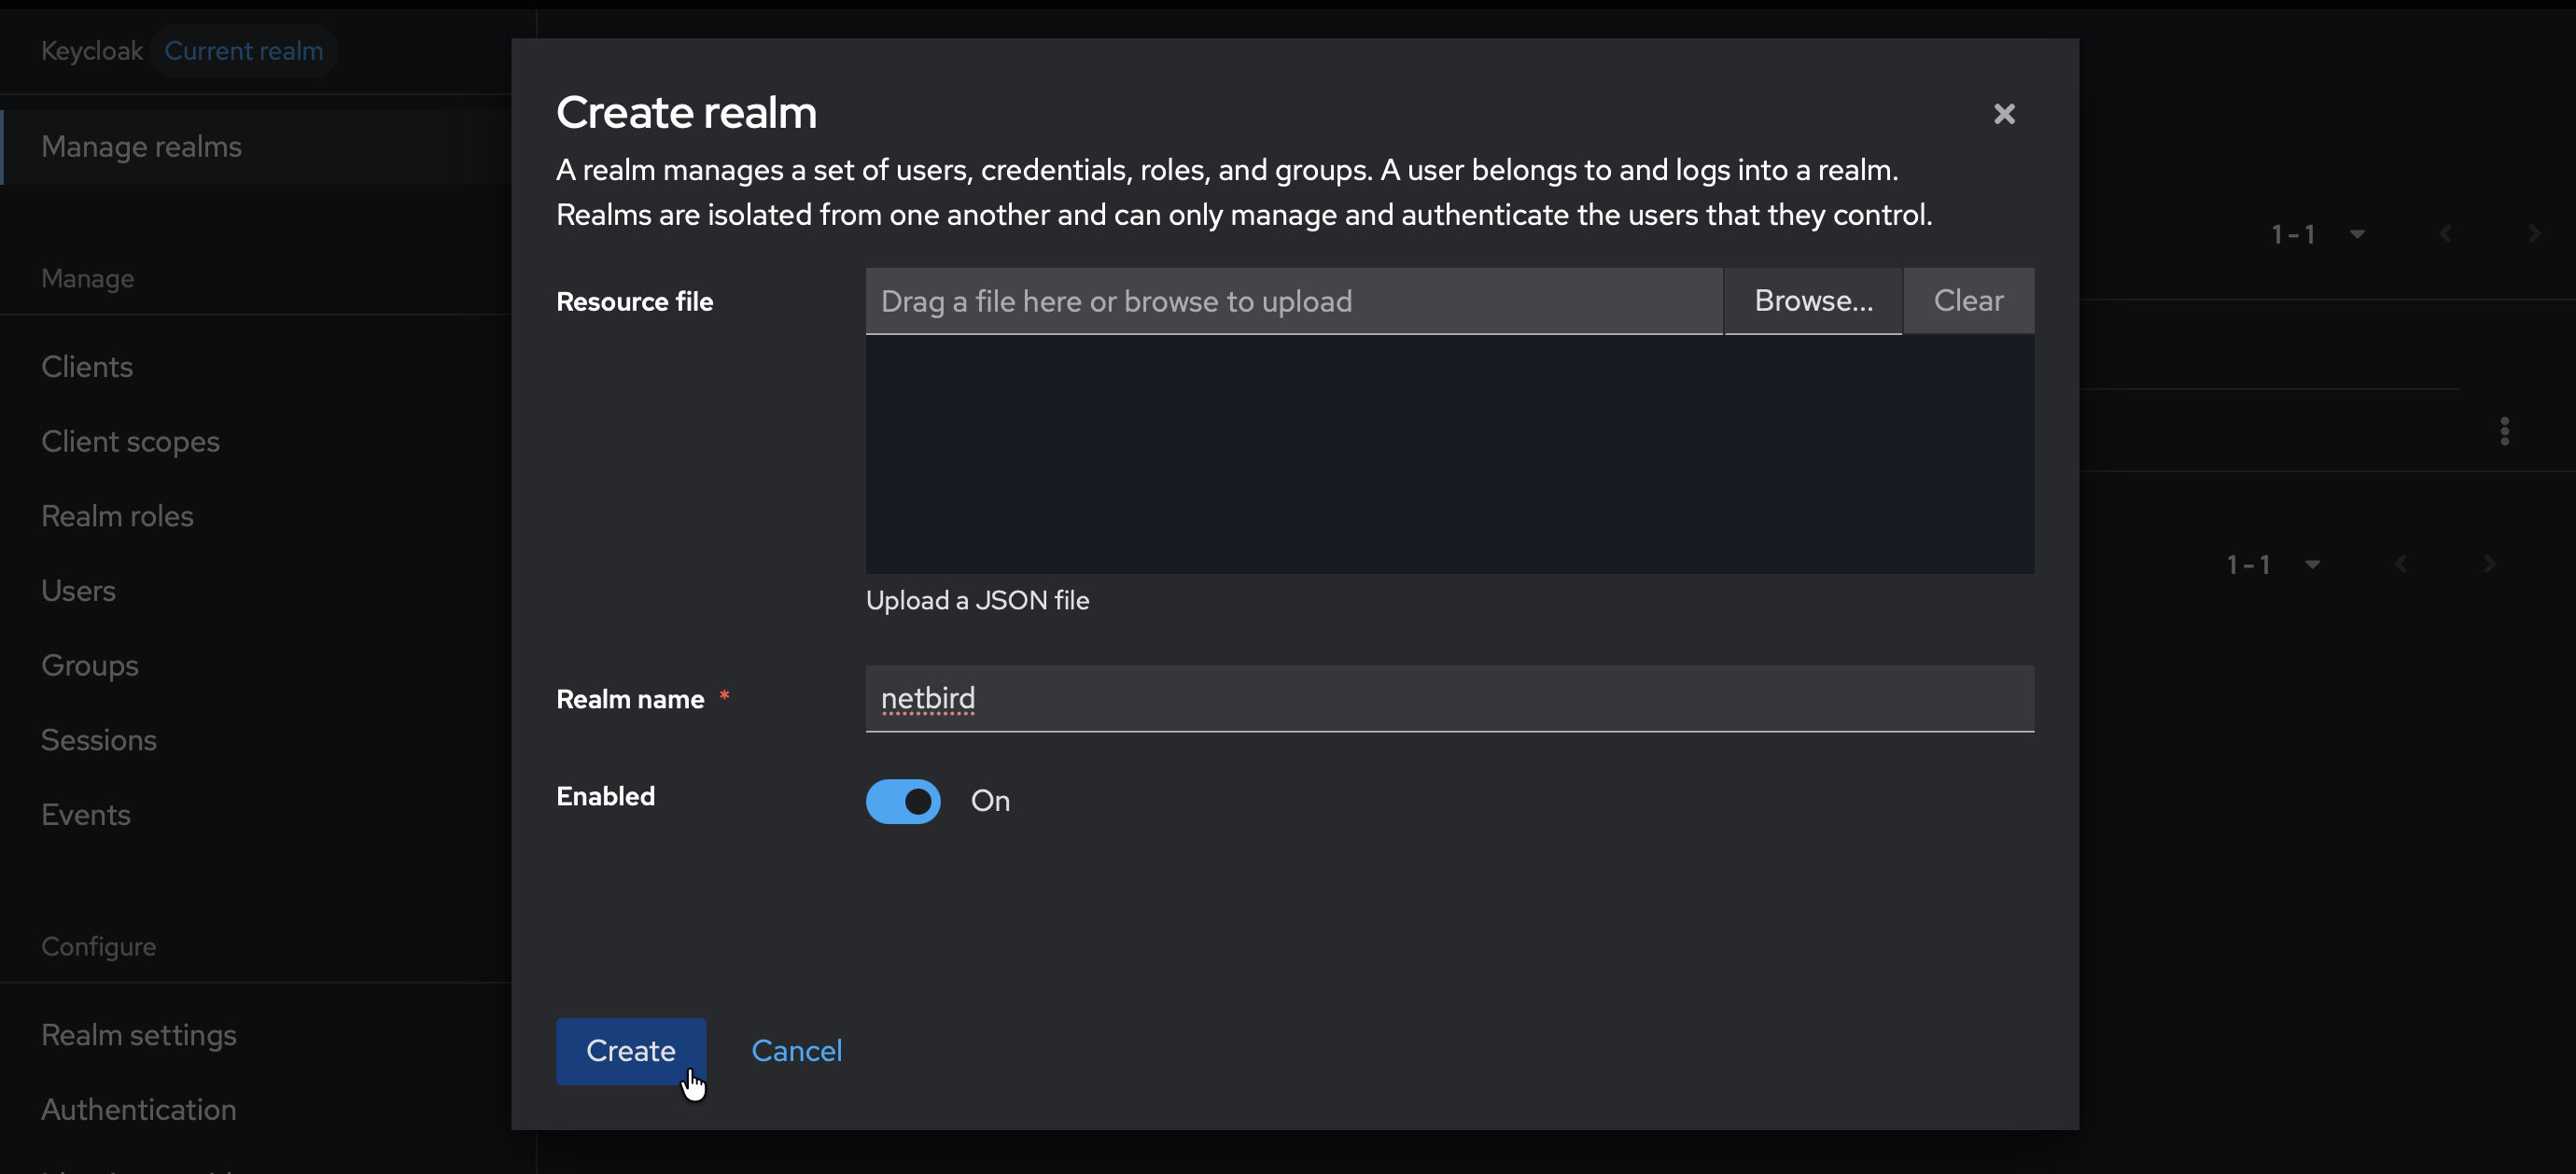
- Click Create
- Verify that
netbirdis now selected in the realm dropdown
Step 2: Create User in Keycloak
- Make sure the
netbirdrealm is selected - Click Users (left-hand menu)
- Click Create new user
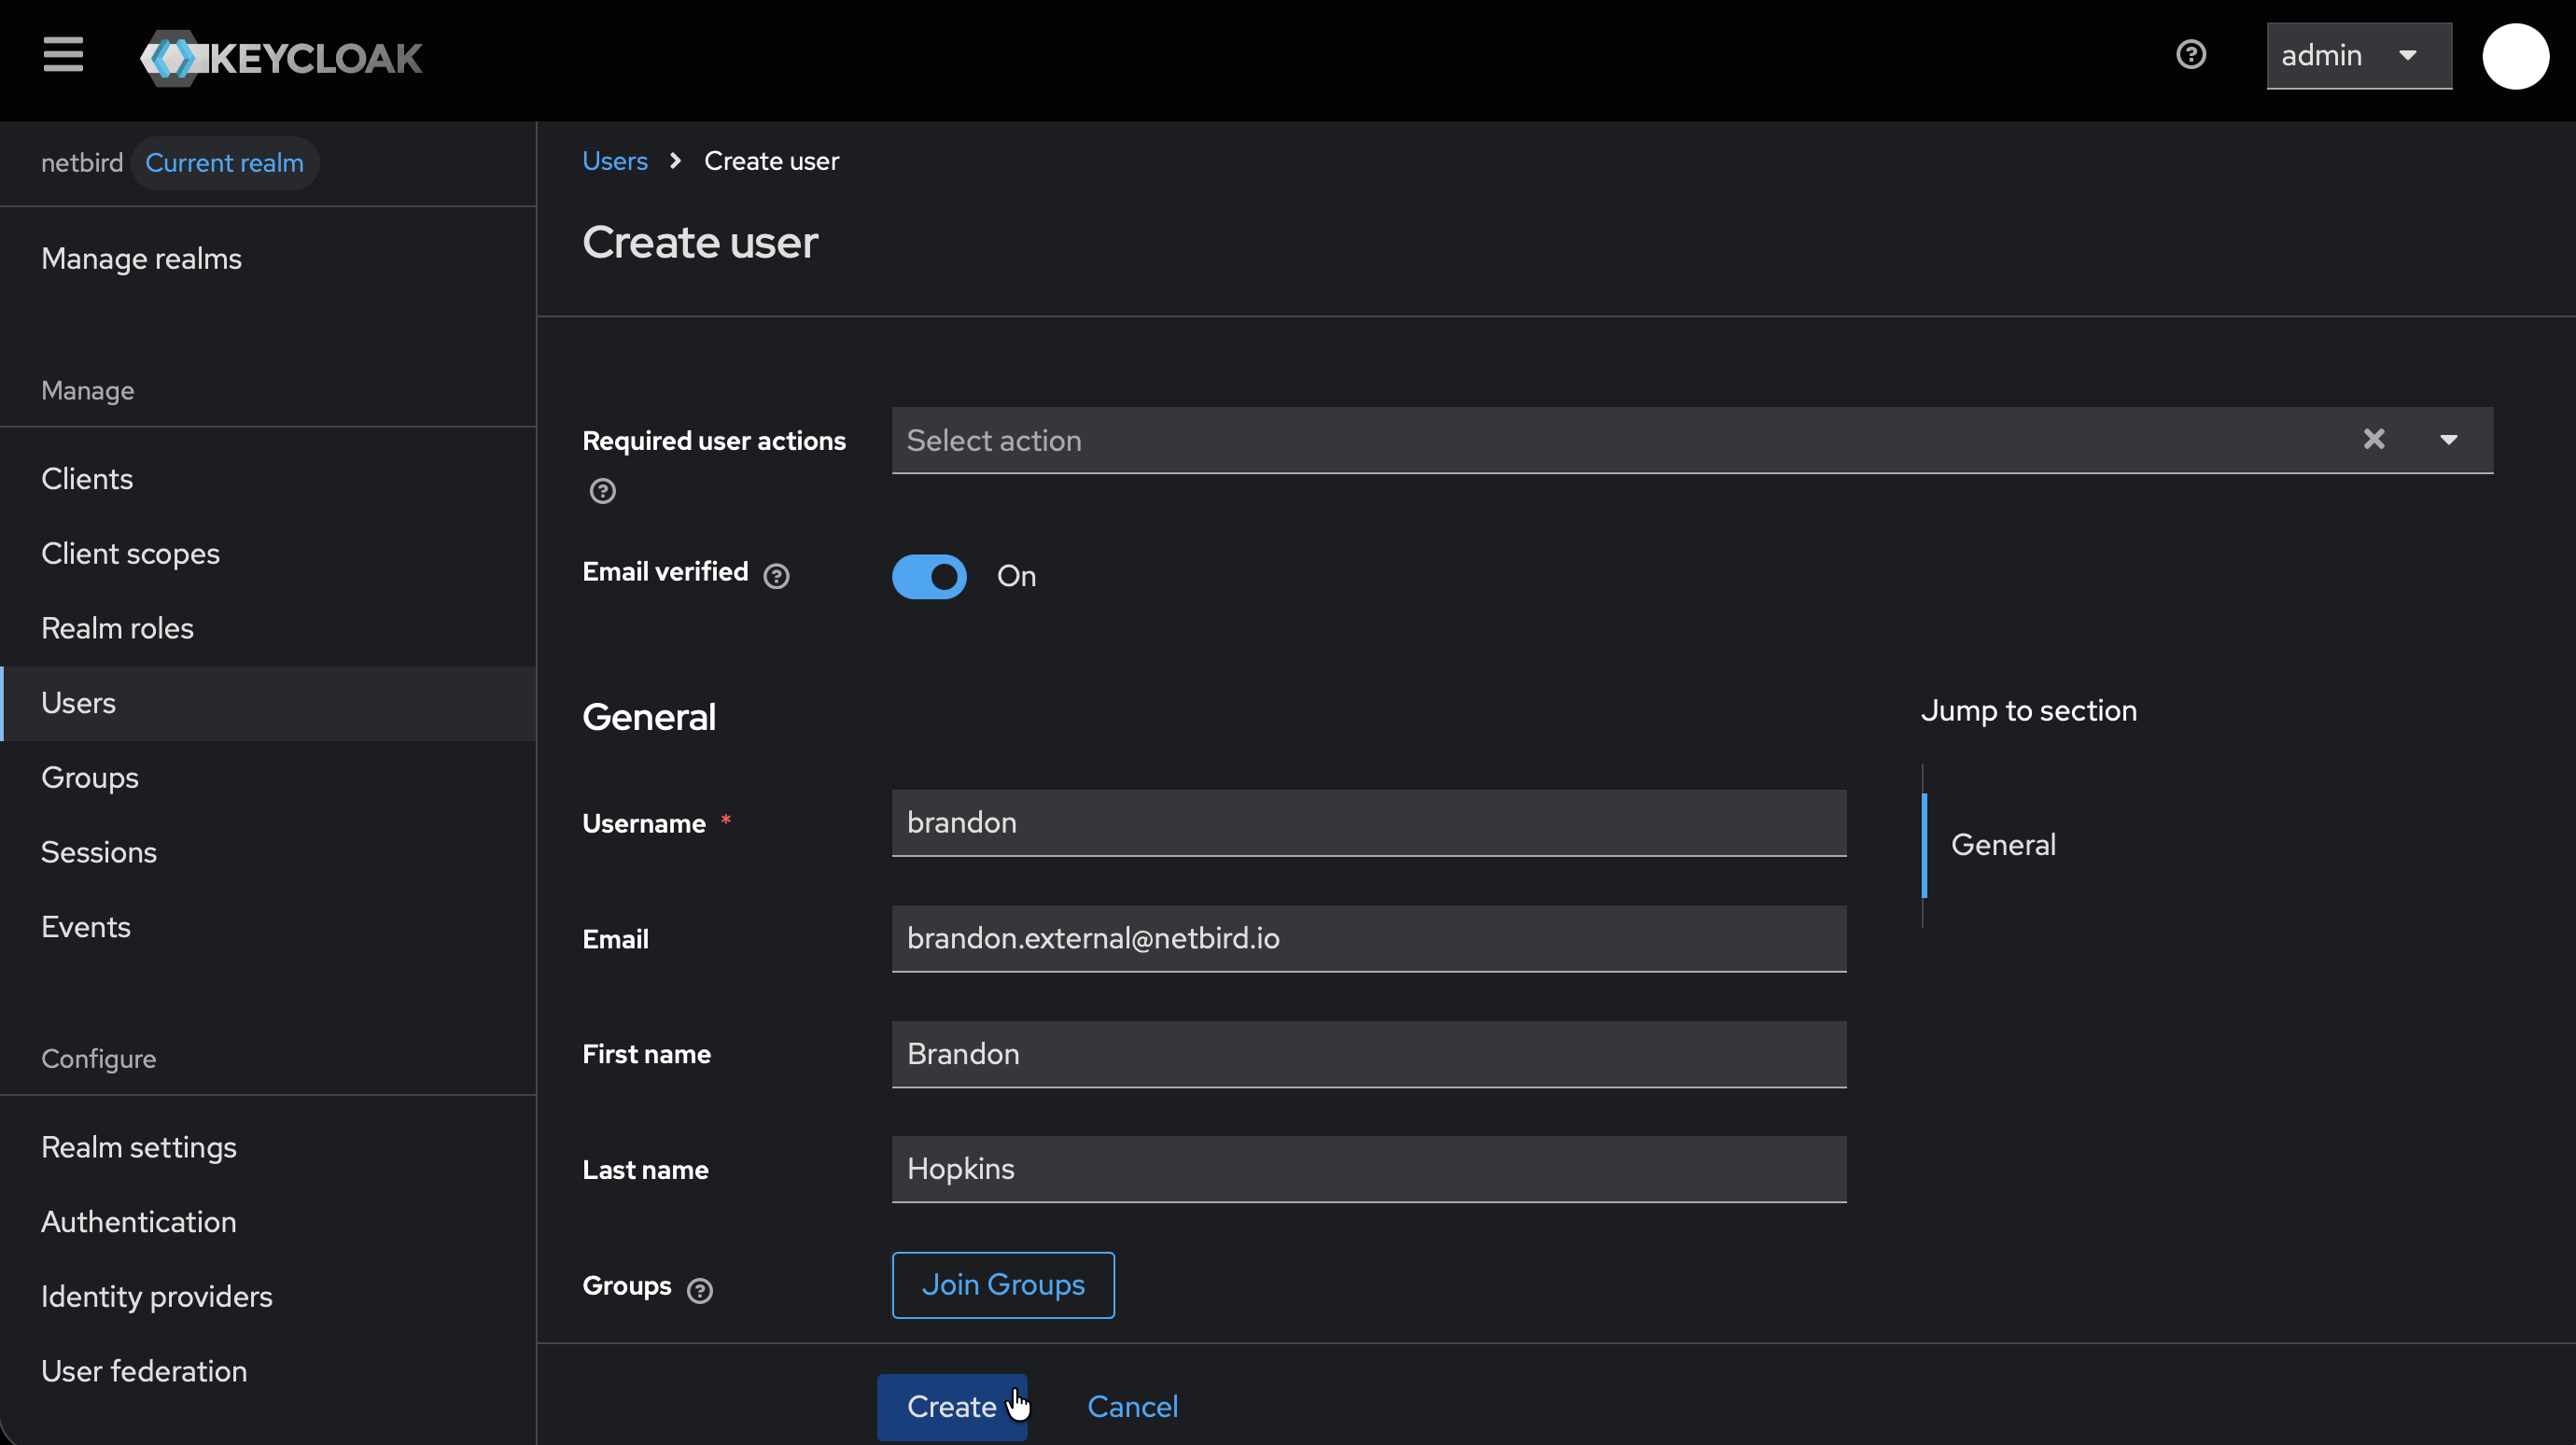
- Fill in:
- Username:
netbird(or your preferred username) - Email: Your email address
- Username:
- Click Create
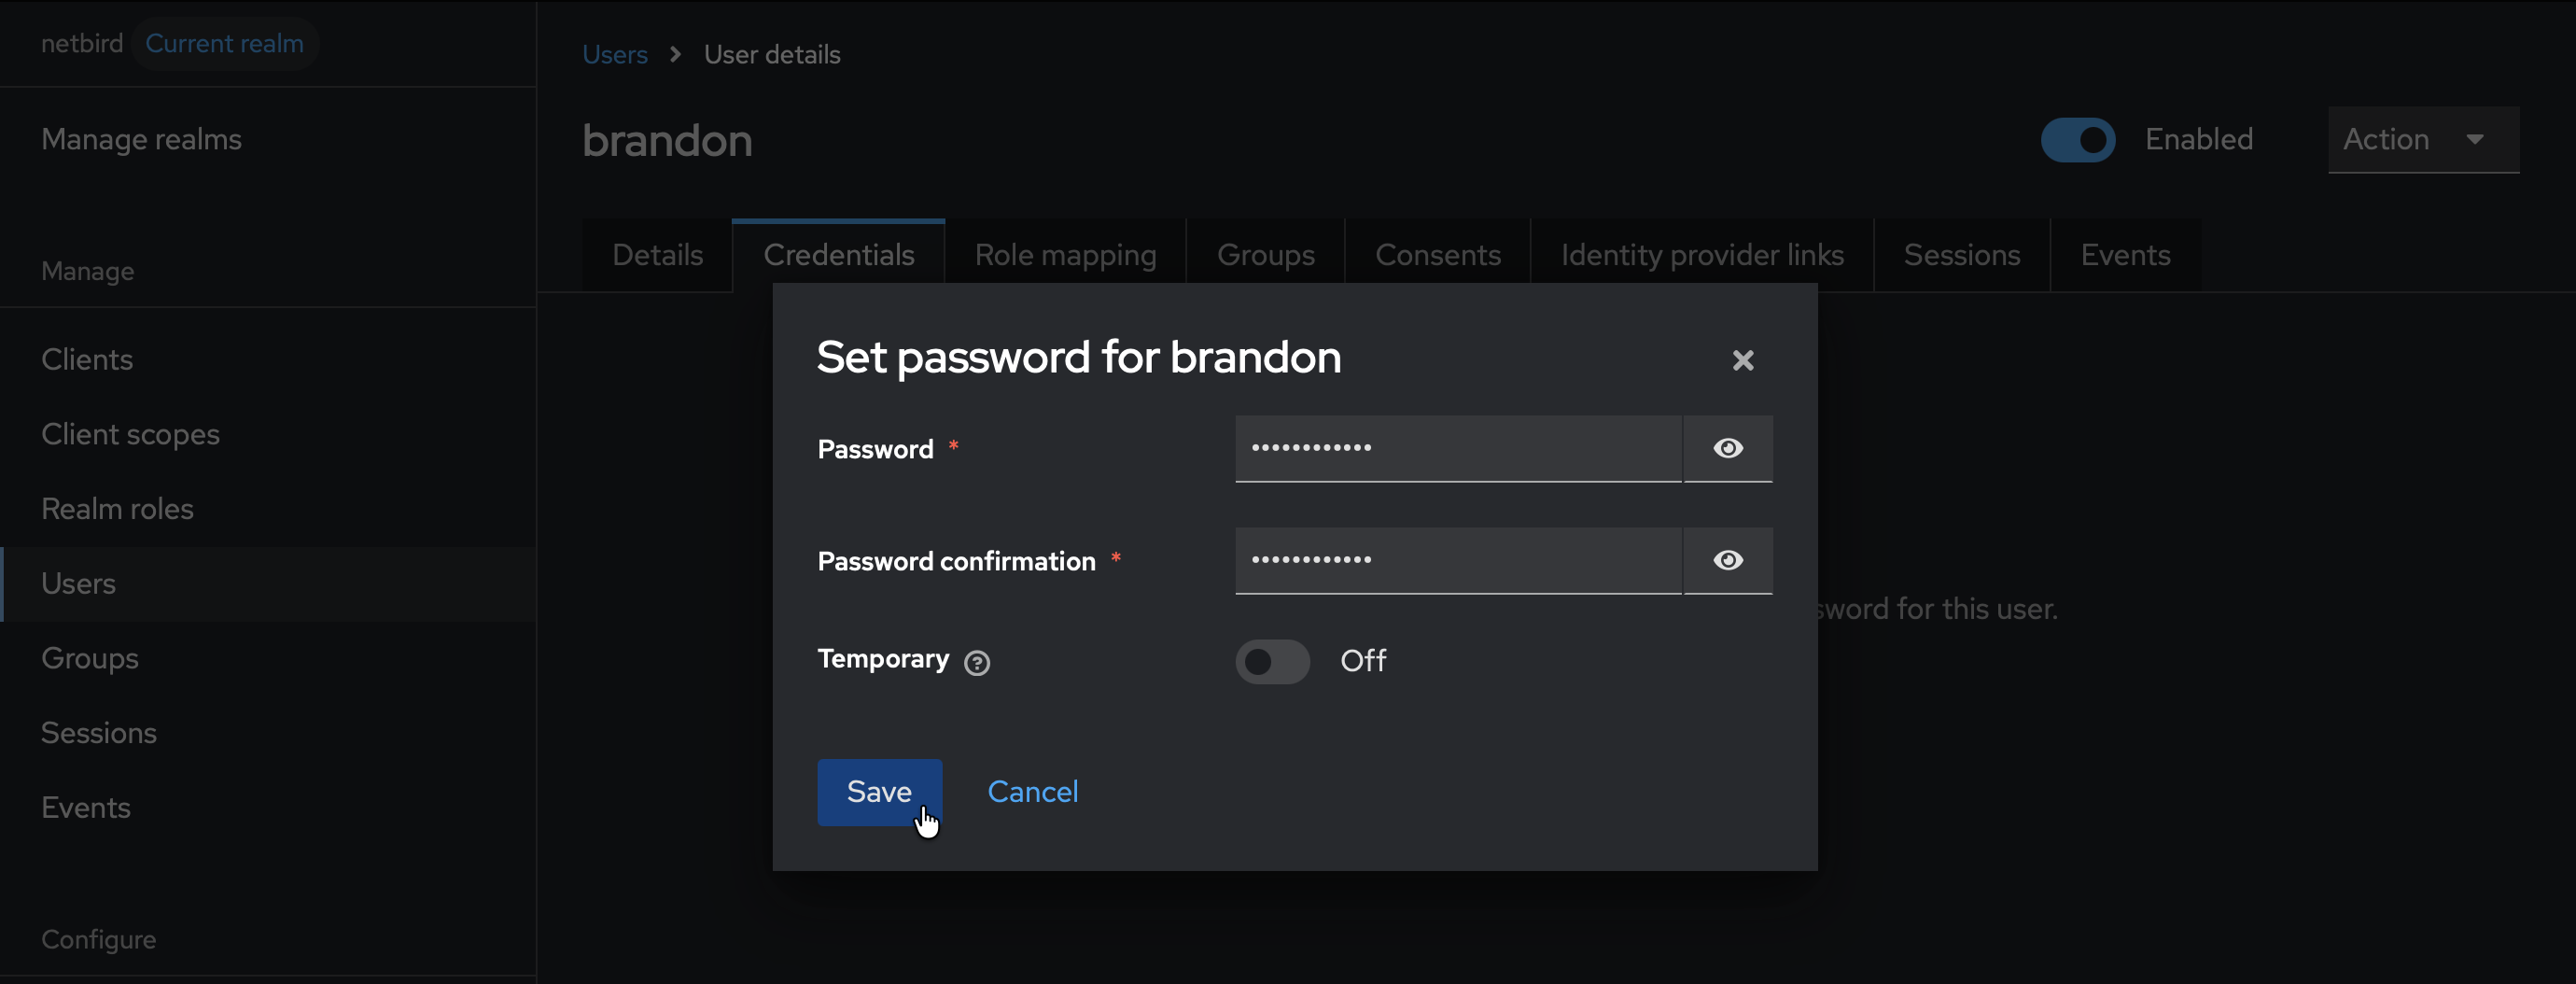
- Click the Credentials tab
- Click Set password
- Fill in the password and set Temporary to
Off - Click Save
Step 3: Start Creating Client in Keycloak
- Click Clients → Create client
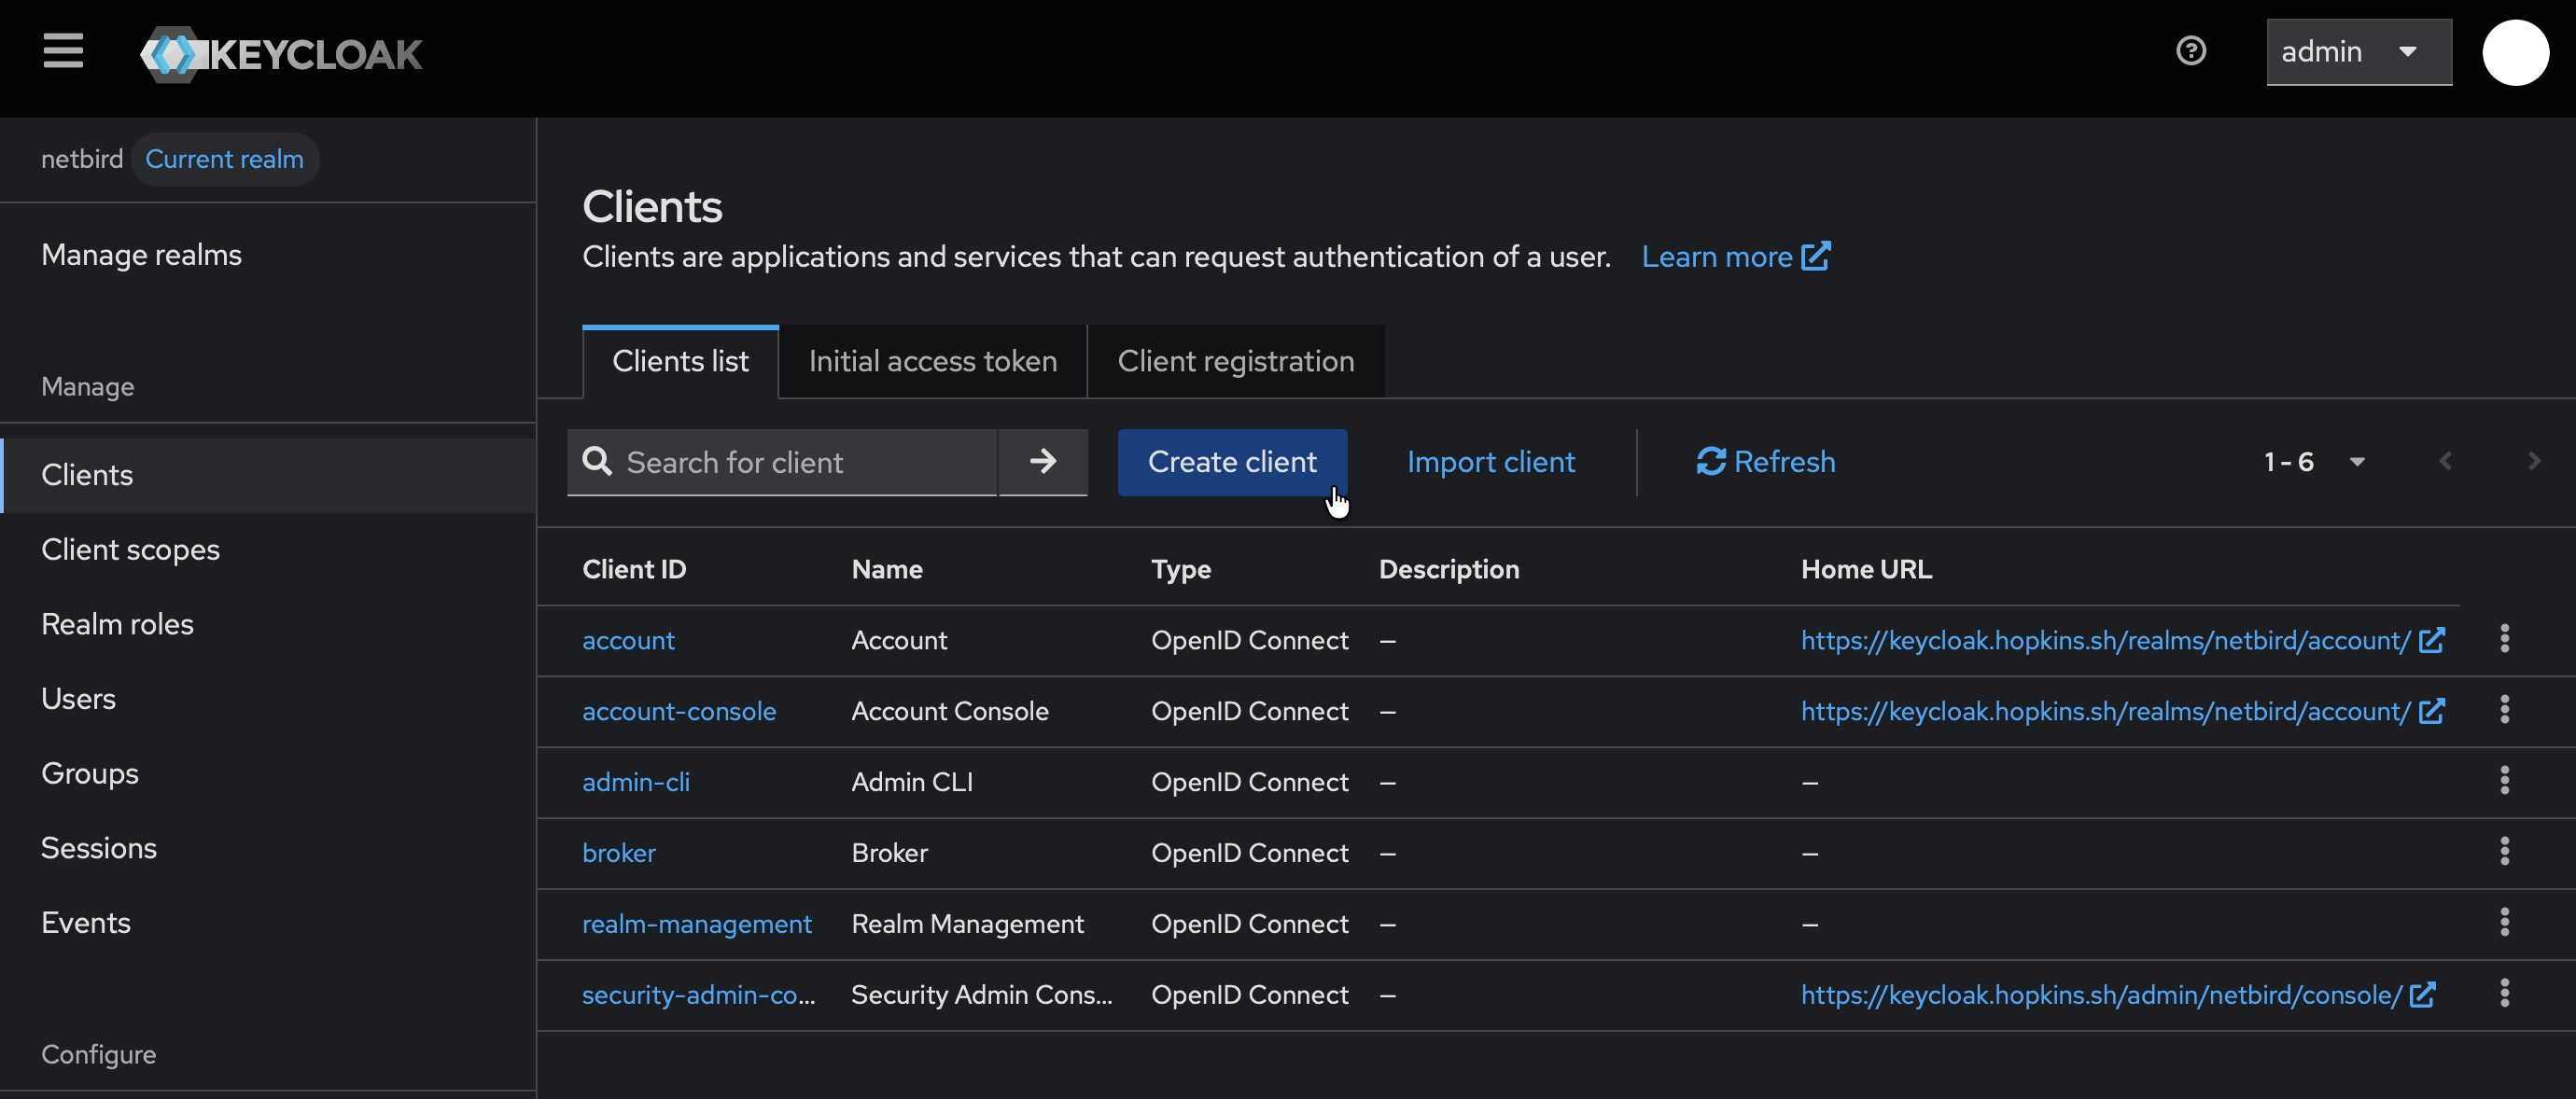
- Fill in the form:
- Client type:
OpenID Connect - Client ID:
netbird
- Client type:
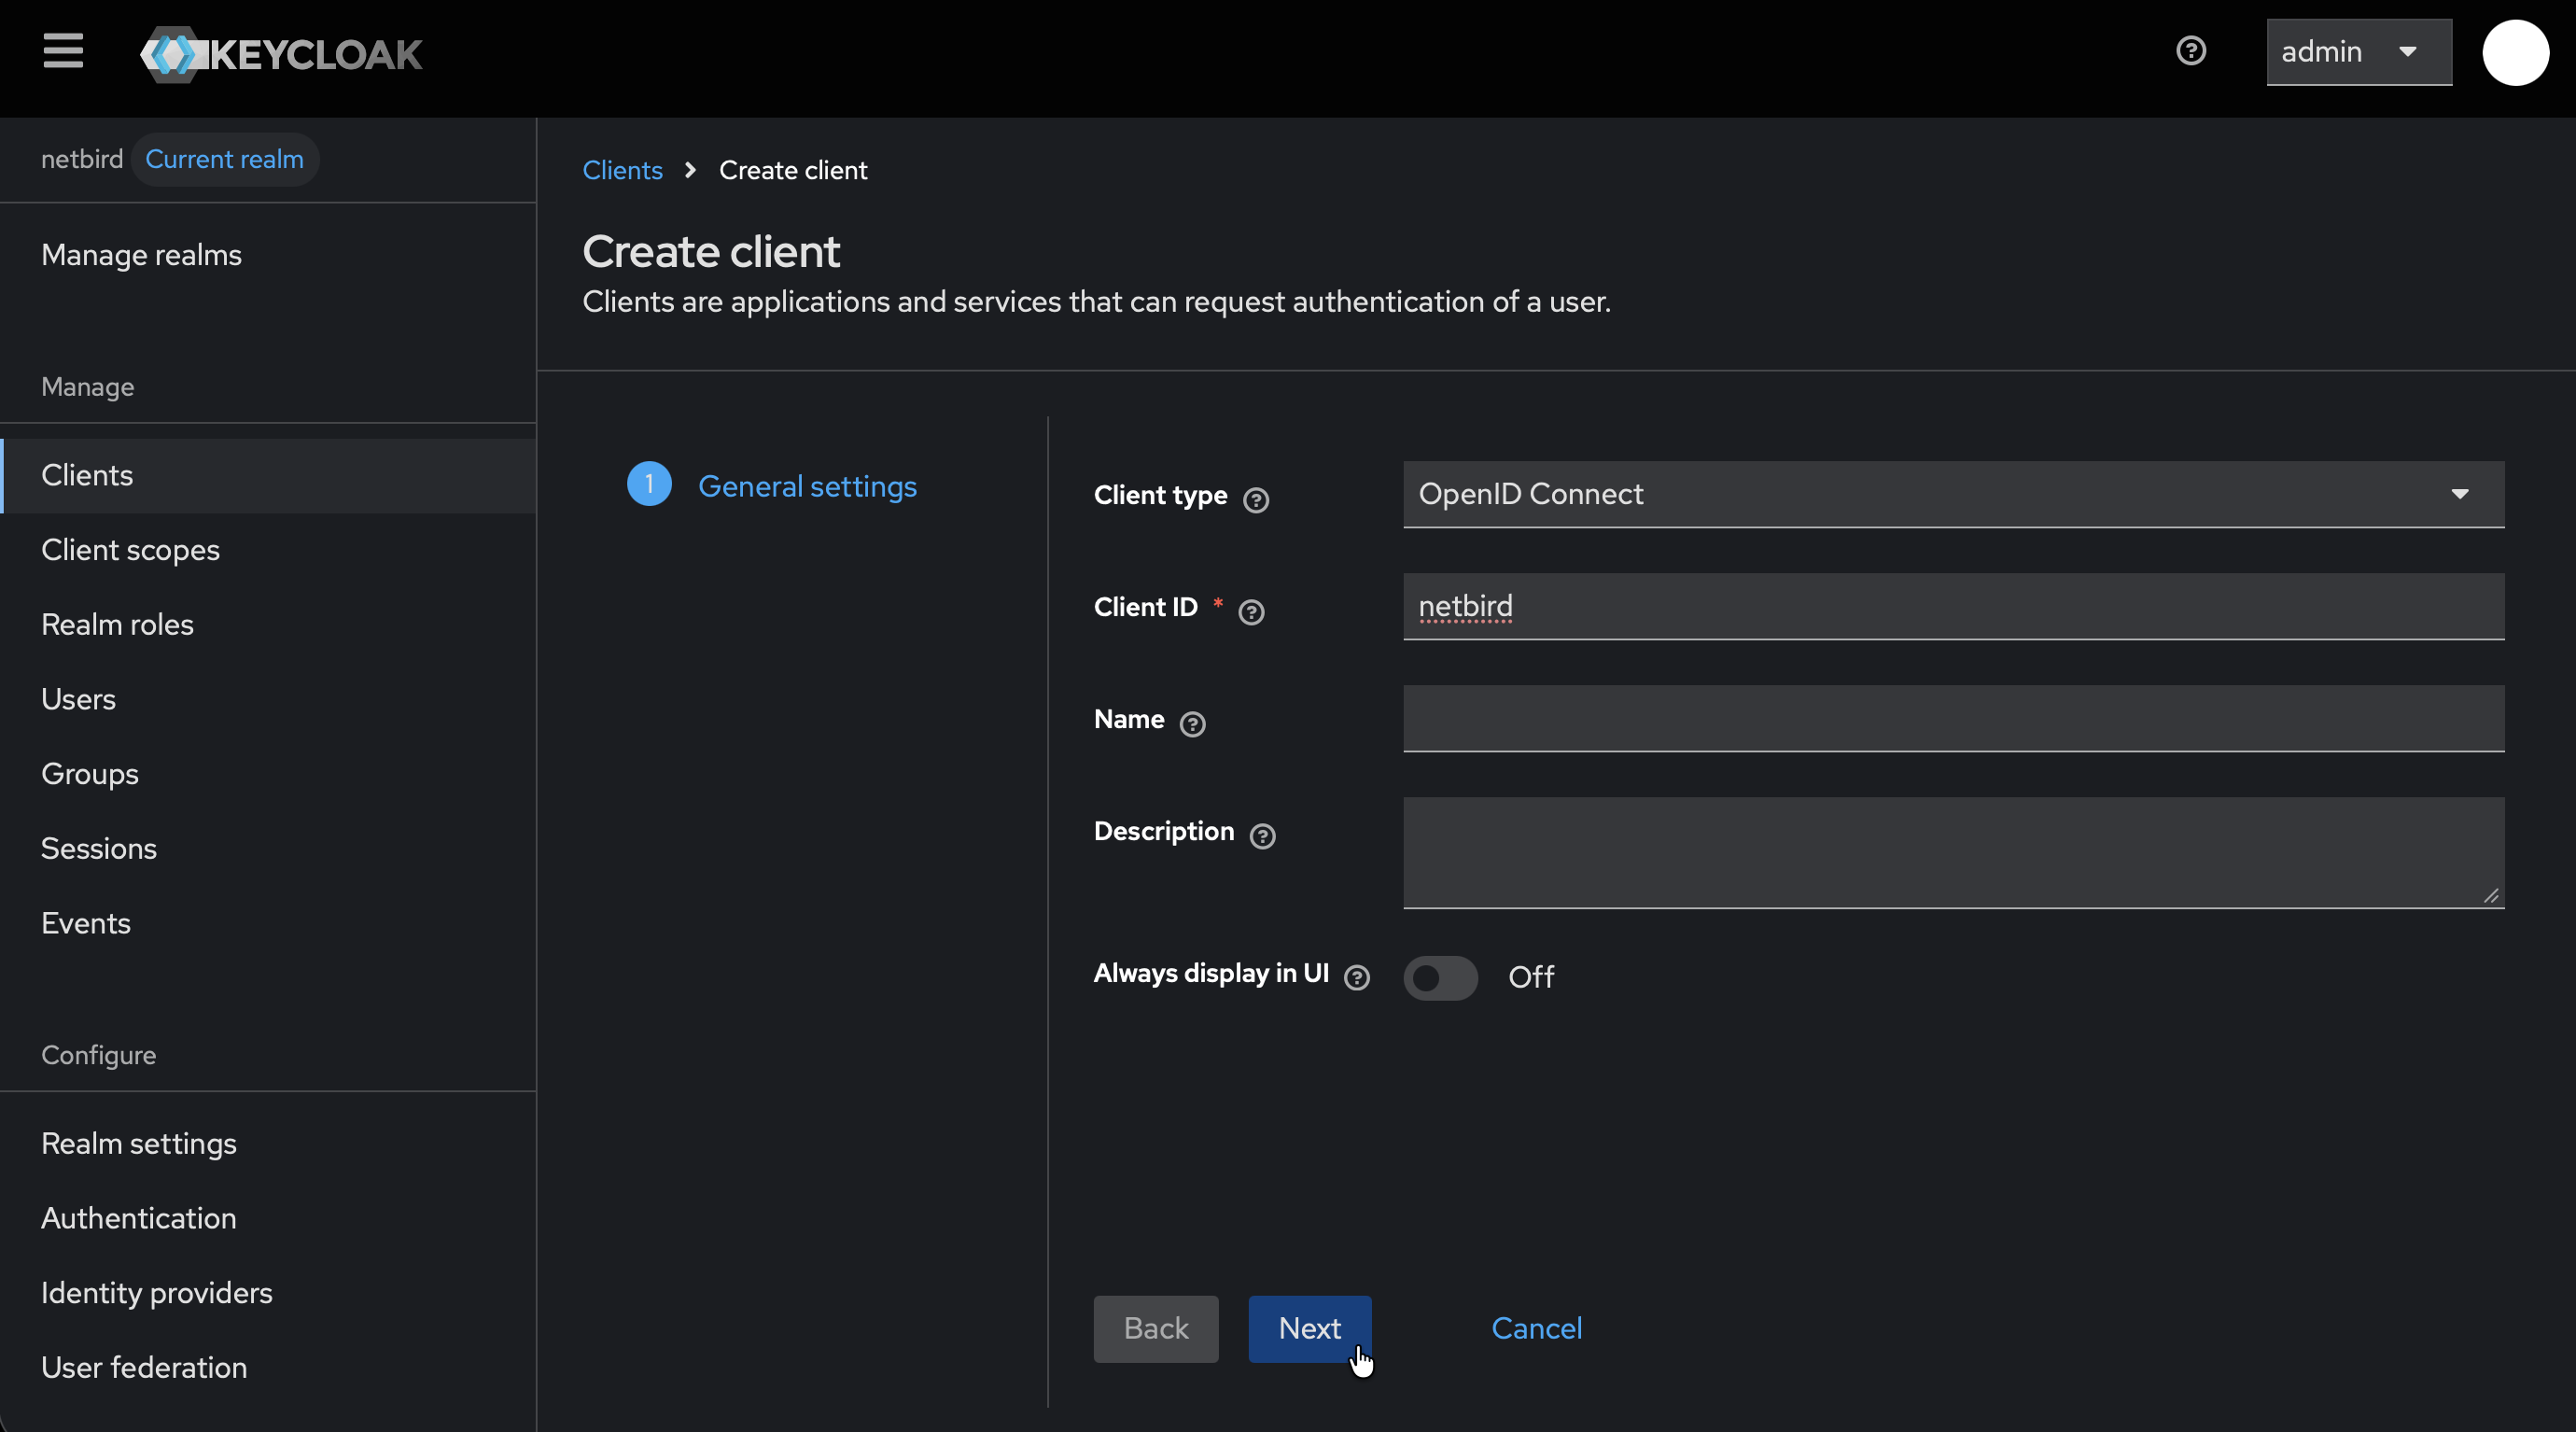
- Click Next
- On Capability config:
- Enable Client authentication
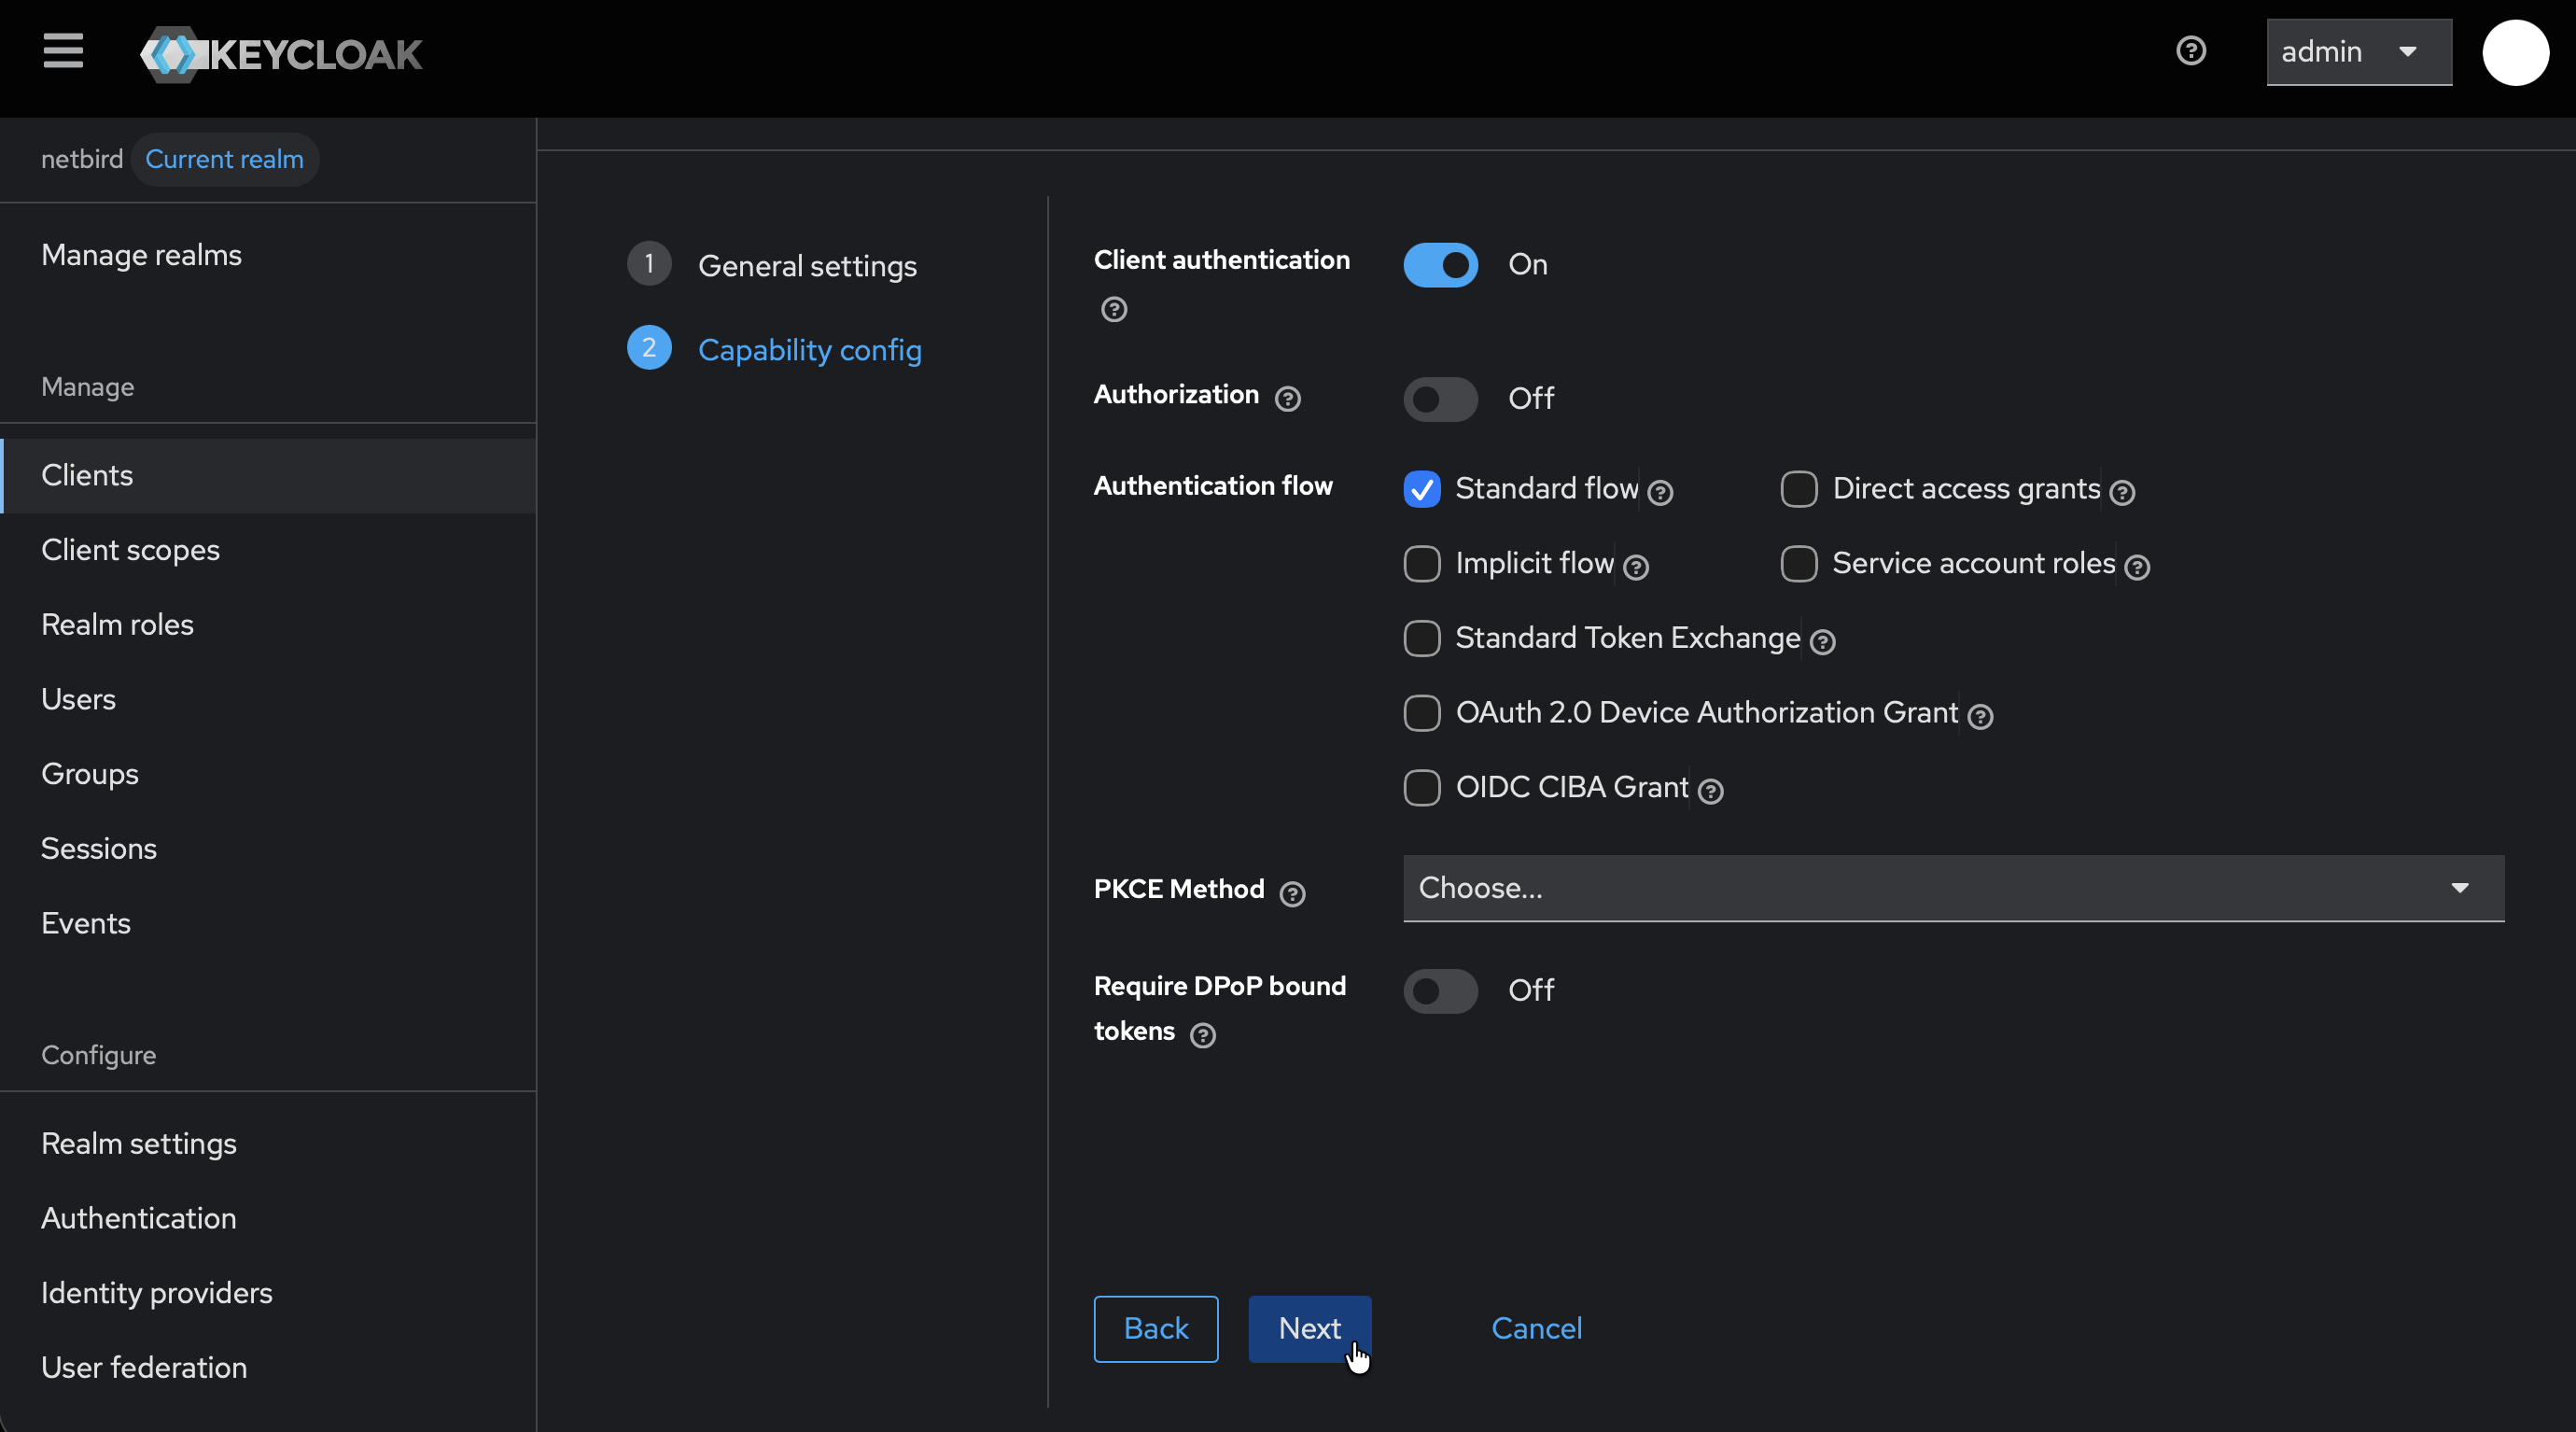
- Click Next
- On Login settings page, don't click Save yet — you'll add the redirect URI in Step 4
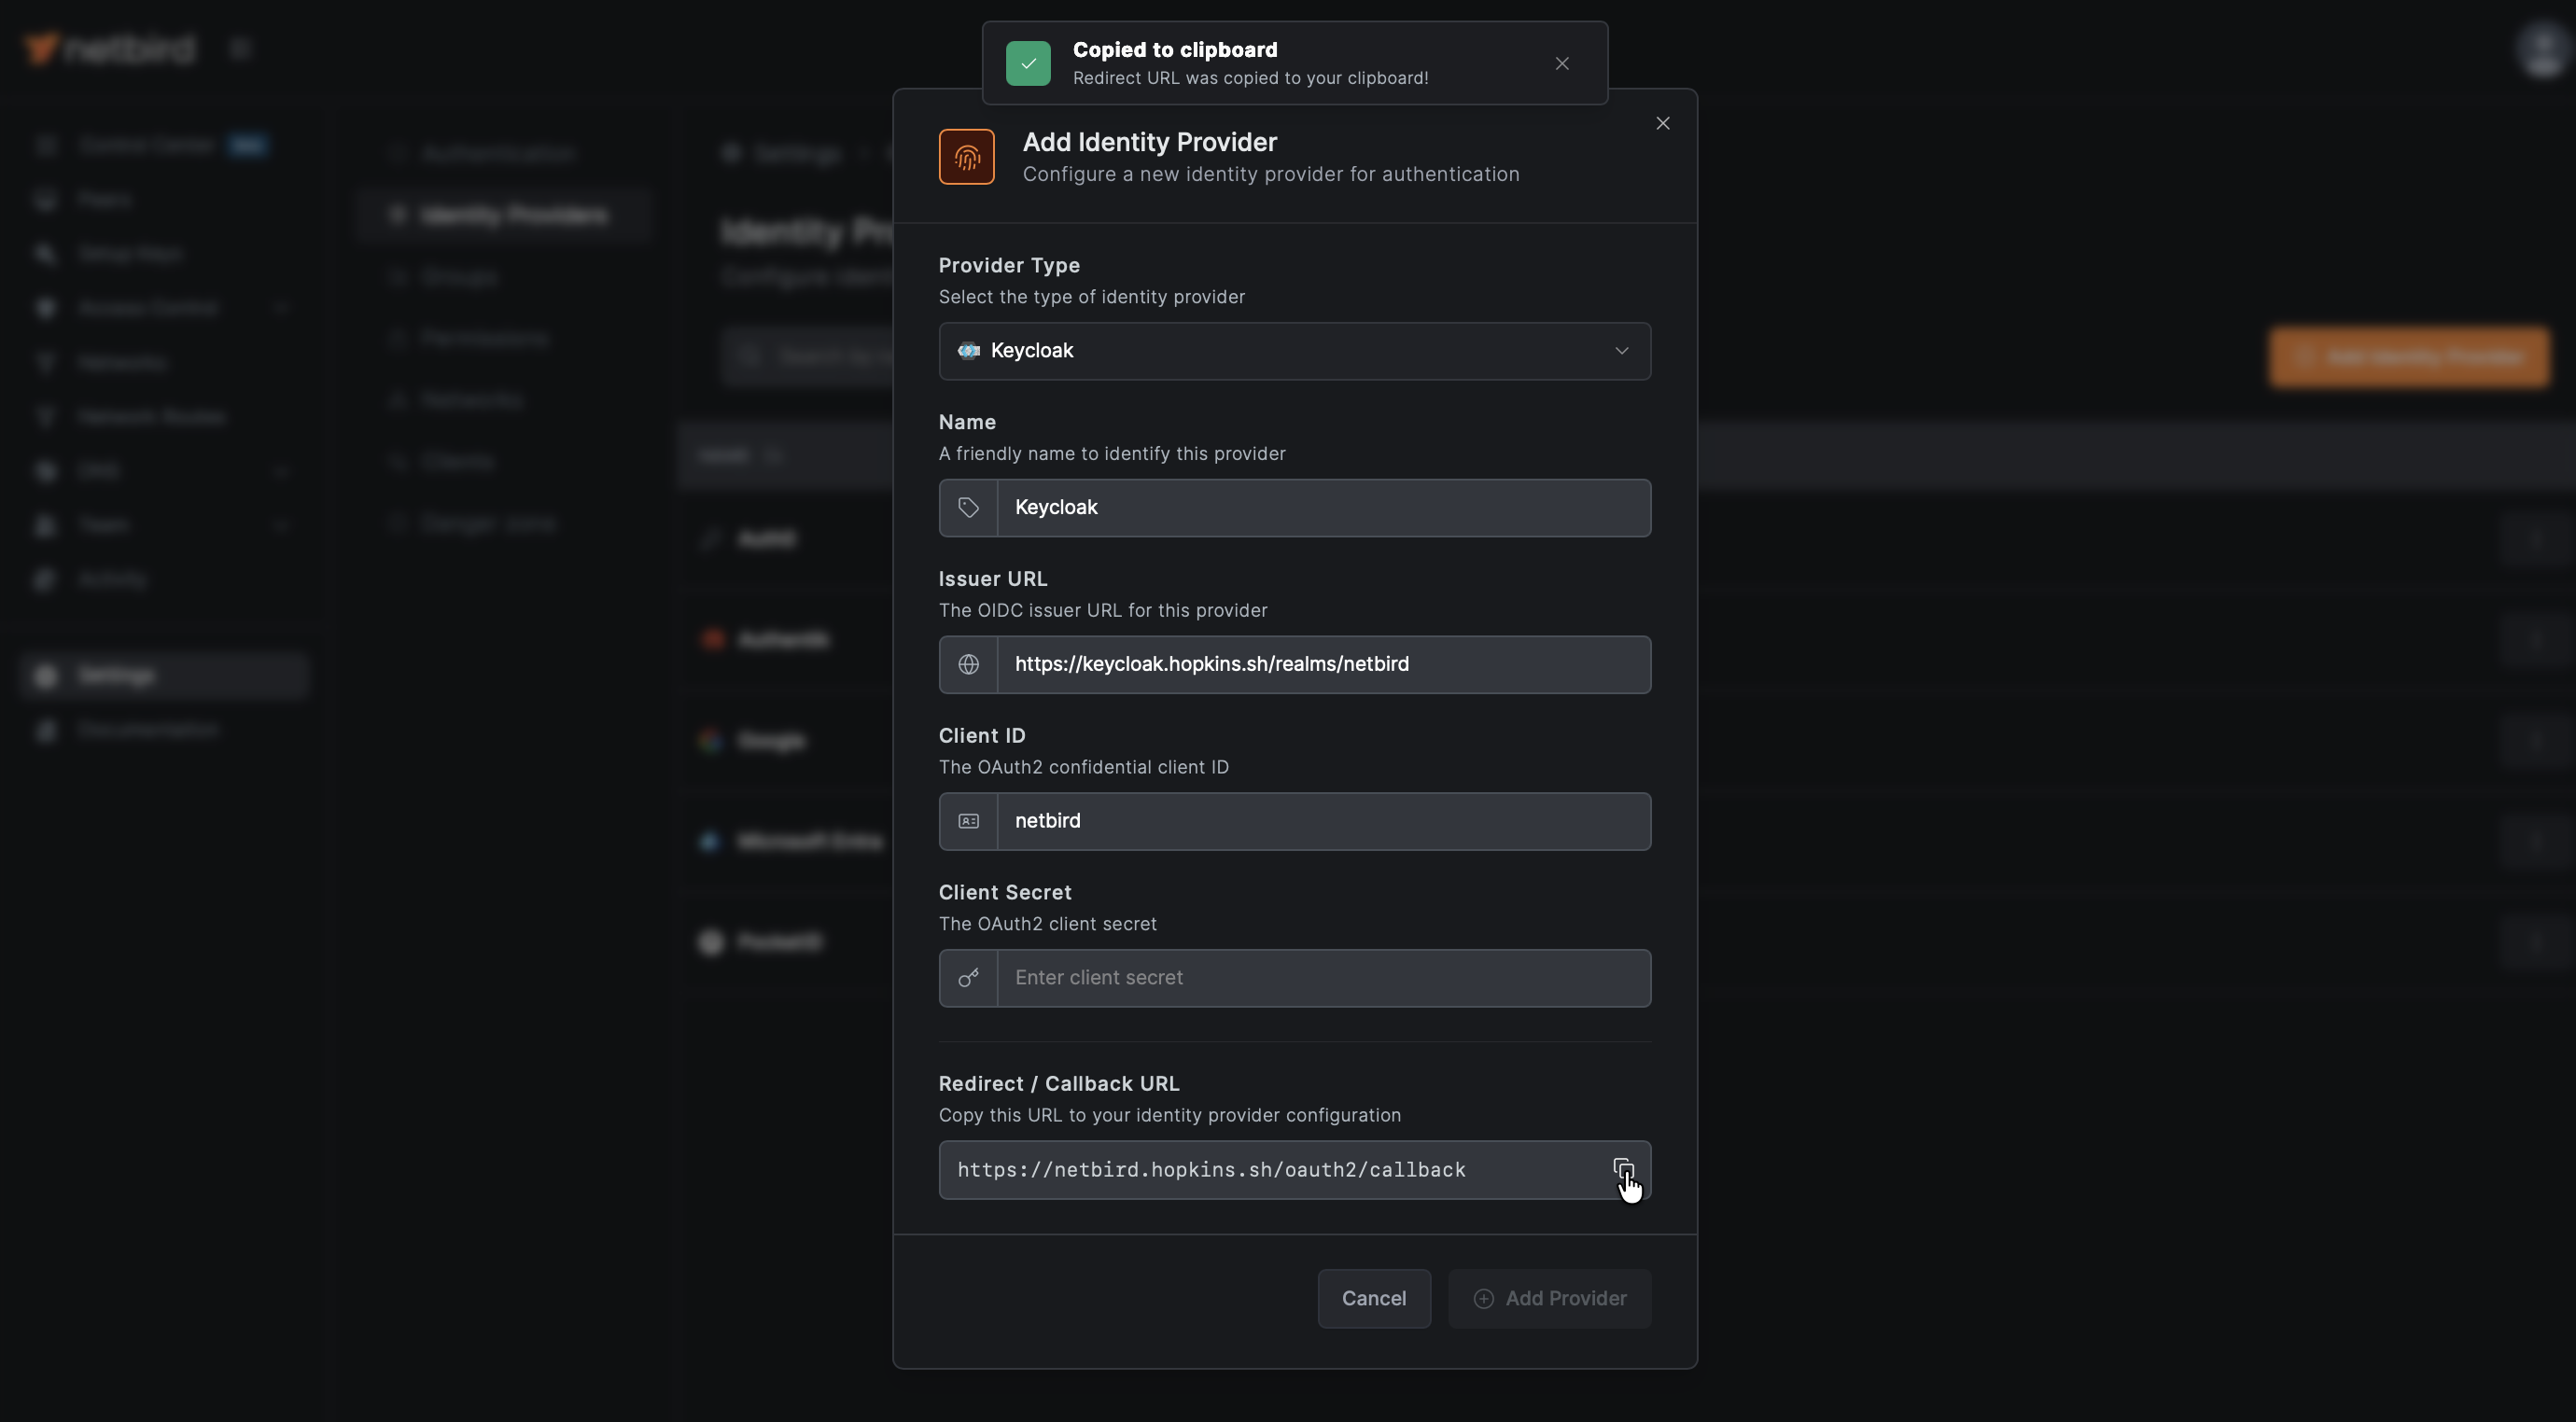
Step 4: Get Redirect URL from NetBird
- Open a new tab or window and log in to your NetBird Dashboard
- Navigate to Settings → Identity Providers
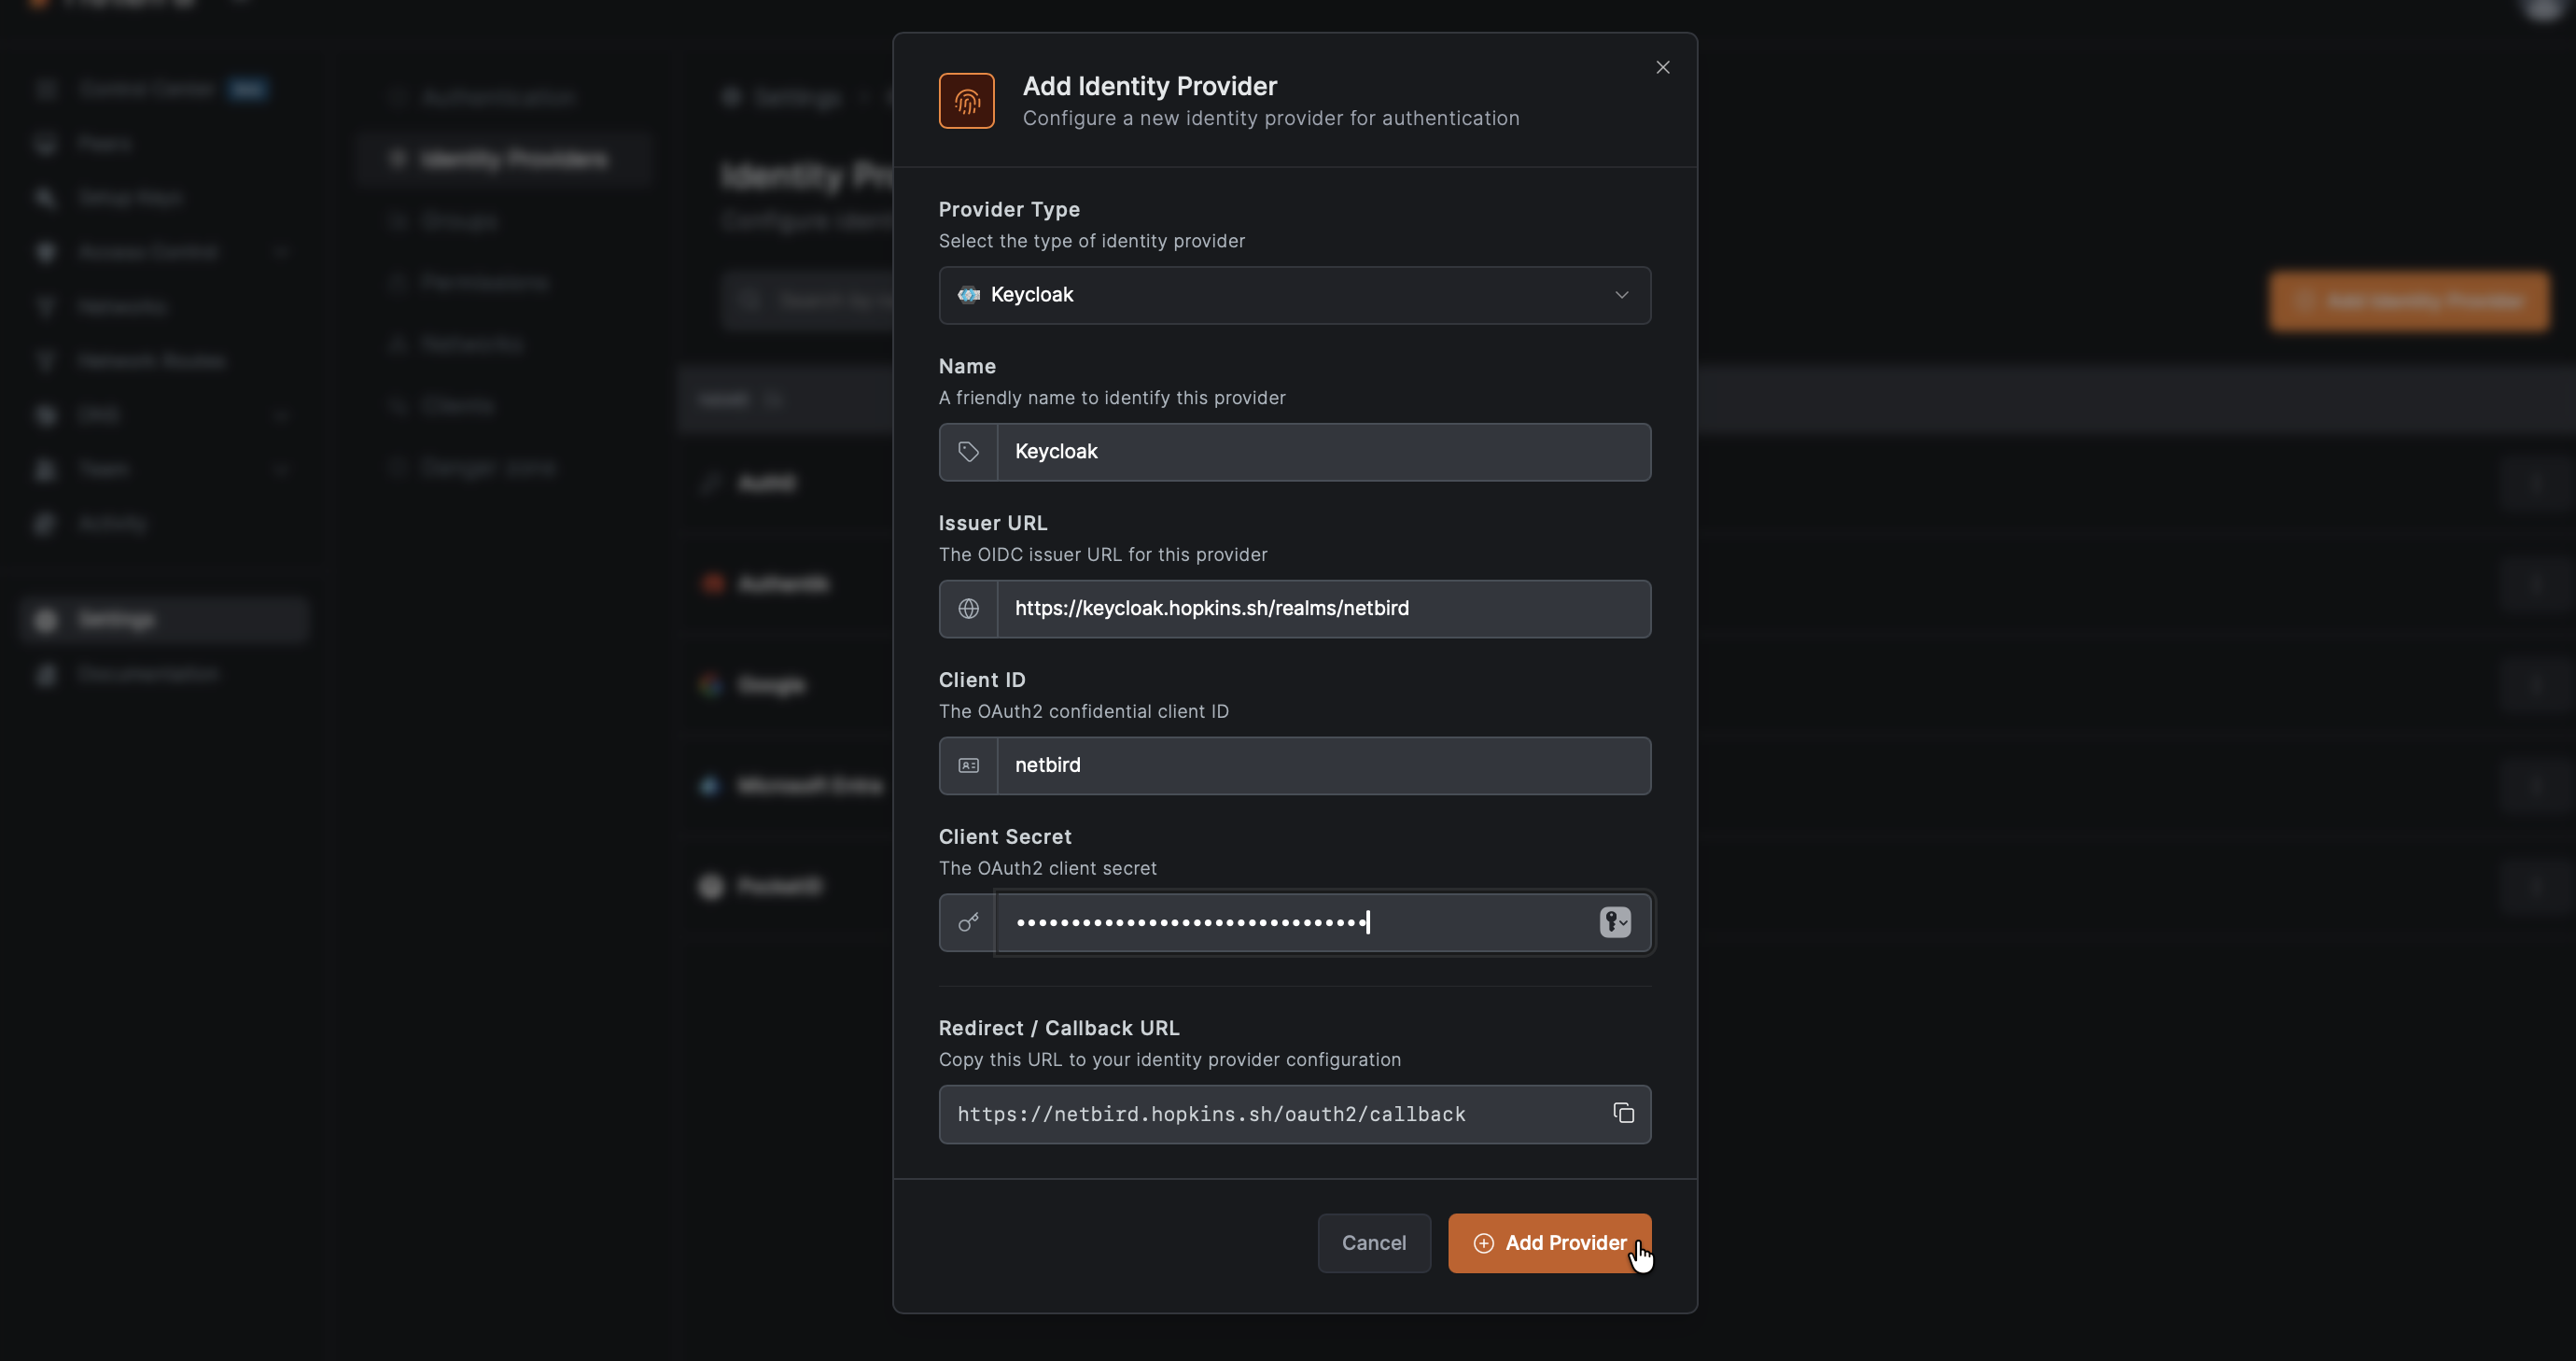
- Click Add Identity Provider
- Select Keycloak (or choose Generic OIDC if Keycloak is not listed)
- Fill in the fields (you can leave Client Secret empty for now):
| Field | Value |
|---|---|
| Type | Generic OIDC (if not already selected) |
| Name | Keycloak (or your preferred display name) |
| Client ID | netbird (from Step 3) |
| Client Secret | Leave empty for now |
| Issuer | https://keycloak.example.com/realms/netbird |
- NetBird will display a Redirect URL — copy this URL (but don't click Add Provider yet)
Step 5: Complete Client Configuration in Keycloak
- Return to the Keycloak Admin Console tab
- On the Login settings page:
- Under Valid redirect URIs, paste the redirect URL you copied from NetBird
- (Optional) Under Valid post logout redirect URIs, add
https://netbird.example.com/oauth2/logout/callback(replacenetbird.example.comwith your NetBird dashboard domain) so logout redirects back to NetBird cleanly
- Click Save
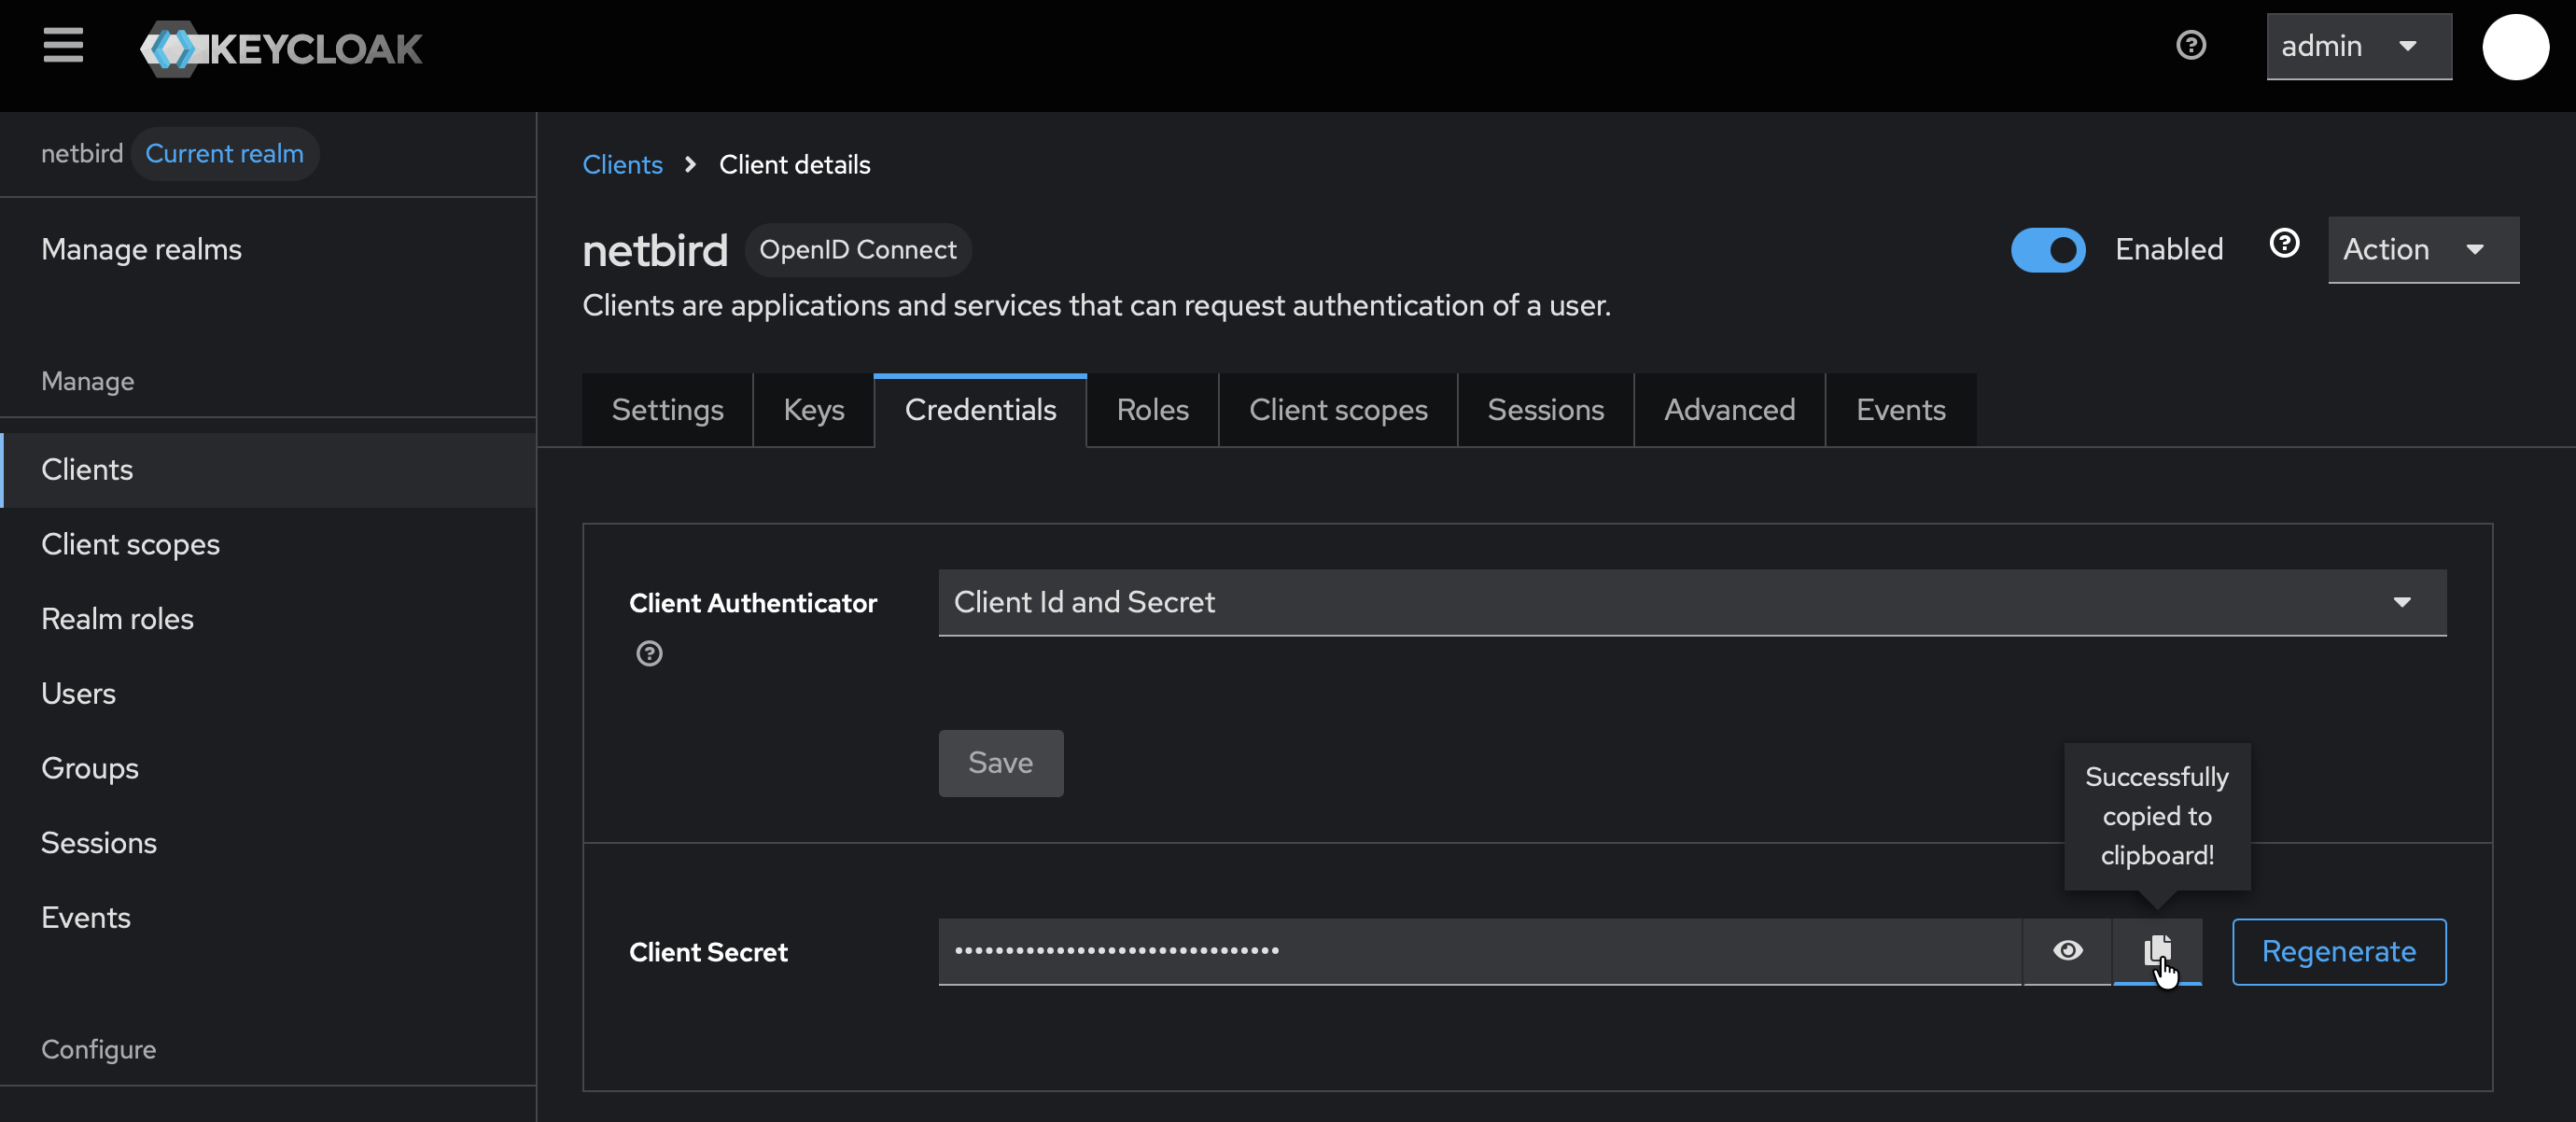
- Go to the Credentials tab and copy the Client secret — you'll need this for Step 6
Step 6: Complete NetBird Setup
- Return to the NetBird tab
- In the identity provider form, paste the Client secret you copied from Step 5
- Click Add Provider
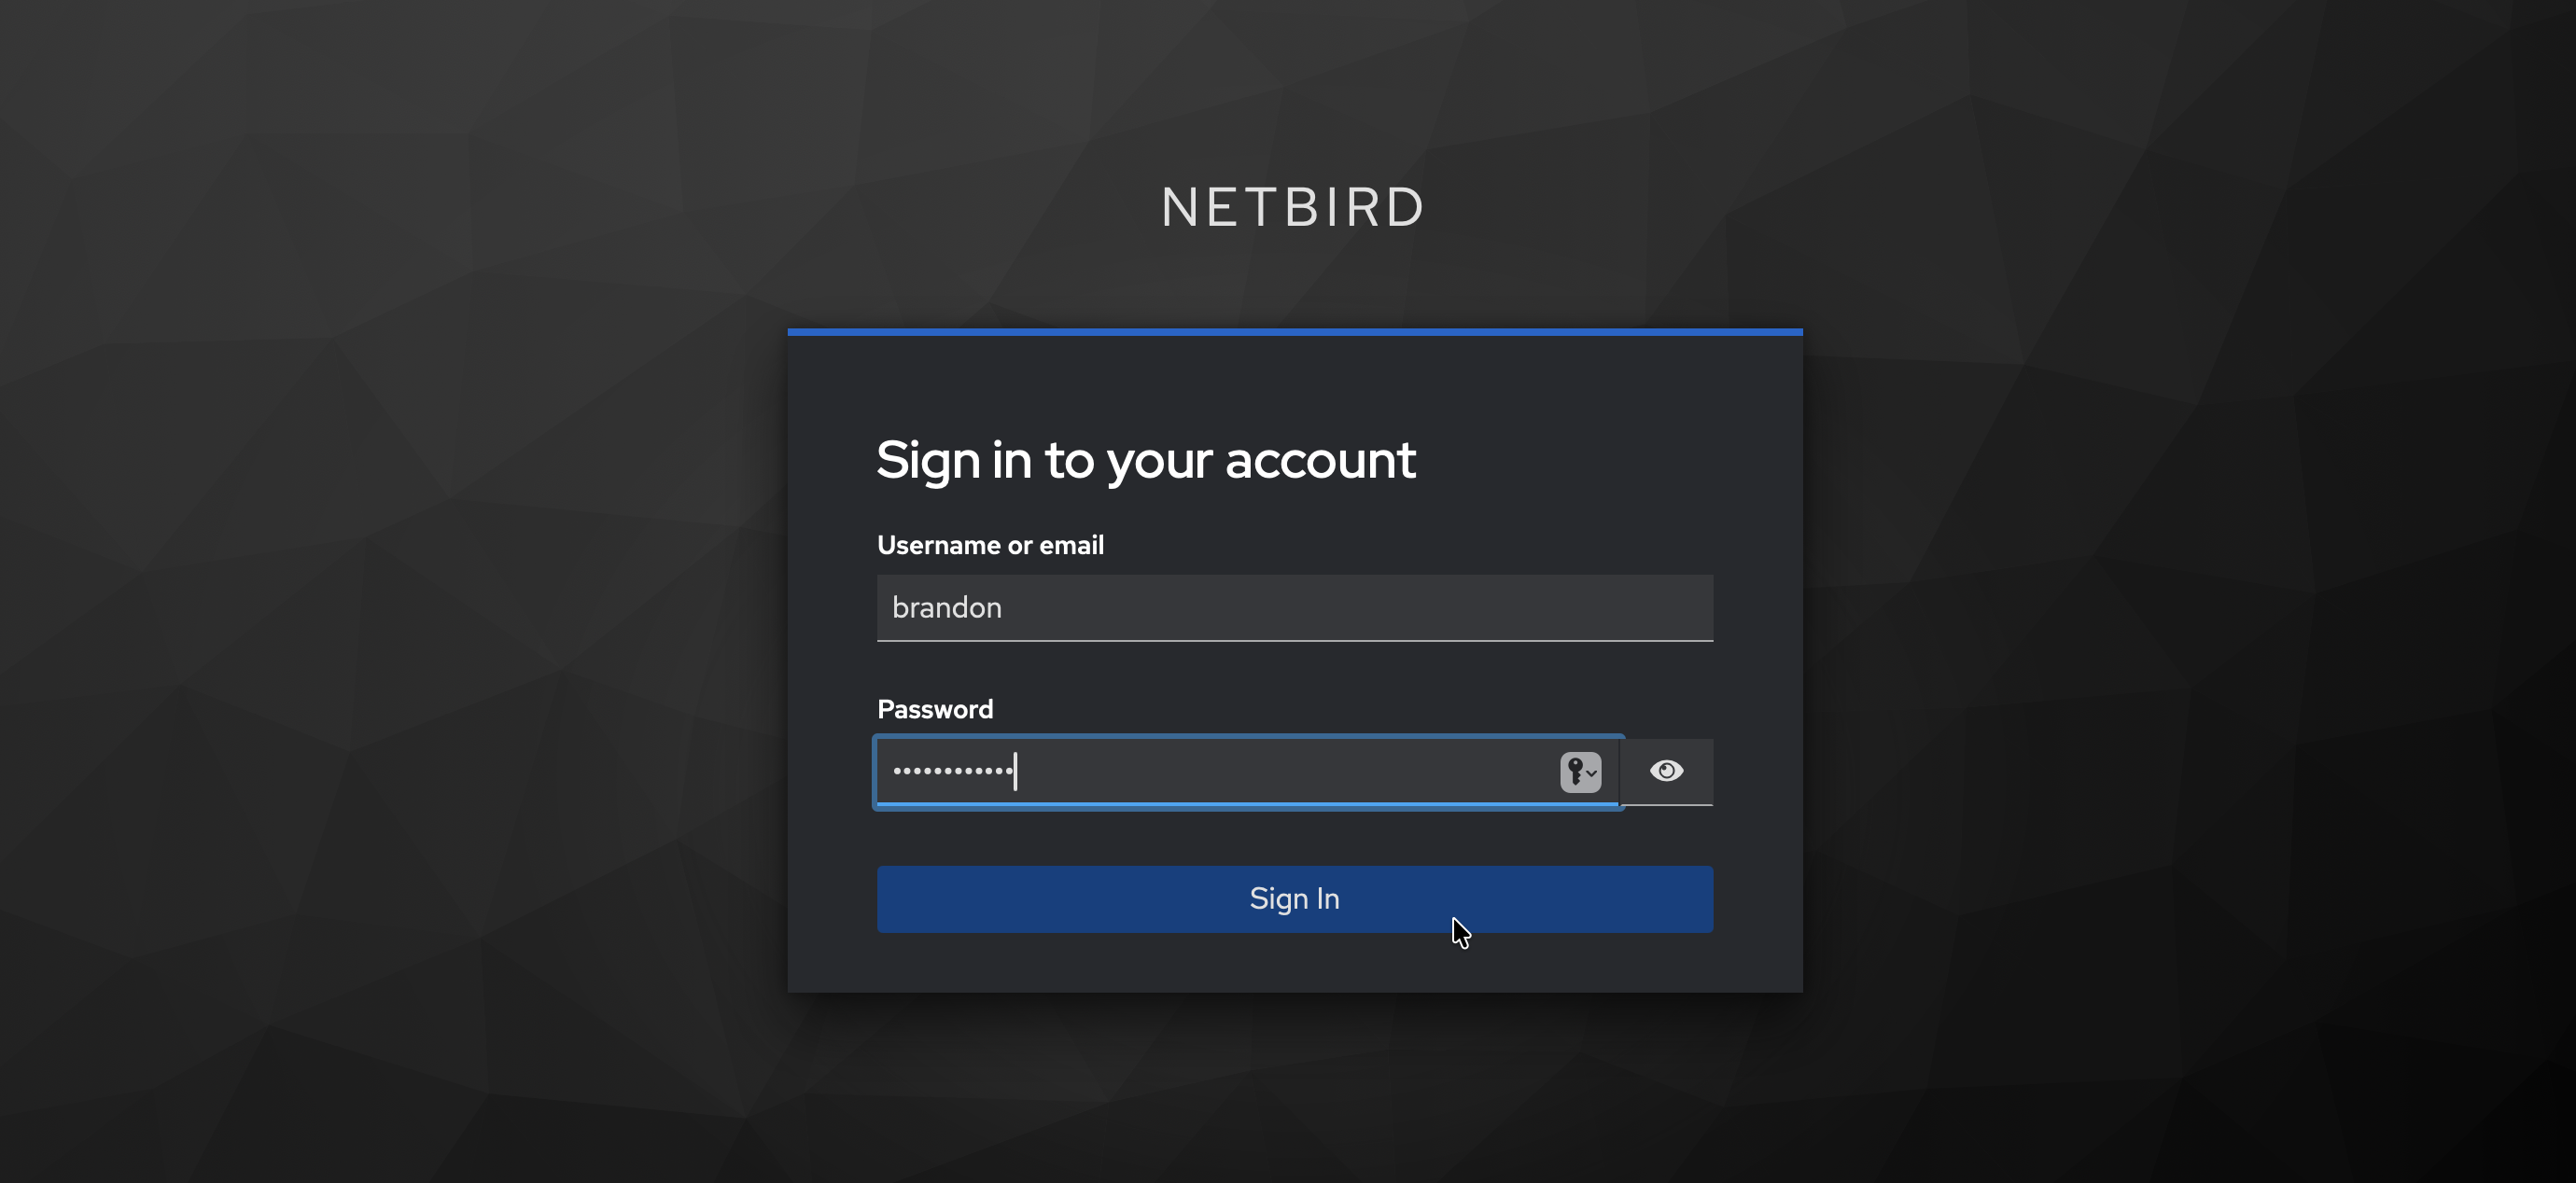
Step 7: Test the Connection
- Log out of NetBird Dashboard
- On the login page, you should see a "Keycloak" button
- Click it and authenticate with the user credentials you created in Step 2
- You should be redirected back to NetBird and logged in
Users who authenticate via Keycloak will appear in your NetBird Users list with a Keycloak badge next to their name.
Configuring JWT 'groups' Claim
To sync Keycloak groups with NetBird, you need to create a client scope with a group membership mapper.
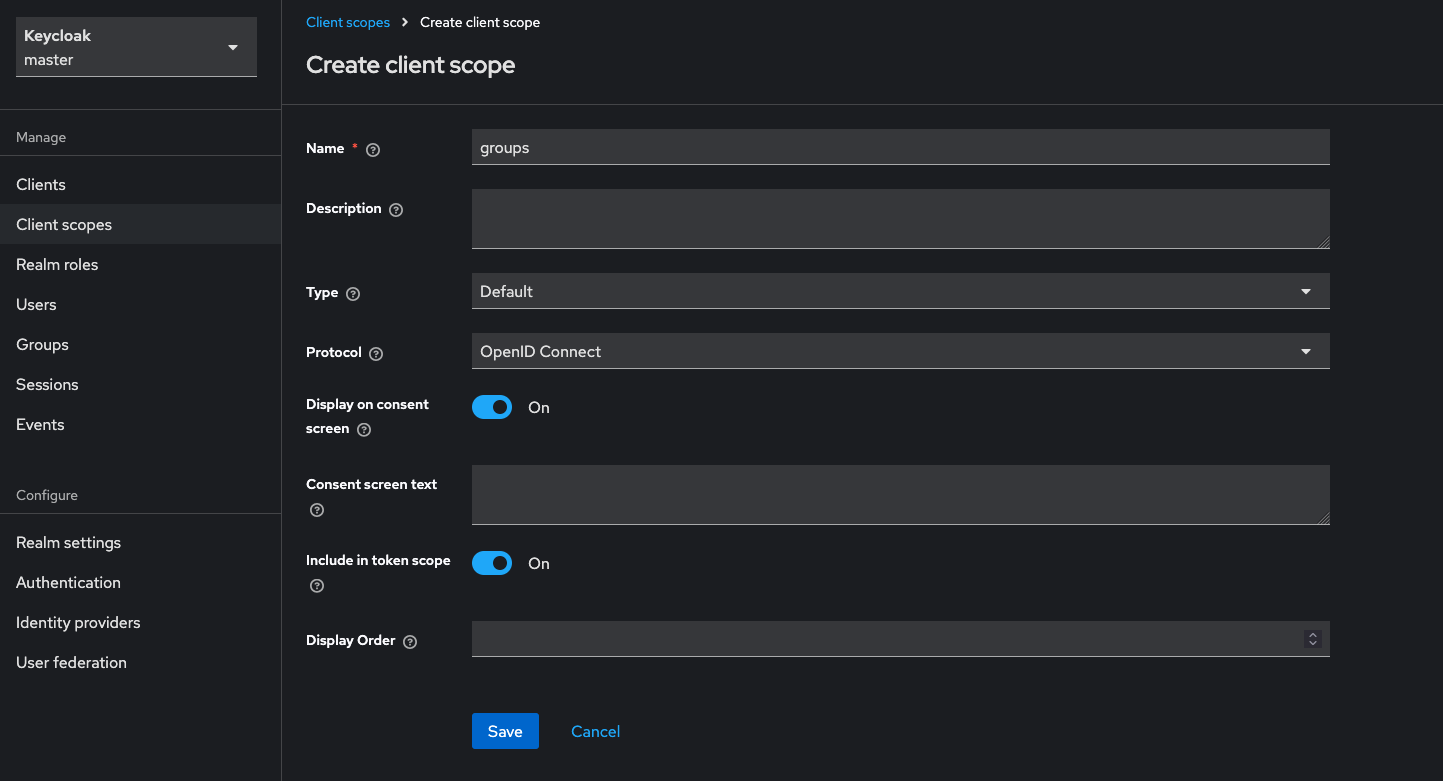
Step 1: Create Groups Client Scope
- In Keycloak Admin Console, ensure the
netbirdrealm is selected - Go to Client scopes → Create client scope
- Fill in:
- Name:
groups - Type:
Default - Include in token scope:
On
- Name:
- Click Save
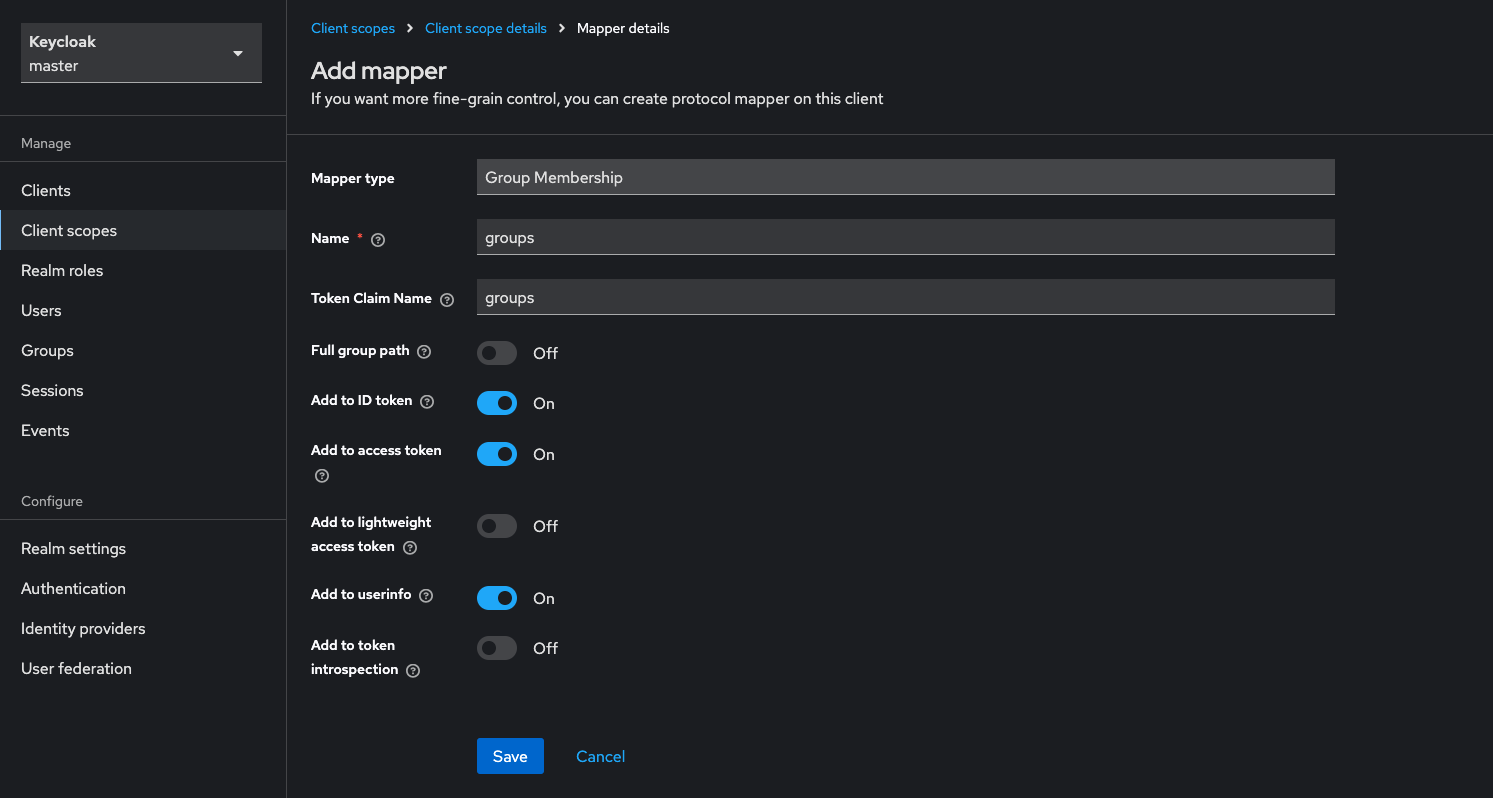
Step 2: Add Group Membership Mapper
- In the newly created
groupsclient scope, go to the Mappers tab - Click Configure a new mapper
- Select Group Membership
- Configure the mapper:
- Name:
groups - Token Claim Name:
groups - Full group path:
Off(recommended for cleaner group names) - Add to ID token:
On - Add to access token:
On - Add to userinfo:
On - Add to token introspection:
Off
- Name:
- Click Save
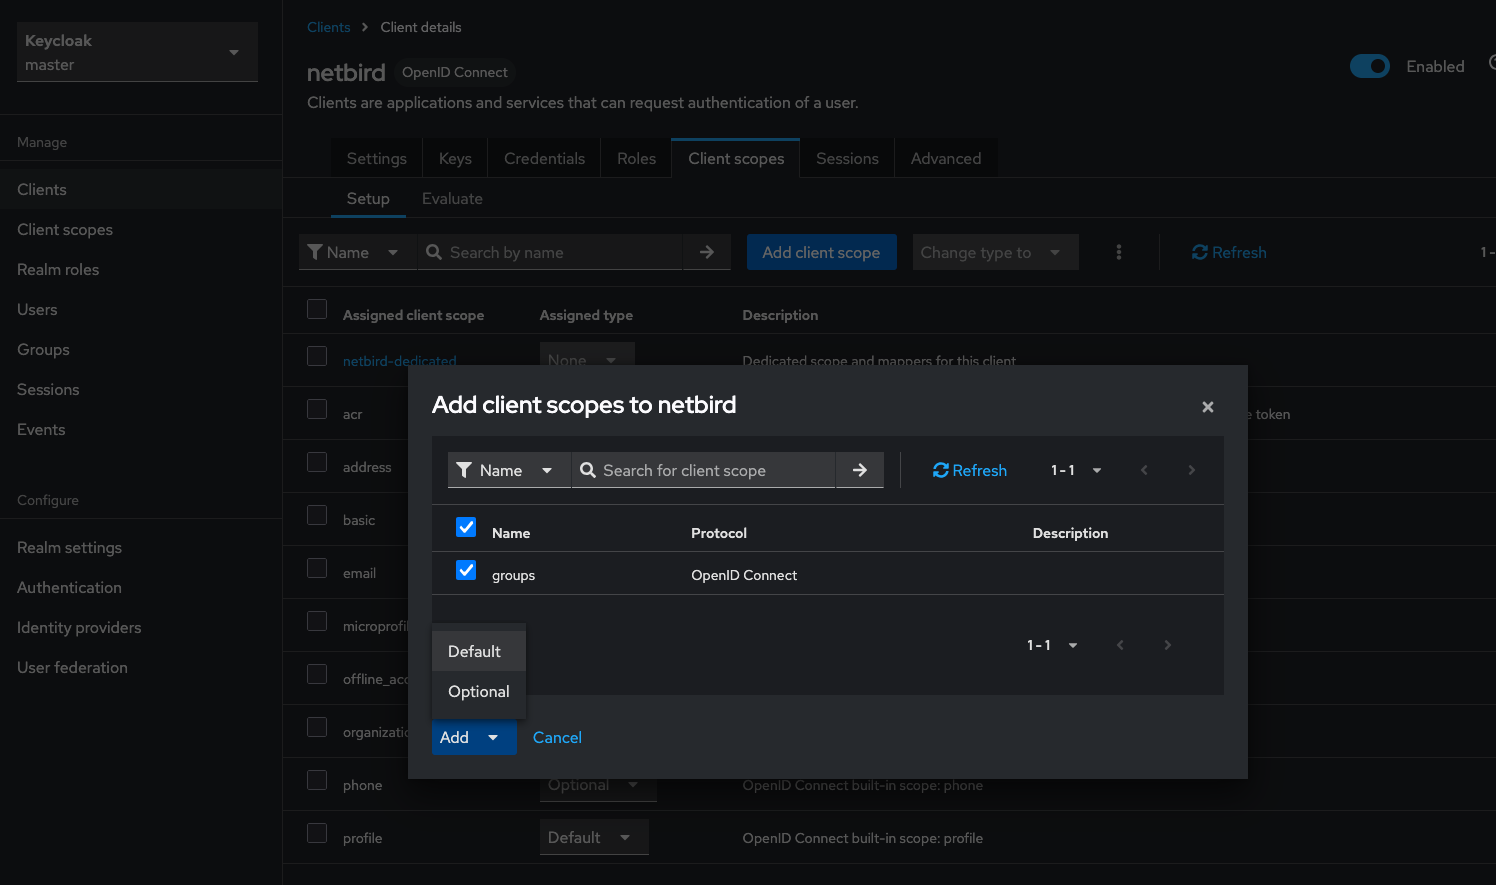
Step 3: Add Client Scope to NetBird Client
- Go to Clients → netbird (your client)
- Go to the Client scopes tab
- Click Add client scope
- Select groups and add it as Default
Step 4: Create Groups and Assign Users
- Go to Groups → Create group
- Create groups as needed (e.g.,
admins,developers) - Go to Users → select a user → Groups tab
- Click Join Group and assign users to groups
Step 5: Enable JWT Group Sync in NetBird
- In NetBird Dashboard, go to Settings → Groups
- Enable JWT group sync
- Set JWT claim to
groups - Optionally configure JWT allow groups to restrict access
If Full group path is enabled, group names will include the path (e.g., /admins or /parent/child). Disable it for cleaner names like admins.
Standalone Setup (Advanced)
Use Keycloak as your primary identity provider instead of NetBird's embedded IdP. This option gives you full control over authentication and user management, is recommended for experienced Keycloak administrators as it also requires additional setup and ongoing maintenance.
For most deployments, the embedded IdP is the simpler choice — it's built into NetBird, fully integrated, and requires minimal configuration to get started. For this implementation, go back up to the Management Setup (Recommended) section above.
For detailed instructions on the standalone setup, see the Keycloak SSO with NetBird Self-Hosted (Advanced) documentation.
If you prefer not to self-host an Identity and Access Management solution, you could use a managed alternative like Auth0.
Troubleshooting
"Invalid redirect URI" error
- Ensure the redirect URI matches exactly what's configured
- Use the exact URL from the NetBird success modal
"Invalid token" errors
- Verify the issuer URL includes
/realms/netbird(or your realm name) - Ensure the client ID matches in both Keycloak and NetBird
- Check clock synchronization between servers
Users not appearing in NetBird
- Users appear after their first successful login