Zitadel with NetBird Self-Hosted
Updated
Zitadel is an open-source identity infrastructure platform designed for cloud-native environments. It provides multi-tenancy, customizable branding, passwordless authentication, and supports protocols like OpenID Connect, OAuth2, SAML2, and LDAP.
Zitadel was previously used in the NetBird quickstart script. If you have an existing Zitadel deployment, you can continue using it as a standalone IdP or migrate to the embedded IdP with Zitadel as an external IdP directly in the NetBird Management Dashboard.
Management Setup (Recommended)
Add Zitadel as an external IdP directly in the NetBird Management Dashboard. This is the simplest approach for new deployments or when migrating from the previous quickstart.
Prerequisites
- NetBird self-hosted with embedded IdP enabled
- Zitadel instance (cloud or self-hosted)
Step 1: Create a Project in Zitadel
- Log in to your Zitadel Console
- If you don't have a project yet, click New Project (or navigate to an existing project)
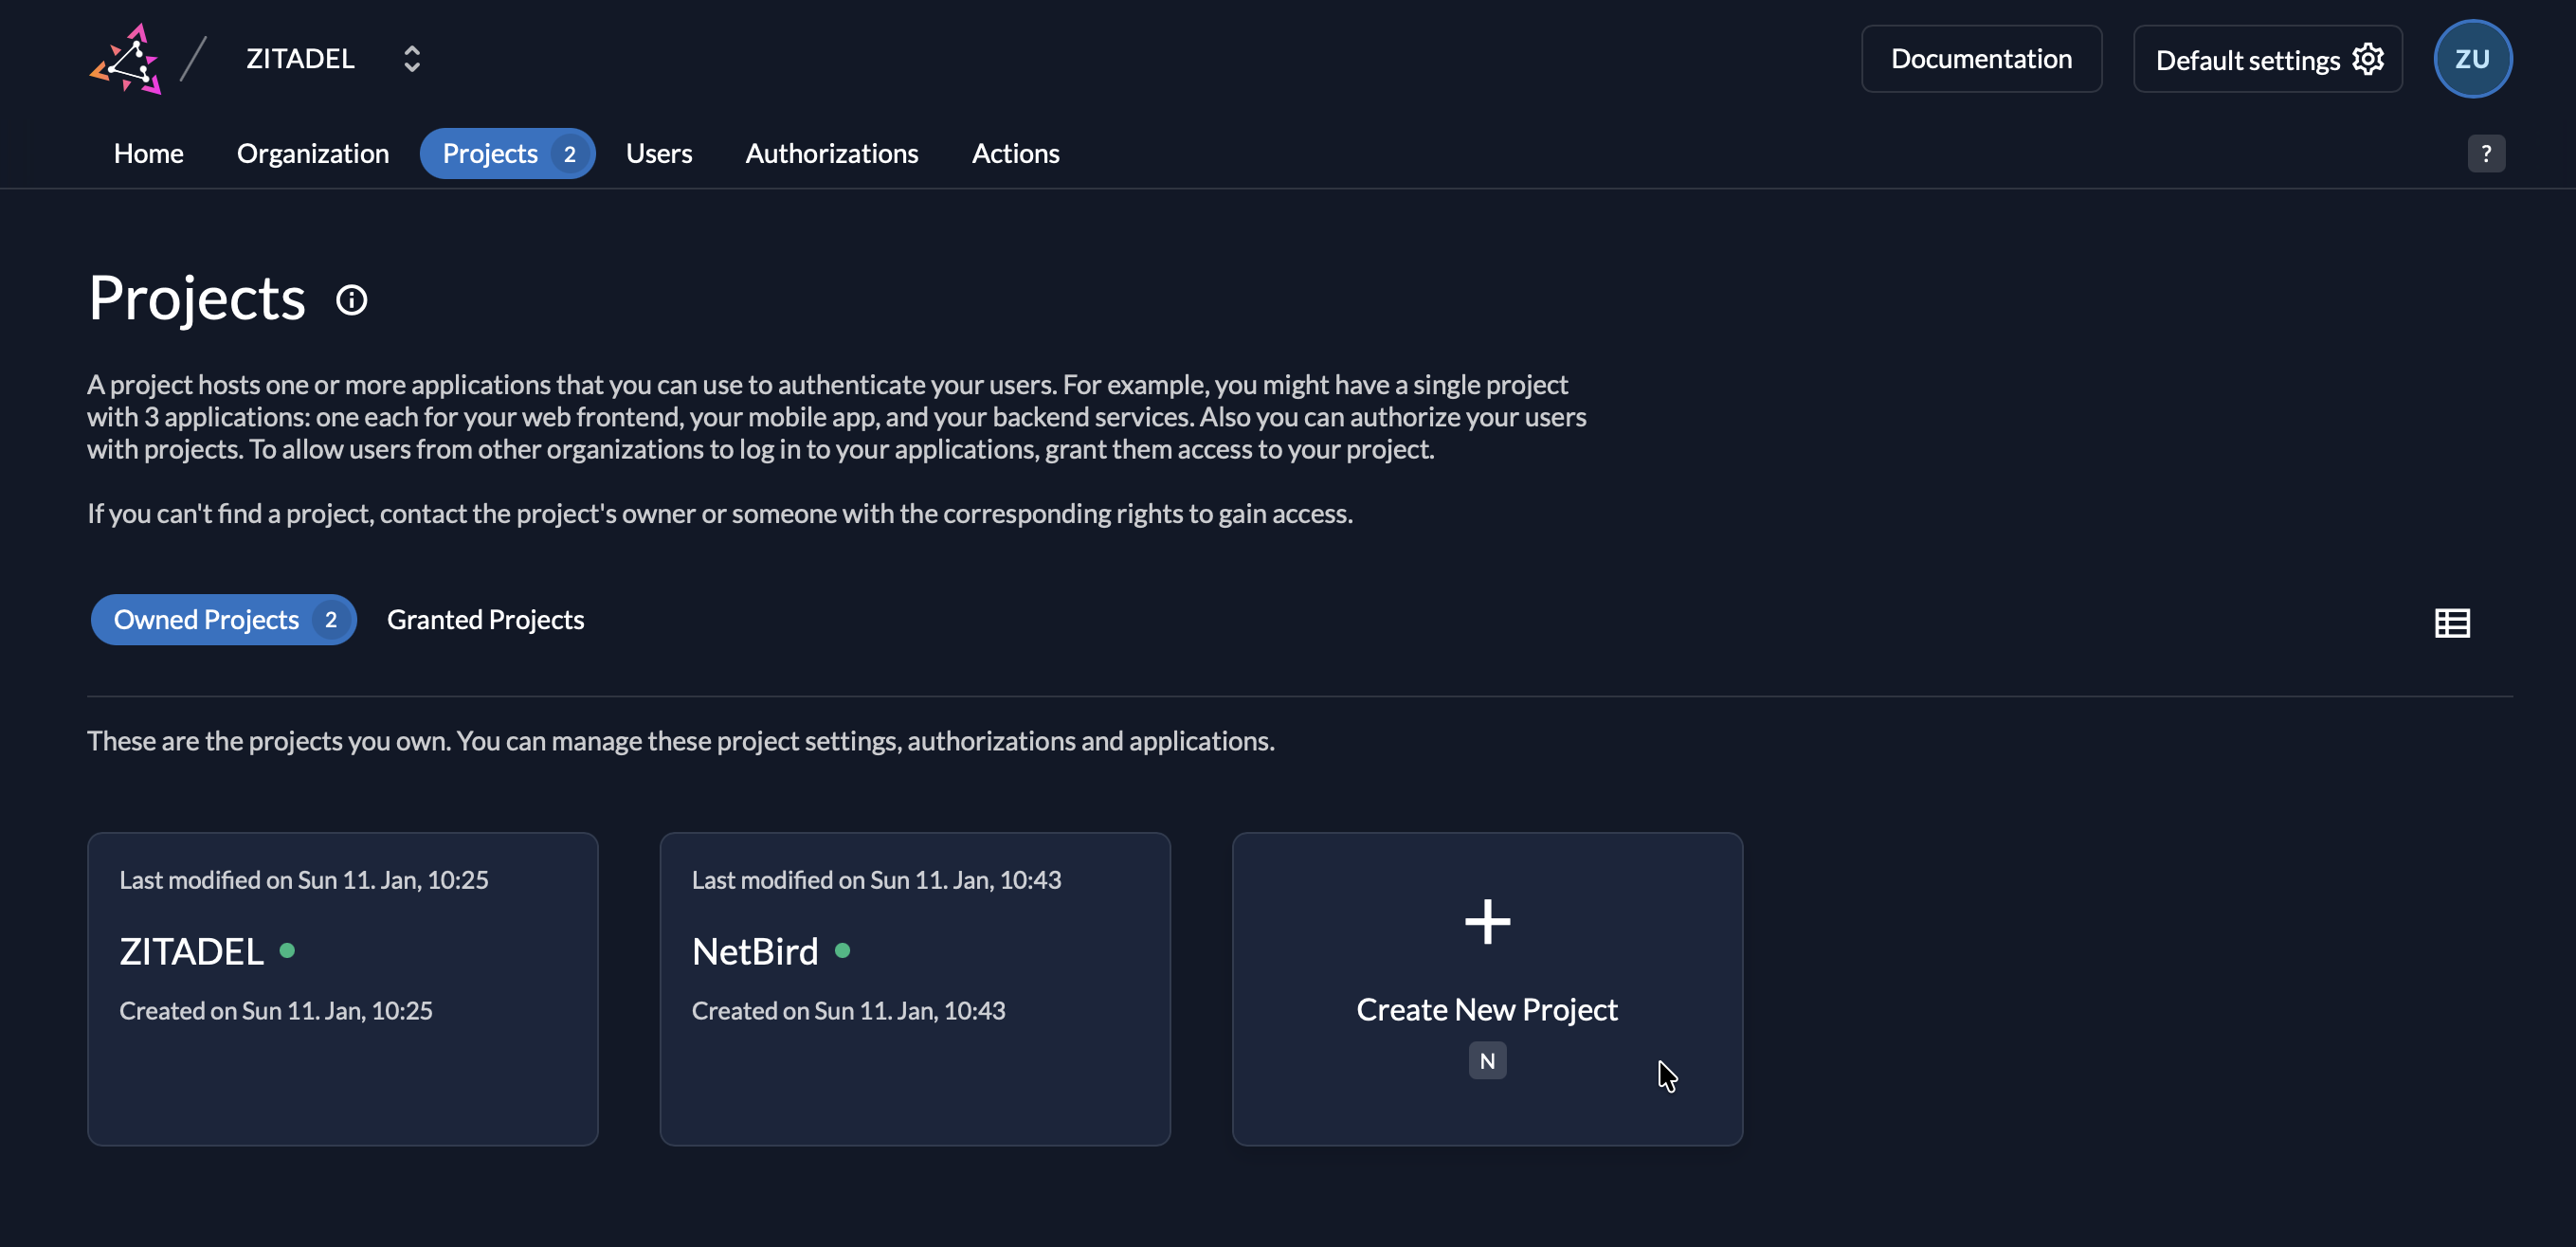
- Fill in the project details:
- Name:
NetBird(or your preferred name)
- Name:
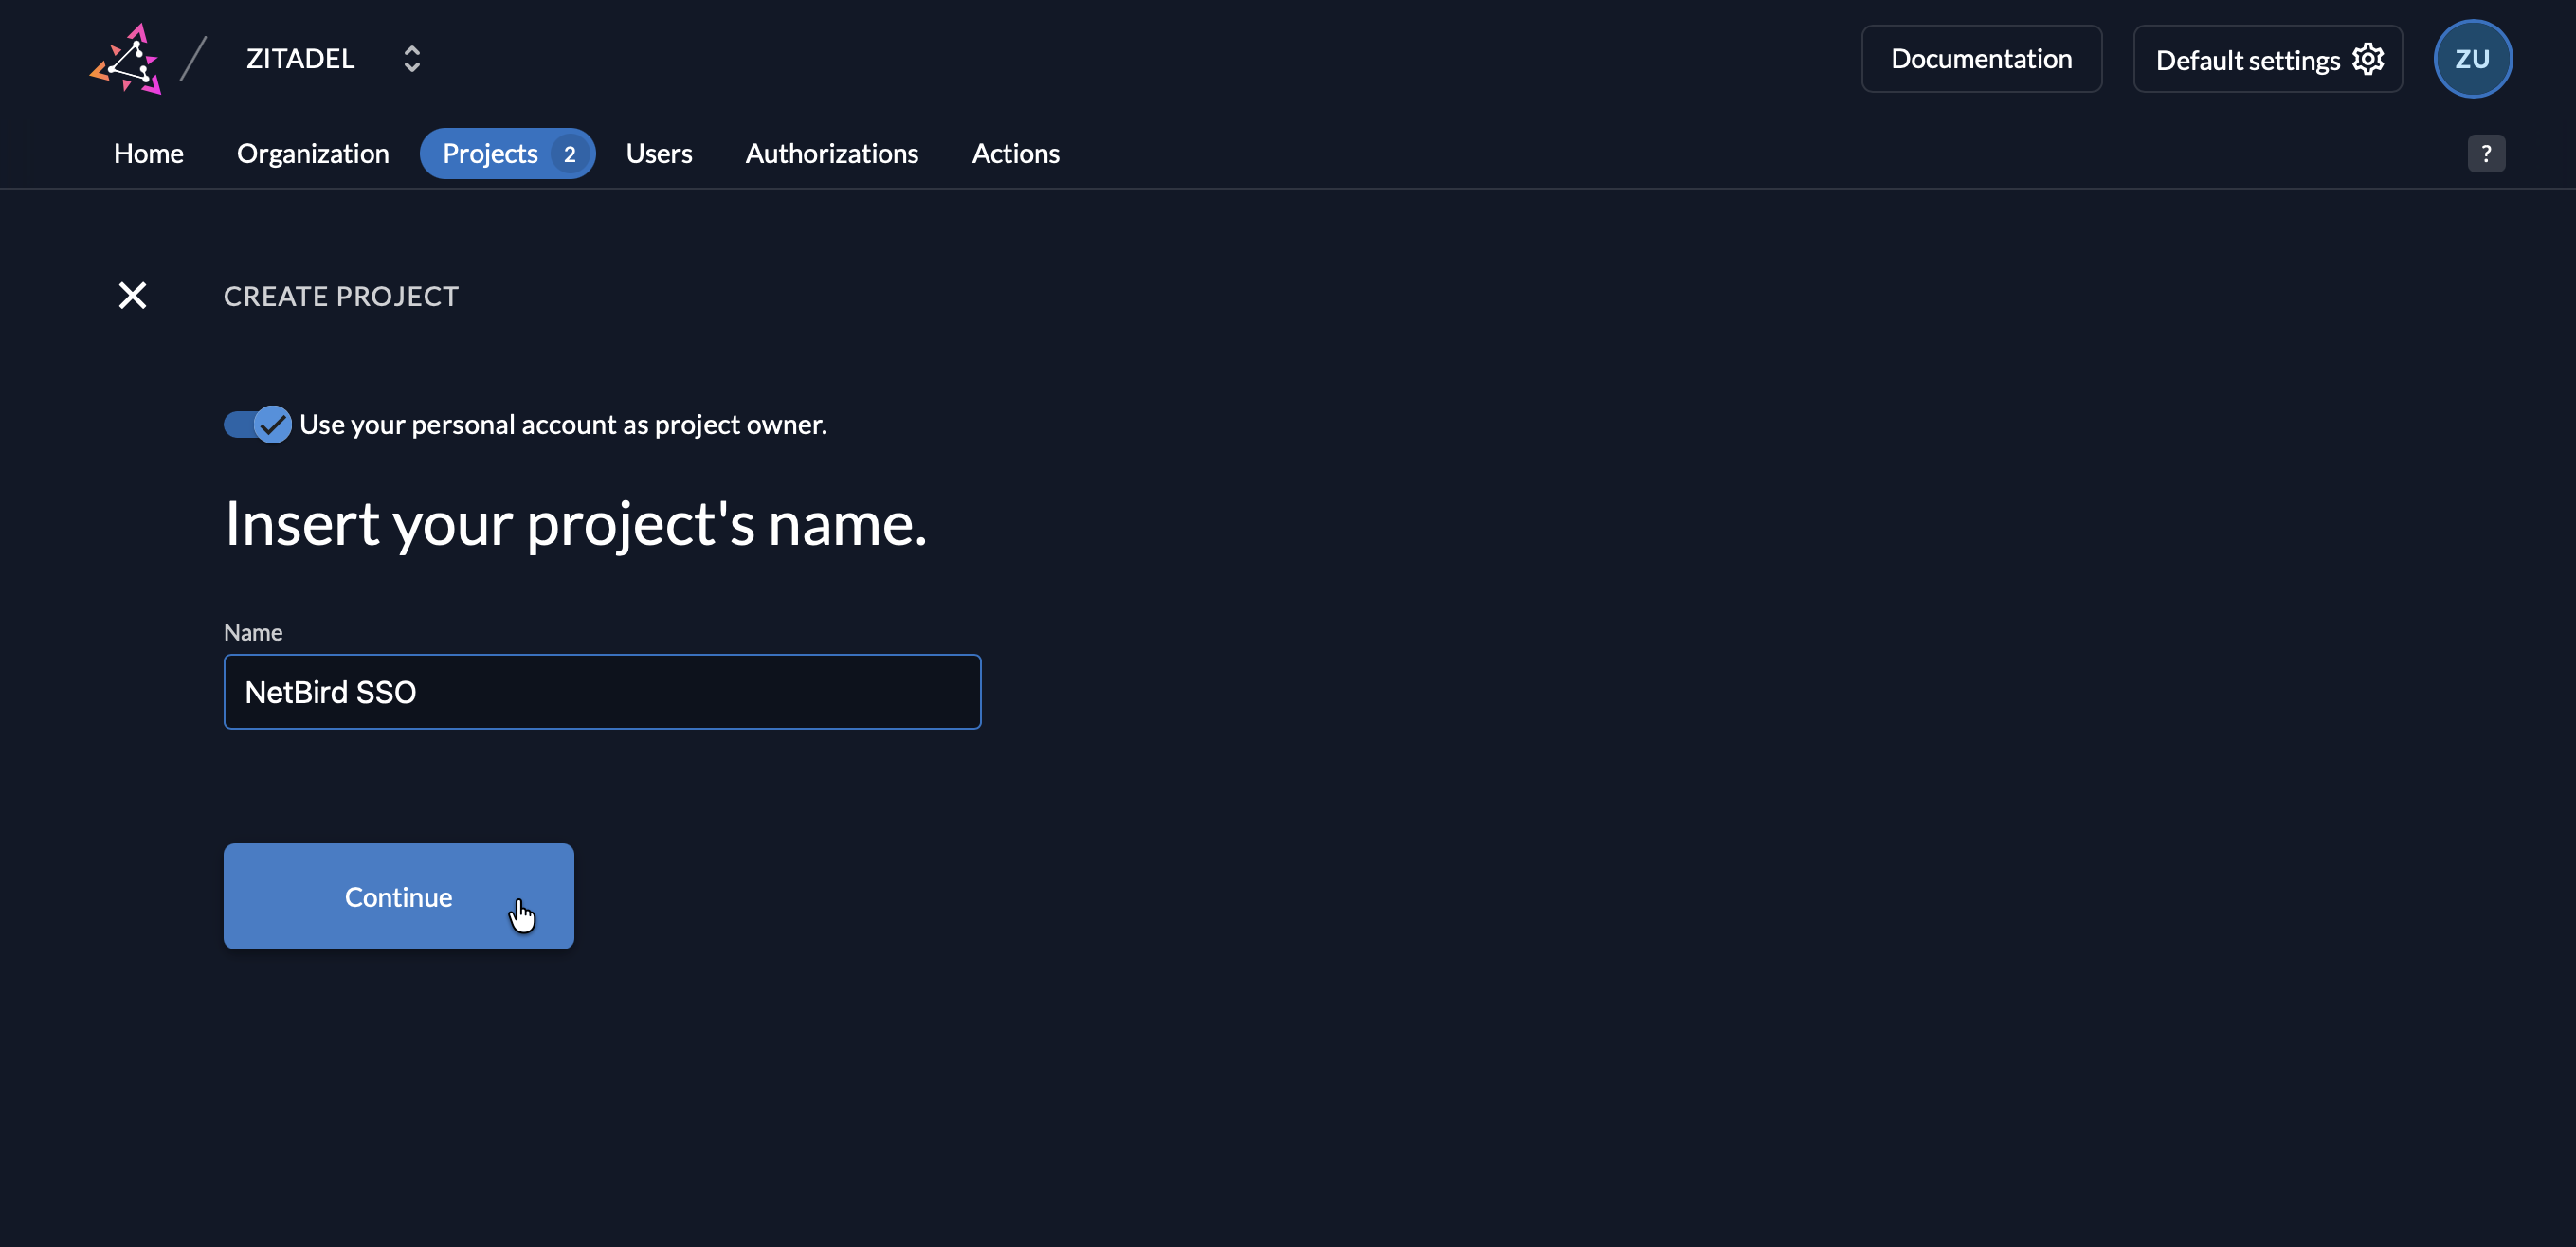
- Click Create
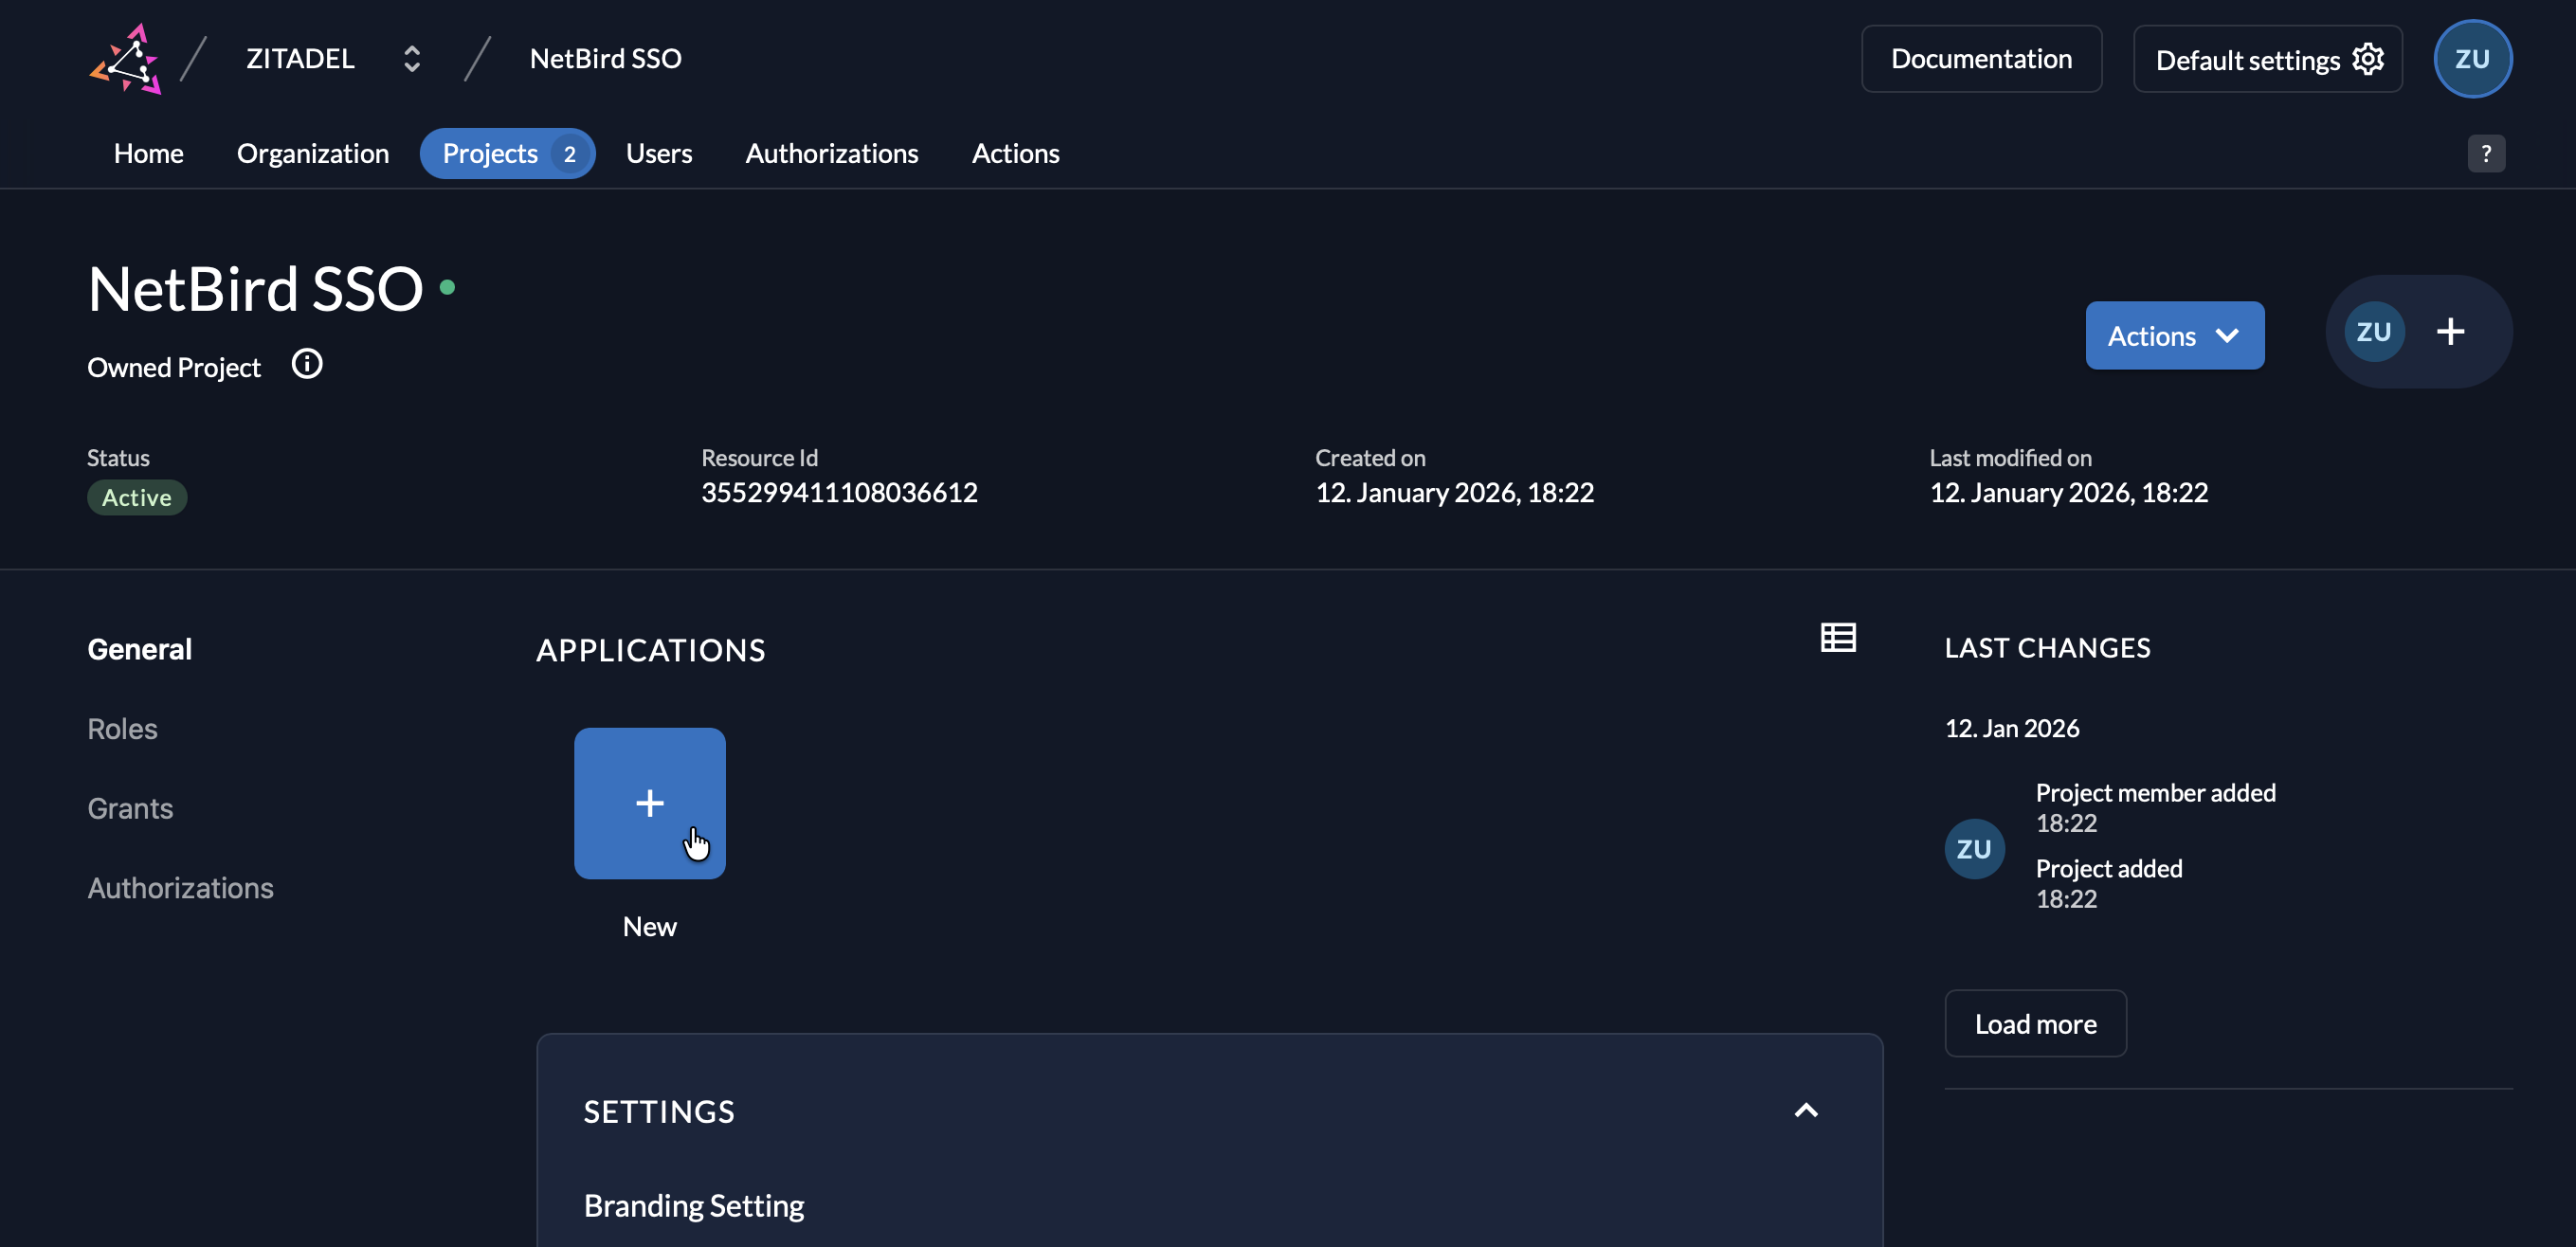
Step 2: Create Application in Zitadel
- Make sure you're in your project (select it from the project dropdown if needed)
- Click New in the Applications section
- Fill in:
- Name:
NetBird - Type:
Web
- Name:
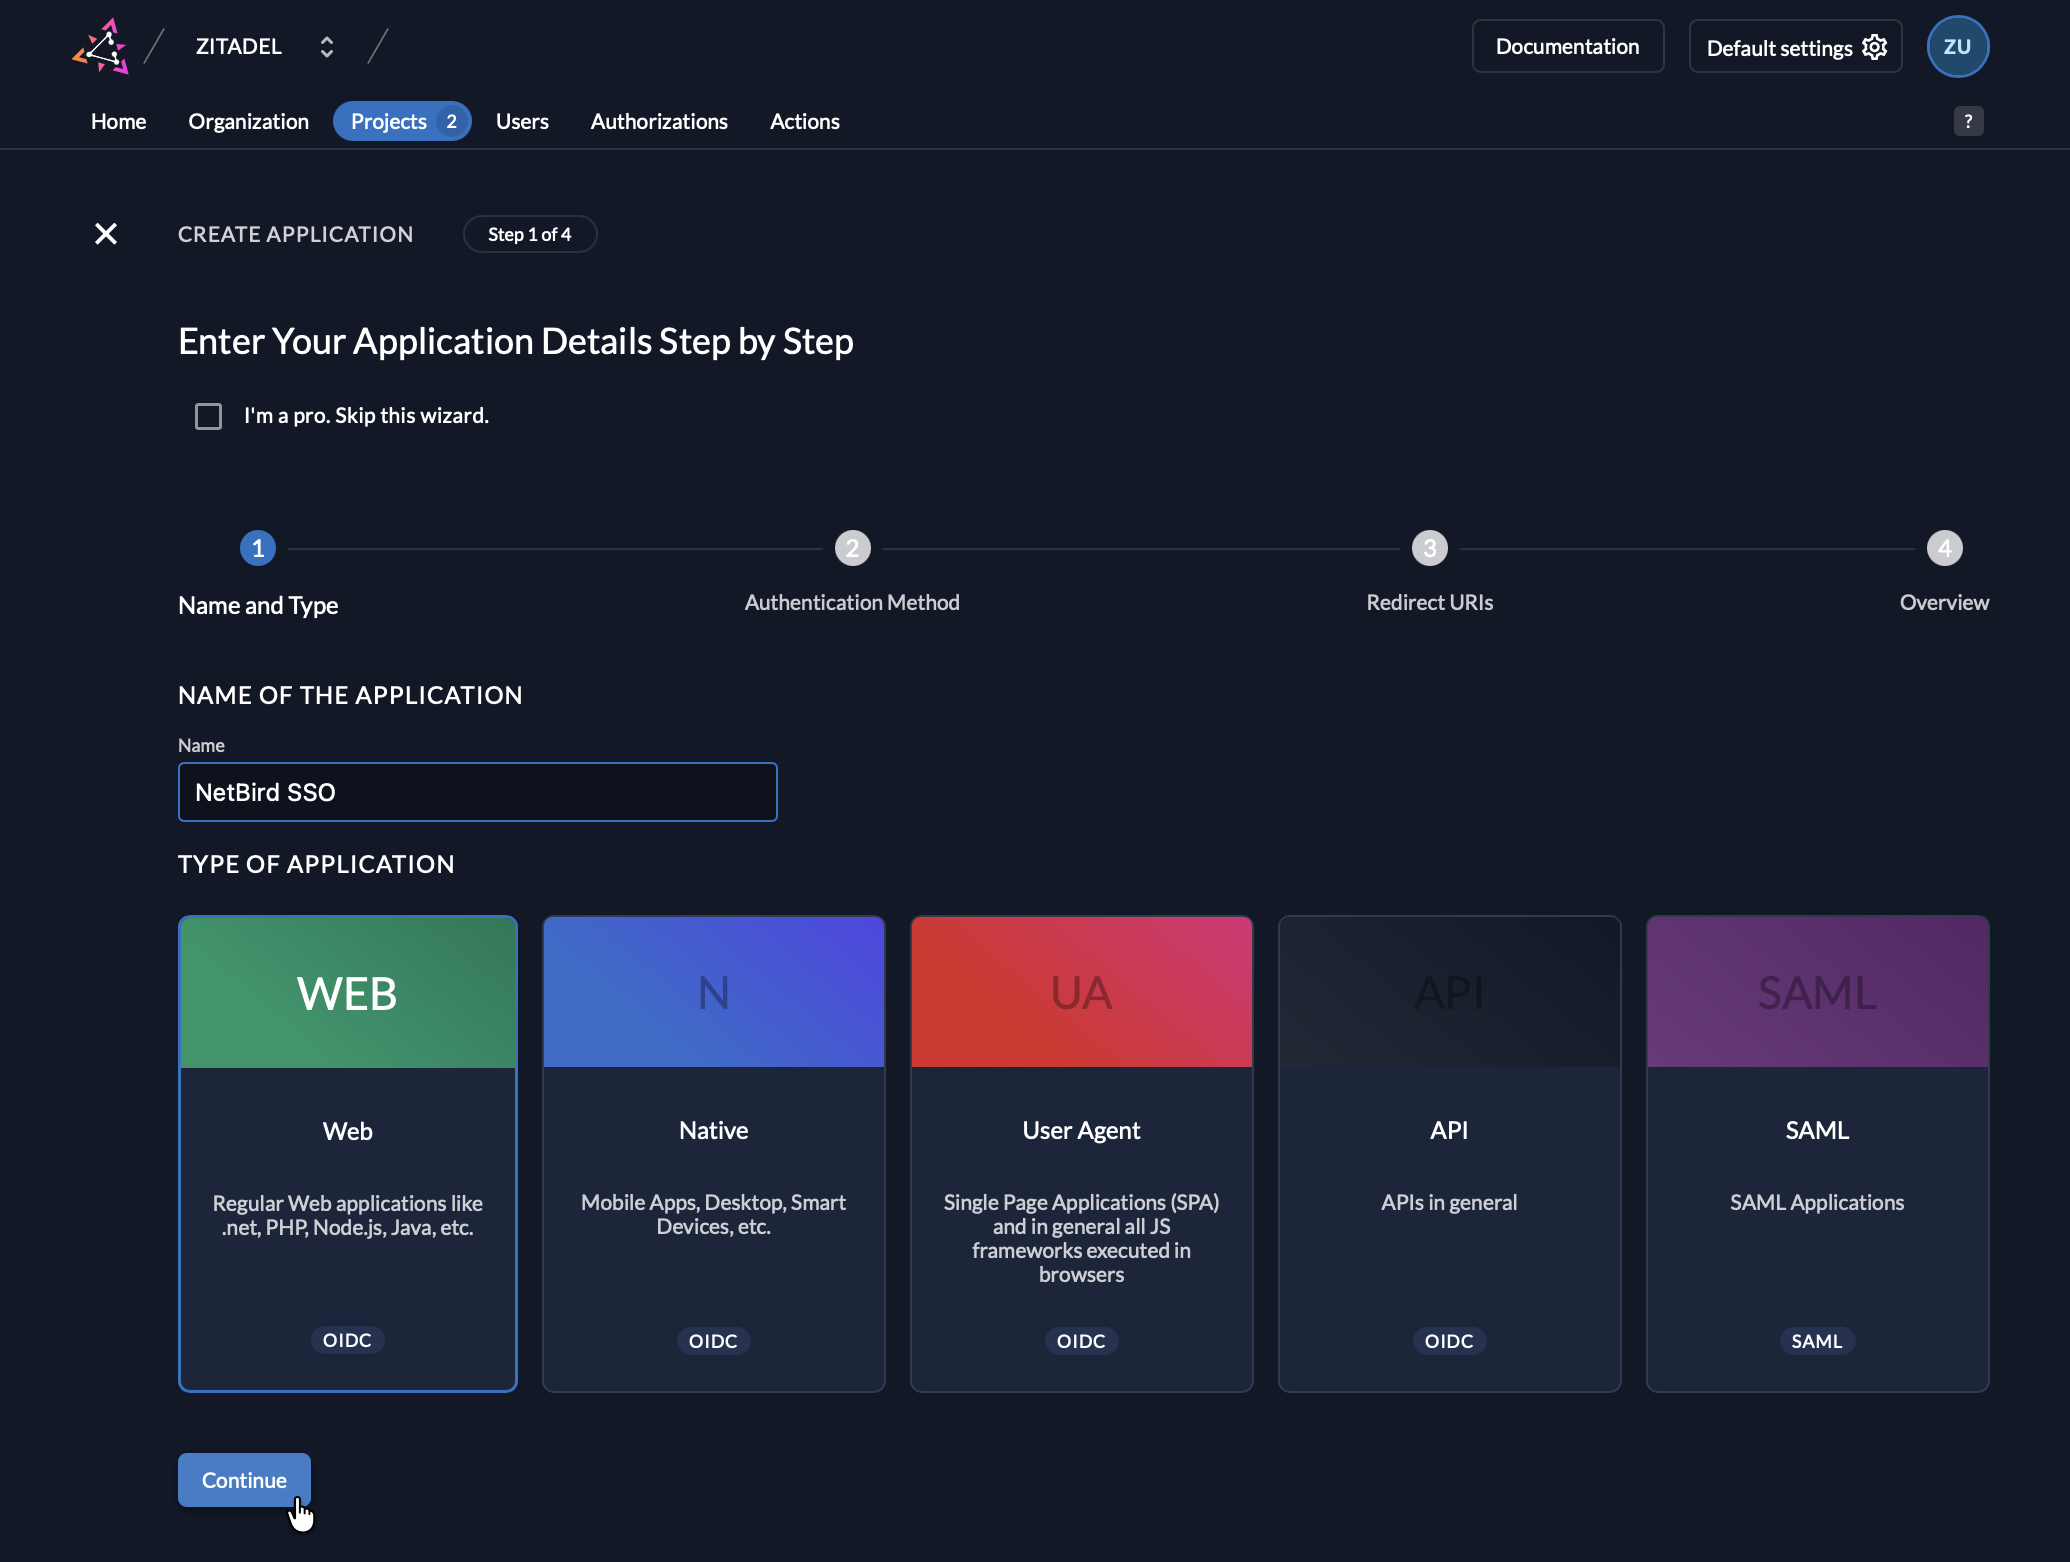
- Click Continue
- Configure authentication:
- Authentication Method:
Code(not PKCE)
- Authentication Method:
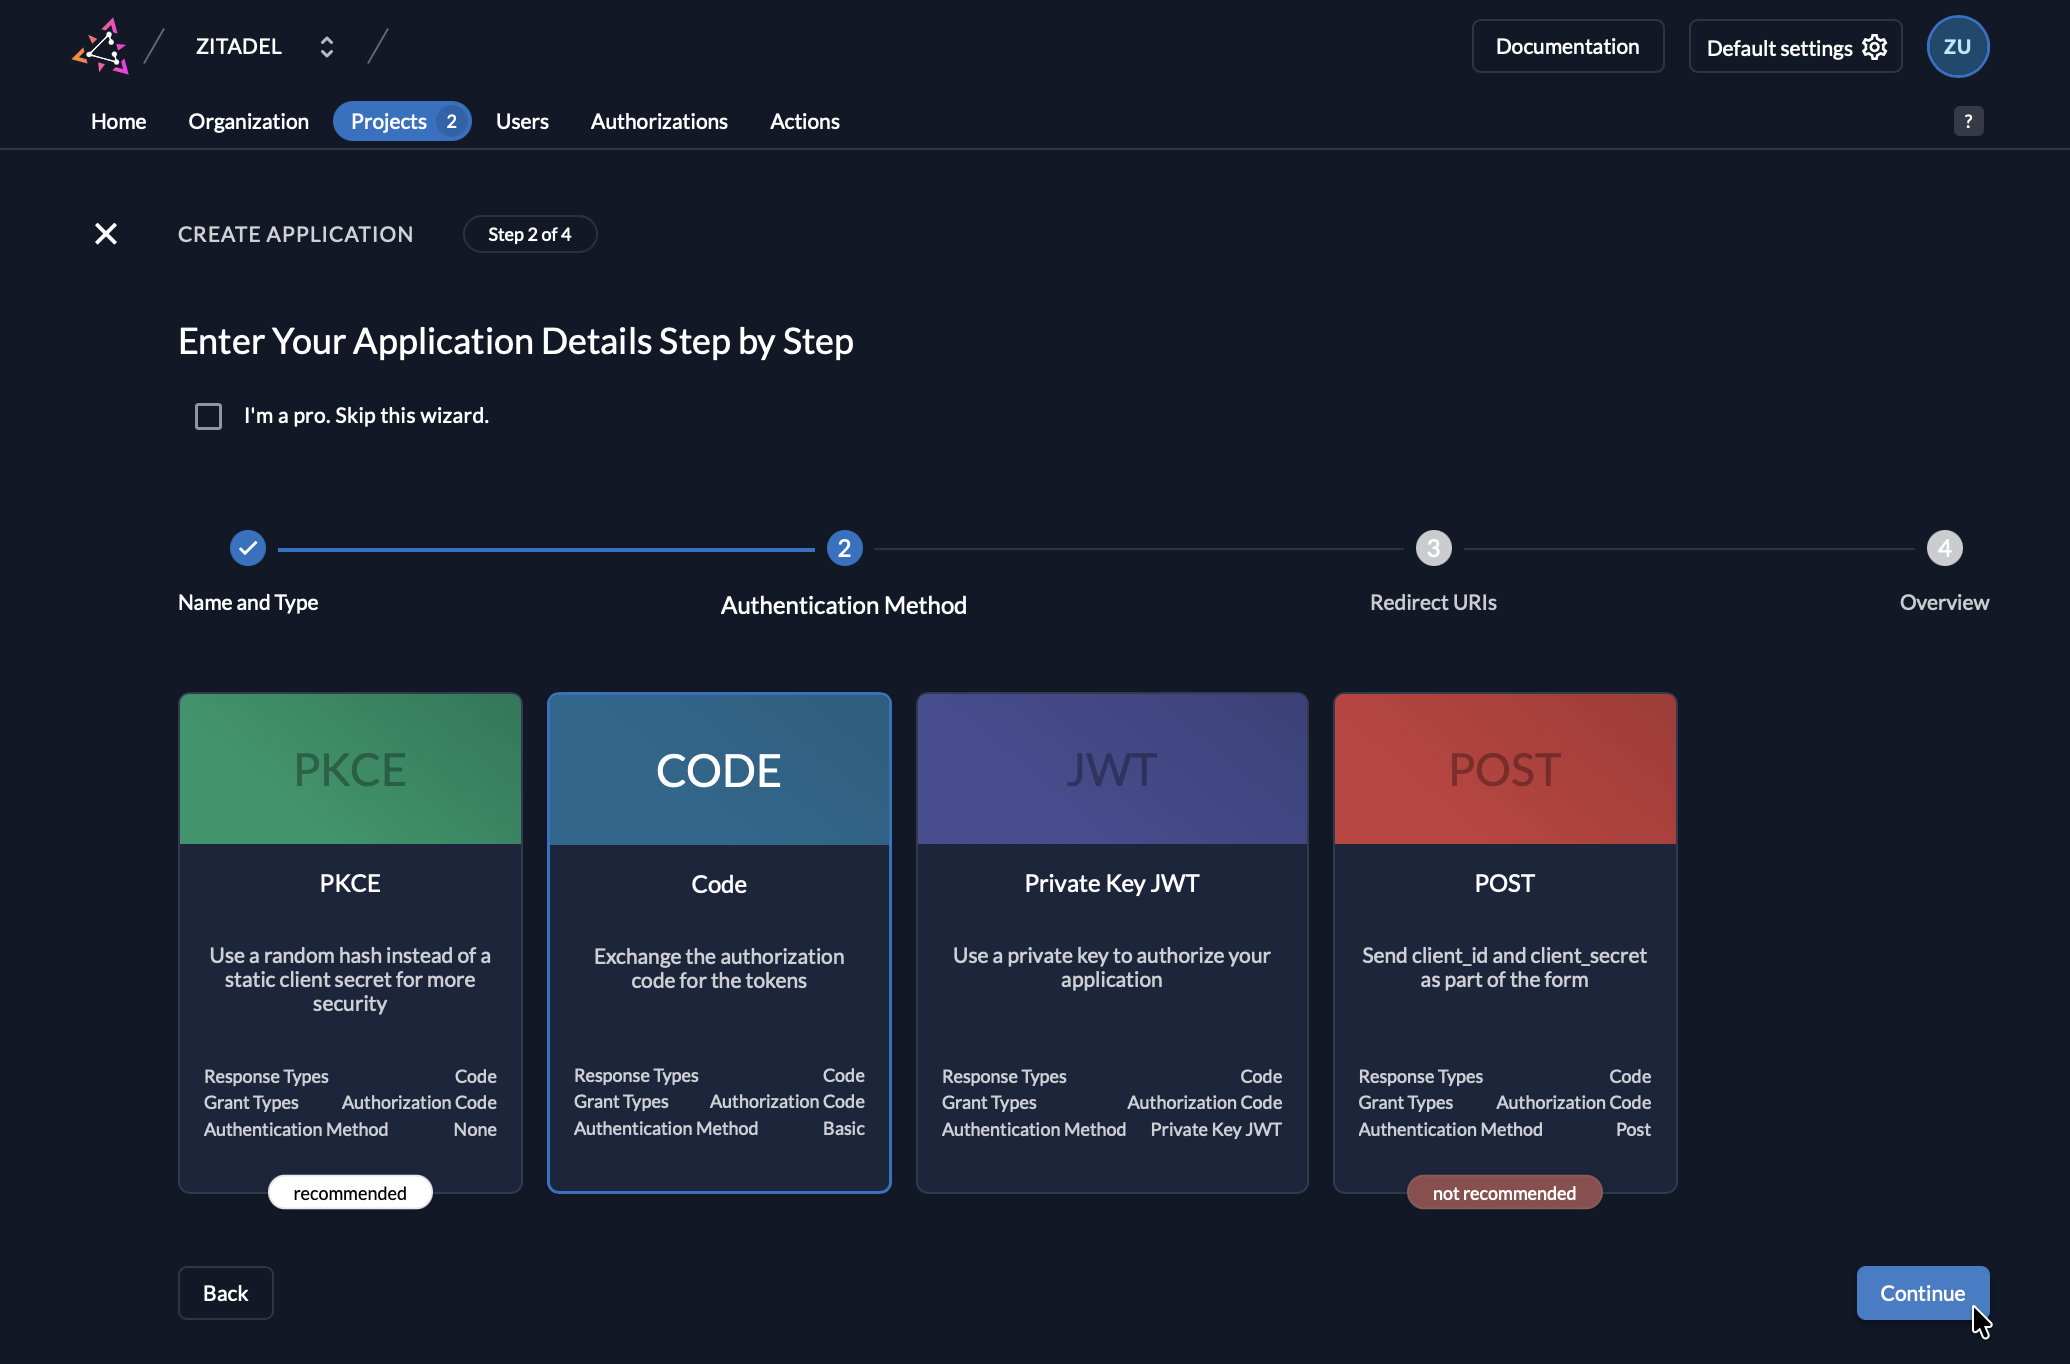
- Don't click Create yet — you'll add the redirect URI in Step 4
Step 3: Get Redirect URL from NetBird
- Open a new tab or window and log in to your NetBird Dashboard
- Navigate to Settings → Identity Providers
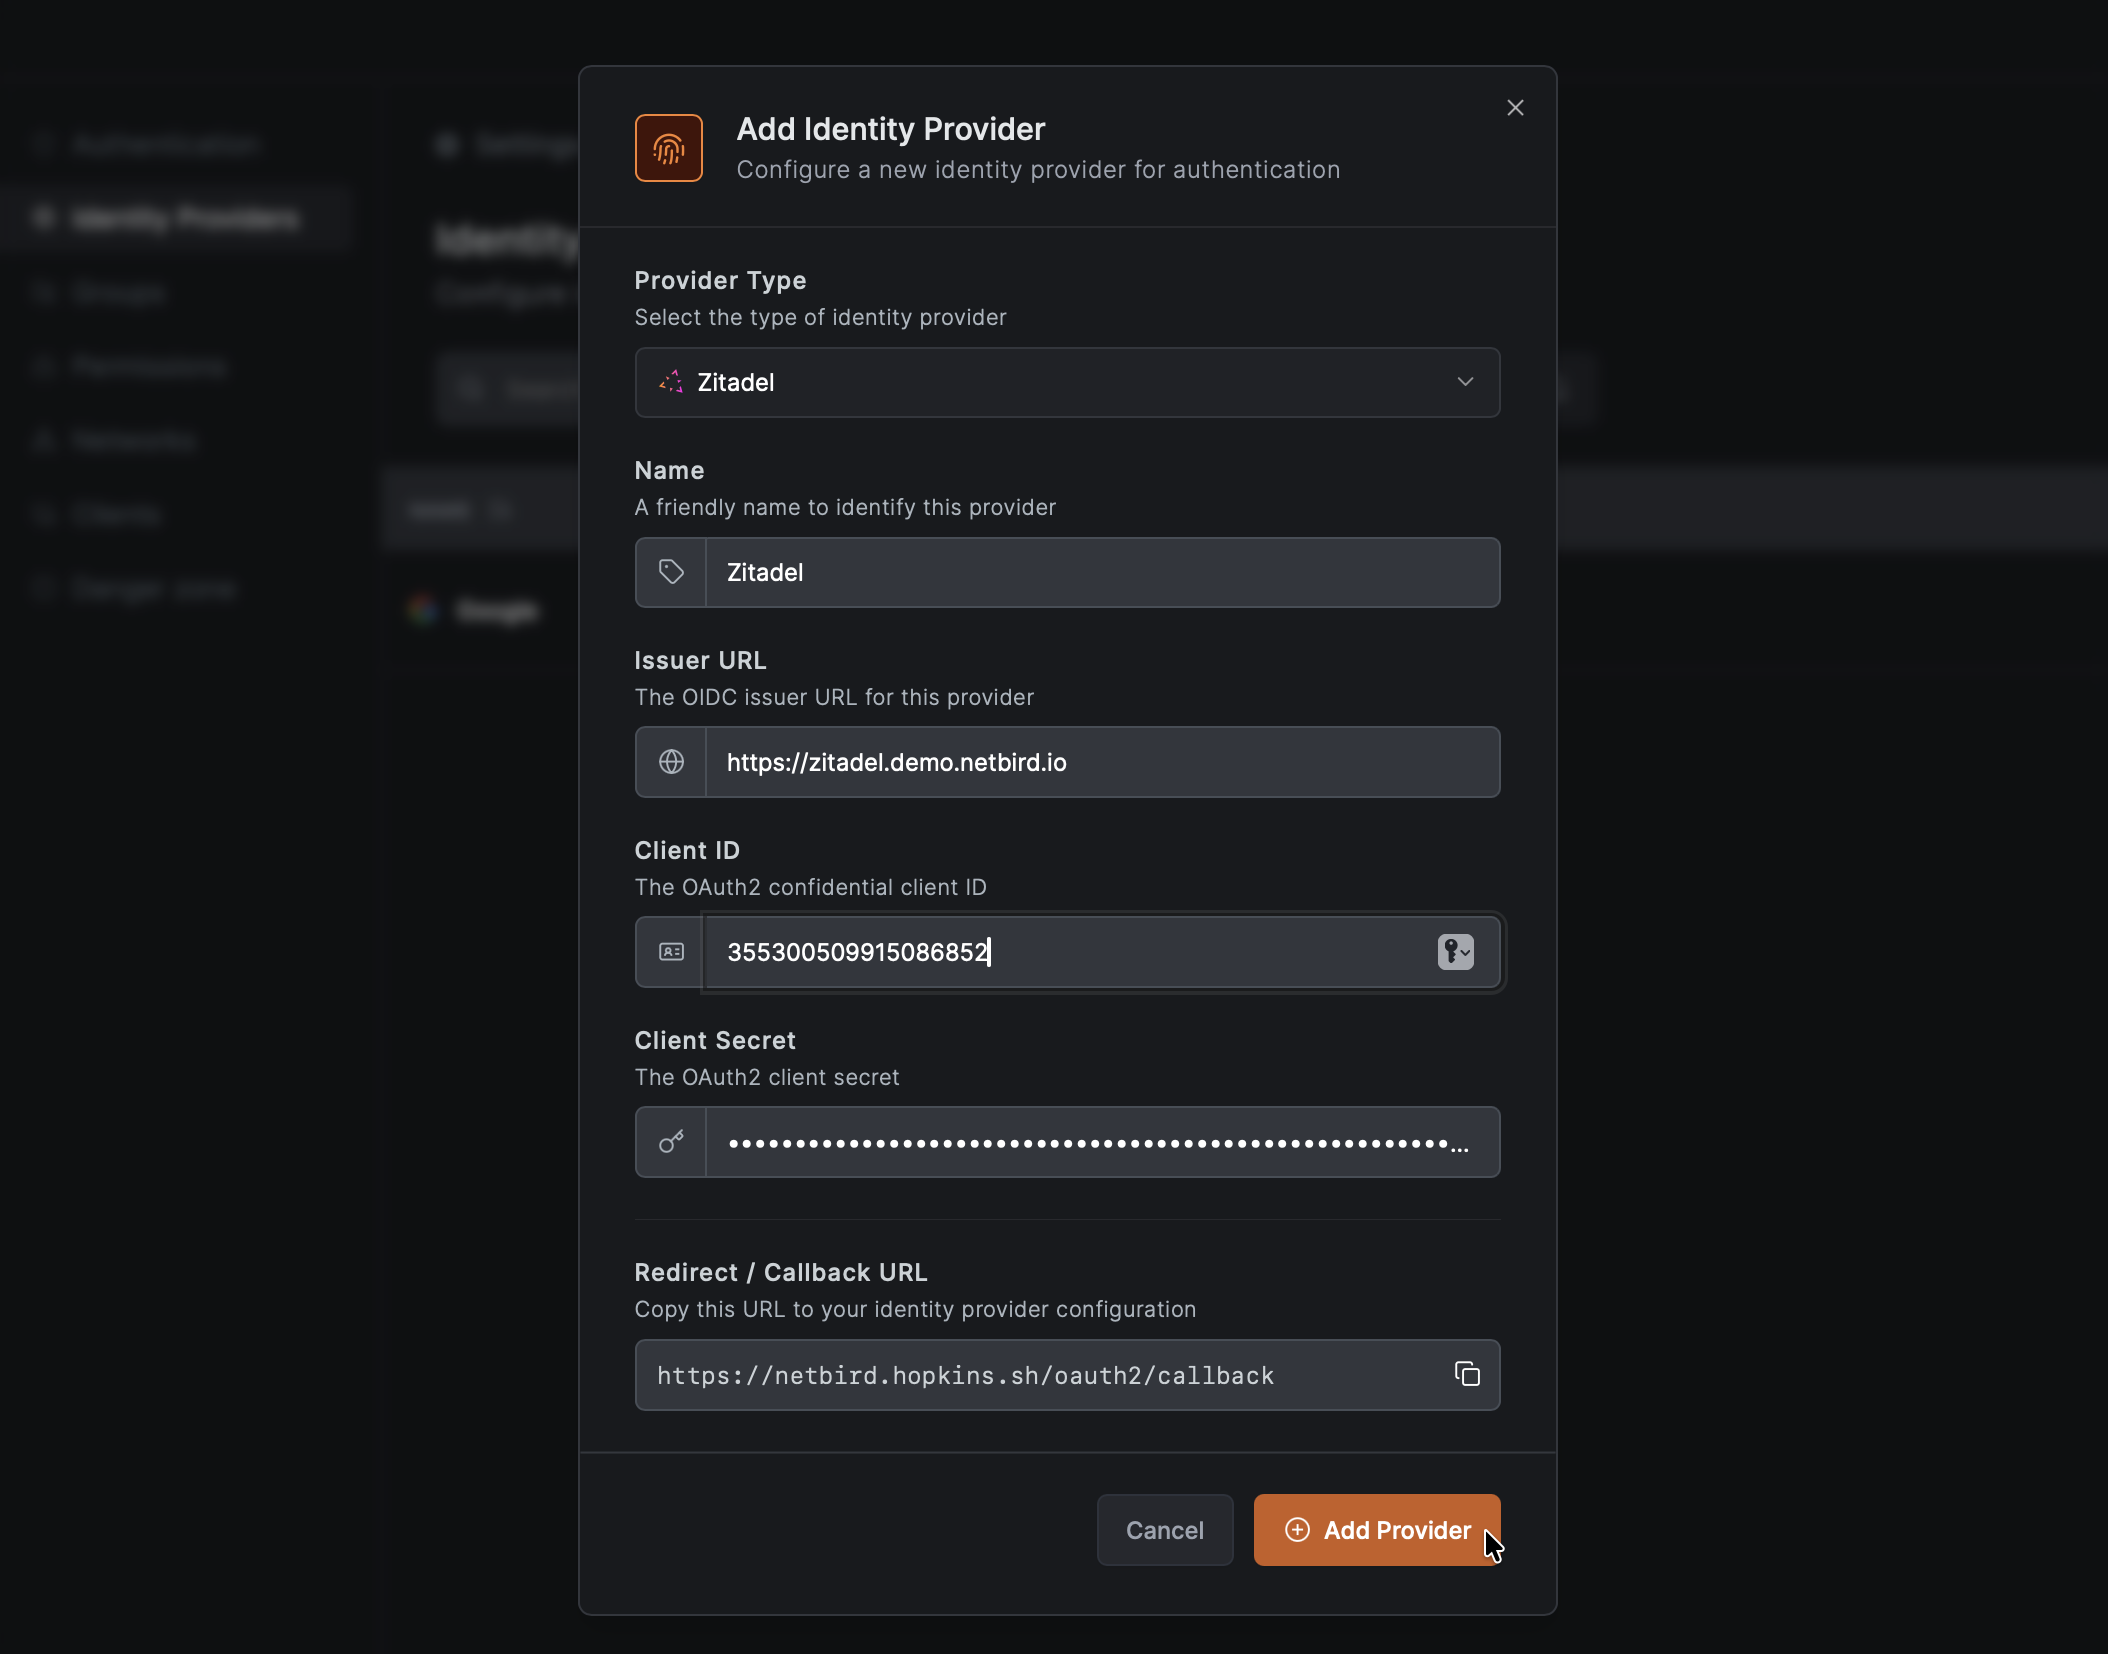
- Click Add Identity Provider
- Fill in the fields (you can leave Client ID and Secret empty for now):
| Field | Value |
|---|---|
| Type | Zitadel |
| Name | Zitadel (or your preferred display name) |
| Issuer URL | Your Zitadel URL (e.g., https://your-instance.zitadel.cloud) |
| Client ID | Leave empty for now |
| Client Secret | Leave empty for now |
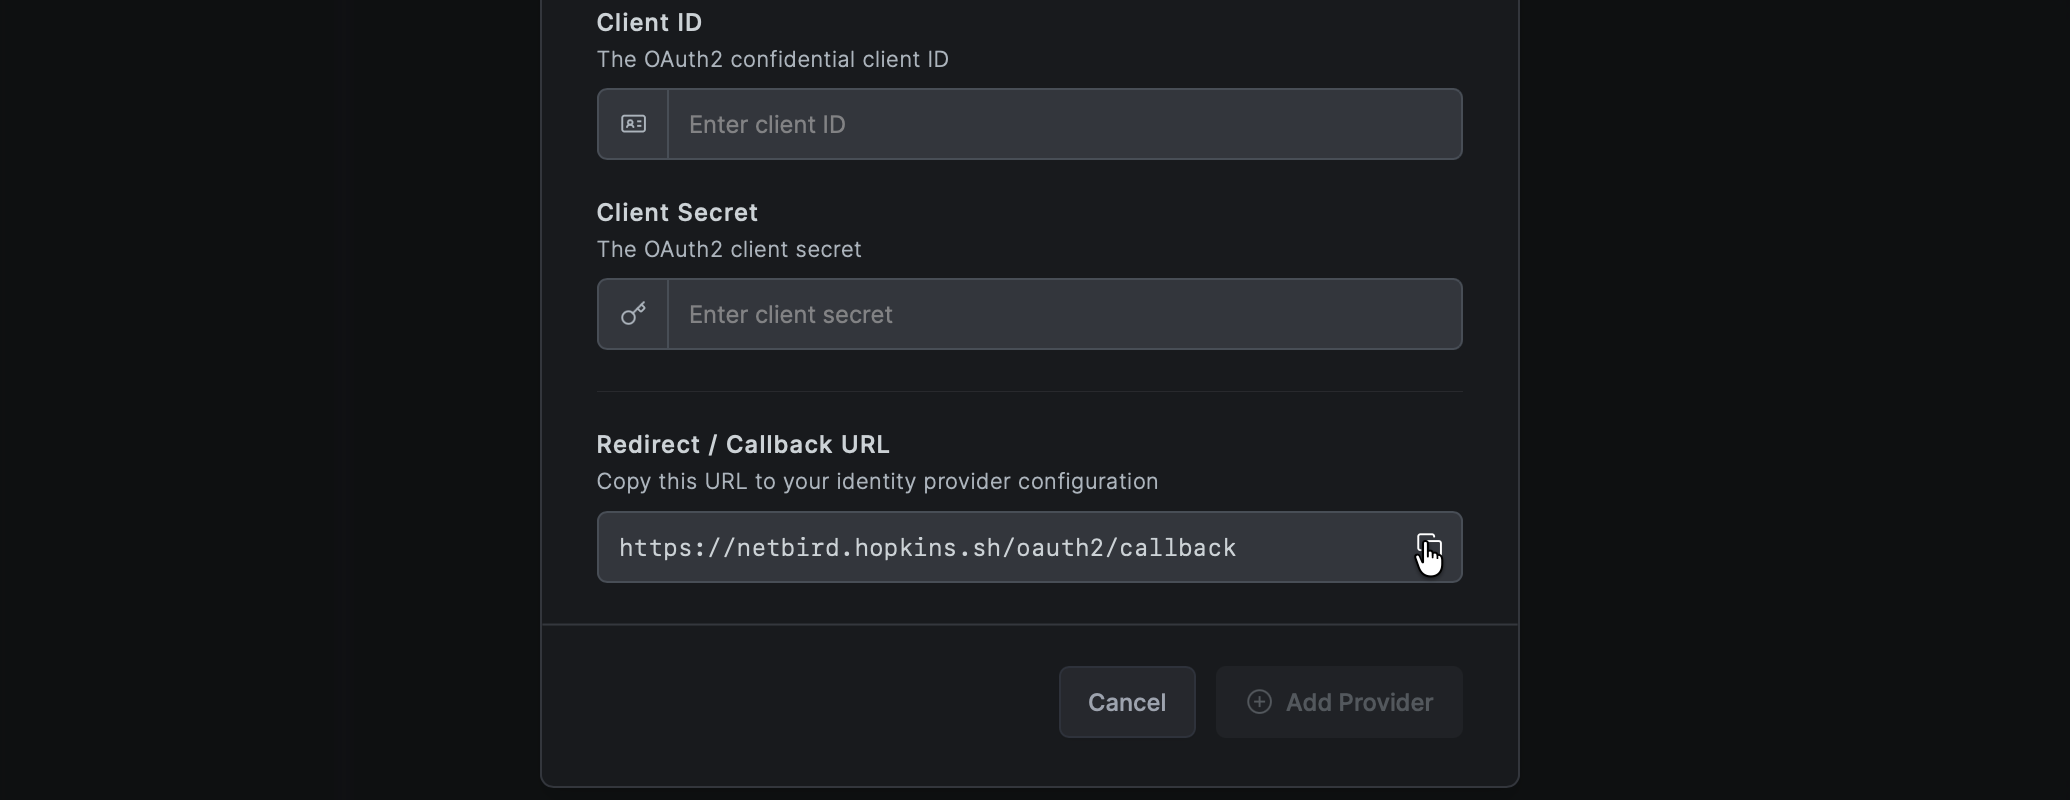
- NetBird will display a Redirect URL — copy this URL (but don't click Save yet)
Step 4: Complete Application Configuration in Zitadel
- Return to the Zitadel Console tab
- In the redirect URIs field, paste the redirect URL you copied from NetBird
- (Optional) In the Post Logout URIs field, add
https://netbird.example.com/oauth2/logout/callback(replacenetbird.example.comwith your NetBird dashboard domain) so logout redirects back to NetBird cleanly
- (Optional) In the Post Logout URIs field, add
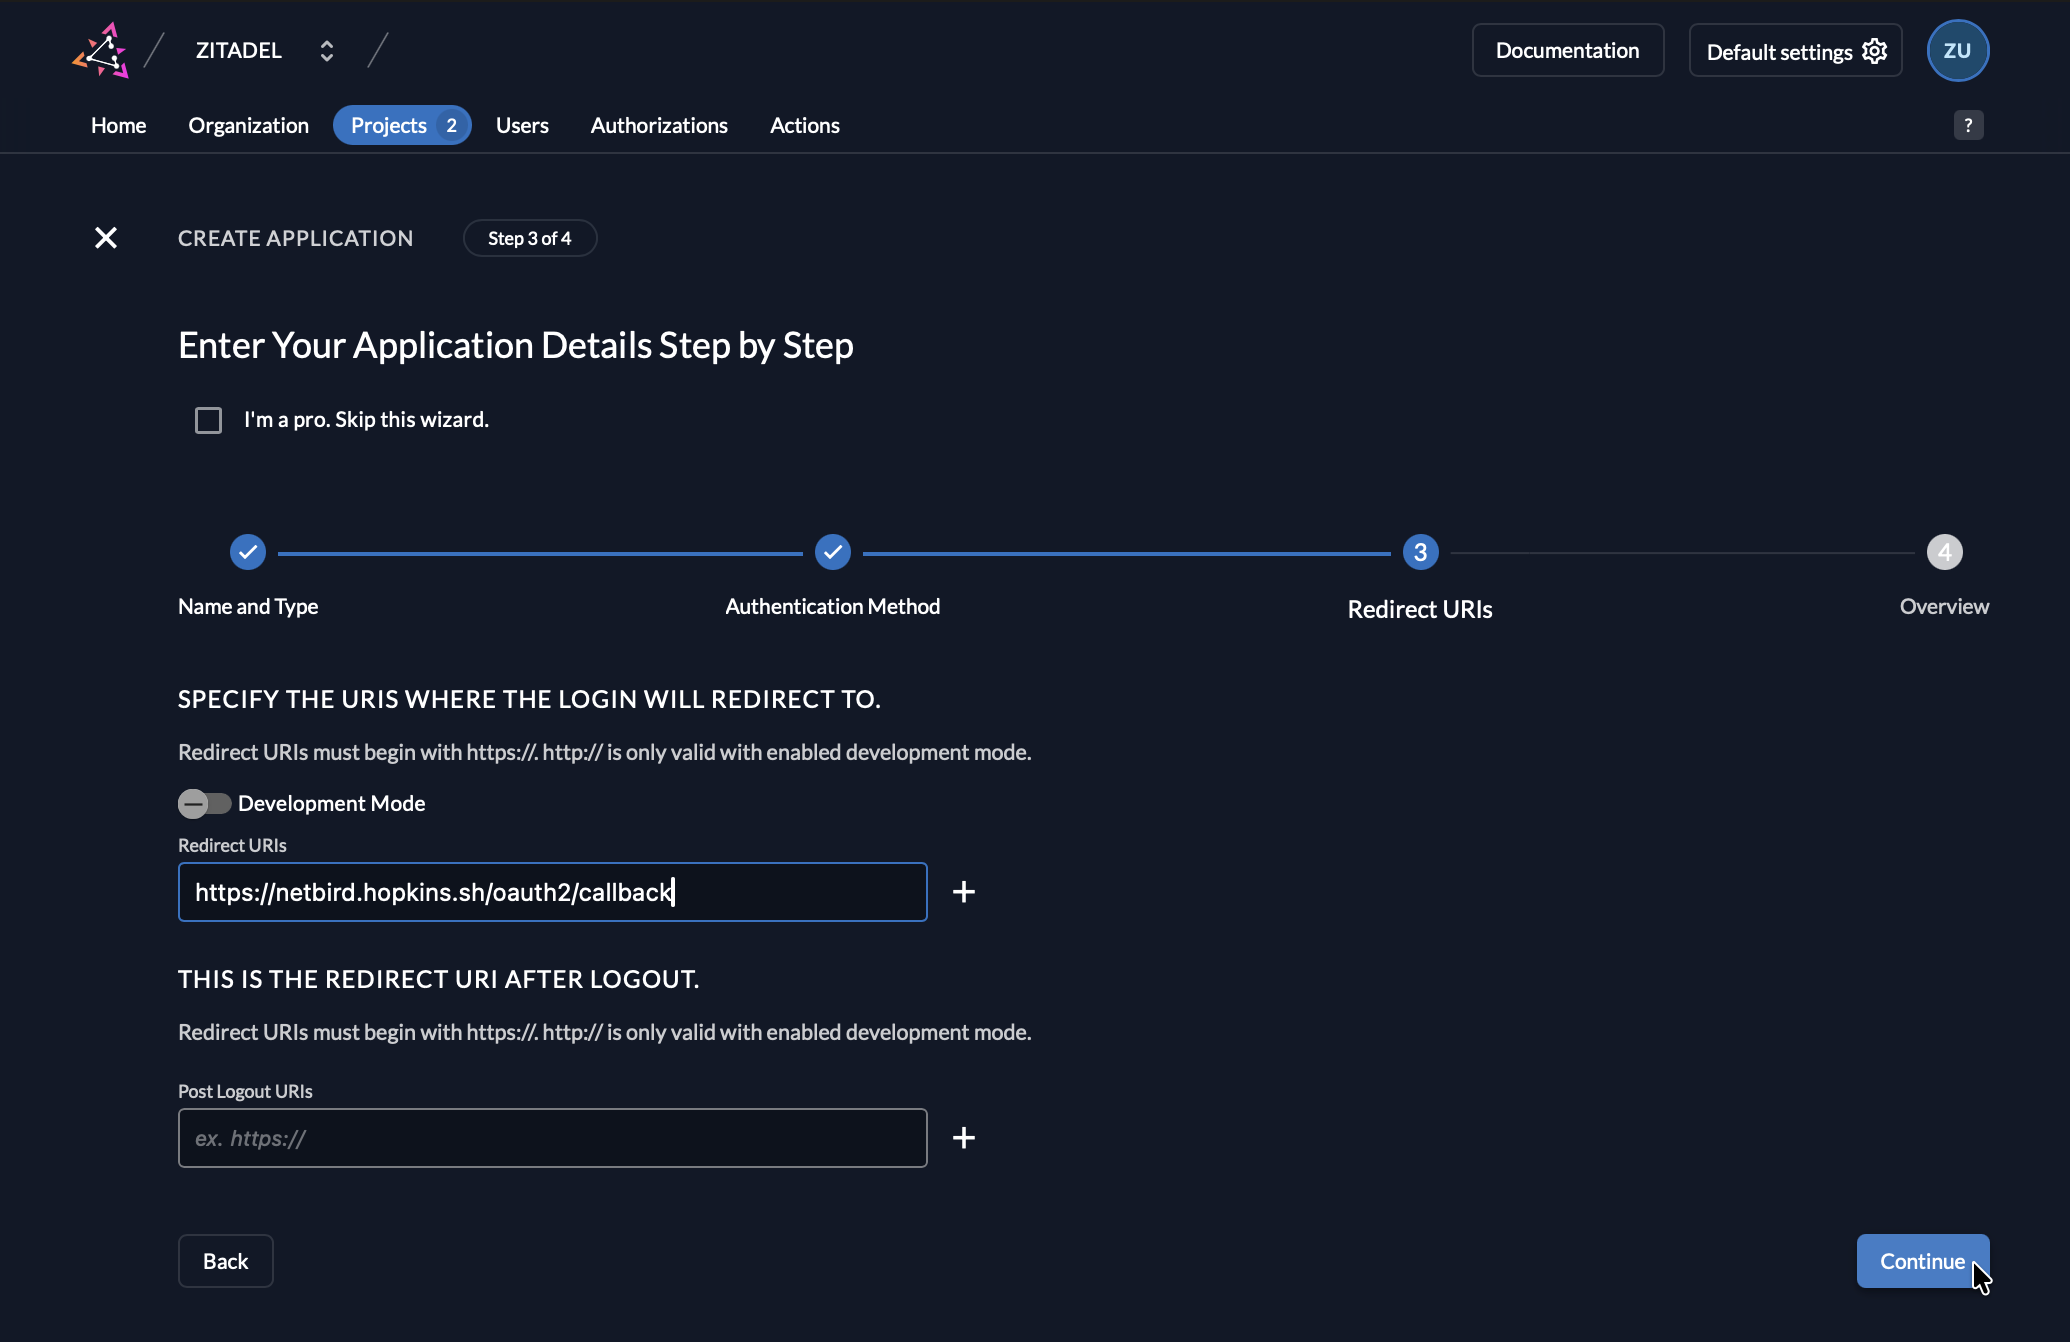
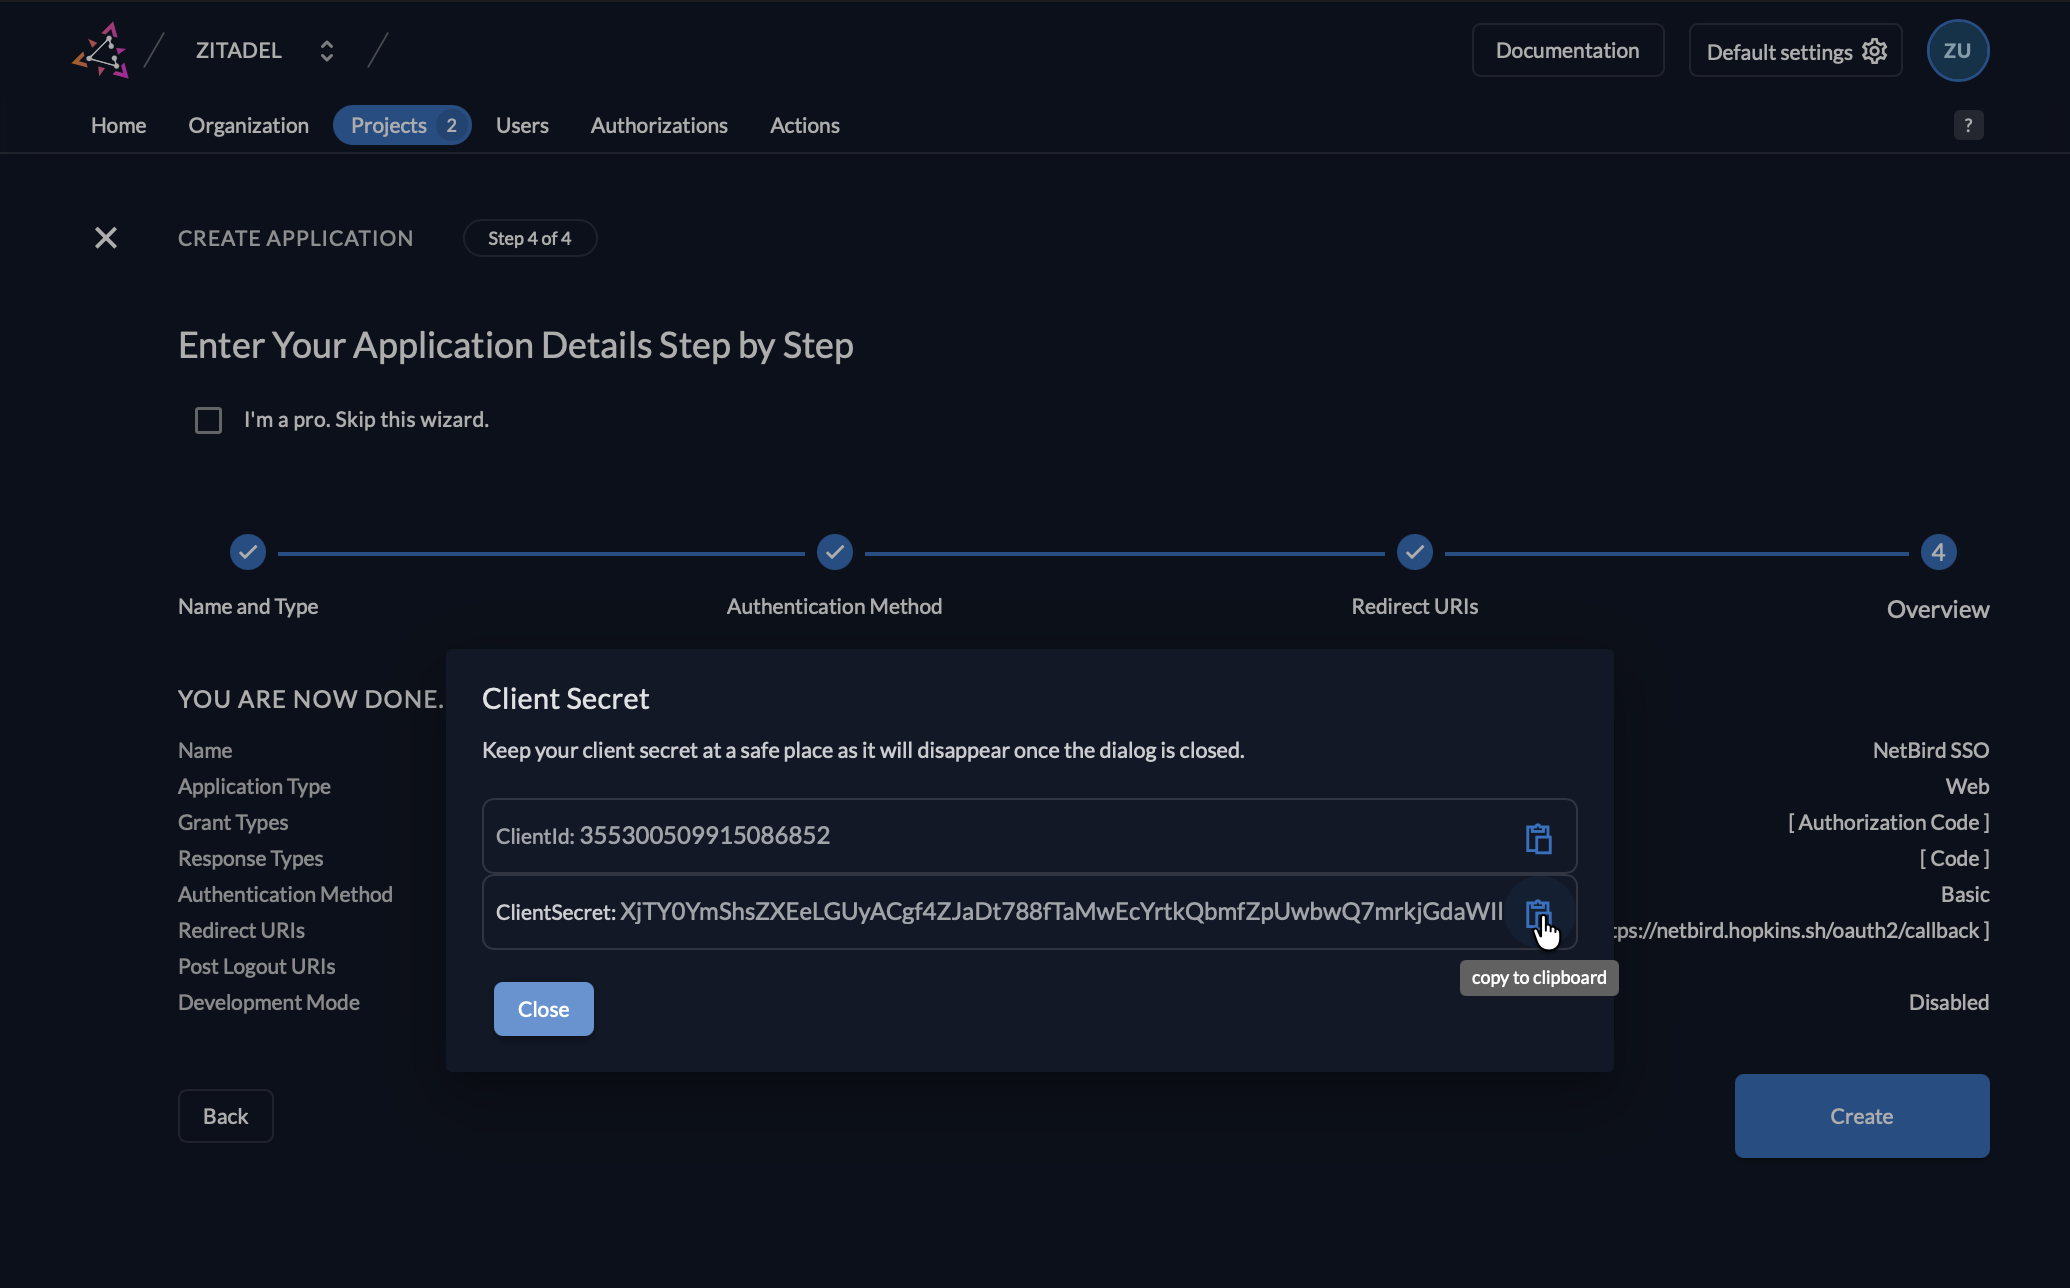
- Click Create
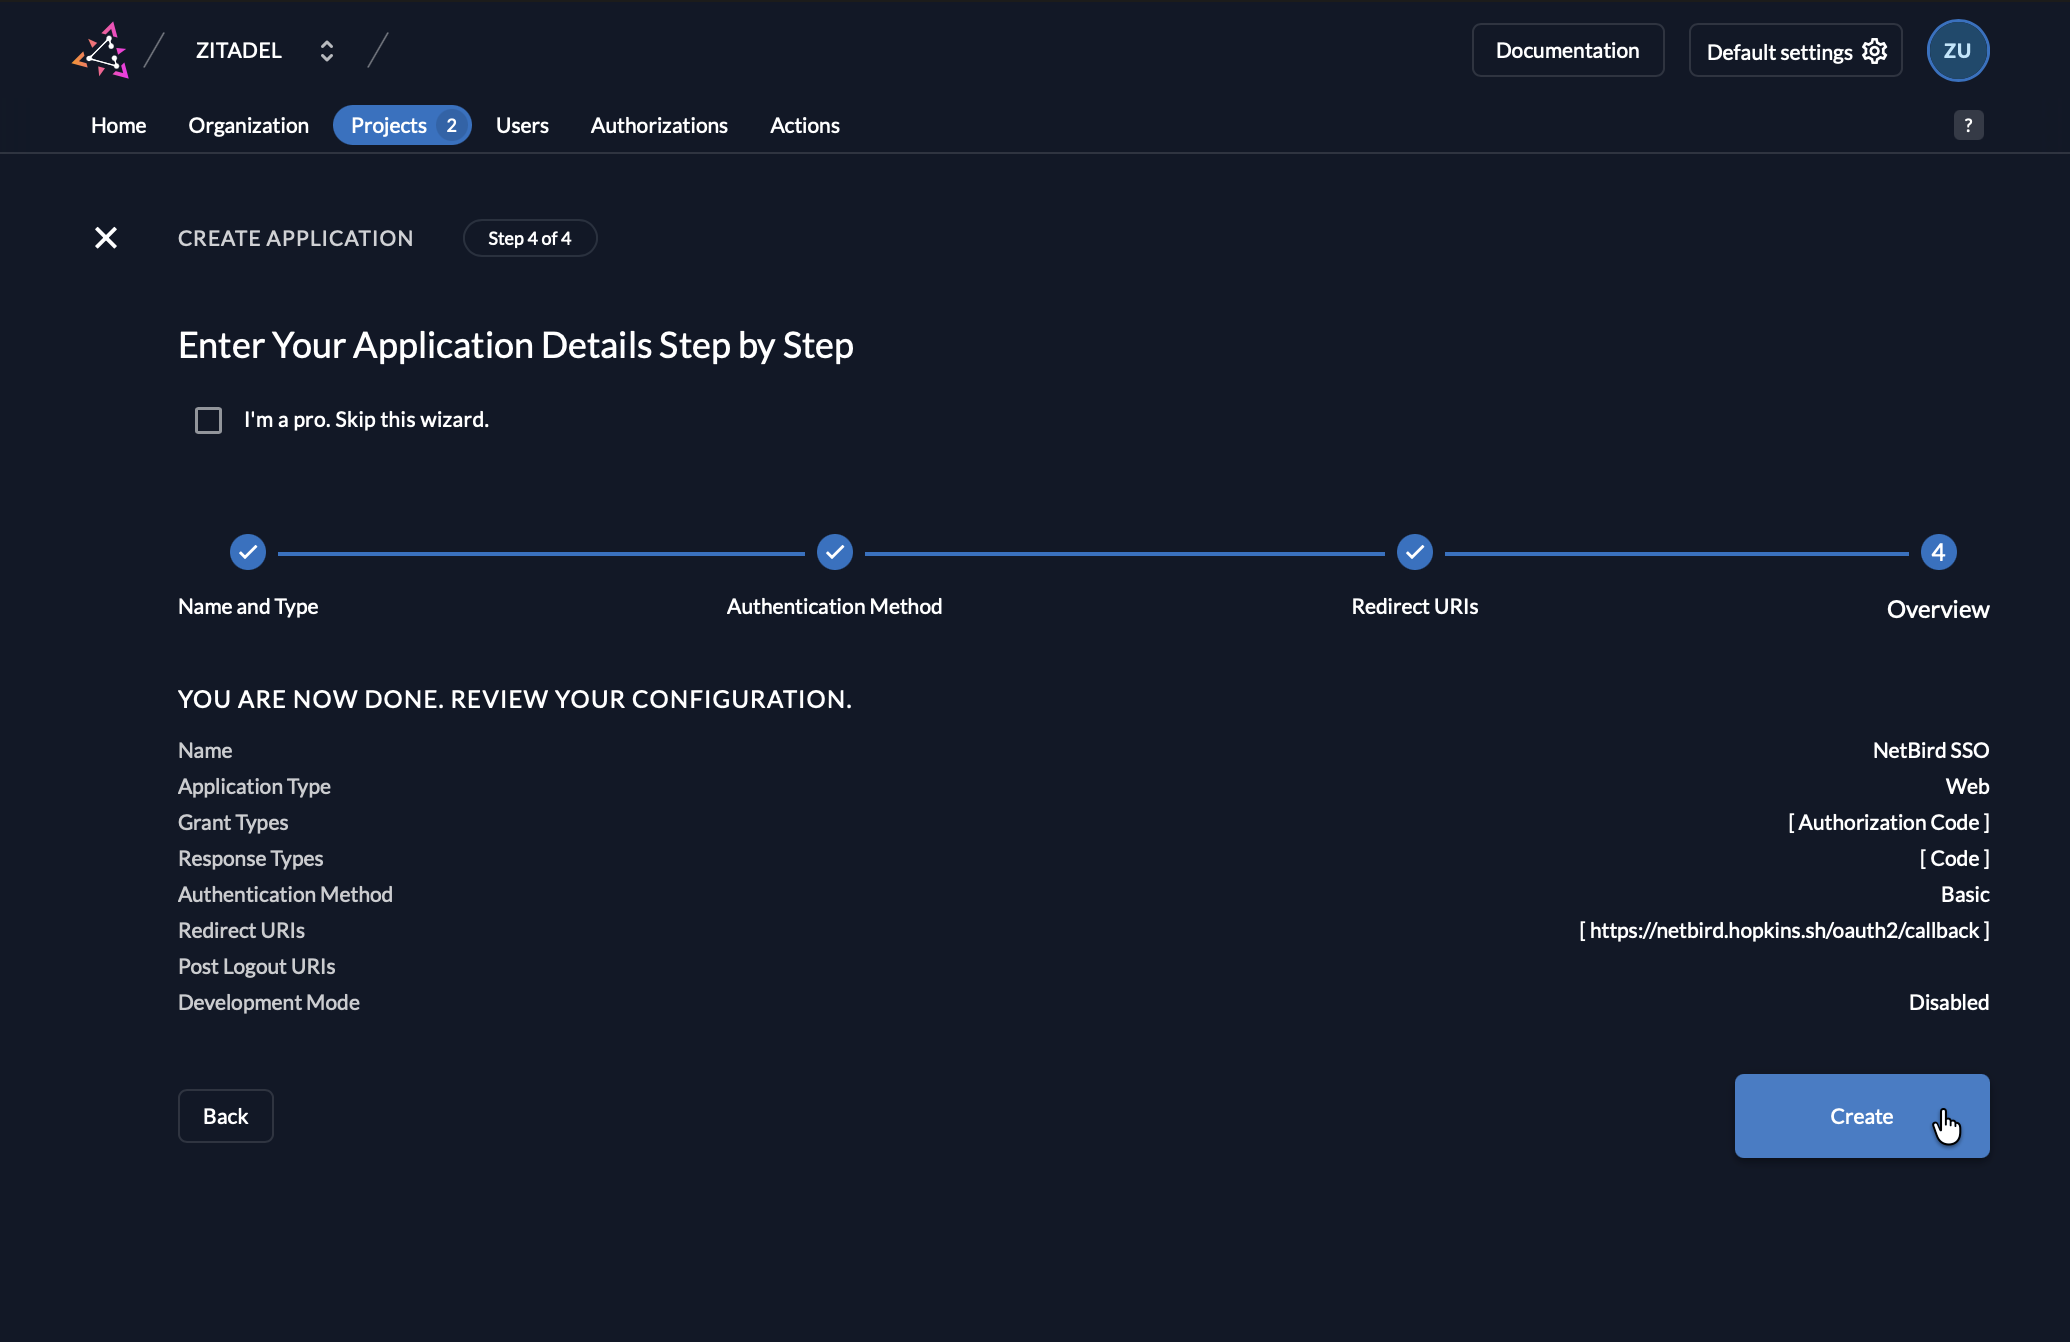
- Now you will have the Client ID and Secret displayed.
Step 5: Complete NetBird Setup
- Return to the NetBird tab
- In the identity provider form, paste the Client ID and Secret you displayed in Step 4
- Click Save
Step 6: Configure Token Settings in Zitadel
- Return to the Zitadel Console tab
- Navigate to your NetBird application → Token Settings
- Enable:
- Include user's profile info in the ID Token
- User roles inside ID Token (if group mapping is needed)
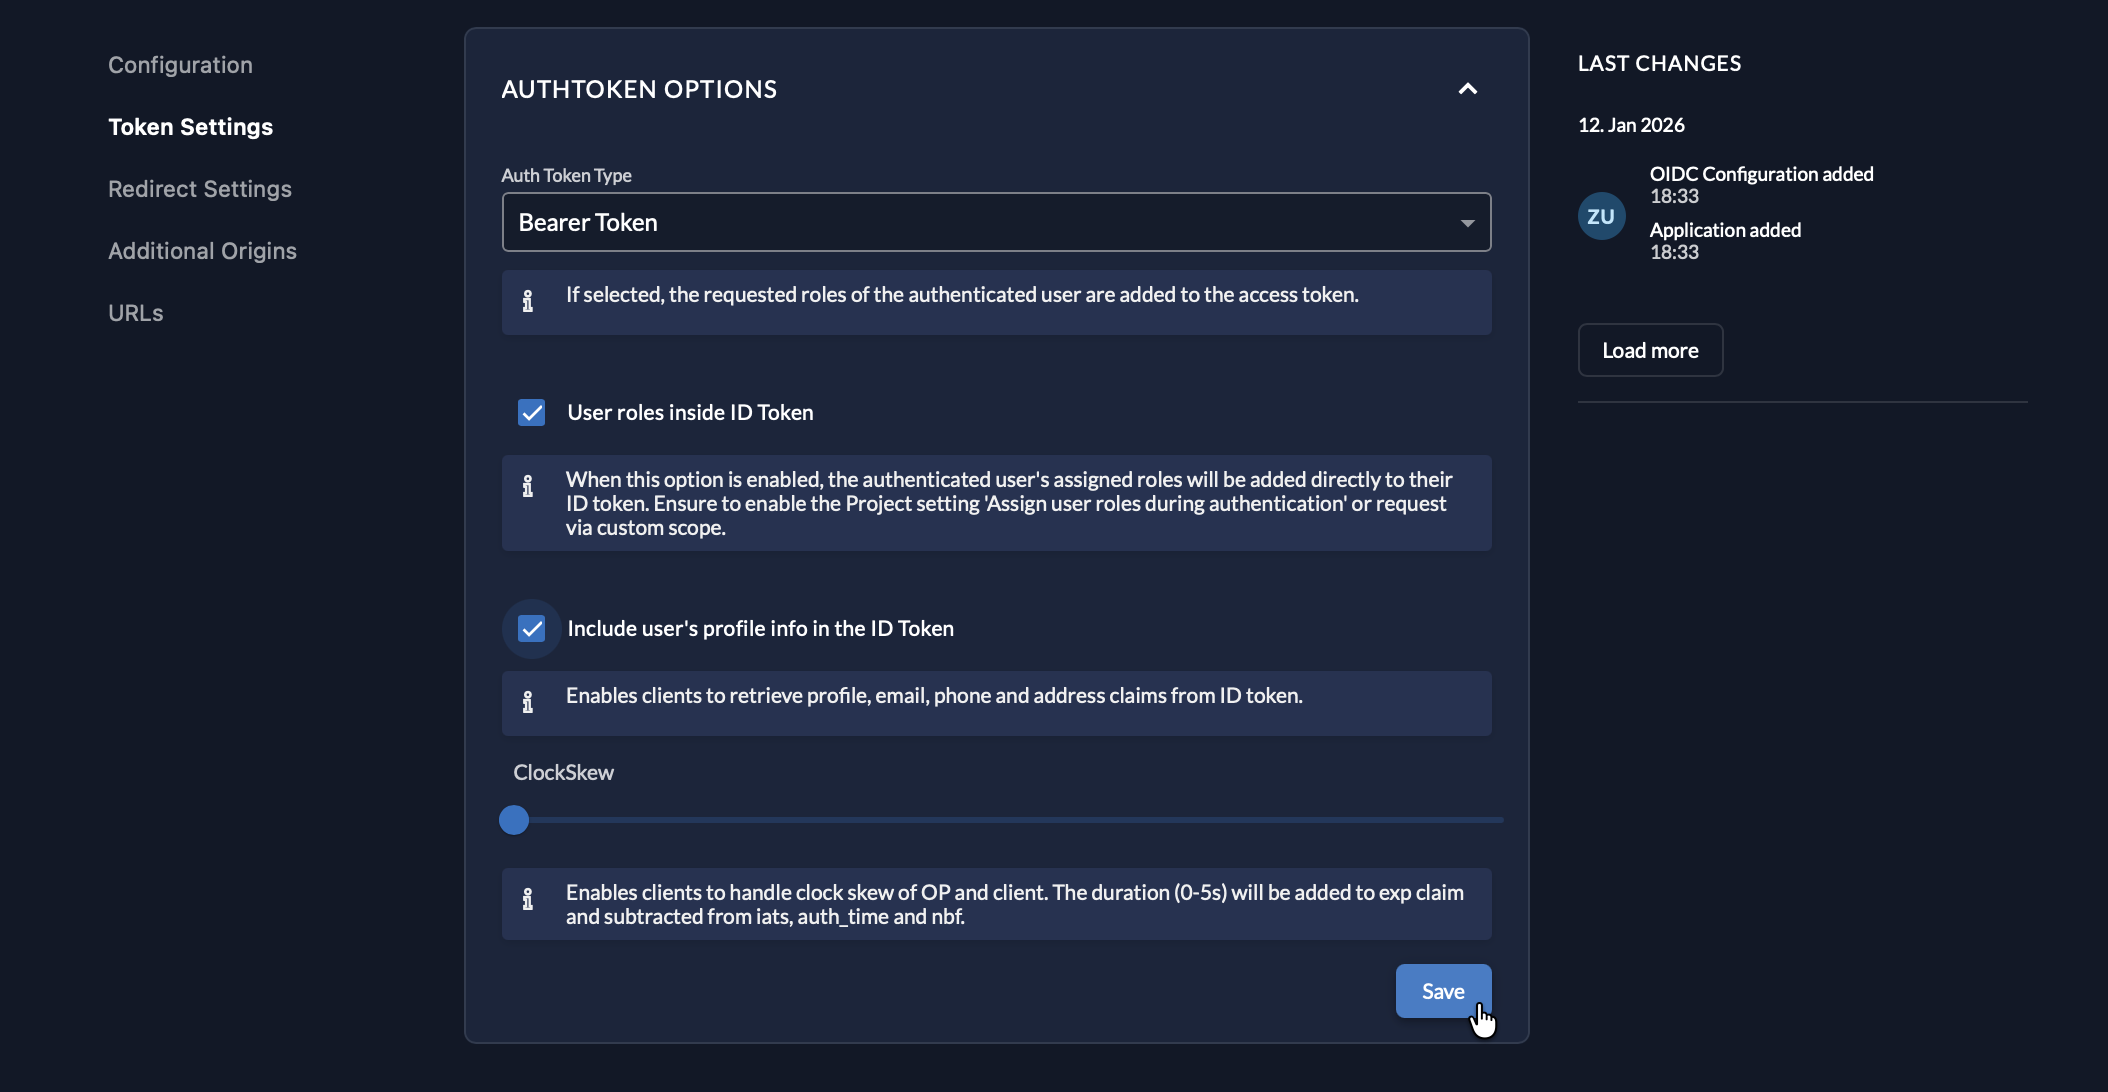
- Click Save
Step 7: Test the Connection
- Log out of NetBird Dashboard
- On the login page, you should see a "Zitadel" button
- Click it and authenticate with your Zitadel credentials
- You should be redirected back to NetBird and logged in
Configuring JWT 'groups' Claim
Zitadel uses roles instead of groups. By default, Zitadel's role claims use a nested JSON object format, but NetBird expects a flat array of strings. You'll need to create a Zitadel Action to transform roles into a groups claim.
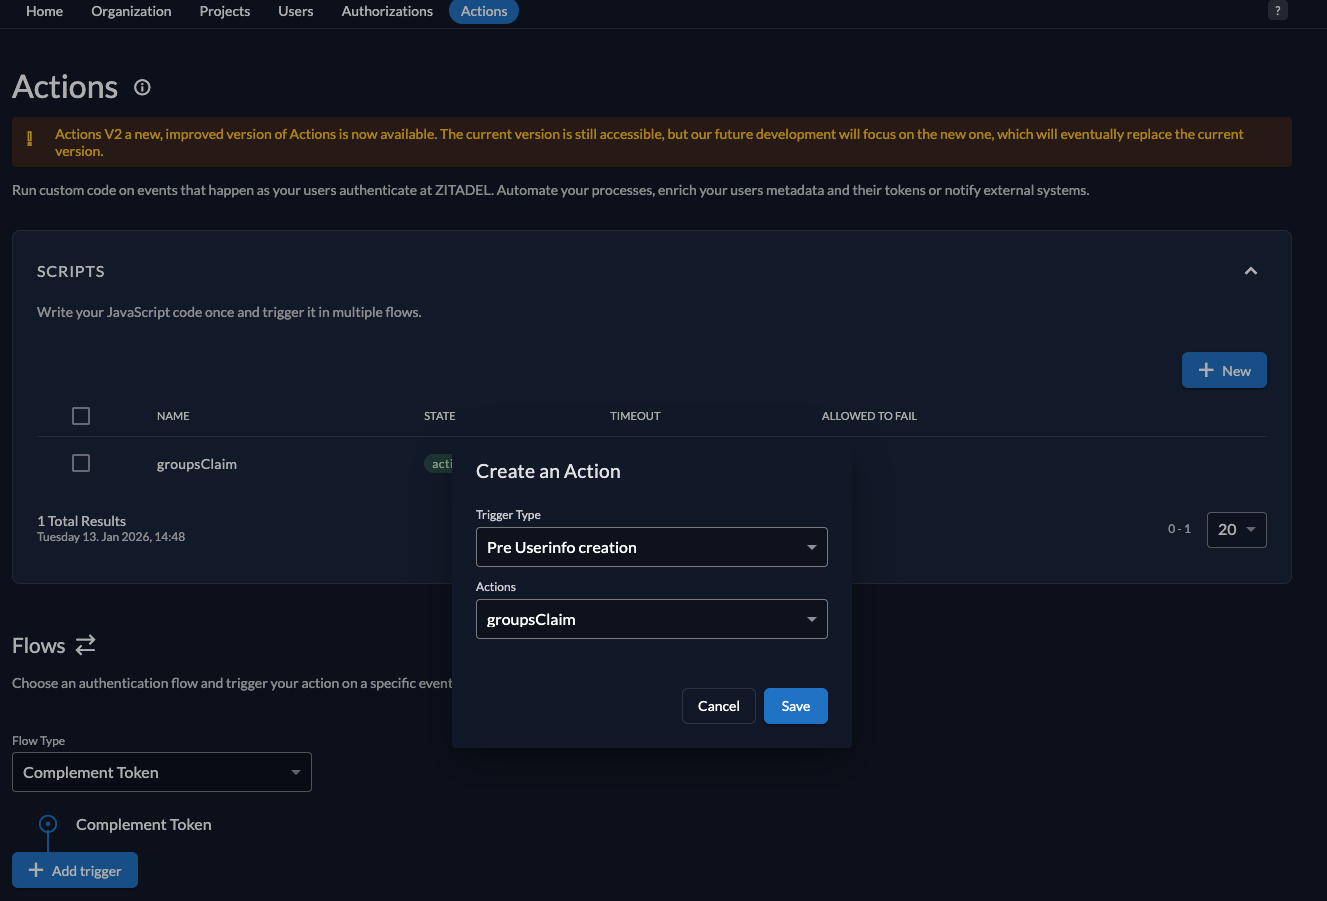
Step 1: Create the Groups Action
- In Zitadel Console, go to Actions
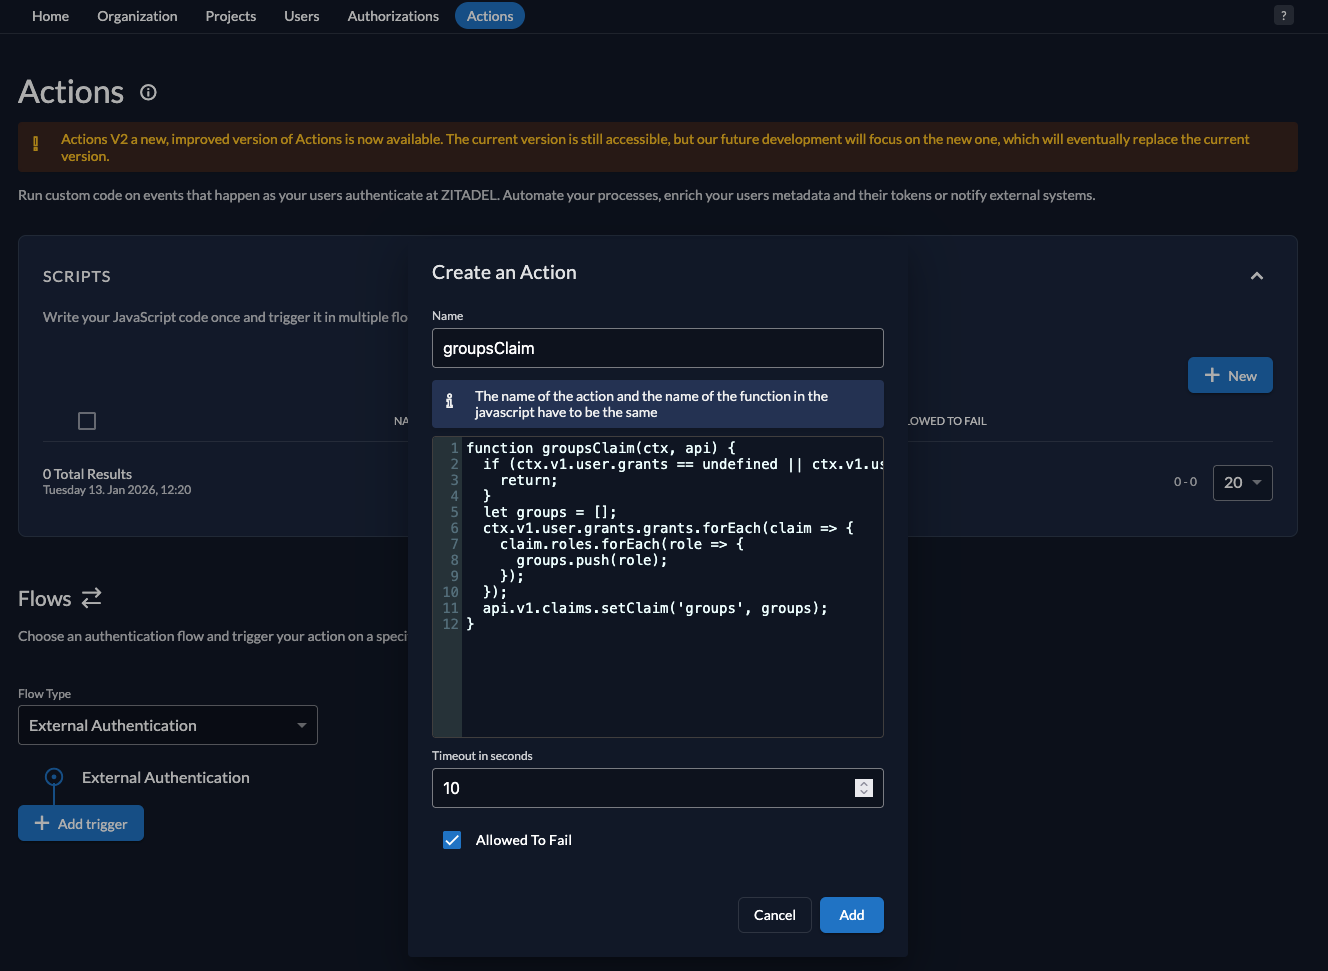
- Click New
- Fill in:
- Name:
groupsClaim
- Name:
- Add the following script:
function groupsClaim(ctx, api) {
  if (ctx.v1.user.grants == undefined || ctx.v1.user.grants.count == 0) {
    return;
  }
  let groups = [];
  ctx.v1.user.grants.grants.forEach(claim => {
    claim.roles.forEach(role => {
      groups.push(role);
    });
  });
  api.v1.claims.setClaim('groups', groups);
}
- Click Add
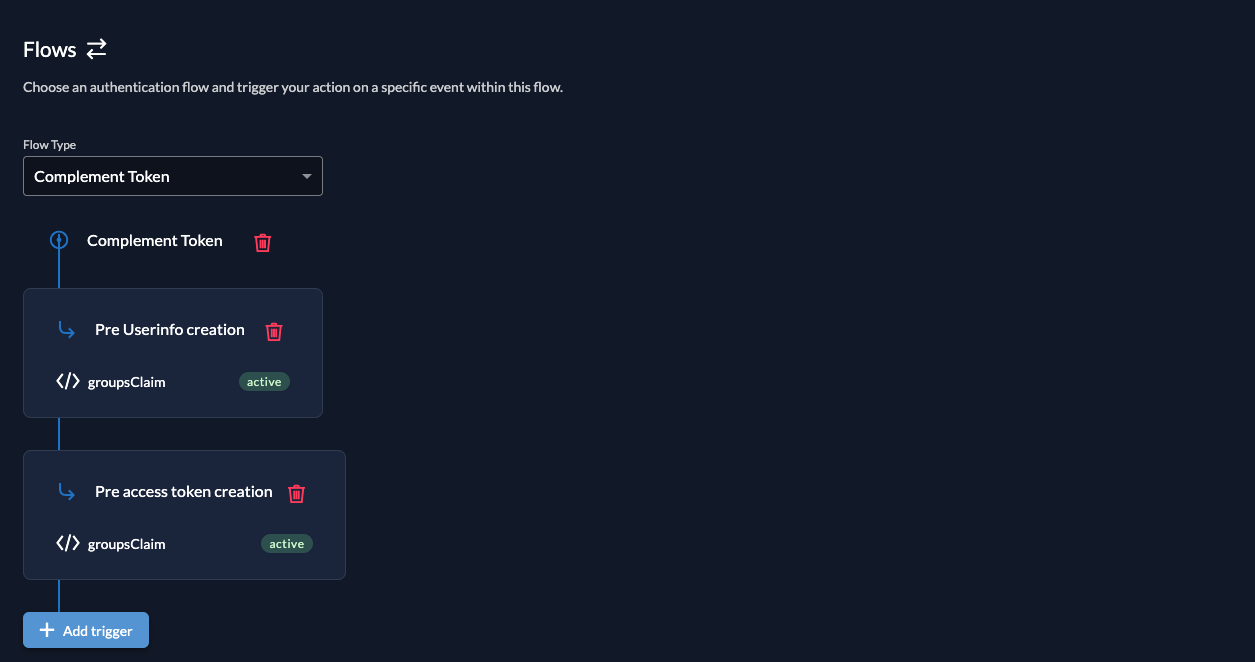
Step 2: Configure Action Triggers
- Go to Actions → Flows
- Select Complement Token
- Add triggers for the
groupsClaimaction:- Pre Userinfo creation
- Pre access token creation
Step 3: Assign Roles to Users
- Go to your Project in Zitadel
- Navigate to Roles and create roles (e.g.,
admin,developer) - Go to Authorizations and assign roles to users
Step 4: Enable JWT Group Sync in NetBird
- In NetBird Dashboard, go to Settings → Groups
- Enable JWT group sync
- Set JWT claim to
groups - Optionally configure JWT allow groups to restrict access
The action transforms Zitadel's role structure into a flat array. If you need to include project context, modify the script to use groups.push(role + ':' + claim.projectId).
Standalone Setup (Advanced)
Use Zitadel as your primary identity provider instead of NetBird's embedded IdP. This option gives you full control over authentication and user management, is recommended for experienced Zitadel administrators as it also requires additional setup and ongoing maintenance.
For most deployments, the embedded IdP is the simpler choice — it's built into NetBird, fully integrated, and requires minimal configuration to get started. For this implementation, go back up to the Management Setup (Recommended) section above.
For detailed instructions on the standalone setup, see the Zitadel SSO with NetBird Self-Hosted (Advanced) documentation.
If you prefer not to self-host, Zitadel offers a managed cloud option at zitadel.com.
Migrating from Zitadel Quickstart
If you deployed NetBird using the previous quickstart script with Zitadel:
Option A - Keep using Zitadel standalone: Continue with your existing setup. No changes needed.
Option B - Add Zitadel as external IdP directly in NetBird Management Dashboard:
- Deploy new NetBird version with embedded IdP
- Add your existing Zitadel as an external IdP directly in the NetBird Management Dashboard (follow Management Setup above)
- Users can continue logging in with Zitadel
- Optionally create local user accounts as fallback
Option C - Migrate fully to embedded IdP:
- Export user list from Zitadel
- Deploy new NetBird version with embedded IdP
- Recreate users in NetBird Dashboard
- Decommission Zitadel when ready
Troubleshooting
"Invalid redirect URI" error
- Verify the redirect URI exactly matches what's configured
- Check for trailing slashes
- Ensure the application type is correct (User Agent for Dashboard)