Microsoft and Entra ID SSO with NetBird Self-Hosted
Updated
Use Microsoft accounts for authentication with NetBird. This supports both personal Microsoft accounts and Microsoft Entra ID (formerly Azure AD) for work and school accounts.
Management Setup (Recommended)
Add Microsoft as an external IdP directly in the NetBird Management Dashboard. Choose the appropriate identity provider type based on your needs:
| Identity Provider Type | Use Case |
|---|---|
Microsoft (microsoft) | Personal Microsoft accounts |
Microsoft Entra ID (entra) | Work/school accounts via Azure AD |
Prerequisites
- NetBird self-hosted with embedded IdP enabled
- Access the Entra Admin Center
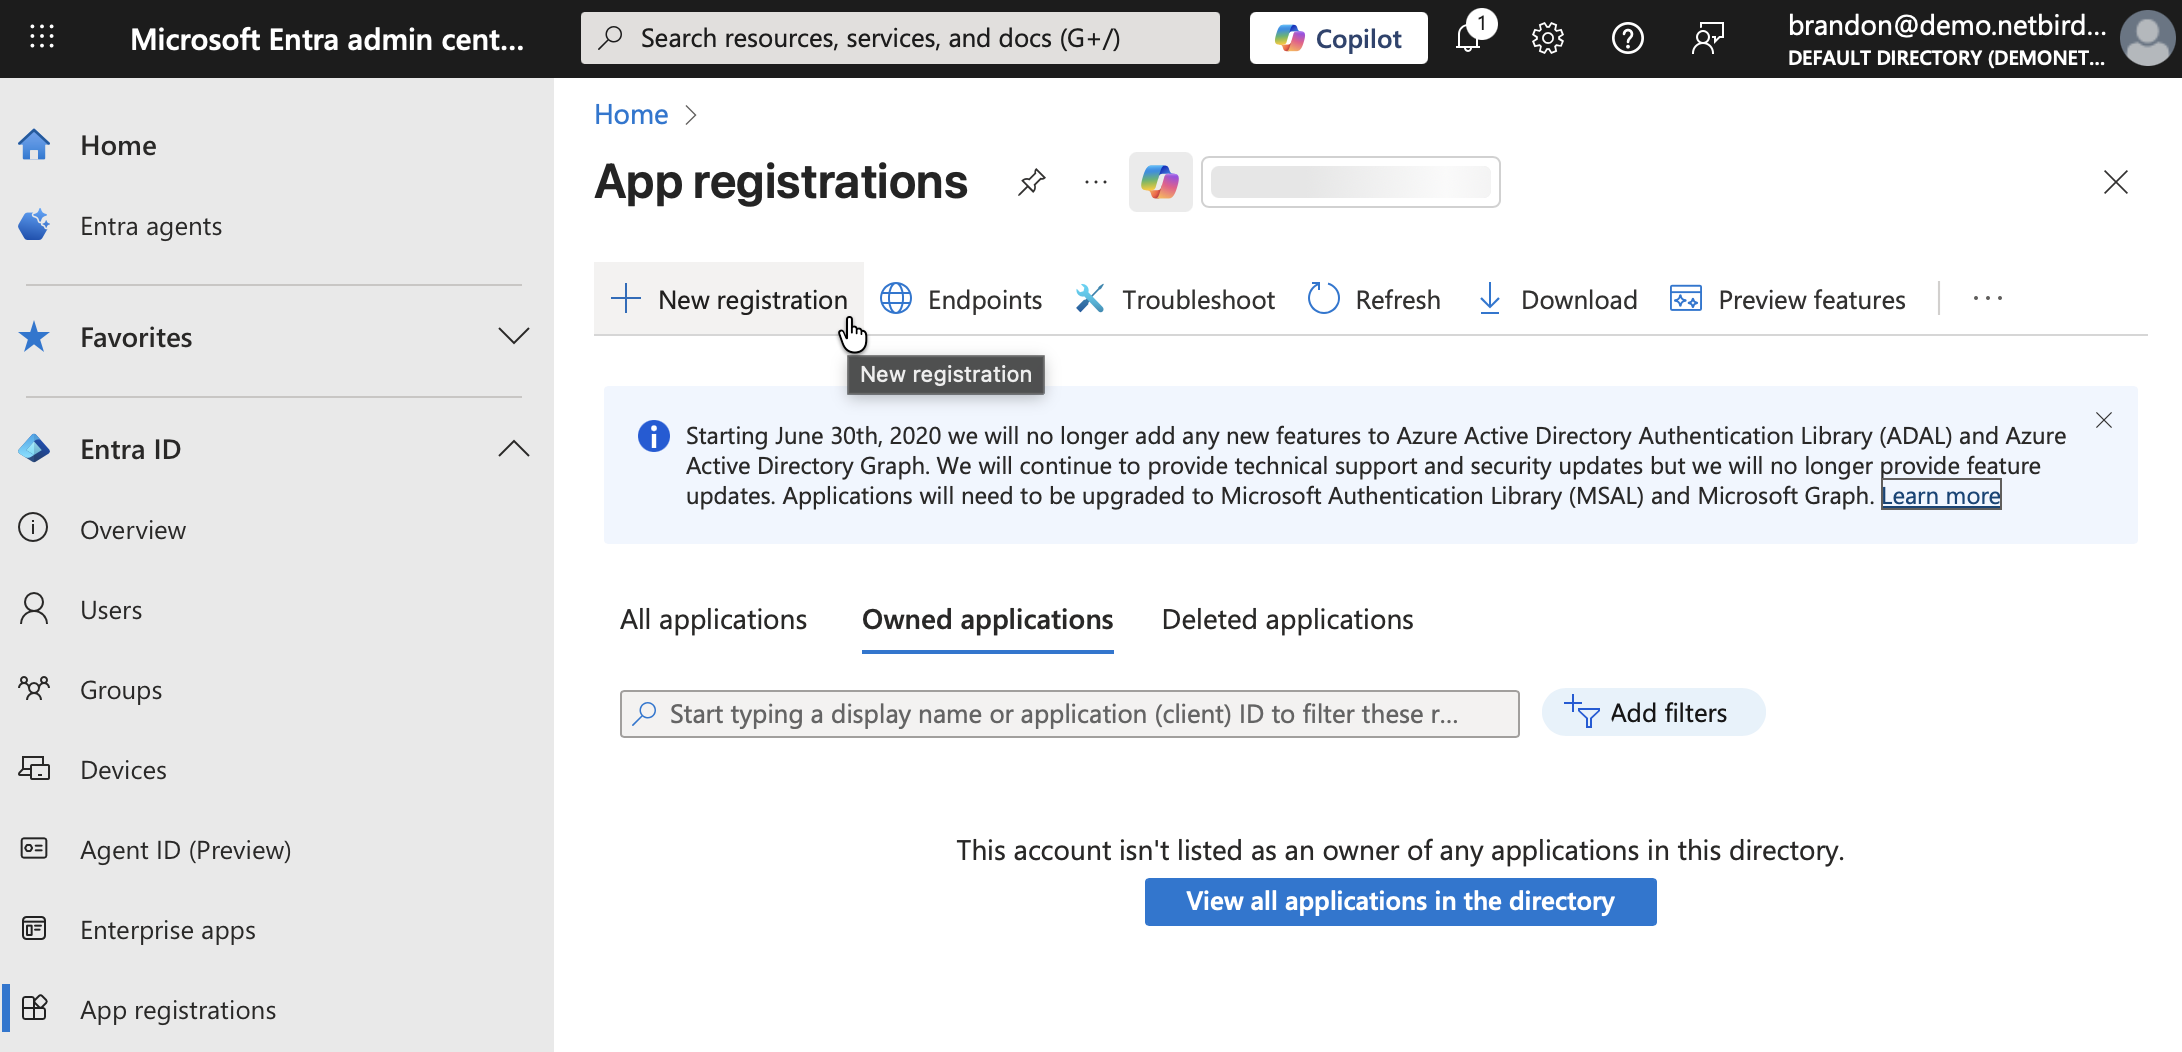
Step 1: Start Creating App Registration
- Navigate to Entra Admin Center)
- Click App registrations → New registration
-
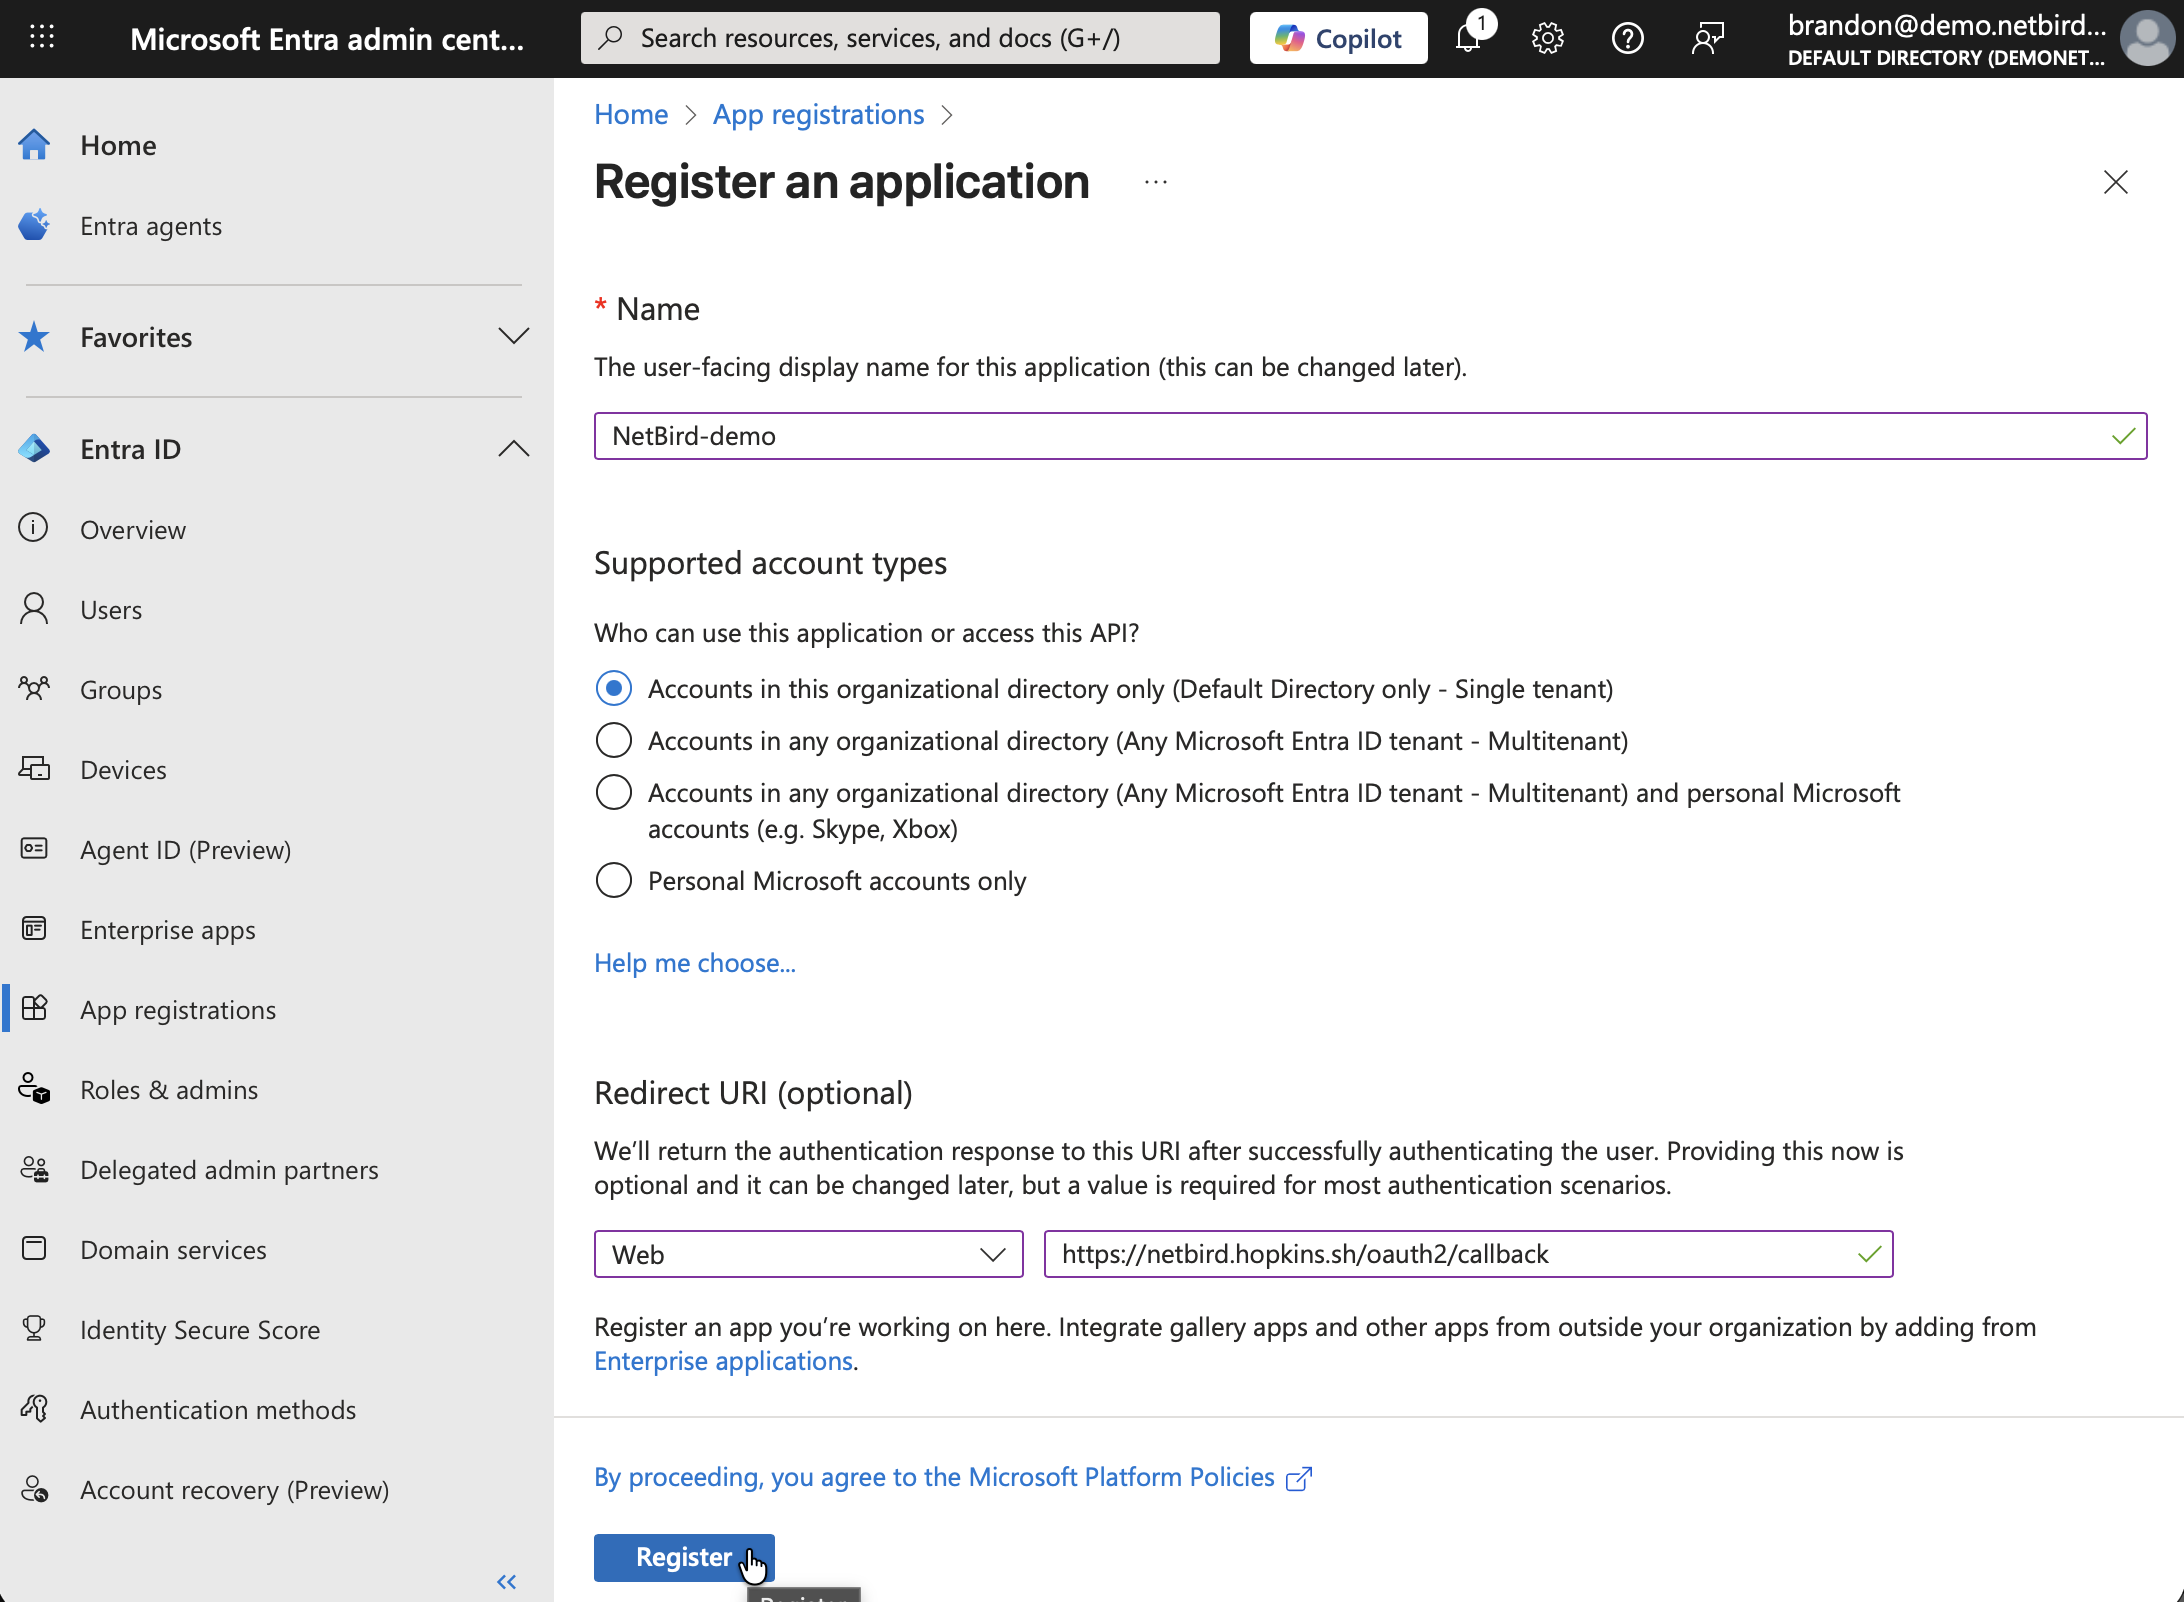
Fill in:
- Name:
NetBird - Supported account types: Choose based on your needs:
- Single tenant (your organization only):
Accounts in this organizational directory only (Default Directory only - Single tenant) - Multi-tenant (any Entra ID organization):
Accounts in any organizational directory (Any Microsoft Entra ID tenant - Multitenant) - Multi-tenant with personal accounts:
Accounts in any organizational directory (Any Microsoft Entra ID tenant - Multitenant) and personal Microsoft accounts (e.g. Skype, Xbox) - Personal accounts only:
Personal Microsoft accounts only
- Single tenant (your organization only):
- Redirect URI: Leave empty for now (you'll add this in Step 4)
- Name:
-
Don't click Register yet — keep this tab open and proceed to Step 2
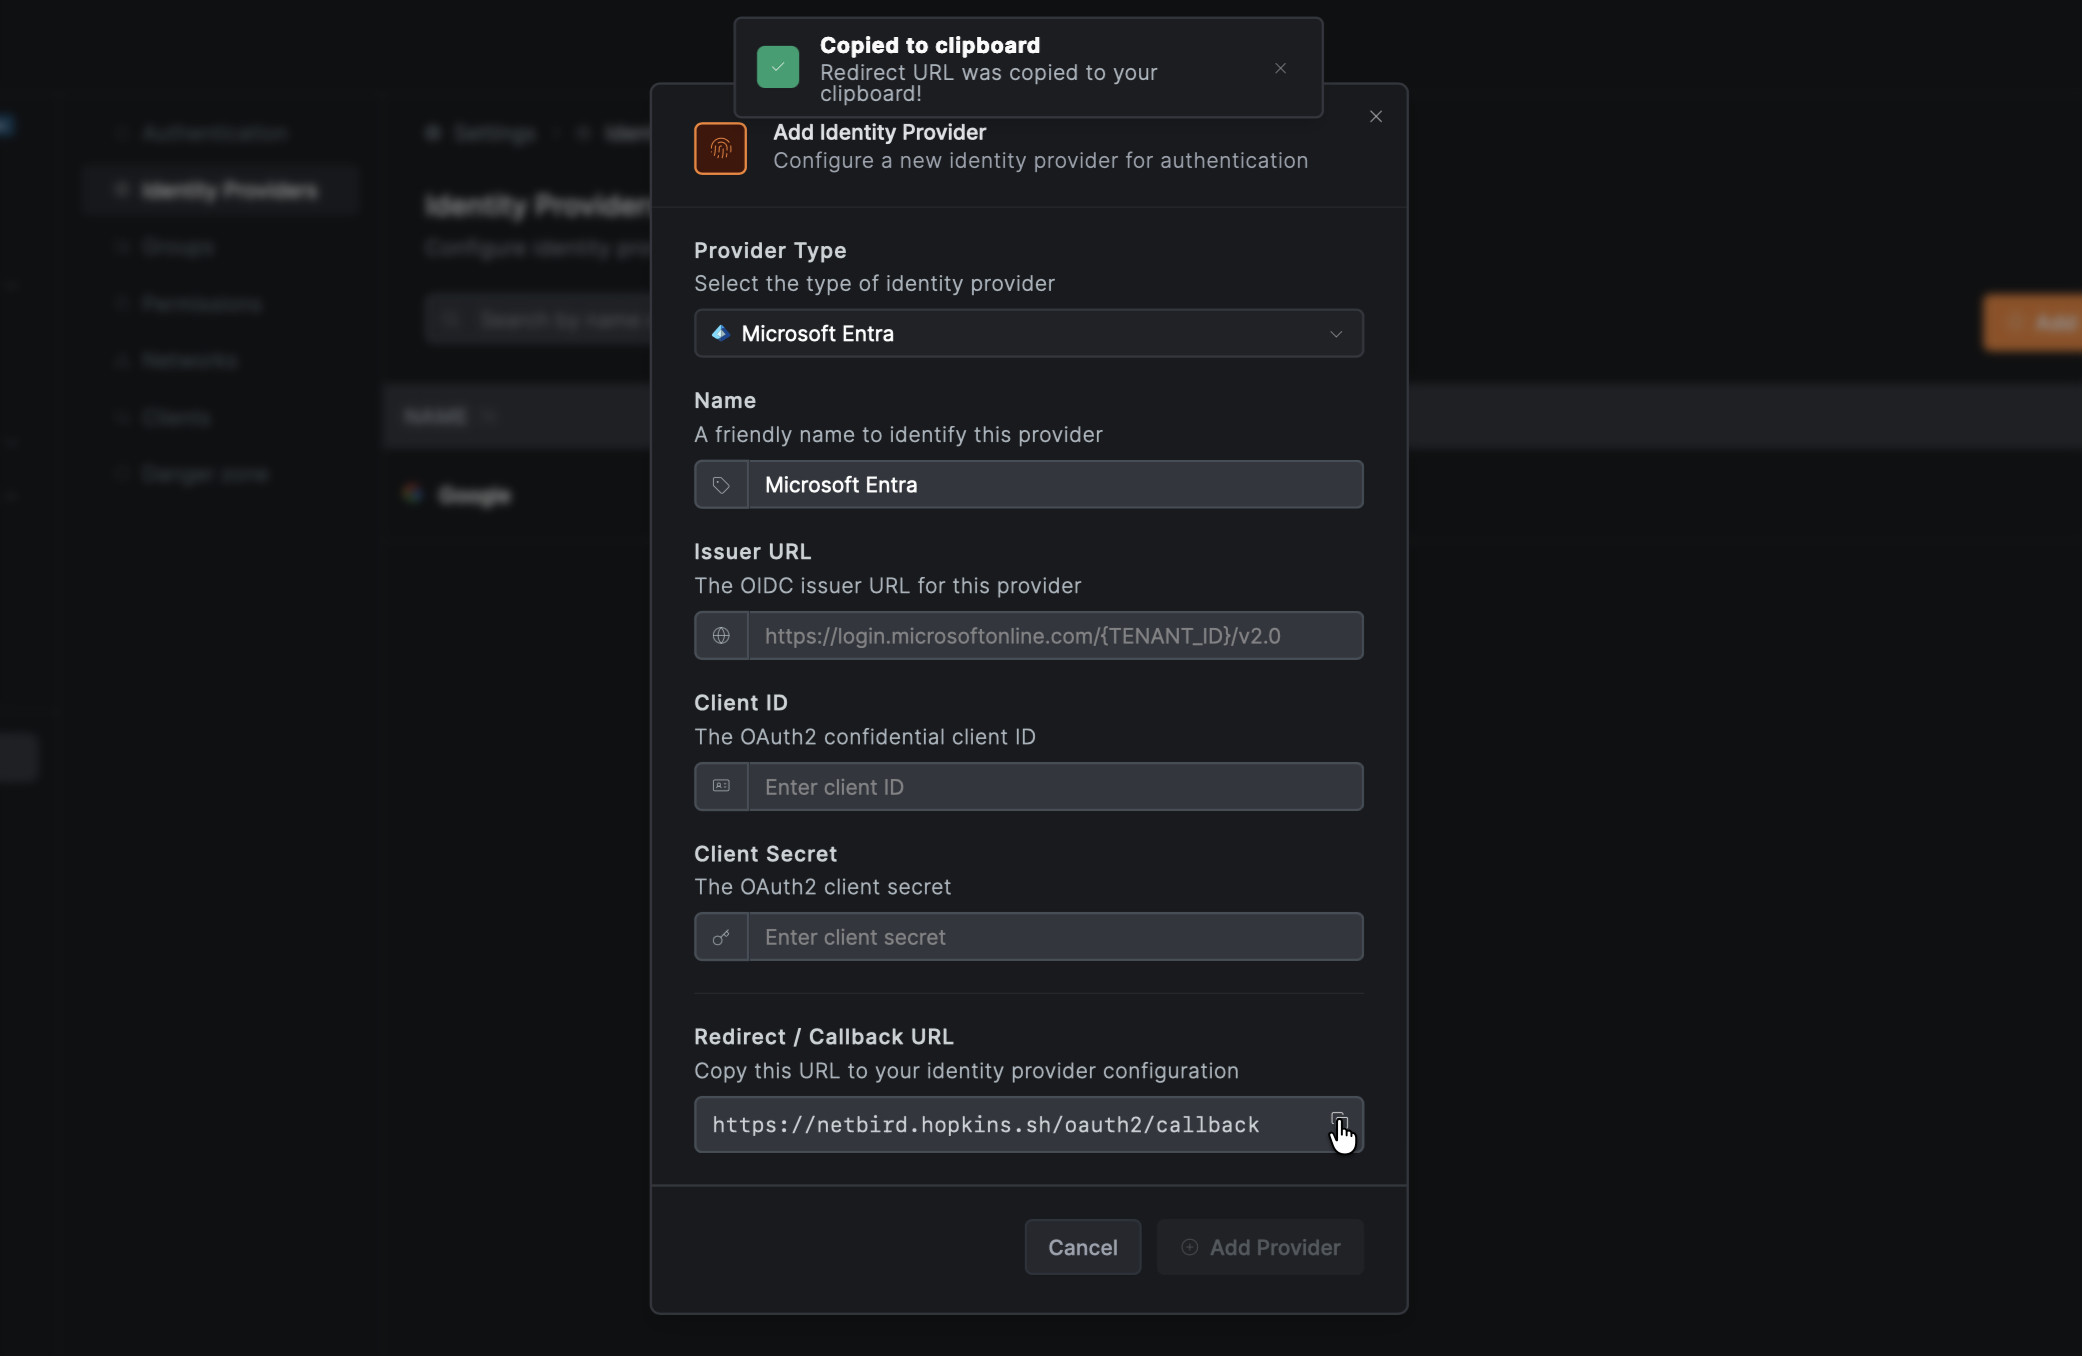
Step 2: Get Redirect URL from NetBird
- Open a new tab or window and log in to your NetBird Dashboard
- Navigate to Settings → Identity Providers
- Click Add Identity Provider
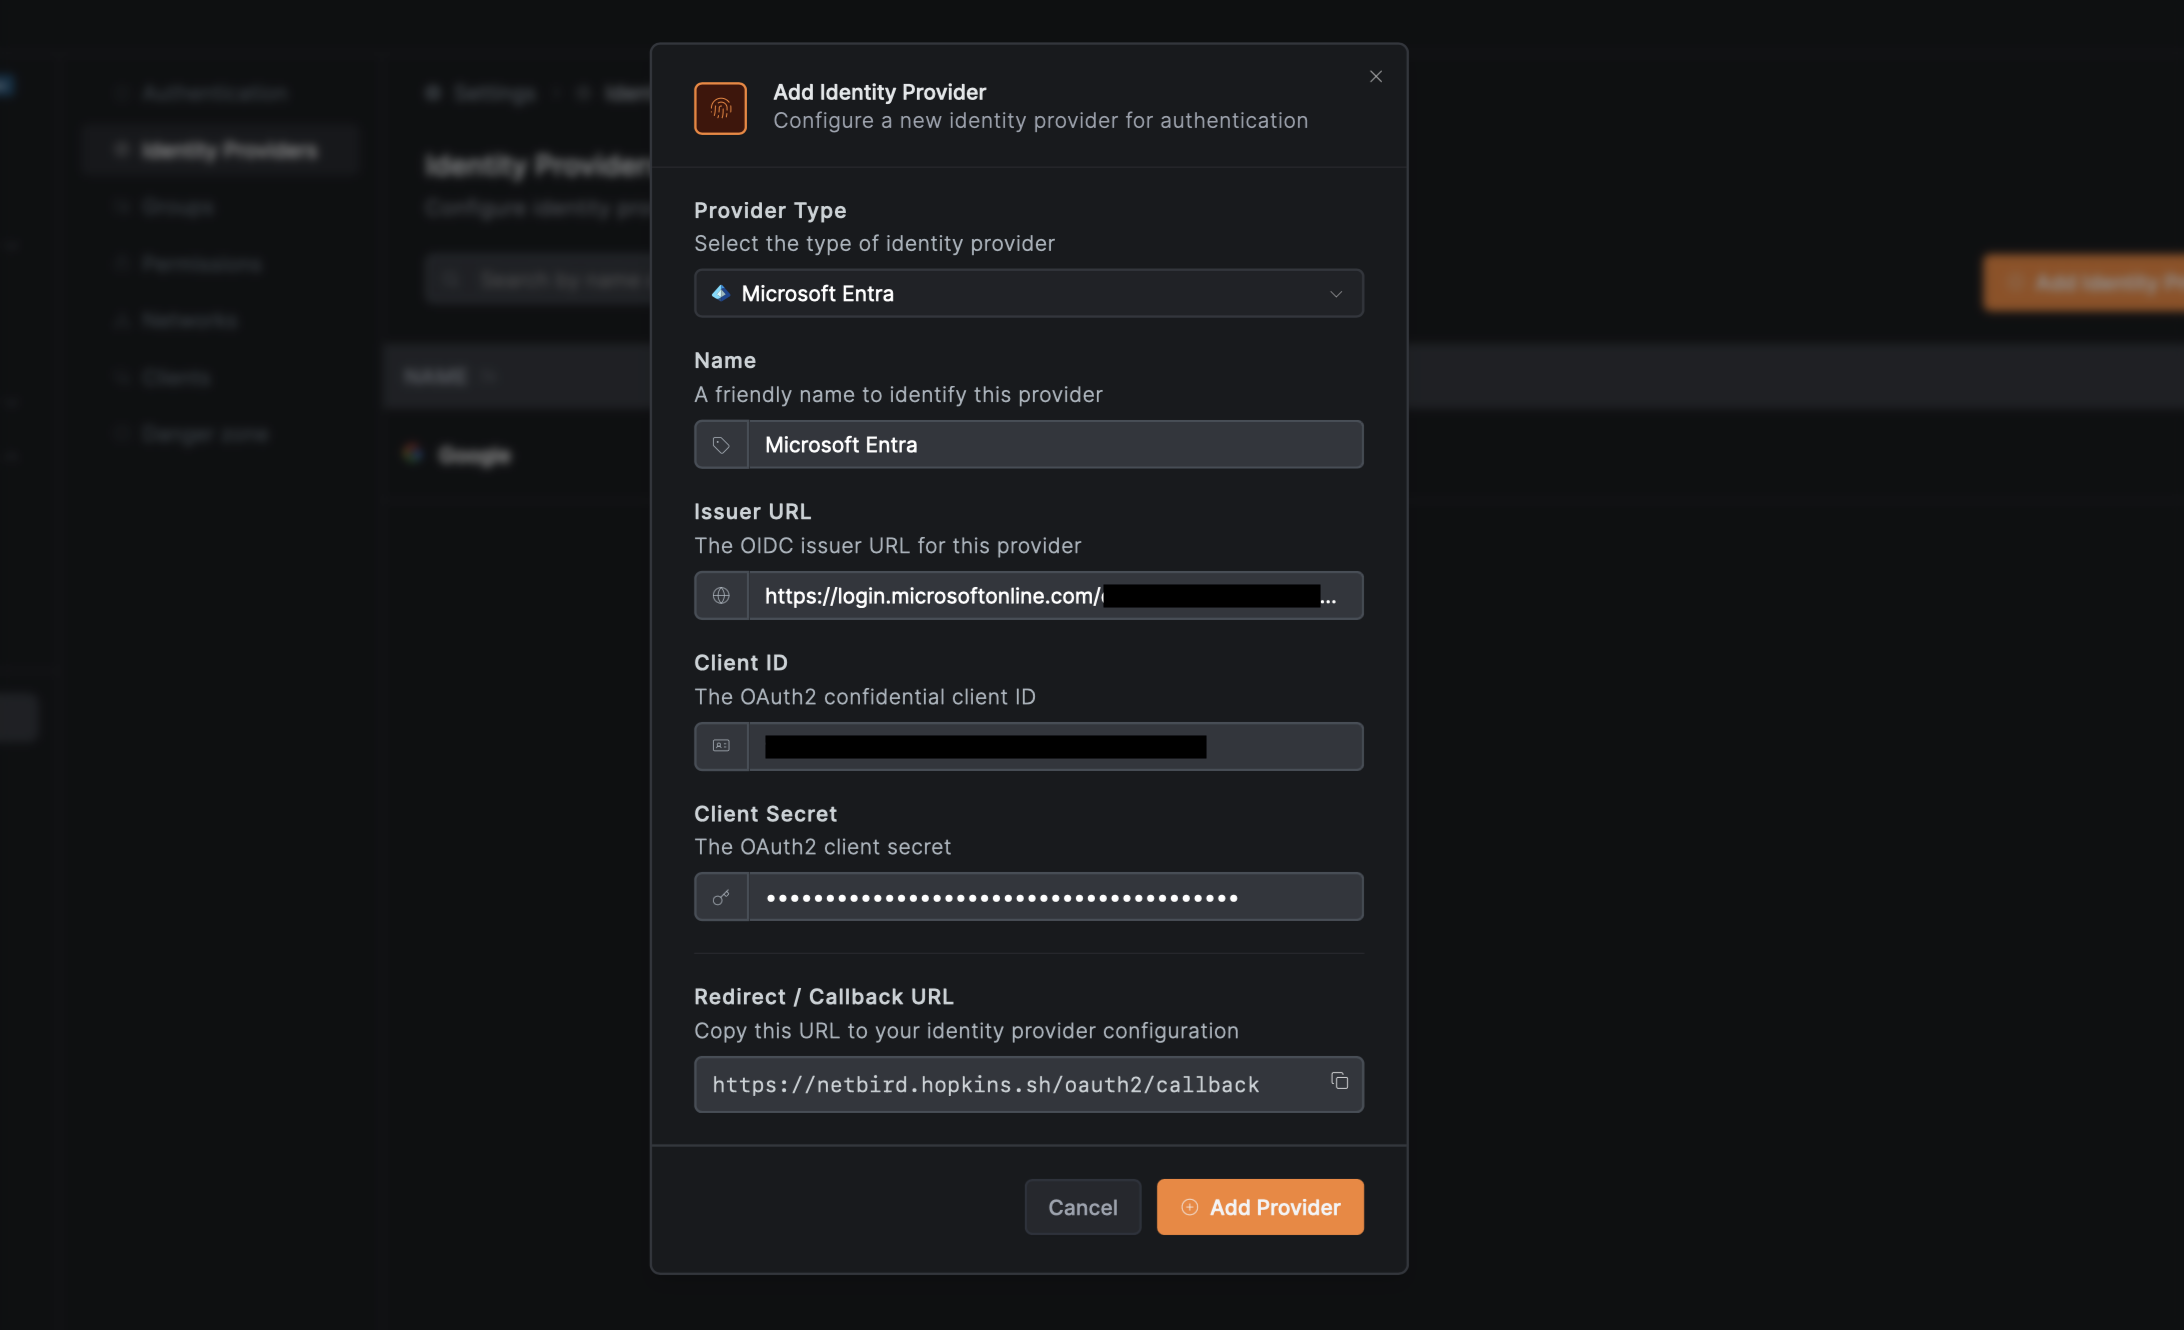
- Fill in the fields:
For Personal Microsoft Accounts:
| Field | Value |
|---|---|
| Type | Microsoft |
| Name | Microsoft (or your preferred display name) |
| Client ID | From Azure app registration (will fill after Step 3) |
| Client Secret | From Azure app registration (will fill after Step 5) |
For Microsoft Entra ID (Work/School):
| Field | Value |
|---|---|
| Type | Microsoft Entra ID |
| Name | Microsoft Work (or your preferred display name) |
| Issuer URL | From Azure app registration (will fill after Step 3) |
| Client ID | From Azure app registration (will fill after Step 3) |
| Client Secret | From Azure app registration (will fill after Step 5) |
Issuer URL format: https://login.microsoftonline.com/{tenant-id}/v2.0 where {tenant-id} is your Directory (tenant) ID from Azure.
- Copy the Redirect URL that NetBird displays (but don't click Add Provider yet)
Step 3: Complete App Registration
- Return to the Entra Admin Center tab
- Click Register
- Note the Application (client) ID and Directory (tenant) ID — you'll need these for Step 6
- Construct the Issuer URL using the format:
https://login.microsoftonline.com/{tenant-id}/v2.0(replace{tenant-id}with your Directory (tenant) ID)
Step 4: Configure Redirect URI
- Still in the Entra Admin Center tab, go to Authentication
- Click Add a platform → Web
- In the dropdown next to the redirect URI field, select Web
- Paste the redirect URL you copied from NetBird in the Redirect URI field
- (Optional) Add NetBird's logout callback as an additional Web redirect URI:
https://netbird.example.com/oauth2/logout/callback(replacenetbird.example.comwith your NetBird dashboard domain). Entra validates the post-logout redirect against the registered redirect URIs, so this lets logout return to NetBird cleanly.
- (Optional) Add NetBird's logout callback as an additional Web redirect URI:
- Click Configure
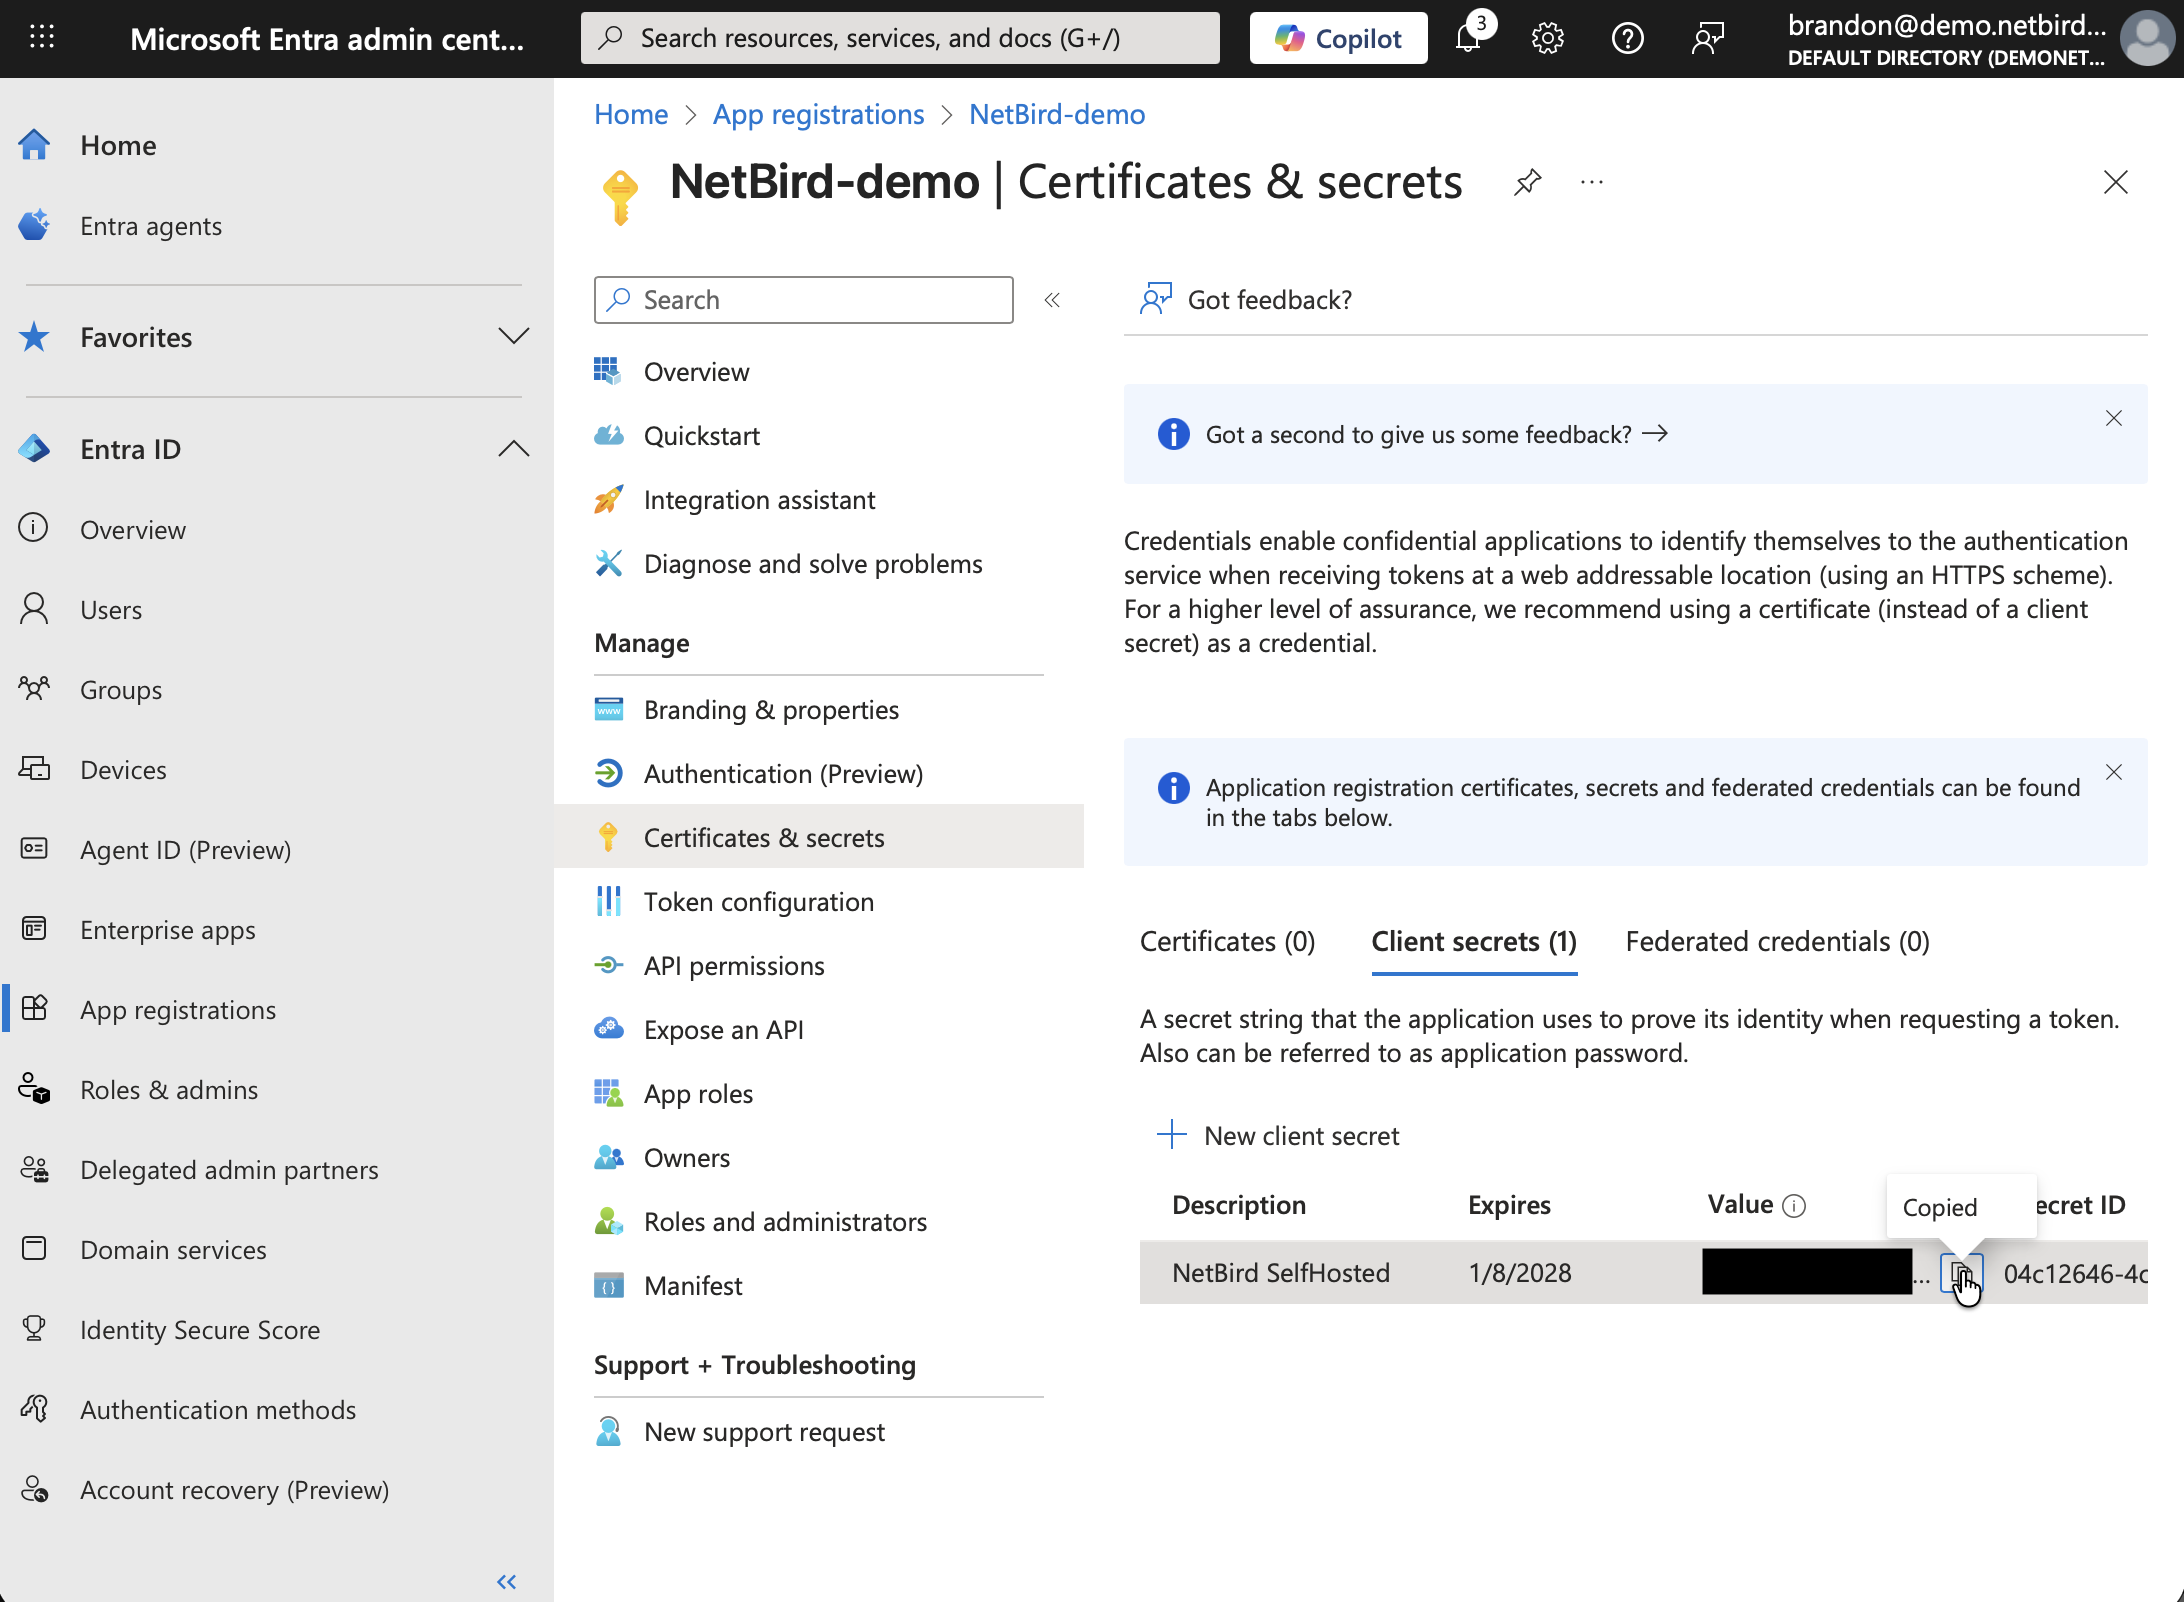
Step 5: Create Client Secret
- Go to Certificates & secrets
- Click New client secret

- Add a description and expiration
- Click Add
- Copy the Value immediately (it won't be shown again) — you'll need this for Step 6
Step 6: Complete NetBird Setup
- Return to the NetBird tab
- Fill in the fields:
- Client ID: Paste the Application (client) ID from Step 3
- Client Secret: Paste the Value from Step 5
- Issuer URL: Paste the Issuer URL you constructed in Step 3 (for Entra ID only)
- Click Add Provider
Step 7: Test the Connection
- Log out of NetBird Dashboard
- On the login page, you should see the Microsoft button
- Click it and sign in with your Microsoft account
- You should be redirected back to NetBird and logged in. Unless your user approval setting were changed you will need to log back into your local admin account to approve the user.
Configuring JWT 'groups' Claim
To sync Entra ID groups with NetBird, you need to configure your app registration to include group claims in the ID token.
Step 1: Configure Groups Claim in Azure
- In Entra Admin Center, go to your app registration
- Navigate to Token configuration
- Click Add groups claim
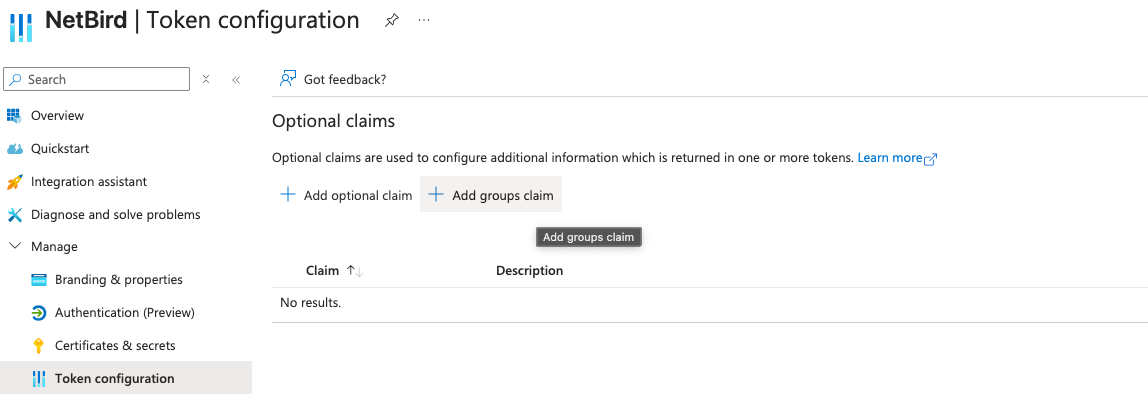
- Select the group types to include:
- Security groups - Recommended for most use cases
- Groups assigned to the application - Recommended for large organizations (avoids token size limits)
- Under Customize token properties by type, expand ID and select:
- Group ID - Returns Azure object IDs (default)
- Click Add
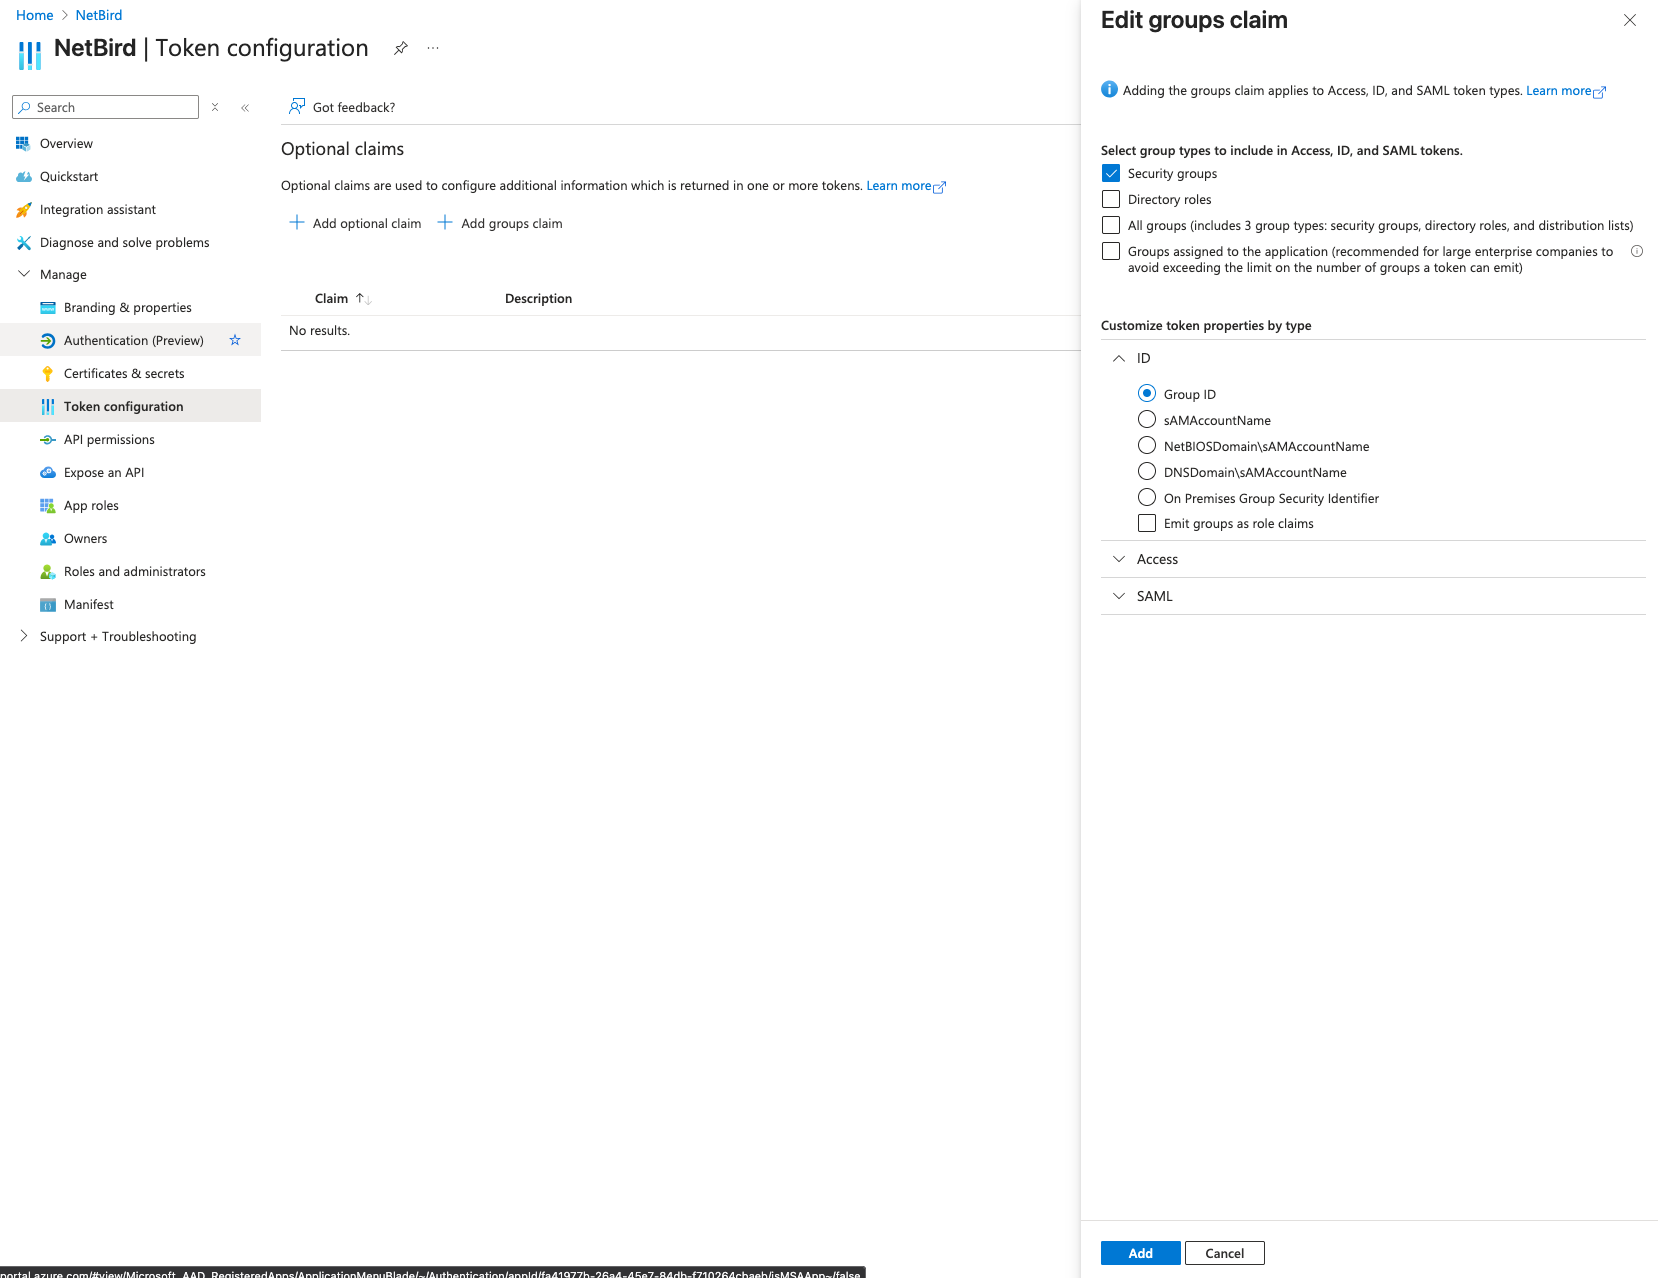
Token size limit: Entra ID limits groups to 200 in JWT tokens. If a user belongs to more groups, the claim is omitted entirely. Use Groups assigned to the application to avoid this by only including relevant groups.
Step 2: Assign Groups to the Application (Recommended)
If you selected "Groups assigned to the application":
- Go to Enterprise applications in Entra Admin Center
- Find and select your NetBird application
- Go to Users and groups
- Click Add user/group
- Select the groups you want to sync with NetBird
- Click Assign
Step 3: Enable JWT Group Sync in NetBird
- In NetBird Dashboard, go to Settings → Groups
- Enable JWT group sync
- Set JWT claim to
groups - Optionally configure JWT allow groups to restrict access
Entra ID returns group object IDs (GUIDs) by default, not group names. Your NetBird groups will appear as IDs like a1b2c3d4-5678-90ab-cdef-1234567890ab. To use display names instead, you need Azure AD Premium and cloud-only groups. NetBird Cloud does not have this limitation—it syncs group names directly via the Microsoft integration.
Standalone Setup (Advanced)
Use Microsoft Entra ID as your primary identity provider instead of NetBird's embedded IdP. This option gives you full control over authentication and user management, is recommended for experienced Microsoft Entra ID administrators as it also requires additional setup and ongoing maintenance.
For most deployments, the embedded IdP is the simpler choice — it's built into NetBird, fully integrated, and requires minimal configuration to get started. For this implementation, go back up to the Management Setup (Recommended) section above.
For detailed instructions on the standalone setup, see the Microsoft and Entra ID SSO with NetBird Self-Hosted (Legacy) documentation.
If you prefer to have full control over authentication, consider self-hosted alternatives like PocketID.
Troubleshooting
"AADSTS50011: The redirect URI specified in the request does not match"
- Ensure the redirect URI in Azure exactly matches what NetBird provides
- Check platform type (SPA vs Mobile/Desktop)
- Verify no trailing slashes
"AADSTS700016: Application not found"
- Verify the Application (client) ID is correct
- Check tenant ID for single-tenant apps
- Ensure the app registration is in the correct directory
Users from wrong tenant signing in
- Use single-tenant configuration for organization-only access
- Verify "Supported account types" setting in app registration