Google Workspace SSO with NetBird Self-Hosted (Legacy)
The client secret has been removed from the authentication flow. The secret was originally included to support providers like Google Workspace that don't offer a proper PKCE flow, but this is no longer necessary with the embedded IdP.
If you are using this standalone Google Workspace setup, we strongly recommend migrating to the embedded IdP setup with Google as an external provider. The embedded IdP approach is simpler, fully supported, and does not rely on the deprecated client secret.
Use Google accounts for authentication with NetBird. This supports both personal Google accounts and Google Workspace (formerly G Suite) organizations.
Standalone Setup (Advanced)
NetBird includes built-in local user management powered by an embedded IdP, allowing you to create and manage users directly without requiring an external identity provider. You can also add multiple external identity providers alongside local users, giving users multiple login options.
We highly recommend using the simpler setup that adds Google as an external IdP directly in the NetBird Management Dashboard. This approach requires minimal configuration, works alongside local users, and doesn't require replacing your embedded IdP. See the Management Setup (Recommended) section in the main Google Workspace documentation.
The standalone setup below replaces your embedded IdP entirely and is only recommended for experienced Google Workspace administrators who need full control over authentication and user management.
Use Google Workspace as your primary identity provider instead of NetBird's embedded IdP. This option gives you full control over authentication and user management, is recommended for experienced Google Workspace administrators as it also requires additional setup and ongoing maintenance.
For most deployments, the embedded IdP is the simpler choice — it's built into NetBird, fully integrated, and requires minimal configuration to get started. For this implementation, go back up to the Management Setup (Recommended) section above.
Beginning with NetBird version v0.23.6 and onwards, the Google Workspace IdP manager no longer requires the custom admin role called User and Schema Management. We now use a read-only role for user information.
Prerequisites
- A Google Workspace account (not just personal Google)
- Admin permissions in Google Workspace
- A project in Google Cloud Console
- Enable Admin SDK API for your project at https://console.cloud.google.com/apis/library/admin.googleapis.com
Step 1: Configure OAuth Consent Screen
- Navigate to OAuth consent
- Select Internal User Type and click Create
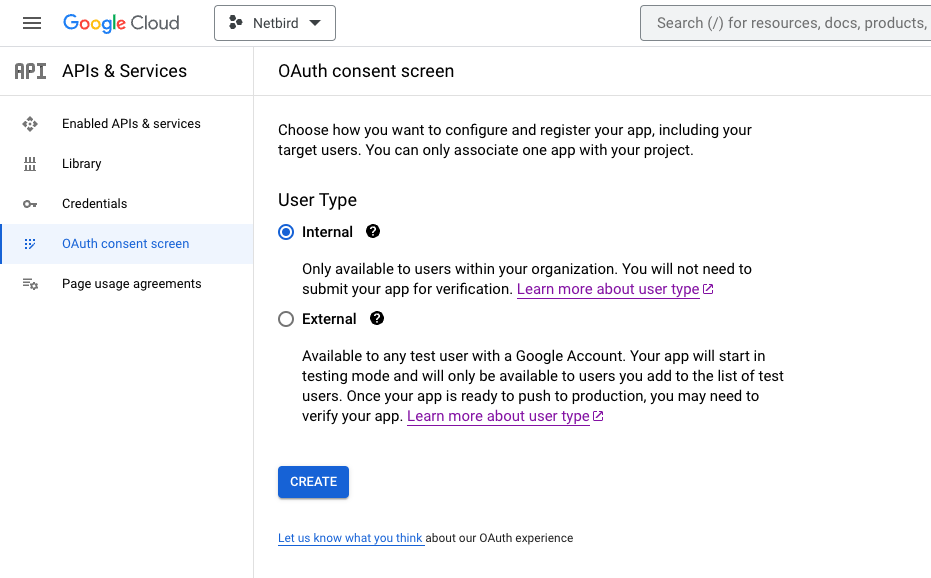
- Fill in the form:
- App name:
Netbird - User support email:
<administrator email> - Authorized domain:
<your netbird domain> - Developer contact information:
<developer email>
- App name:
- Click SAVE AND CONTINUE
- Click ADD OR REMOVE SCOPES
- Select
/auth/userinfo.email,/auth/userinfo.profile, andopenid - Click UPDATE
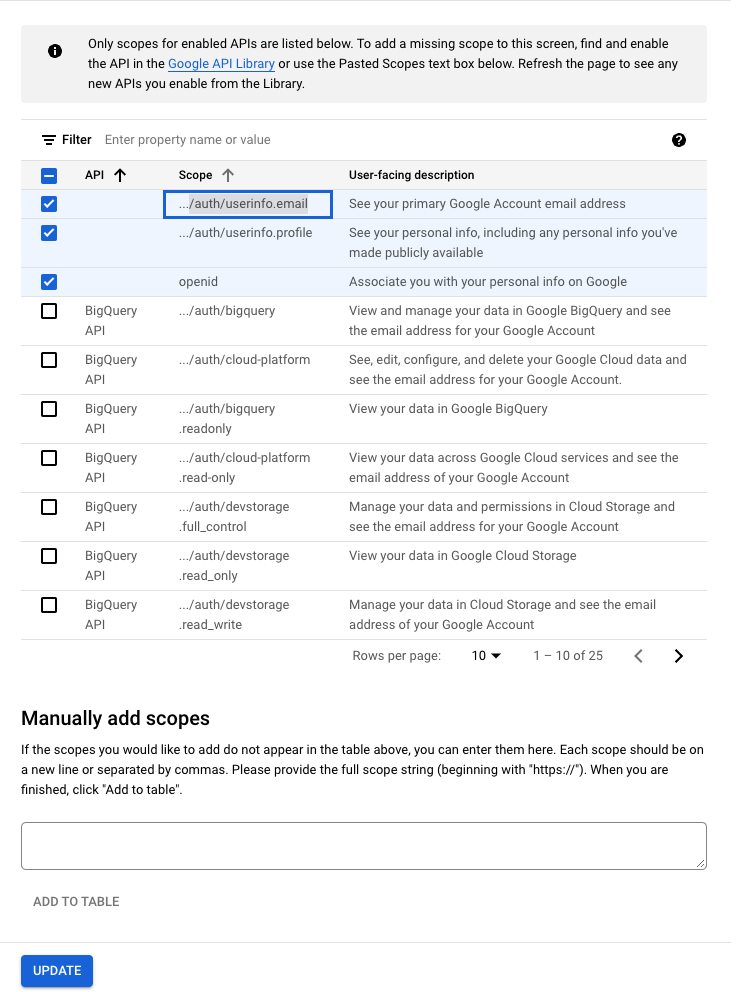
- Click SAVE AND CONTINUE
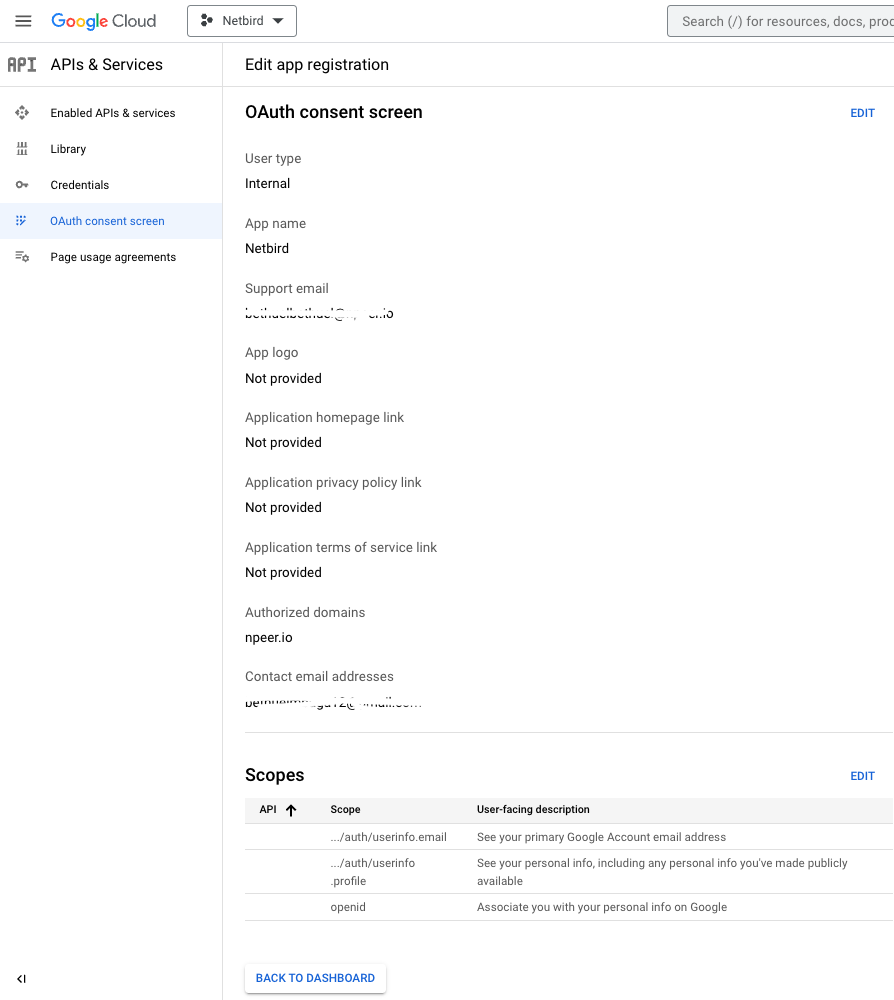
- Review the summary and click BACK TO DASHBOARD
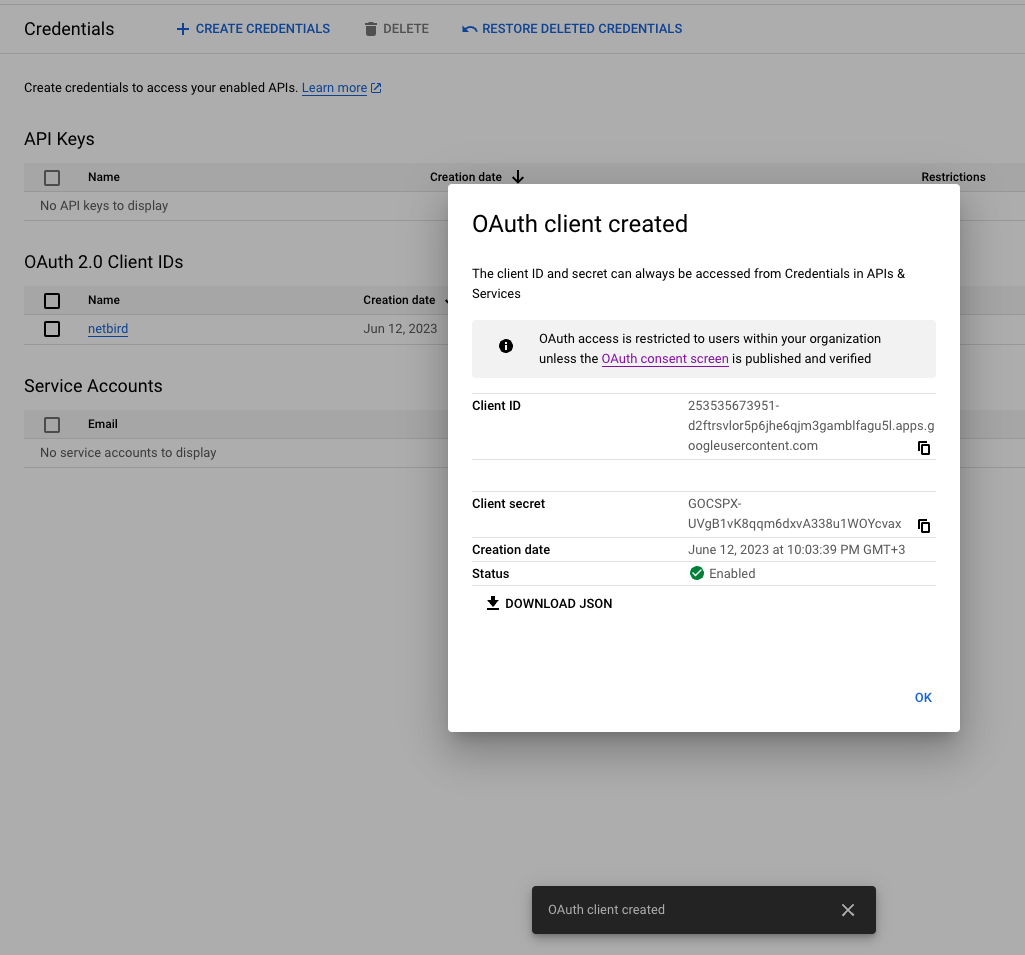
Step 2: Create OAuth 2.0 Credentials
- Navigate to API Credentials
- Click CREATE CREDENTIALS → OAuth client ID
- Fill in:
- Application type:
Web application - Name:
netbird - Authorized JavaScript origins:
https://<your domain>andhttp://localhost - Authorized redirect URIs:
https://<your domain>/authhttps://<your domain>/silent-authhttp://localhost:53000
- Application type:
- Click CREATE

- Note Client ID and Client Secret
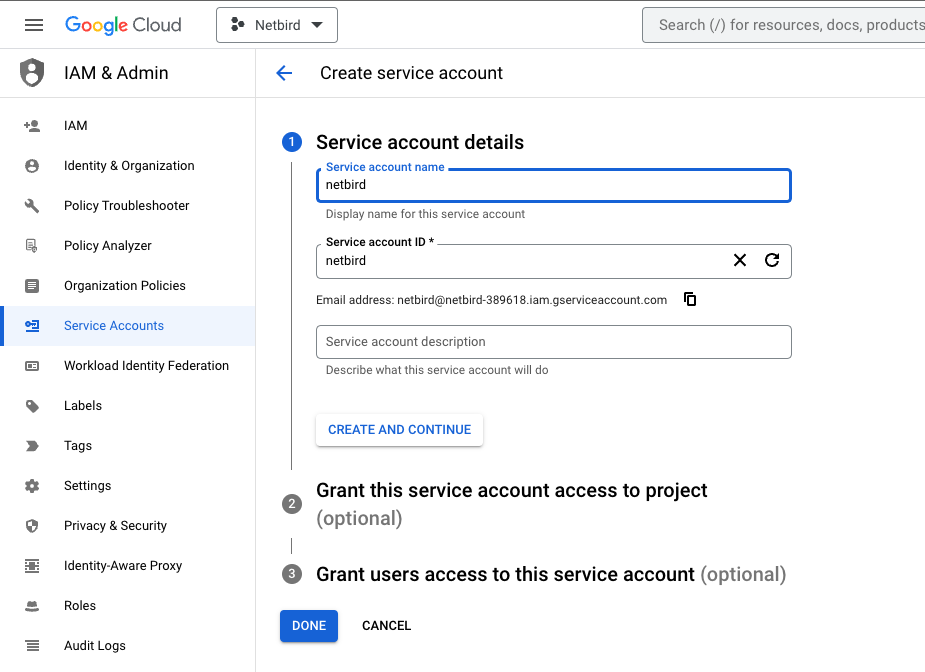
Step 3: Create Service Account
- Navigate to API Credentials
- Click CREATE CREDENTIALS → Service account
- Fill in:
- Service account name:
netbird - Service account ID:
netbird
- Service account name:
- Note the service account email address
- Click DONE
Step 4: Create Service Account Keys
- Navigate to API Credentials
- Under Service Accounts, click netbird to edit
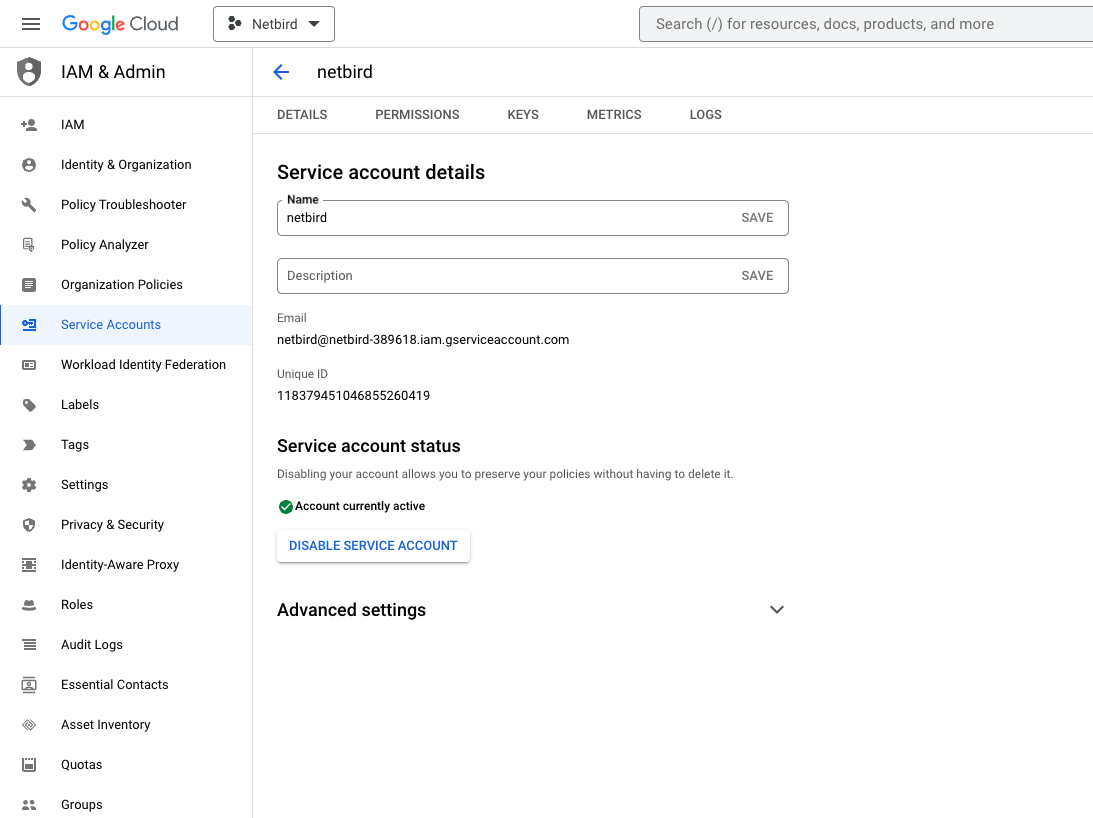
- Click the Keys tab
- Click Add key → Create new key
- Select JSON and click Create
The key file downloads automatically. Store it securely. Read about managing service account keys.
- Open the downloaded JSON file and note the
client_id(Service Account Client ID)
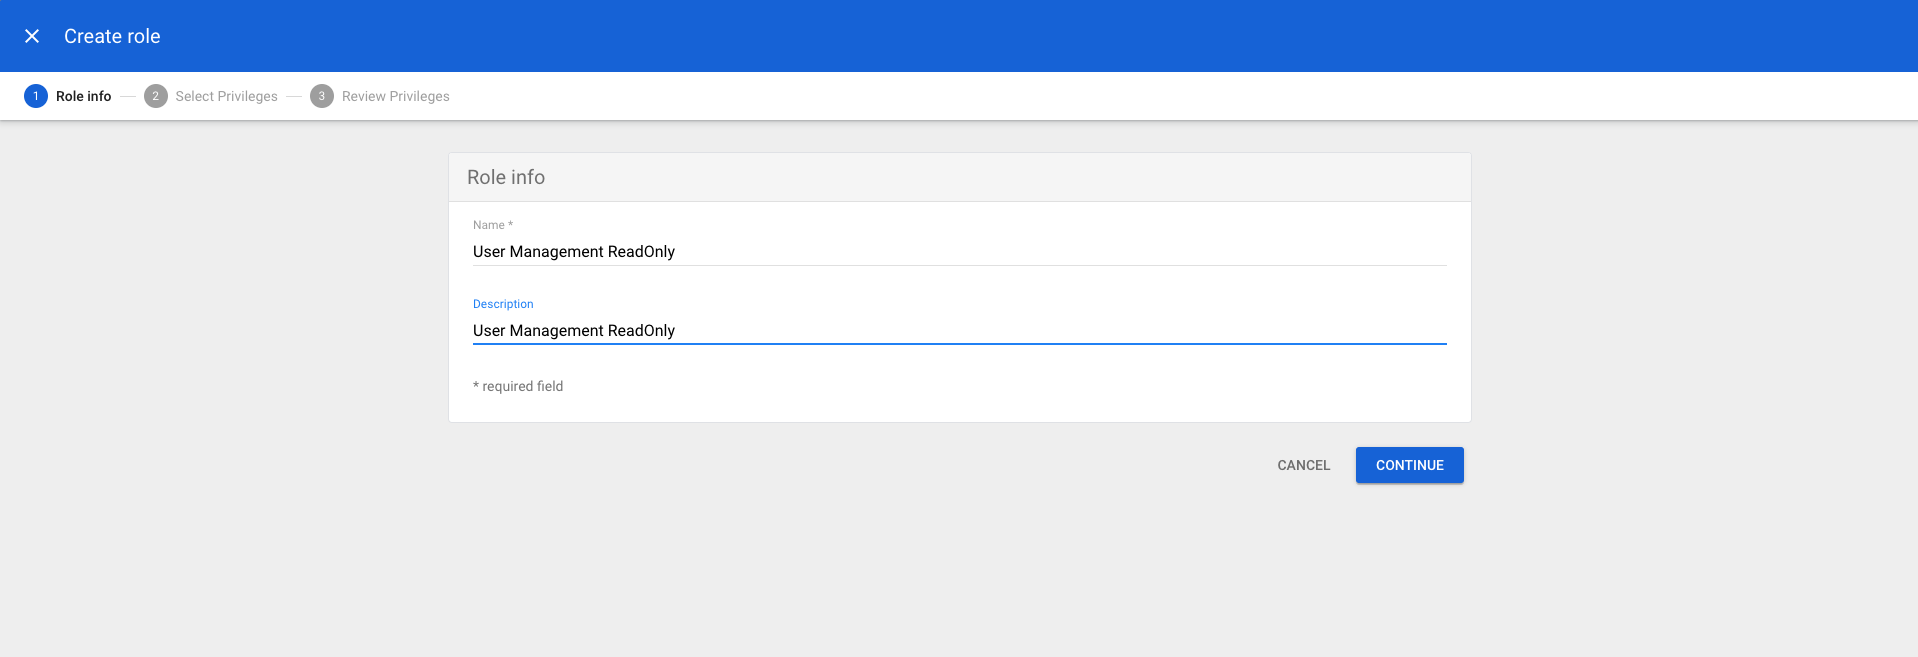
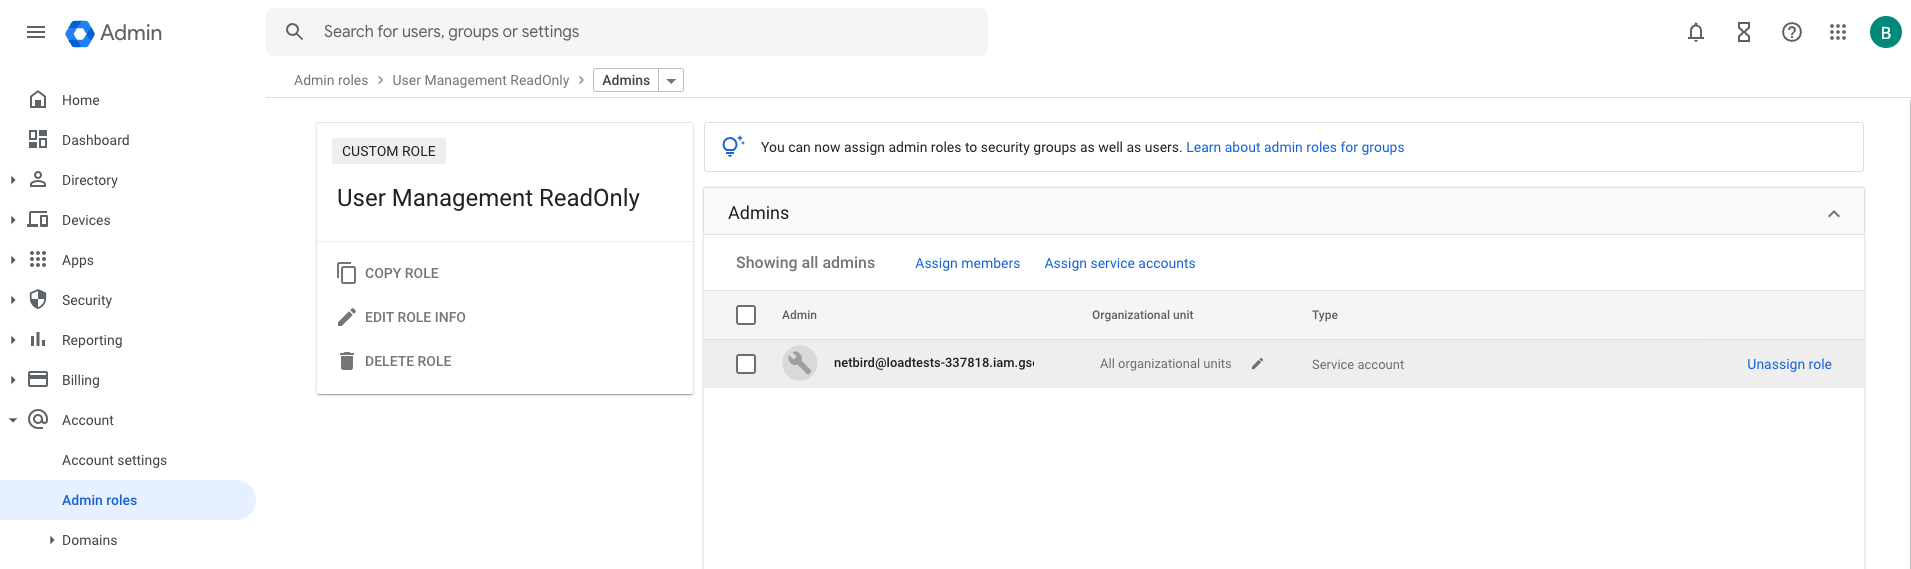
Step 5: Grant User Management Admin Role
- Navigate to Admin Console
- Select Account → Admin Roles
- Click Create new role
- Fill in:
- Name:
User Management ReadOnly - Description:
User Management ReadOnly
- Name:
- Click CONTINUE
- Scroll to Admin API privileges and add:
- Users:
Read
- Users:
- Click CONTINUE
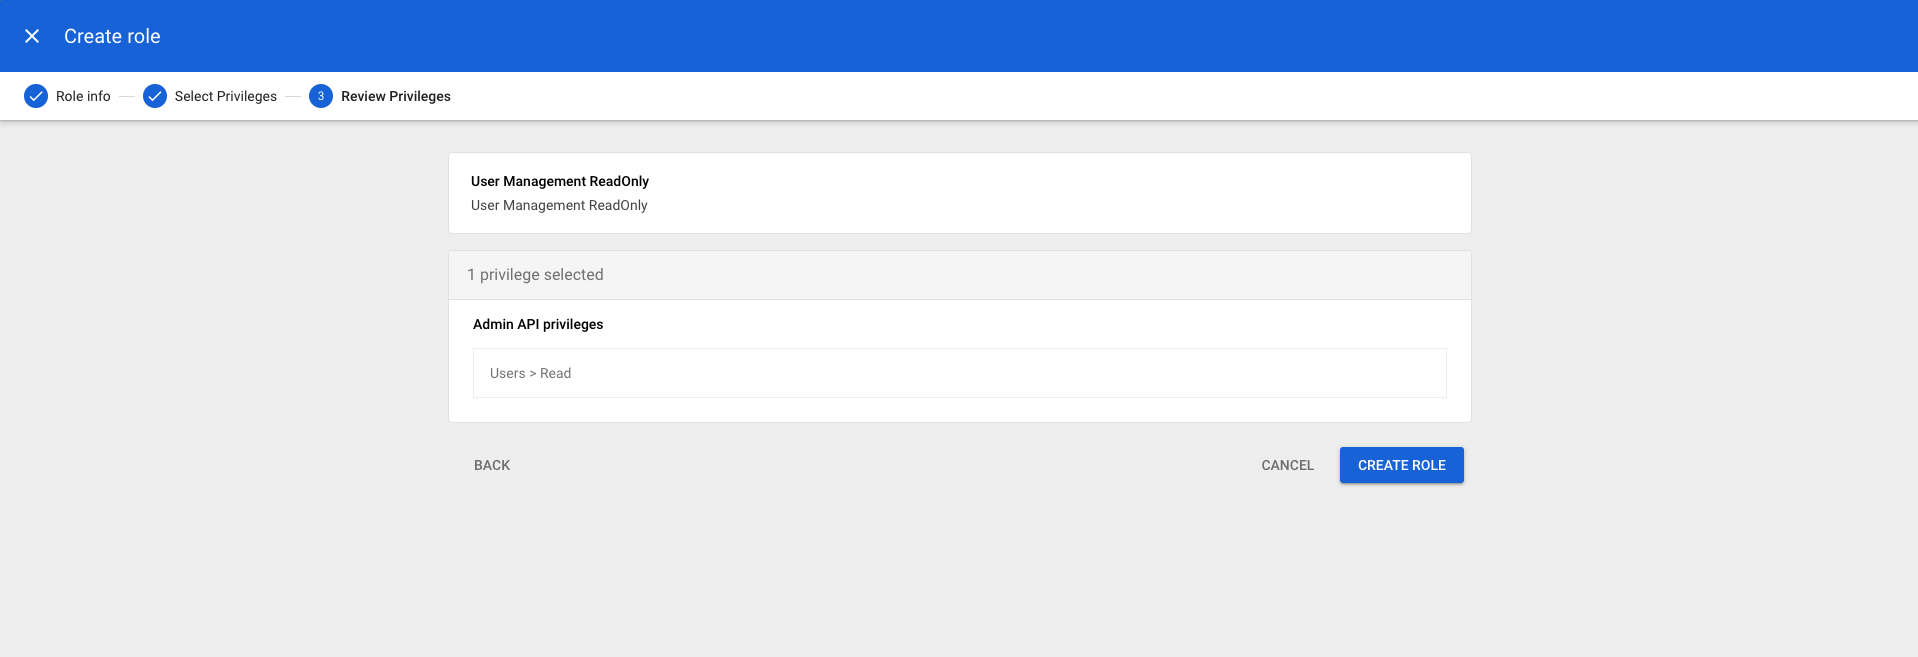
- Click CREATE ROLE
- Click Assign service accounts
- Add the service account email address
- Click ADD then ASSIGN ROLE

- Navigate to Account Settings and note the Customer ID
Step 6: Encode Service Account Key
base64 -i <SERVICE_ACCOUNT_KEY_PATH>
Step 7: Configure NetBird
Set properties in the setup.env file:
NETBIRD_DOMAIN="<YOUR_DOMAIN>"
NETBIRD_AUTH_OIDC_CONFIGURATION_ENDPOINT="https://accounts.google.com/.well-known/openid-configuration"
NETBIRD_USE_AUTH0=false
NETBIRD_AUTH_AUDIENCE="<OAUTH_CLIENT_ID>"
NETBIRD_AUTH_CLIENT_ID="<OAUTH_CLIENT_ID>"
NETBIRD_AUTH_CLIENT_SECRET="<OAUTH_CLIENT_SECRET>"
NETBIRD_AUTH_SUPPORTED_SCOPES="openid profile email"
NETBIRD_AUTH_REDIRECT_URI="/auth"
NETBIRD_AUTH_SILENT_REDIRECT_URI="/silent-auth"
NETBIRD_TOKEN_SOURCE="idToken"

NETBIRD_AUTH_DEVICE_AUTH_PROVIDER="none"

NETBIRD_MGMT_IDP="google"
NETBIRD_MGMT_IDP_SIGNKEY_REFRESH=true
NETBIRD_IDP_MGMT_EXTRA_SERVICE_ACCOUNT_KEY="<BASE64_SERVICE_ACCOUNT_KEY>"
NETBIRD_IDP_MGMT_EXTRA_CUSTOMER_ID="<GOOGLE_WORKSPACE_CUSTOMER_ID>"
Step 8: Continue with NetBird Setup
You've configured all required resources in Google Workspace. Continue with the NetBird Self-hosting Guide.
Troubleshooting
"Access blocked" error
- Ensure OAuth consent screen is configured correctly
- For external apps, you may need to submit for verification or add test users
- Check that required scopes are added
"Invalid redirect URI" error
- Verify the redirect URI exactly matches what's in Google Cloud Console
- Check for trailing slashes or HTTP vs HTTPS mismatches
- Google is case-sensitive for redirect URIs
Users from wrong domain signing in
- For Workspace, use Internal user type in OAuth consent screen
- Verify domain restrictions in consent screen settings
Service account not syncing users
- Verify Admin SDK API is enabled
- Check that the service account has the User Management ReadOnly role
- Ensure the Customer ID is correct
NetBird includes built-in local user management powered by an embedded IdP, allowing you to create and manage users directly without requiring an external identity provider. You can also add multiple external identity providers alongside local users, giving users multiple login options.
We highly recommend using the simpler setup that adds Google as an external IdP directly in the NetBird Management Dashboard. This approach requires minimal configuration, works alongside local users, and doesn't require replacing your embedded IdP. See the Management Setup (Recommended) section in the main Google Workspace documentation.