Provision Users and Groups From Google Workspace
Google Workspace provides a comprehensive suite of cloud-based productivity tools that enhance team collaboration and communication. Notably, its identity management features streamline user authentication and access control, ensuring efficiency and security across your organization.
NetBird's Google Workspace integration enhances user management capabilities by synchronizing users and groups from Google Workspace to NetBird. You can utilize these synchronized groups to configure your network, establish network access policies, and automate onboarding and offboarding processes, adding significant value to your organizational workflow and security posture.
The integration process involves two complementary services: Google Workspace and Google Cloud Platform (GCP). Google Workspace serves as your Identity Provider (IdP), managing user and group identities and providing Single Sign-On (SSO) capabilities. GCP is used to create a service account, which NetBird uses to authenticate and access Google Workspace data via the Admin SDK API. This service account uses OAuth 2.0 for secure, authorized access to Workspace information.
Get Started with NetBird-Google Workspace Integration
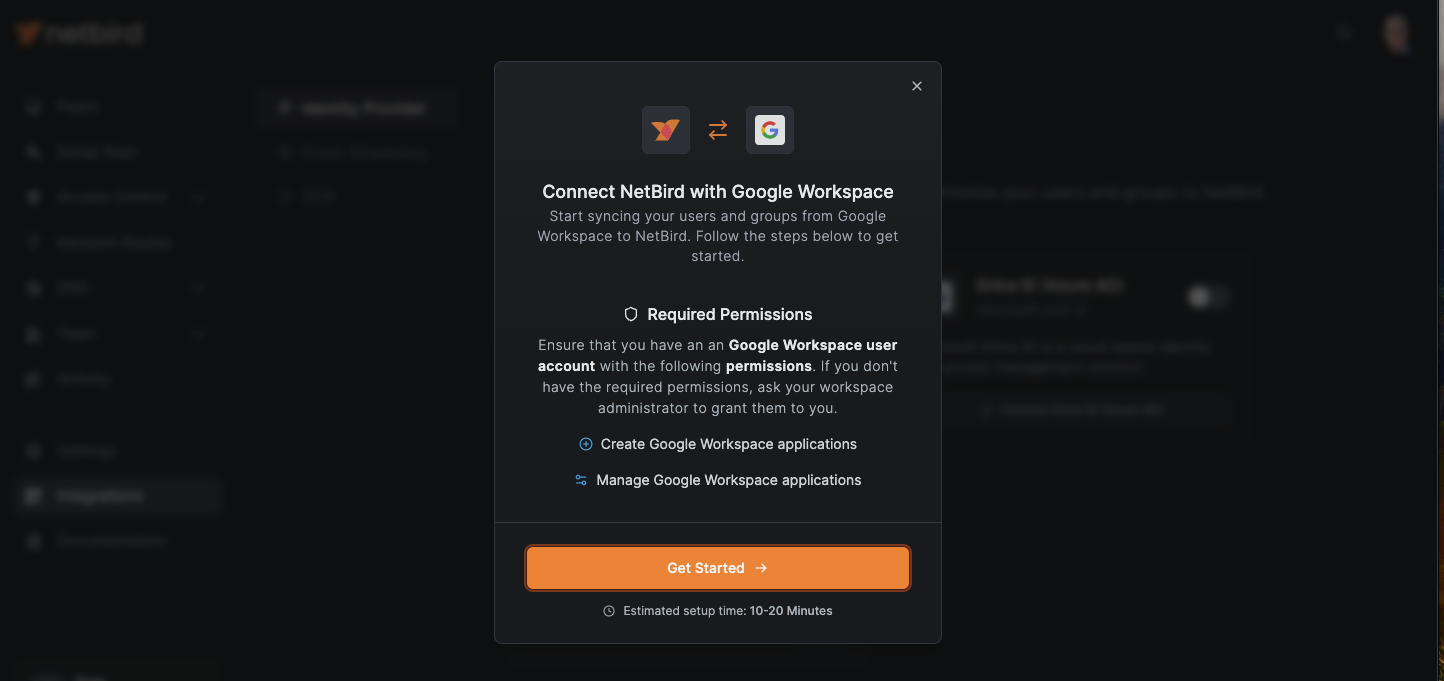
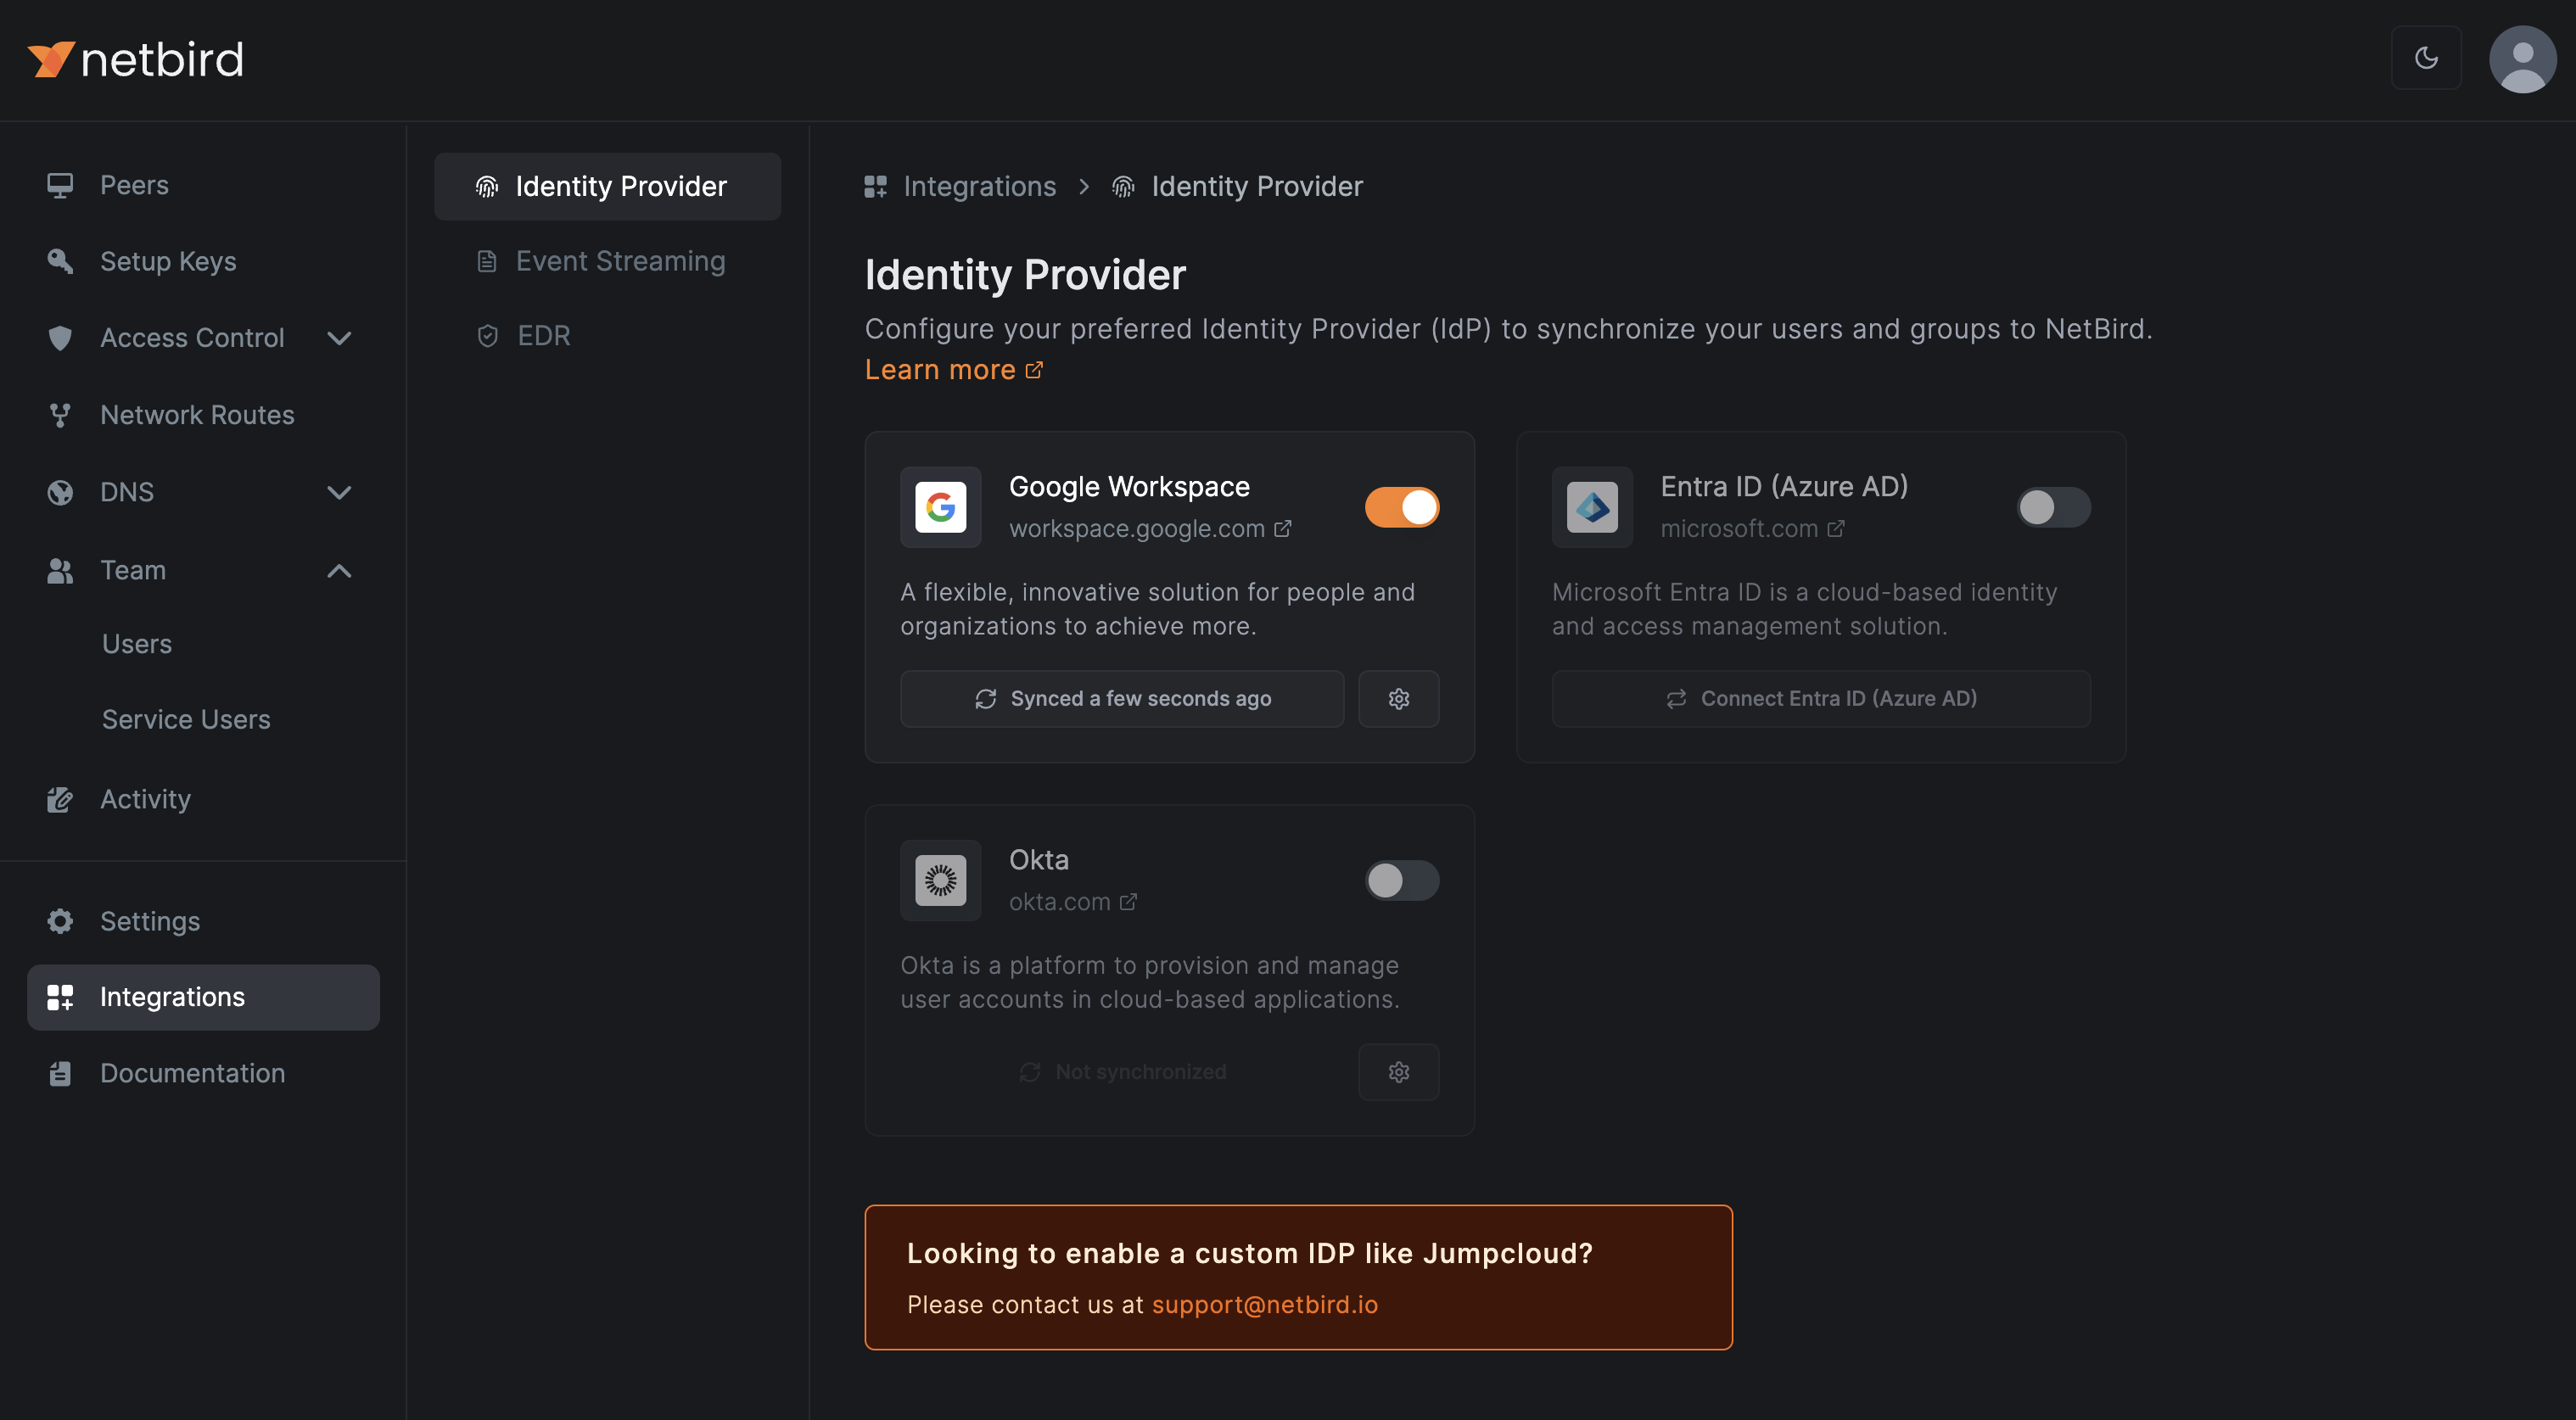
Go to the Integrations section in the left menu to access the Identity Provider integration. Click the Google Workspace button. This will open a pop-up window featuring an intuitive wizard to guide you through the synchronization process between NetBird and Google Workspace.
Prerequisites
The NetBird-Google Workspace integration process involves:
- Creating a project on the Google Cloud Platform.
- Setting up a service account within that GCP project.
- Creating a secret key for the service account.
- Creating a new role in Google Workspace for the service account.
- Granting the service account the appropriate role in Google Workspace.
You’ll need a Google Workspace user account with sufficient permissions to create and manage user and group access. User roles that have these permissions include:
- Super Admin
- Groups Admin
- User Management Admin
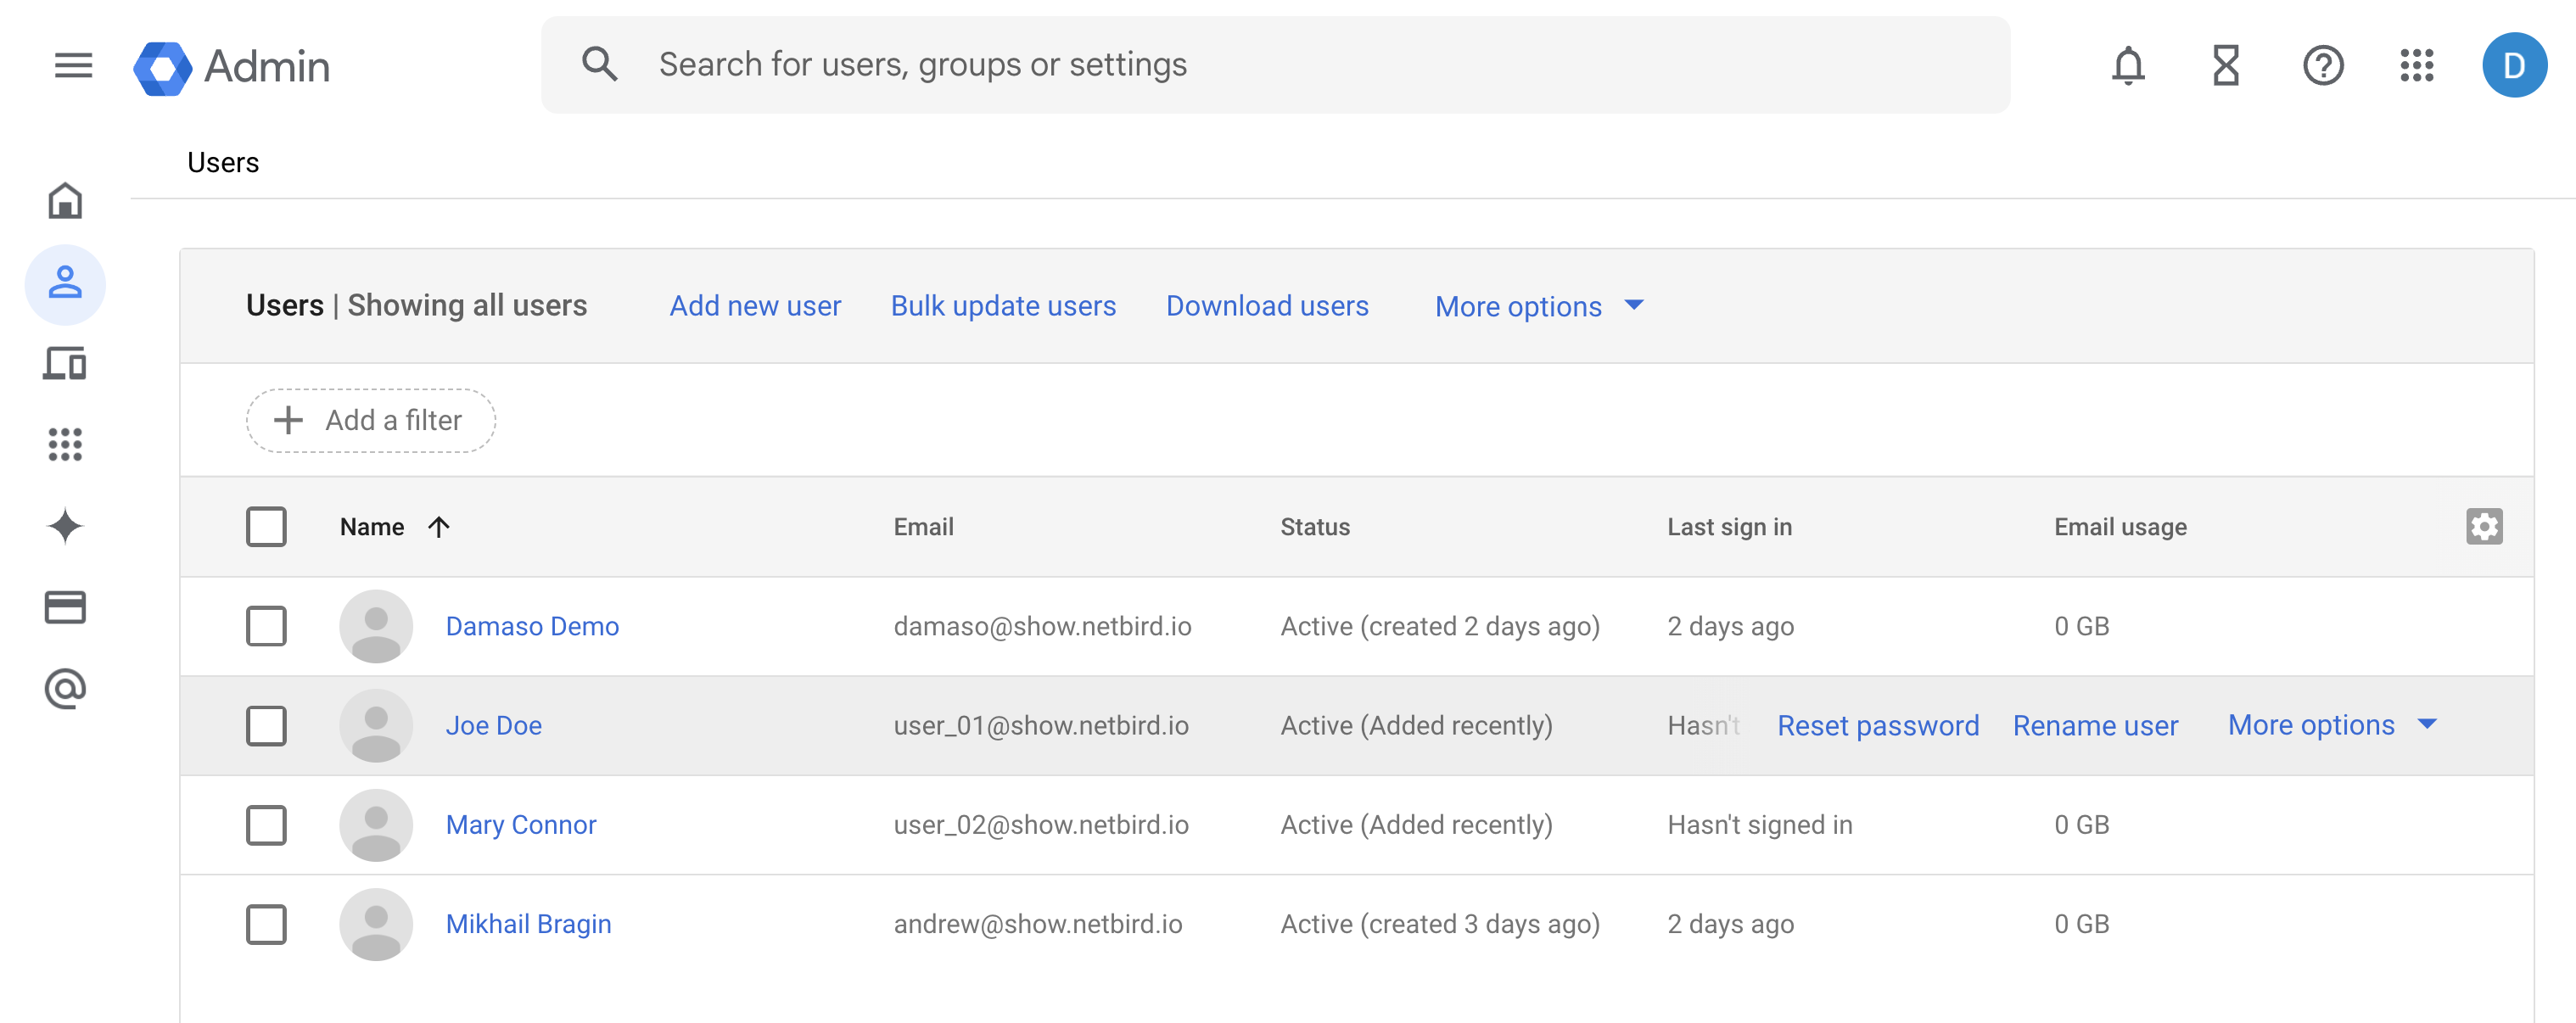
To check your user permissions within Google Workspace:
- Sign in to your Google Admin console
- Navigate to
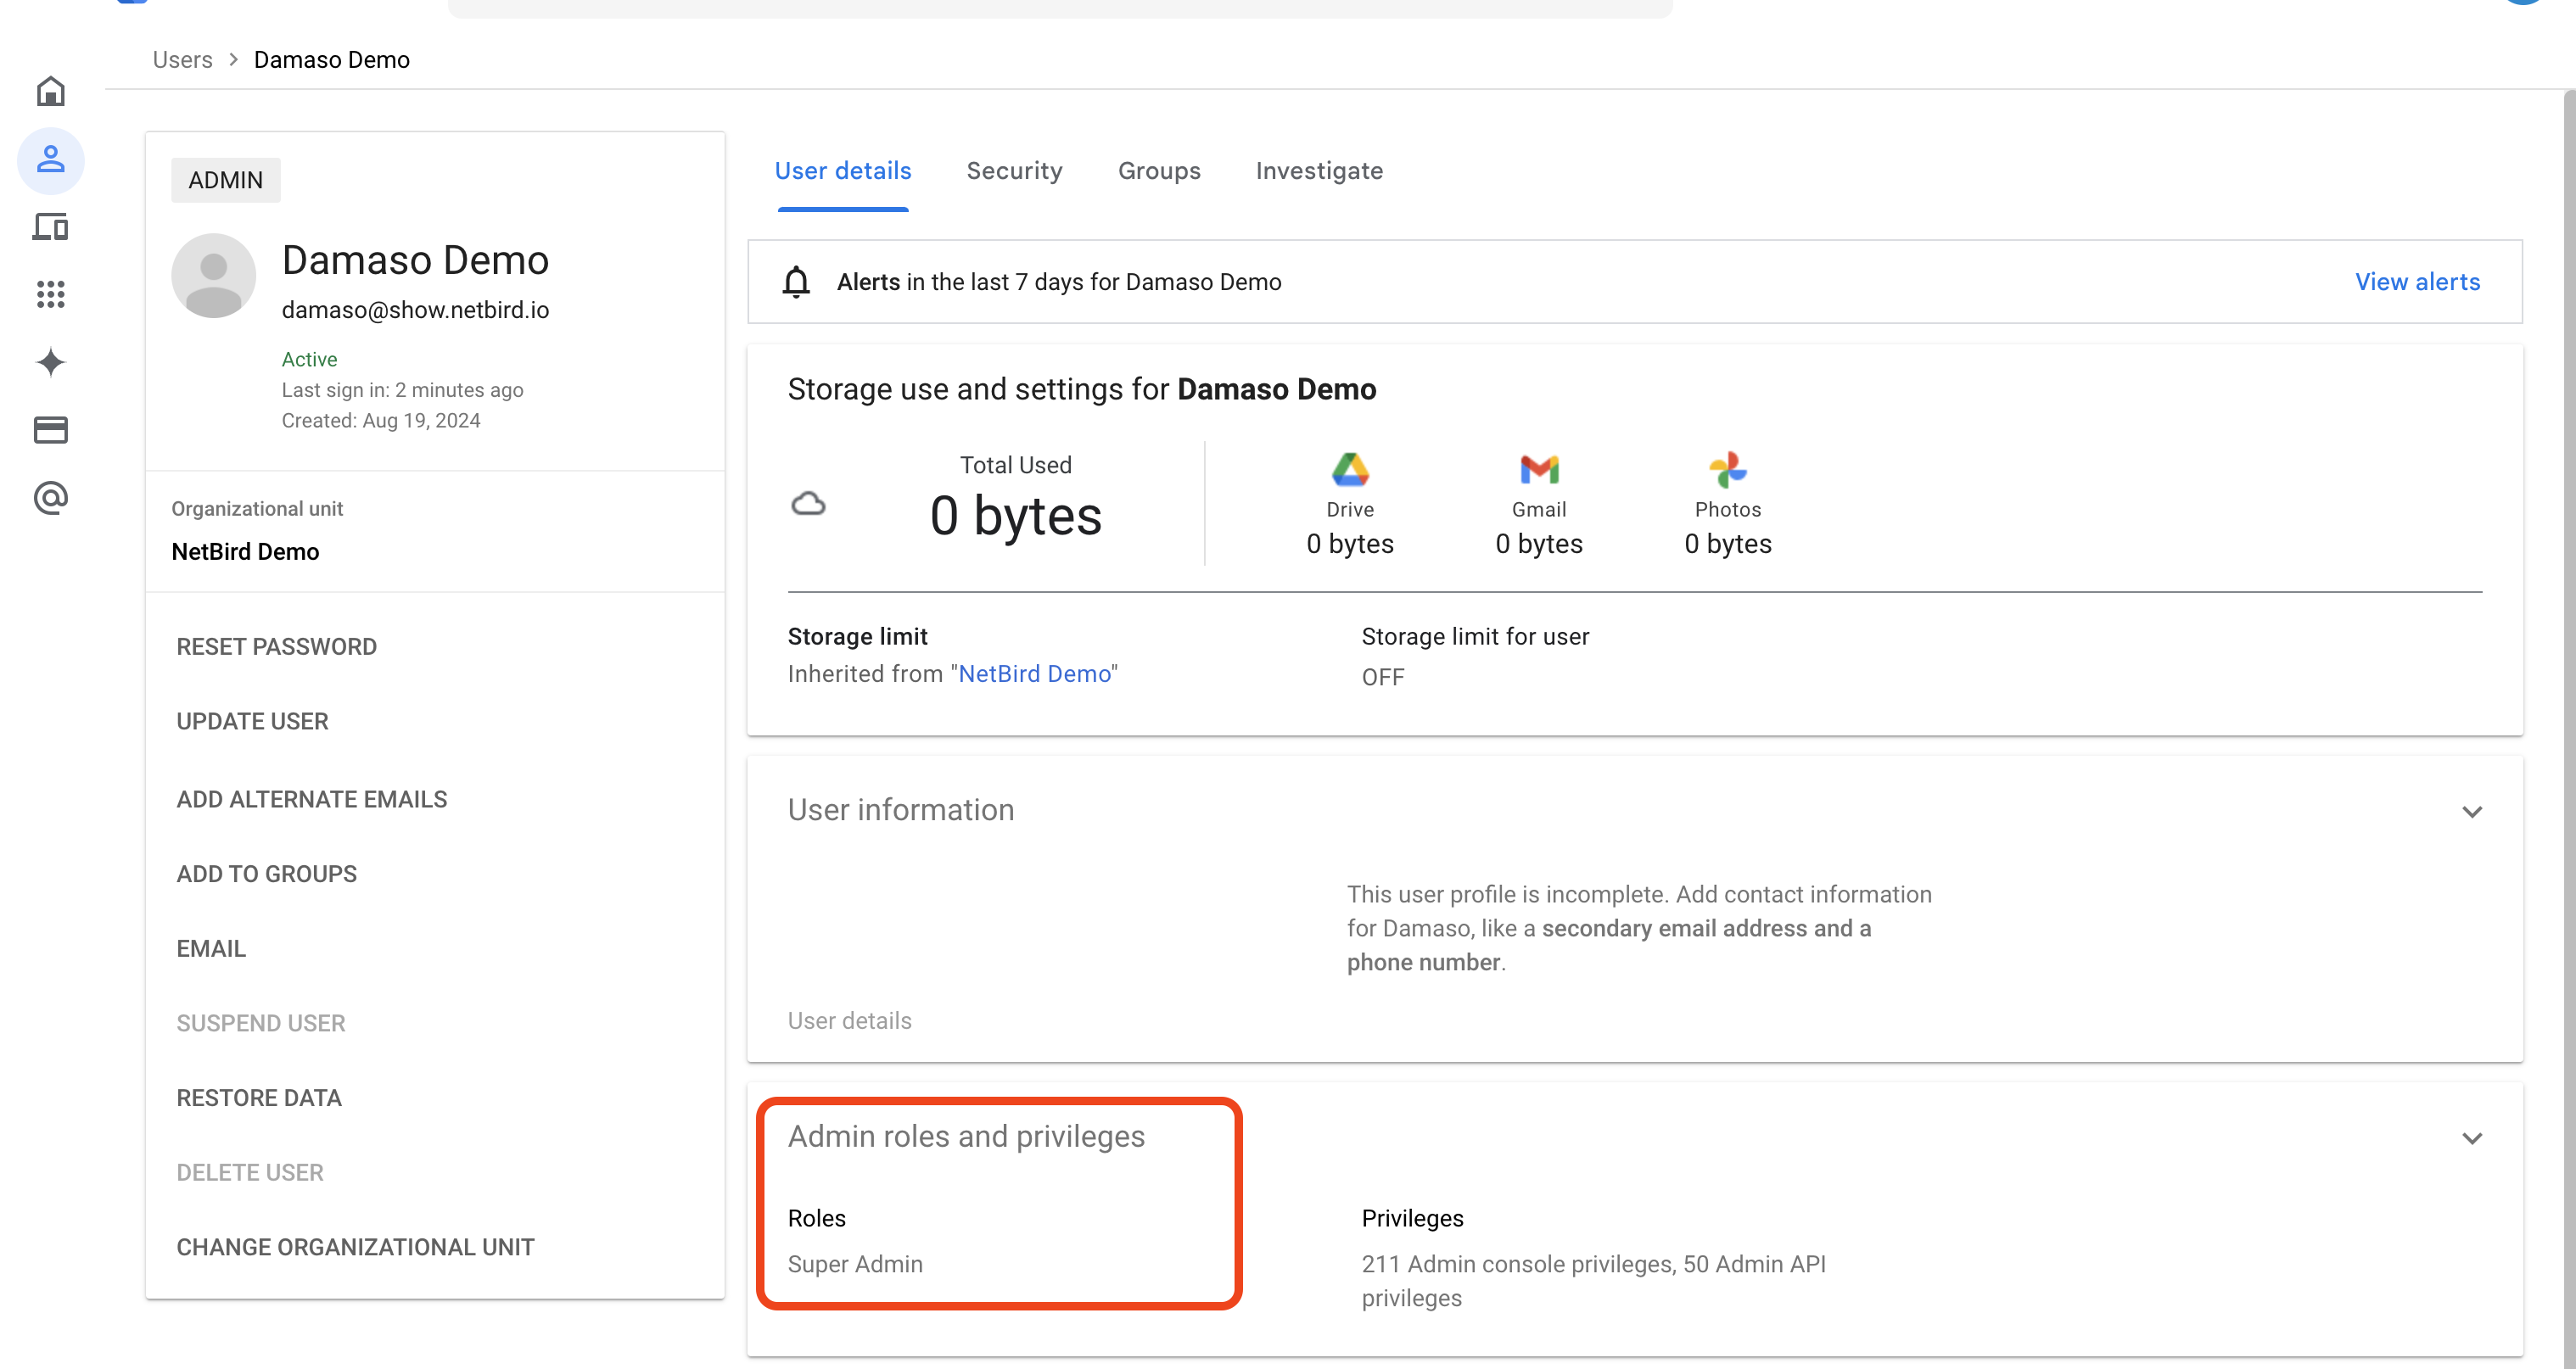
Directory>Users. - Select your user account and click on
Admin roles and privilegesto view assigned roles and permissions.
Confirm that you have one of the required roles before proceeding with the integration:
If you lack the required permissions, please contact your workspace administrator to request them.
Because Google Cloud automatically provision new organizations with Secure by Default enforcements, you’ll also need a GCP user account with enough permissions to create service account keys. User roles that have these permissions include:
- Organization Administrator
- Organization Policy Administrator
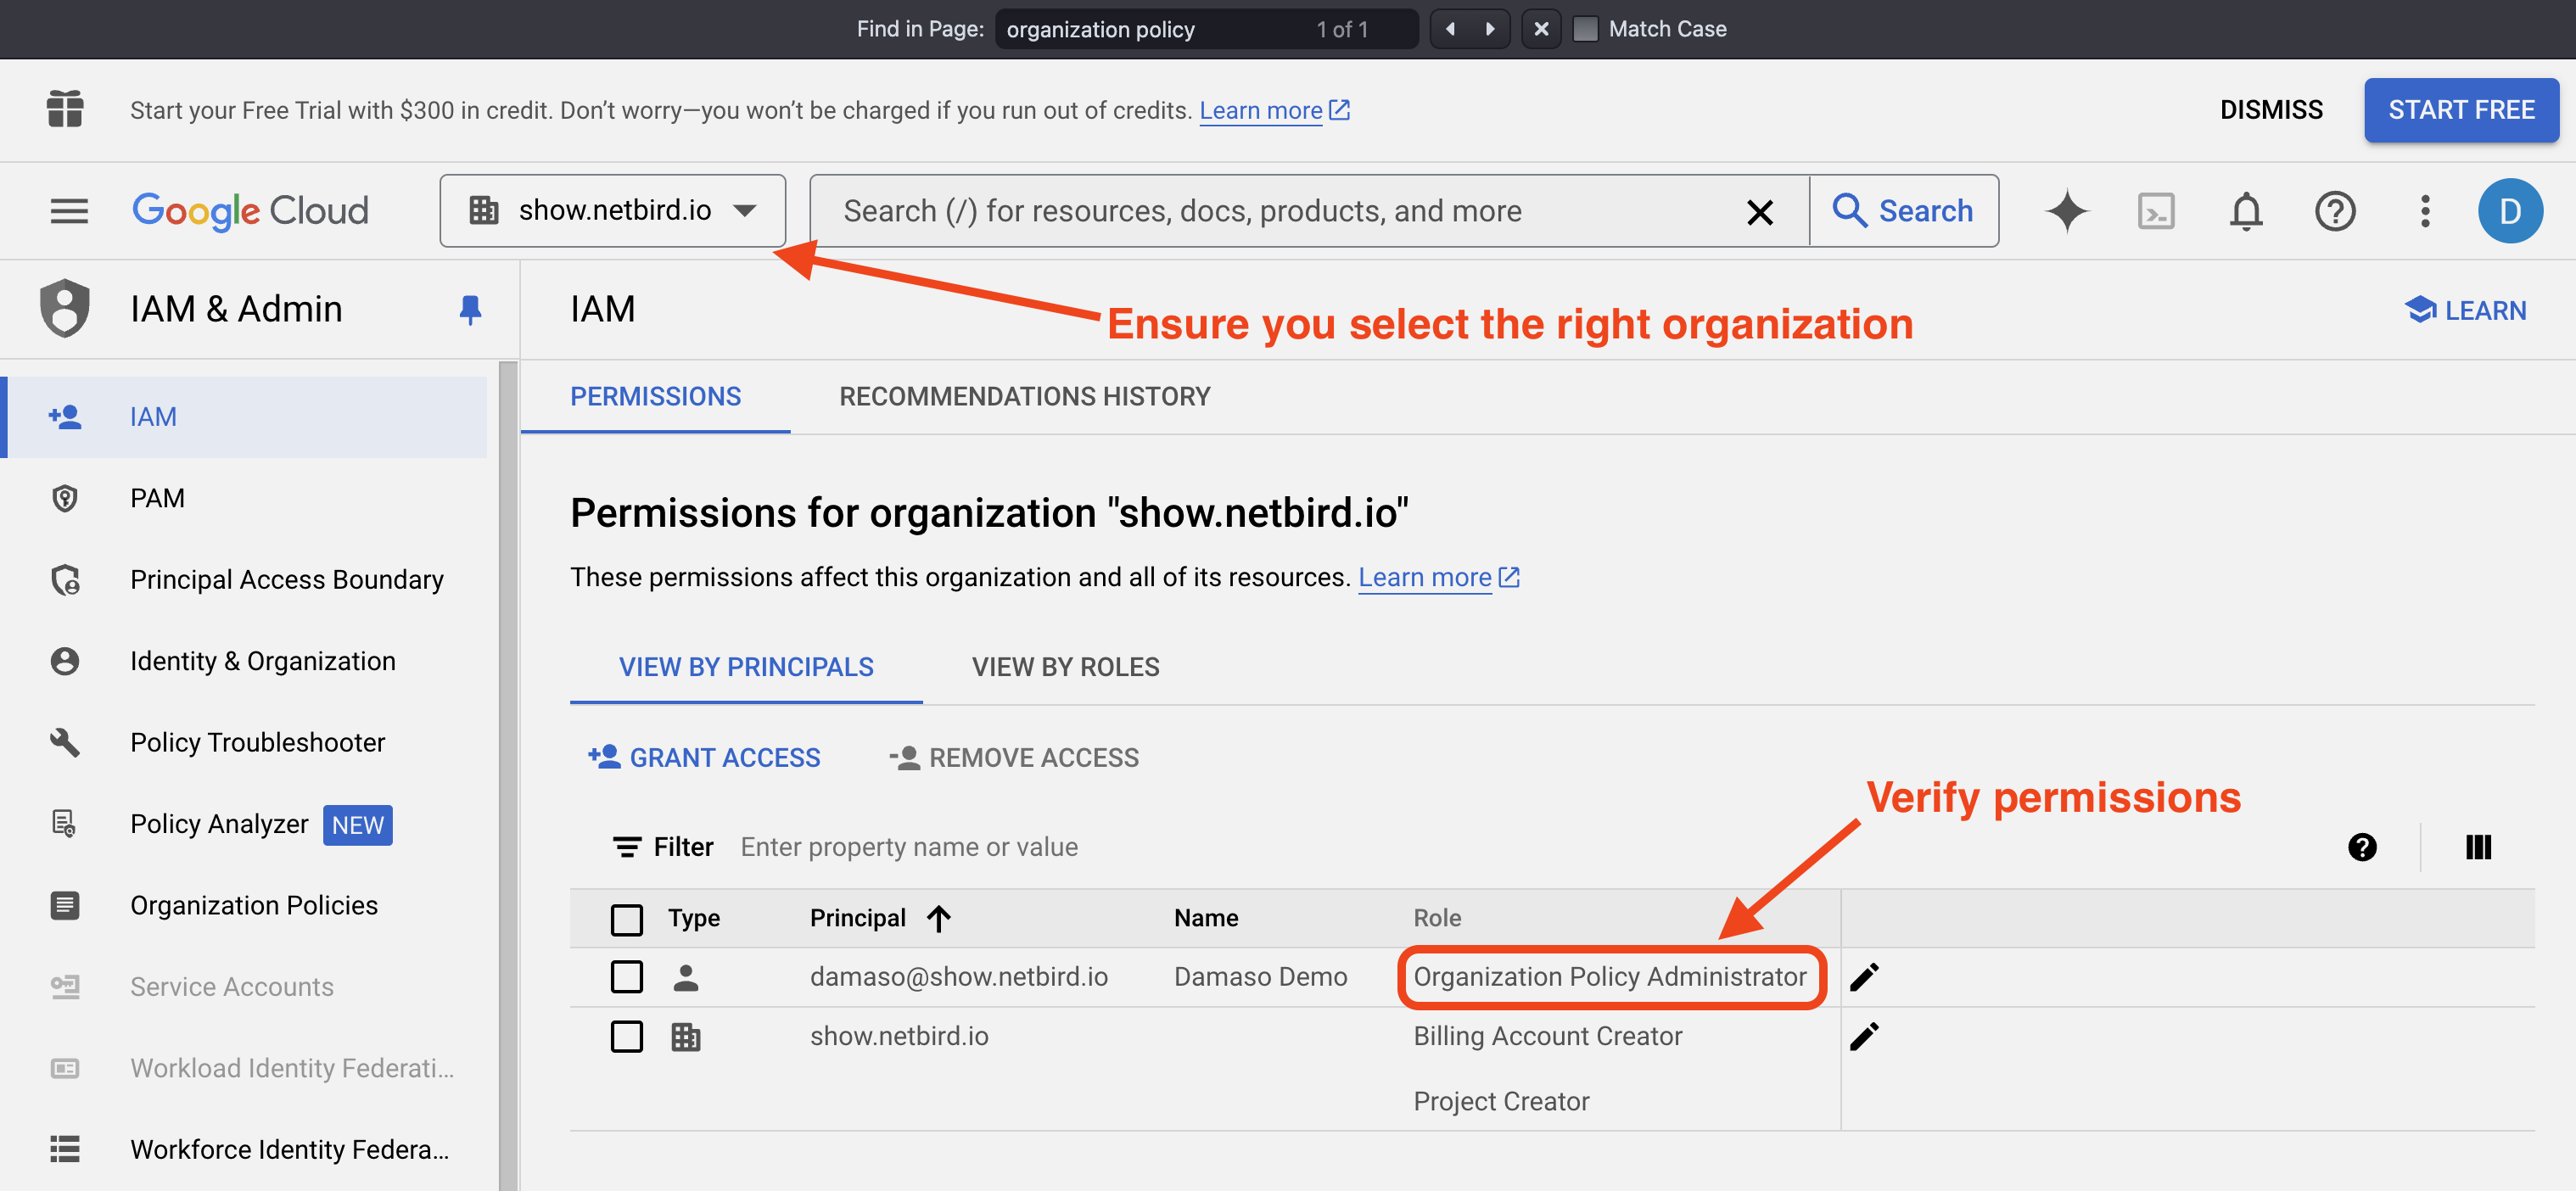
To check your organization-level permissions within Google Cloud:
- Sign in to Google Console
- In the top bar, click on the dropdown. Find and select your organization in the list.
- Once you've selected the organization, go to
IAM & Admin>IAMin the left sidebar. This will show you a list of all users (principals) and service accounts with roles at the organization level. - Look for users with roles like
Organization Administrator,Organization Policy Administrator, or other high-level roles.
NOTE: Verifying your GCP permissions is mandatory before proceeding with the integration since you might need to disable the
iam.disableServiceAccountKeyCreationconstraint temporarily during the process.
If you lack the required role, contact your organization's IT department or the person who set up your Google Cloud account.
Creating the NetBird Project
Once you have the necessary permissions, you can create the NetBird project in GCP.

Let's go through the required steps:
- Sign in to Google Console
- Click the project dropdown at the top of the page.
- Click
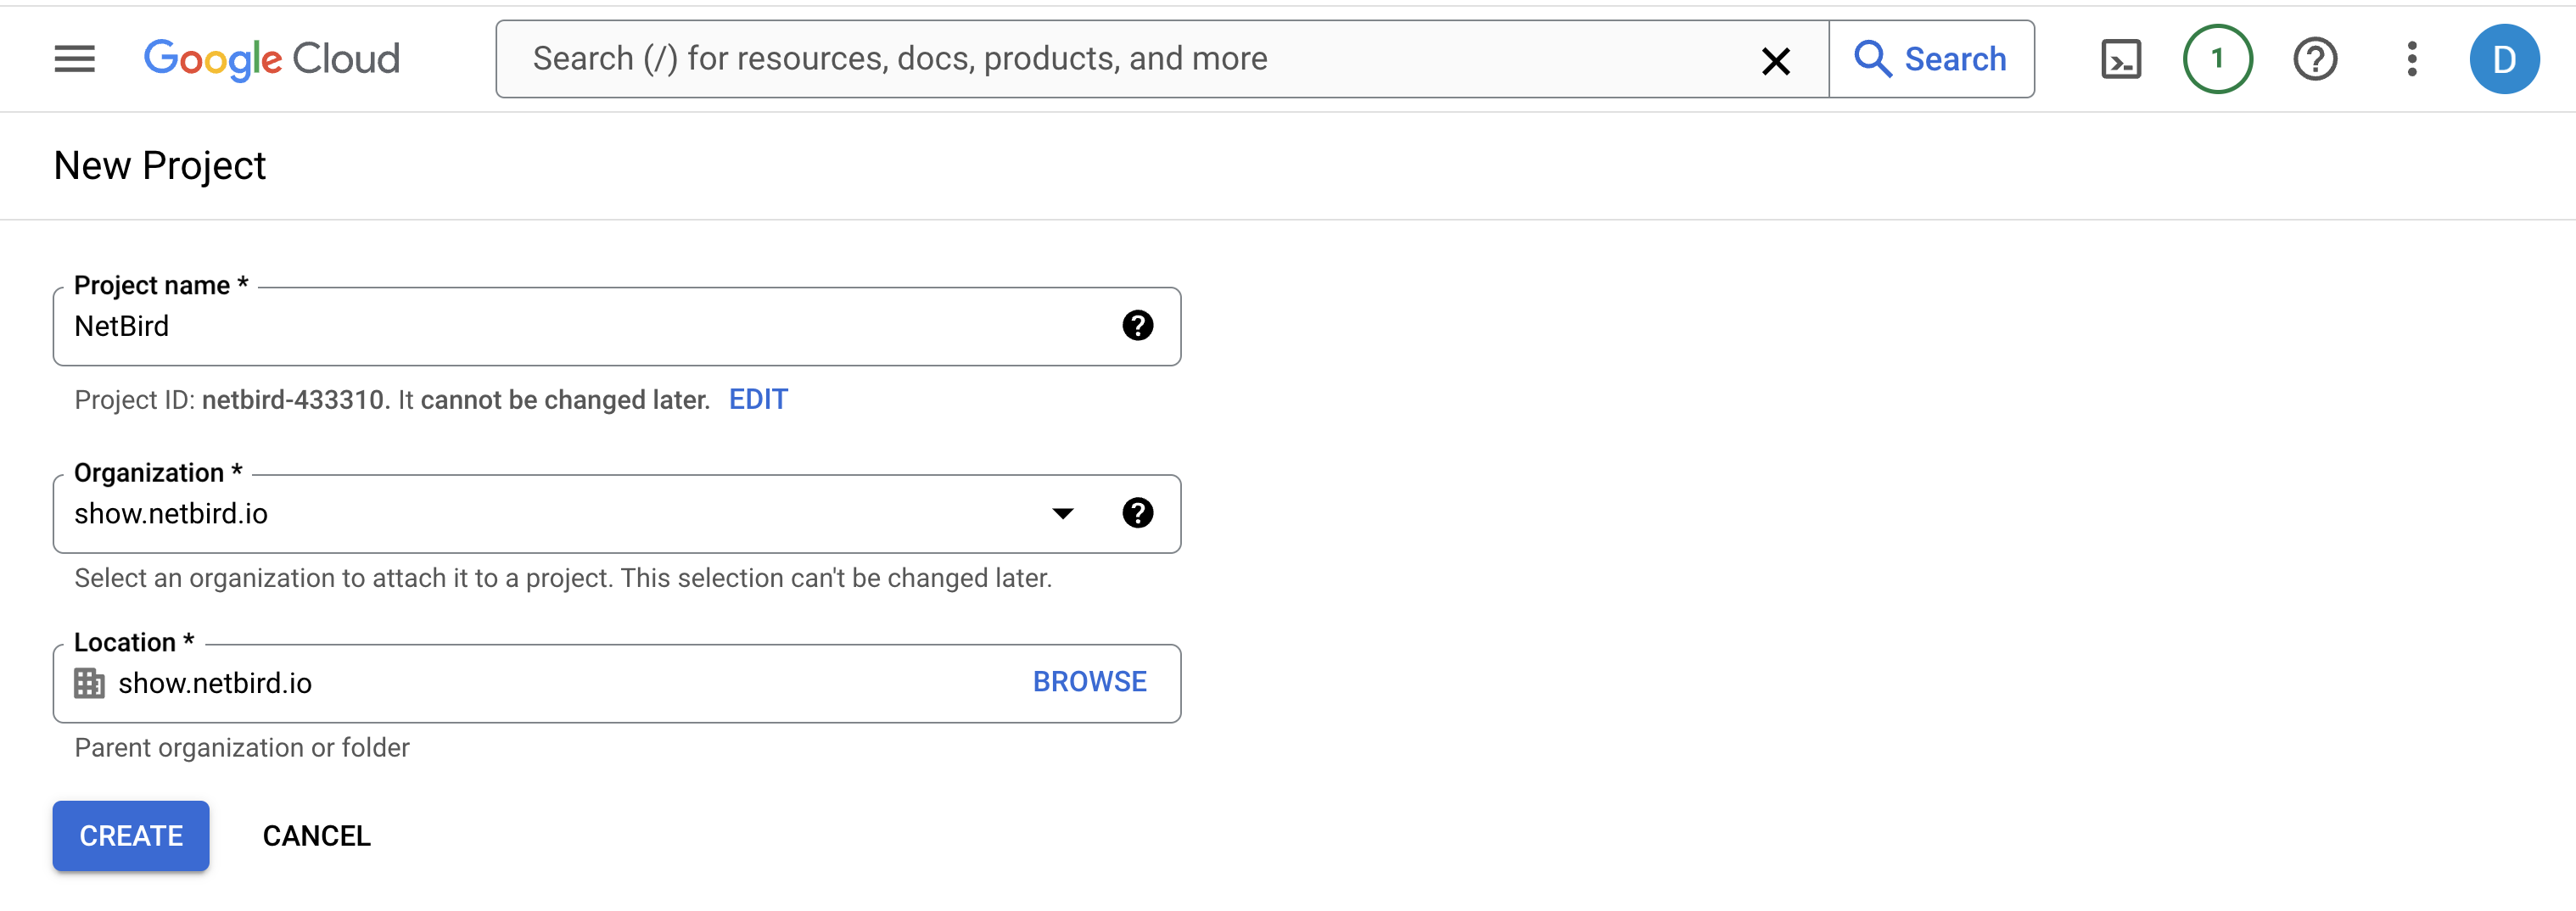
New Projectin the dropdown menu. - Enter
NetBirdas the project name. - Ensure the proper organization is selected in the
Organizationfield. - Click
CREATE.
To let NetBird authenticate and access Google Workspace, you must enable the Admin SDK API. Here’s how to do it:
- Ensure you're in the correct project.
- Navigate to https://console.cloud.google.com/apis/library/admin.googleapis.com
- Click the
Enablebutton.

Creating the NetBird Service Account
Once you create the project, you can set up the NetBird service account. On NetBird, click Continue →. That will show you a summary of the required steps.
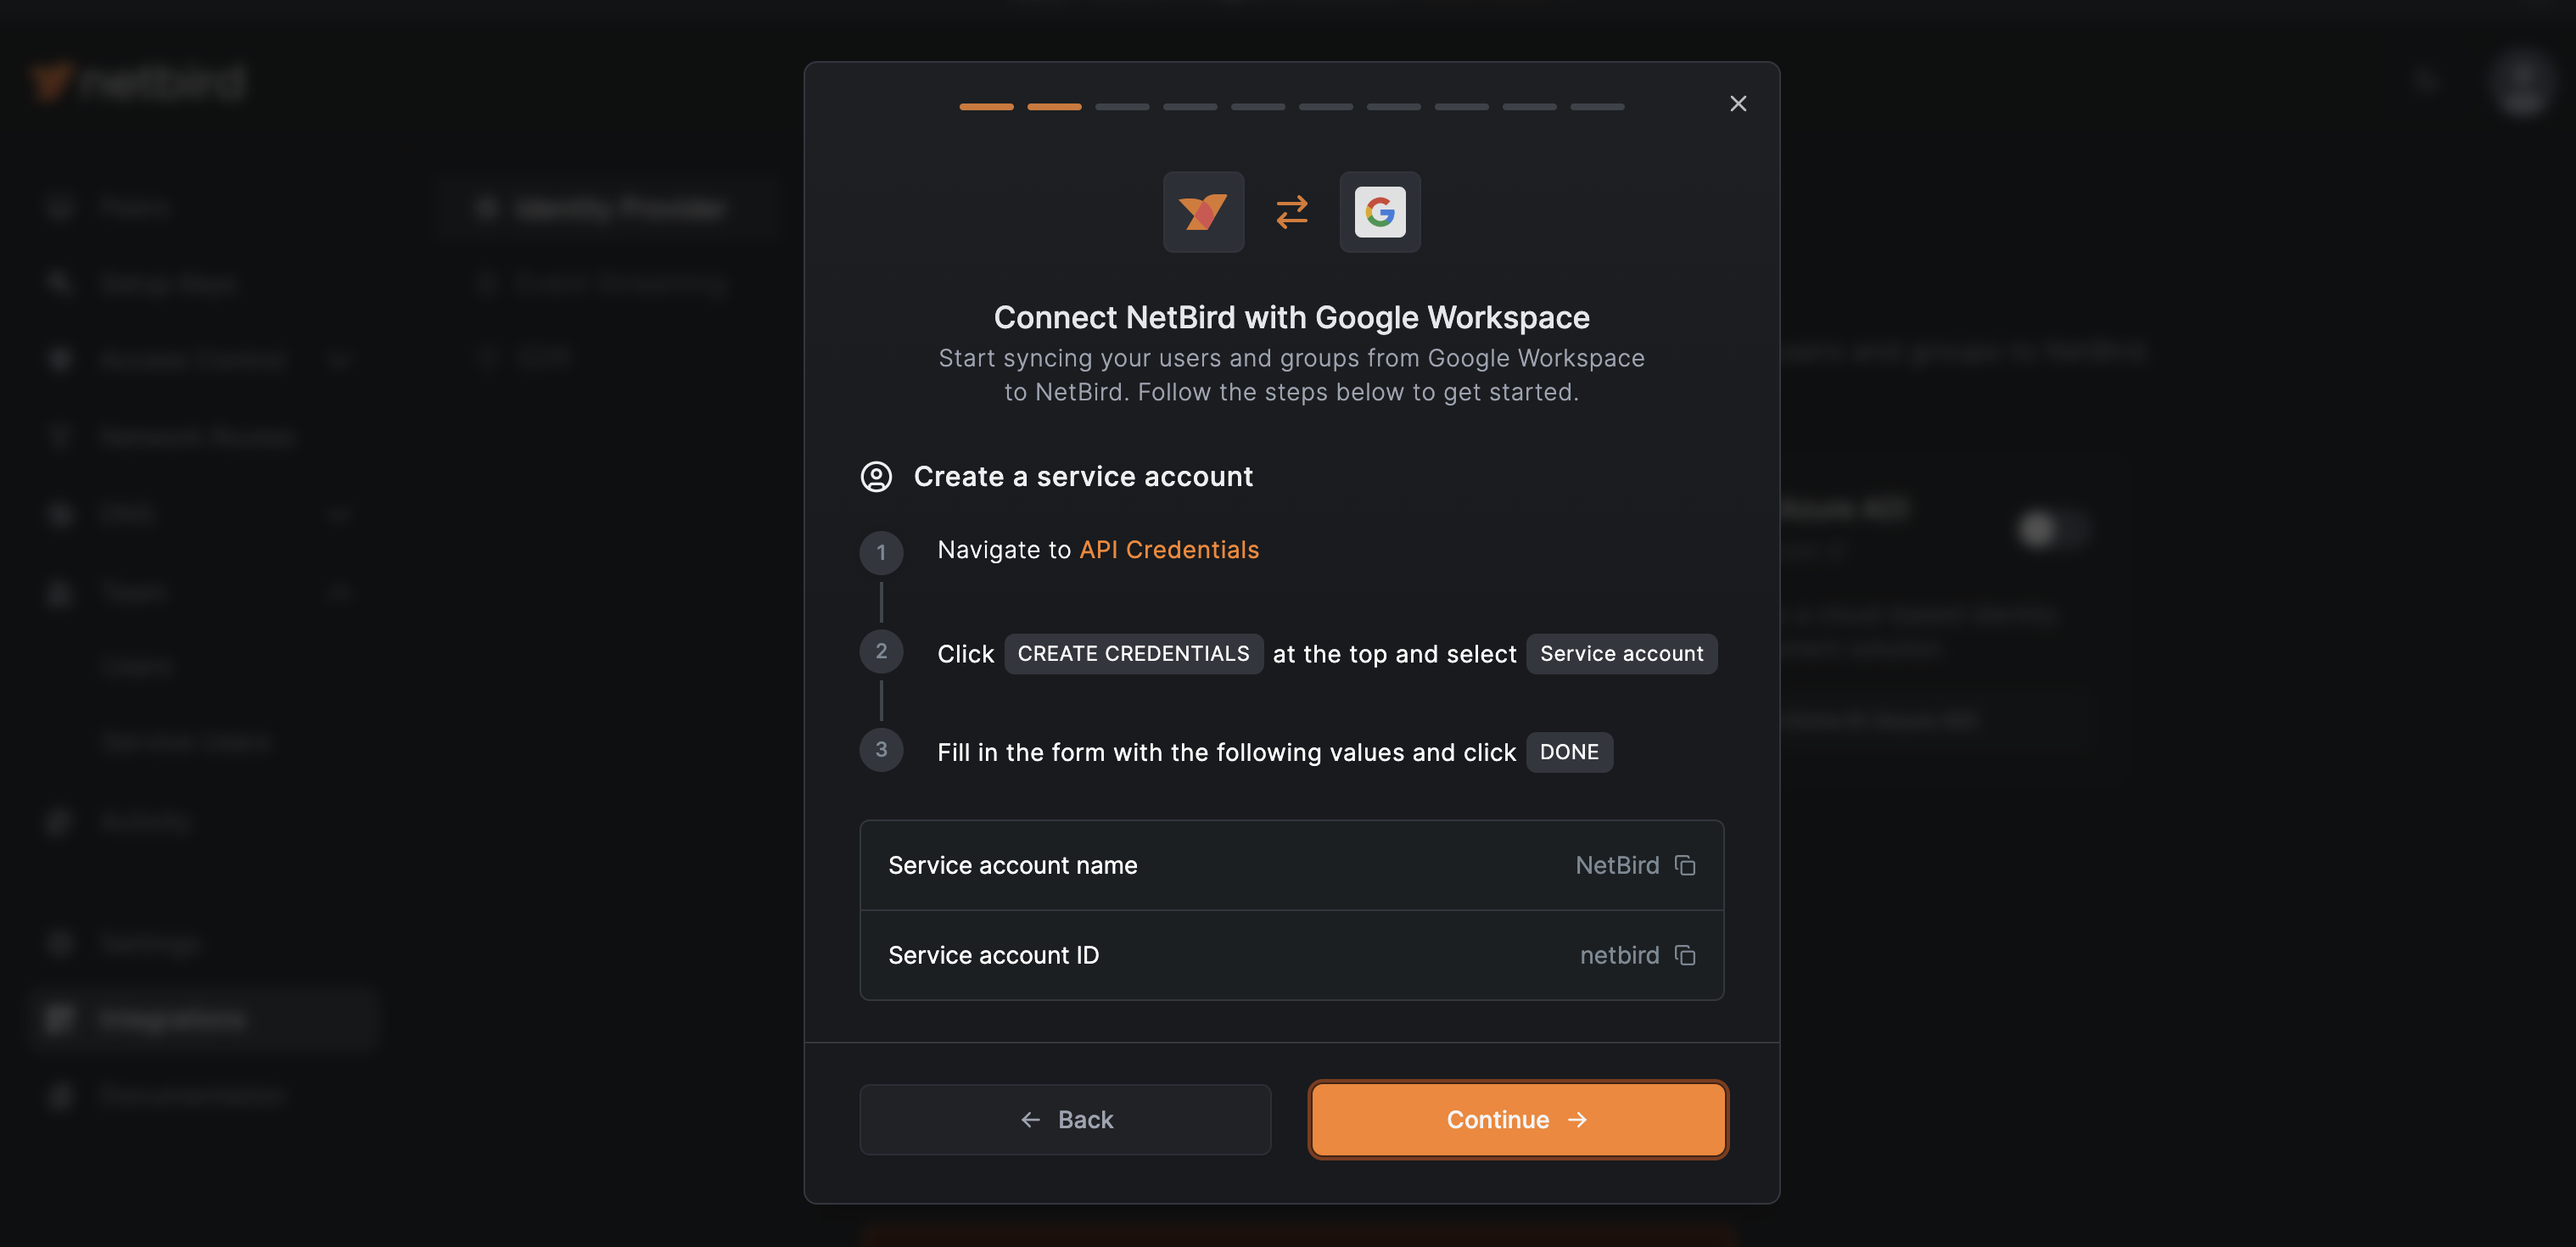
Here are the step-by-step instructions:
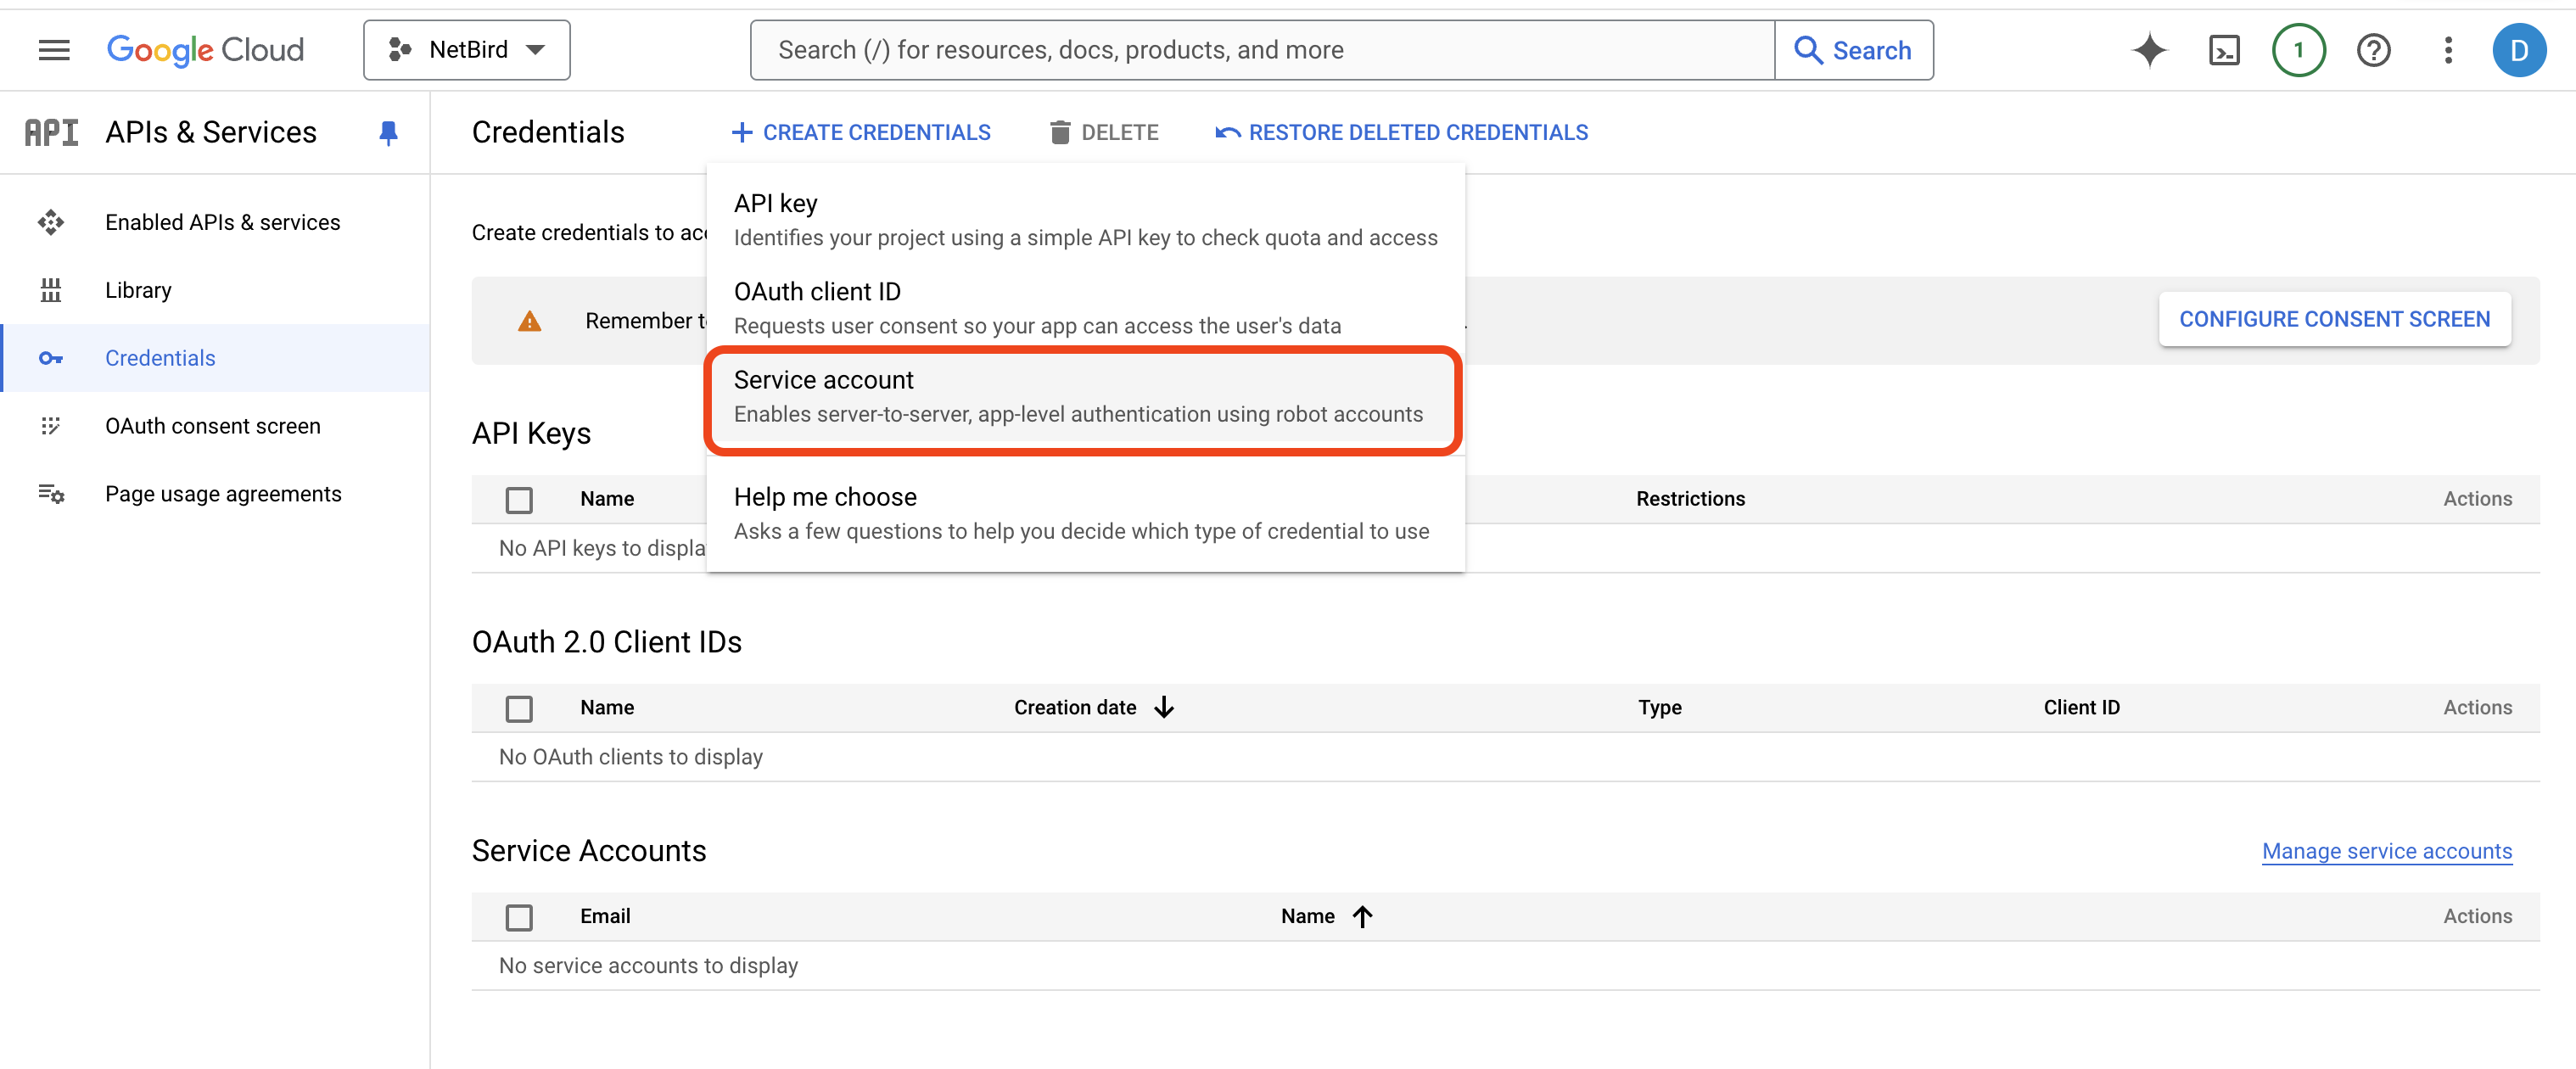
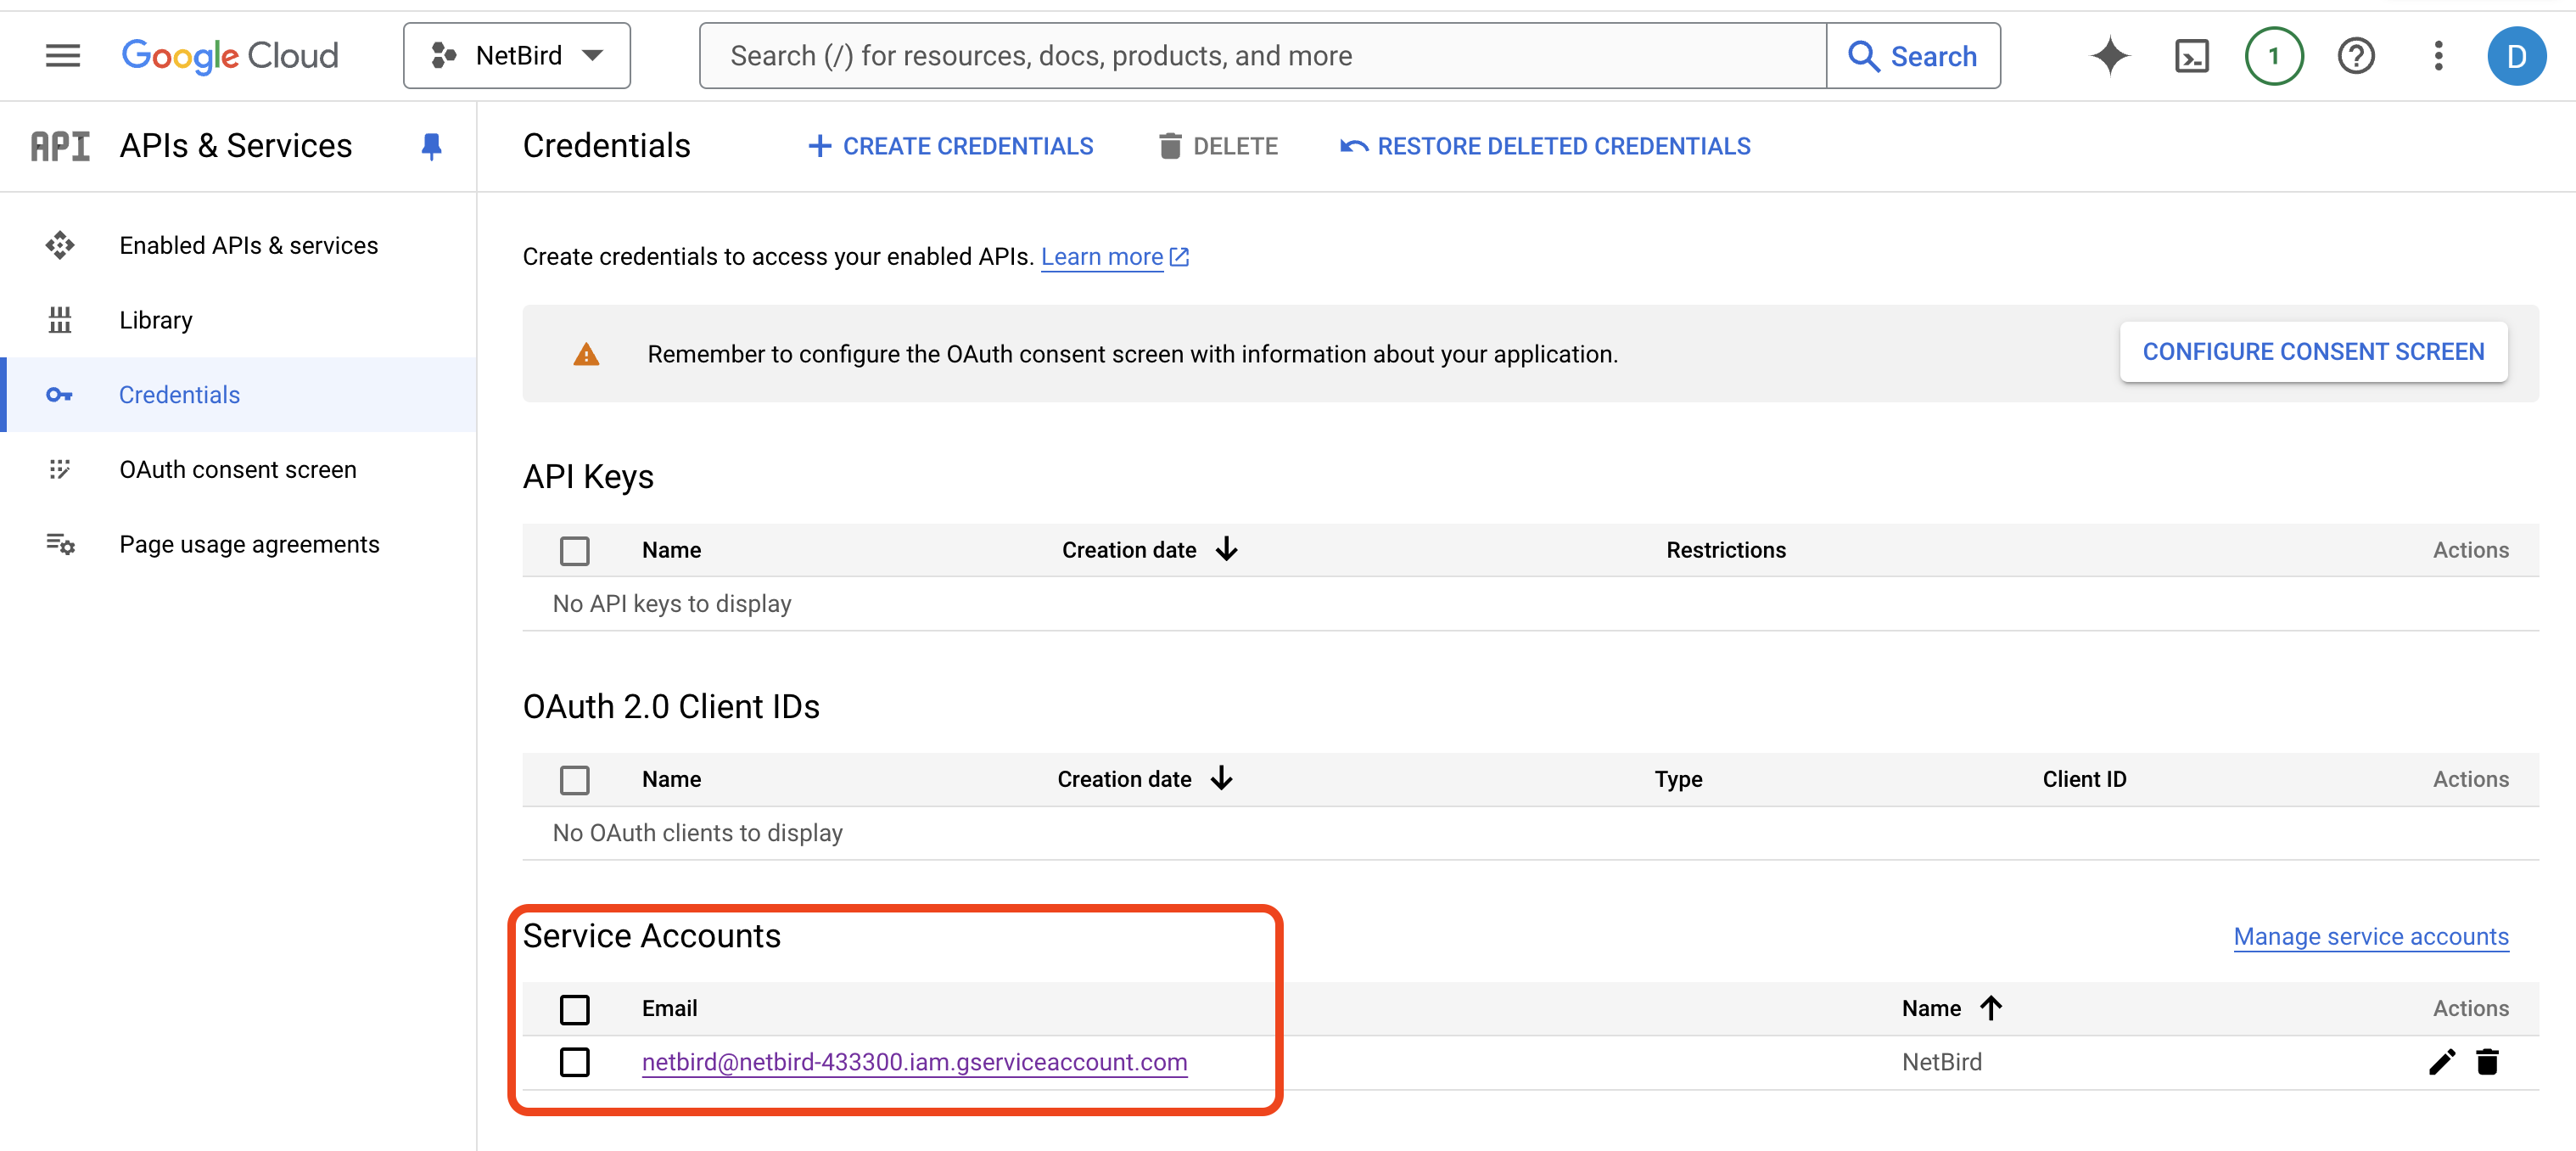
Navigate to https://console.cloud.google.com/apis/credentials, click CREATE CREDENTIALS at the top menu and select Service account from the dropdown list.
Complete the form with the supplied values:
NerBirdfor the service account namenetbirdfor the service account ID
Click DONE when ready.

Getting Your Service Account Email
On NetBird, click Continue →. You’ll need to provide the email of the service account.
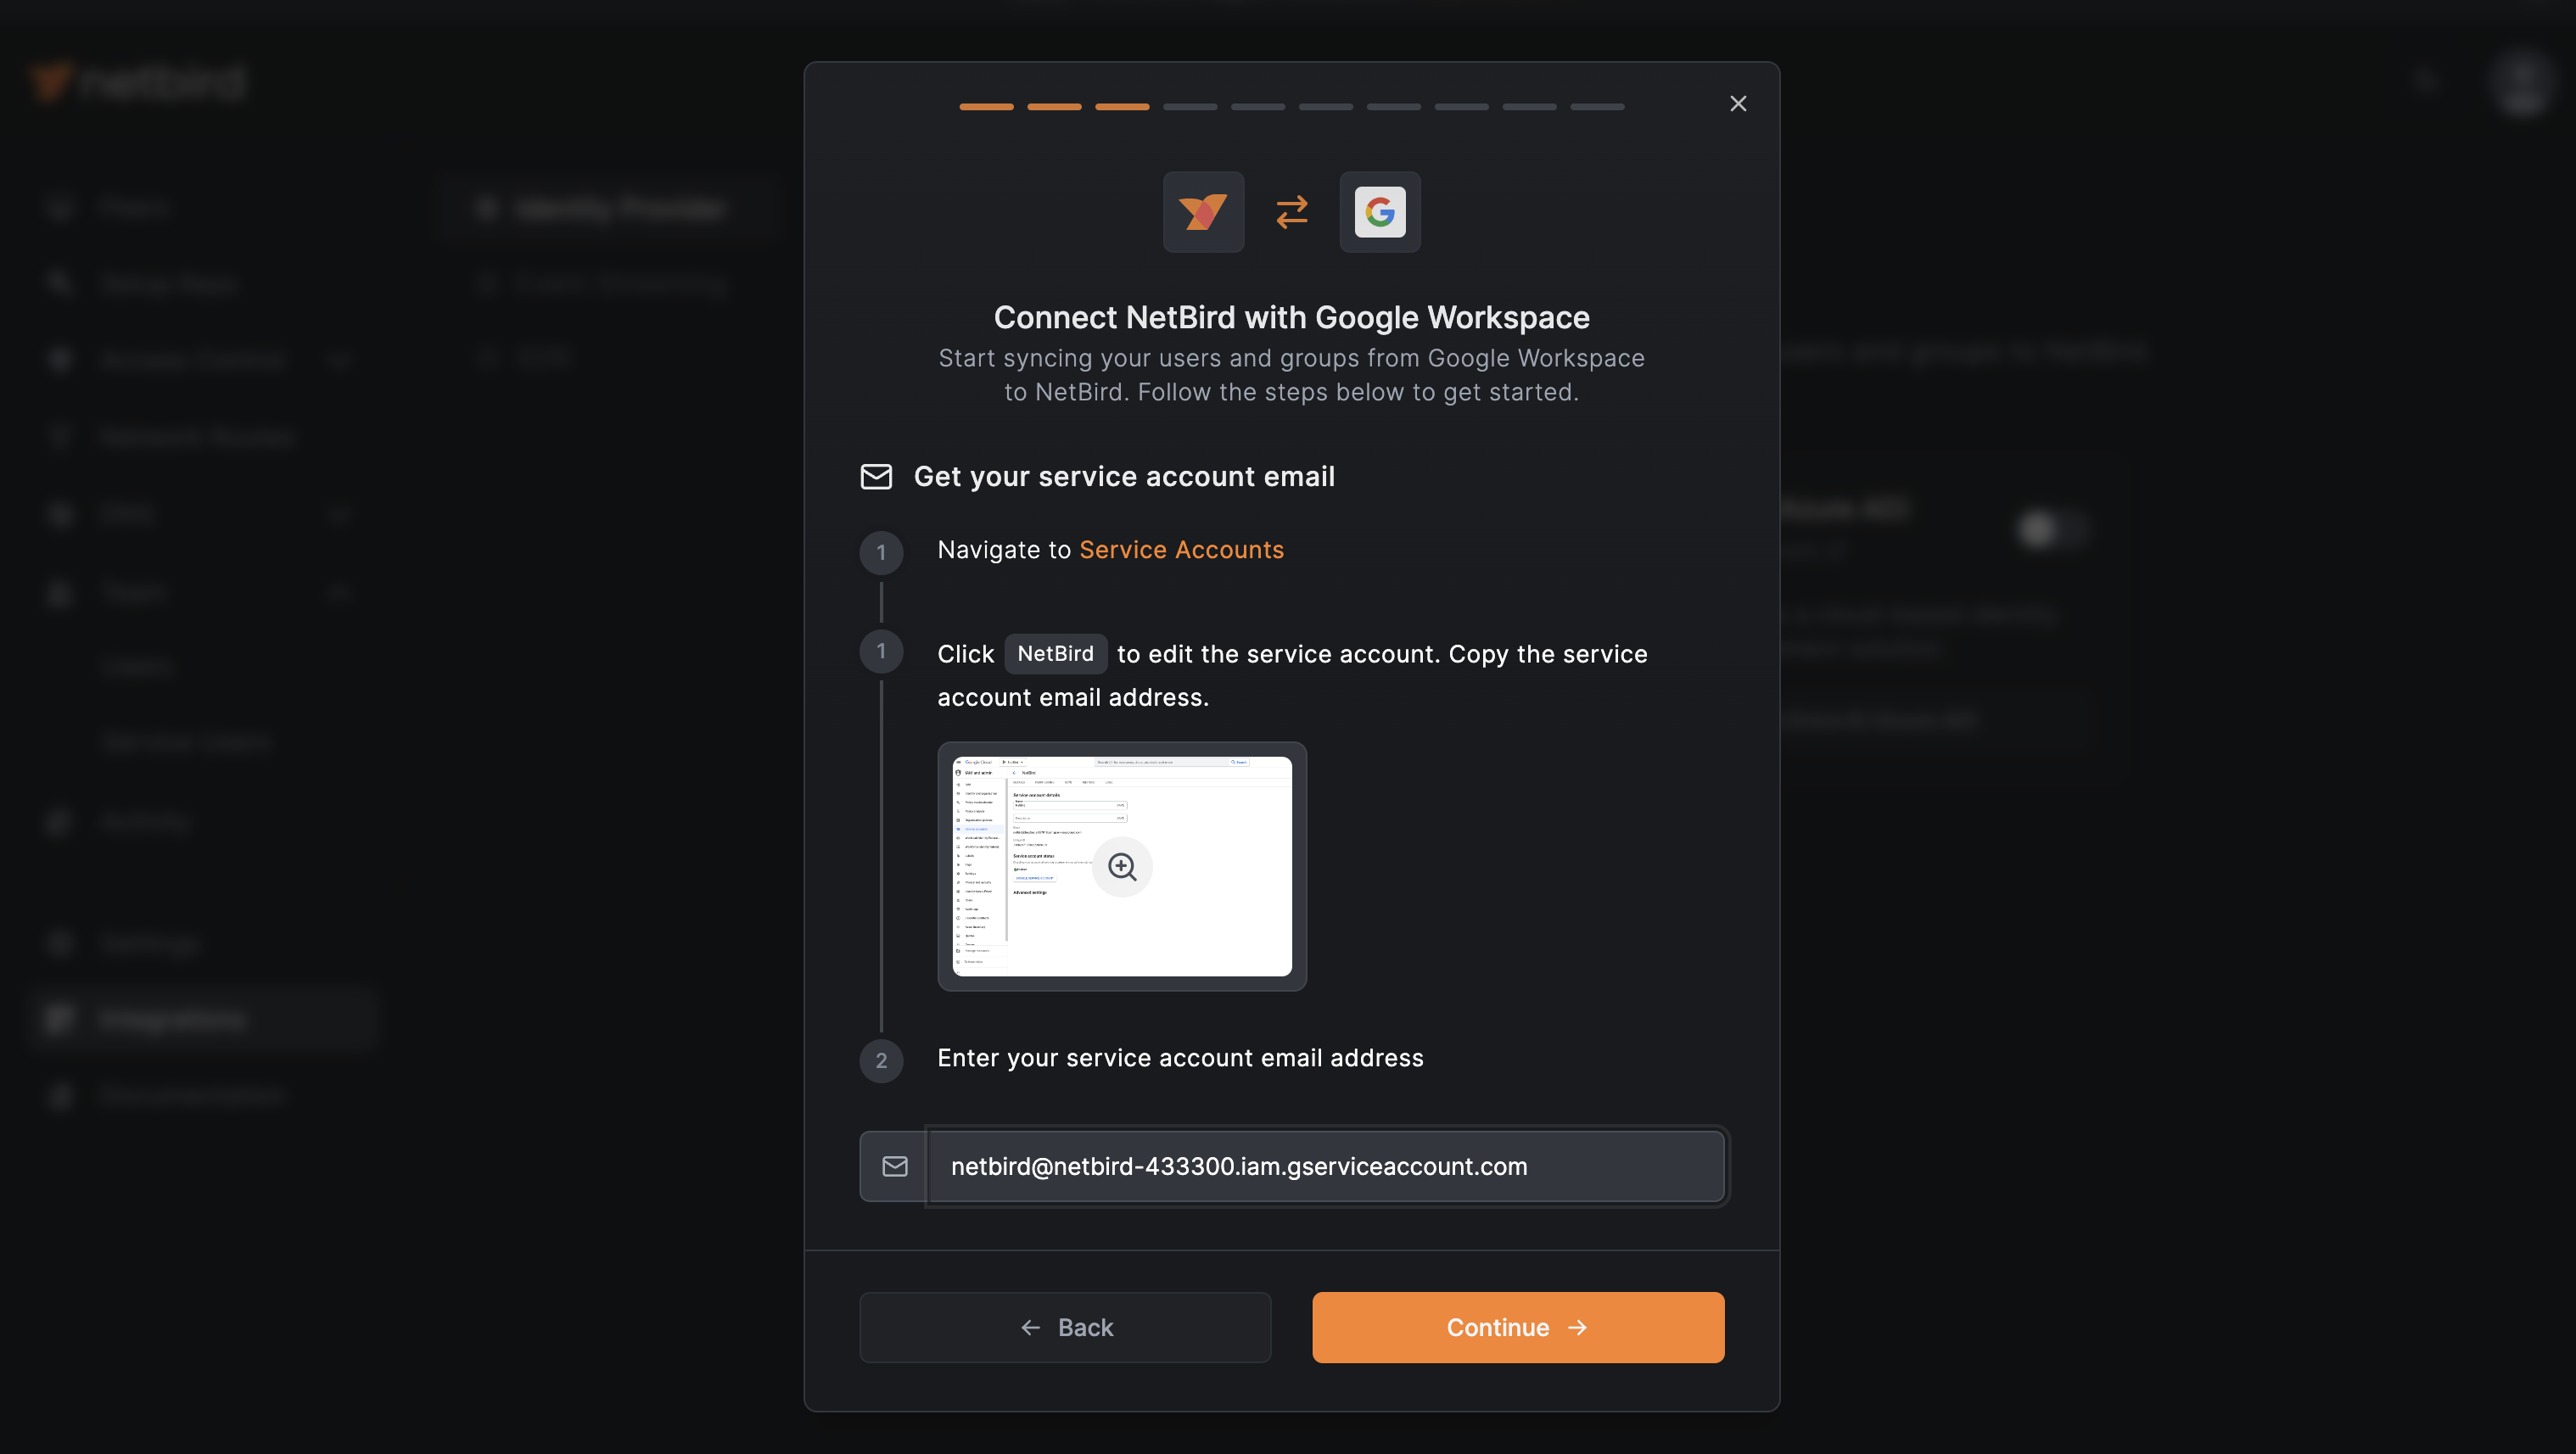
You can copy the email from the Credentials page.
Creating a New Service Account Key
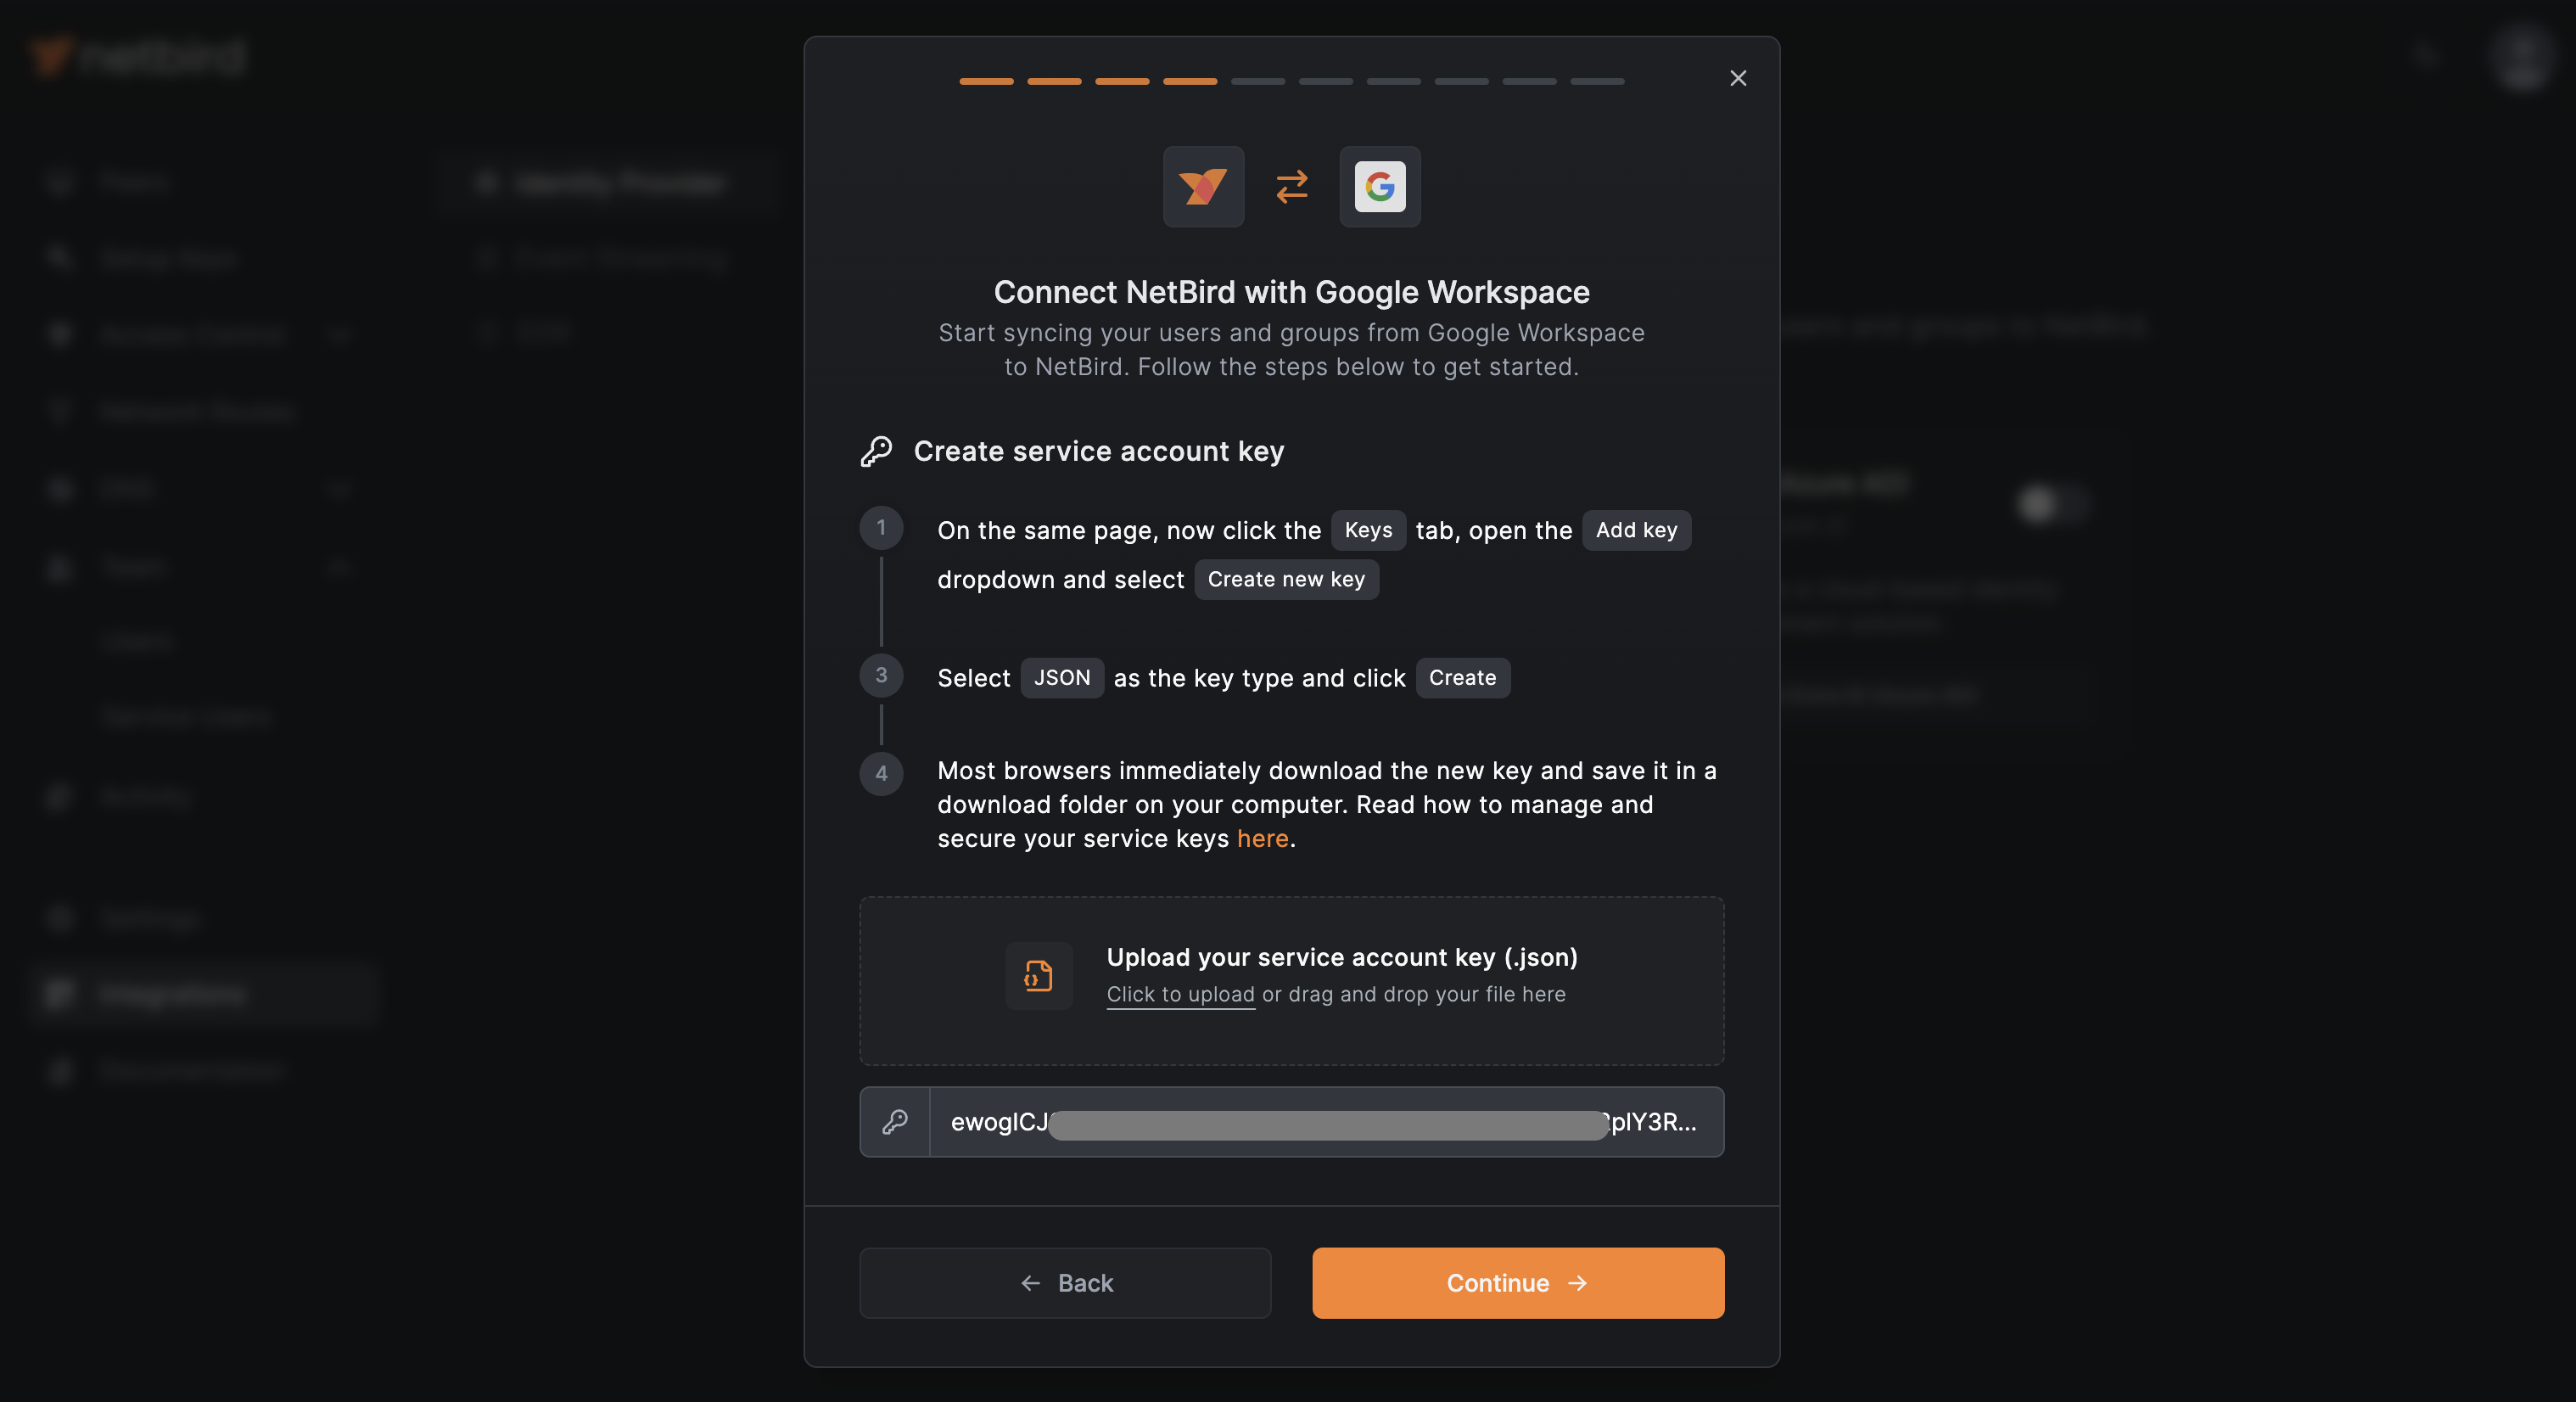
Back on NetBird, click Continue →. You’ll see a summary of how to create a service account key.
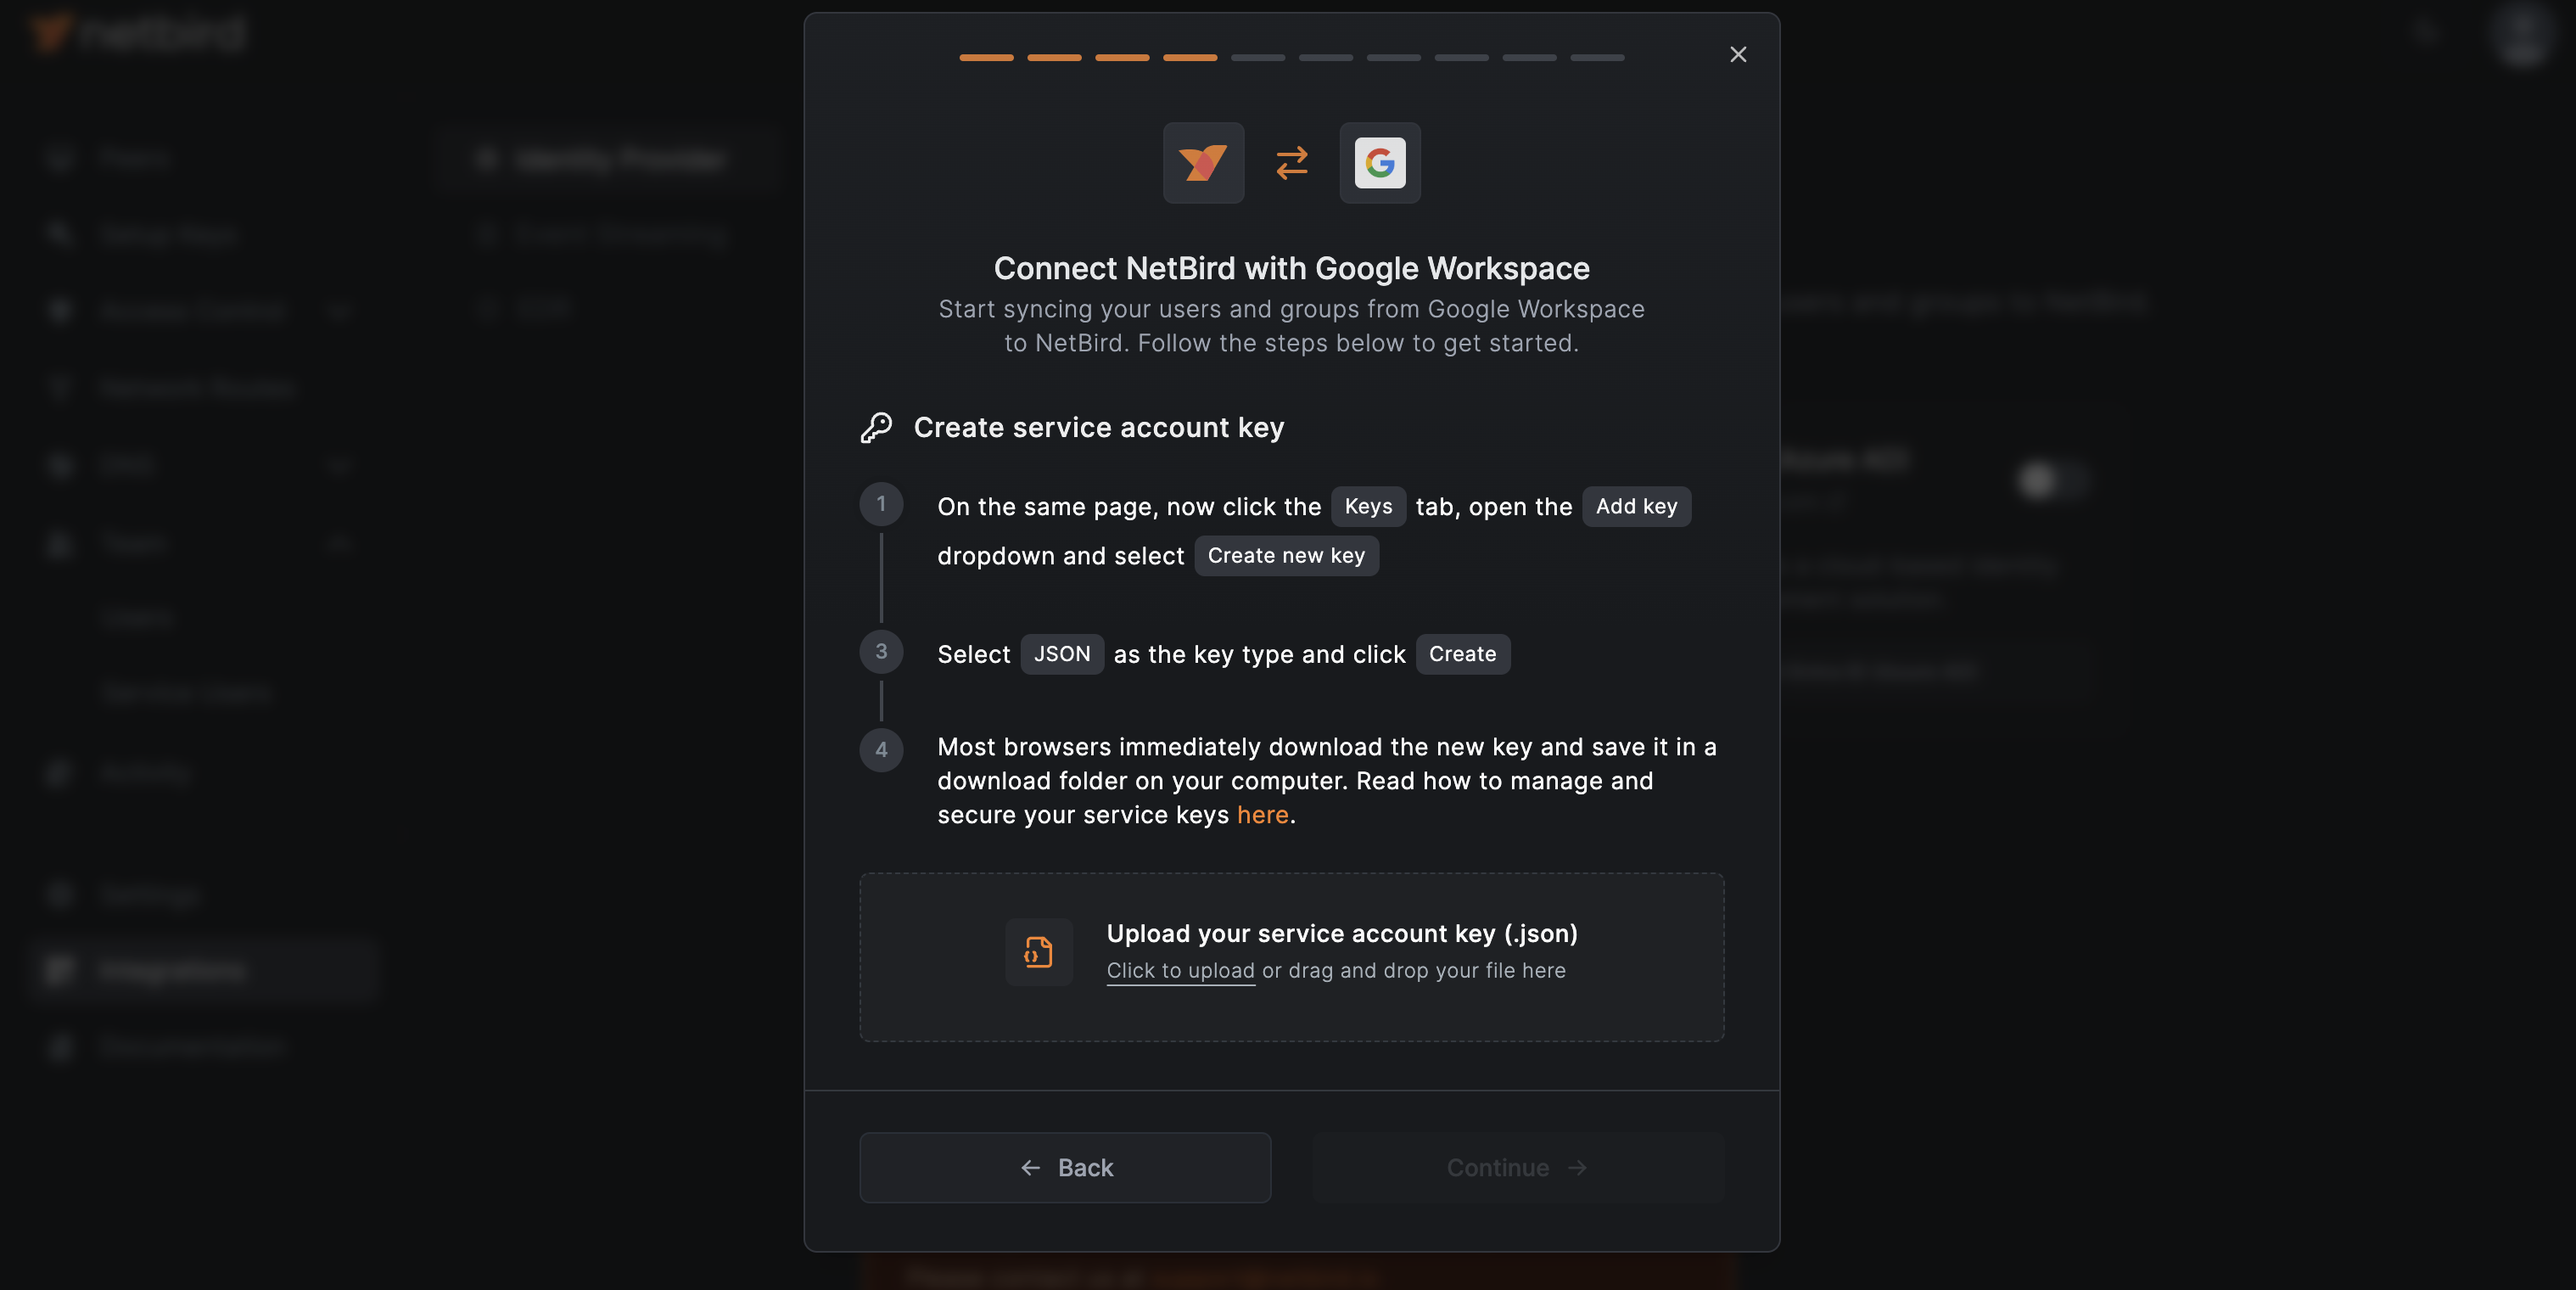
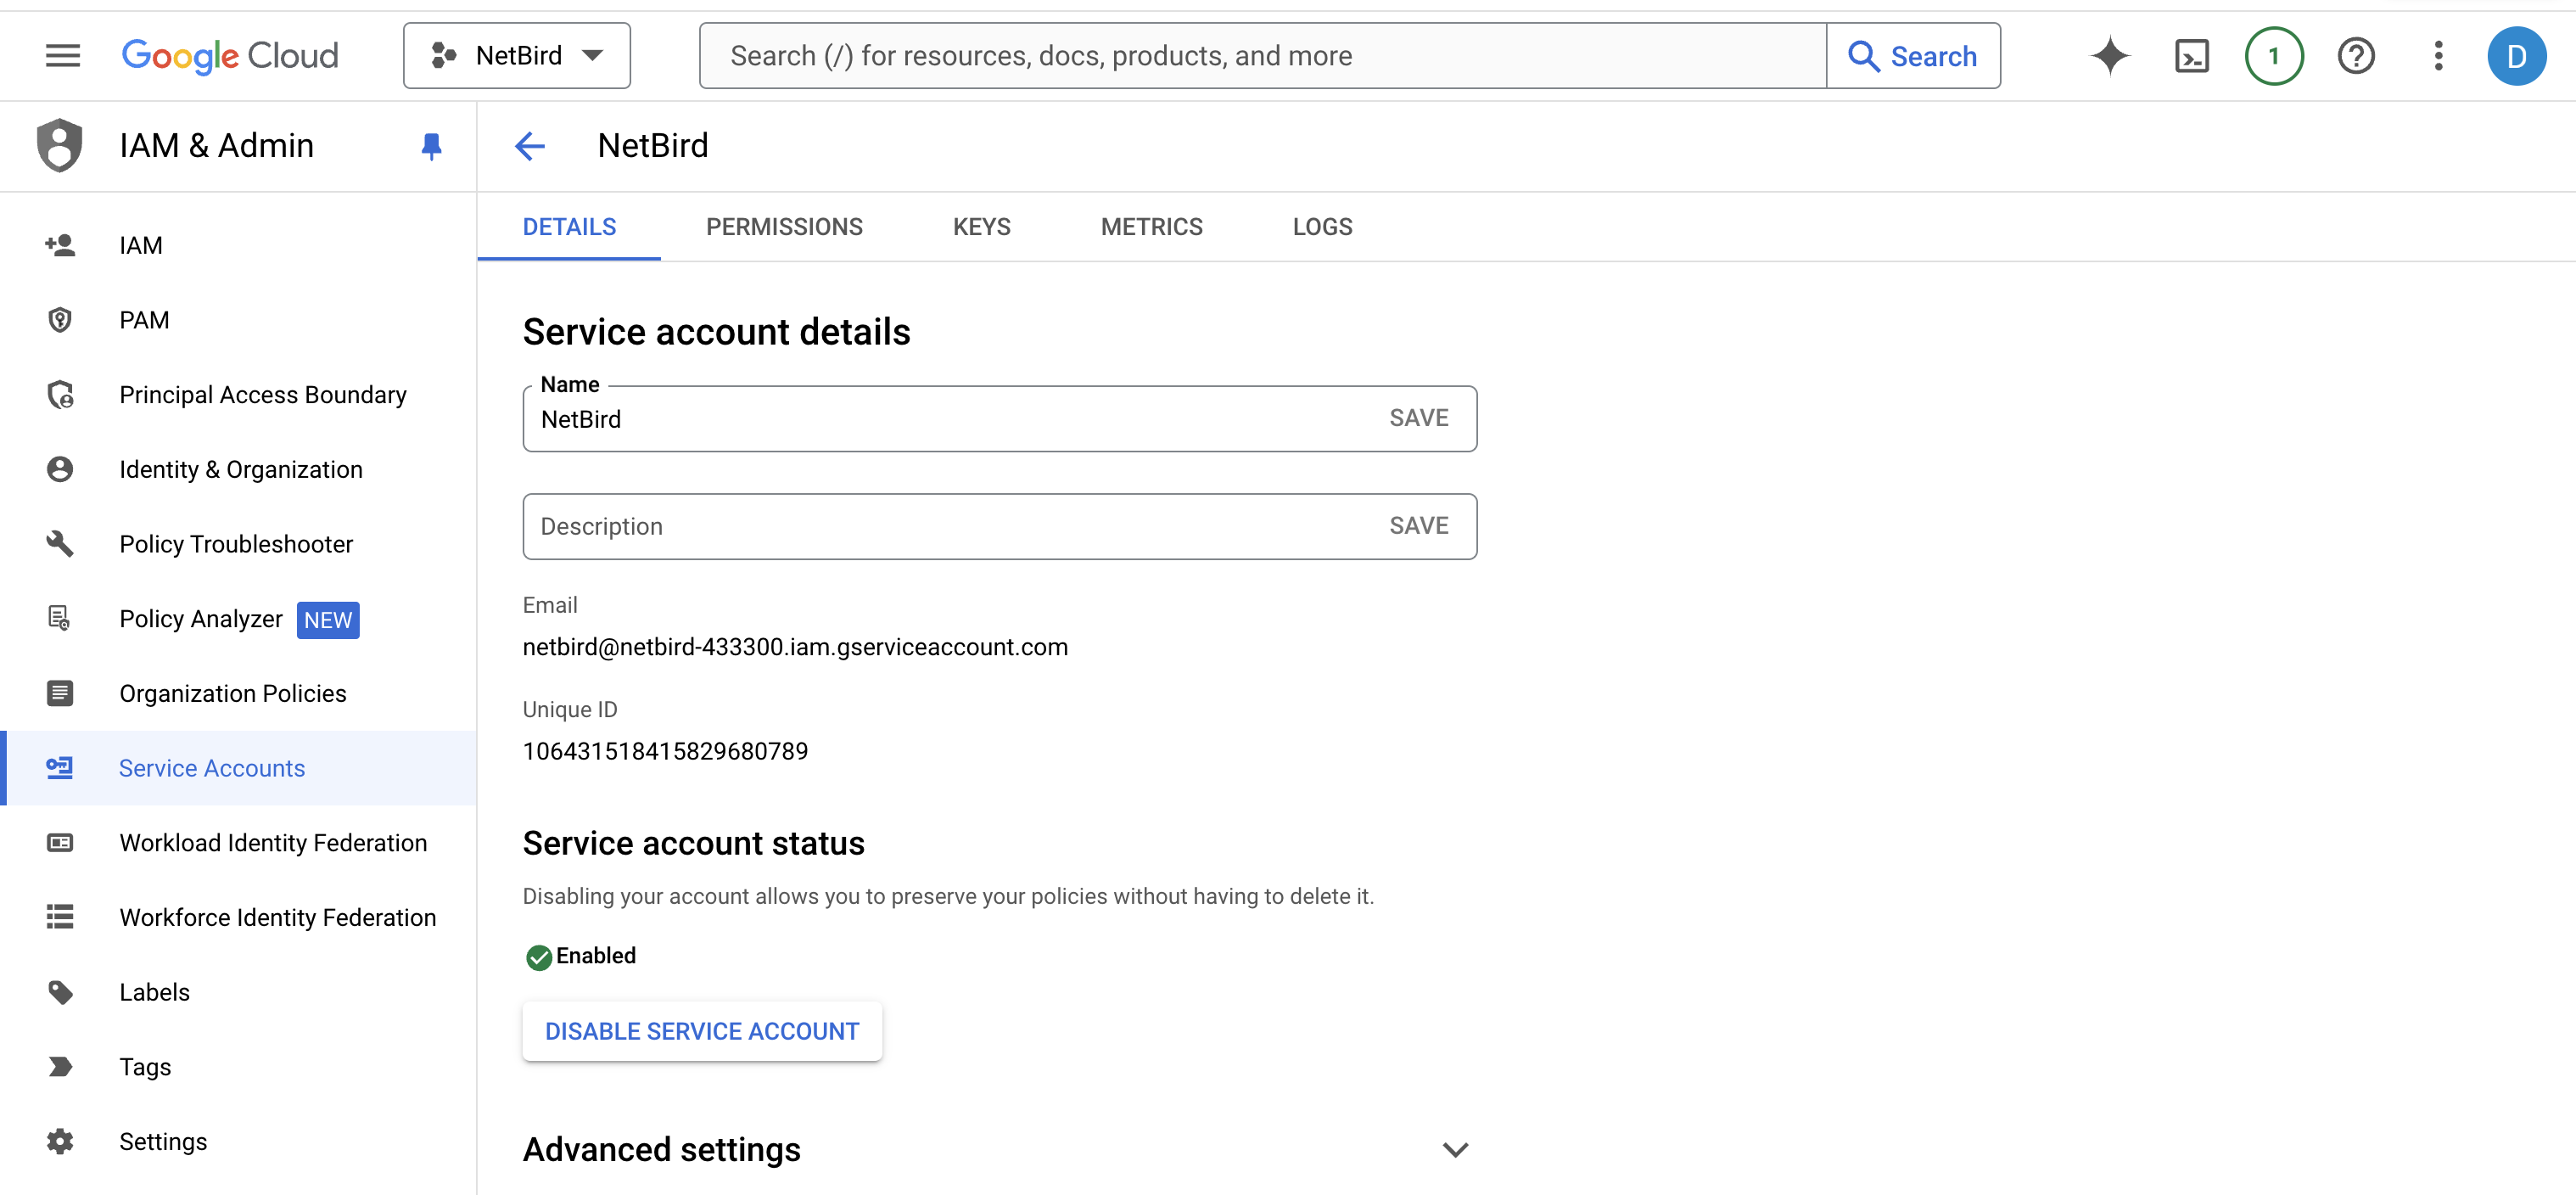
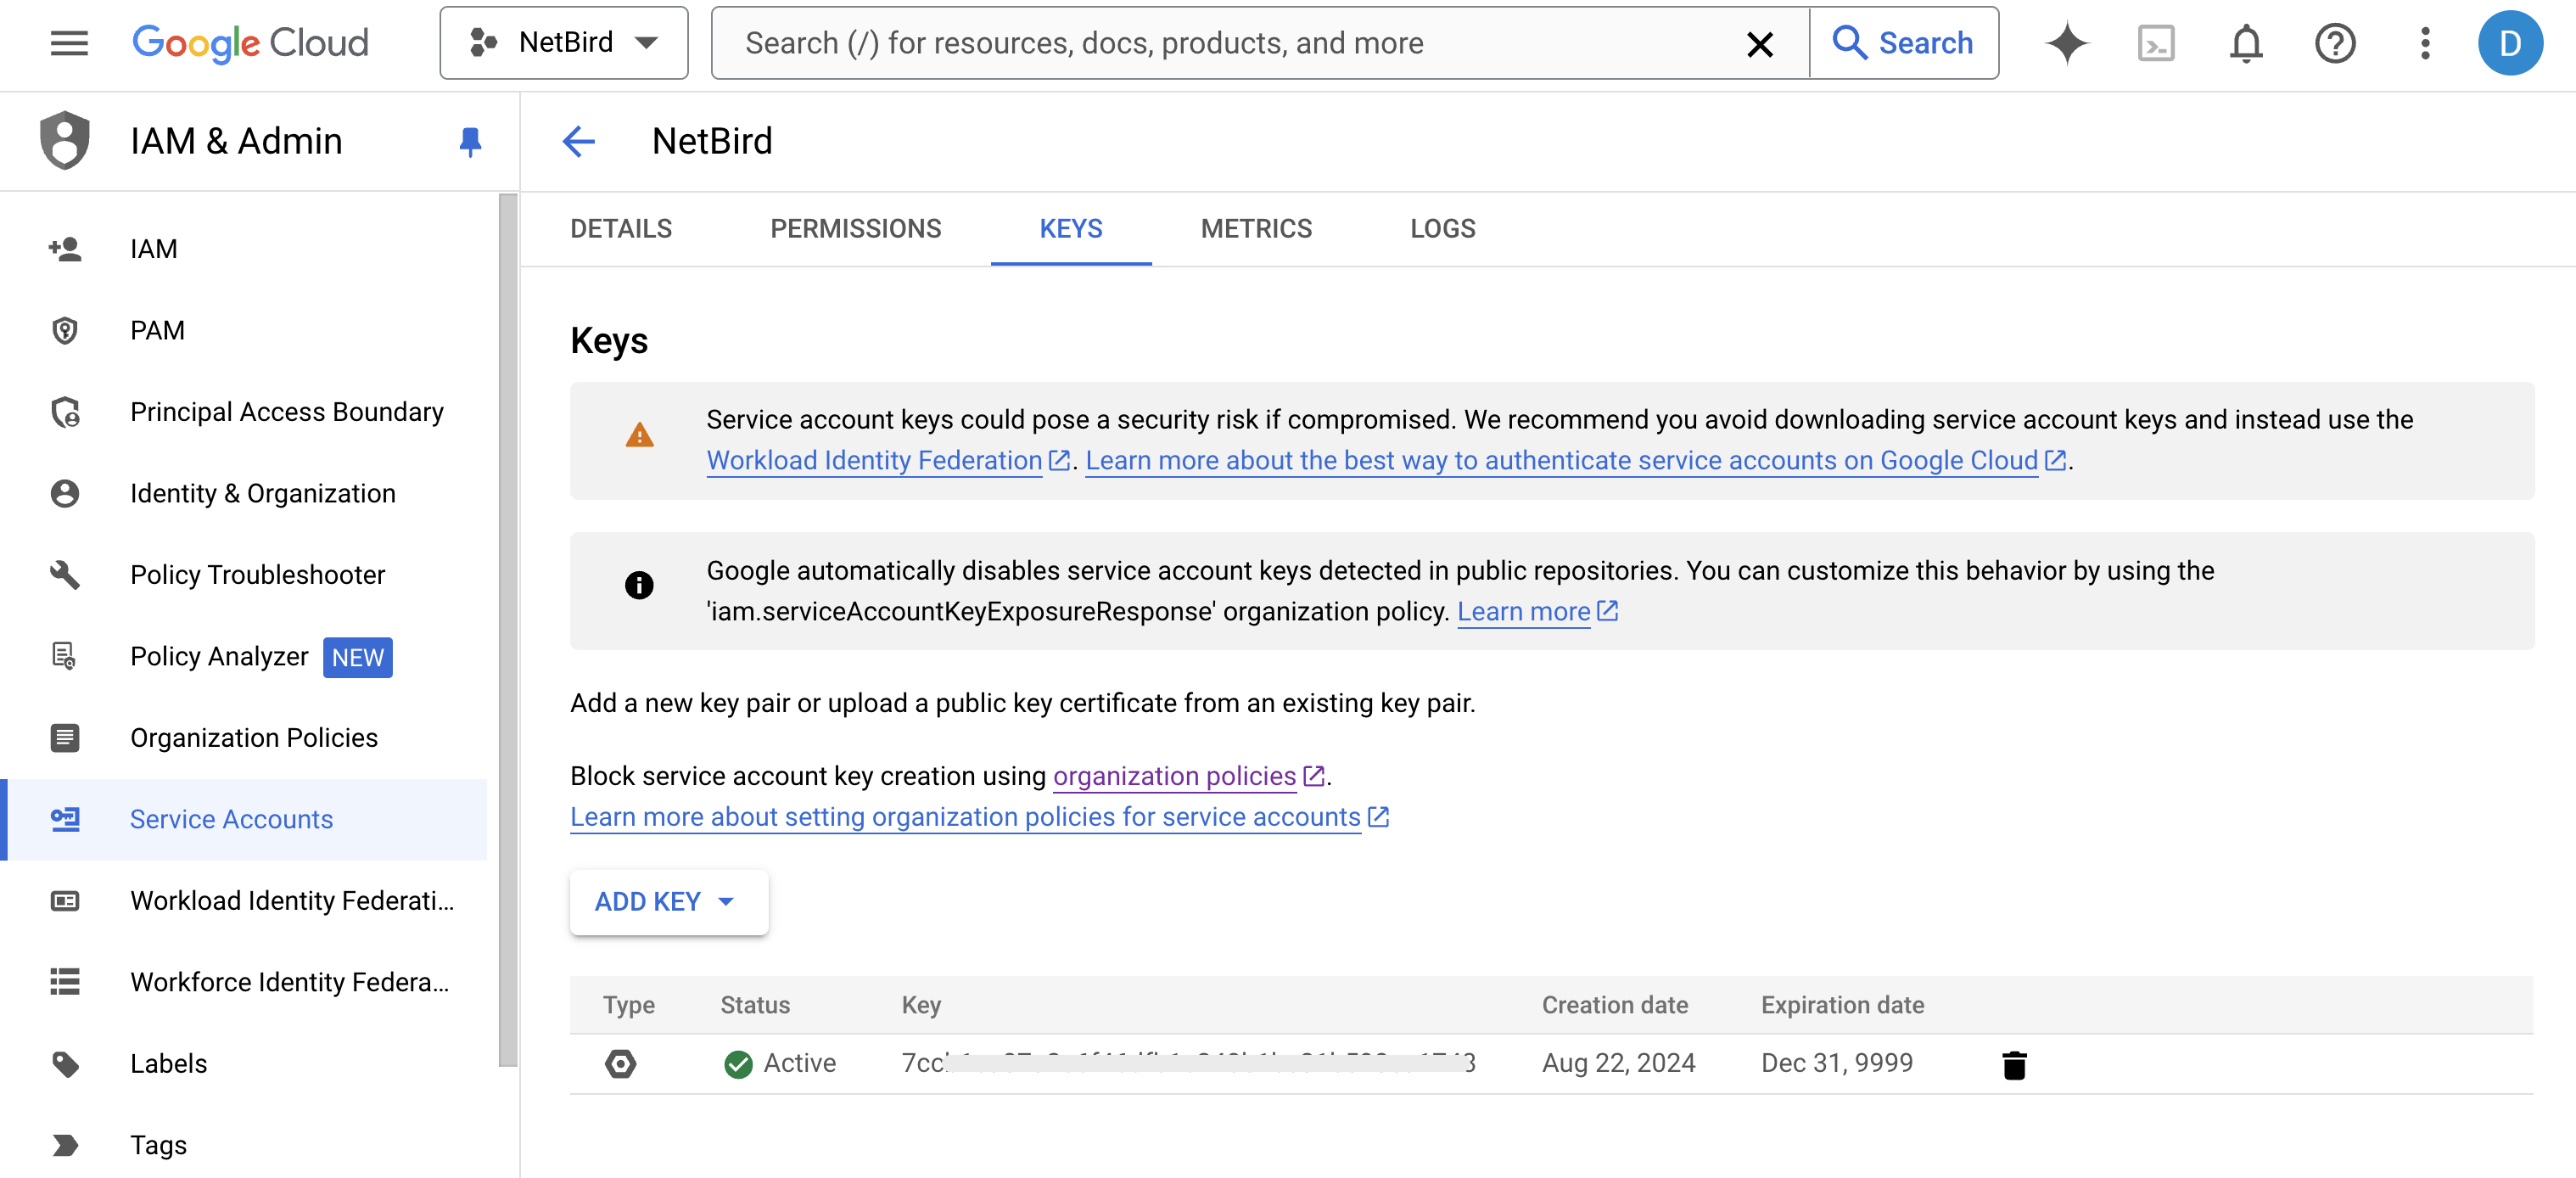
First, click on the service account email to show its details.
Next, click the Keys tab. Open the ADD KEY drop-down menu and select Create new key from the list.
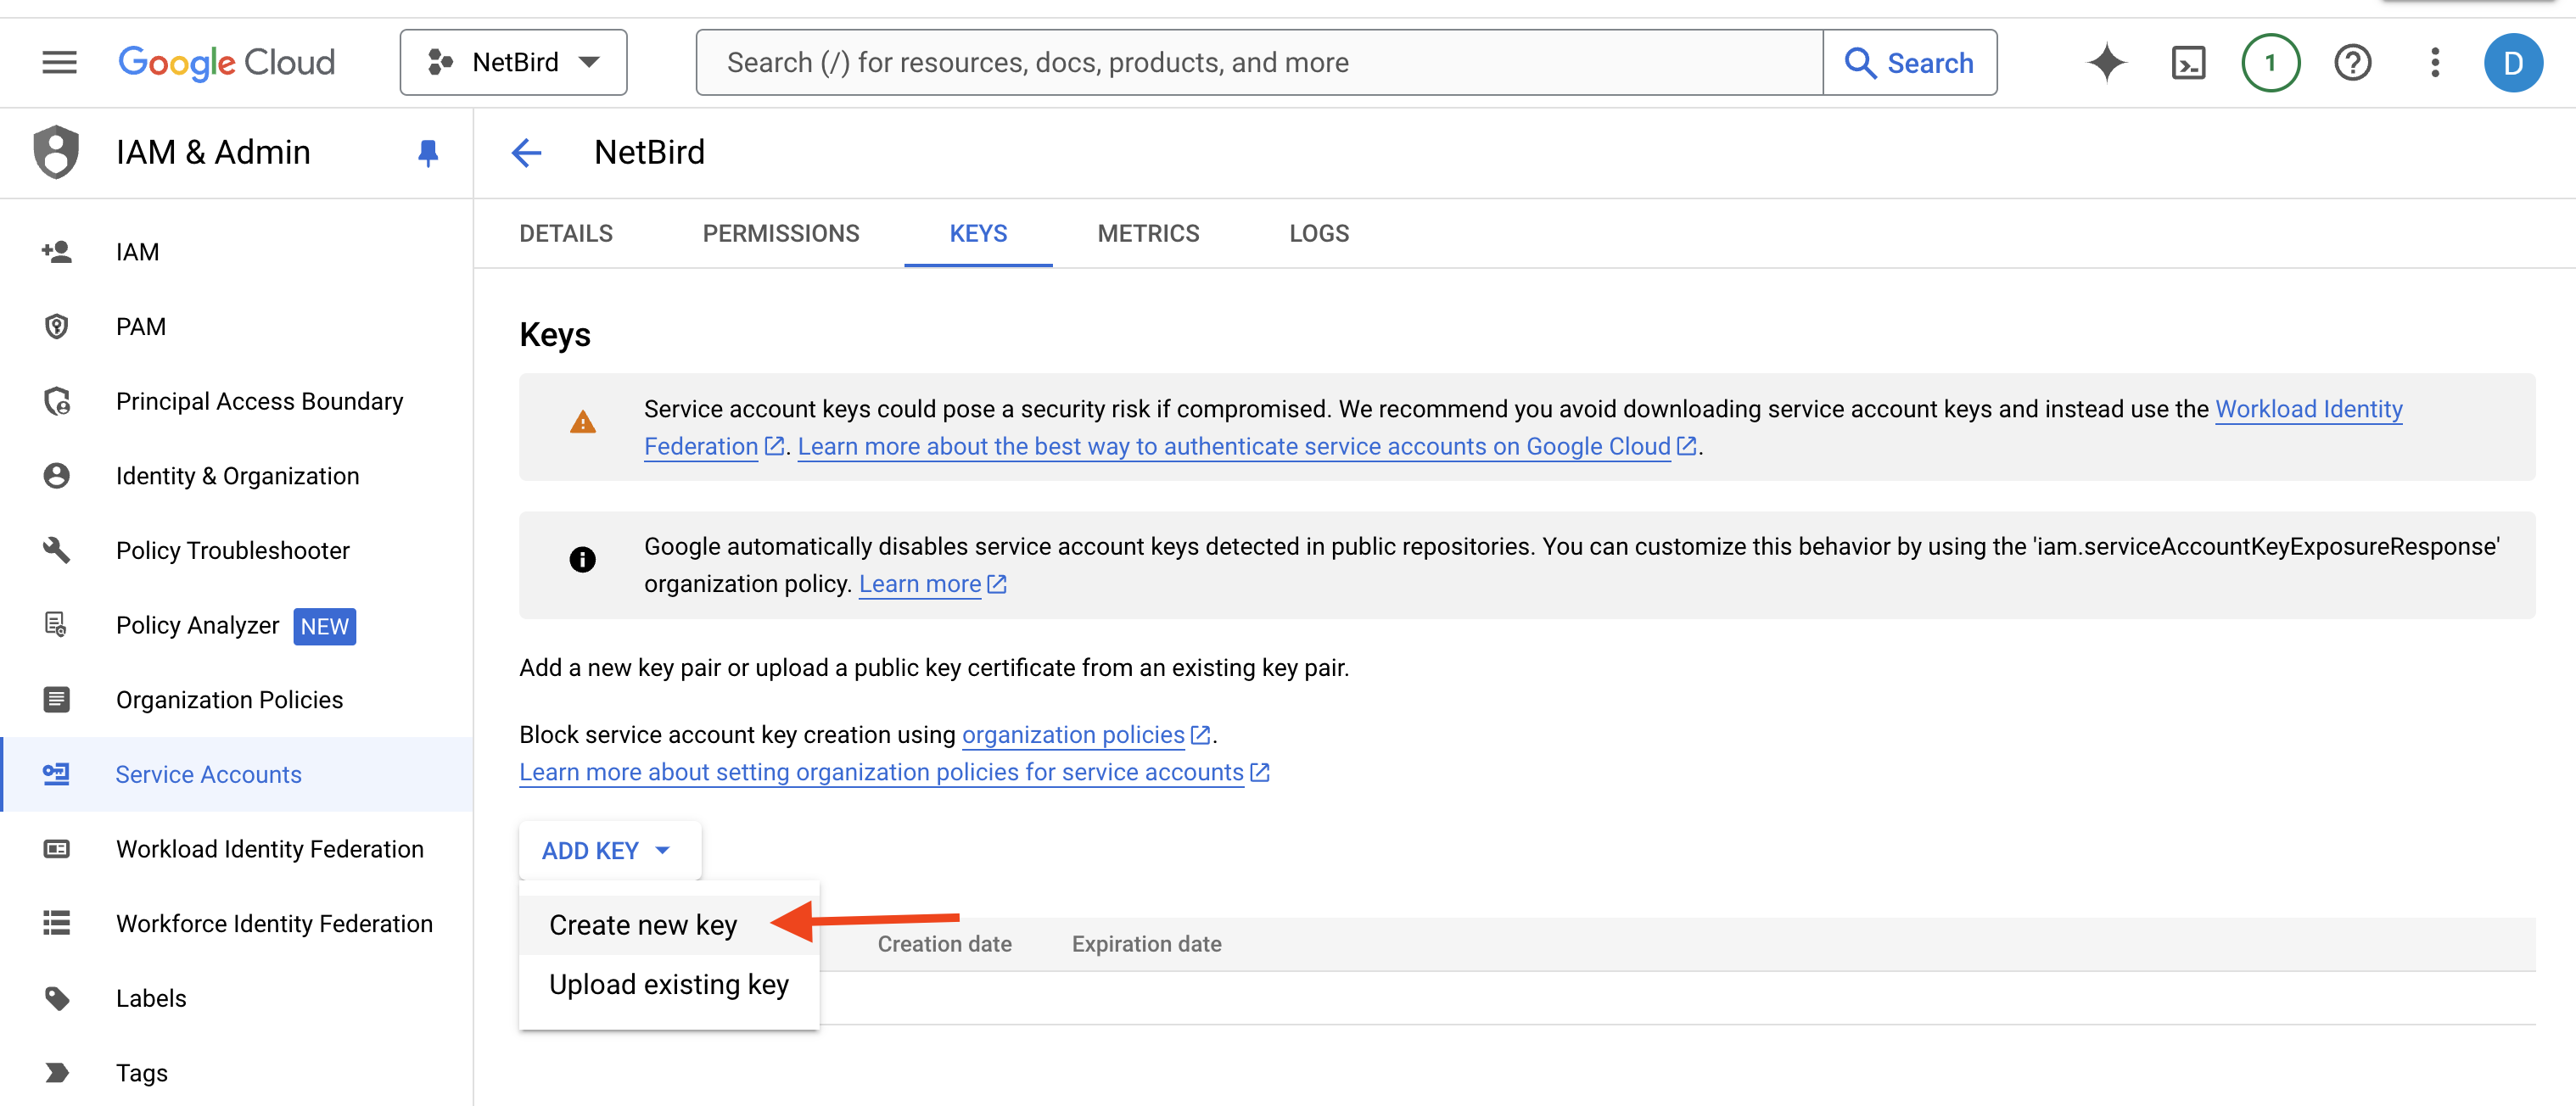
A new pop-up window will open, select JSON as indicated below:
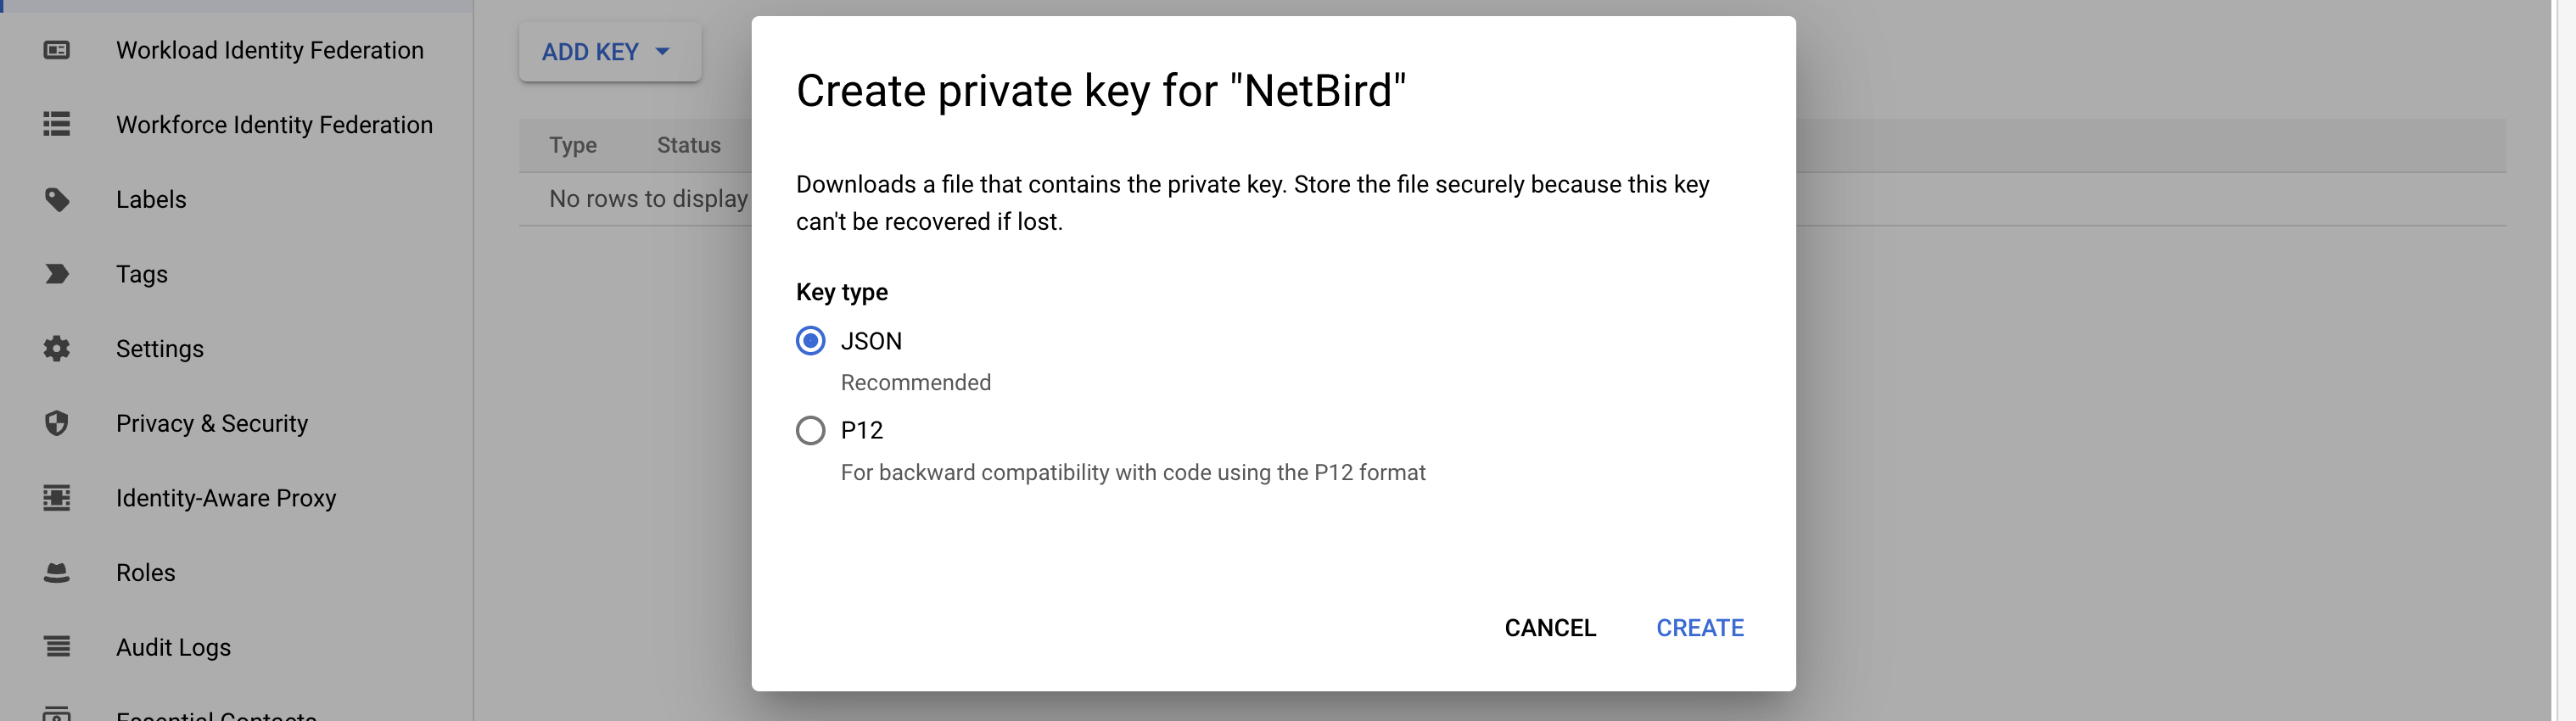
The key will automatically download to your local device. The new key will also appear as active in the KEYS tab.
During service account key creation, you may encounter the following error:
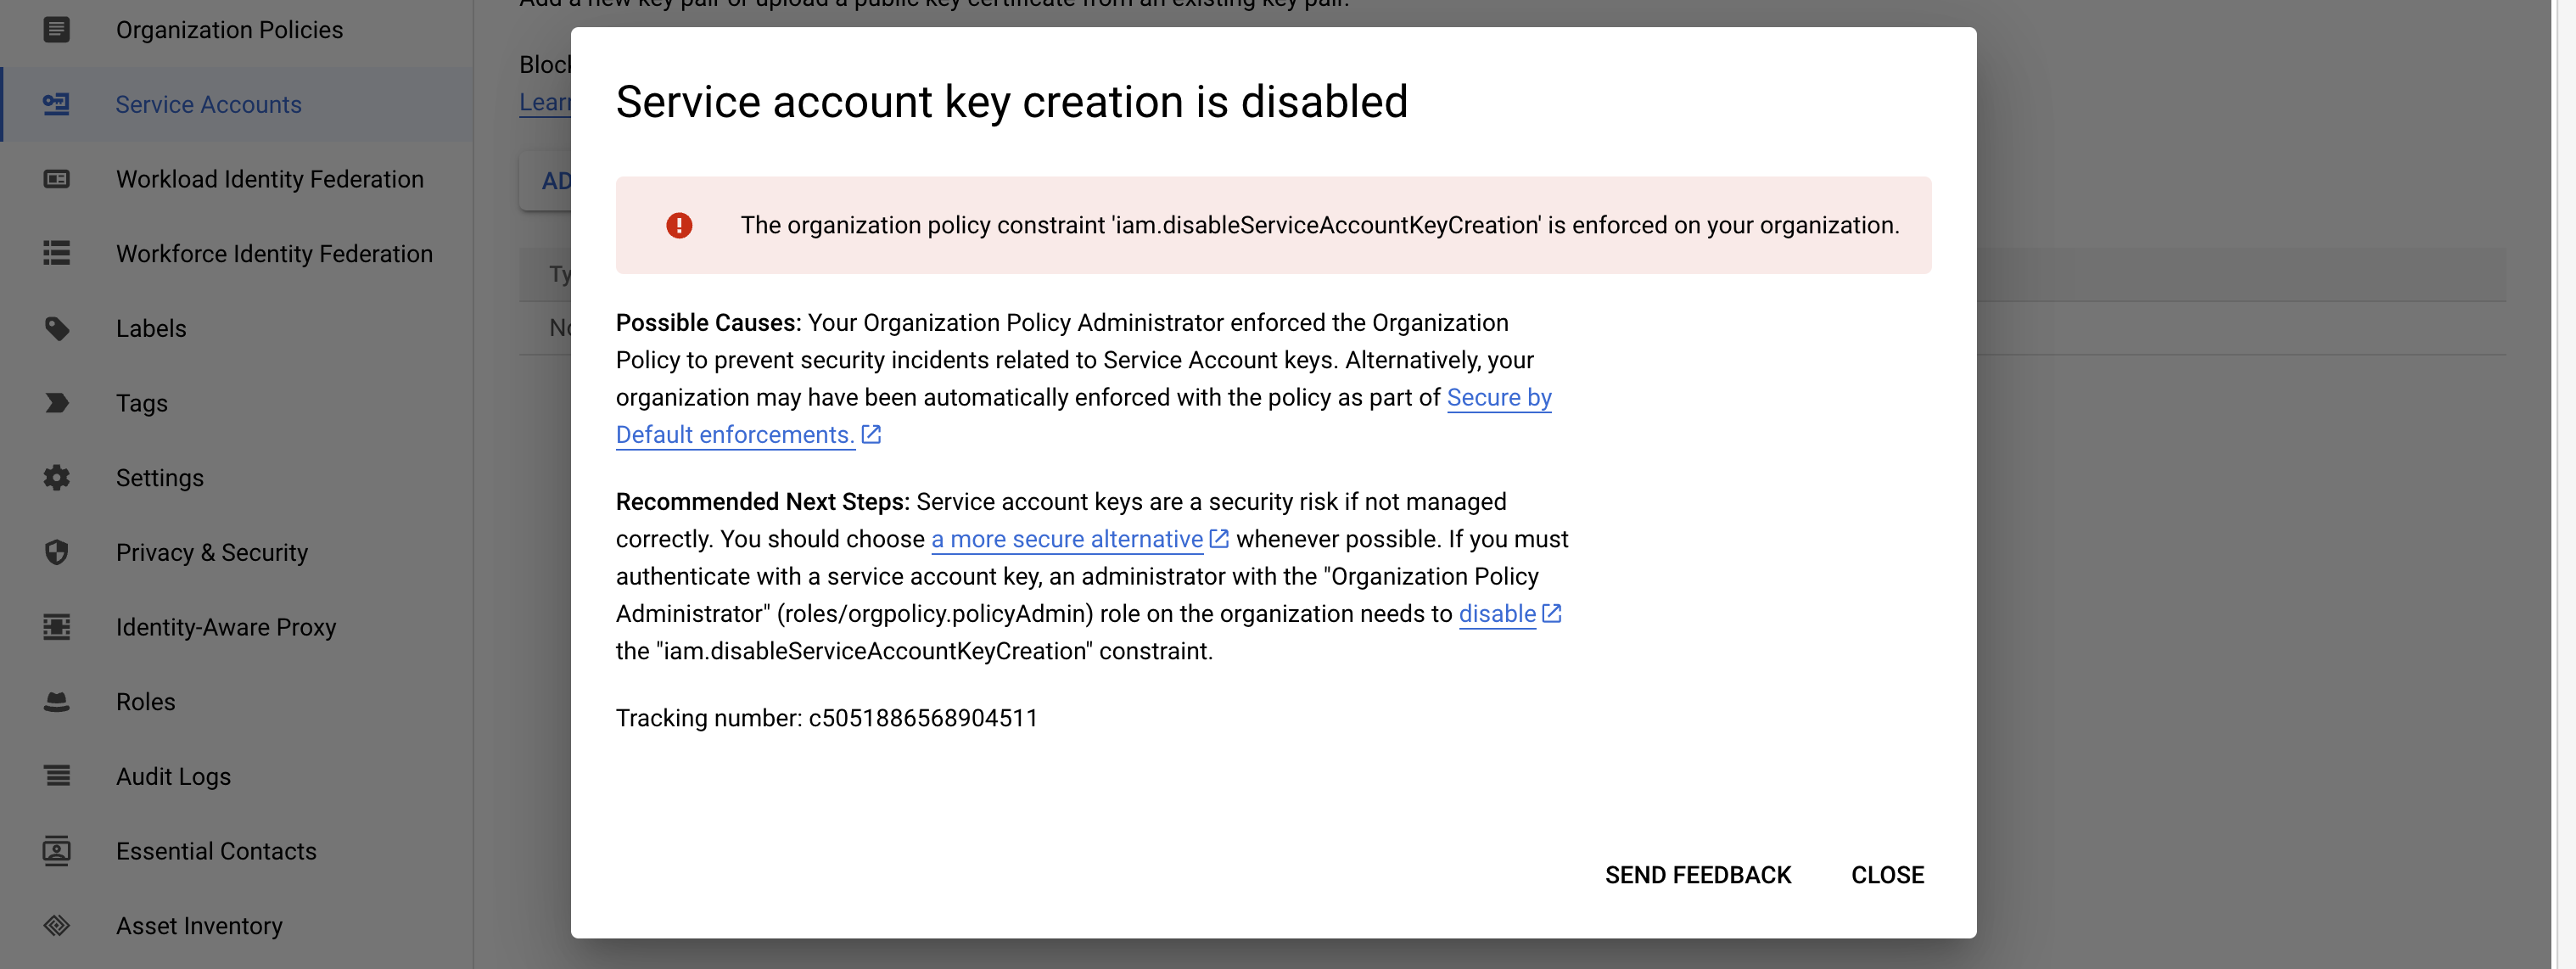
If that’s the case, activate Google Cloud Shell on the top menu (shell icon) and enter the following command:
gcloud org-policies delete iam.disableServiceAccountKeyCreation --organization=ORGANIZATION_ID
Remember to replace ORGANIZATION_ID with your organization ID.
Now, you can upload the service account key to NetBird. After a successful upload, you'll see the key listed in the NetBird interface.
Creating a New Admin Role in Google Workspace
After creating the service account in GCP and uploading its secret key, return to NetBird and click 'Continue →'. The next steps will guide you through creating a role in Google Workspace for this service account
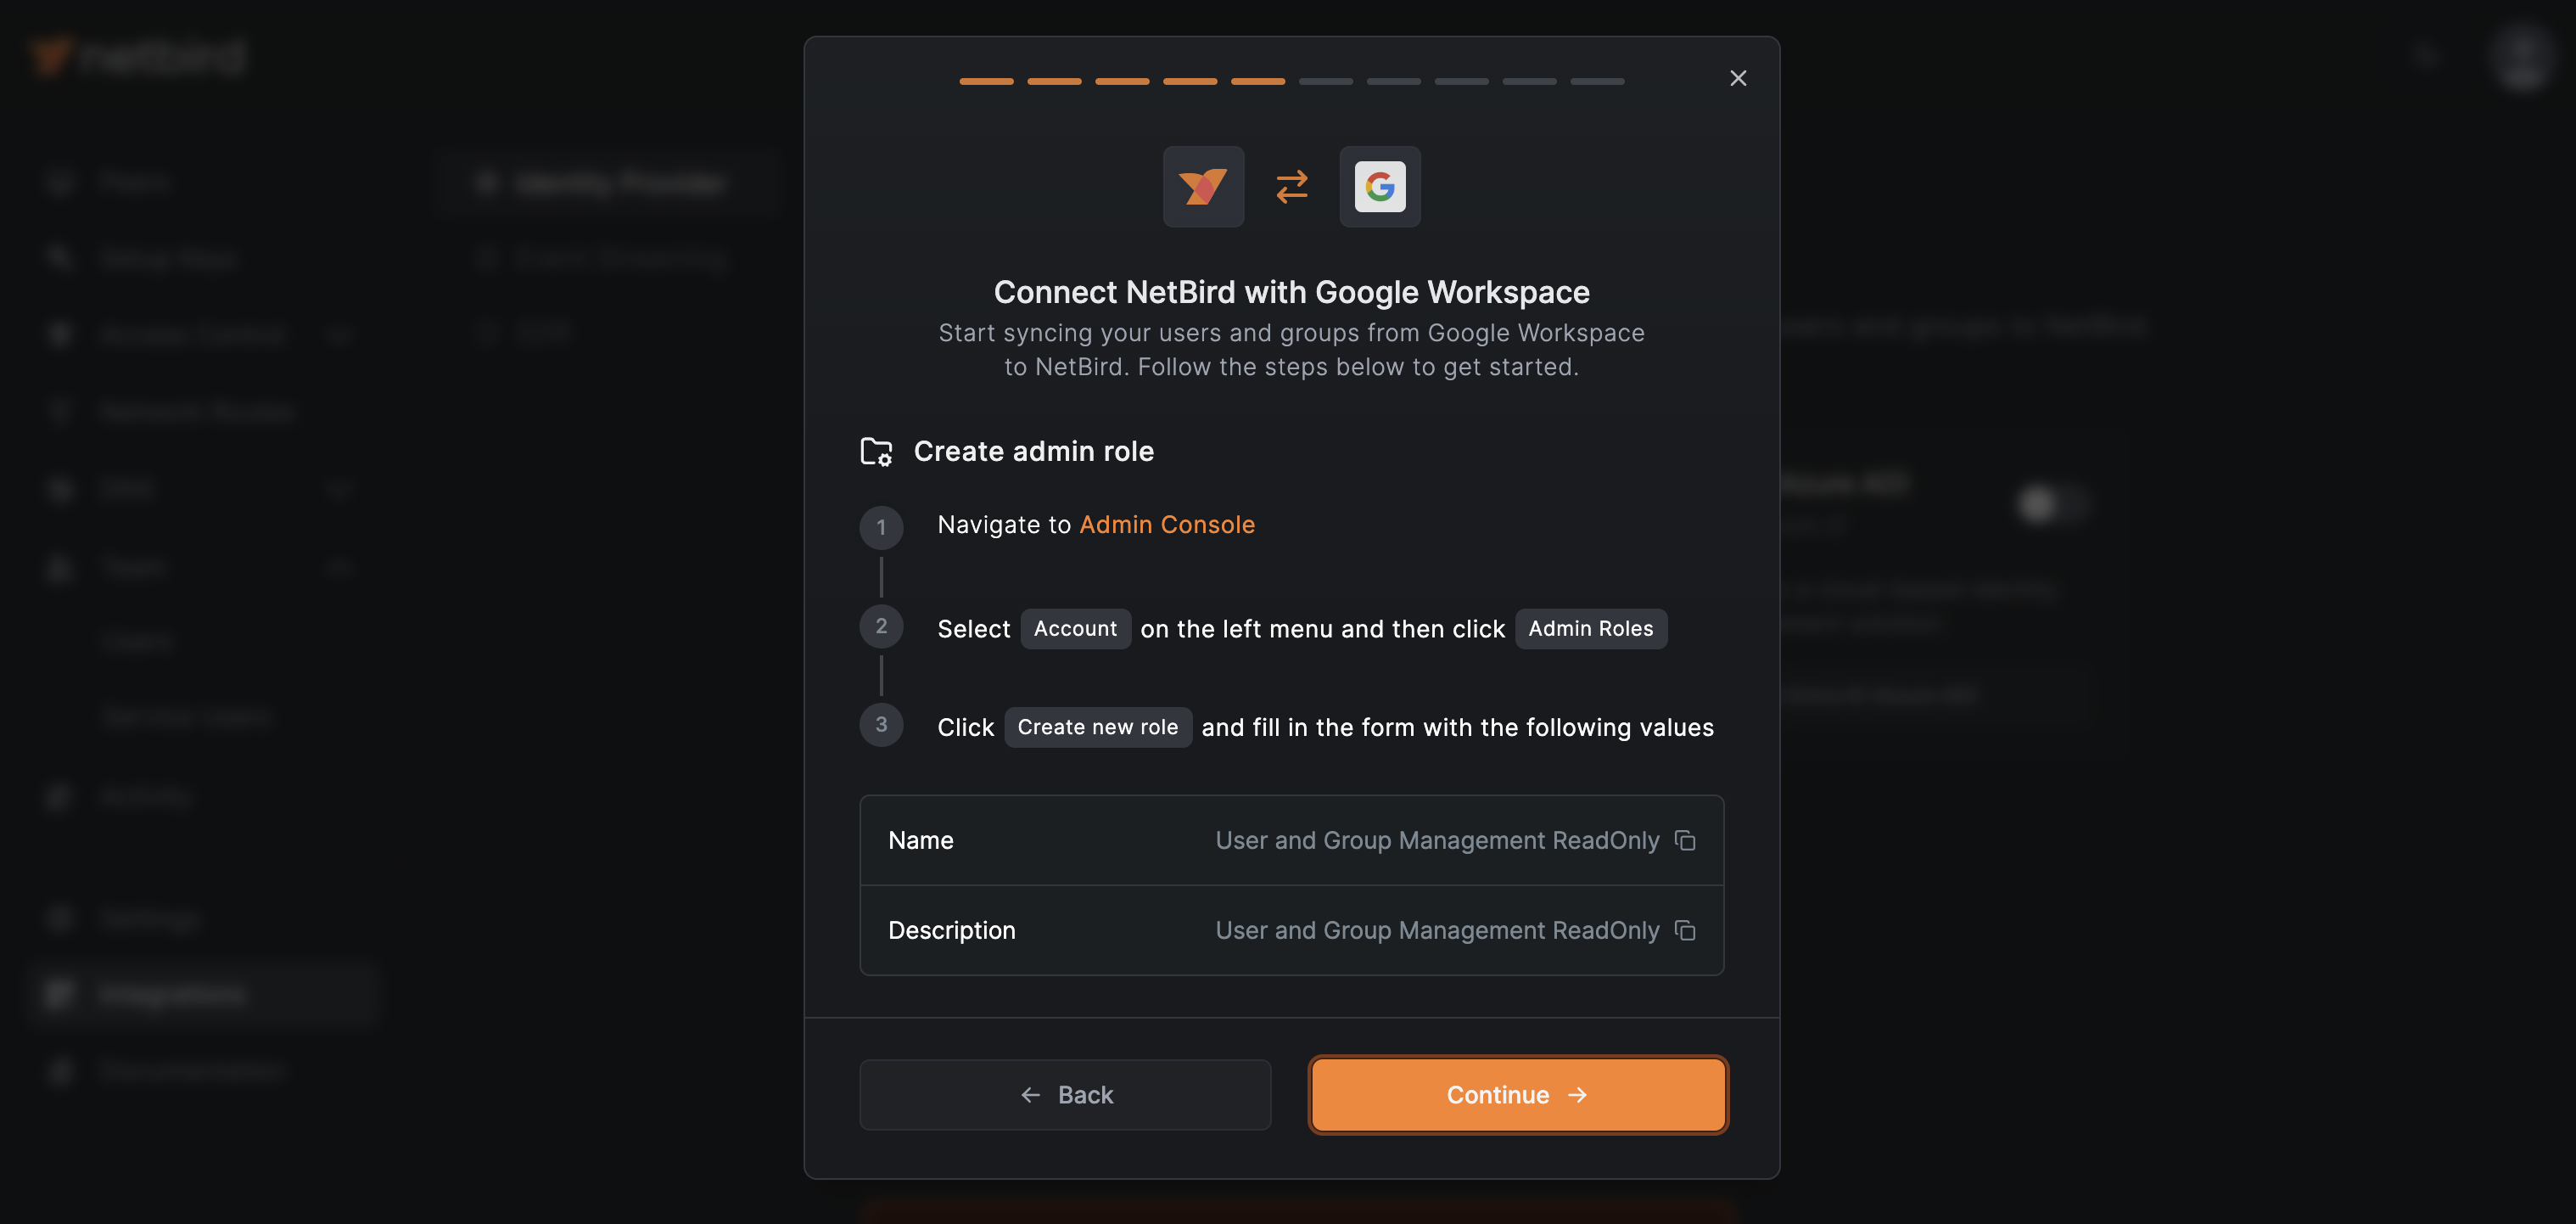
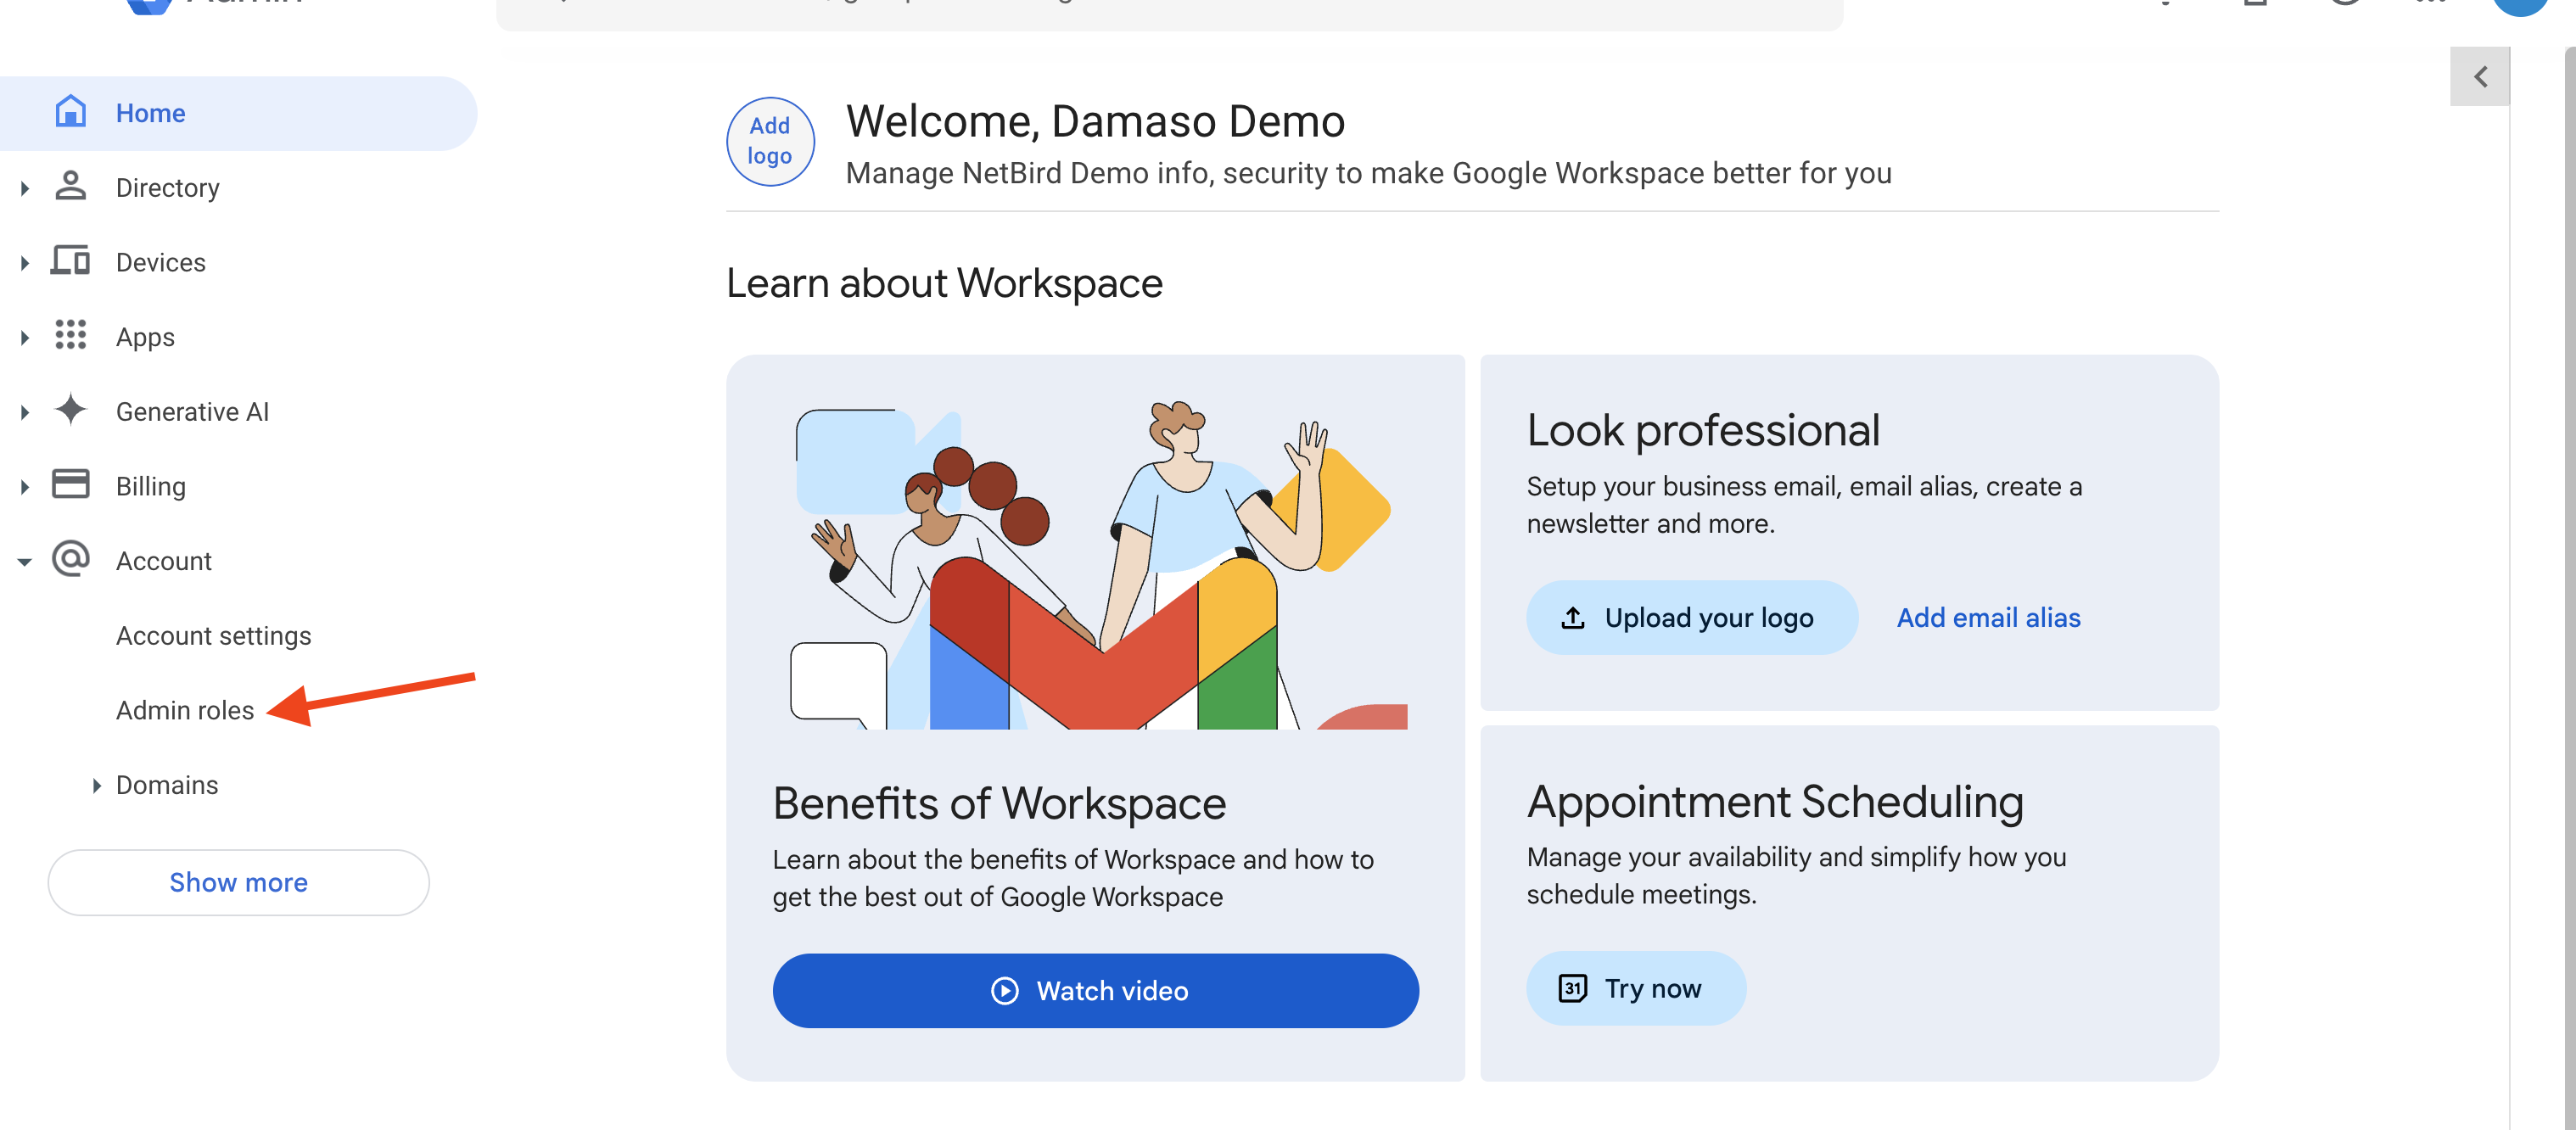
Navigate to Google Workspace Admin Console. Select Account on the left menu and then click Admin Roles
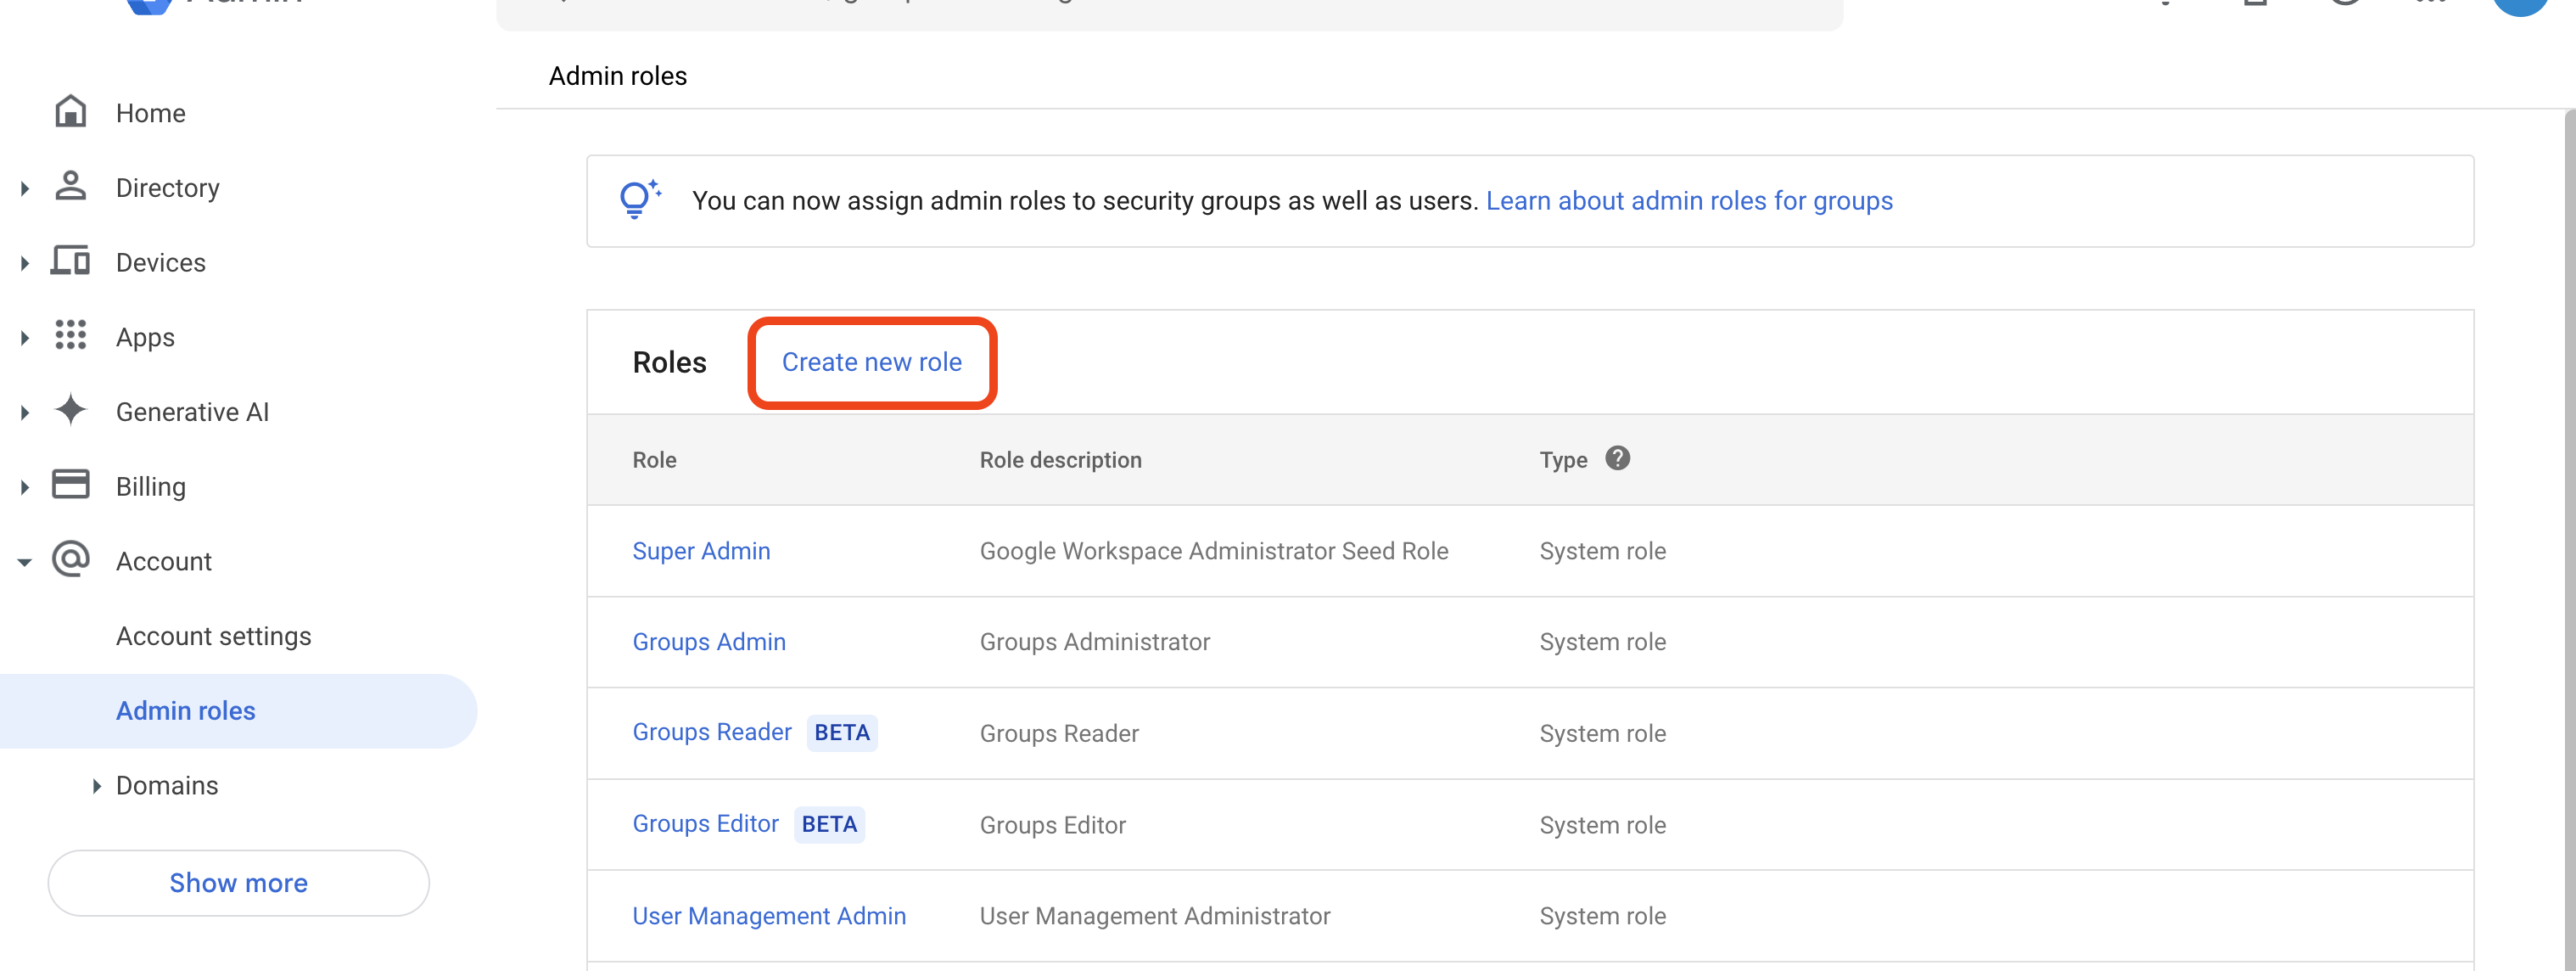
Click Create new role
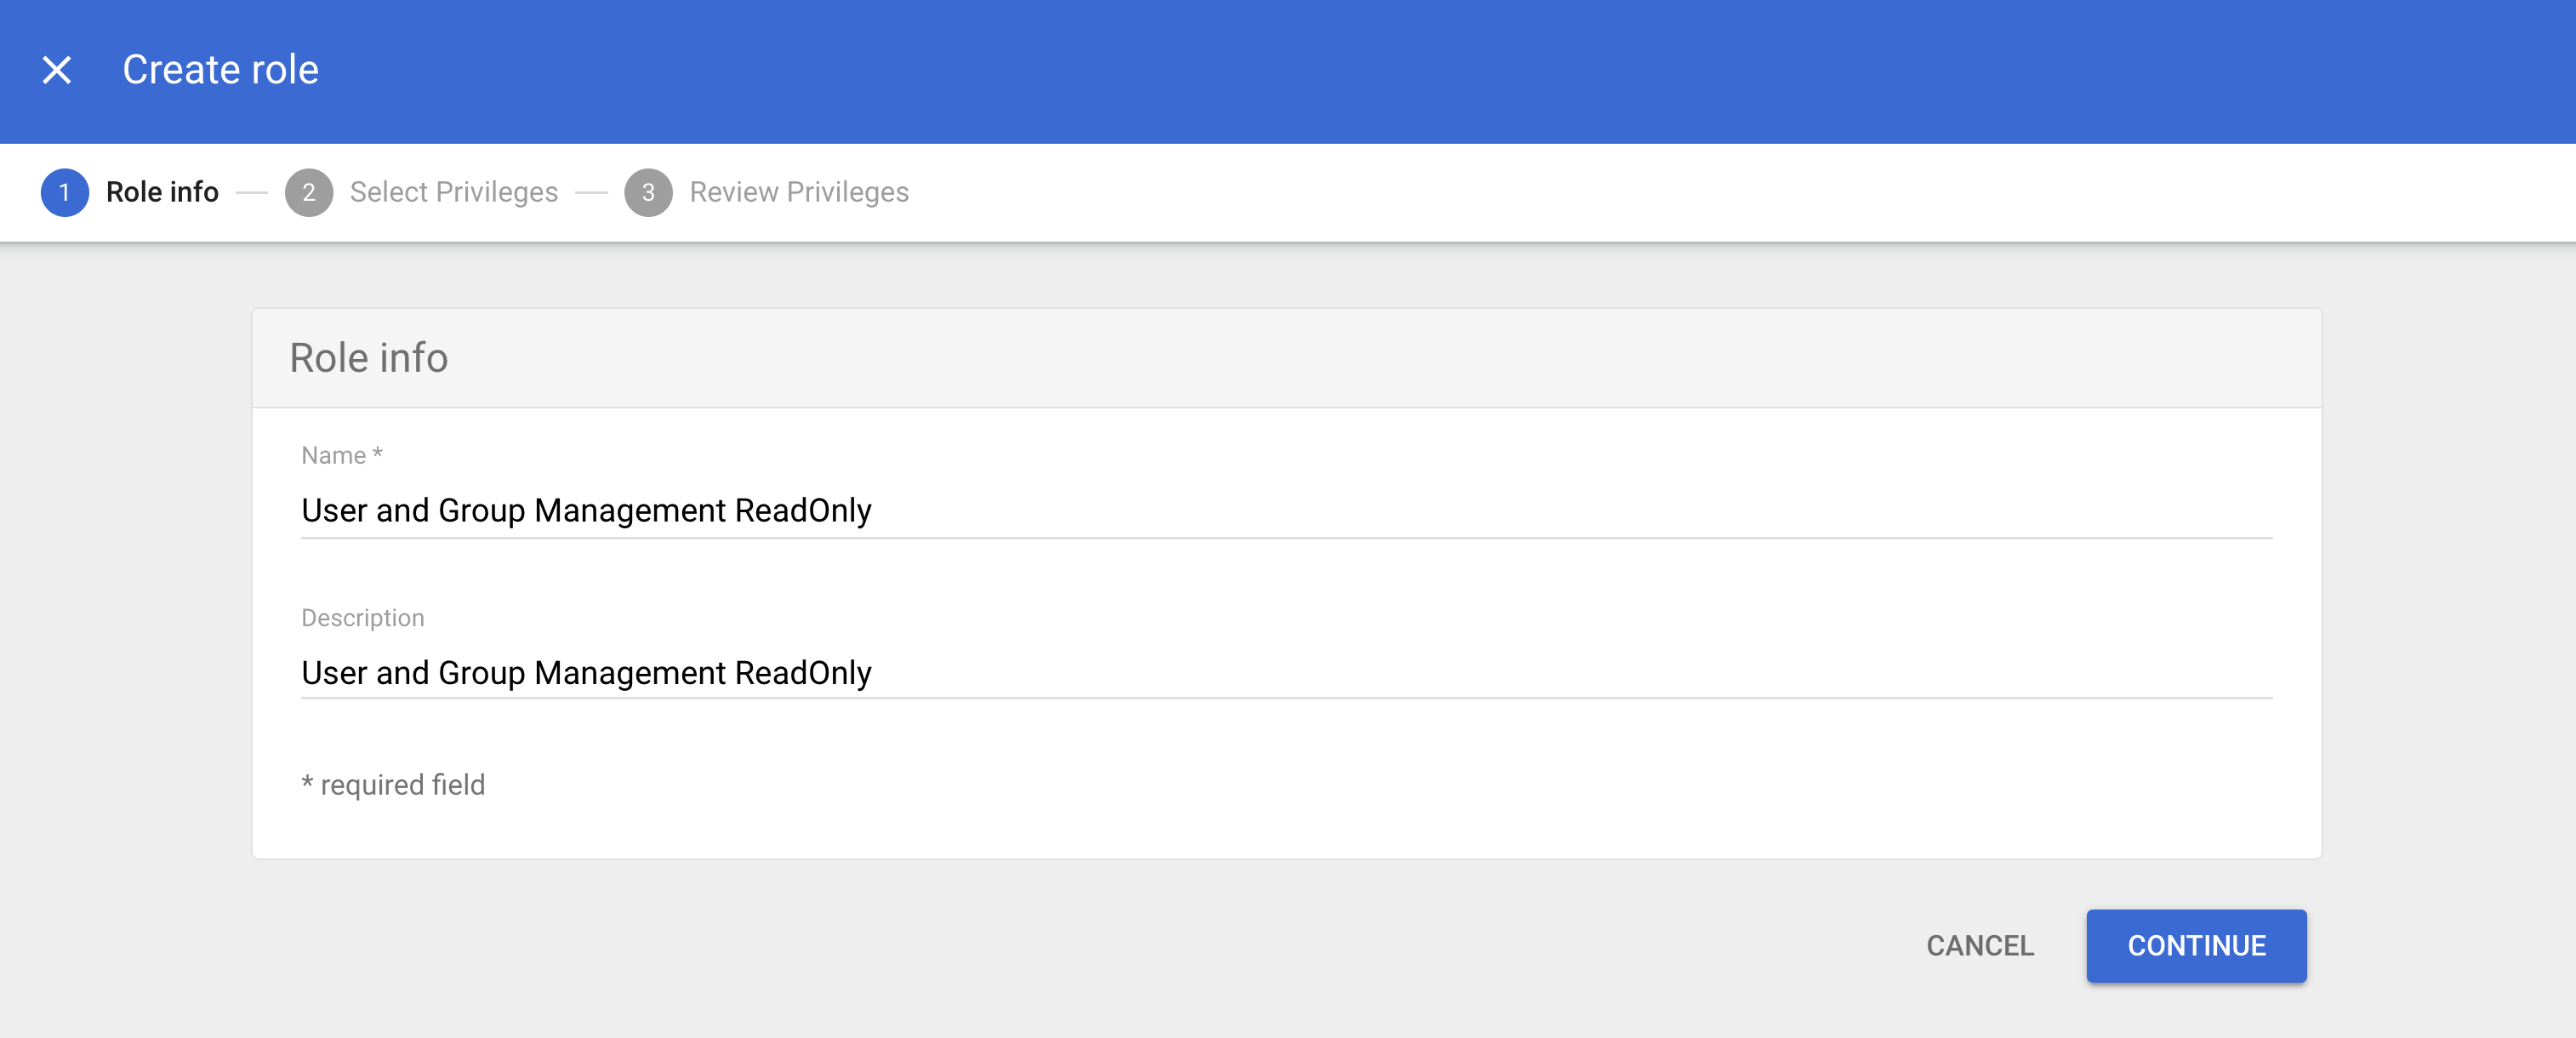
Fill in the form with the values provided in NetBird:
- Name:
User and Group Management ReadOnly - Description:
User and Group Management ReadOnly
When done, click CONTINUE
Granting Role Privileges
Return to NetBird and click Continue →. The next screen shows the privileges needed for the Admin API.
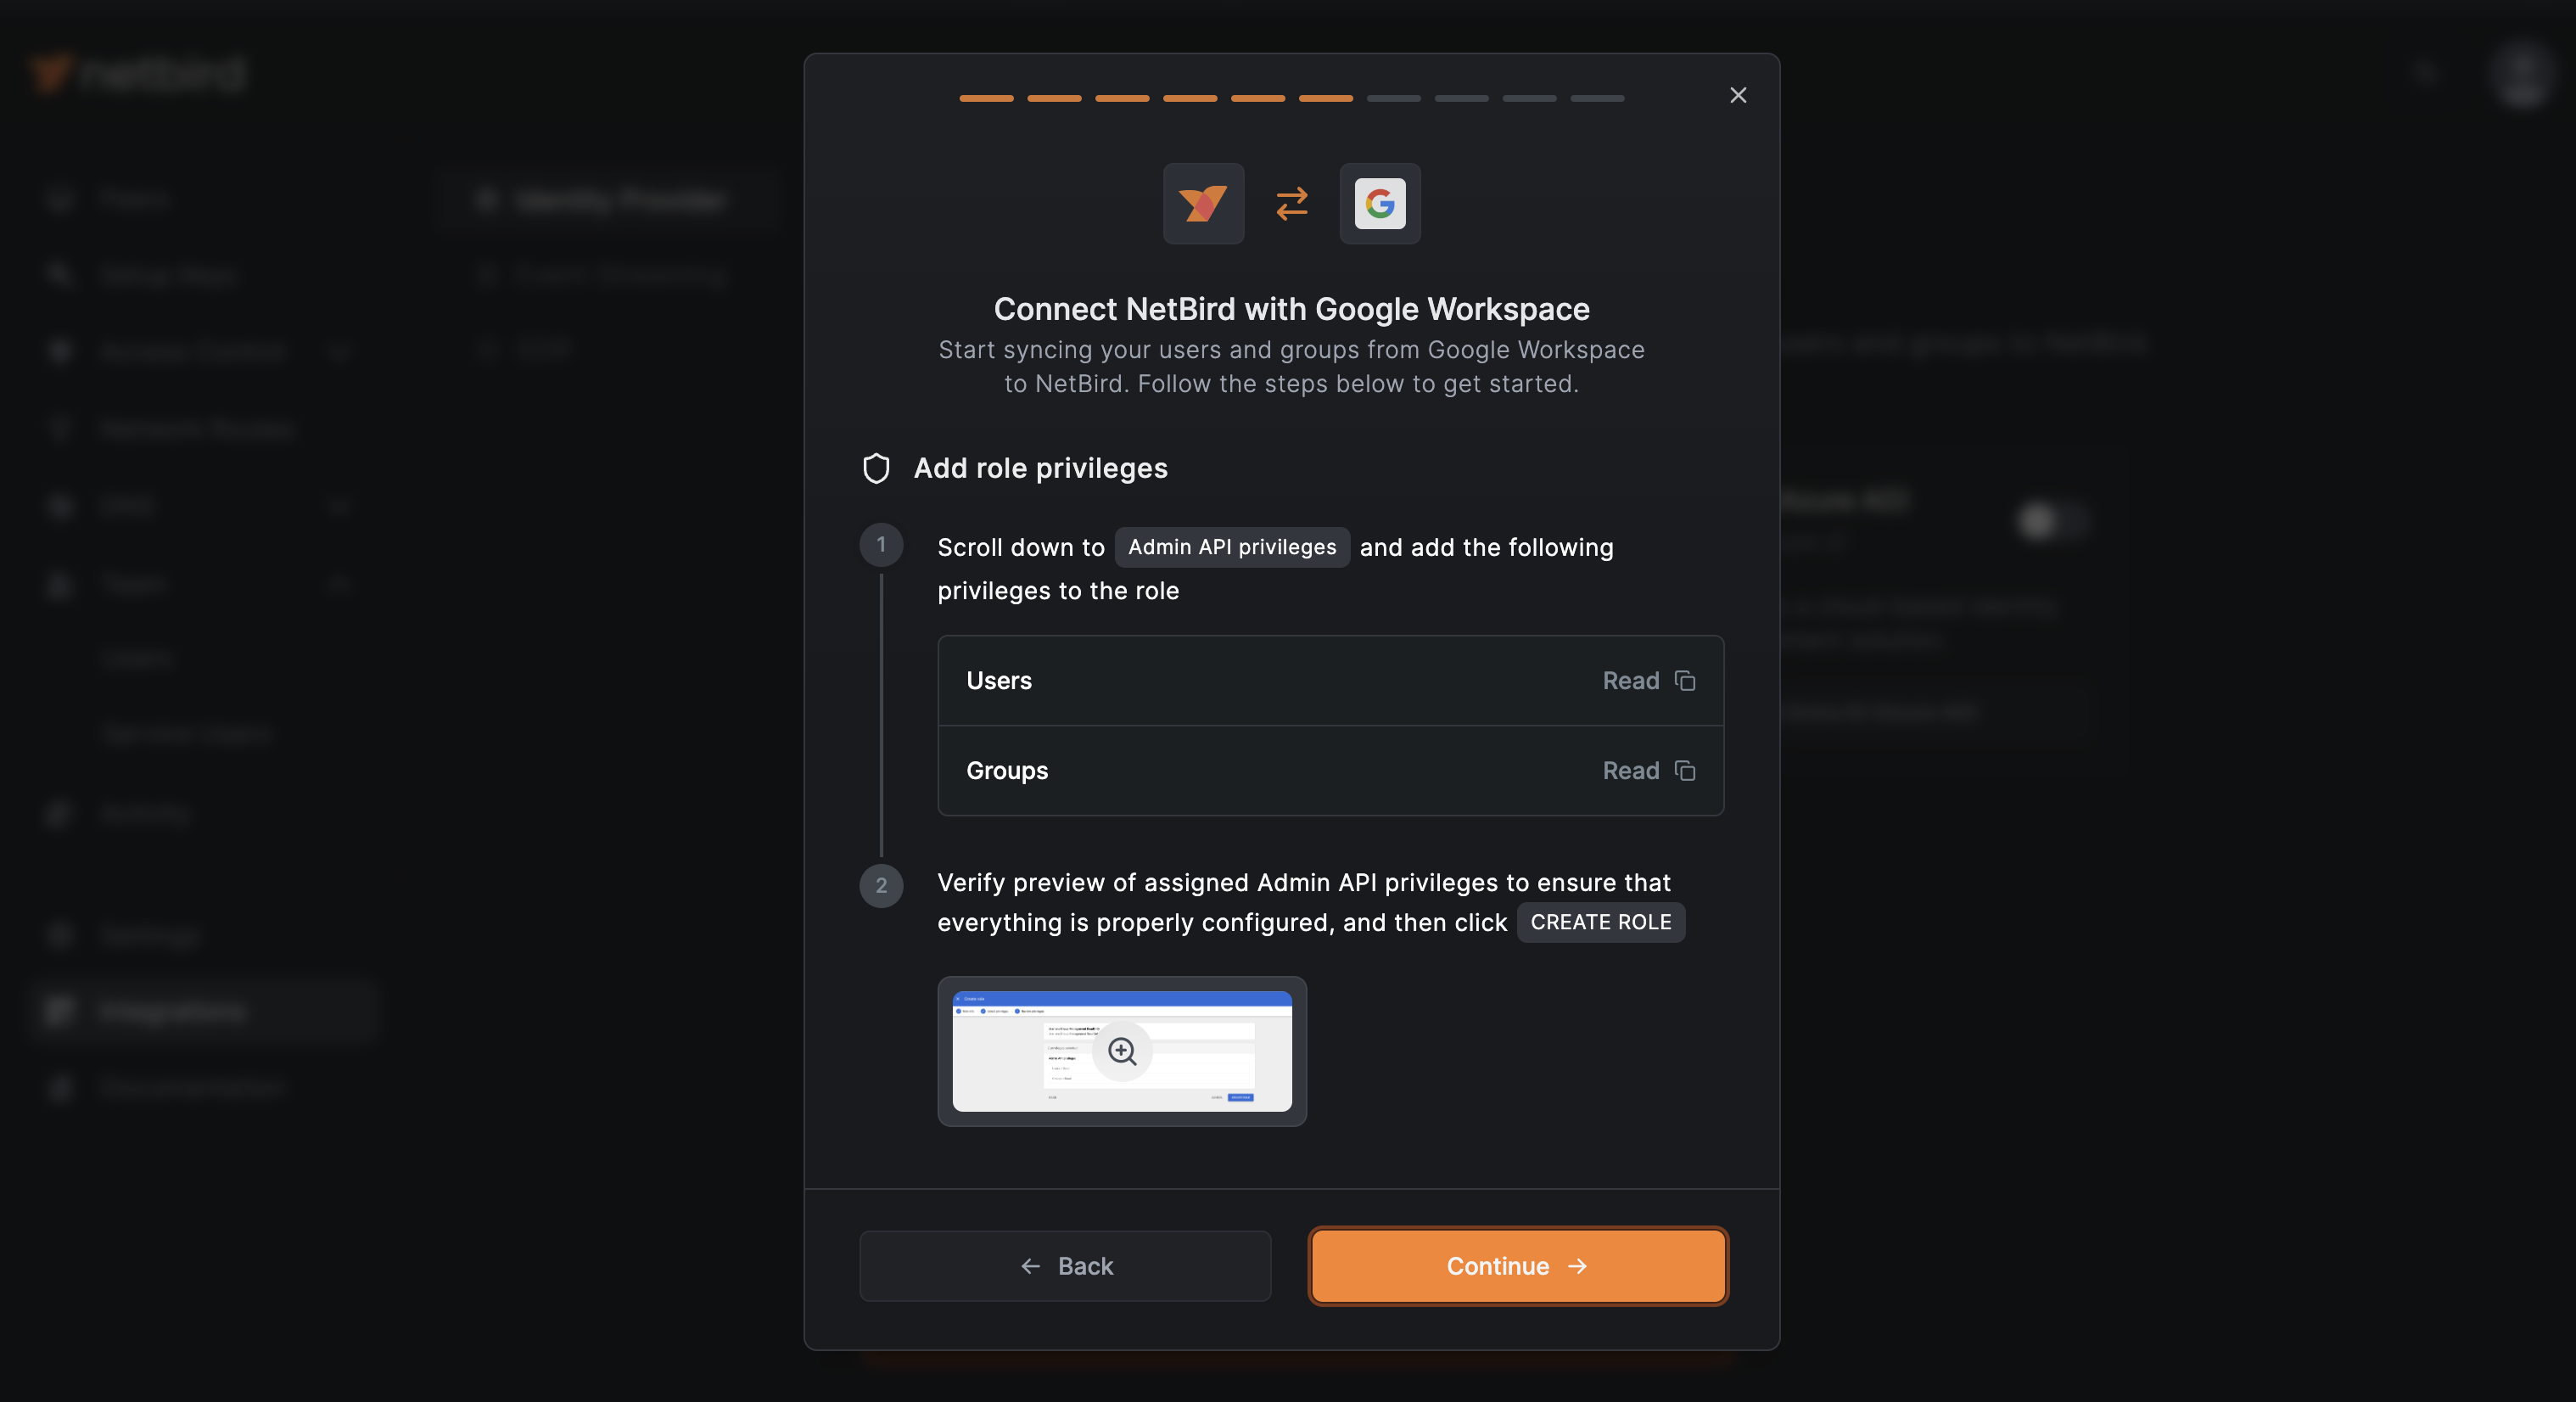
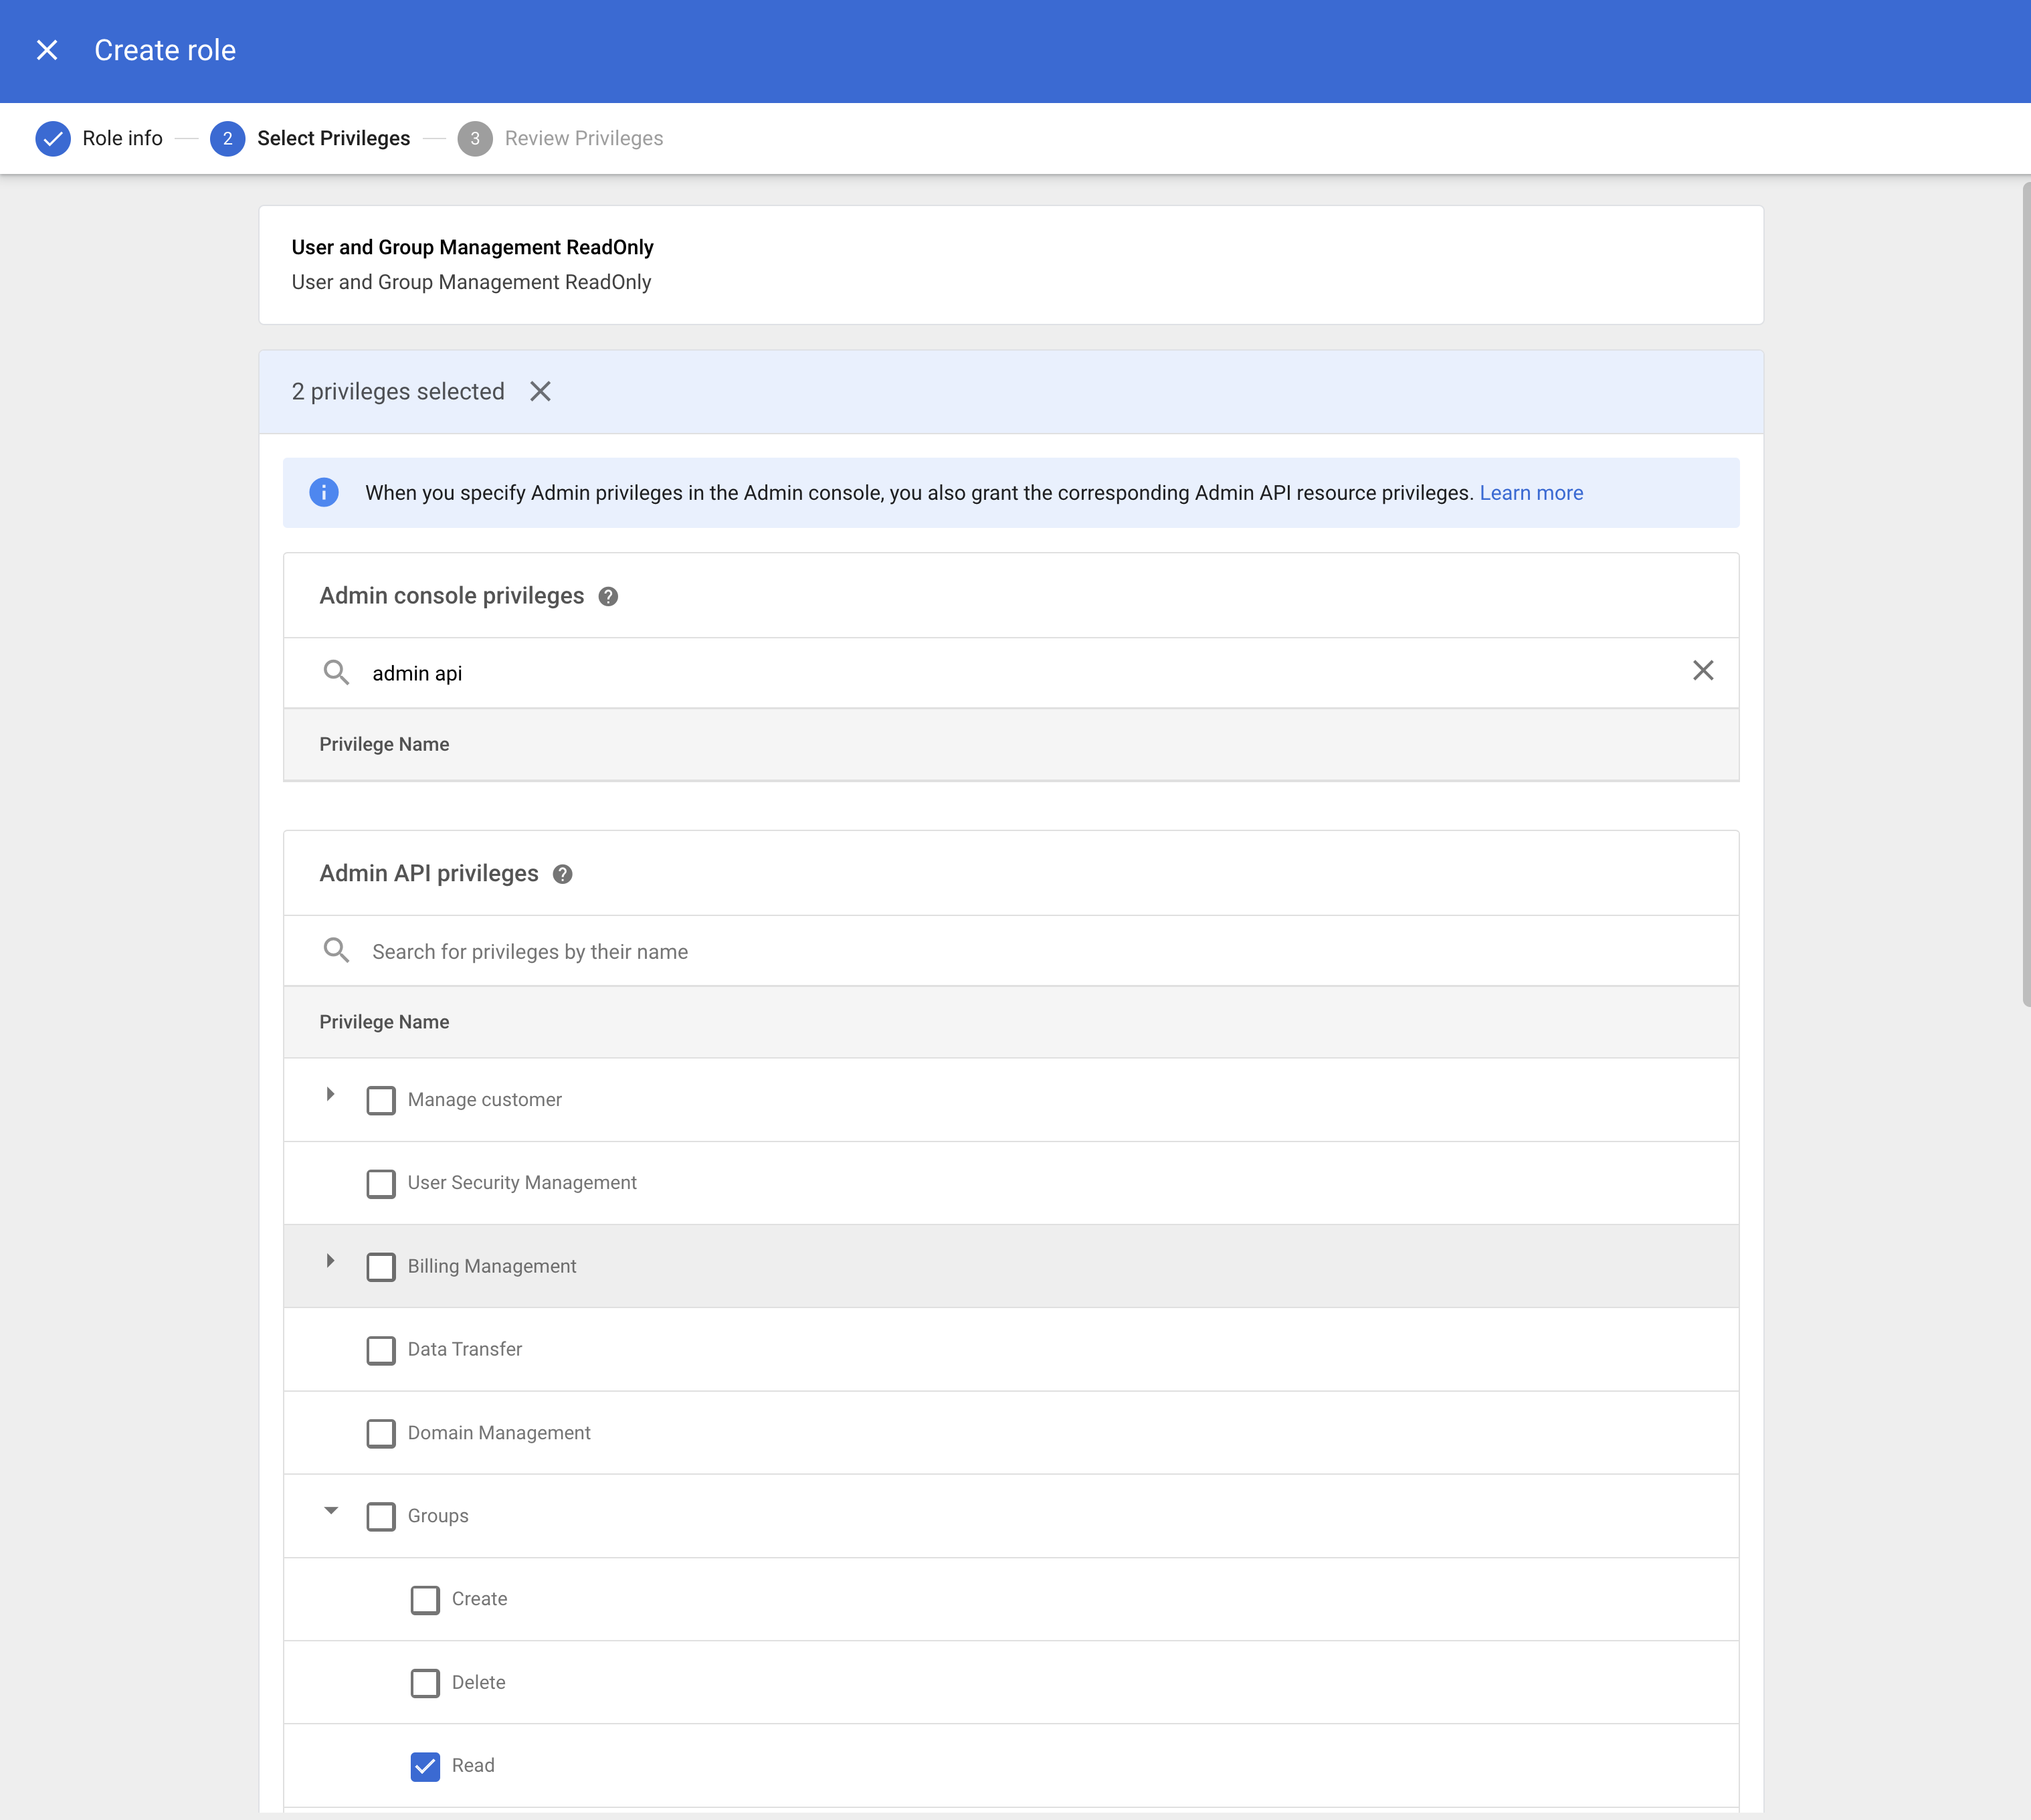
Back to Google Workspace, enter admin api in the search bar and enable the following privileges for the Admin API:
- Users:
Read - Groups:
Read
Then, click CONTINUE
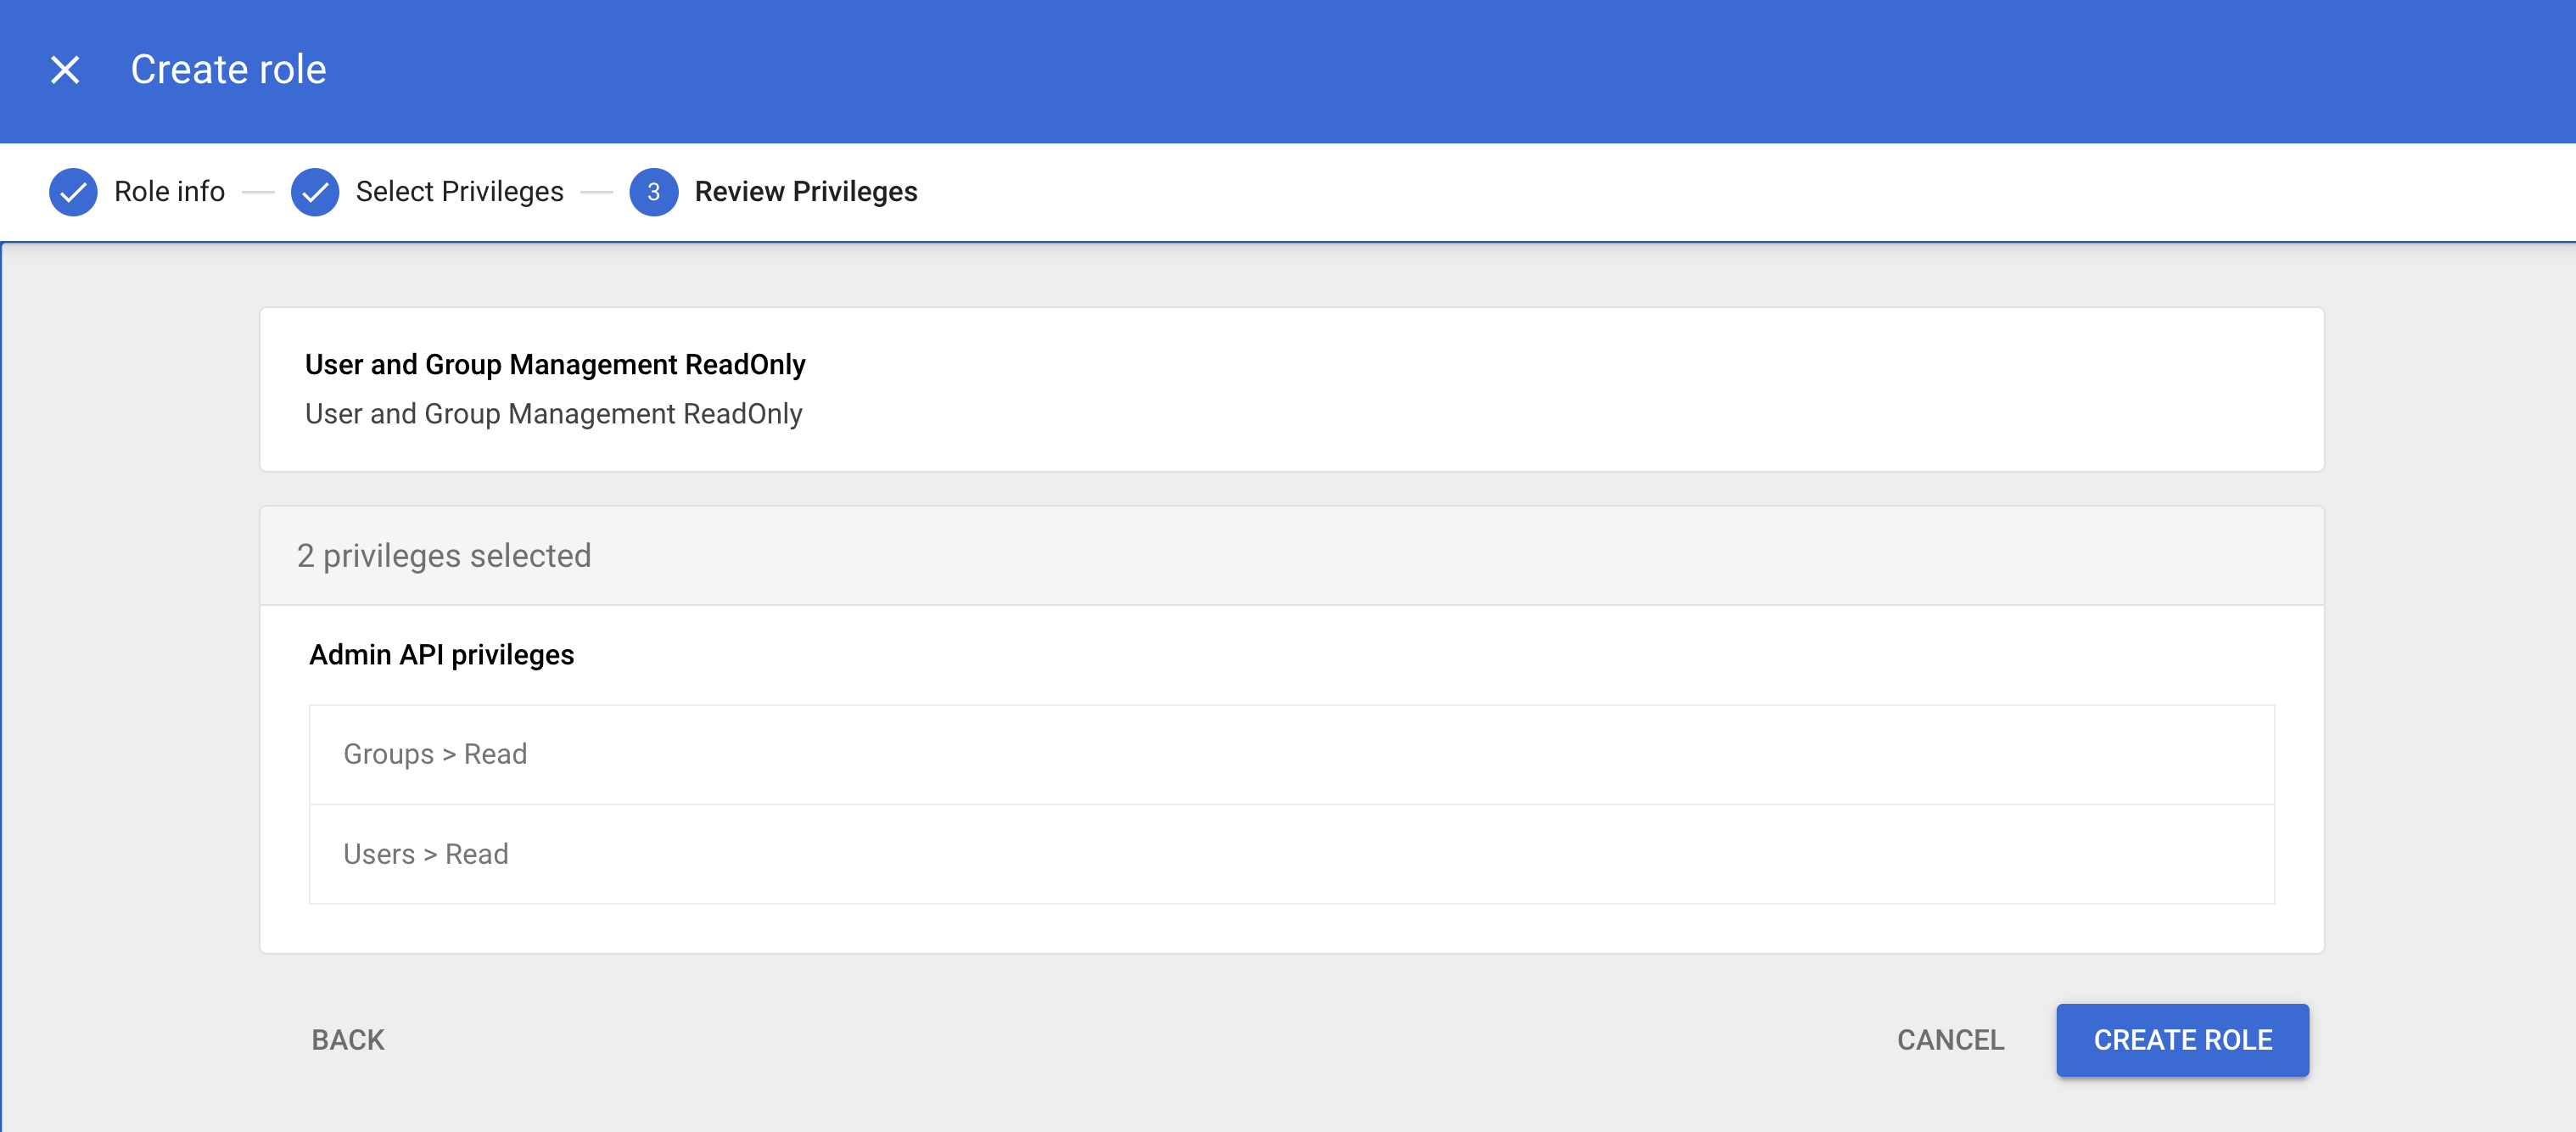
Review the Admin API privileges to verify they are correct and click CREATE ROLE when ready.
Assigning Admin API Privileges to Google Cloud Service Account
In NetBird, click Continue →. For convenience, you can copy the service account Email from this screen and use it to grant it the necessary permissions in Google Workspace.
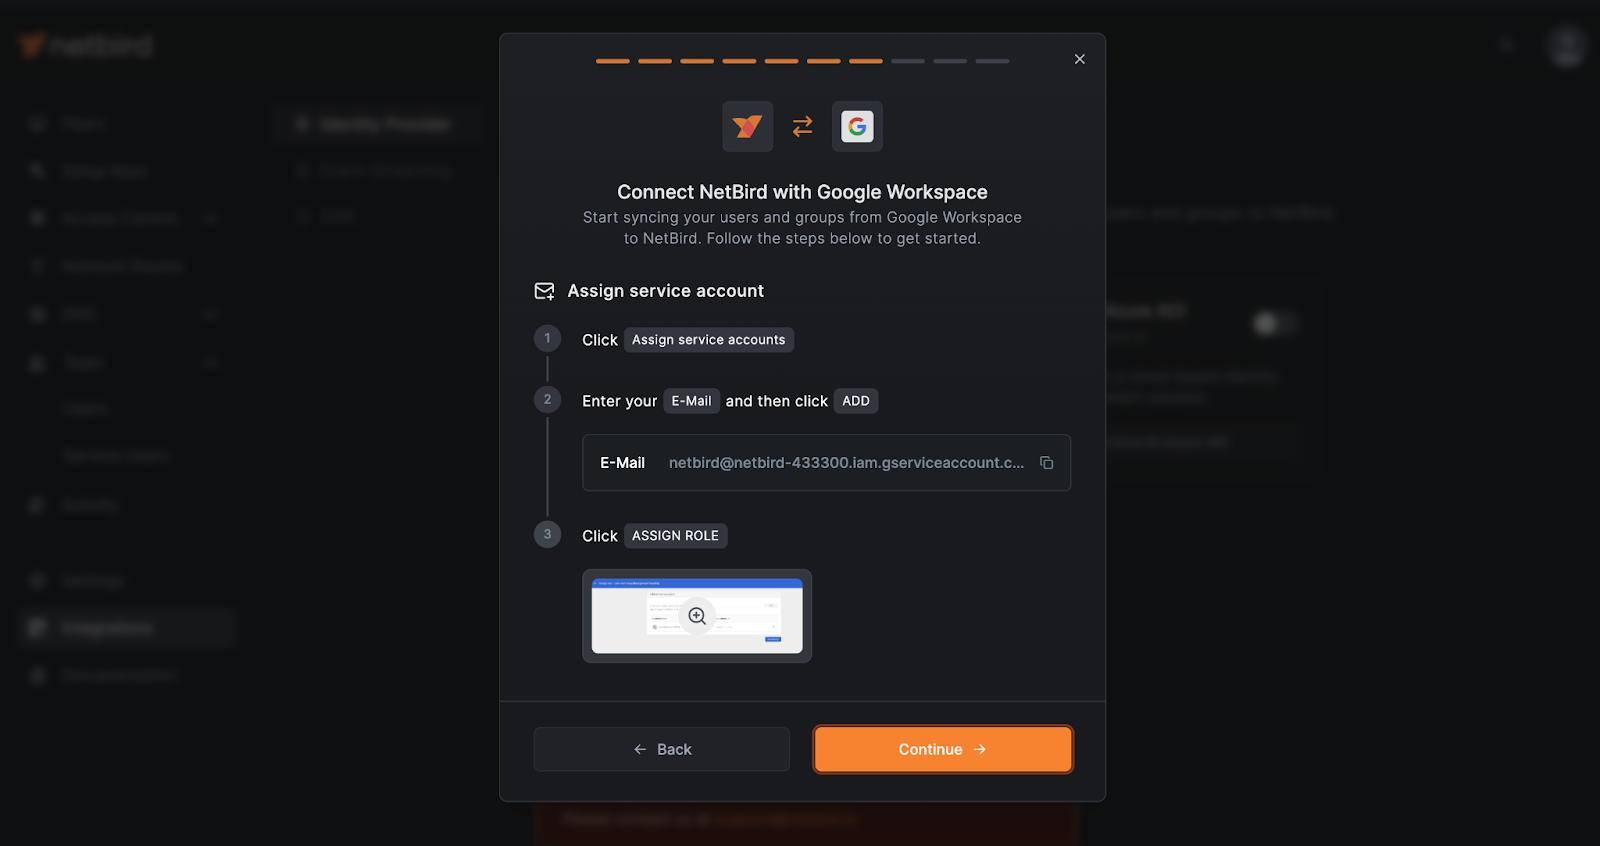
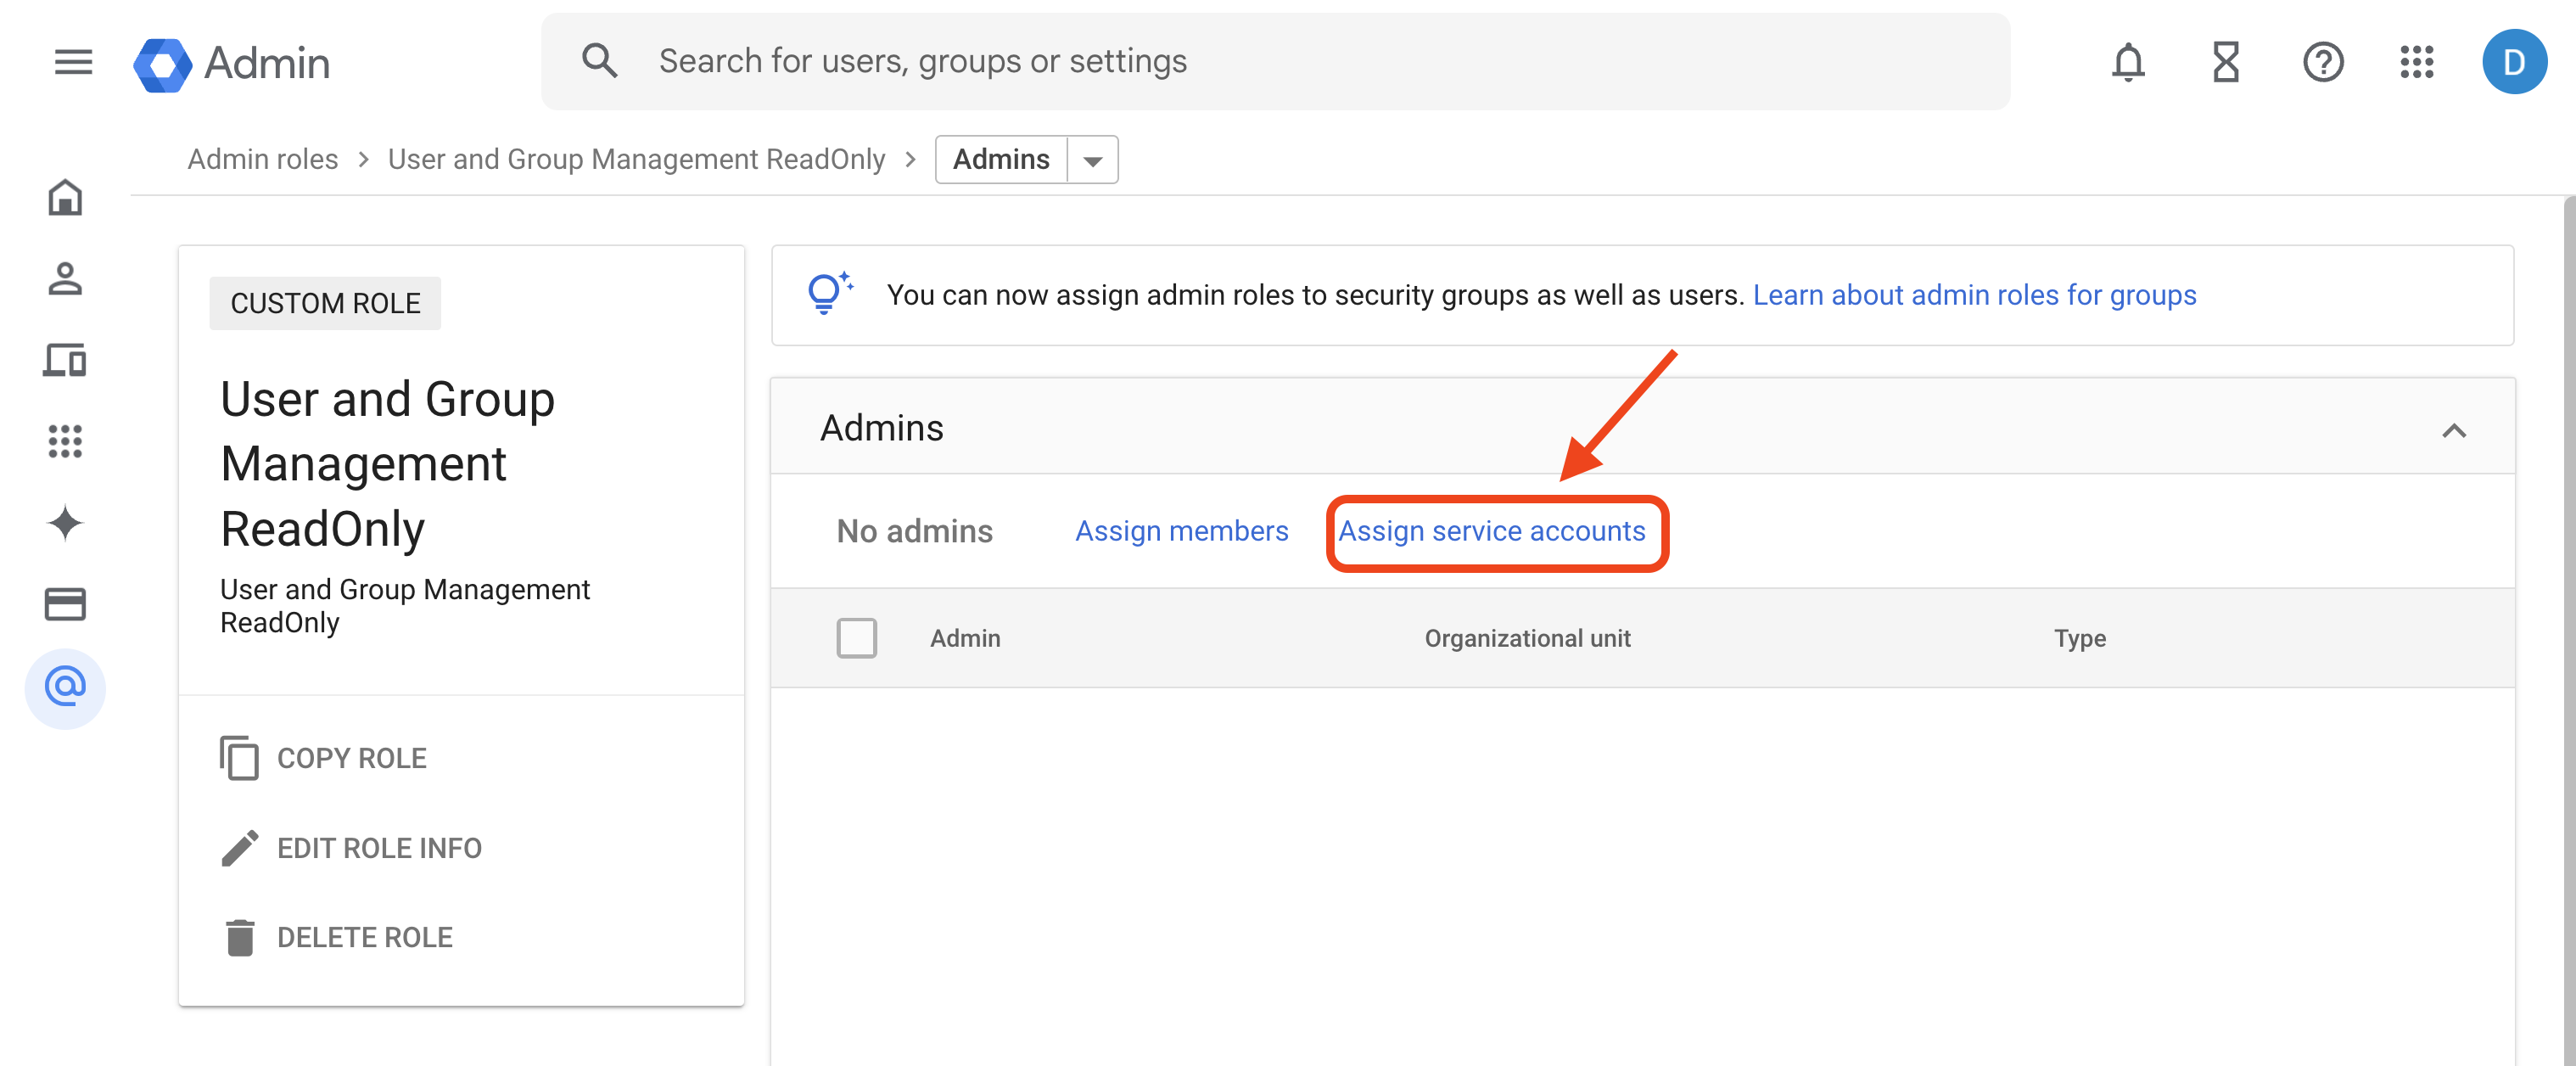
Then, in Google Workspace, click on Assign service accounts as shown below:
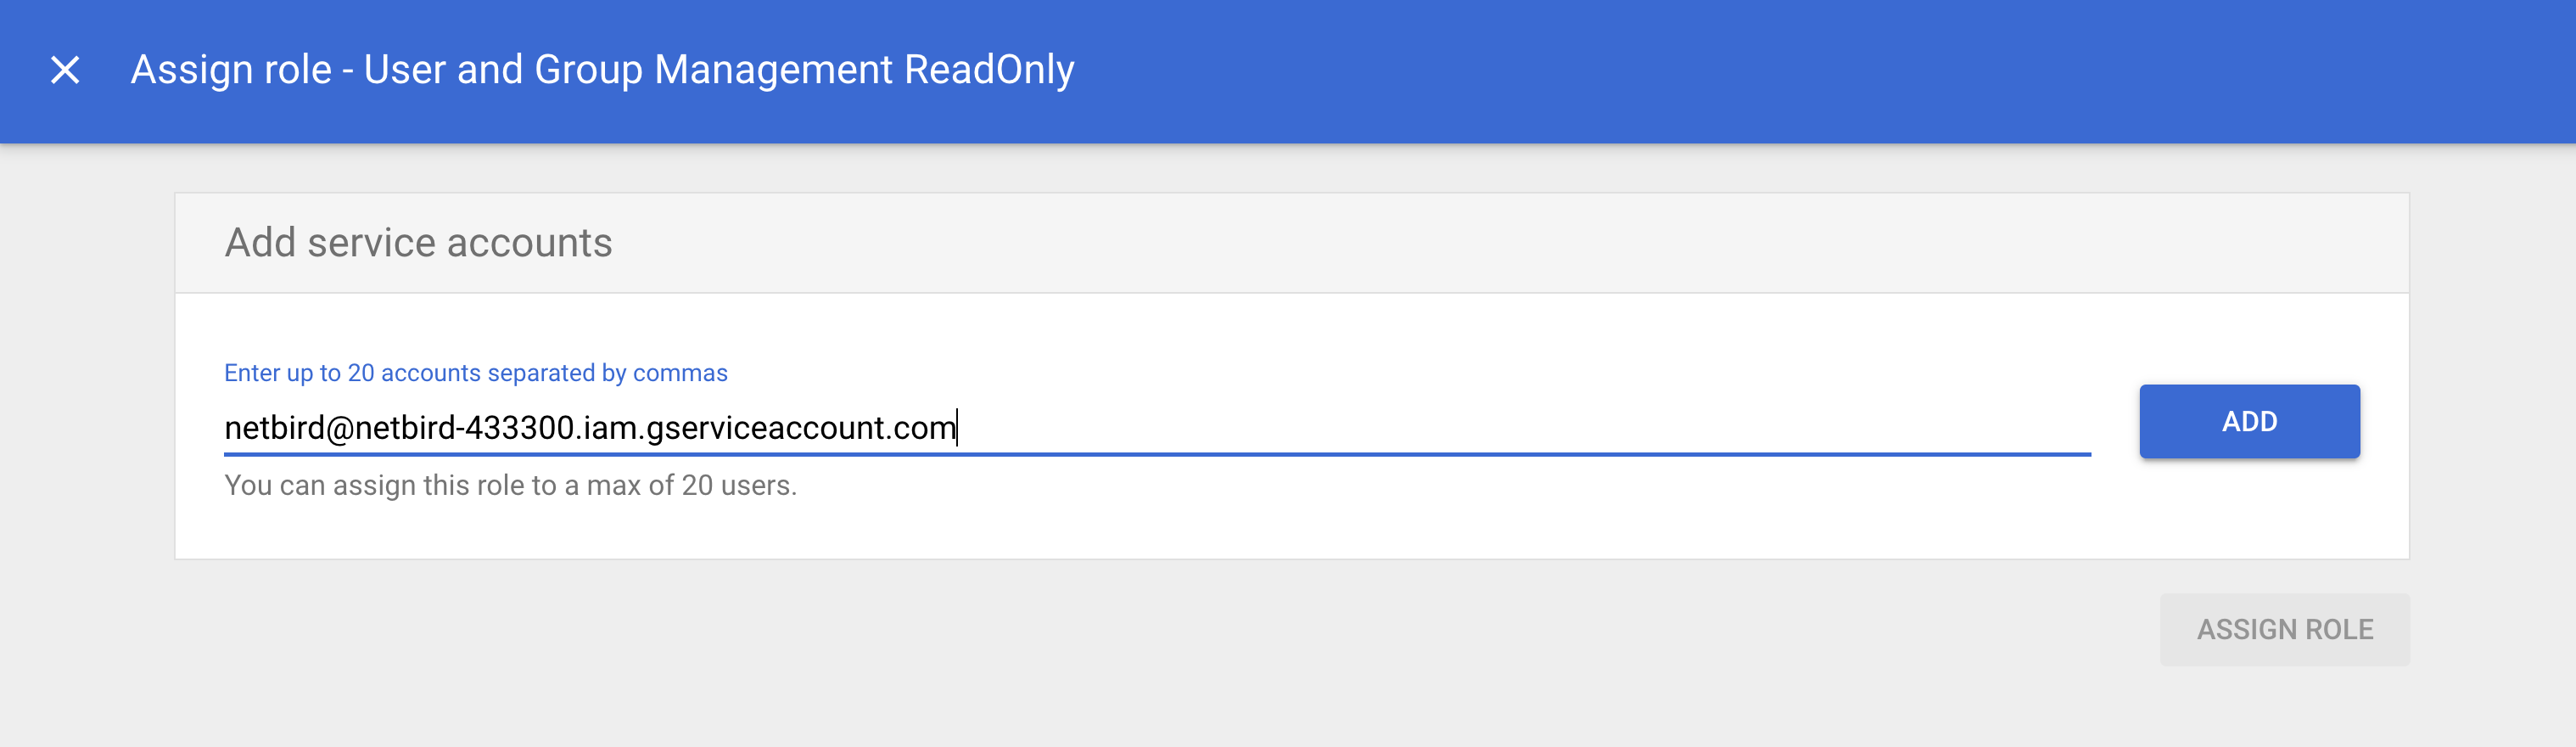
Paste the service account Email address and click the ADD button.
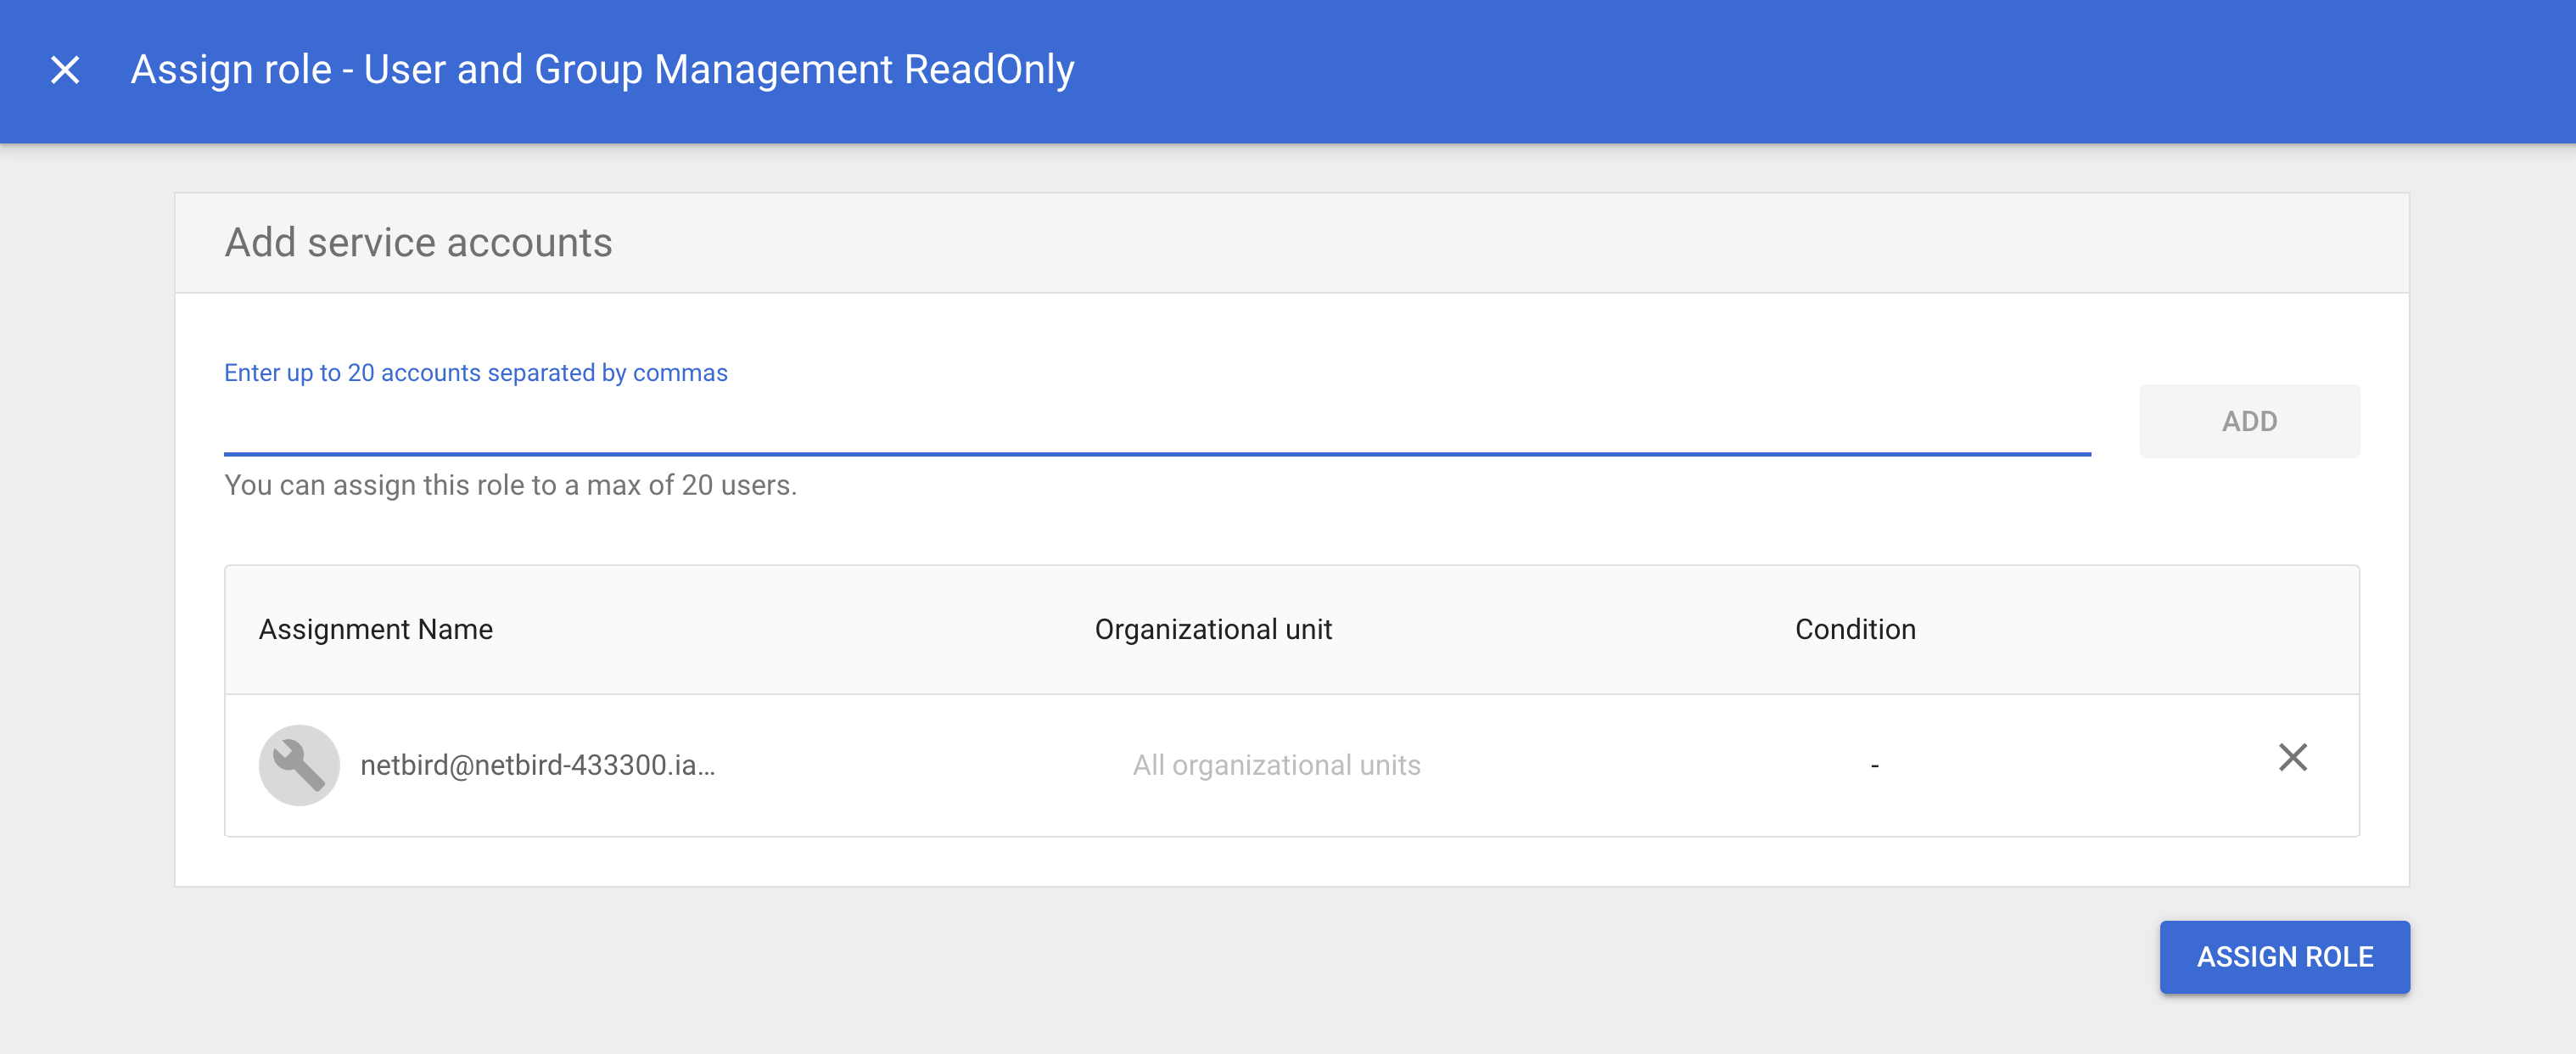
Verify the Email and click ASSIGN ROLE to grant the role User and Group Management ReadOnly to the NetBird service account.
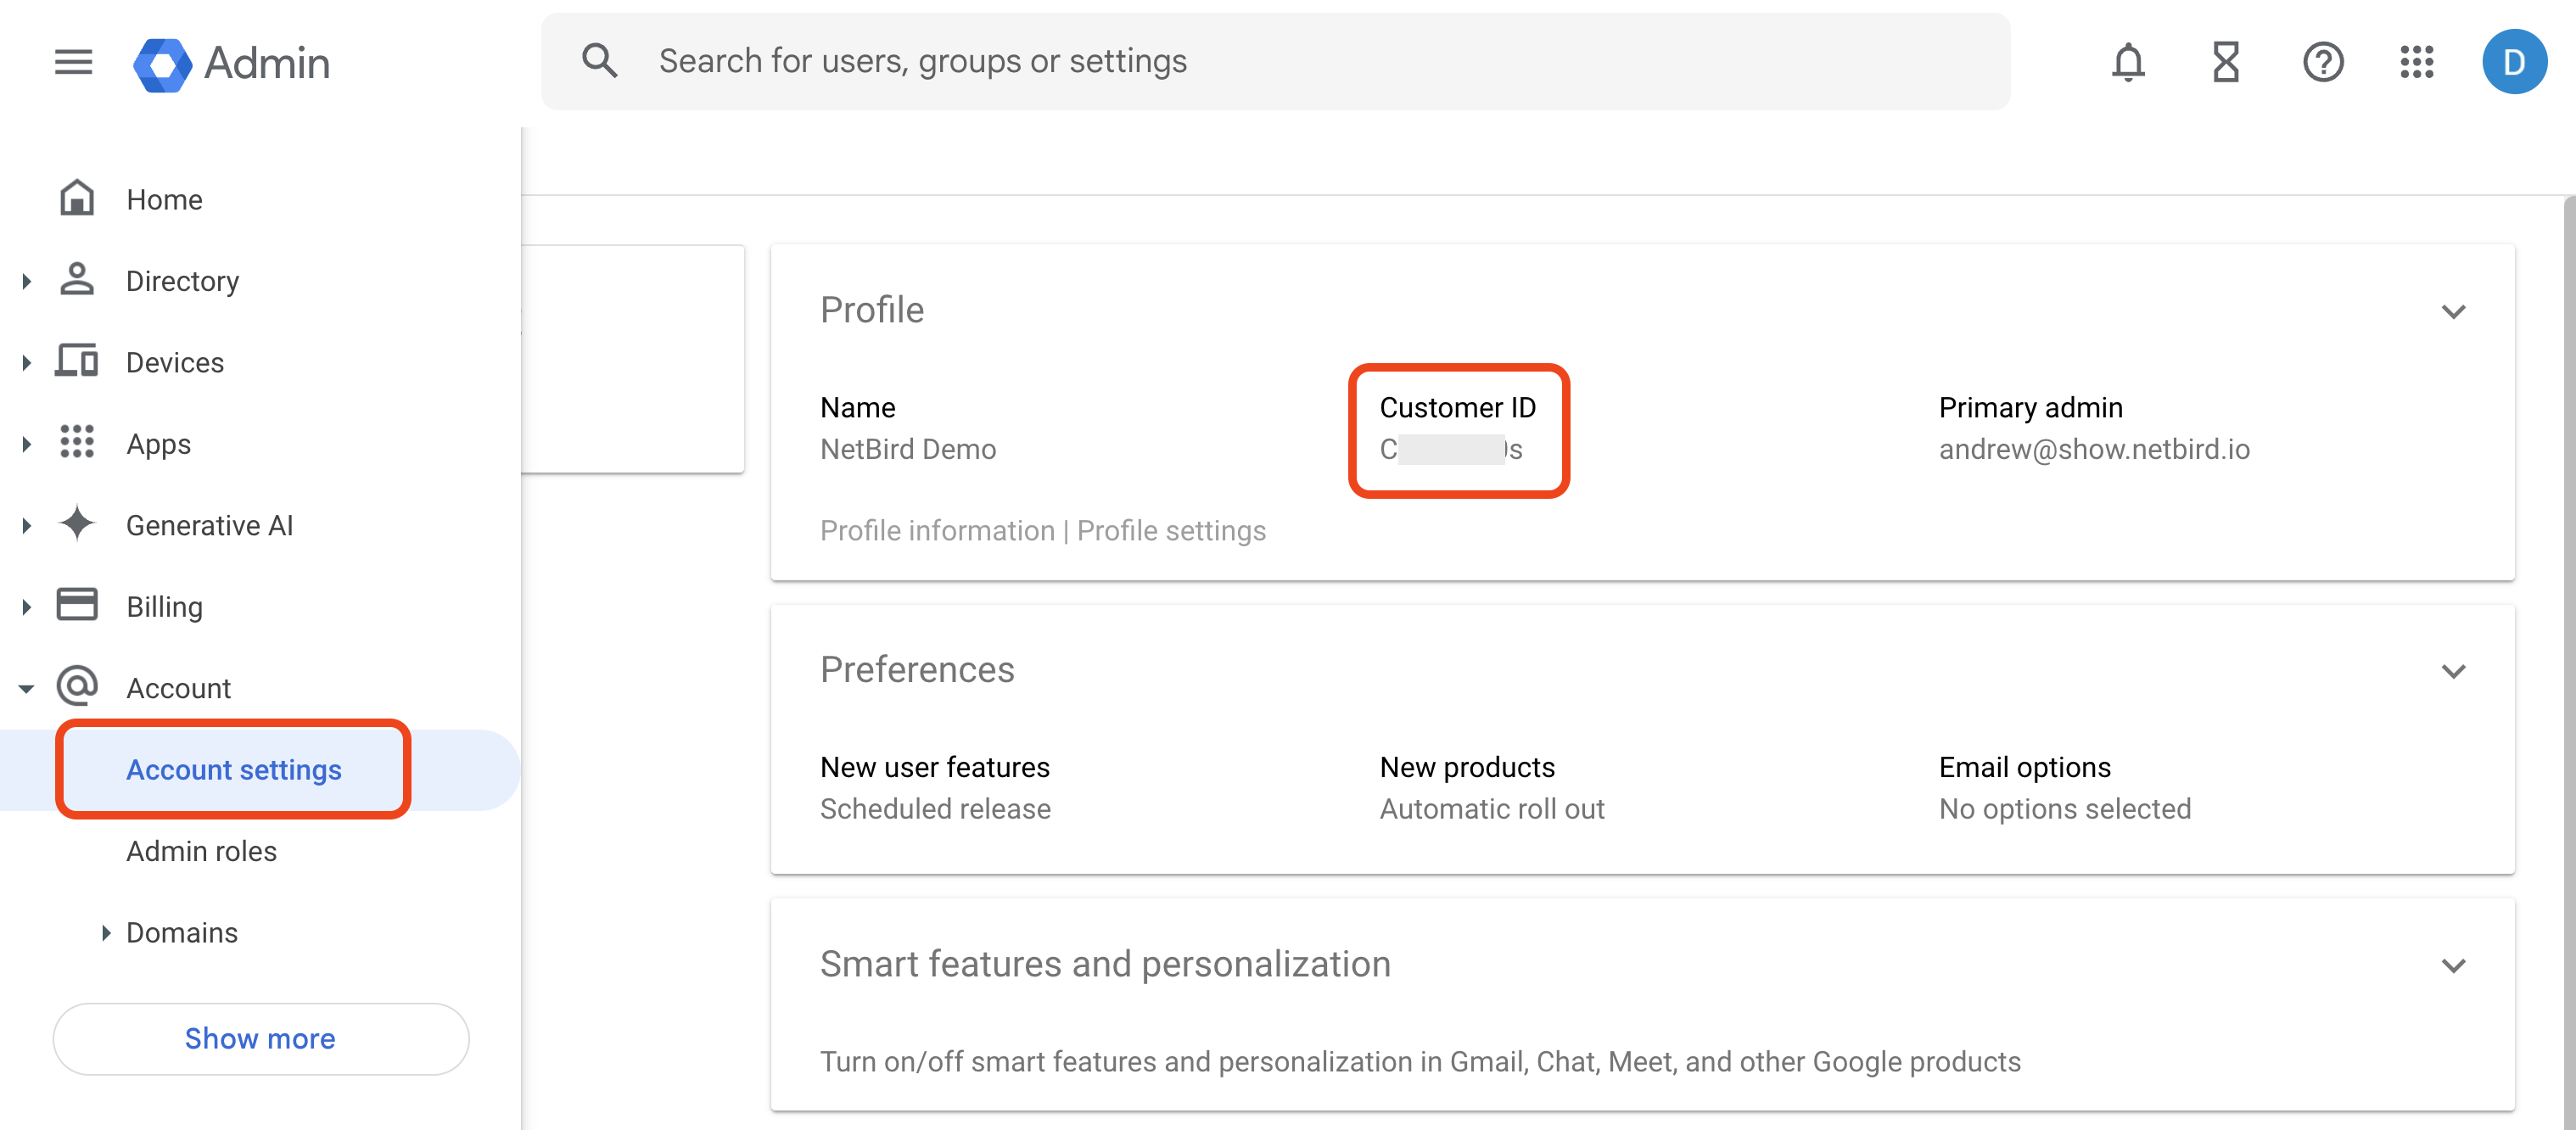
Entering Customer ID
Go back to NetBird and click Continue →. The next screen will prompt you to enter your Google Workspace Customer ID.
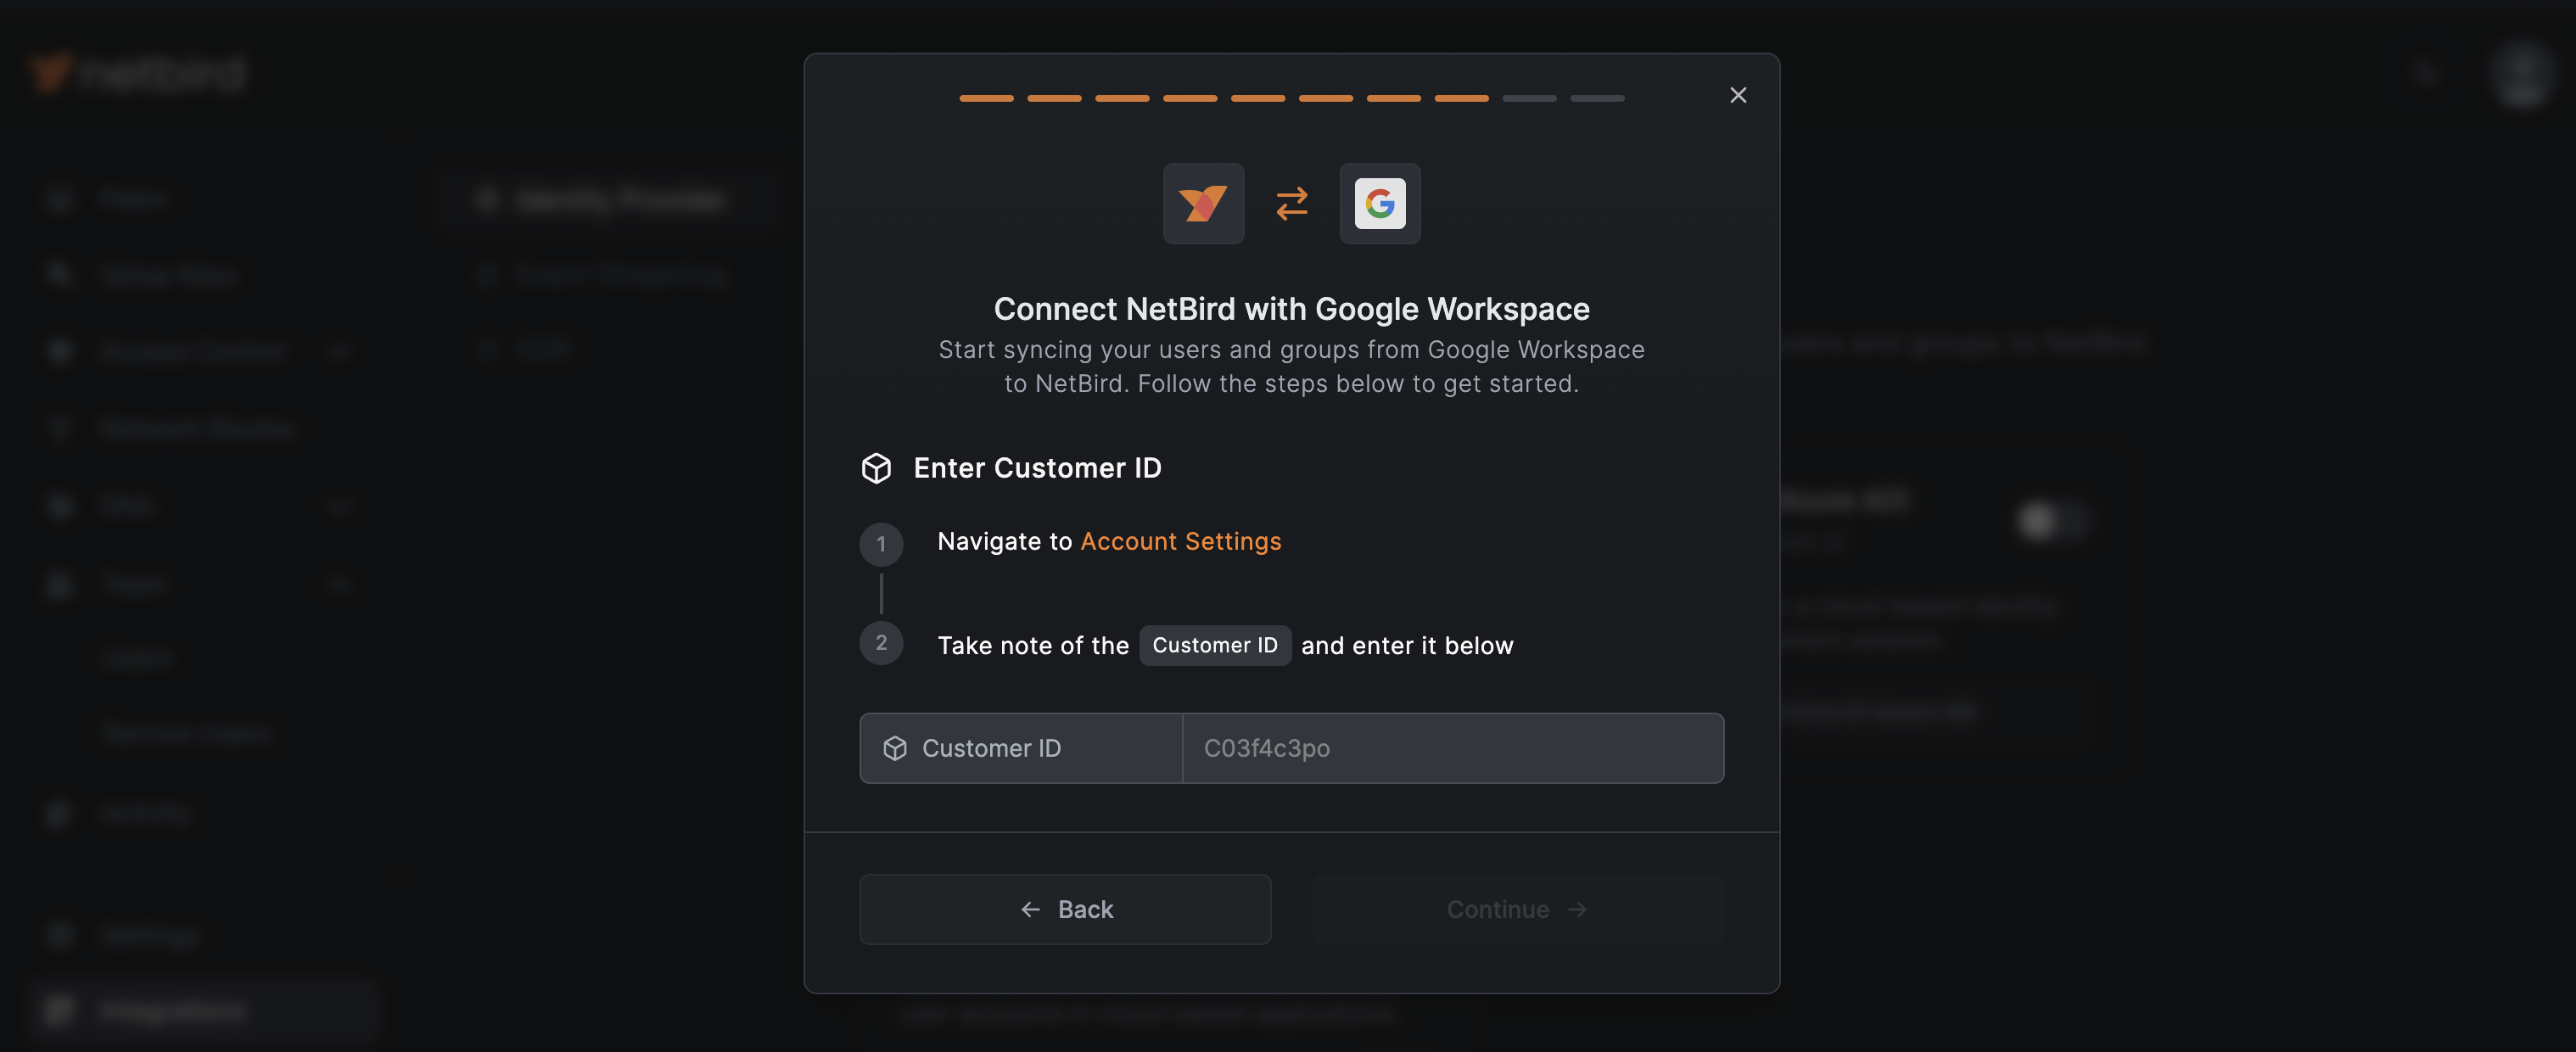
To get your customer ID, navigate to Account Settings and copy the corresponding ID.
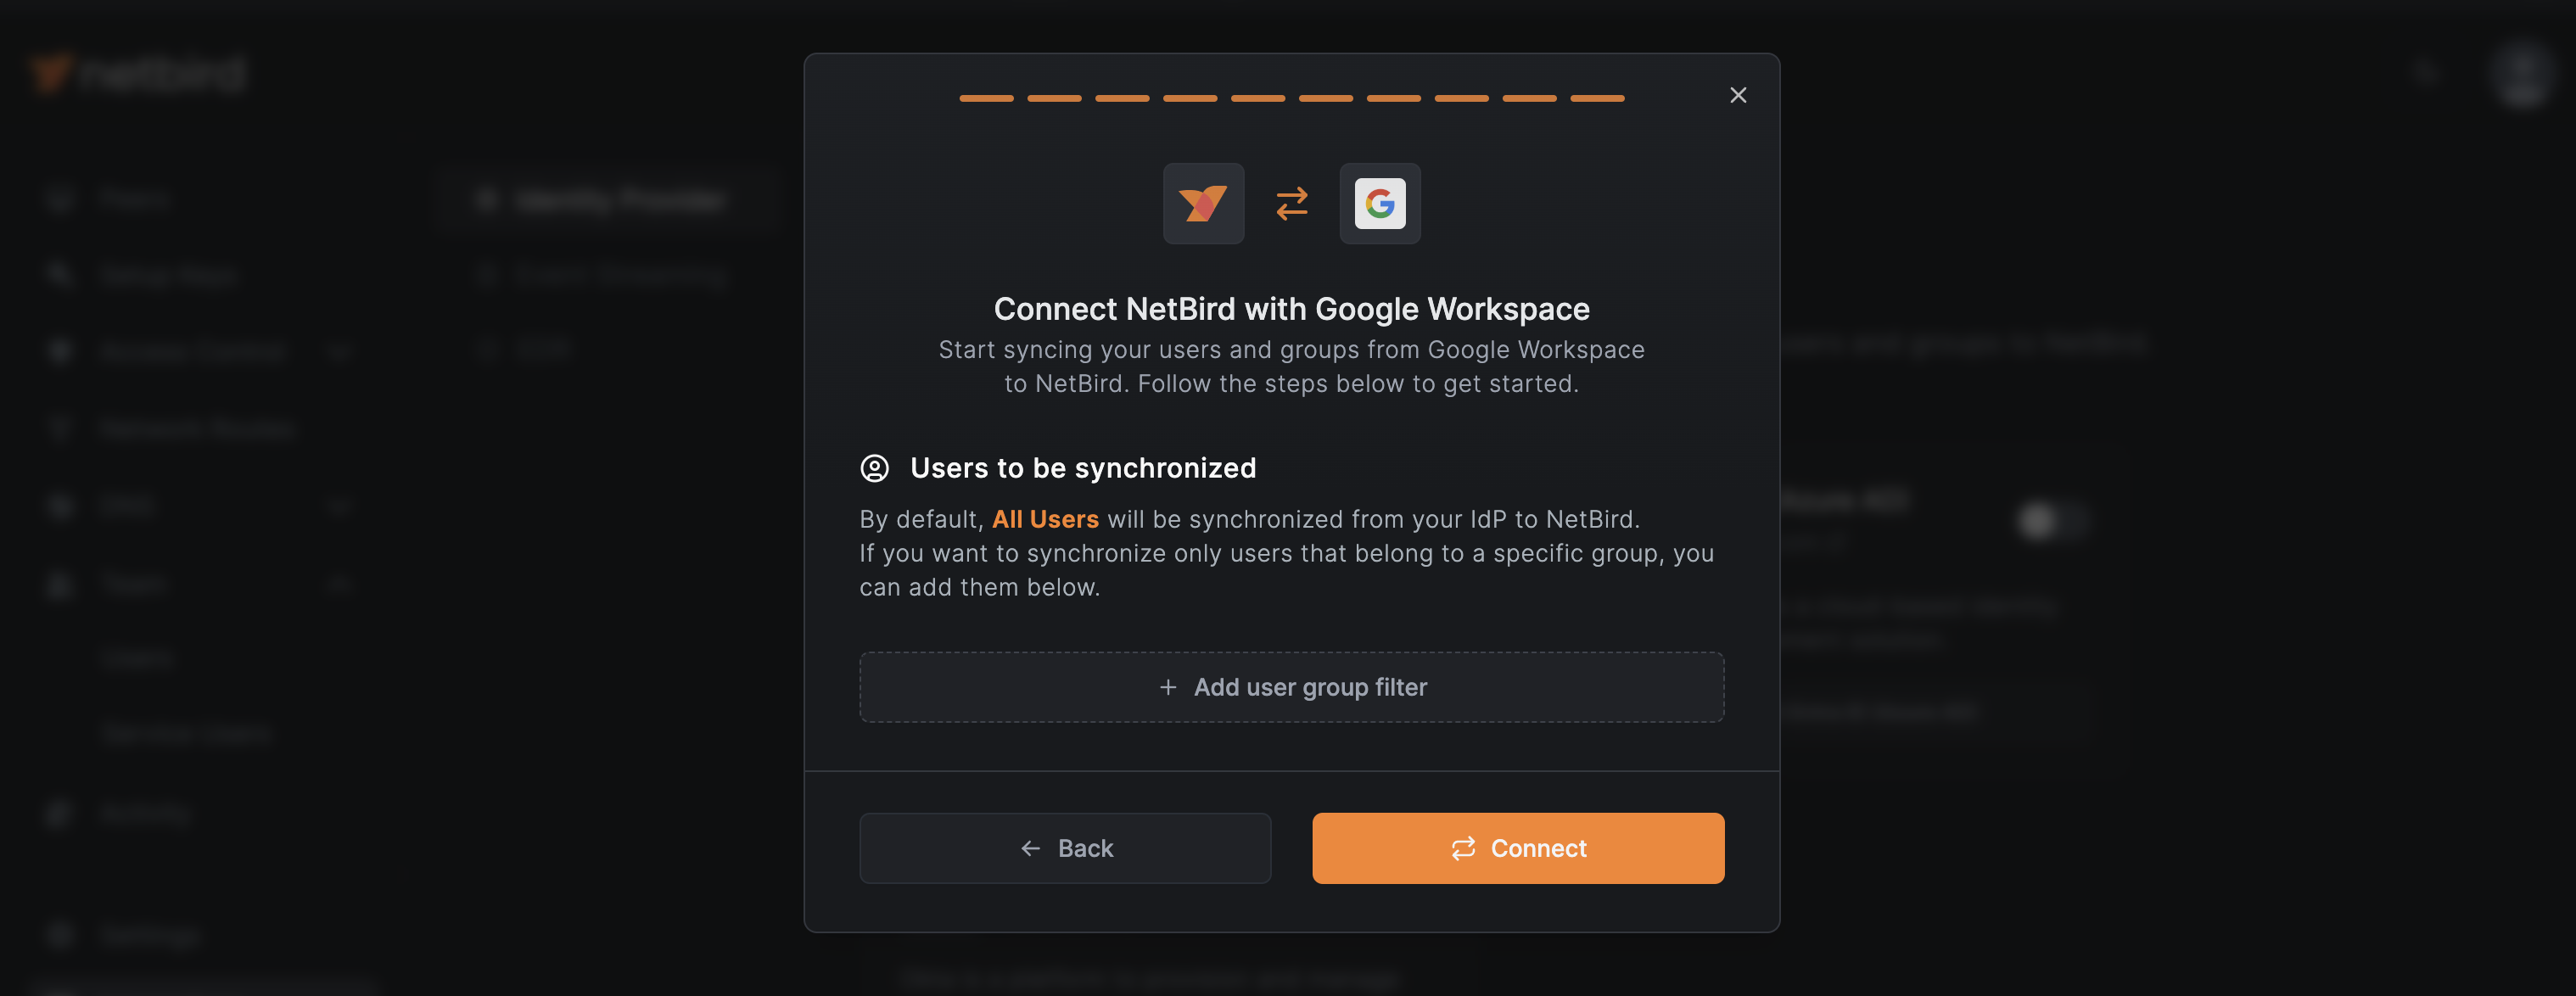
Synchronizing Google Workspace Groups and Users
Return to NetBird. The next two screens allow you to select which Google Workspace groups and users you want to synchronize. By default, NetBird synchronizes all groups and users. If you're okay with syncing everything, click Continue on both screens.

You can also click on + Add group (or user group) filter to change this settings as you see fit. To finish the integration process, click the Connect button.
The next screen, should be similar the following one, verifying that the integration was successful:
To verify the integration is working correctly, you can also navigate to Team > Users. Here, you should see your synchronized Google Workspace users listed.
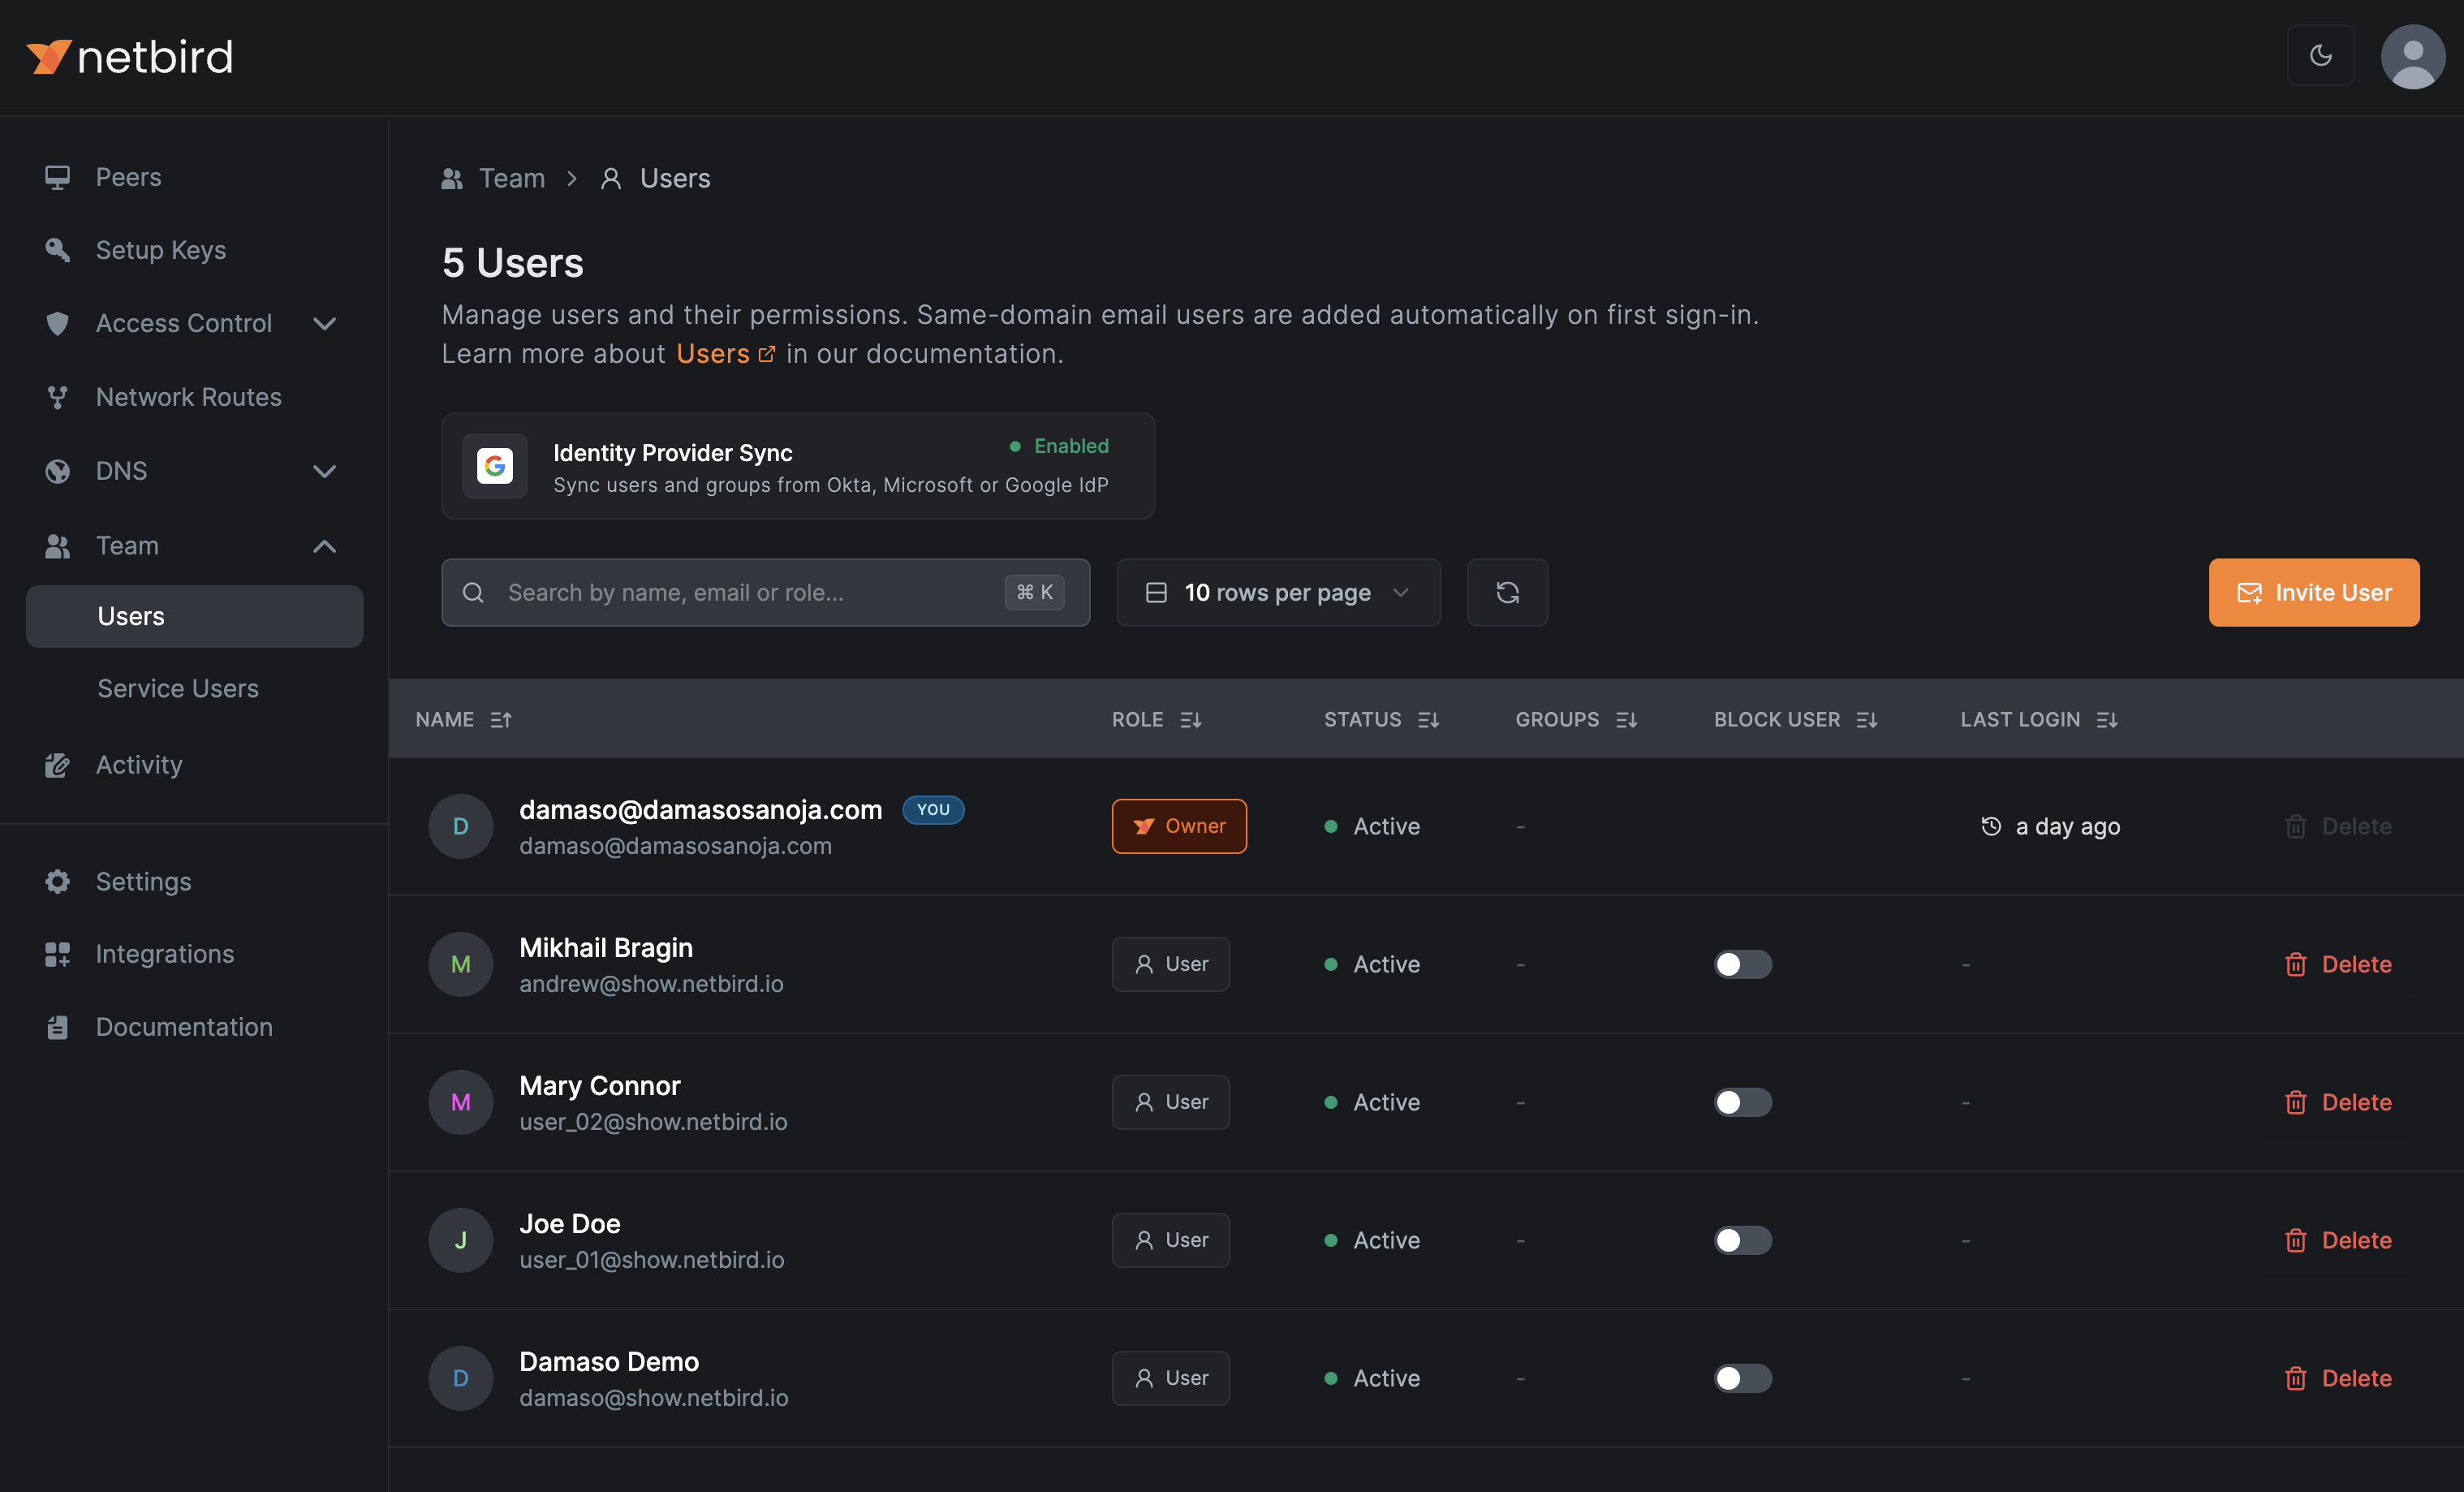
The users should be the same listed in Google Workspace Admin console: