Accessing restricted website domain resources
It is very common to find scenarios where you need to access restricted websites or services. This can be due to company policies, geographical restrictions, or even to avoid tracking. Very often these resources are located behind a cloud load balancer, which changes IP addresses frequently, making it hard to whitelist them. NetBird can help you to access these resources by routing your traffic through a routing peer configured with Networks using Domain resources.
Example
In the following scenario, we will configure access to an accounting website which should accessible only by users from finance team.
The server is running in the company's AWS account in the EU Central region behind a load balancer, so we will create a new Network and add a domain resource
to be routed using Routing peers running in the AWS VPC.
Create a Network
To create a Network, navigate to the Networks > Networks section in the NetBird dashboard:
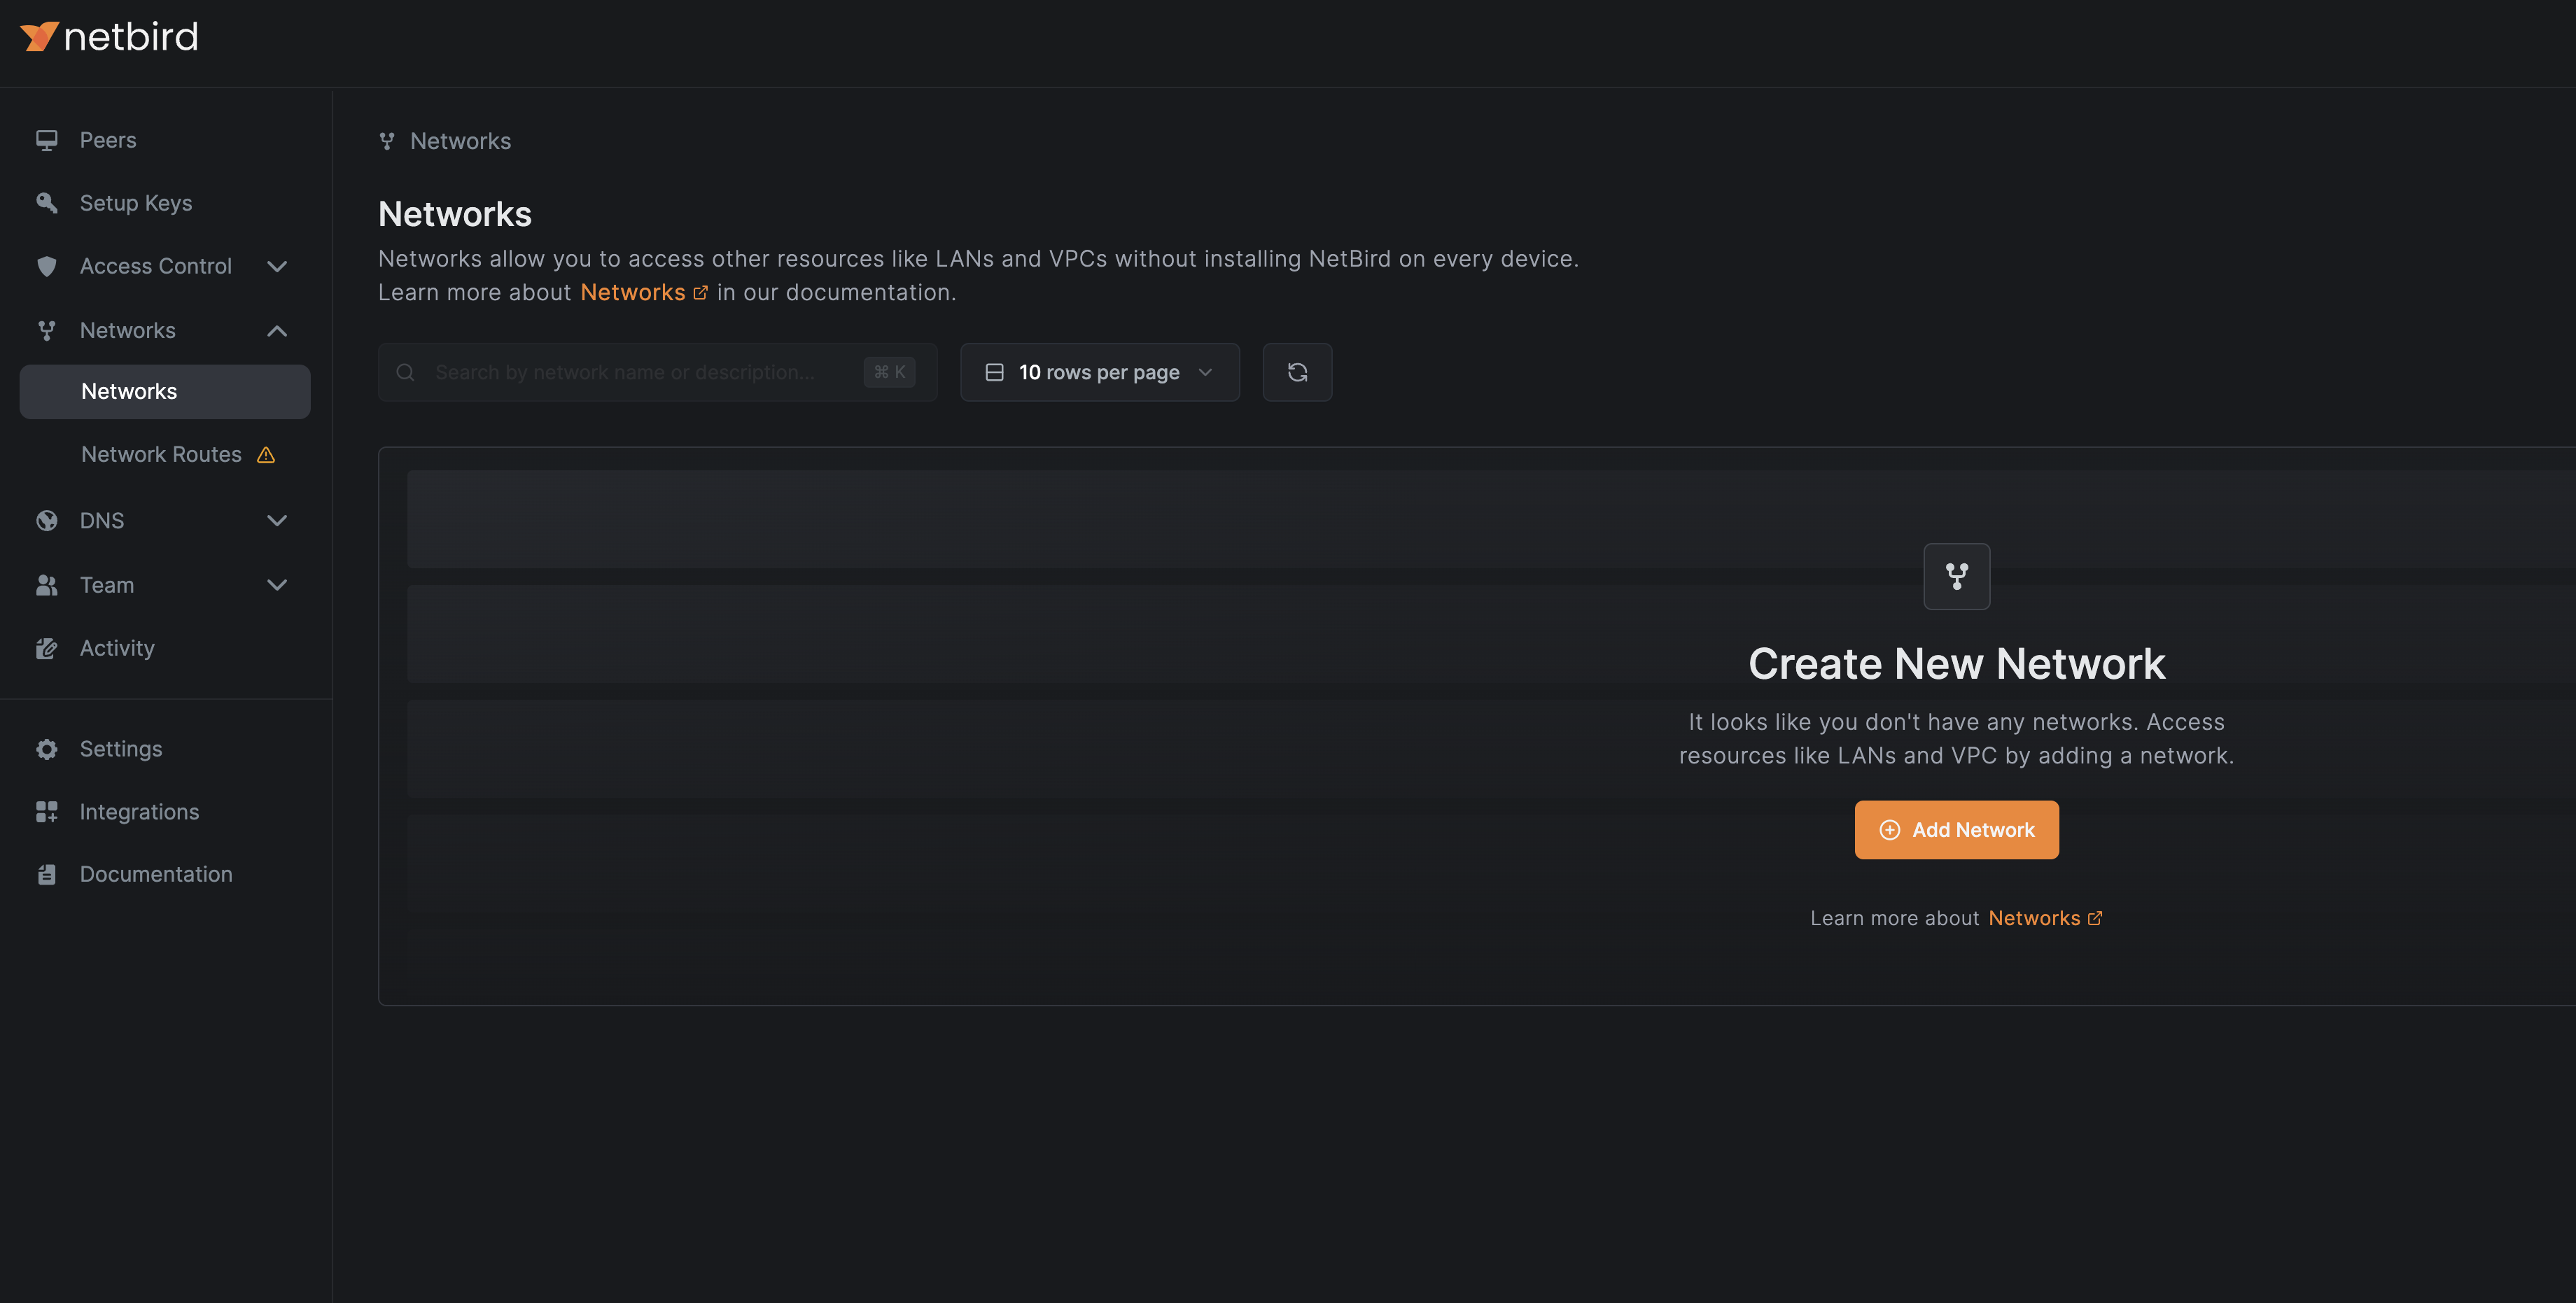
Click on Add Network to follow a Wizard that will guide you through the steps to create a network and add resources to it.
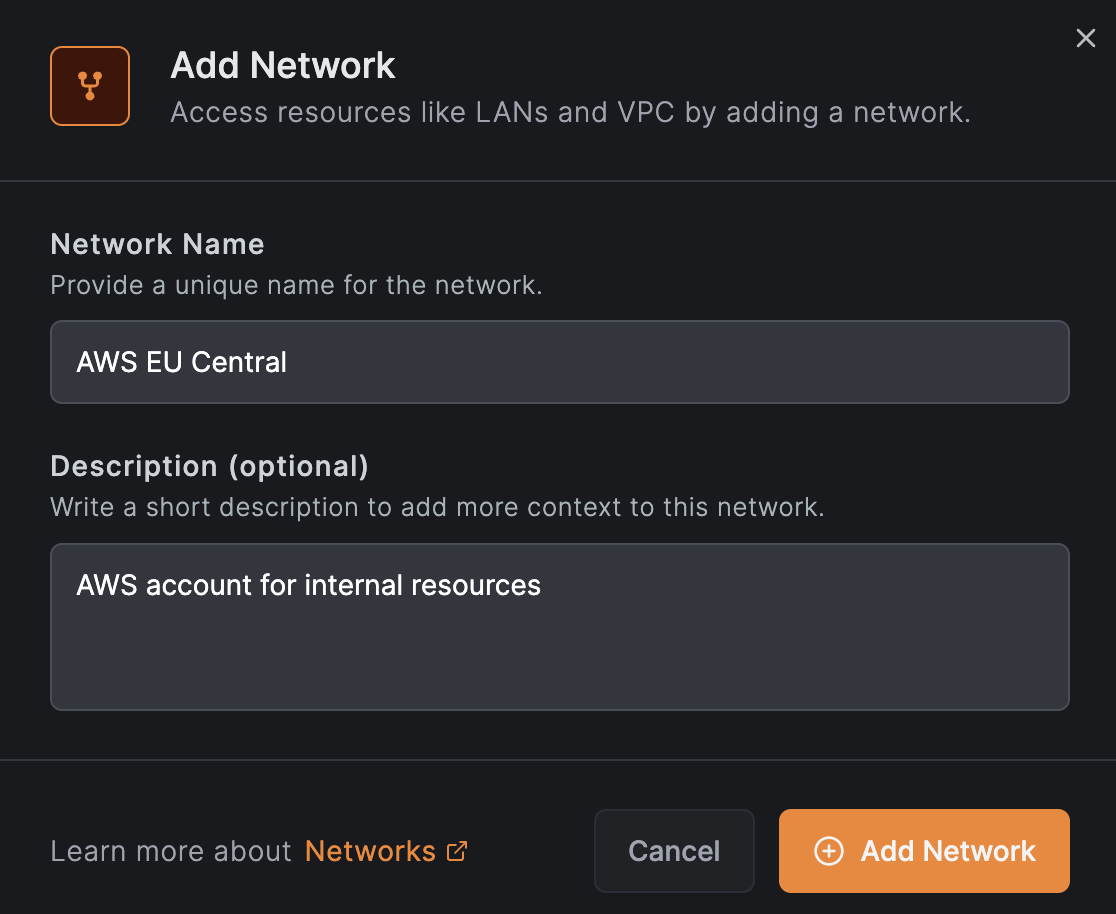
First, we fill out the network Name and Description as shown in the image below and click Continue:
Add a routing peer
Next we are asked to add a routing peer to the network. Let's click on Add routing peer and select a node from that VPC:
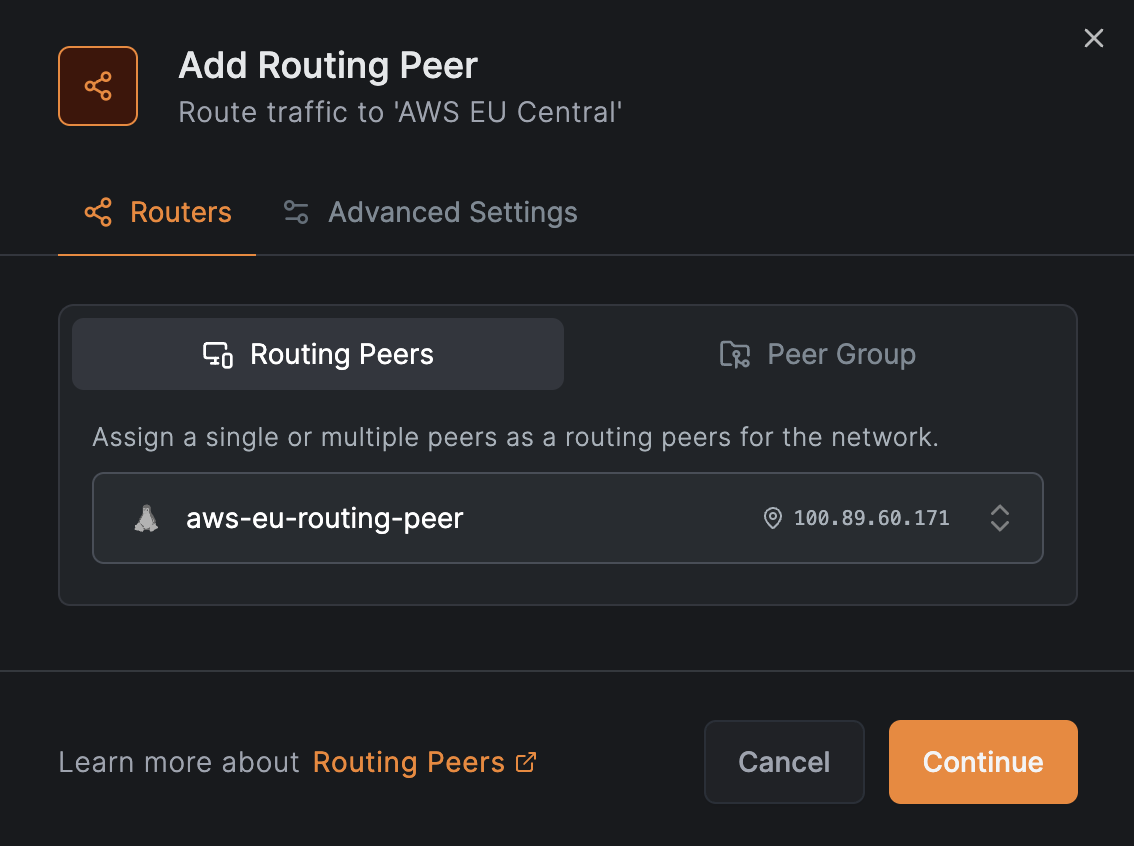
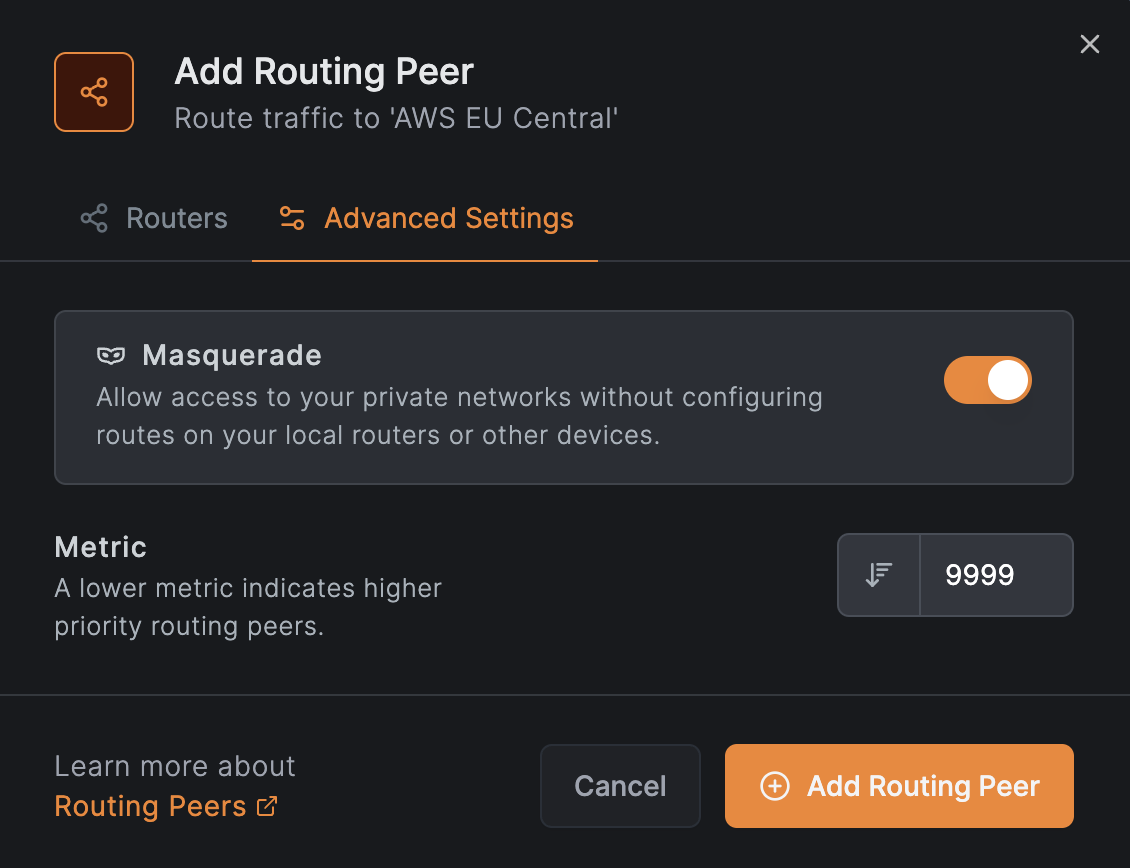
Click on Continue and then accept the defaults to add a routing peer by clicking on Add Routing Peer:
Add a resource
Following the guide, we are asked to add a new resource.
Click on Add Resource and enter the domain name of the accounting website in this case, accounting.example.com:
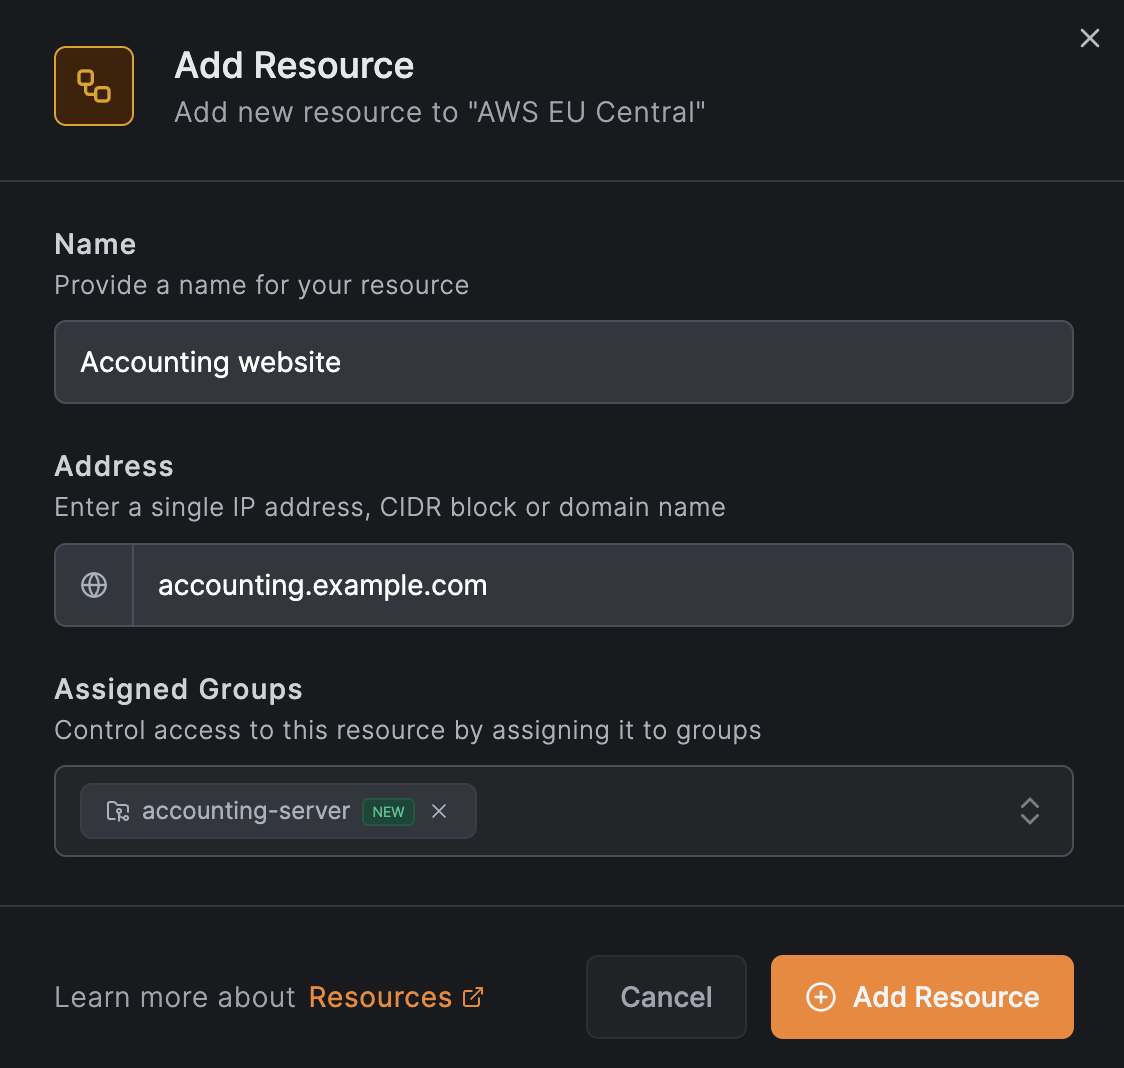
We can also assign a group to this resource; in this case, we will assign the group accounting-server to it. This way, we can create a policy that allows only the finance team to access this resource.
Add an access control policy
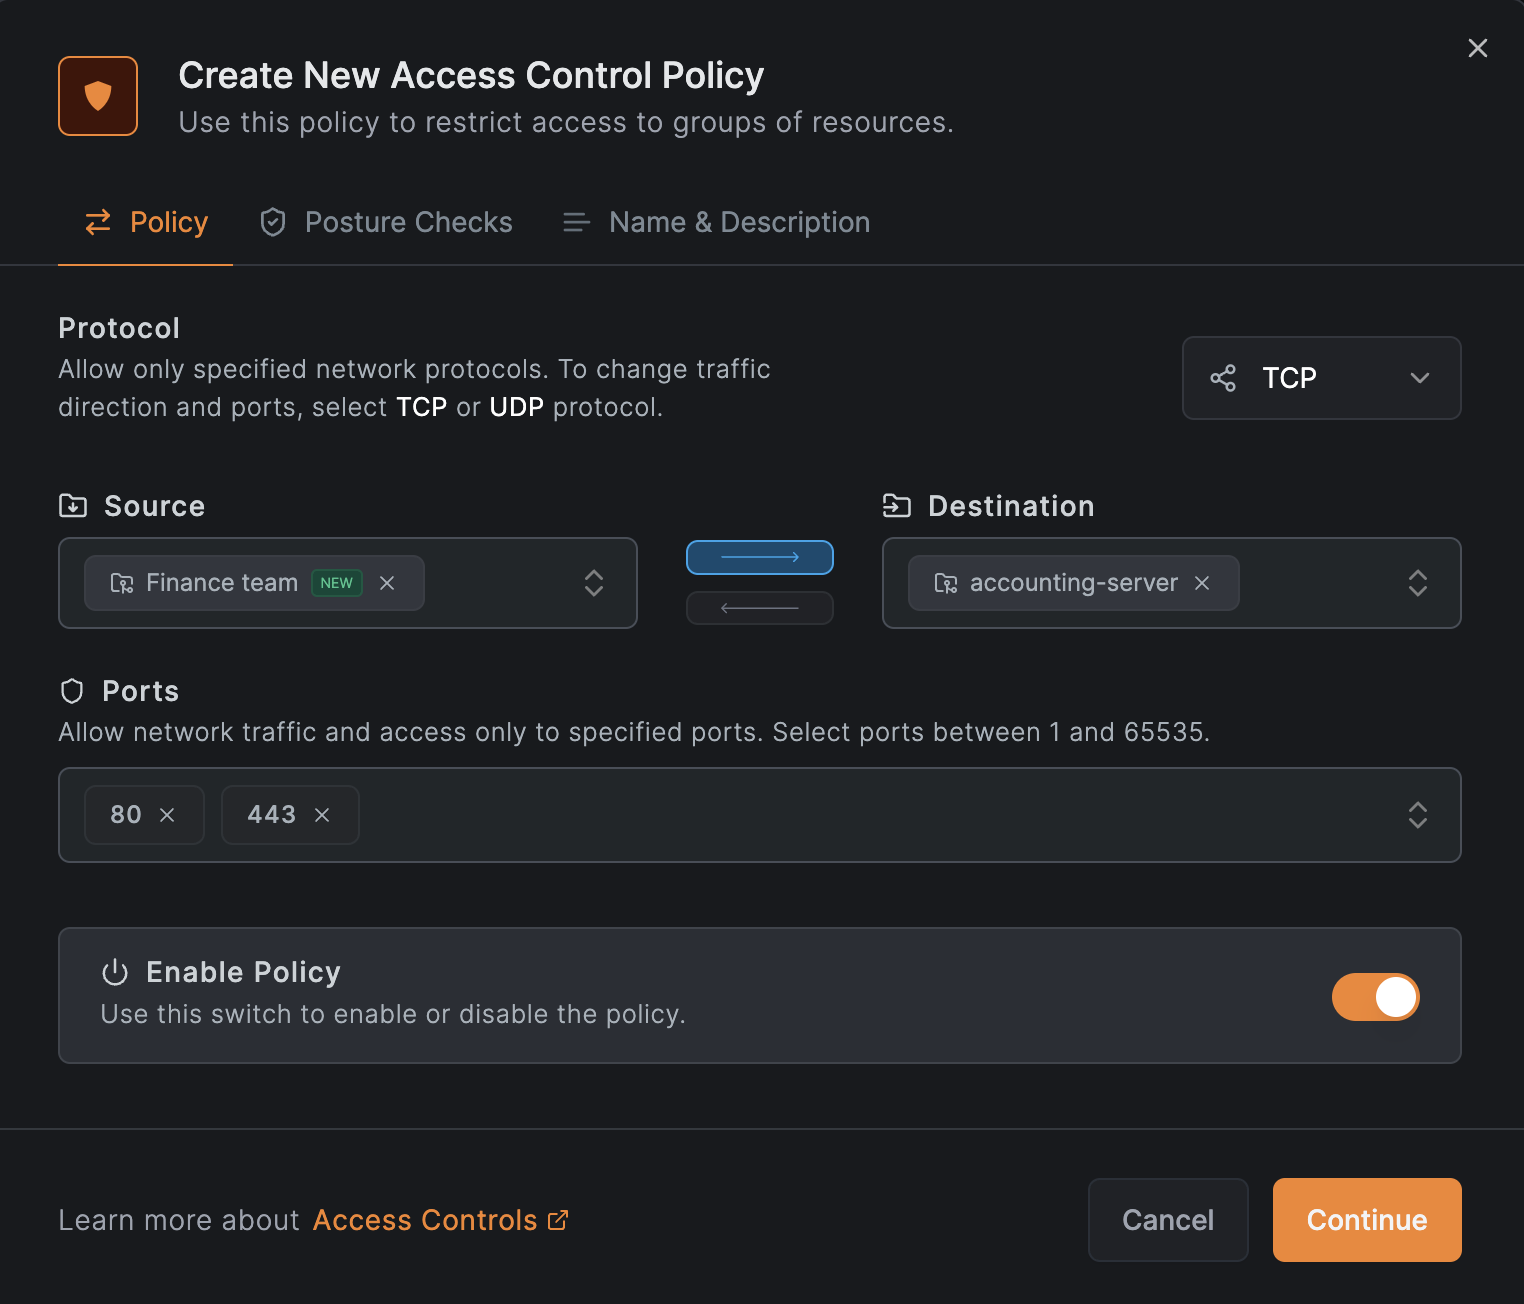
Next, in the guide, we will be asked to create an access control policy. Here, we will create a policy that allows access to the accounting-server group of the accounting.example.com
resource to peers in the Finance team group. They will be able to access the service ports TCP/80 and TCP/443.
Click on Create Policy and fill out the fields as shown in the image below:
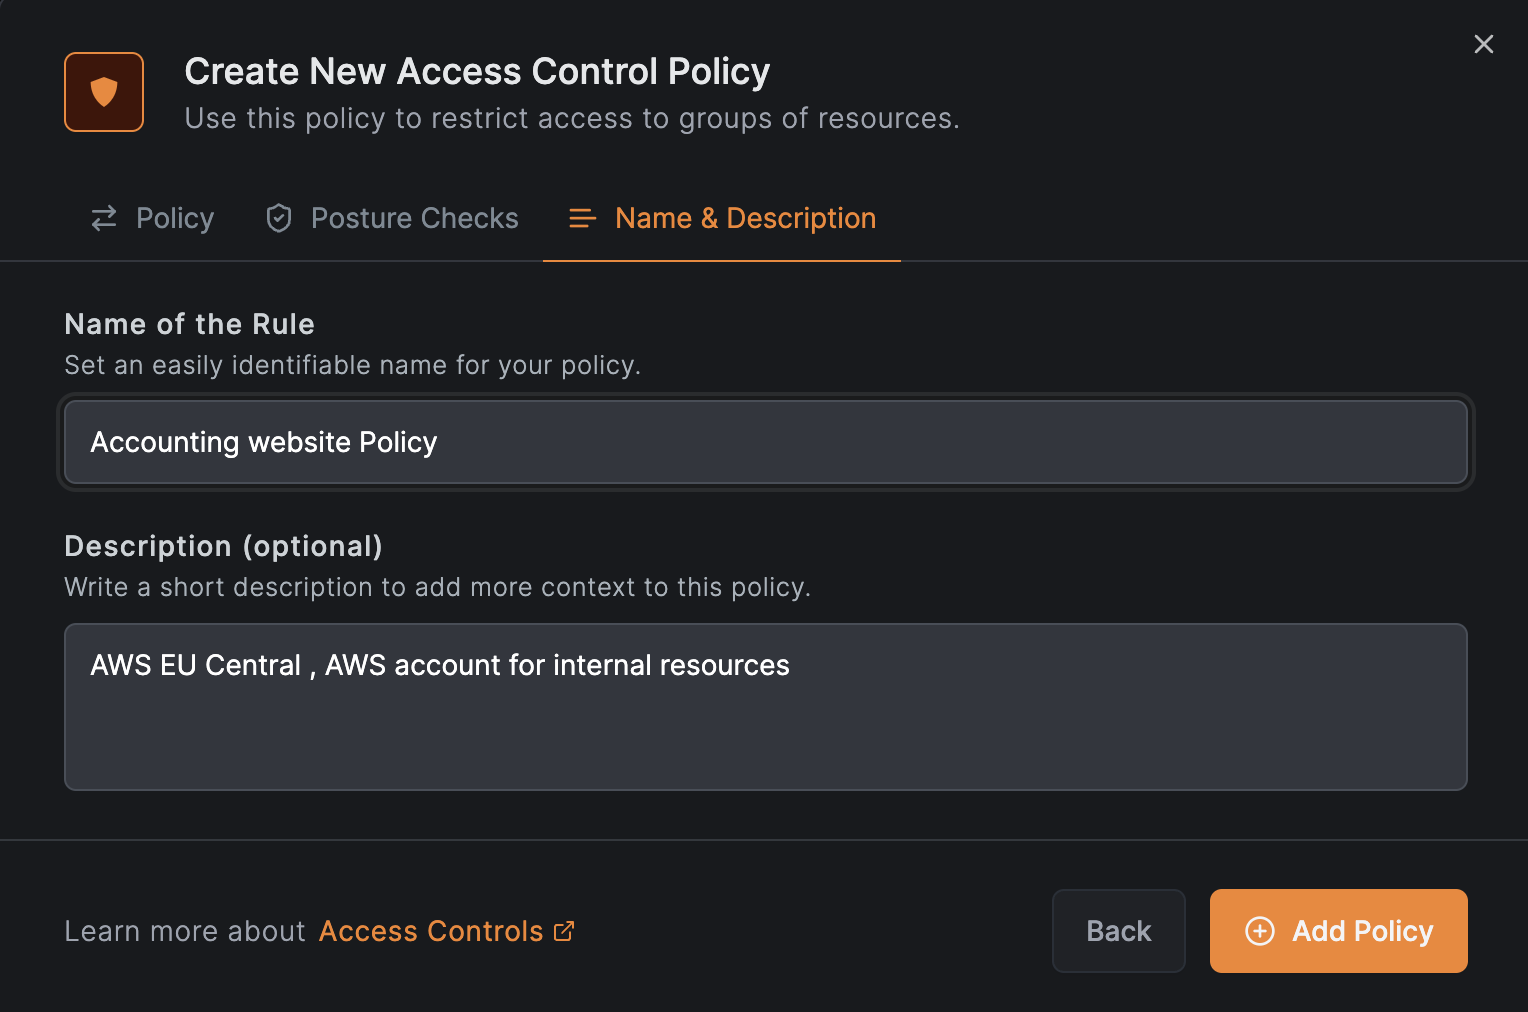
Click on Continue 2 times and then click on Add Policy to save the policy:
View the network
After completing the wizard, you will be able to see the network you just created in the Networks list:

To access a detailed view of the network, click on the network name:
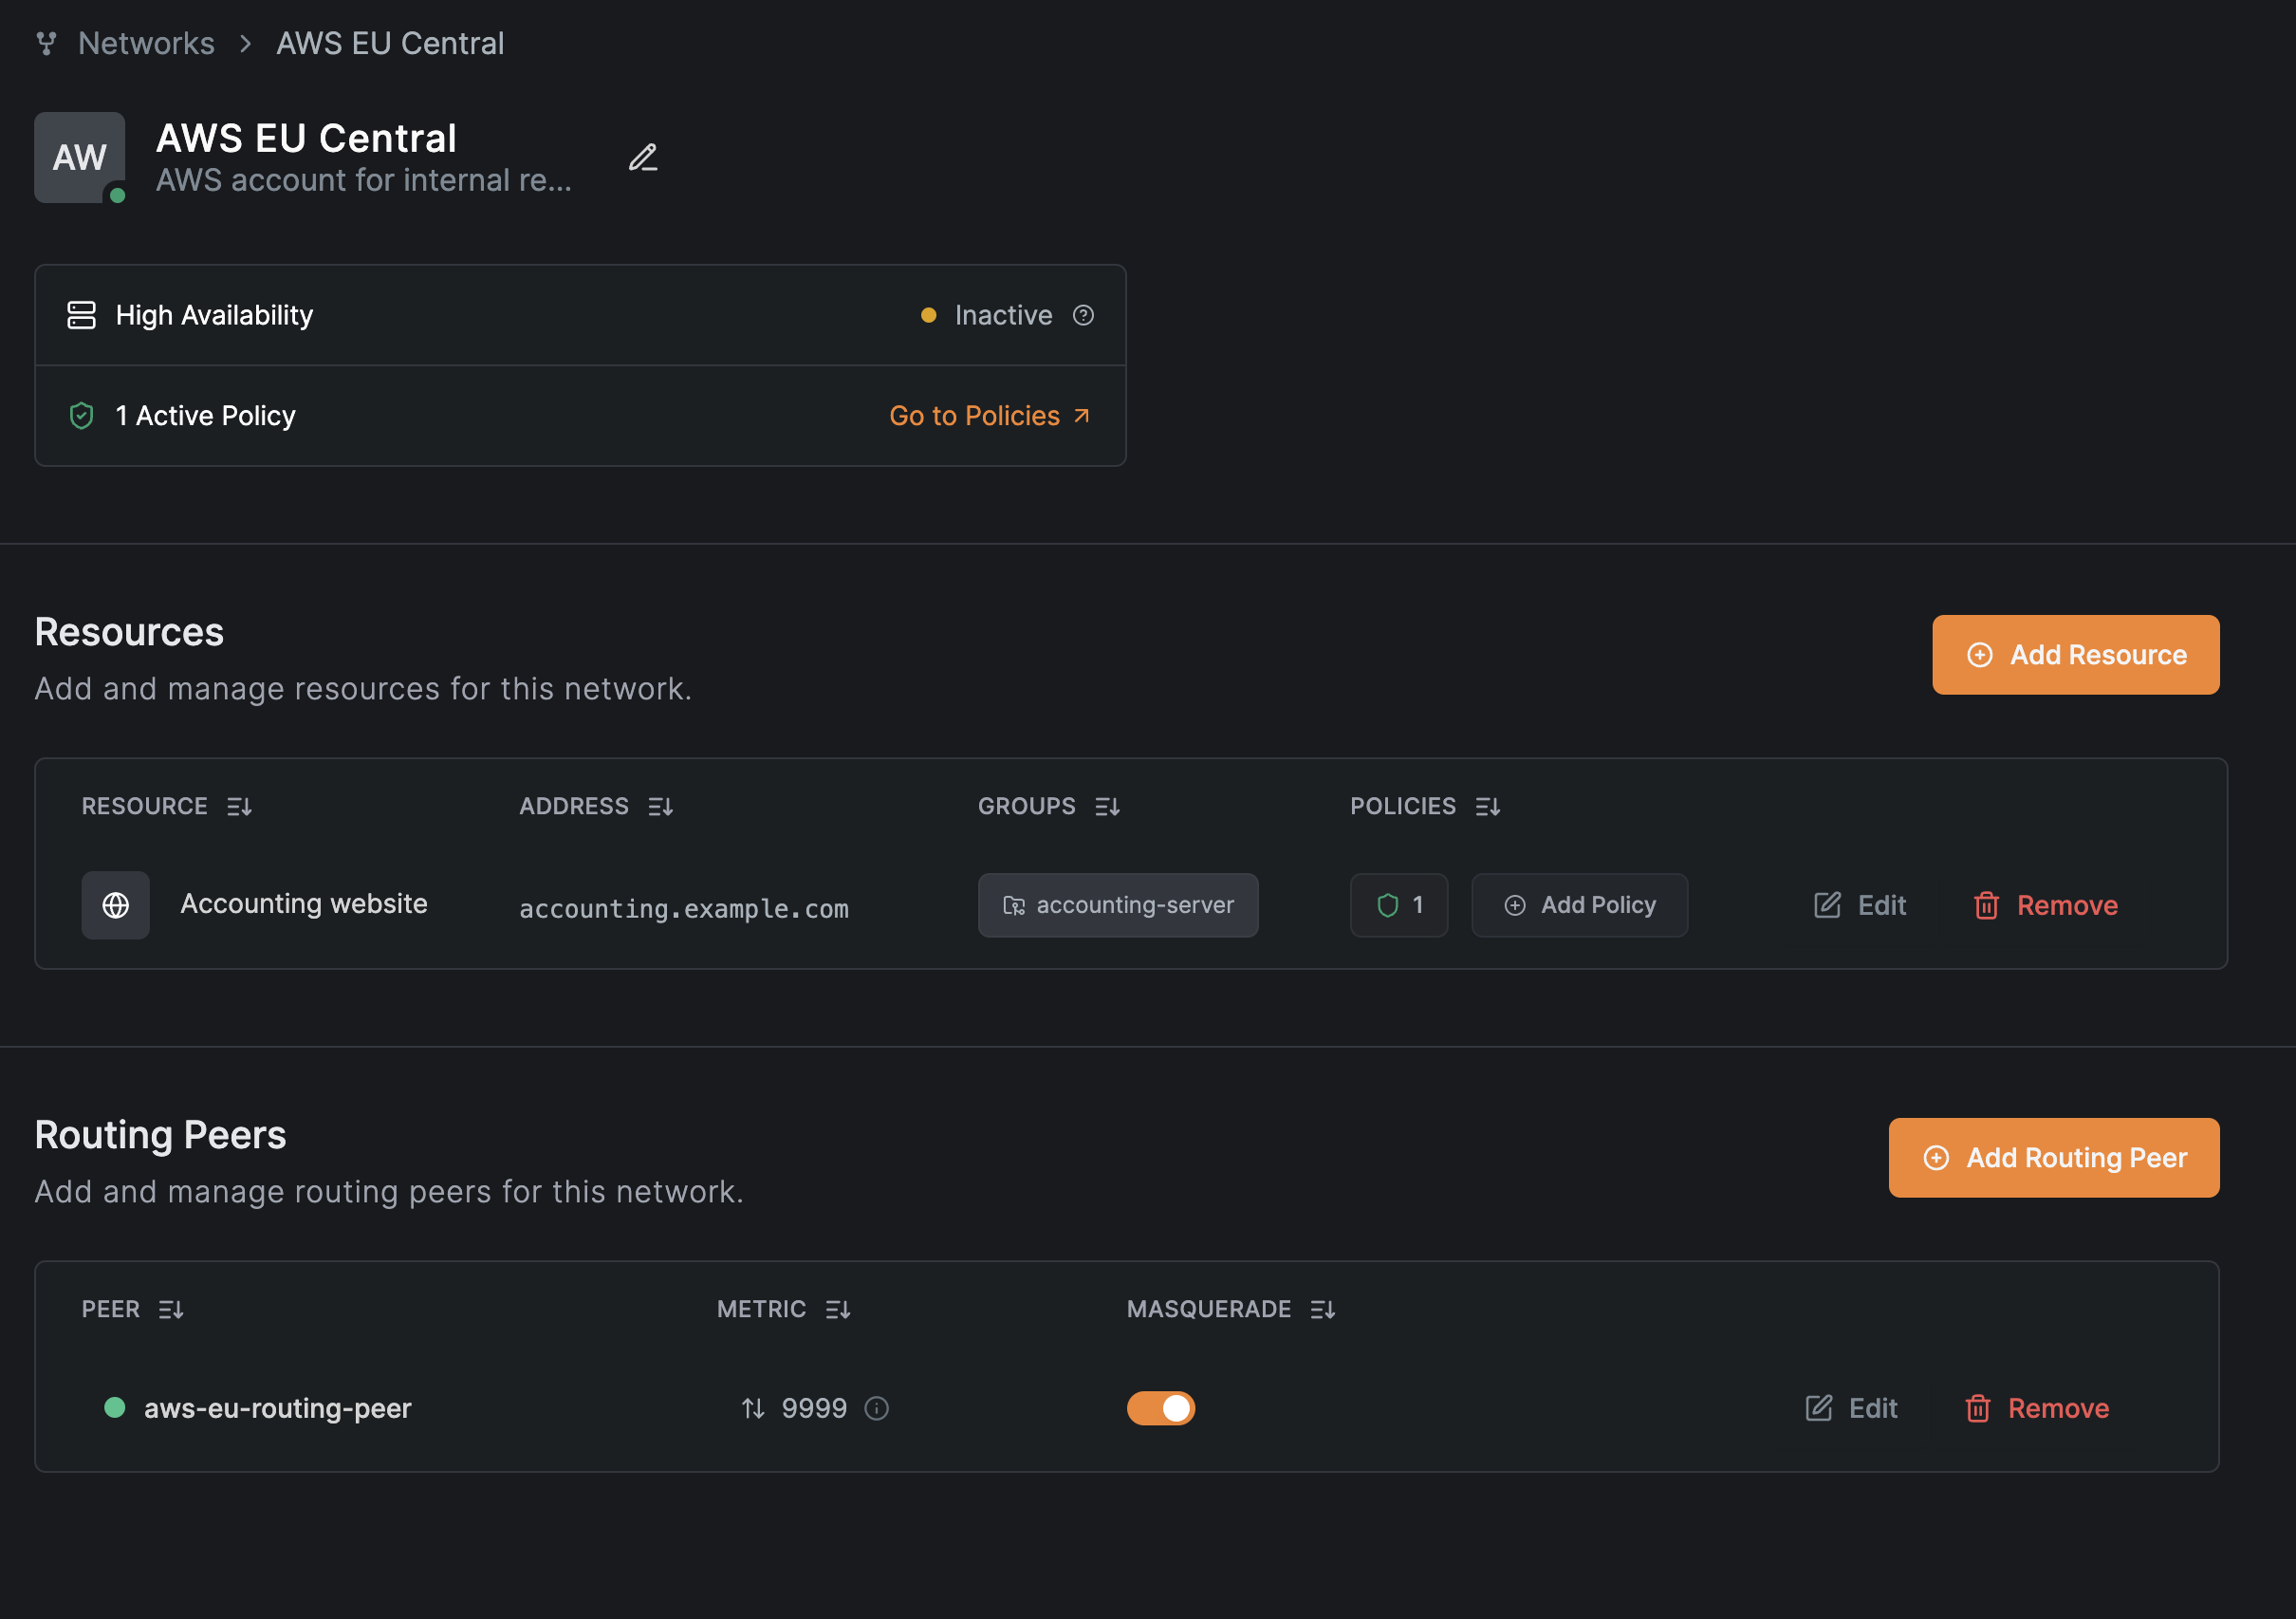
You can edit or add more resources or routing peers to the network by clicking on the Edit buttons of each section in the detailed view.
Get started
- Make sure to star us on GitHub
- Follow us on Twitter
- Join our Slack Channel
- NetBird latest release on GitHub

