Auth0 SSO with NetBird Self-Hosted
Updated
Auth0 is a flexible, drop-in solution to add authentication and authorization services to your applications. It's a managed service that handles identity infrastructure so you don't have to.
Management Setup (Recommended)
Add Auth0 as an external IdP directly in the NetBird Management Dashboard. This is the simplest approach and recommended for most deployments.
Prerequisites
- NetBird self-hosted with embedded IdP enabled
- Auth0 account (sign up at https://auth0.com/)
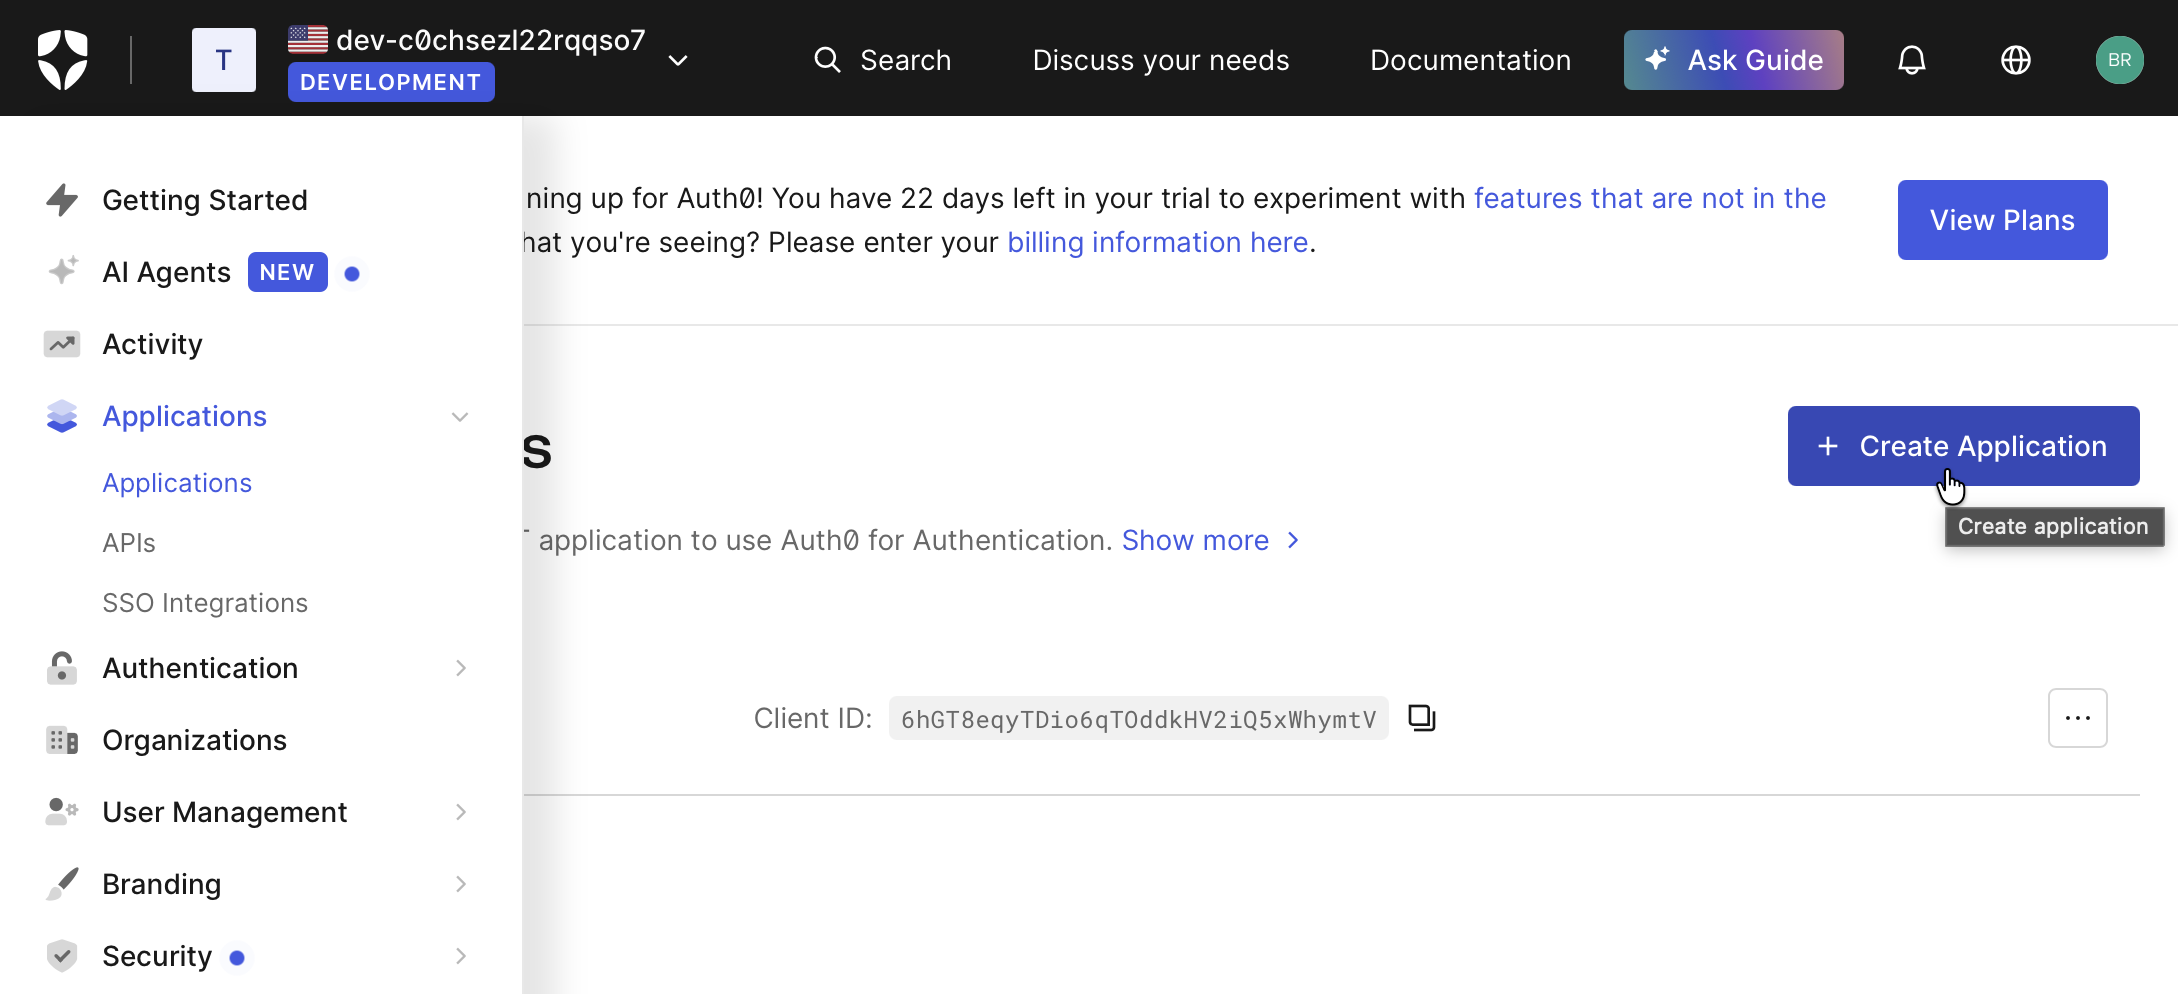
Step 1: Start Creating Application in Auth0
- Log in to your Auth0 dashboard at https://manage.auth0.com/
- Go to Applications → Applications
- Click Create Application
- Fill in:
- Name:
NetBird - Application type:
Regular Web Application
- Name:
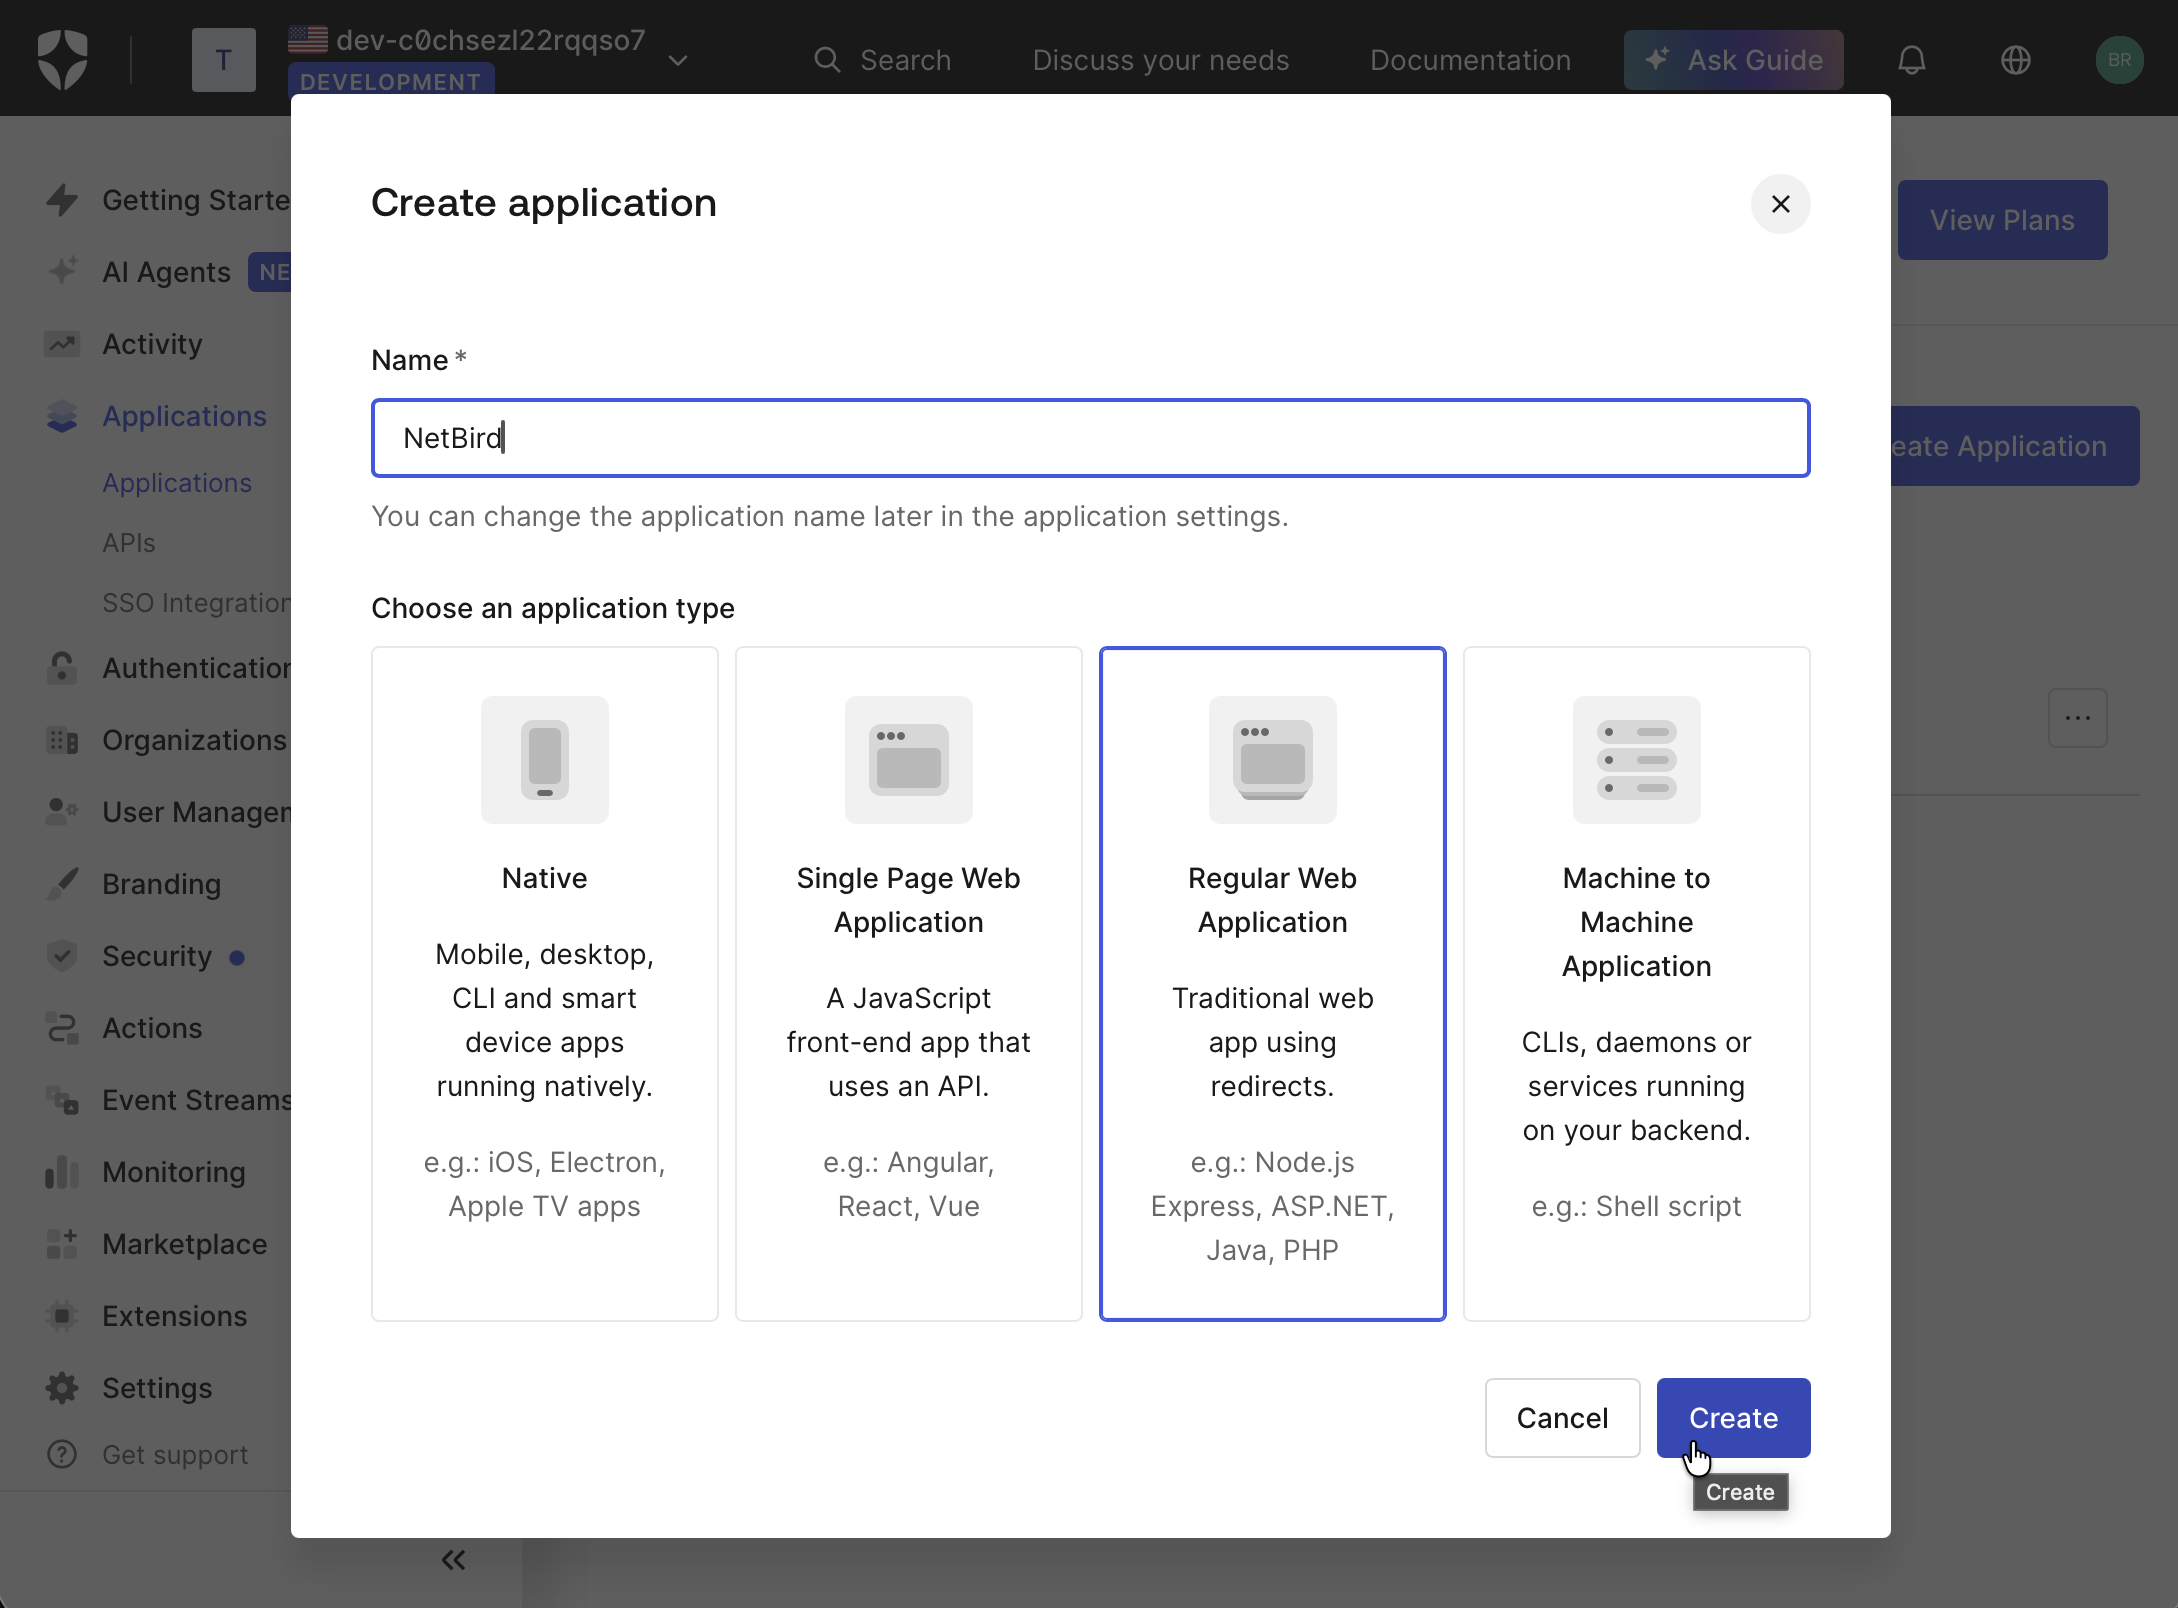
- Click Create
Step 2: Get Redirect URL from NetBird
- Open a new tab or window and log in to your NetBird Dashboard
- Navigate to Settings → Identity Providers
- Click Add Identity Provider
- Fill in the fields:
| Field | Value |
|---|---|
| Type | Generic OIDC |
| Name | Auth0 (or your preferred display name) |
| Client ID | From Auth0 application (will fill after Step 3) |
| Client Secret | From Auth0 application (will fill after Step 3) |
| Issuer | https://your-tenant.auth0.com/ (must include trailing slash) (will fill after Step 3) |
- Copy the Redirect URL that NetBird displays (but don't click Add Provider yet)
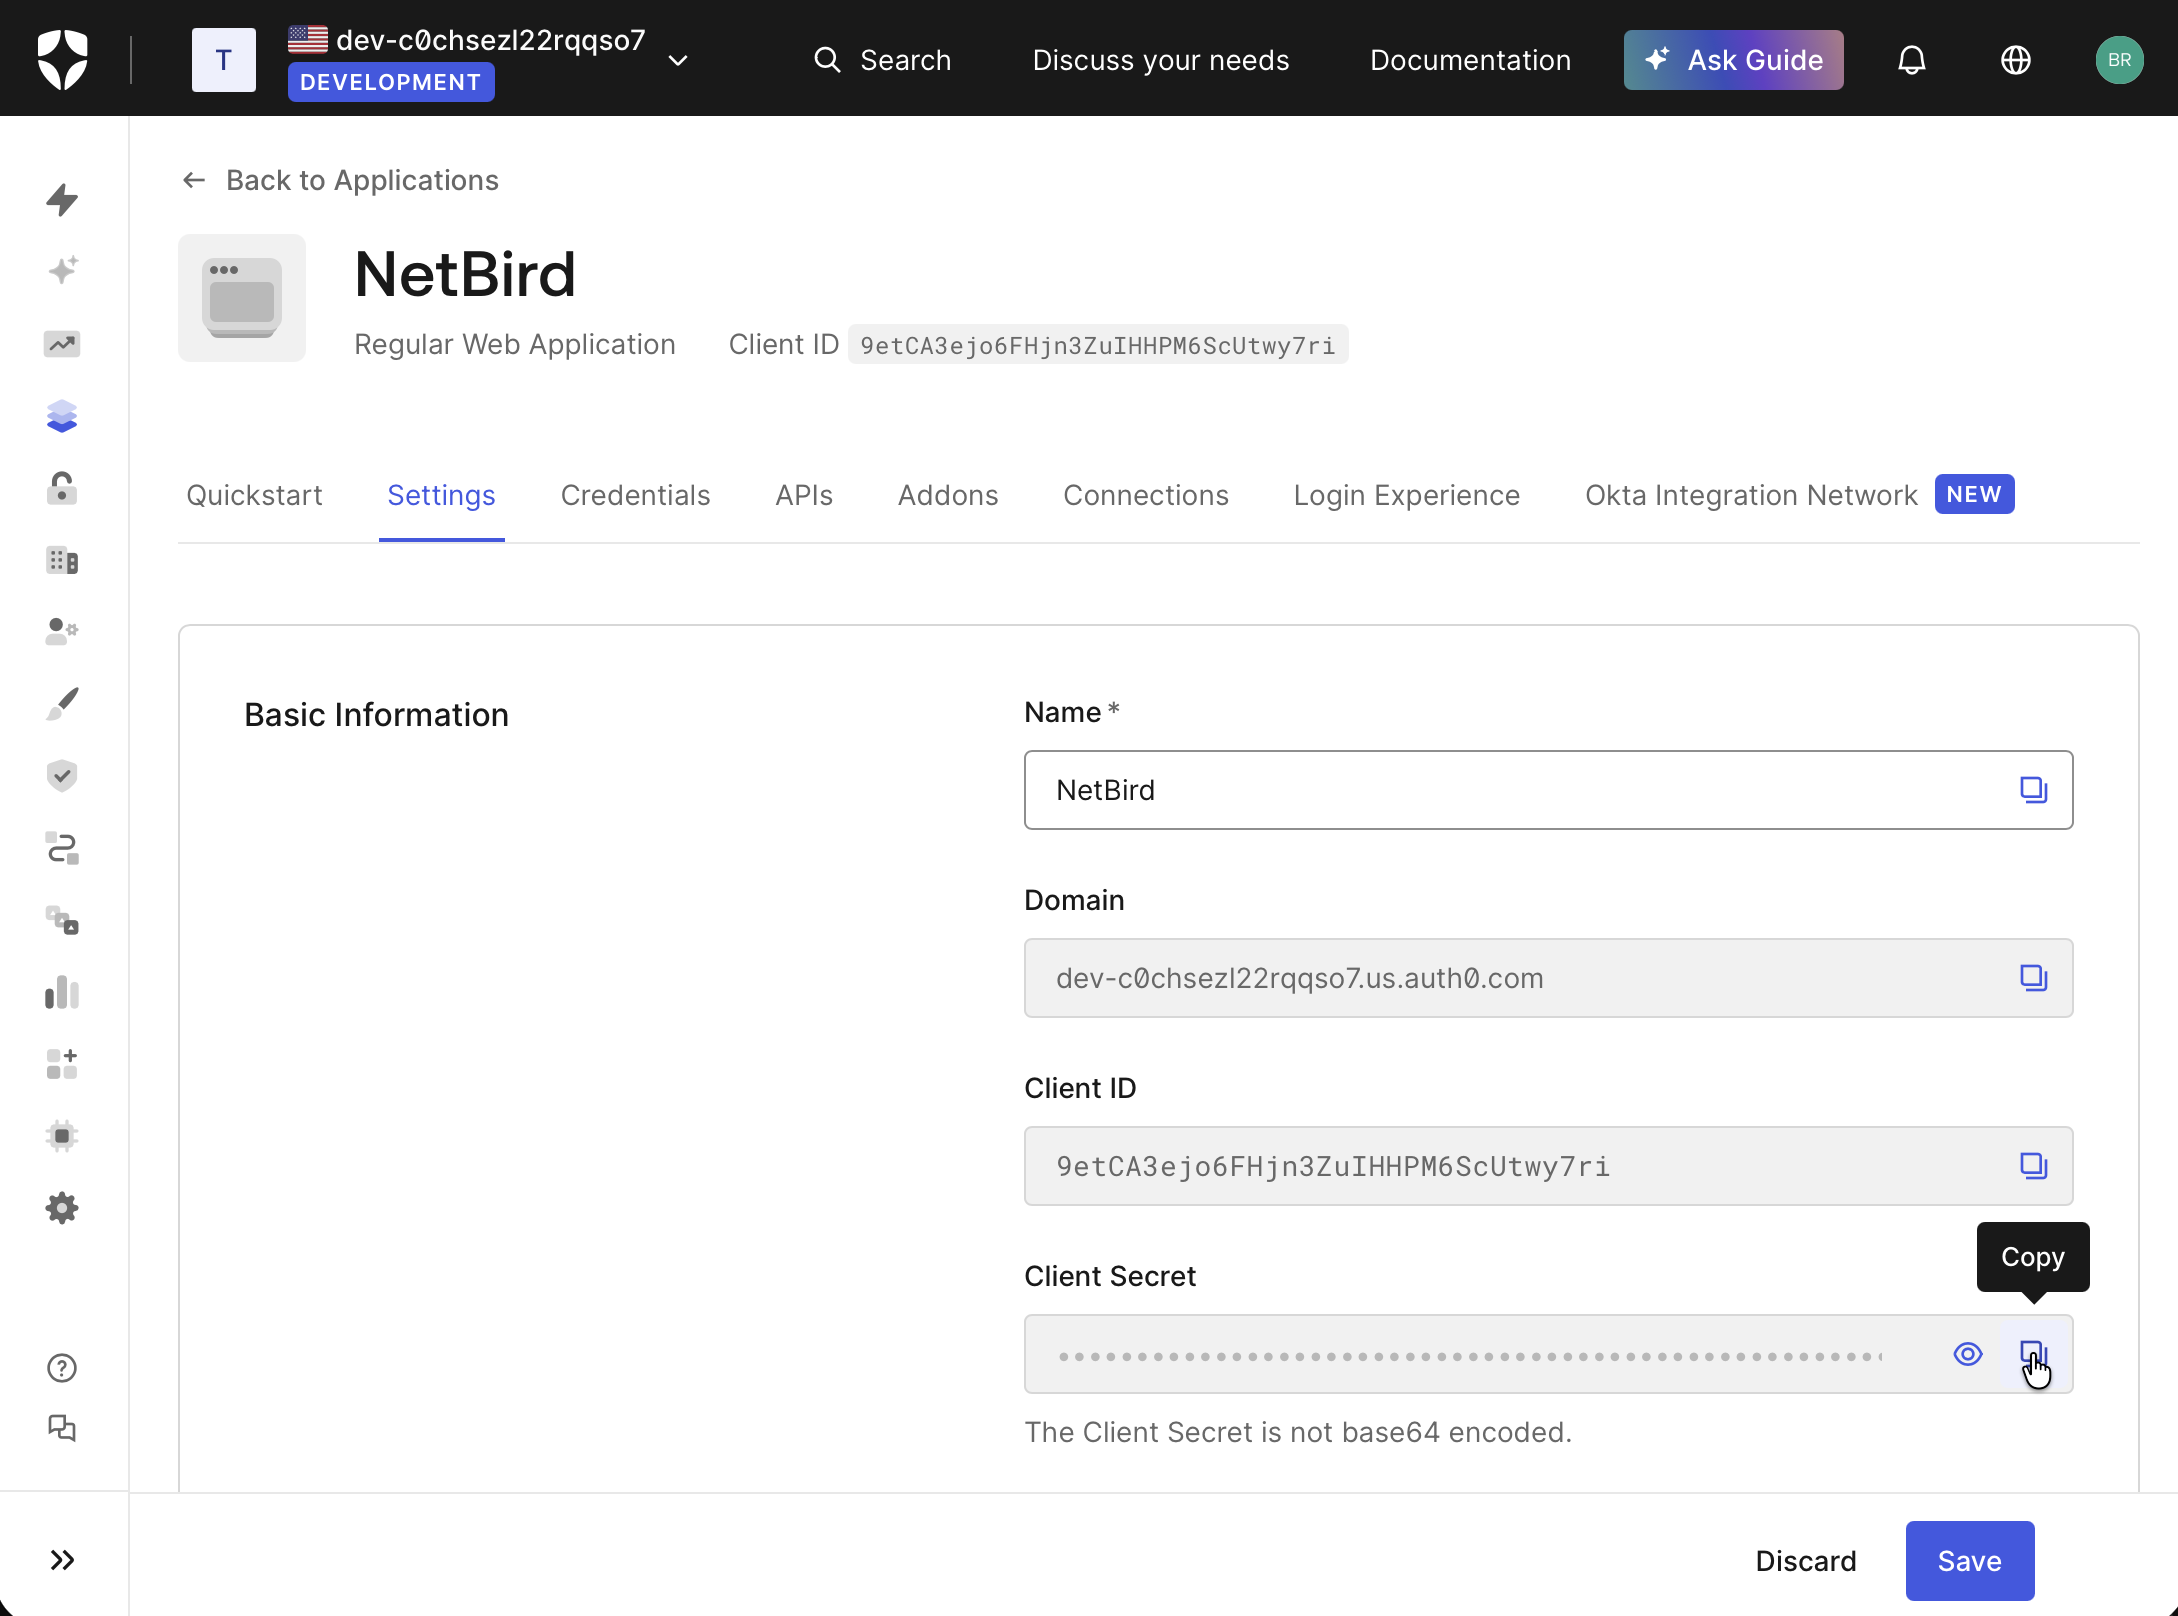
Step 3: Complete Auth0 Application Setup
- Return to the Auth0 tab
- Go to Settings tab
- Under Allowed Callback URLs, add the redirect URL you copied from NetBird
- (Optional) Under Allowed Logout URLs, add
https://netbird.example.com/oauth2/logout/callback(replacenetbird.example.comwith your NetBird dashboard domain) so logout redirects back to NetBird cleanly
- (Optional) Under Allowed Logout URLs, add
- Click Save Changes

- Note the Client ID, Client Secret, and Domain (e.g.,
your-tenant.auth0.com) at the top of the setting tab — you'll need these for Step 4
Step 4: Complete NetBird Setup
- Return to the NetBird tab
- Fill in the Client ID and Client Secret from Step 3
- Update the Issuer field with your Auth0 domain if needed (e.g.,
https://your-tenant.auth0.com/)
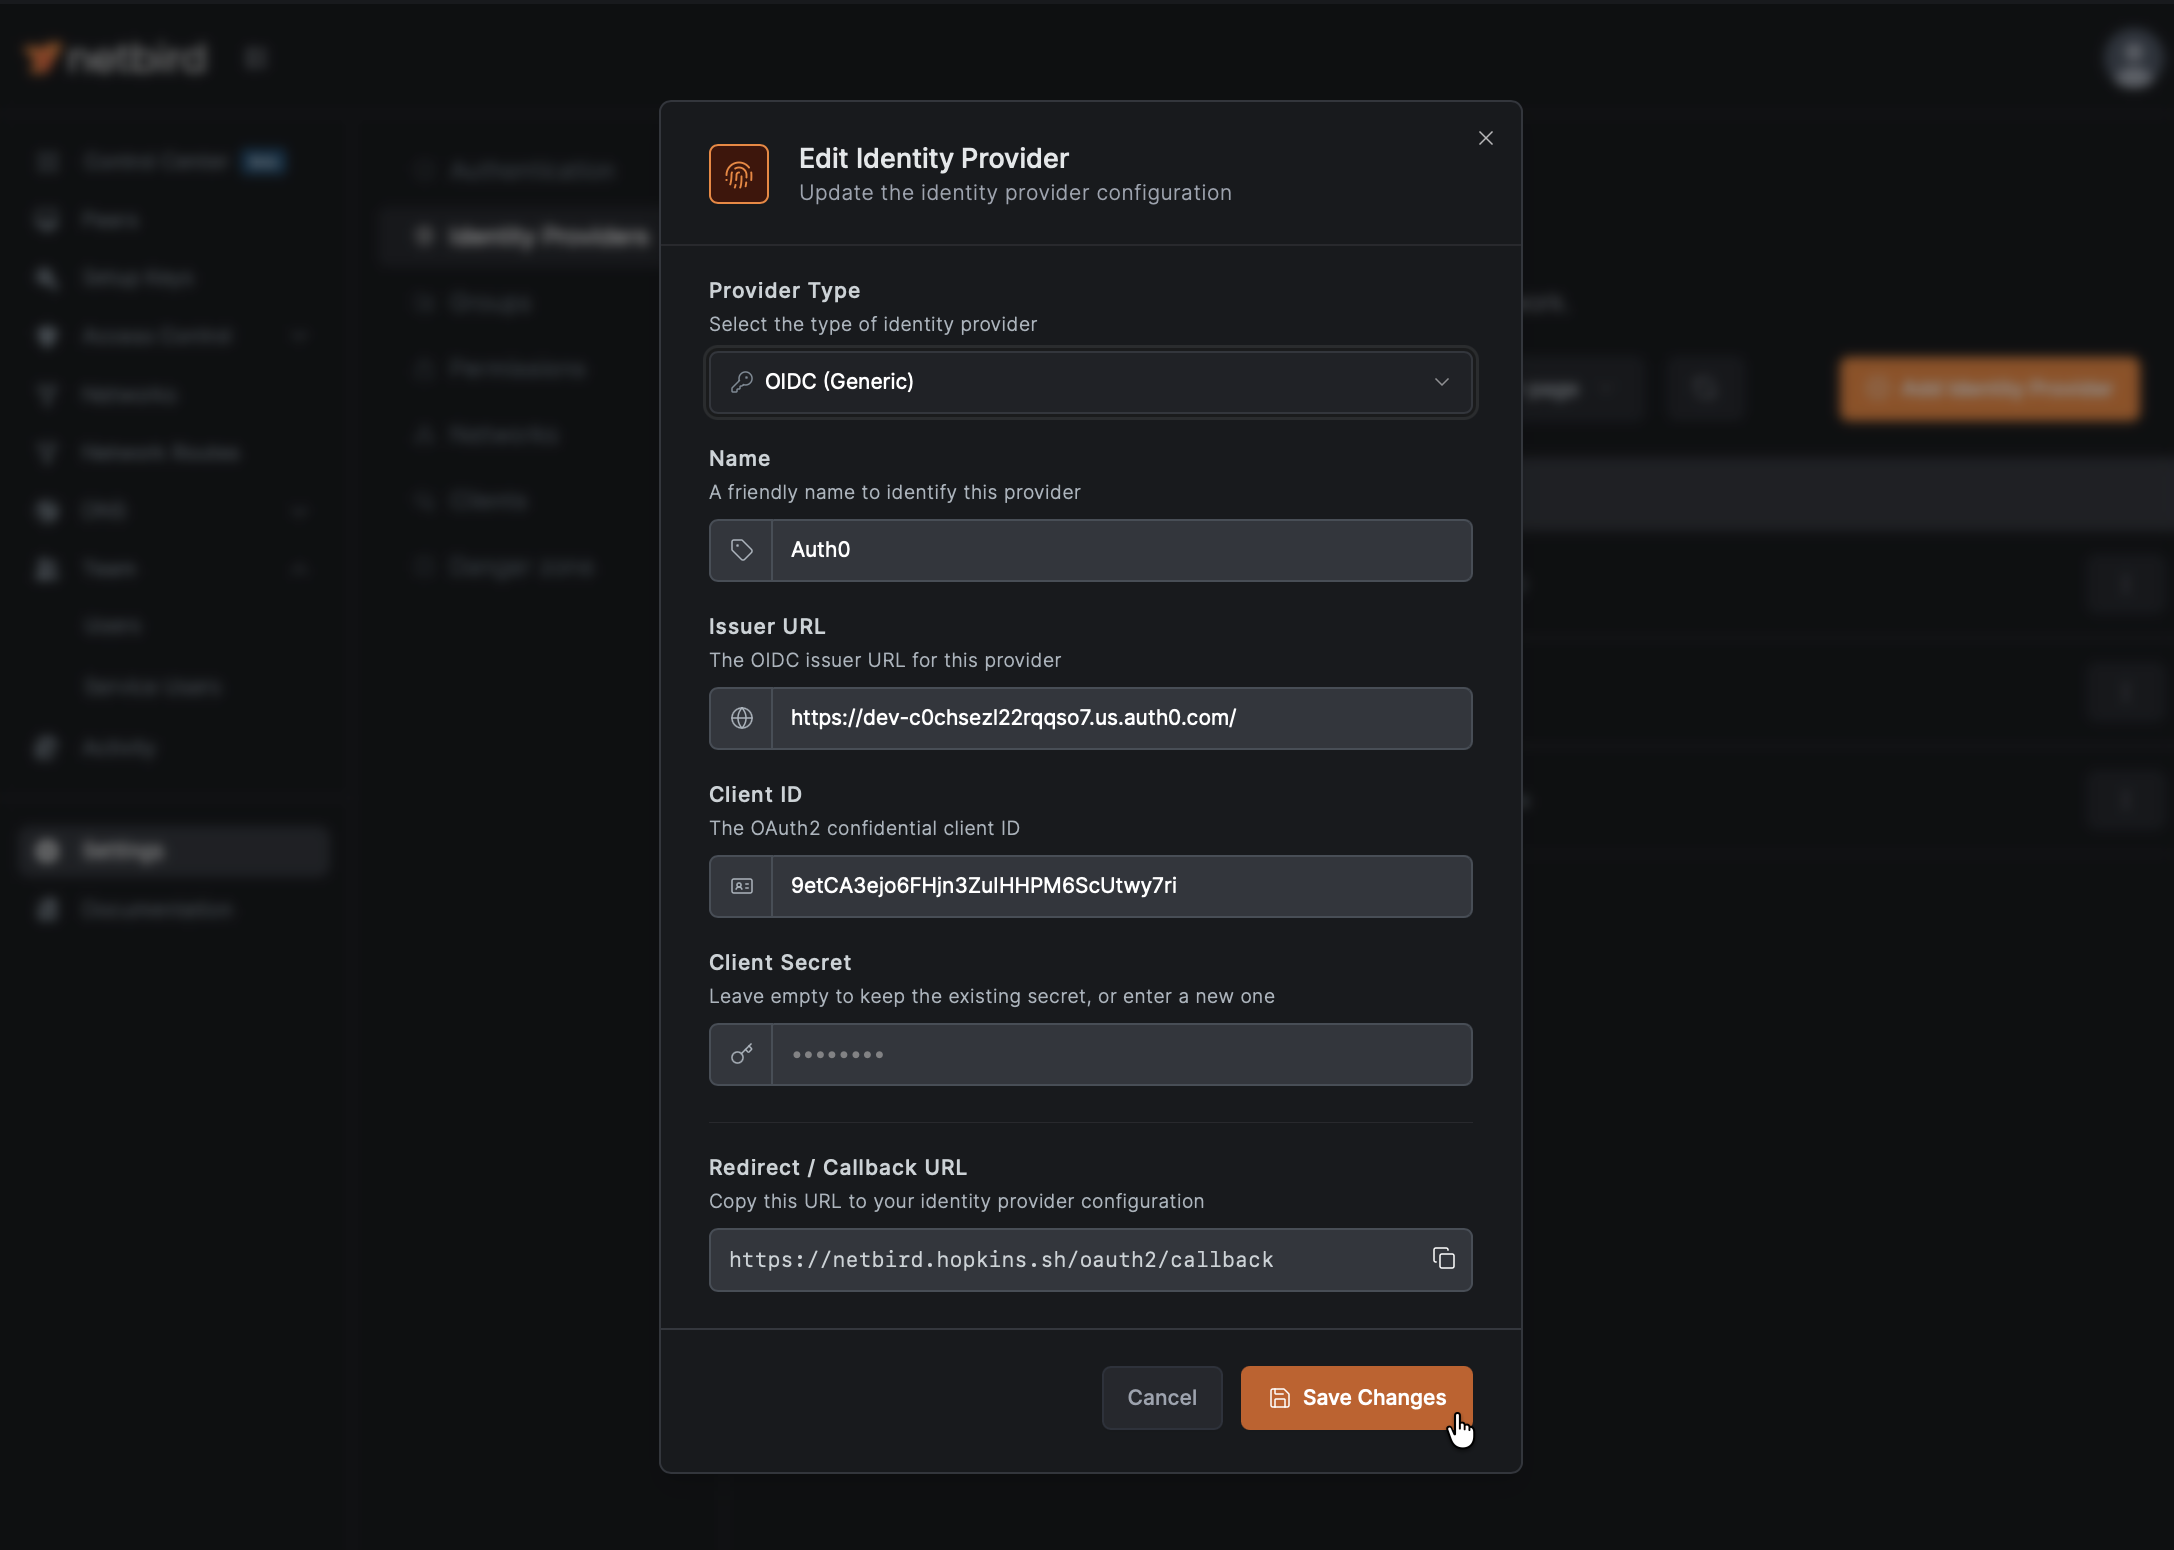
- Click Add Provider
Step 5: Test the Connection
- Log out of NetBird Dashboard
- On the login page, you should see an "Auth0" button
- Click it and authenticate
- You should be redirected back to NetBird and logged in. Unless your user approval setting were changed you will need to log back into your local admin account to approve the user.
Standalone Setup (Advanced)
Use Auth0 as your primary identity provider instead of NetBird's embedded IdP. This option gives you full control over authentication and user management, is recommended for experienced Auth0 administrators as it also requires additional setup and ongoing maintenance.
For most deployments, the embedded IdP is the simpler choice — it's built into NetBird, fully integrated, and requires minimal configuration to get started. For this implementation, go back up to the Management Setup (Recommended) section above.
For detailed instructions on the standalone setup, see the Auth0 SSO with NetBird Self-Hosted (Legacy) documentation.
If you prefer to have full control over authentication, consider self-hosted alternatives like PocketID.
Troubleshooting
"Invalid redirect URI" error
- Ensure all callback URLs are configured in Auth0
- Check for trailing slashes
- Verify URLs match exactly