Duo SSO with NetBird Self-Hosted
Updated
Duo is a cloud-based identity and access management platform by Cisco that provides single sign-on (SSO), multi-factor authentication (MFA), and adaptive access policies. Duo Single Sign-On acts as an OpenID provider (OP), authenticating your users and prompting for two-factor authentication before permitting access.
Management Setup
Add Duo as an external IdP directly in the NetBird Management Dashboard. This is the simplest approach and recommended for most deployments.
Prerequisites
- NetBird self-hosted with embedded IdP enabled
- Duo account with admin permissions (Duo Premier, Duo Advantage, or Duo Essentials plan)
- Duo Single Sign-On configured with an authentication source
Step 1: Create OIDC Application in Duo
- Log in to the Duo Admin Panel
- Navigate to Applications → Application Catalog
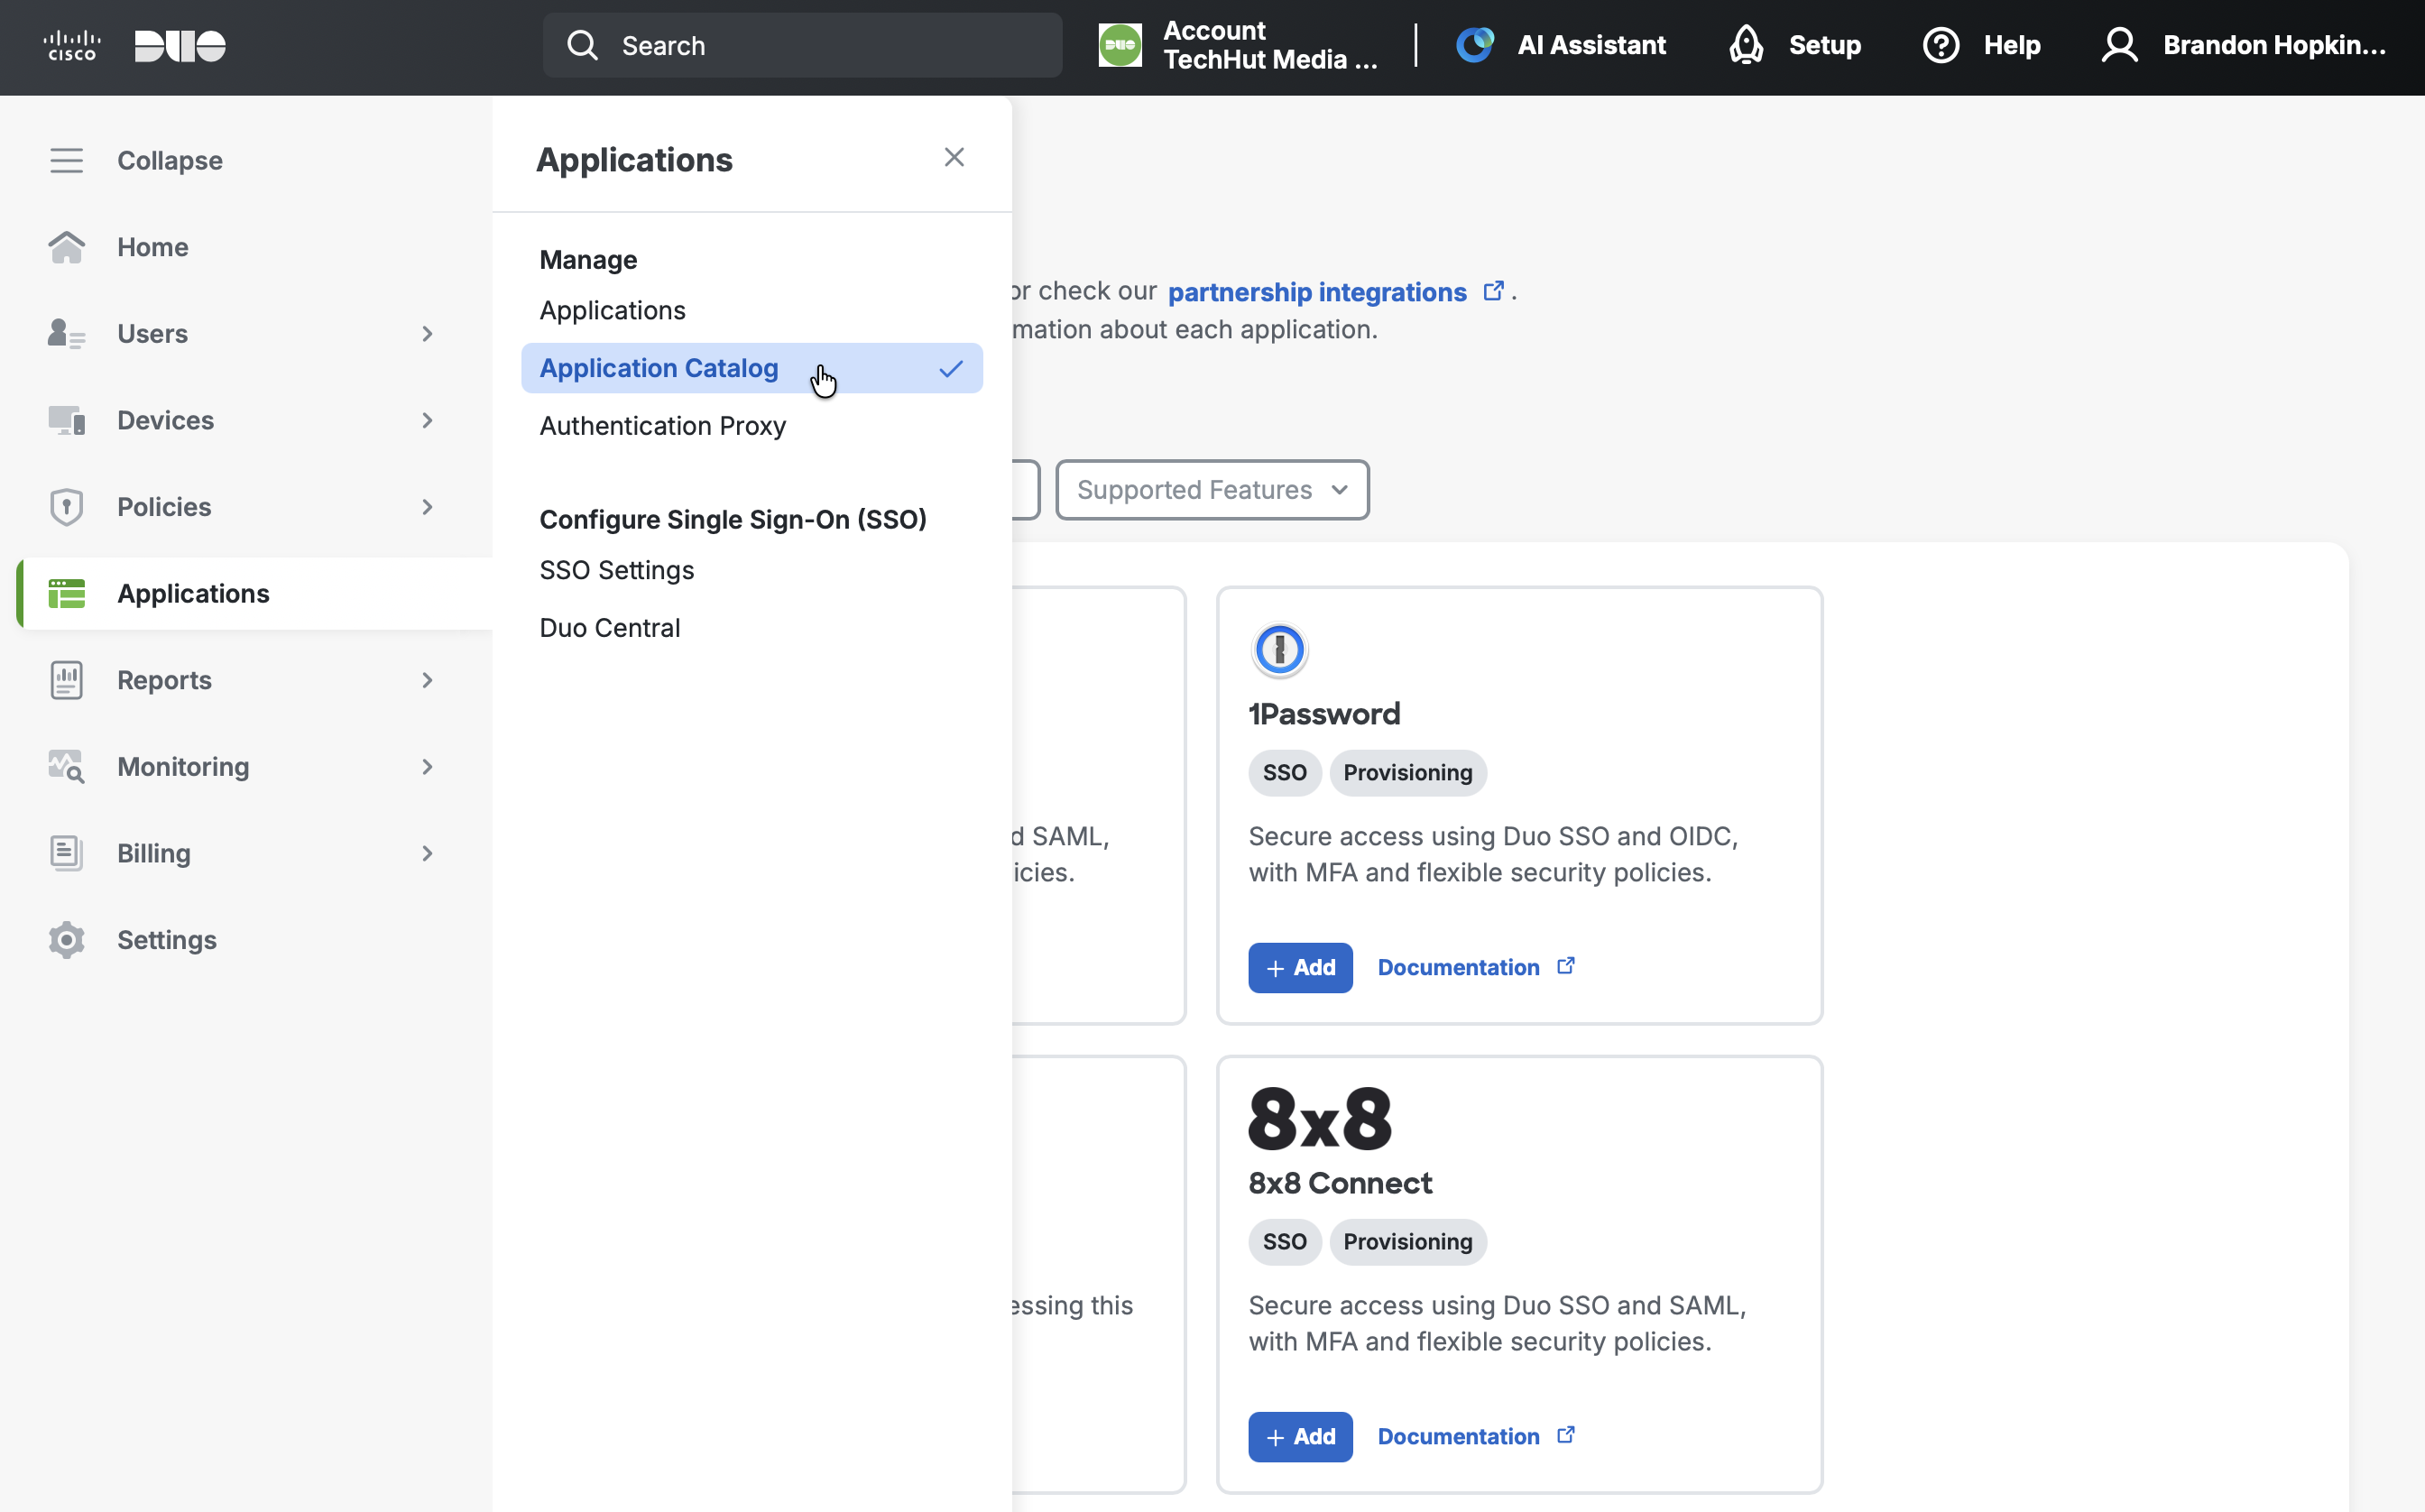
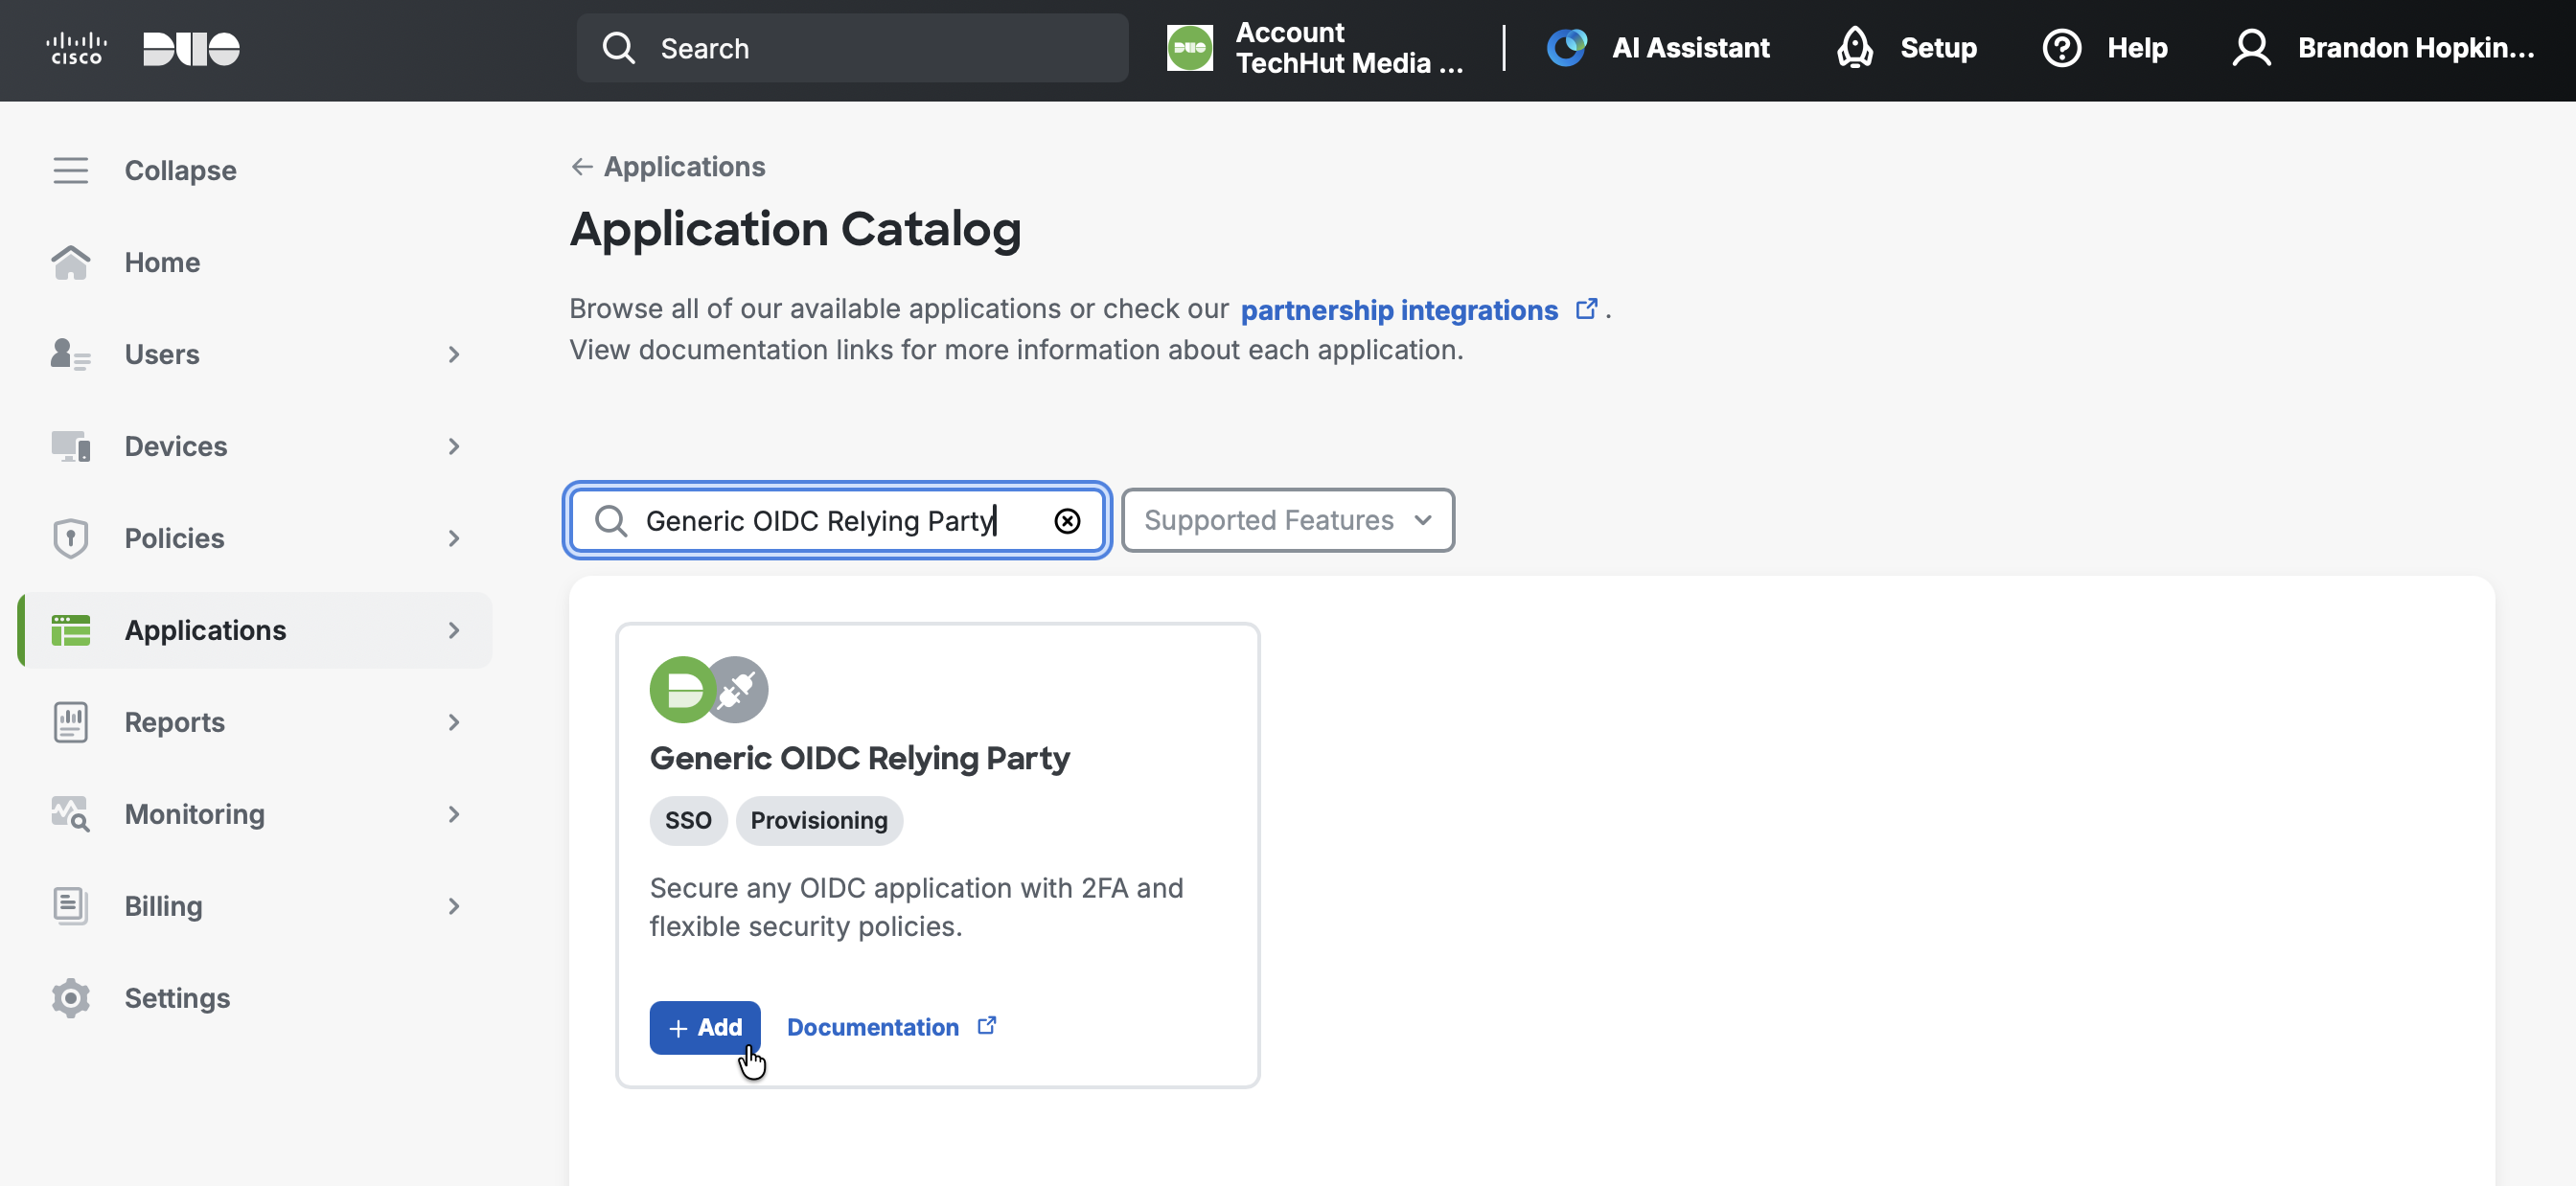
- Search for Generic OIDC Relying Party (look for the "SSO" label)
- Click the + Add button
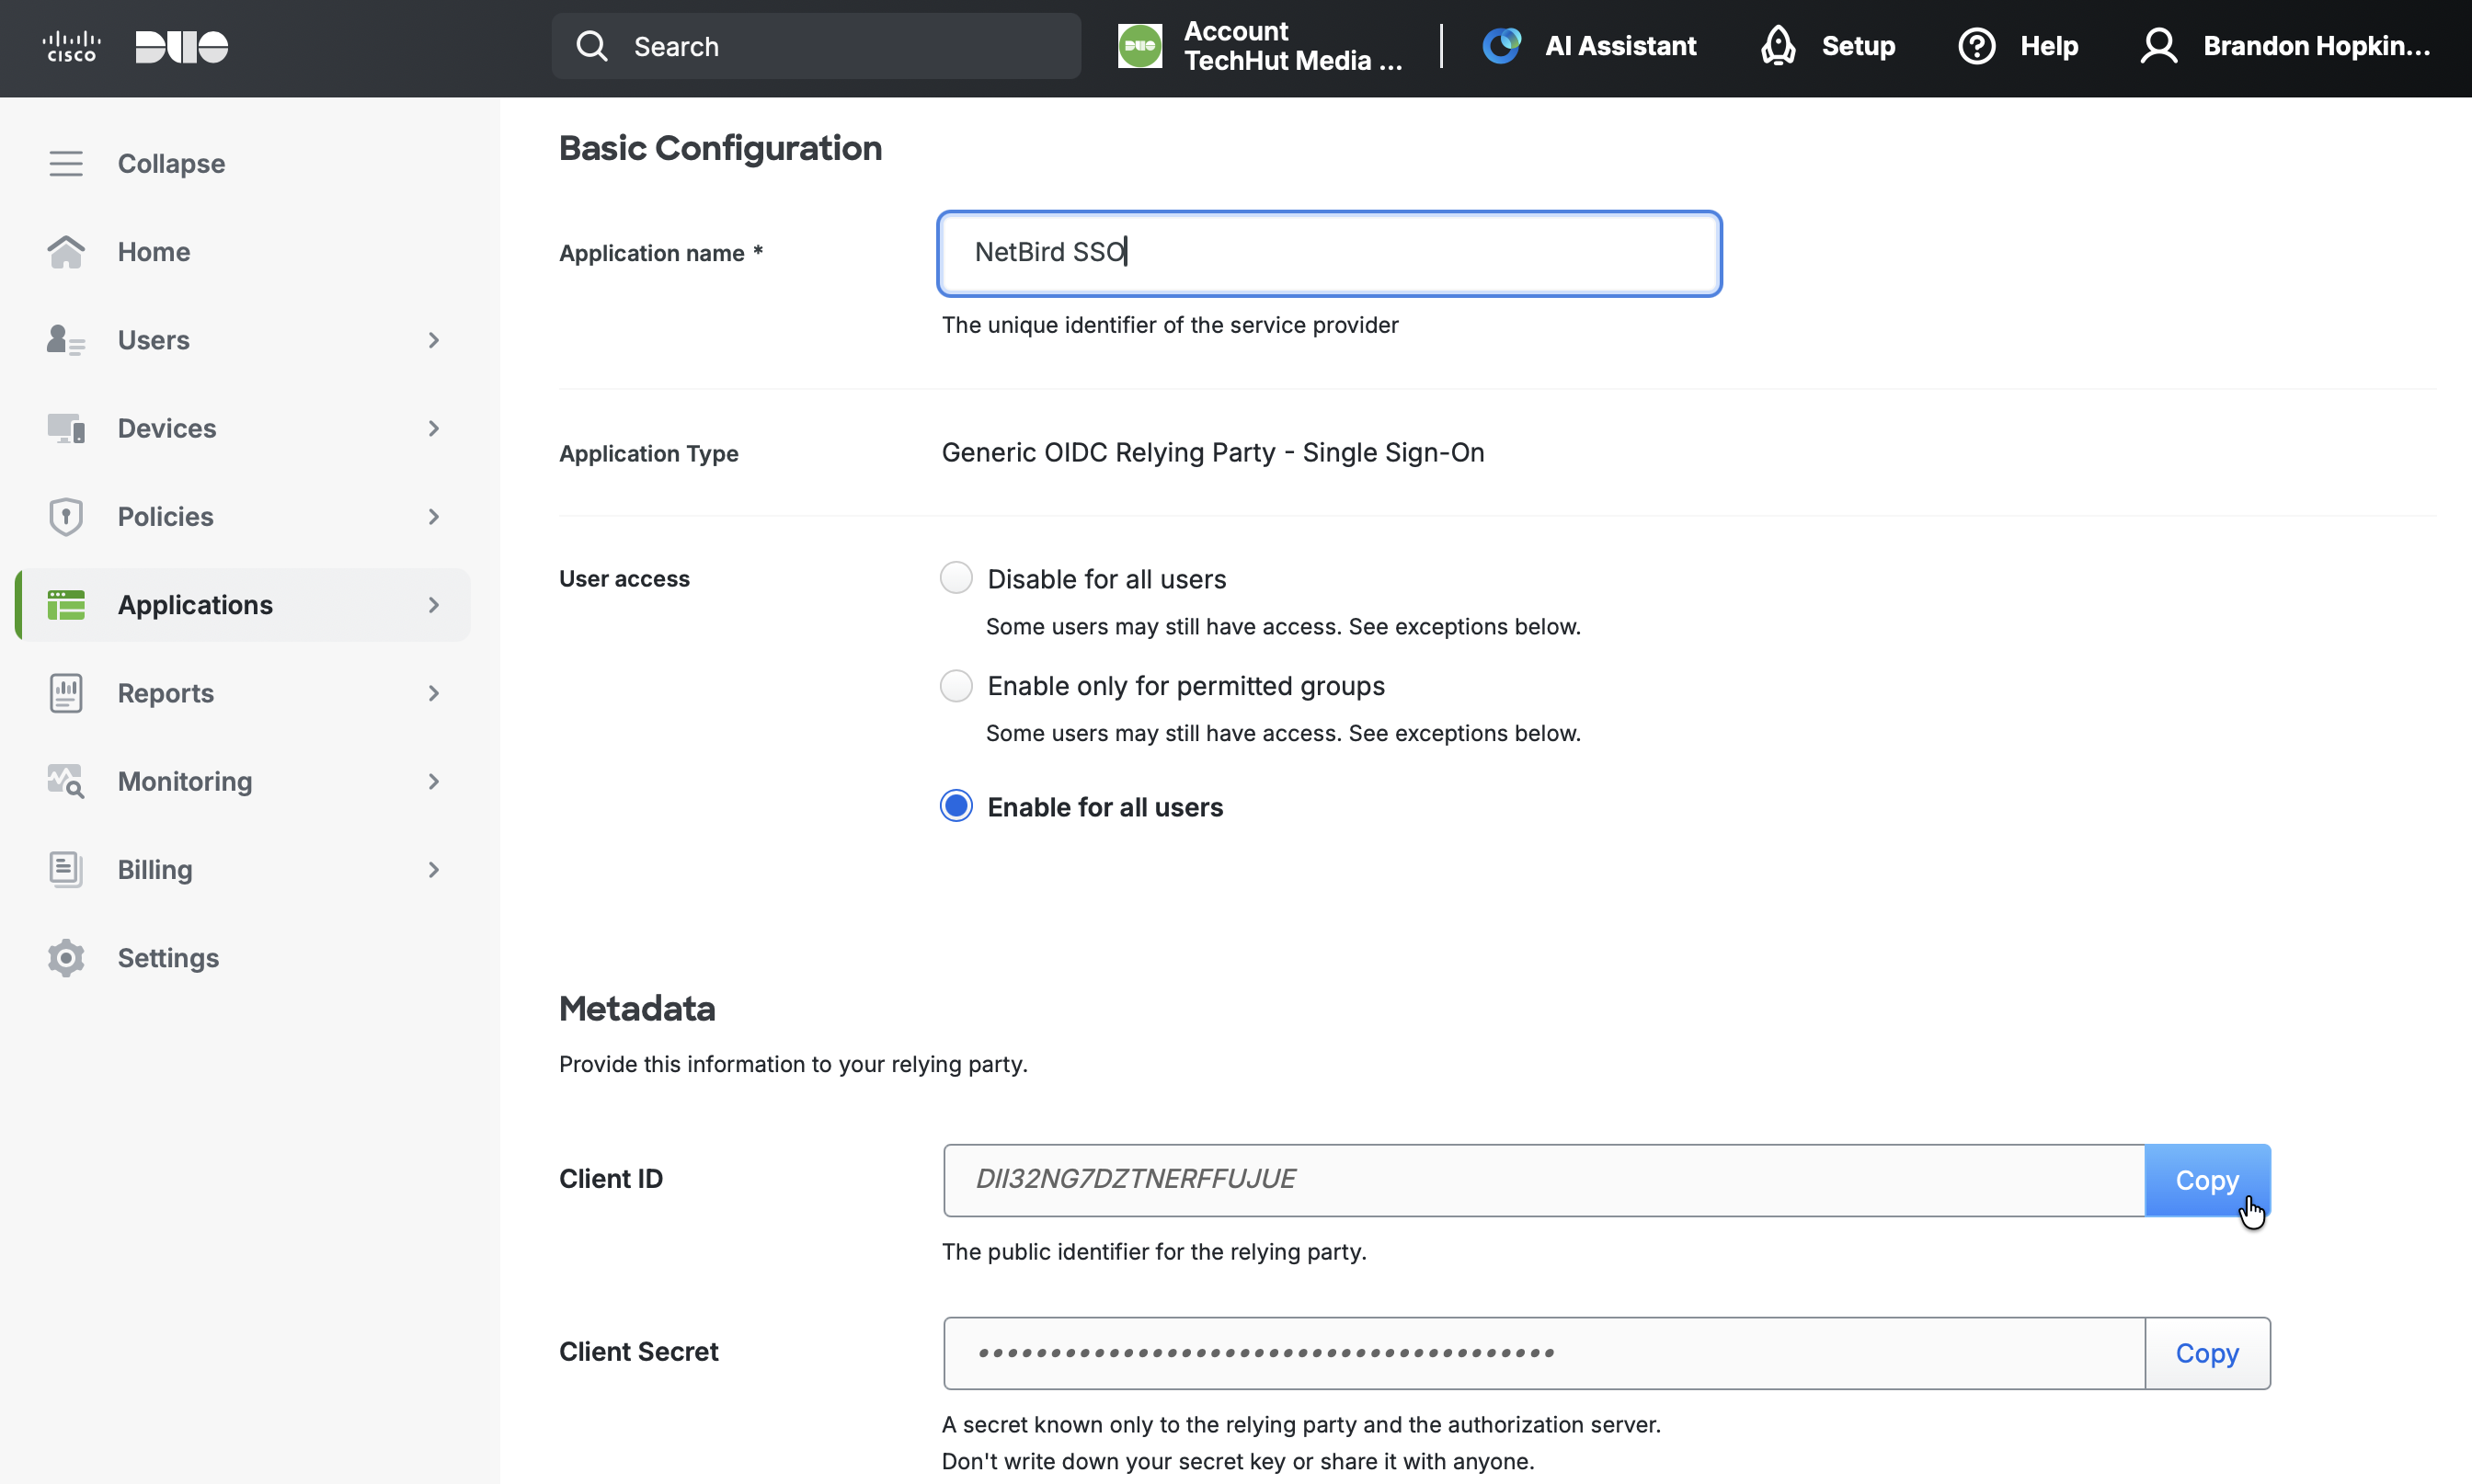
- Give the application a name such as
NetBird SSO - Under User access, grant access to users in selected Duo groups or to all users
- Scroll down to the Metadata section and note the following values (you'll need these in Step 3):
- Client ID
- Client Secret
- Issuer
- Keep this tab open and proceed to Step 2
Step 2: Get Redirect URL from NetBird
- Open a new tab or window and log in to your NetBird Dashboard
- Navigate to Settings → Identity Providers
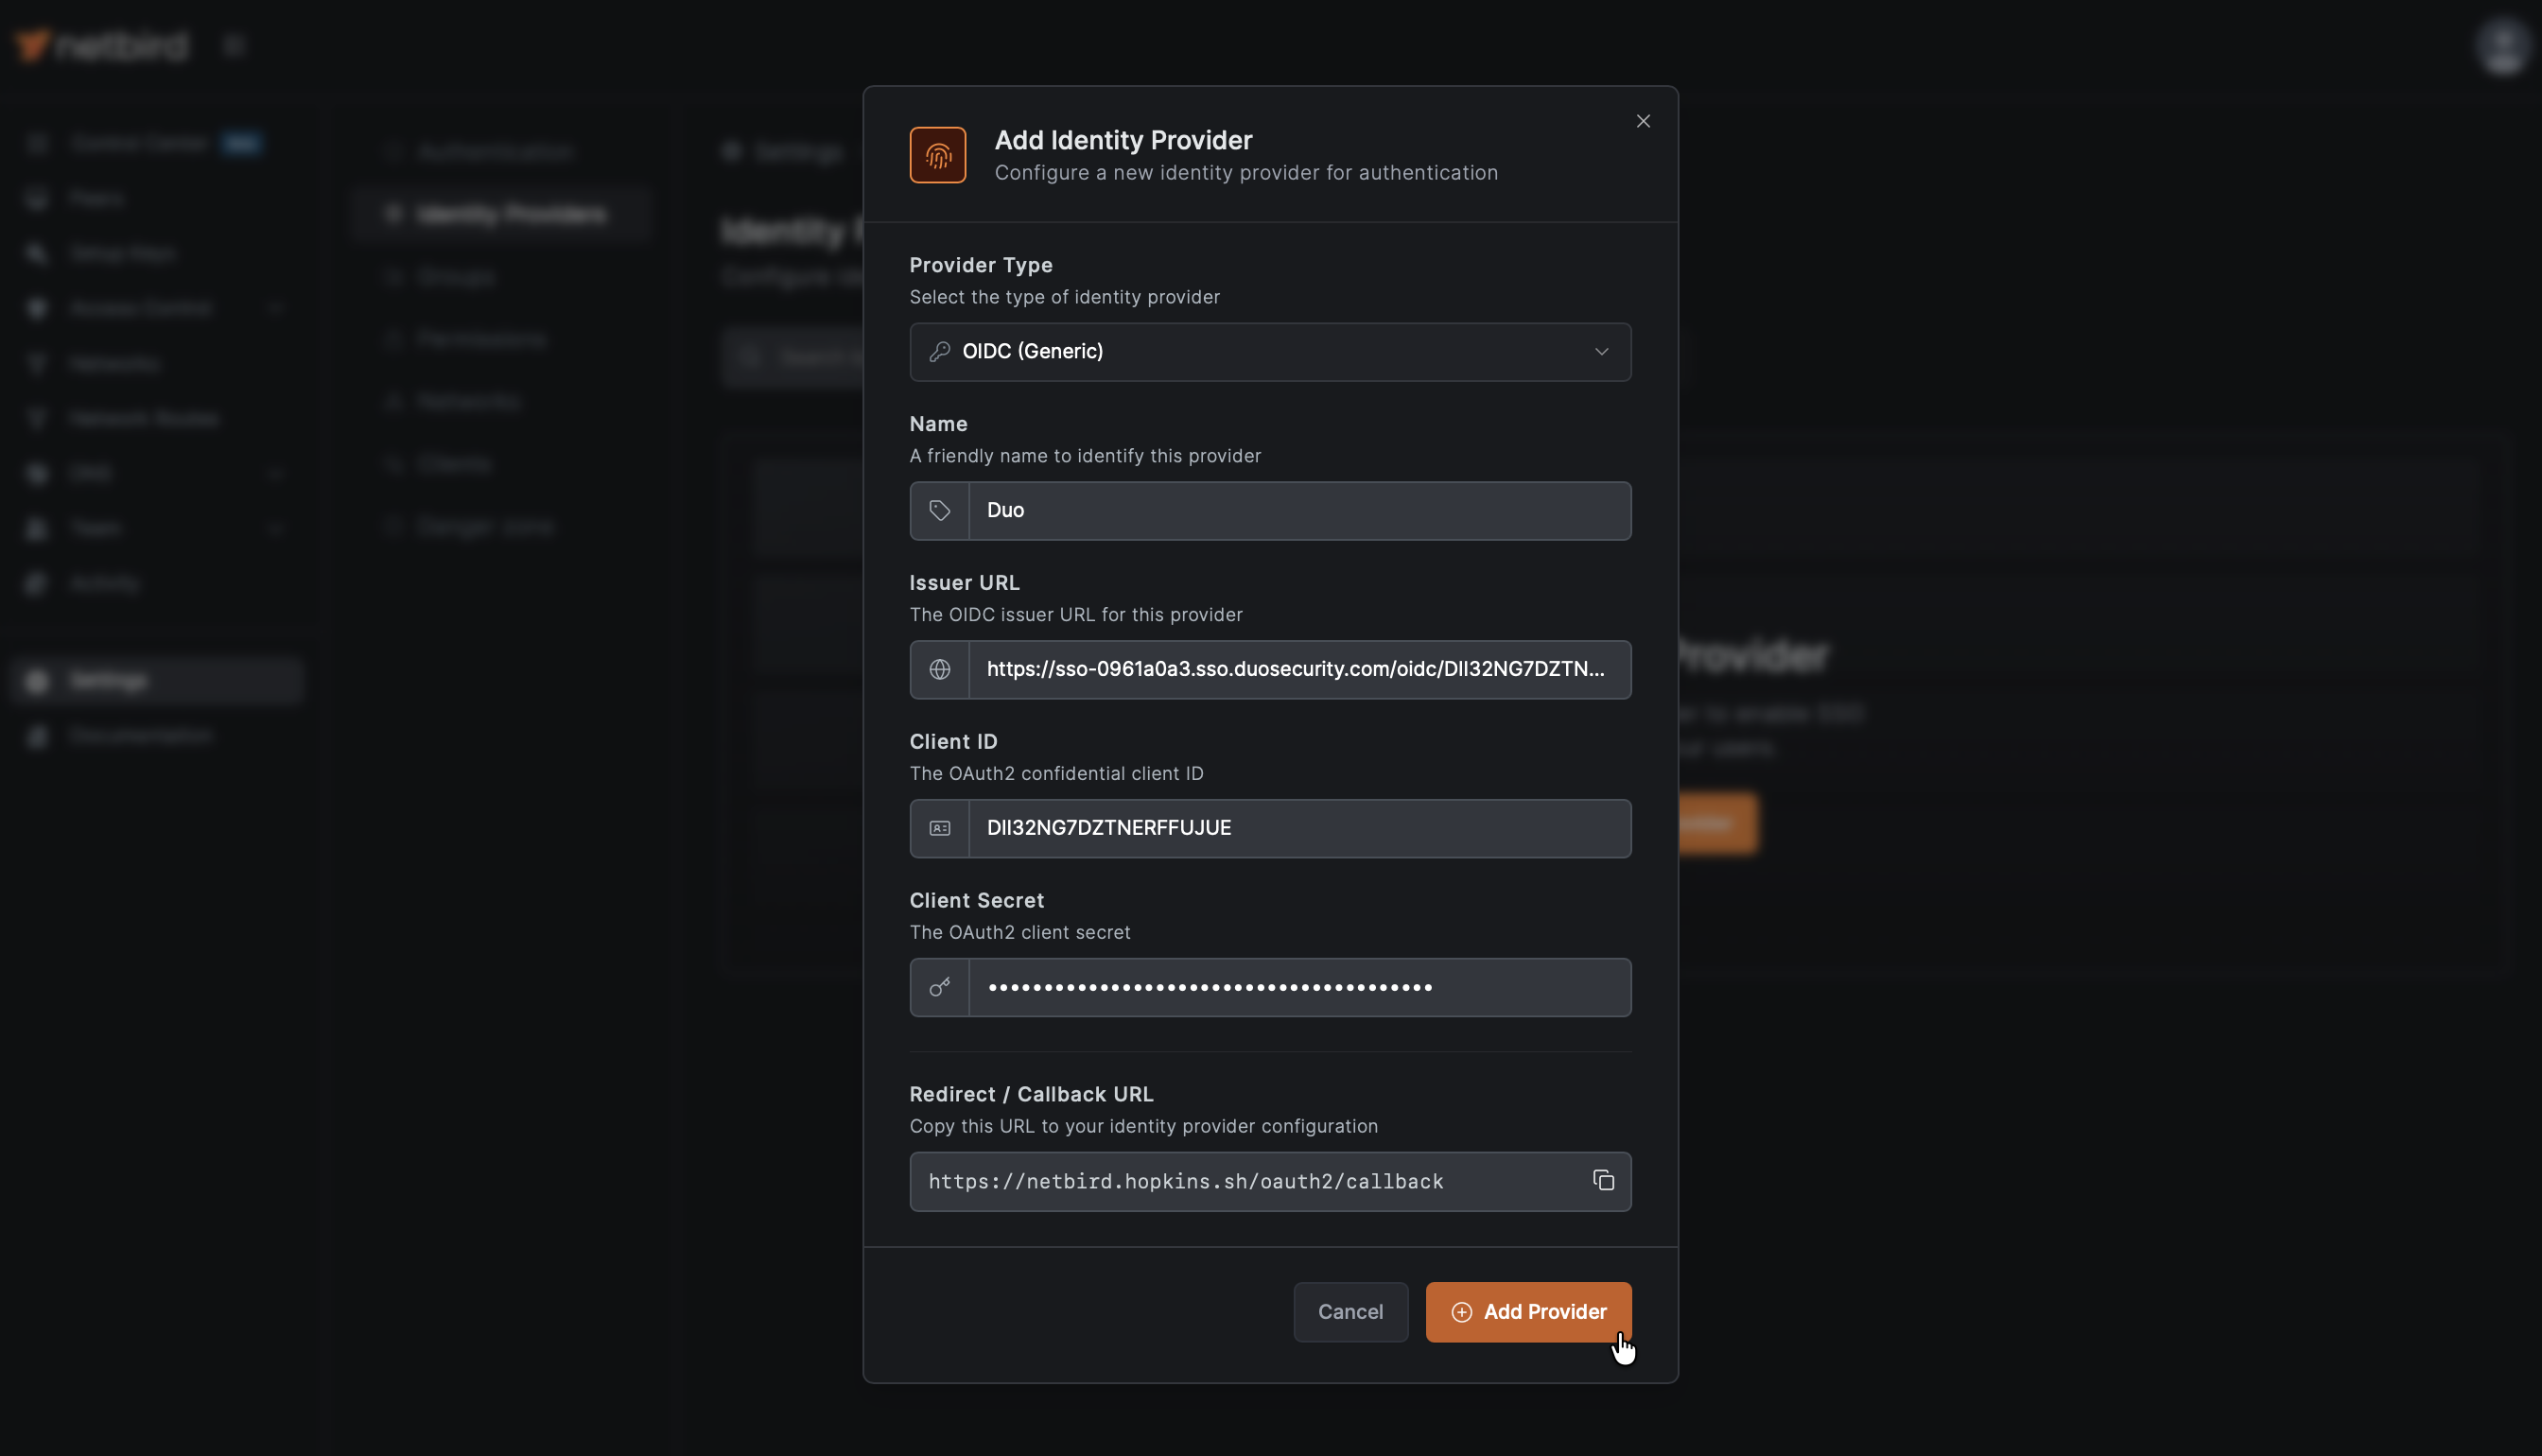
- Click Add Identity Provider
- Fill in the fields:
| Field | Value |
|---|---|
| Type | Generic OIDC |
| Name | Duo (or your preferred display name) |
| Issuer | From Duo Metadata |
| Client ID | From Duo application Metadata (will fill after Step 3) |
| Client Secret | From Duo application Metadata (will fill after Step 3) |
Important: Copy the Issuer URL exactly as shown in Duo's Metadata section. The format is https://sso-{your-id}.sso.duosecurity.com/oidc/{application-id}.
- Copy the Redirect URL that NetBird displays (but don't click Add Provider yet)

Step 3: Complete Duo Application Setup
- Return to the Duo Admin Panel tab
- Scroll down to the Relying Party section
- Under Sign-In Redirect URLs, enter the redirect URL you copied from NetBird (e.g.,
https://netbird.example.com/oauth2/callback)

Duo SSO's generic OIDC relying party only exposes Sign-In Redirect URLs — there is no separate logout/sign-out redirect field, so no logout URL needs to be configured here.
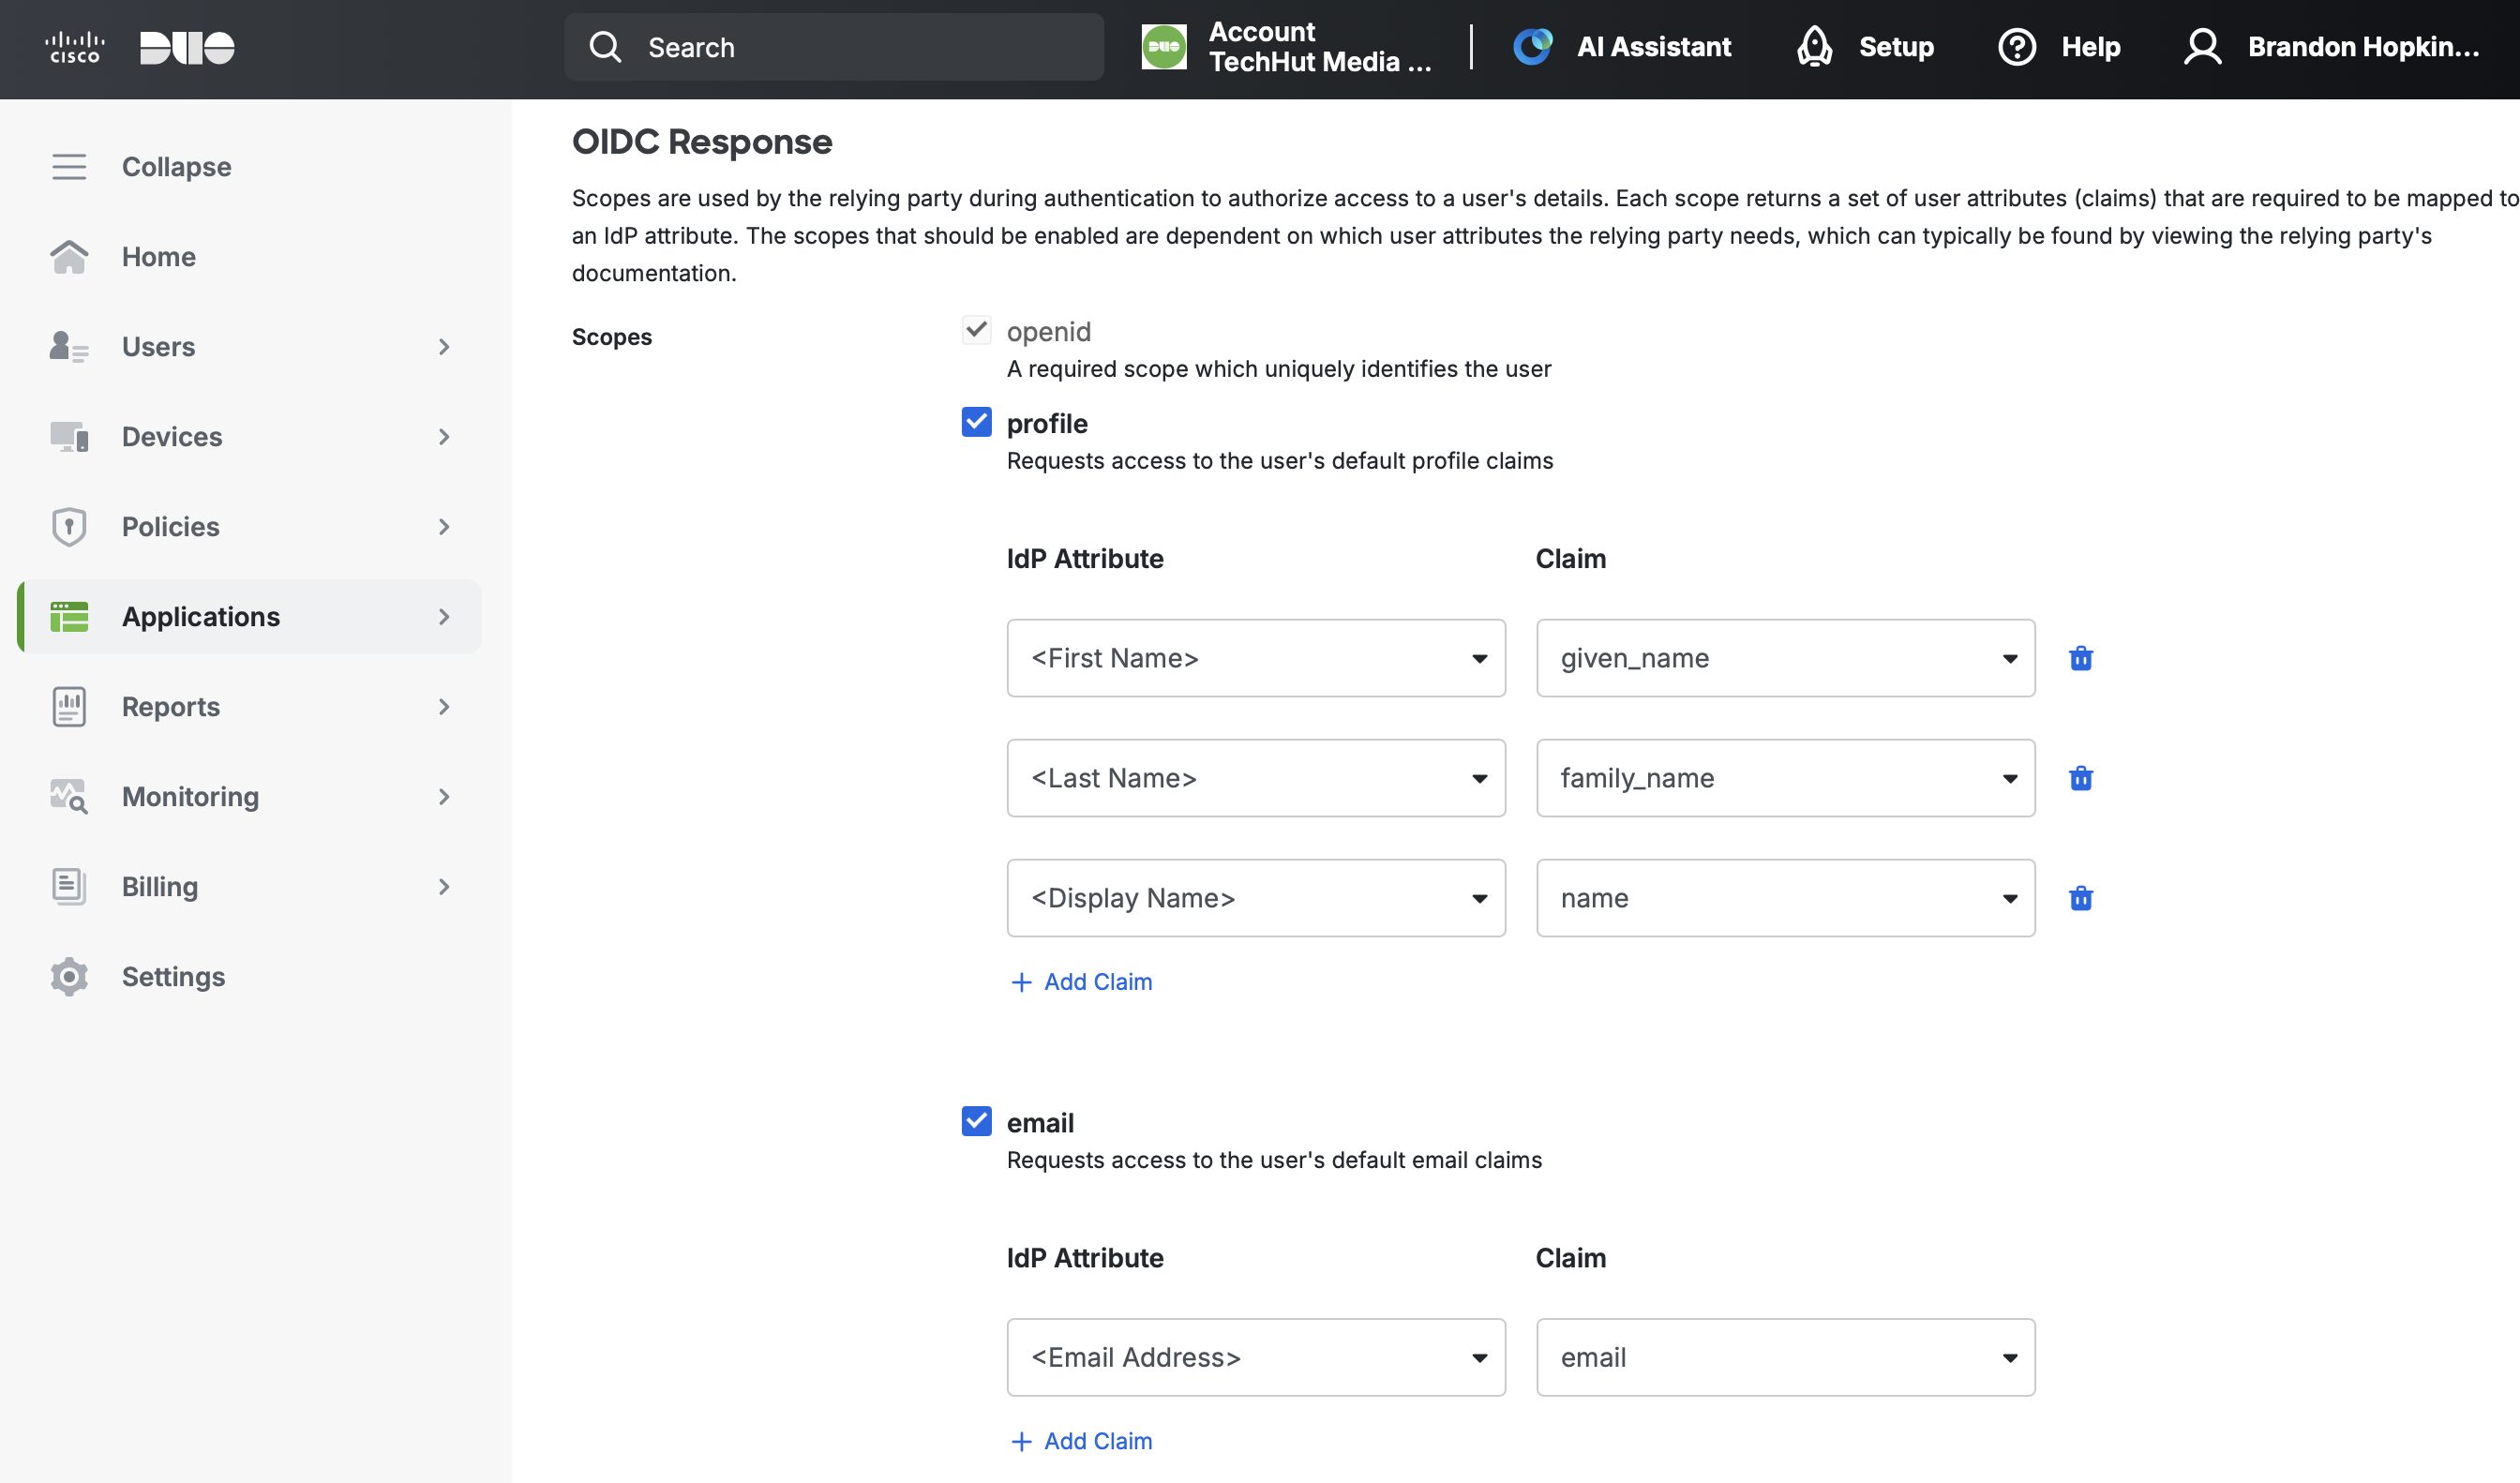
- Under Scopes, ensure the following are enabled:
- openid (required, cannot be disabled)
- profile (check the box)
- email (check the box)
- Scroll down and click Save
Step 4: Complete NetBird Setup
- Return to the NetBird tab
- Fill in the Client ID and Client Secret from Duo's Metadata section
- Click Add Provider
Step 5: Test the Connection
- Log out of NetBird Dashboard
- On the login page, you should see a "Duo" button
- Click it and authenticate with your Duo credentials
- Complete Duo two-factor authentication when prompted
- You should be redirected back to NetBird and logged in. Unless your user approval settings were changed, you will need to log back into your local admin account to approve the user.
Duo Single Sign-On requires users to complete two-factor authentication. Make sure your users have enrolled in Duo MFA before attempting to log in.
Configuring JWT 'groups' Claim
To sync Duo groups with NetBird, you need to add a custom scope with group claims in your Duo OIDC application. This will require a custom attribute for the groups.
Step 1: Add Custom Group Scope in Duo
-
In Duo Admin Panel, go to Applications
-
Select your NetBird (Generic OIDC Relying Party) application
-
Scroll down to the OIDC Response section
-
Click Add Custom Scope
-
Enter the scope name:
groups -
Click Add Claim under the new scope
-
Configure the claim:
- IdP Attribute: Select or enter your group attribute from your authentication source
- Claim:
groups
-
Click Save
The group attribute name depends on your Duo authentication source. For Active Directory, this is typically the group membership attribute. For SAML IdPs, verify your IdP sends group information in the expected attribute.
Step 2: Enable JWT Group Sync in NetBird
- In NetBird Dashboard, go to Settings → Groups
- Enable JWT group sync
- Set JWT claim to
groups - Optionally configure JWT allow groups to restrict access
Troubleshooting
"Connector failed to initialize" error
- Ensure the Issuer URL is copied exactly from Duo's Metadata section
- Verify both profile and email scopes are enabled in Duo
- Check that the Redirect URL in Duo exactly matches the URL from NetBird
- Make sure the application is saved and you have the correct Client ID and Client Secret
- Confirm your Duo authentication source is properly configured
"Invalid redirect URI" error
- Ensure the redirect URI is configured in Duo's Sign-In Redirect URLs
- Check for trailing slashes — the URL must match exactly
- Verify URLs use HTTPS
Users can't complete authentication
- Verify users have access to the application in Duo (check User access settings)
- Ensure users are enrolled in Duo MFA
- Check that users belong to a group with access to the application
Two-factor authentication issues
- Duo requires MFA for all SSO logins — ensure users have set up their Duo authentication methods
- Check Duo's authentication policy settings for your application
- Verify the user's device is registered in Duo
Groups not syncing
- Verify the custom
groupsscope is configured with the correct claim - Check that your authentication source (AD or SAML IdP) is sending group information
- For Active Directory, ensure the group attribute is properly mapped