Allow Only Intune-Managed Devices to Access Your Network
TLDR: Devices marked as "Non-compliant" in Intune will automatically lose access, ensuring strict adherence to your security policies. Once a device returns to a "Compliant" status, access is restored.
Microsoft Intune is a cloud-based endpoint management platform that enables organizations to manage devices, enforce security policies, and protect their networks. Intune agent presence on endpoints allows continuous collection and evaluation of device posture, which can then be used to enforce network access controls based on device compliance, security configuration, and enrollment status.
The integration of NetBird with Microsoft Intune provides network security by ensuring only devices managed and compliant in Intune can access the protected network. This approach ensures only up-to-date and compliant Windows/macOS endpoints have access to critical network resources via NetBird and lets administrators enforce access restrictions based on compliance policies defined in Intune, such as device health, OS version, security baseline adherence, and more.
In this guide, you'll learn how to integrate NetBird with Microsoft Intune and configure access controls to allow only Intune-managed/compliant devices onto your network.
Get Started with NetBird-Intune Integration
- Navigate to the Integrations » EDR tab in the NetBird dashboard
- Click
Connect Intuneto start the configuration wizard
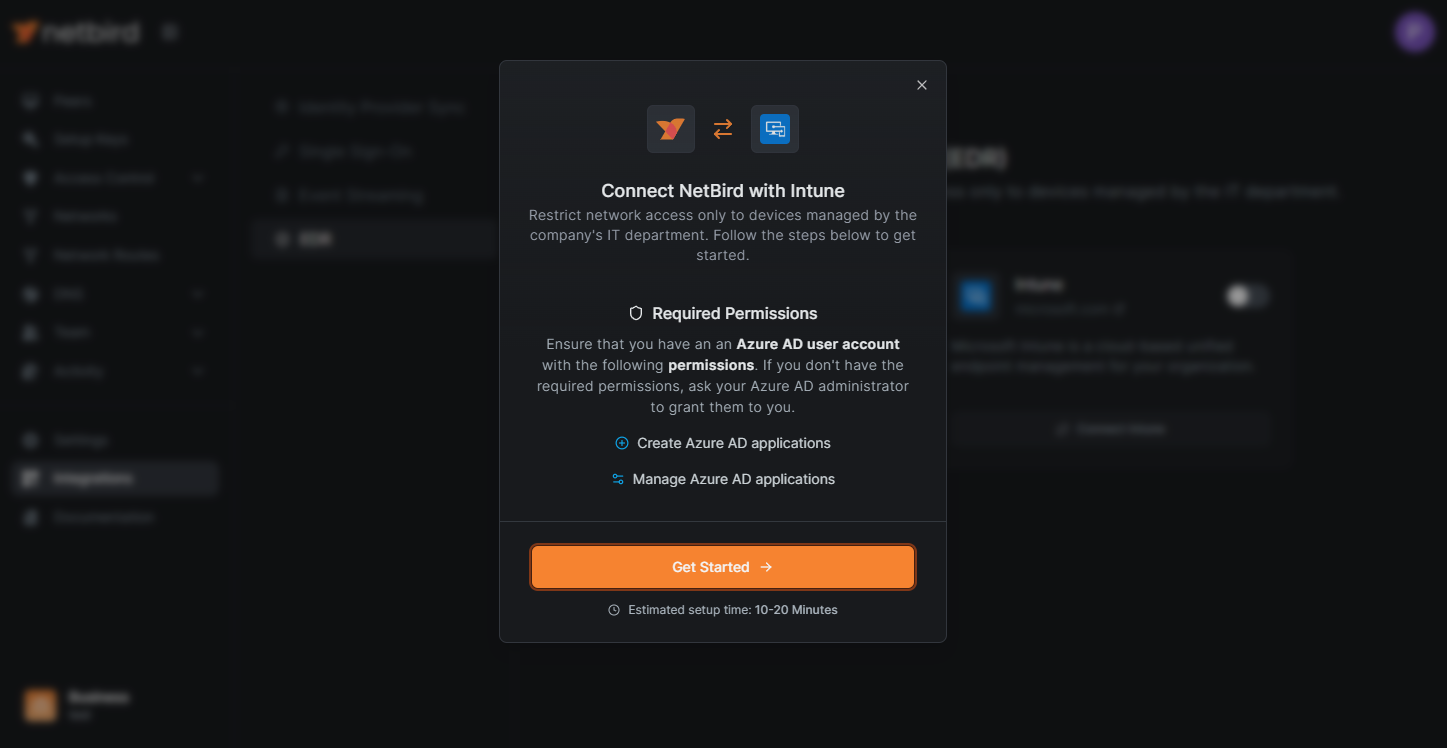
Prerequisites
Before starting the integration process, verify that you have the required permissions in Microsoft Intune. Specifically, you will need an Azure user account with at least one of these roles:
- Application Administrator
- Cloud Application Administrator
- Global Administrator
To check your permissions:
- Log in to the Azure portal.
- Navigate to Manage Microsoft Intune and click
View. - Expand the
Managetab and click onRoles and administratorsin the left menu. - Look for your username and verify if you're assigned any of the above roles.
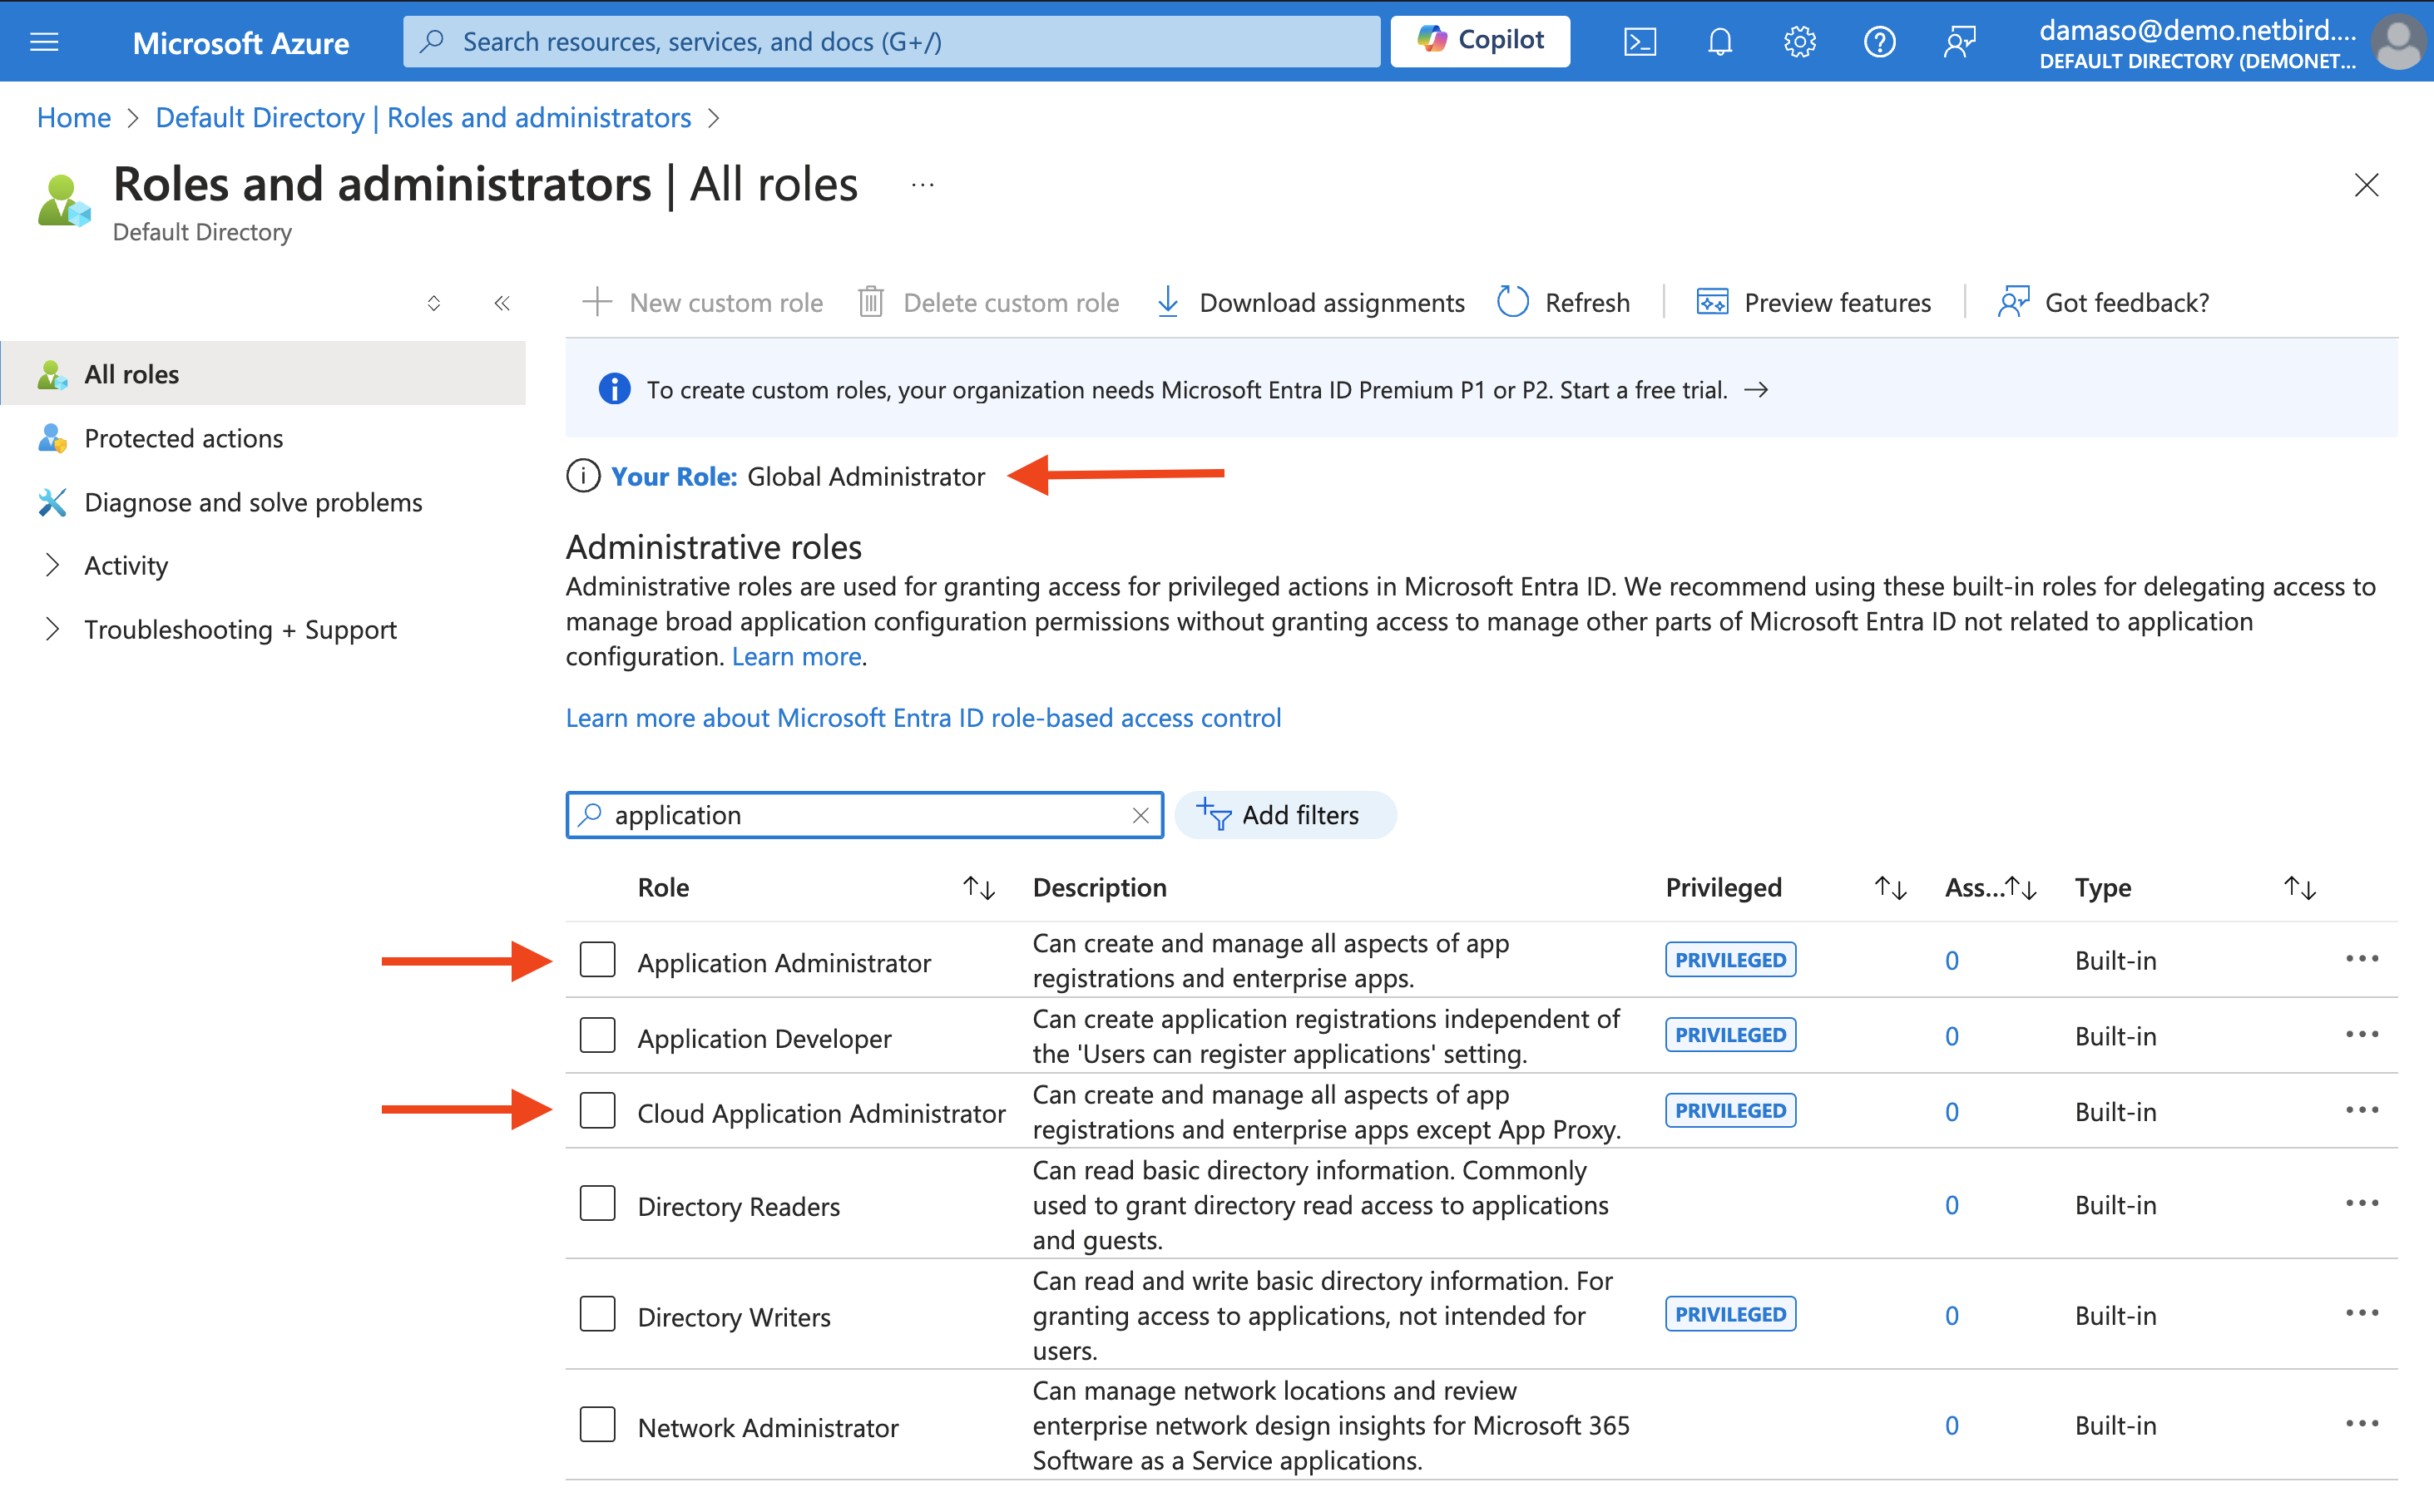
If you don't have the required permissions, contact your Azure AD administrator to grant you the appropriate role before proceeding with the NetBird integration.
Create and Configure a Microsoft Entra ID Application for NetBird Integration
Now that you have the required permissions, return to the NetBird dashboard. Click on the Get Started button to initiate the integration process.
A new wizard screen will appear, offering step-by-step instructions for creating and configuring your Microsoft Entra ID application. To simplify the process, the wizard also provides quick-copy buttons for essential information:
- Name
- Account Type
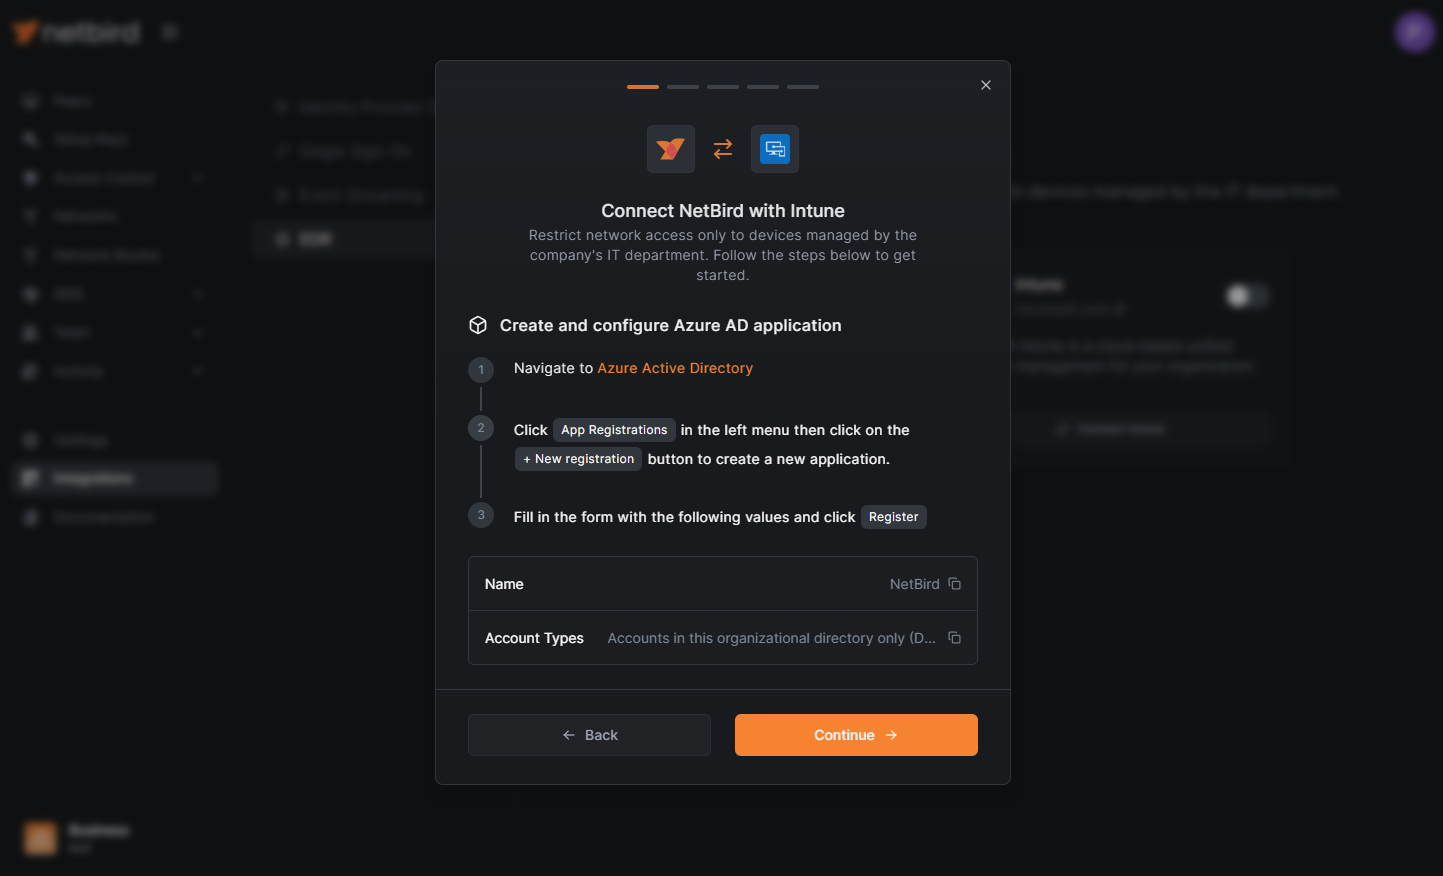
For convenience, click on Azure Active Directory (step 1). That will open the Azure dashboard. Navigate to App registrations in the left menu and then click +New registration as indicated below:

Fill in the required information:
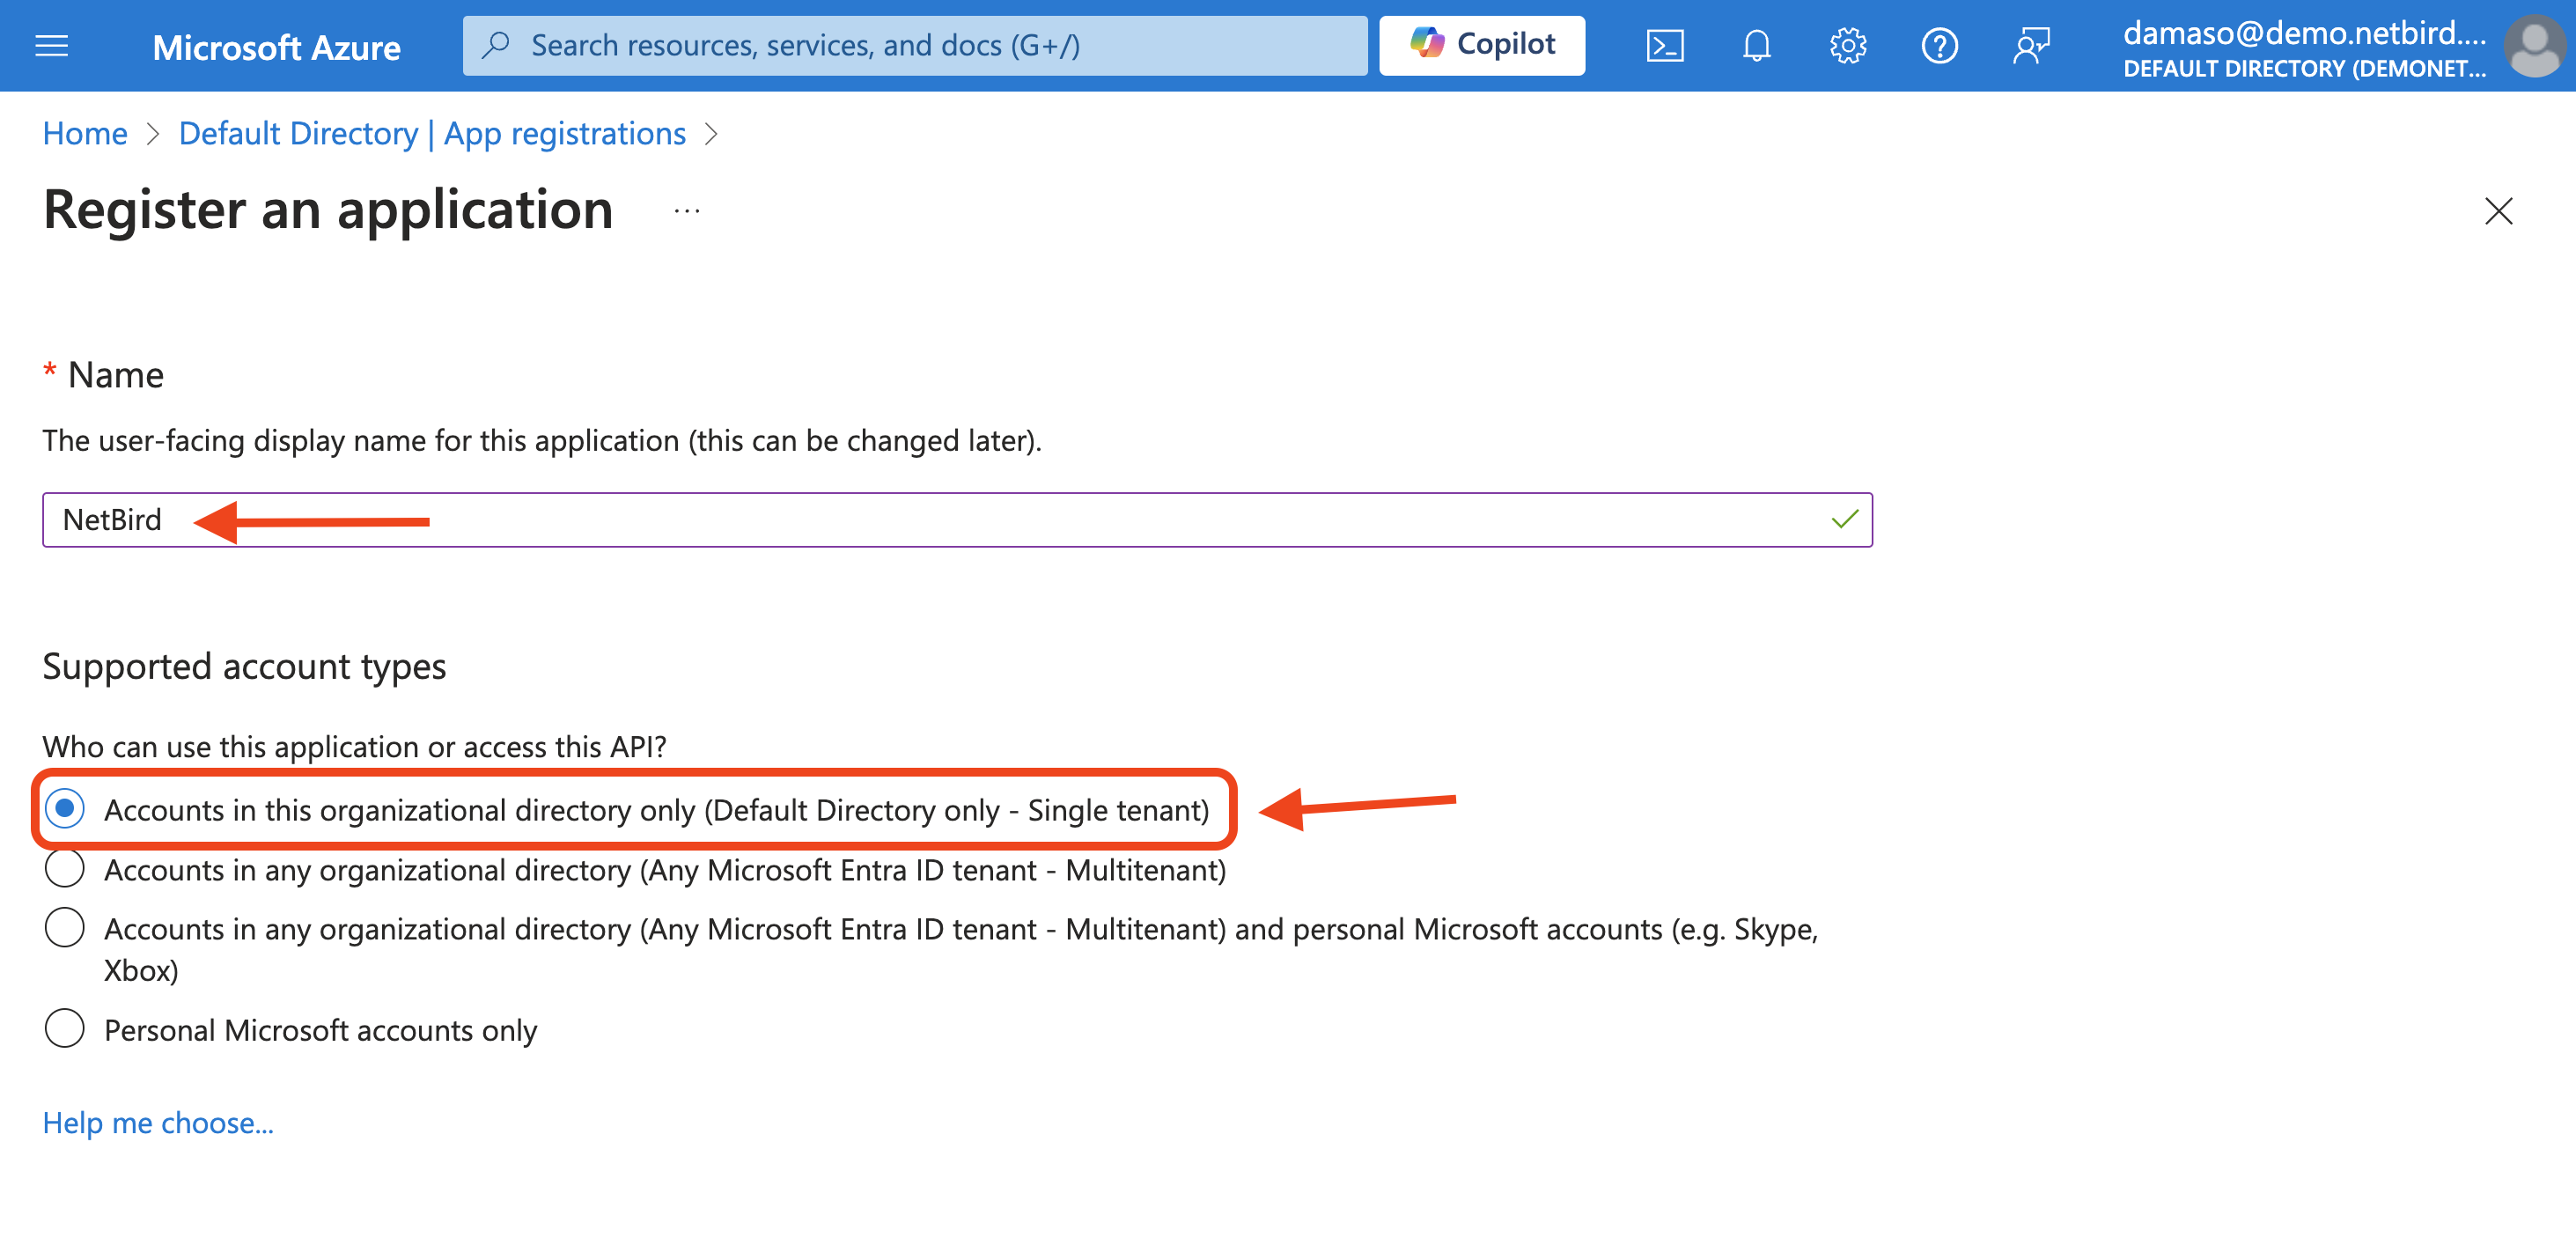
After entering all required information, click the Register button at the bottom of the form to finalize the application registration process.
Upon successful registration, you'll be redirected to a confirmation screen similar to the following:
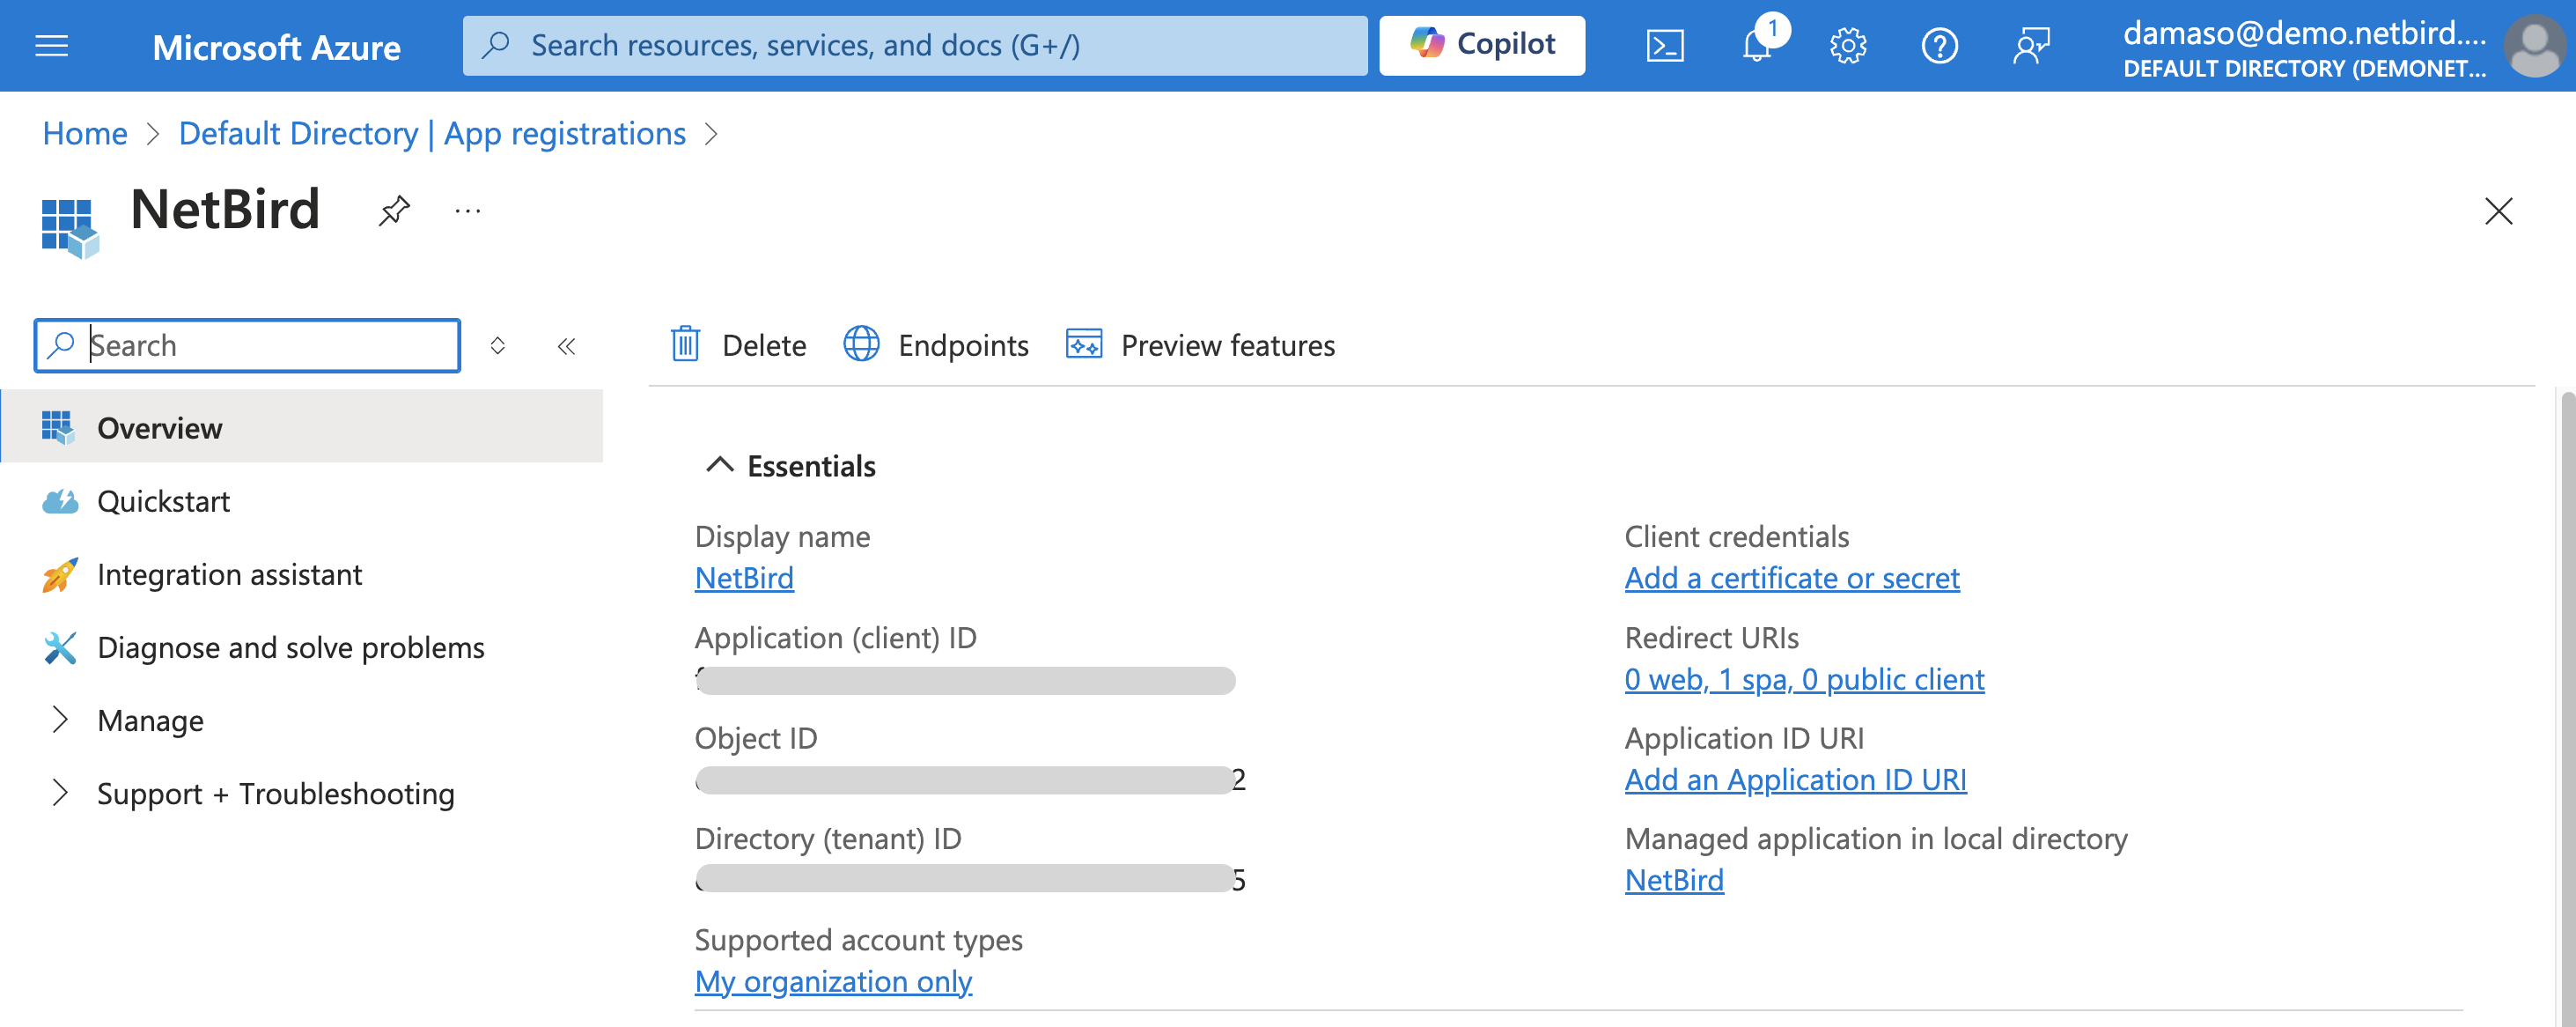
Copy and securely store the generated Application (client) ID and Directory (tenant) ID as you will need them shortly.
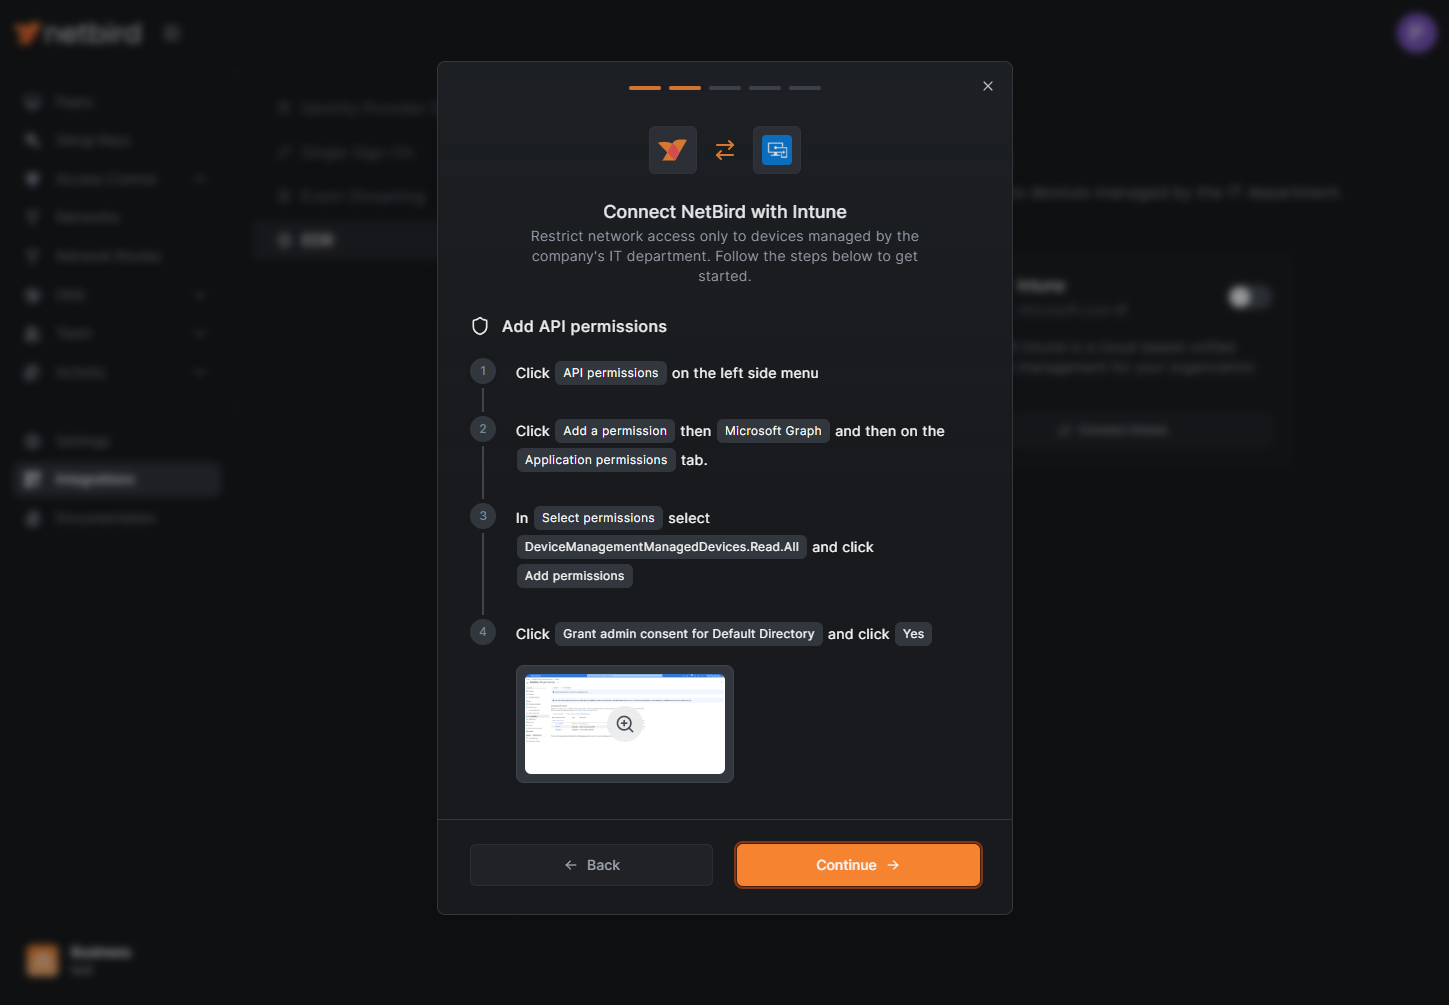
Configure API Permissions for NetBird-Intune Integration
On the NetBird dashboard click the Continue → button. A new wizard screen will appear, this time, offering step-by-step instructions for setting up API permissions.
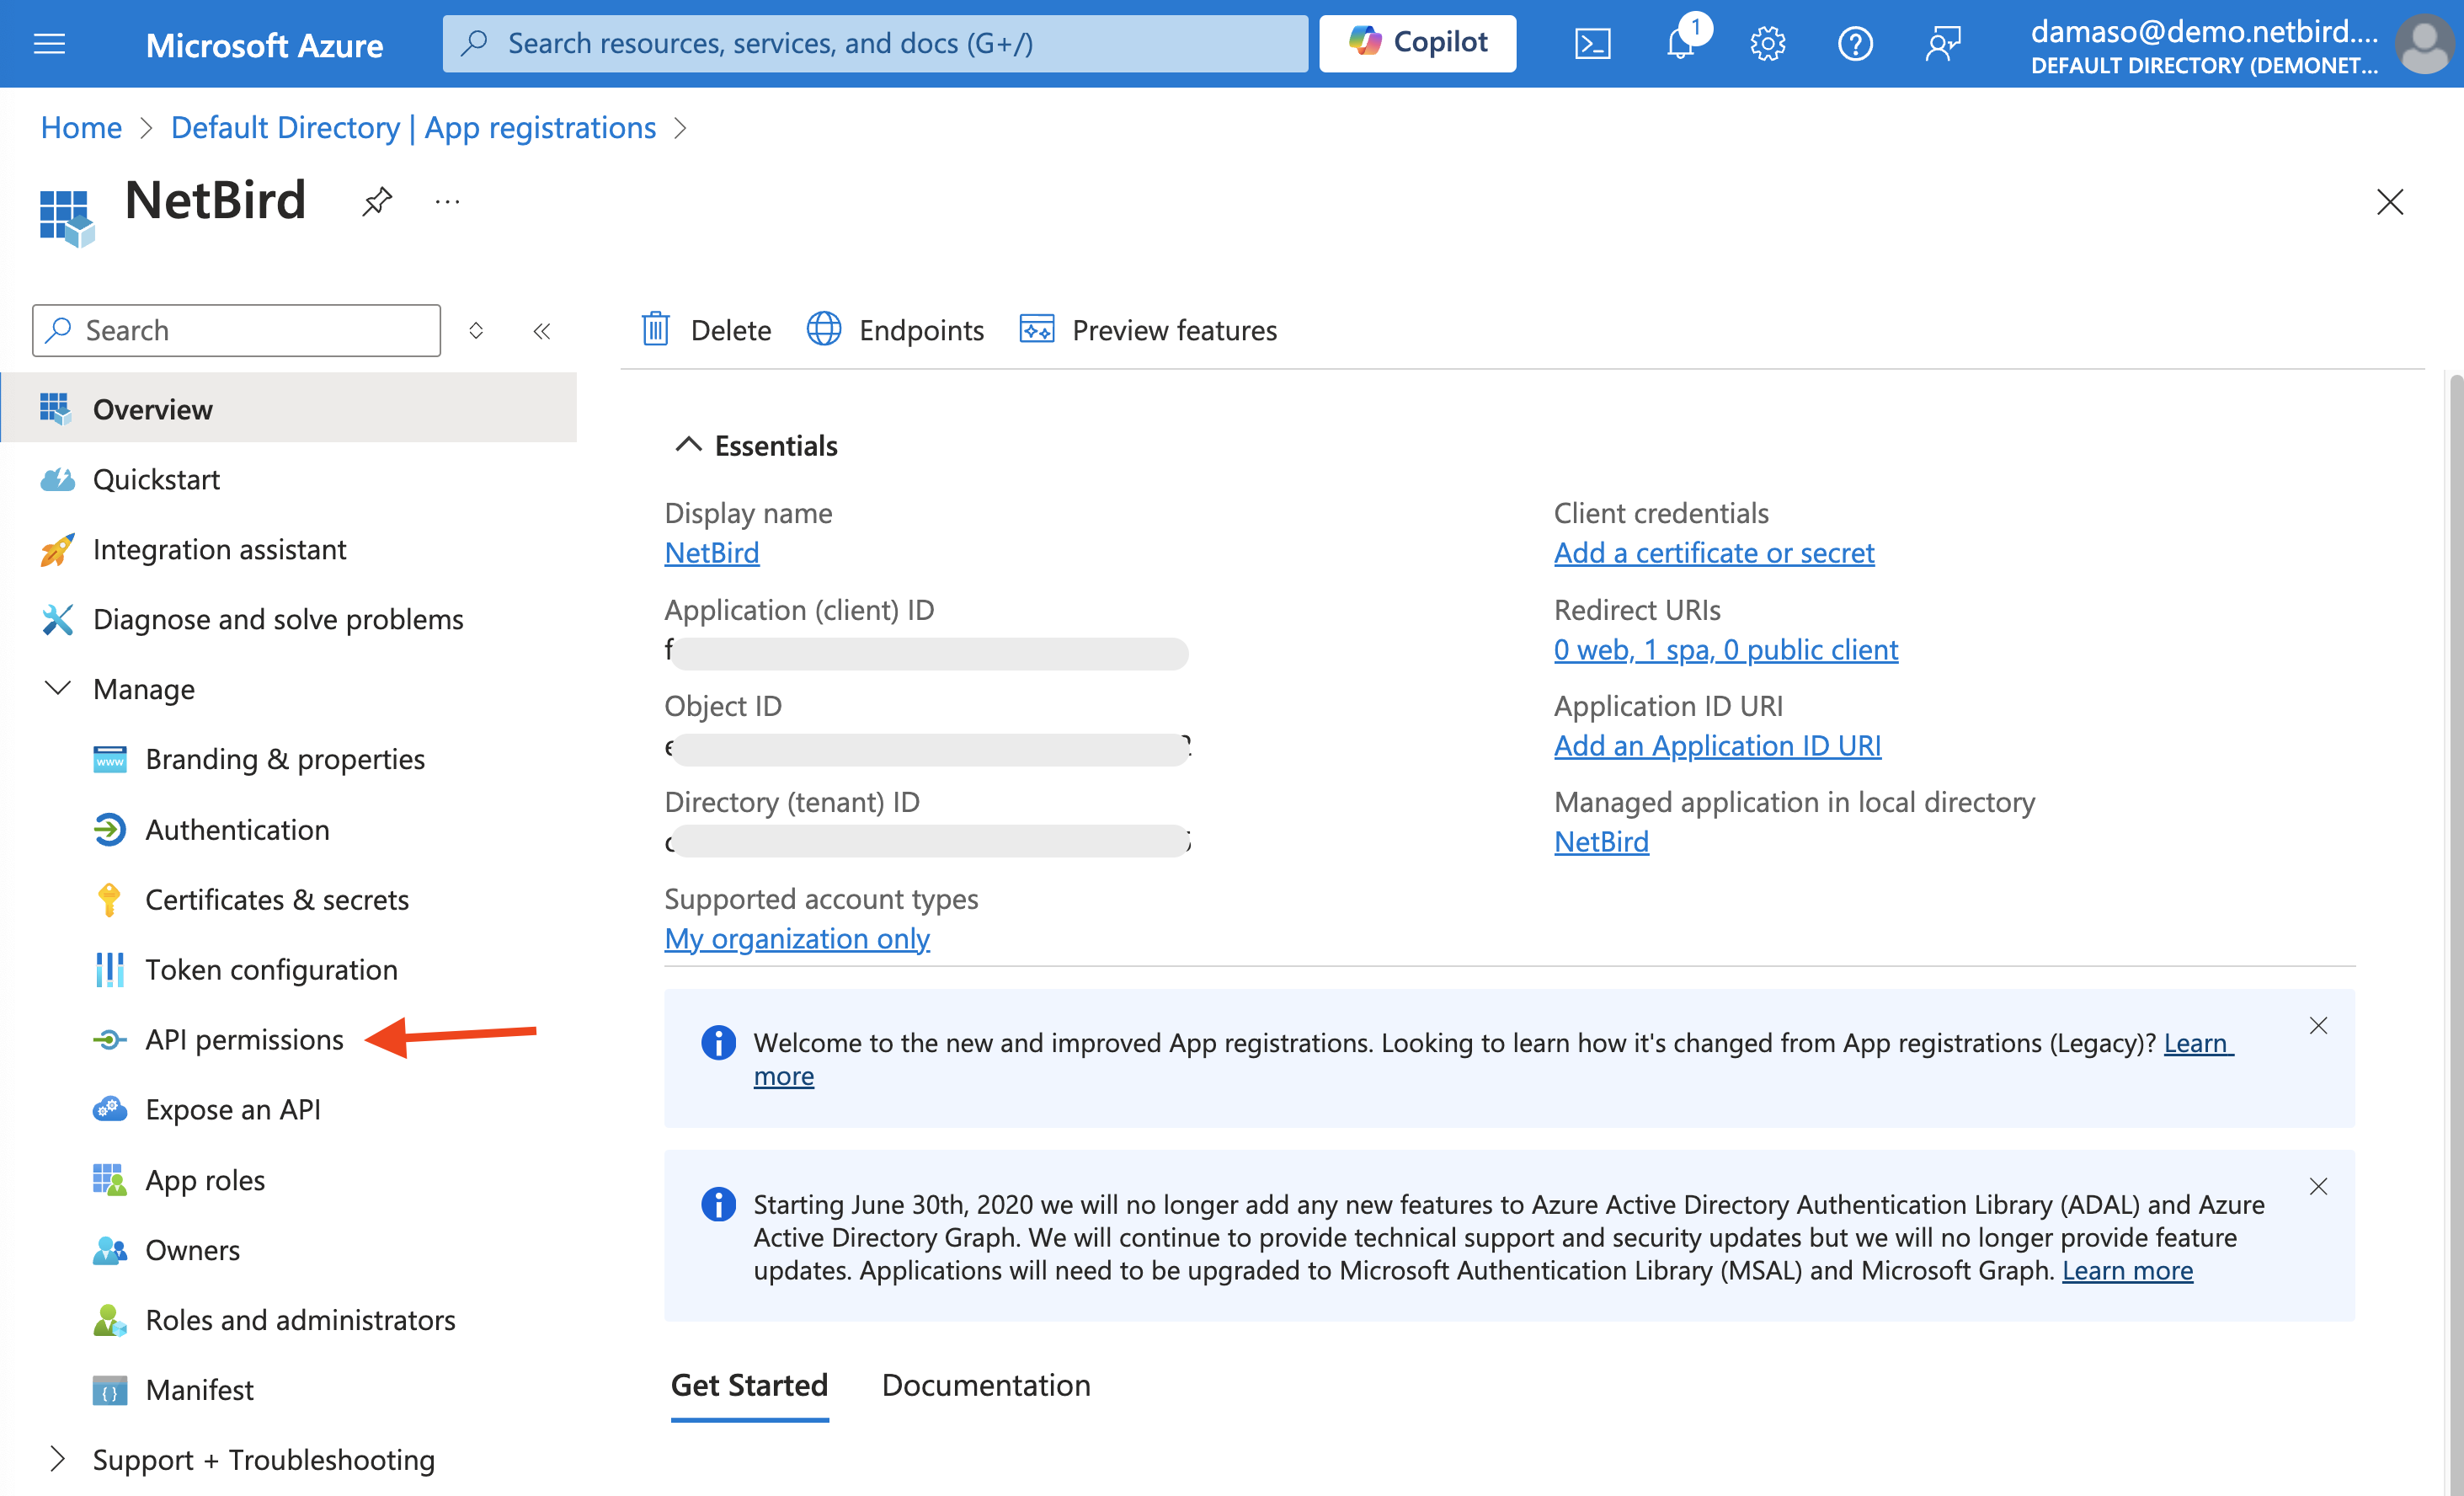
Back to Azure, in the App registrations screen, click on Manage in the left menu to expand it and then click on API permissions:
Look for the + Add a permission button, located near the top of the permissions list and click on it.
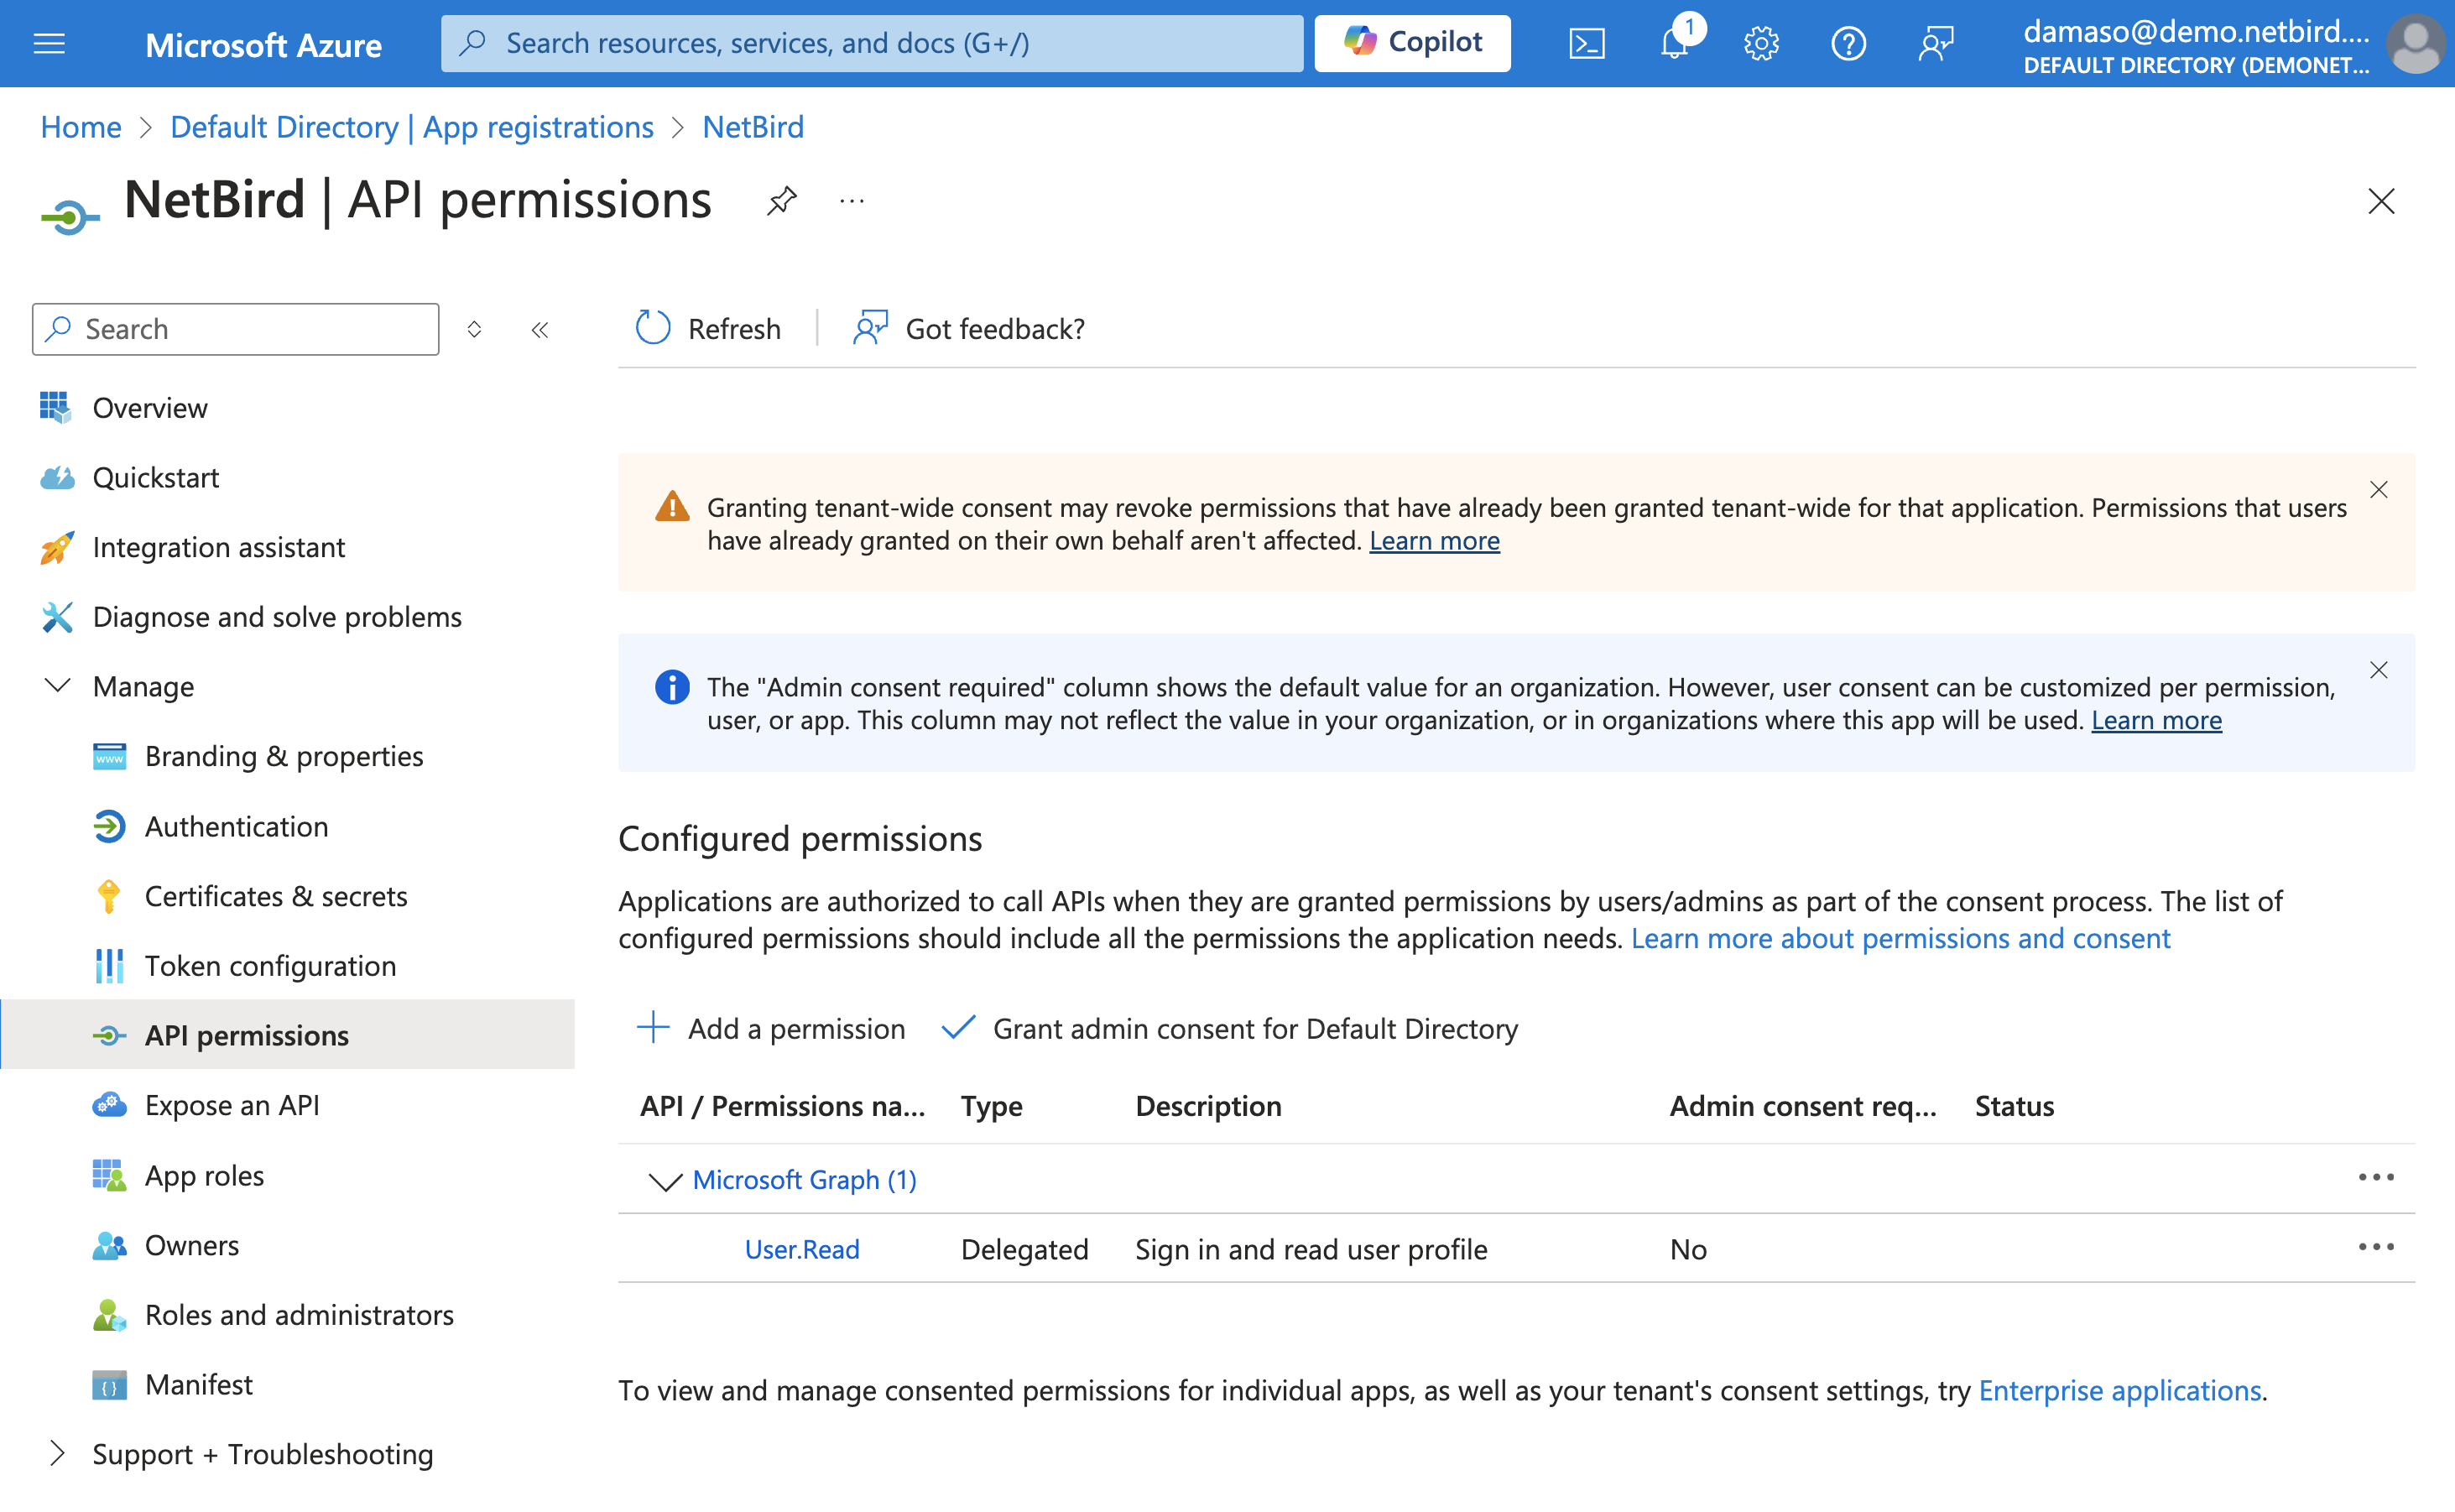
A new pop-up window will appear, asking you to select an API. Click on Microsoft Graph.
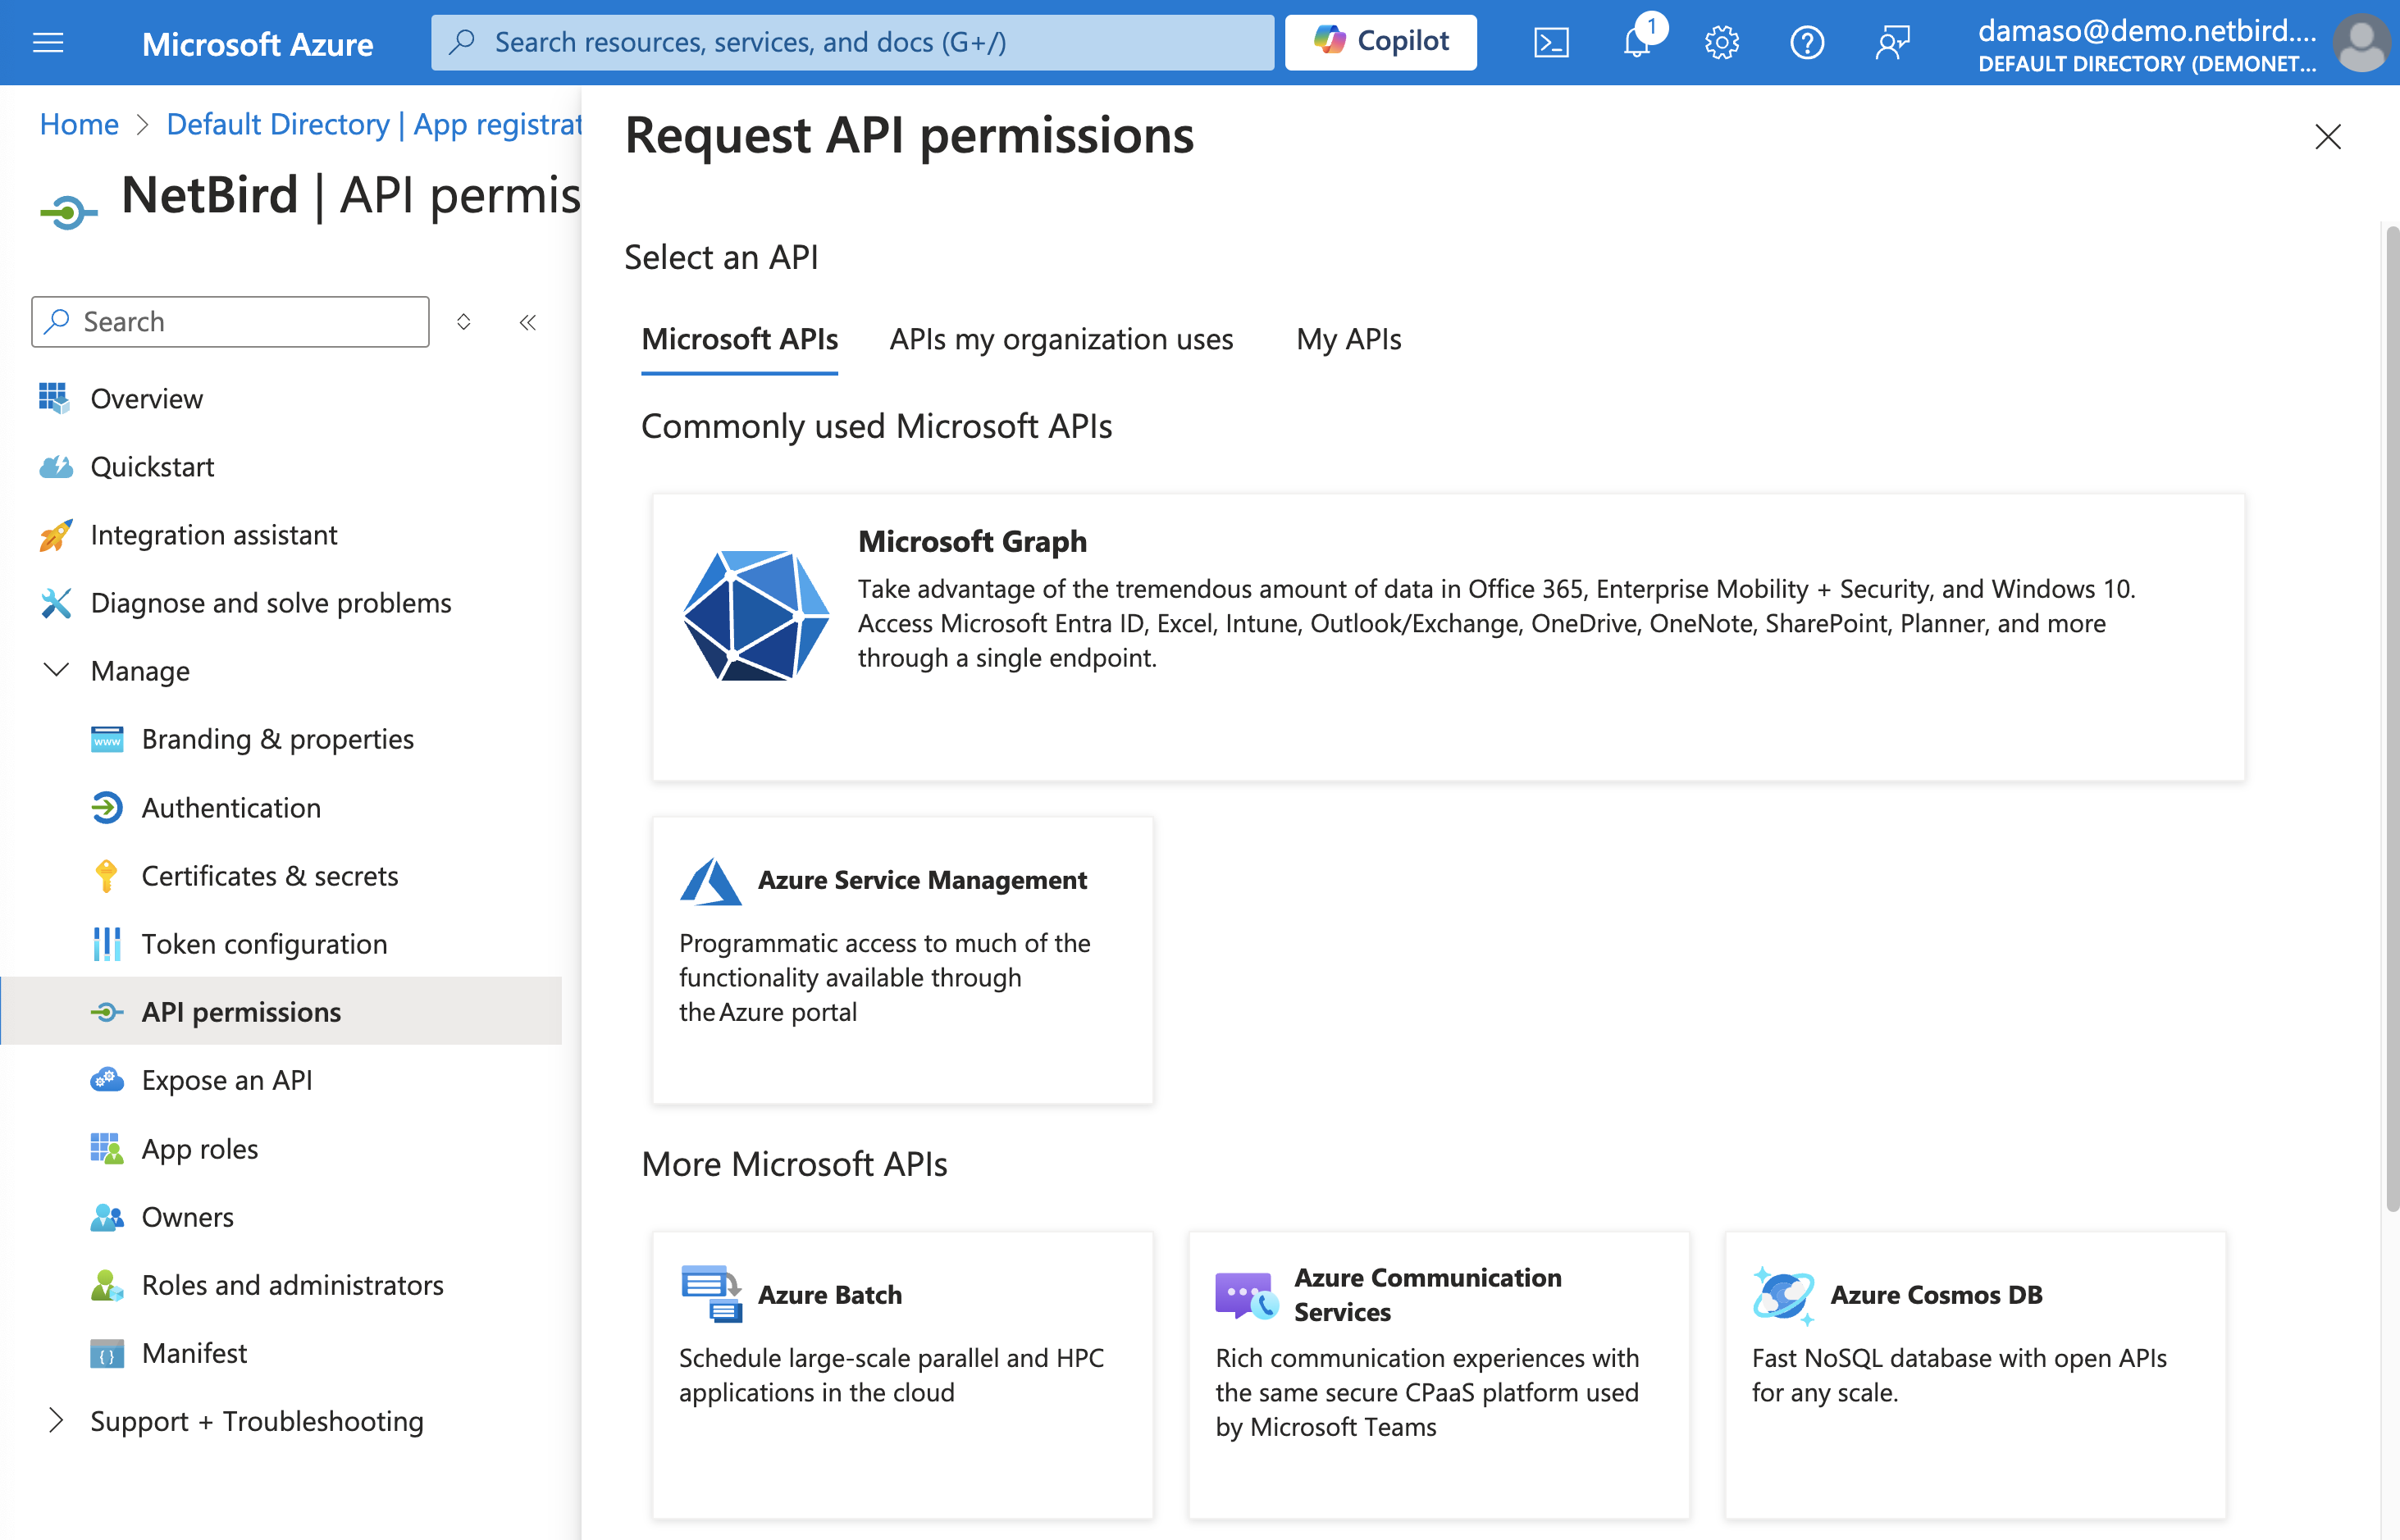
On the next screen, click on the Application permissions button, which will let you select the appropriate permissions for NetBird to function correctly with your Microsoft Intune environment.
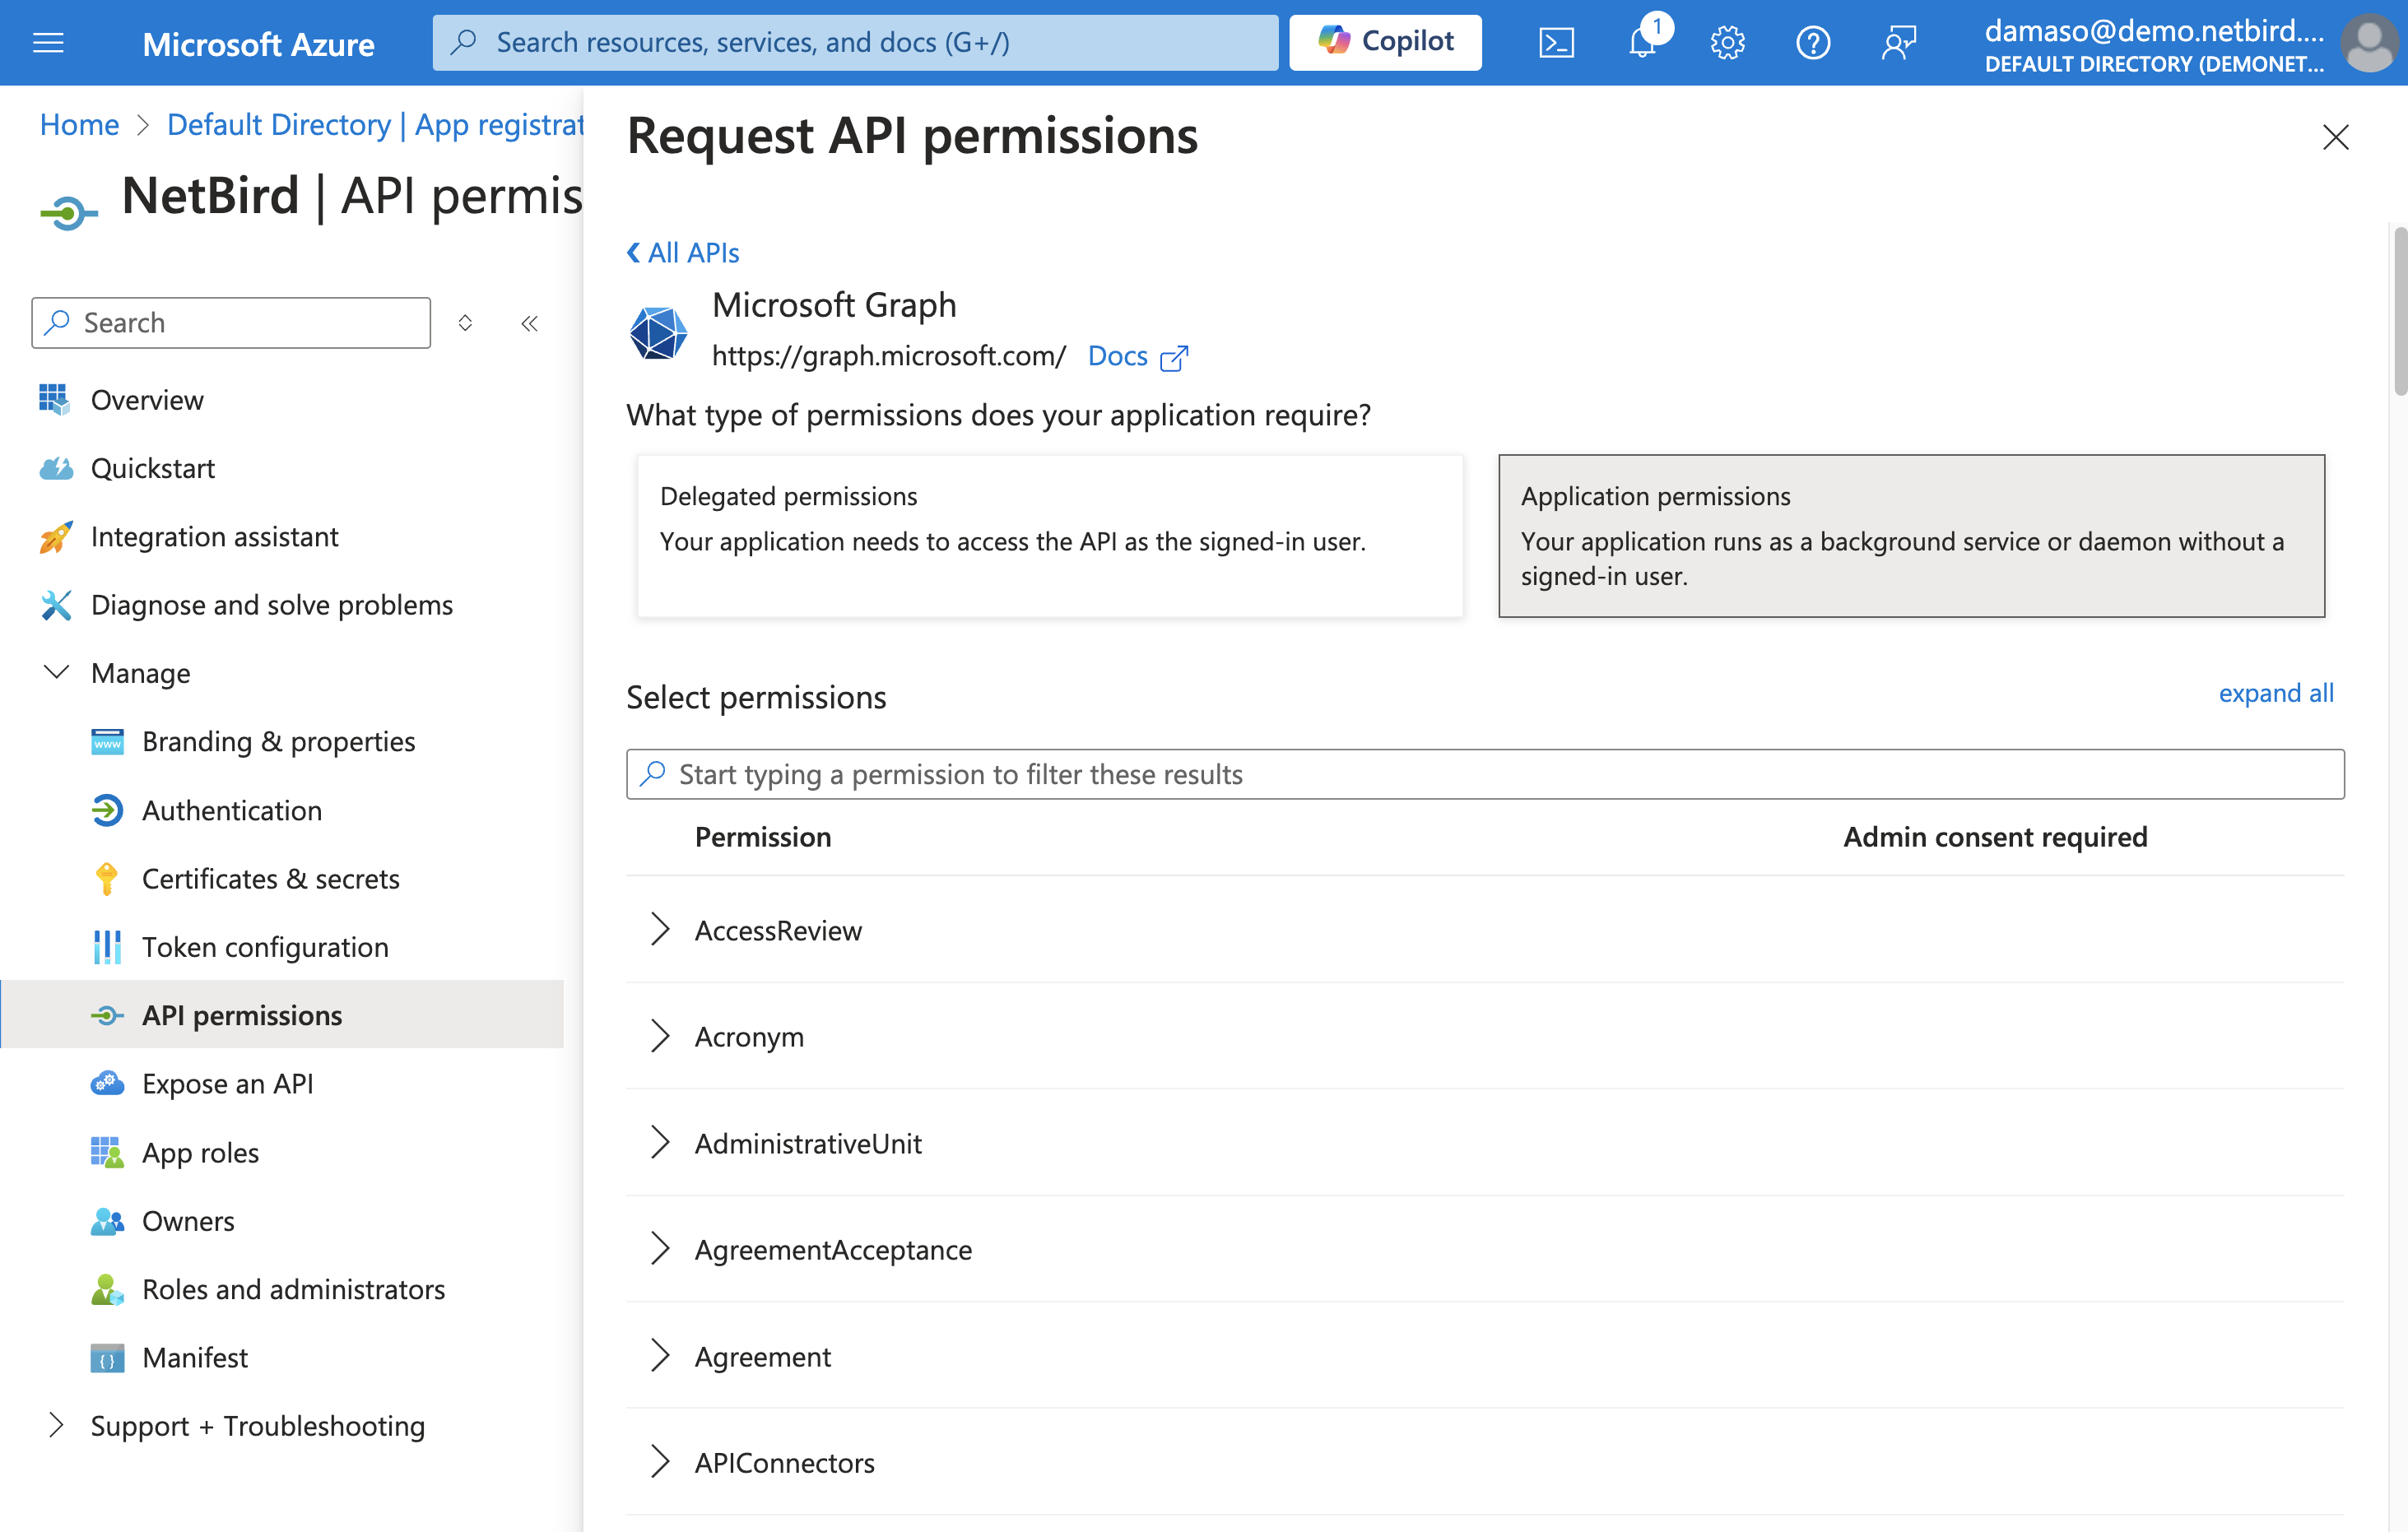
To assign user permissions:
- Locate the search bar at the top. Type
DeviceManagementManagedDevices.Read.Allinto the search bar and pressEnter. - In the search results, click on the
DeviceManagementManagedDevicestab to expand it and view the available permissions. - Click on the checkbox to select and enable the
DeviceManagementManagedDevices.Read.Allpermission.
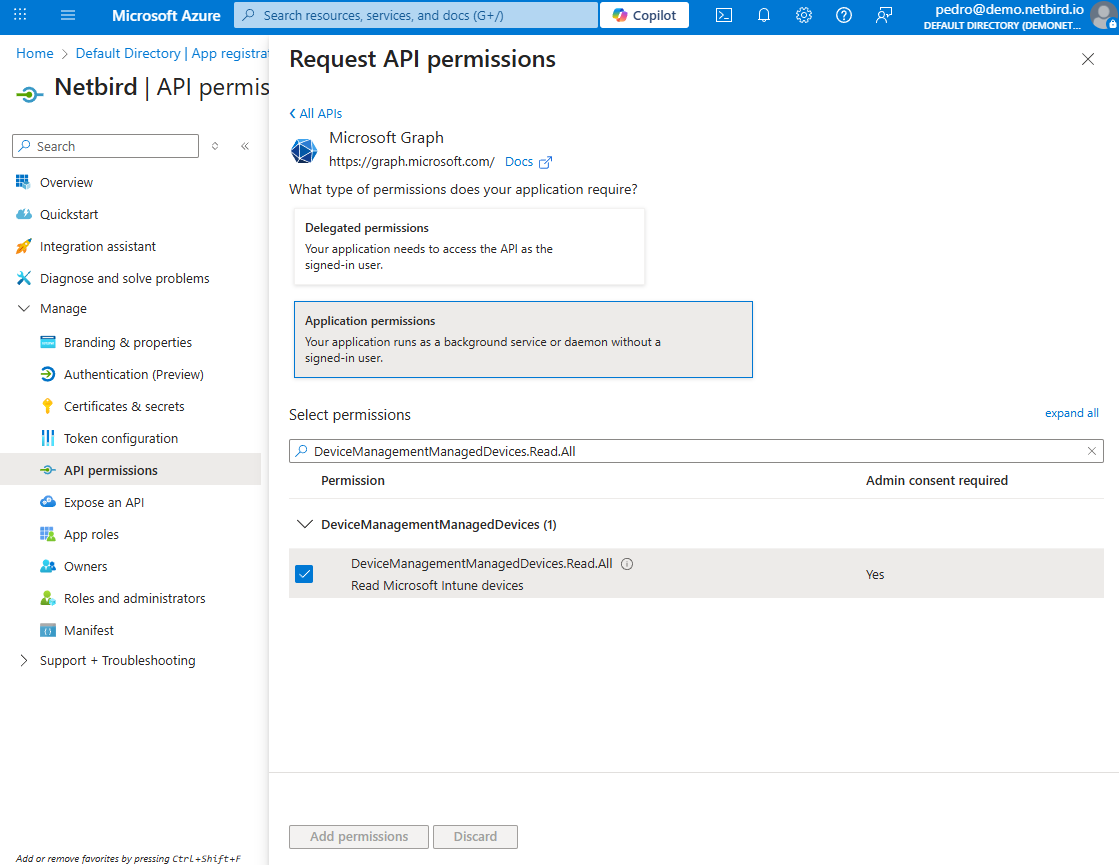
The DeviceManagementManagedDevices.Read.All permission allows NetBird to read the properties of all devices managed by Microsoft Intune in your organization.
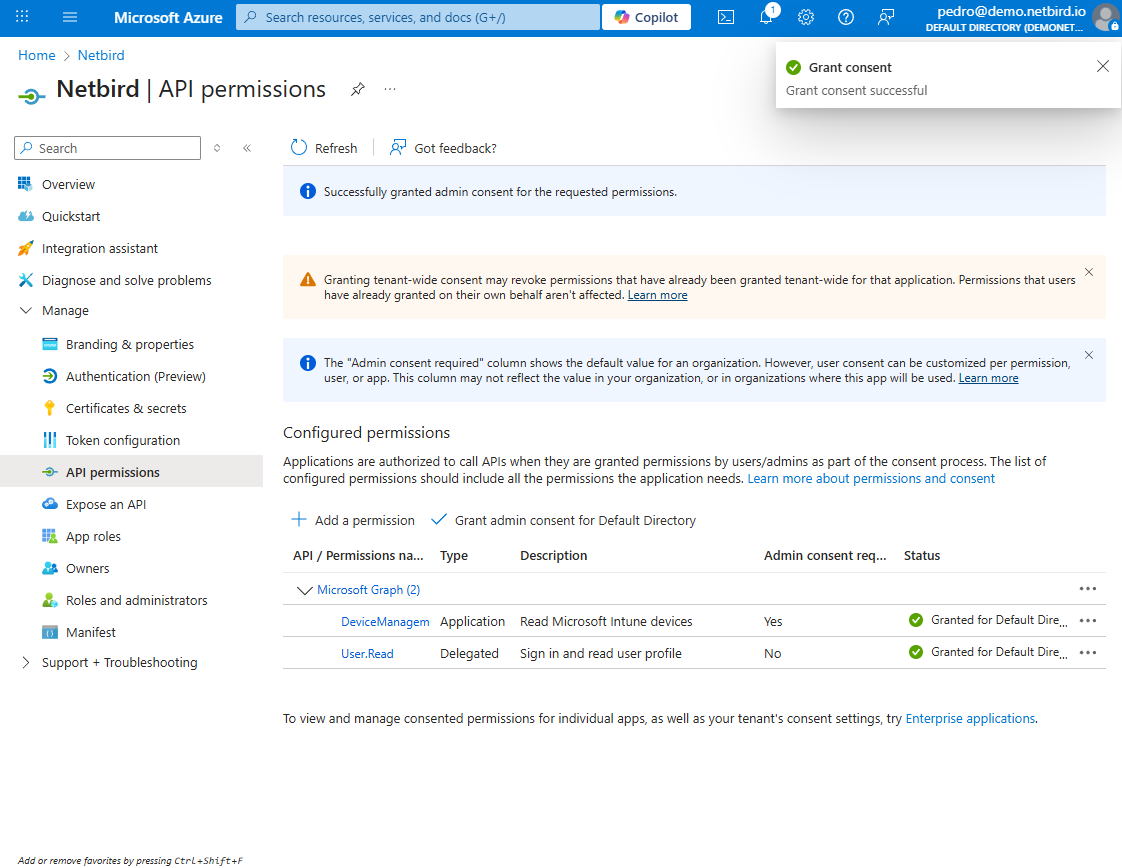
Once done, click the Add permissions button. You will see a few warnings:
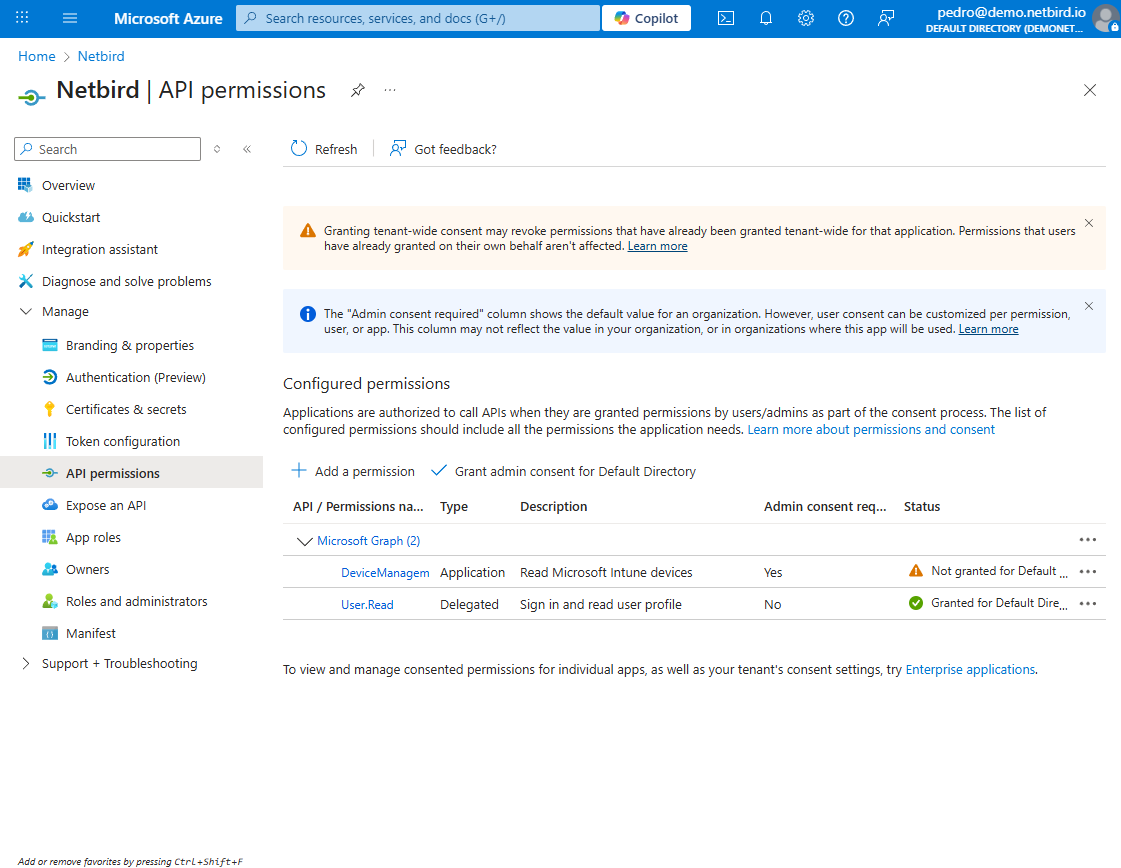
Locate the Grant admin consent for [Your Organization Name] button (you’ll find it next to +Add a permission button). Click on it to grant the required permissions.
A confirmation dialog will appear, asking you to verify this action. Review the permissions listed in the dialog and click Yes to confirm. Wait for the process to complete, this may take a few seconds.
Once finished, the status of the permissions should change to Granted for [Your Organization Name]. Verify that all selected permissions now show a green checkmark, indicating they've been successfully granted:
Create a Client Secret for Secure NetBird-Intune Authentication
Back to the NetBird dashboard, click the Continue → button. A new wizard screen will appear, showing instructions for generating a client secret in Entra ID.
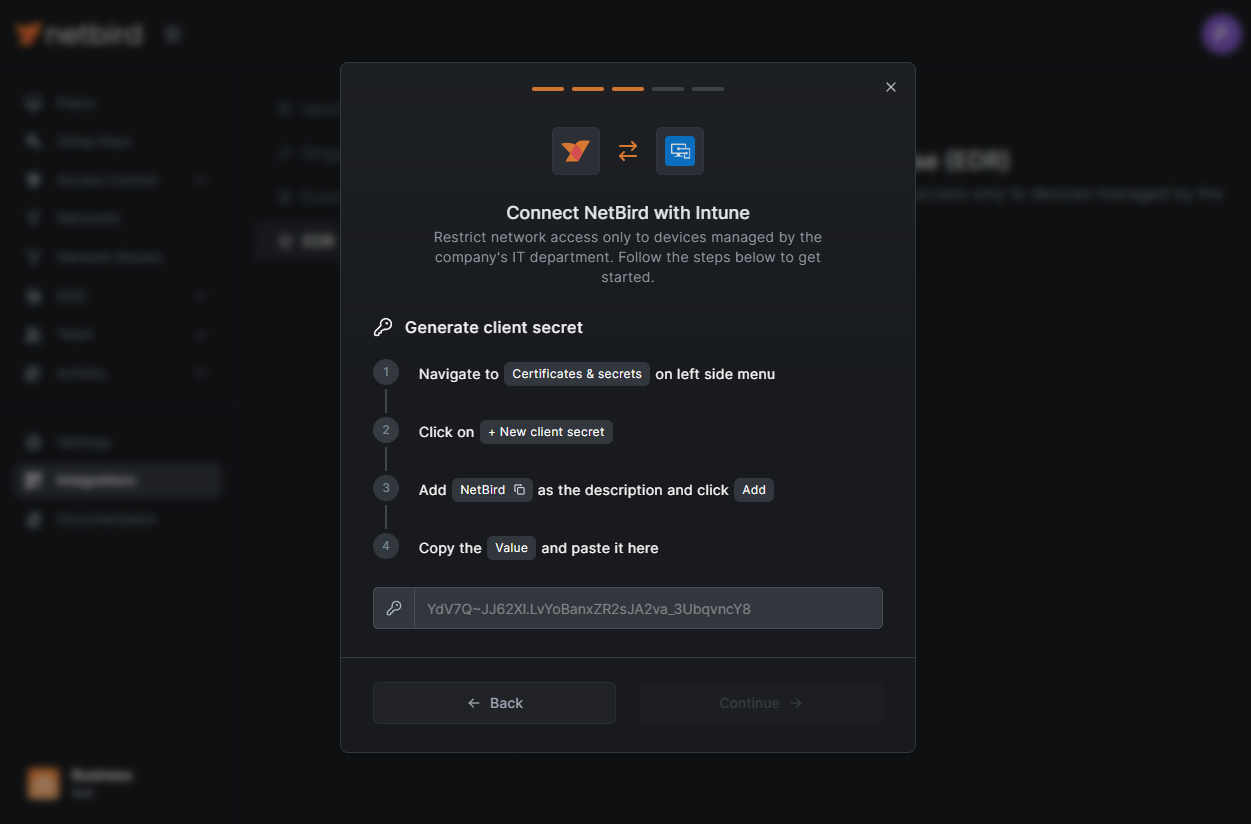
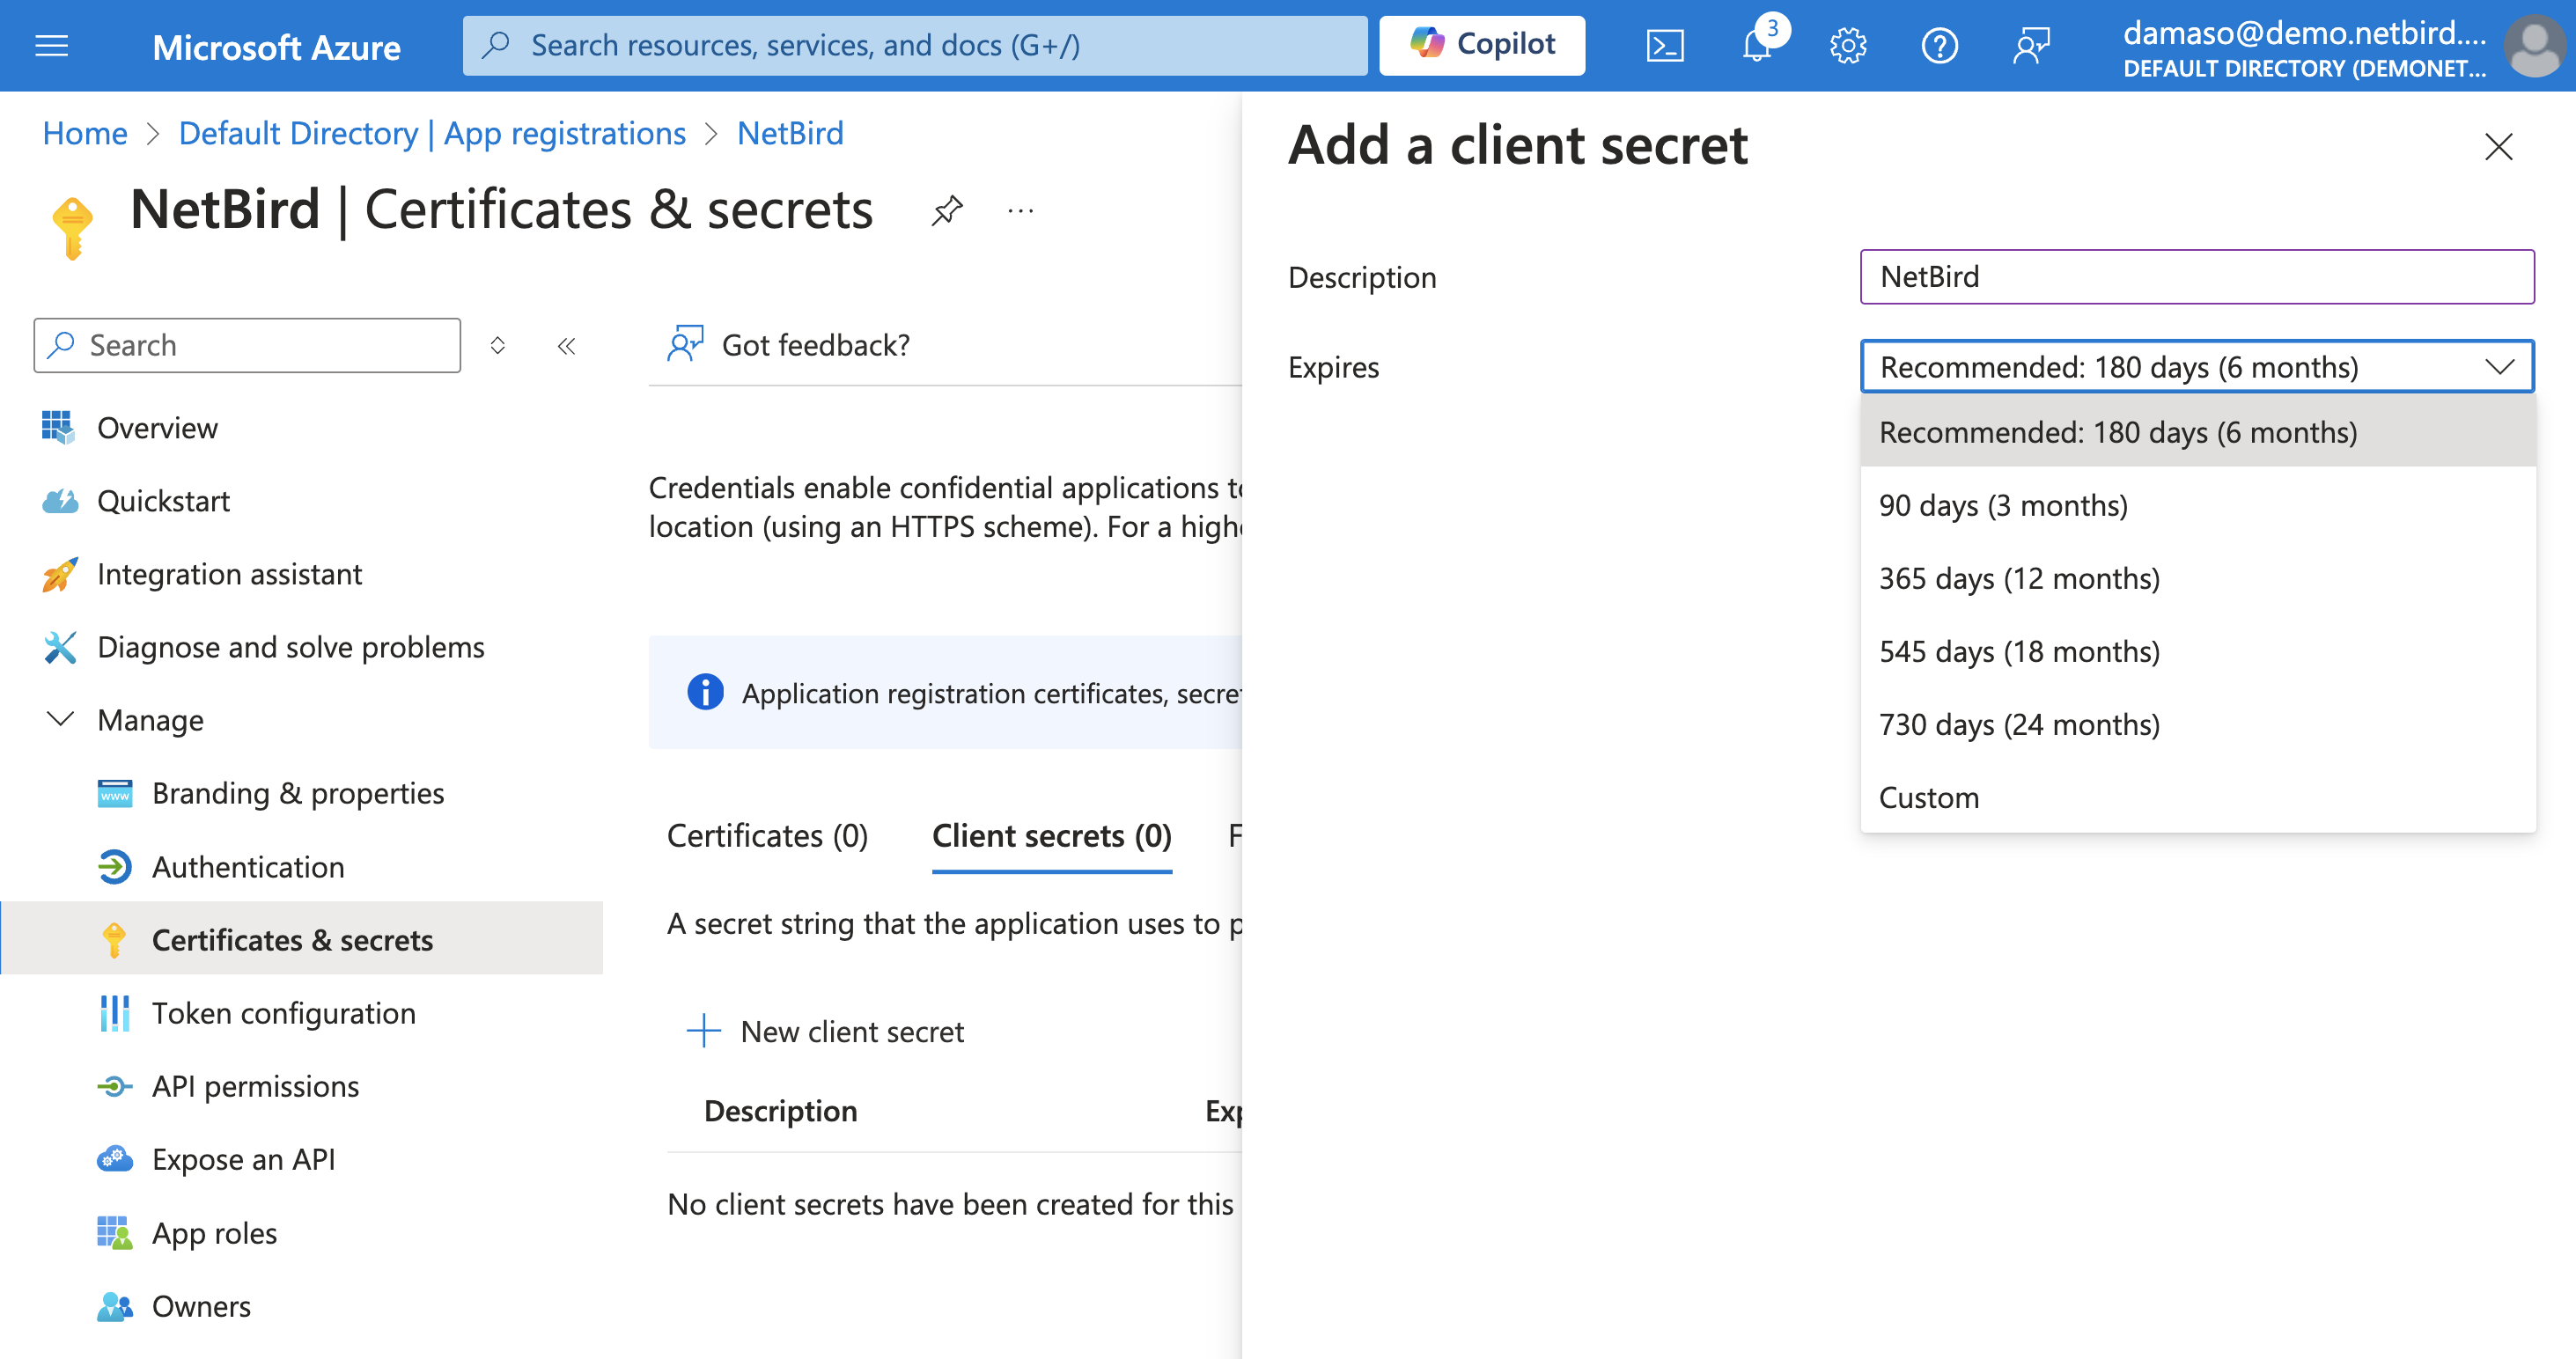
On Azure, click on the Certificates & secrets button in the left menu to open the management page. Click on +New client secret as shown below. Choose an expiration time that suits your security needs and click the Add button.
A new client secret will be generated and displayed on the screen. Copy and securely store the Value field immediately, as you will needed in the next step.

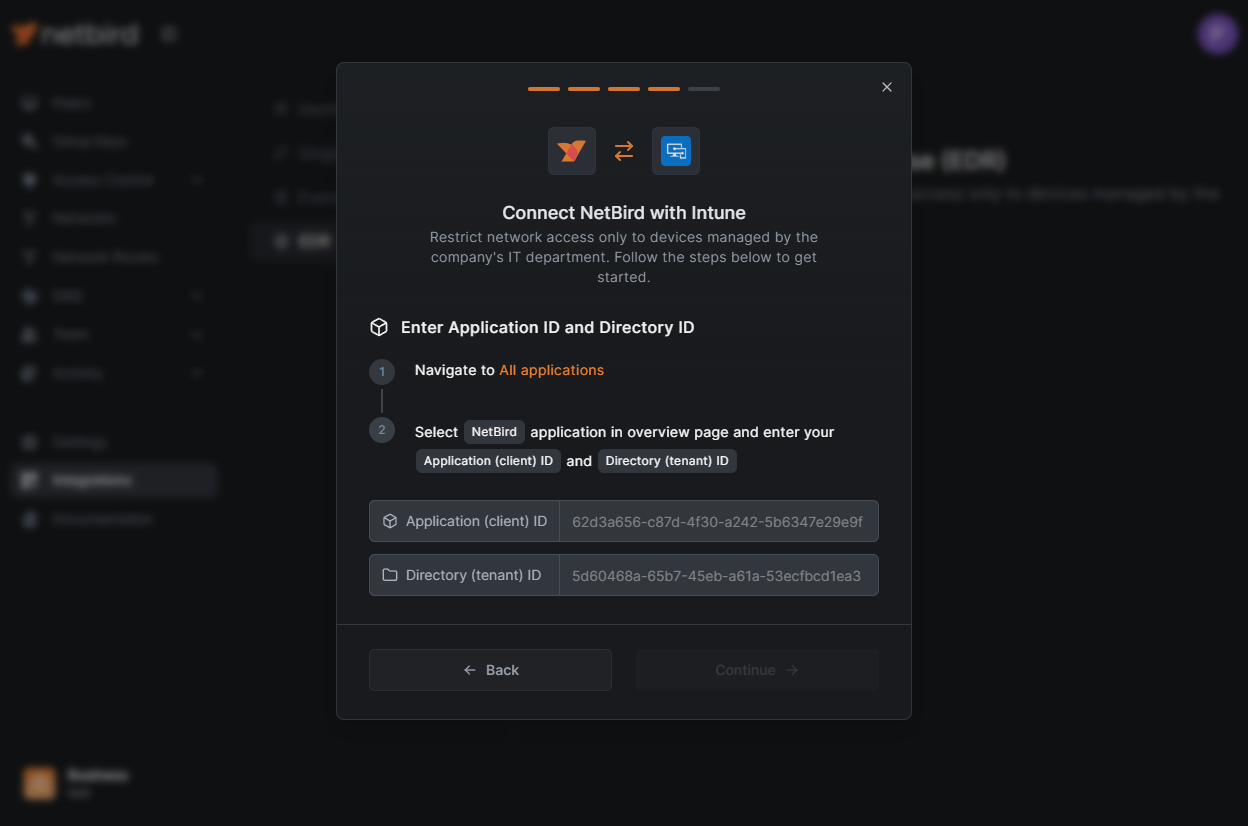
Enter Application ID and Directory ID in NetBird
Paste the secret Value from the previous step into NetBird and click the Continue → button. A new wizard screen will appear, asking for the Application (client) ID and the Directory (tenant) ID credentials generated previously.
Paste the values and click the Continue → button.
Choose Groups to require Intune Agent
At this stage, specify one or more NetBird groups to which the check should apply. The check will require the peer to have a running Intune agent installed.
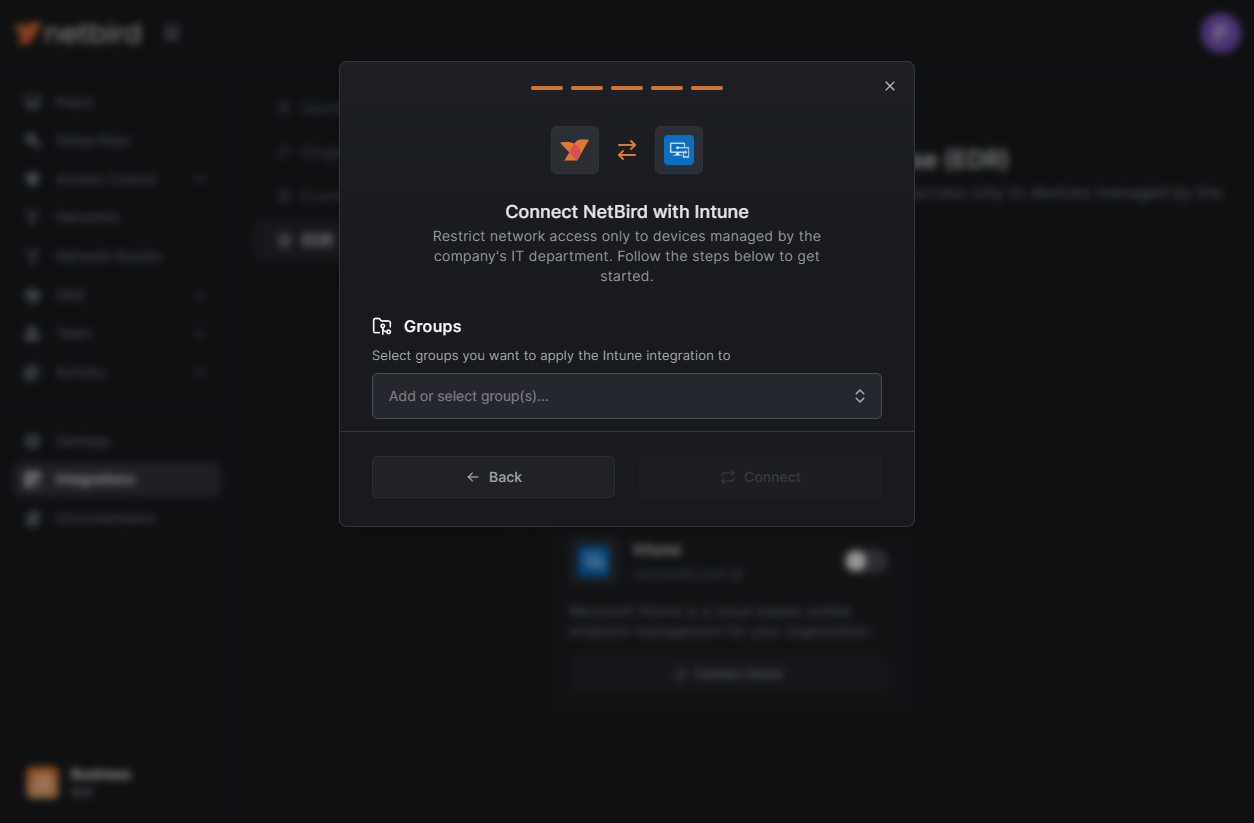
The MDM check will apply only to machines in the selected groups and will require a running Intune agent.
You can also use groups synchronized from your Identity Provider (IdP).
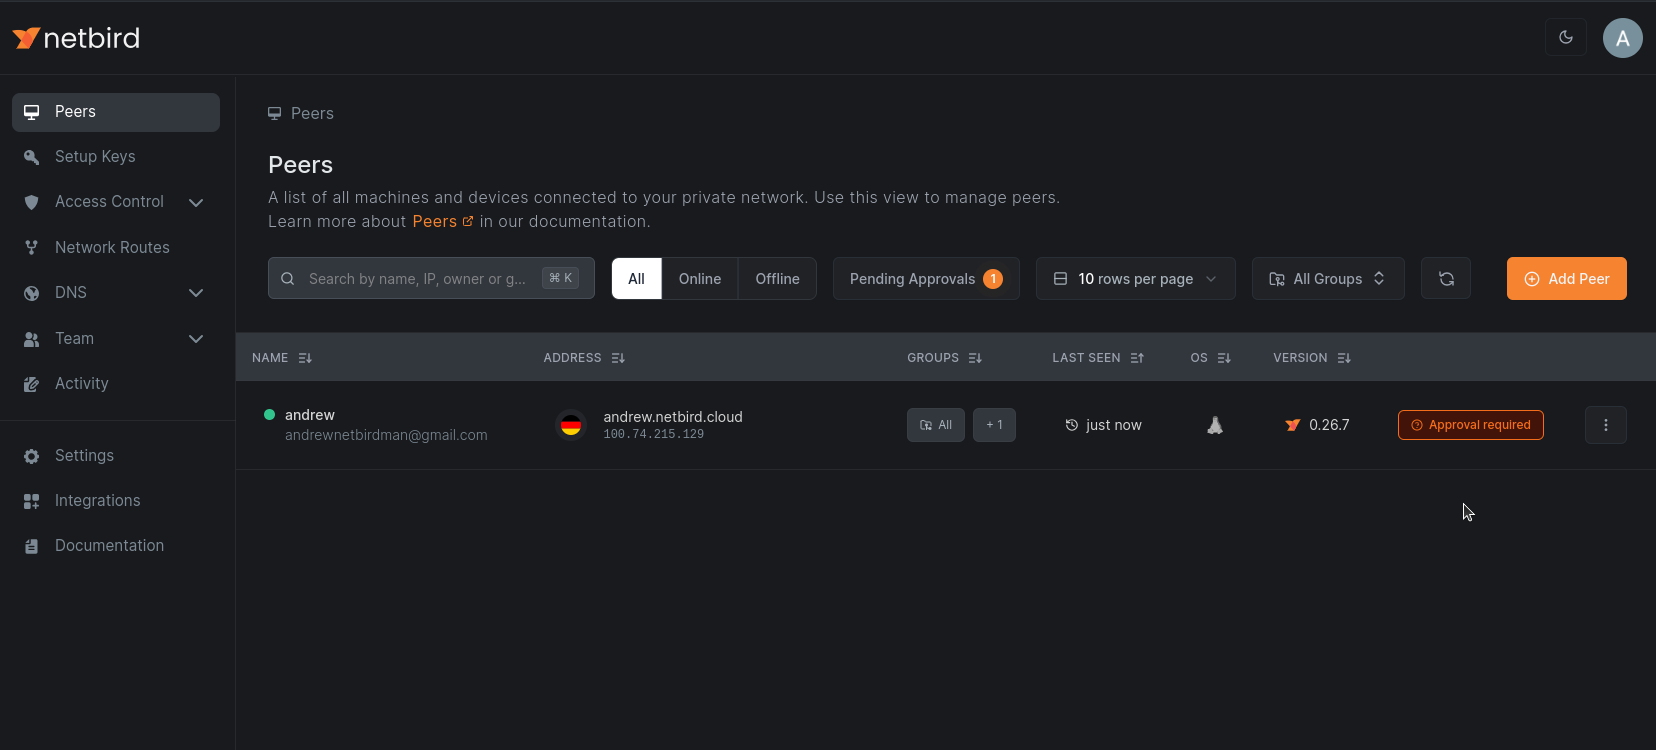
Peers that have the Intune agent installed and are compliant will be granted access to the network. Peers without the agent will appear
with a Approval required mark in the peers list and won't be able to access the network until the agent is installed.
Important Notes
- Only Windows and macOS devices are supported; Linux, iOS, and Android are not eligible for this integration.
- A device must have successfully synced with Intune within the last 24 hours otherwise, it will not be treated as compliant, regardless of its last known state.
- Devices with a Intune compliance state of
CompliantorInGracePeriodare accepted; all other states are rejected. - New devices or those that recently achieved compliance may need to be disconnected and reconnected to NetBird to propagate updated status.
- NetBird regularly synchronizes with Intune every few minutes, so changes in compliance can take some time to reflect on the dashboard.