LiteLLM
Updated
LiteLLM is an AI gateway that routes to many upstream providers. You self-host it, typically inside the same network as the NetBird proxy, so the proxy reaches it directly. Connecting it behind NetBird gives you keyless access over the tunnel and lets LiteLLM apply its own attribution and budgets, because NetBird forwards the caller's identity on every request.
Connect LiteLLM as a Provider
Because LiteLLM is self-hosted, the upstream URL points at your own instance. Host it in the
same network as the proxy so the proxy can reach it directly (for example
https://litellm.internal).
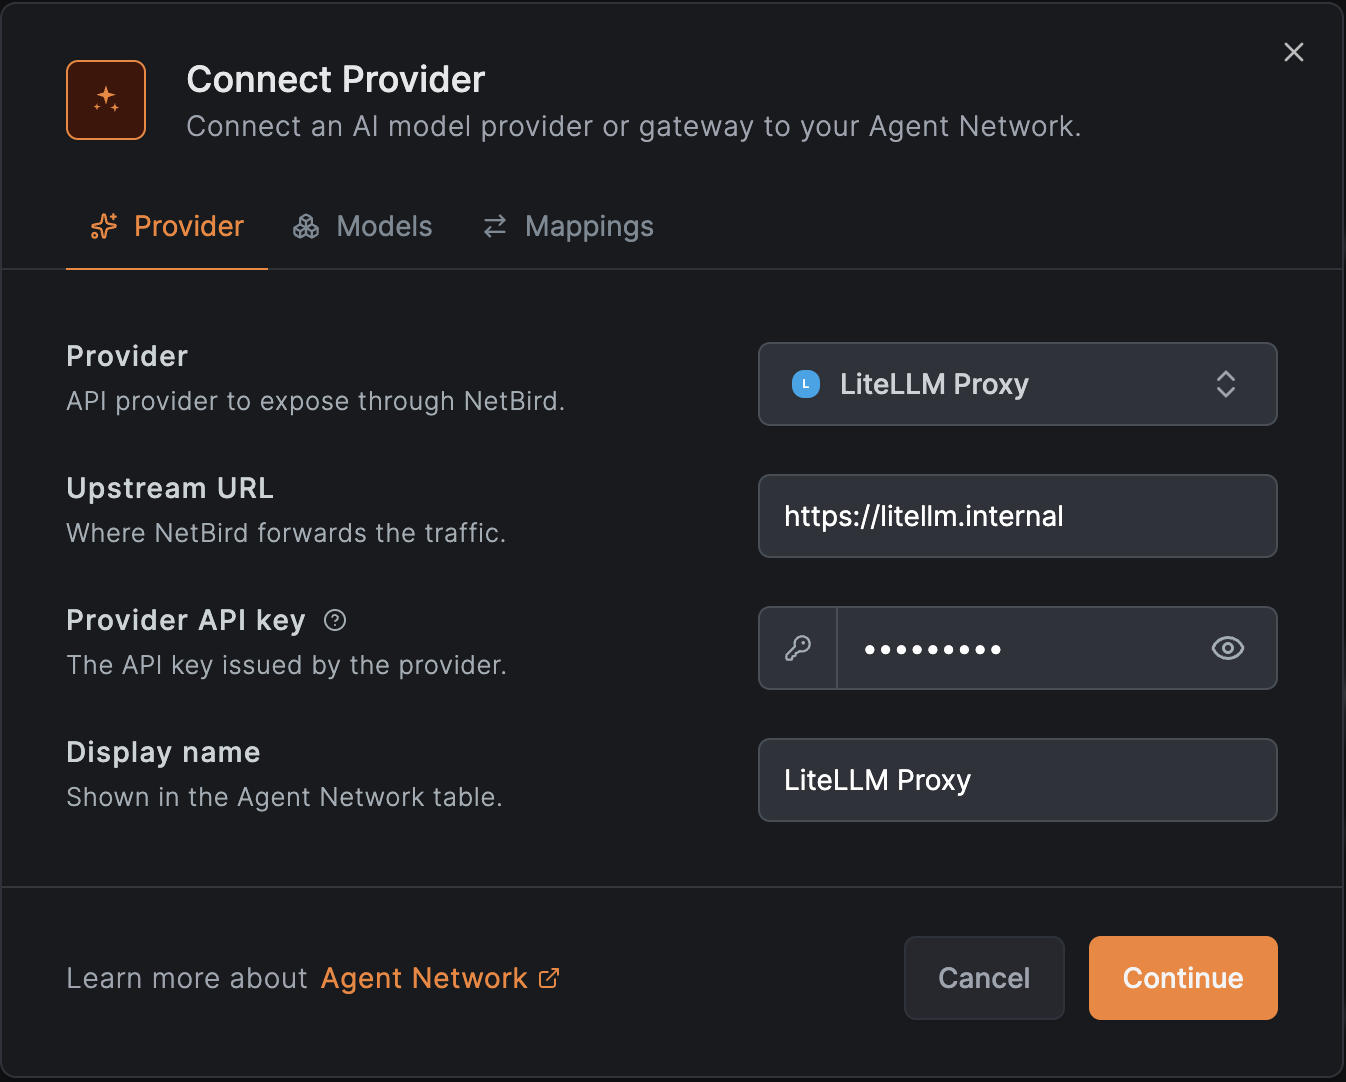
- Go to Agent Network → Providers and click Connect Provider.
- Select LiteLLM Proxy and set the Upstream URL to your self-hosted LiteLLM instance.
- Paste a LiteLLM virtual key as the API key. NetBird stores it server-side.
- Save the provider. The key is now held server-side — the next step authorizes who can use it.
Create a Policy
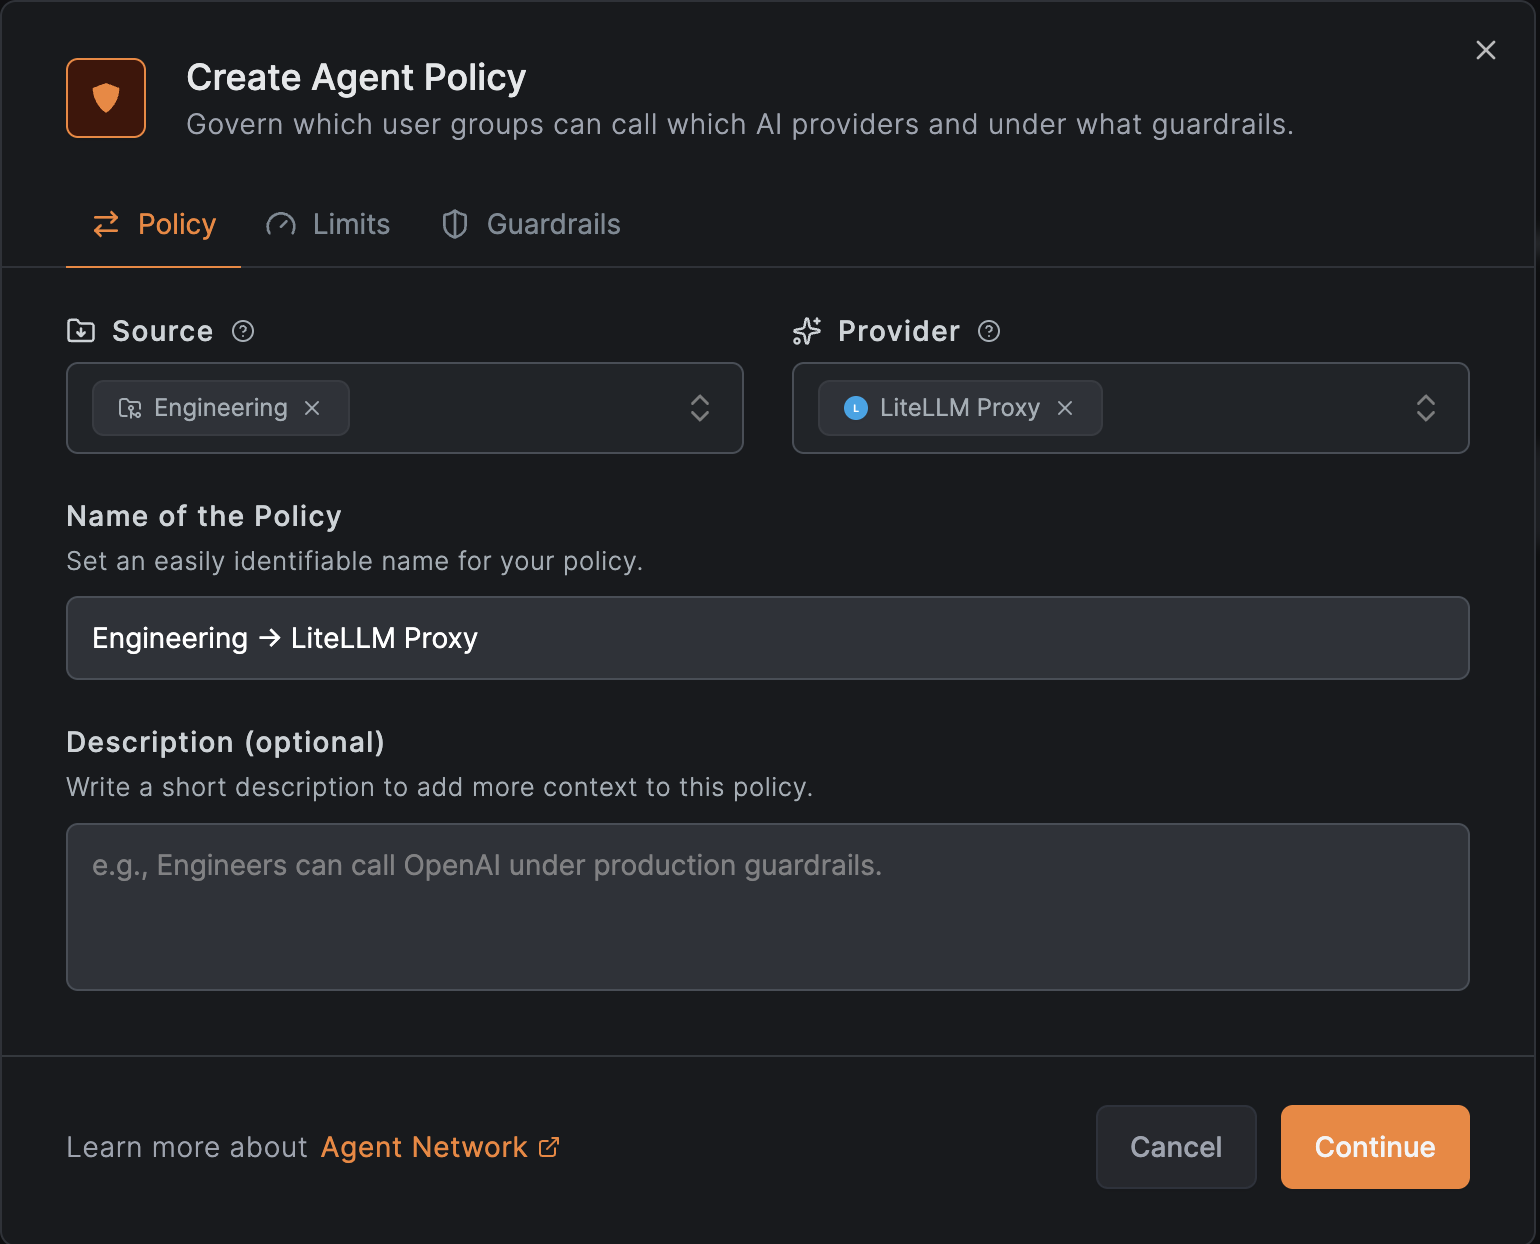
By default nothing is allowed — a policy must connect a source group to the LiteLLM provider before anyone can route through it.
- Go to Agent Network → Policies and add a policy.
- Set the Source to the users or agents who should be able to use LiteLLM (for example
your
Engineeringgroup from your IdP). - Set the Provider to the LiteLLM provider you just connected.
- Optionally attach per-user or per-group token and budget limits and guardrails such as a model allowlist. These are enforced by NetBird before the request reaches LiteLLM, on top of LiteLLM's own budgets.
See Policies for details.
How Identity Is Forwarded
When the upstream is LiteLLM, NetBird maps the calling agent's identity onto the request so the gateway can attribute usage and enforce its own controls:
- Groups are written into
metadata.tagsin the JSON body, so LiteLLM can apply tag budgets and rate limits. - The user identity is sent in the
x-litellm-end-user-idheader.
The proxy strips any client-supplied value first, so an app can't spoof its identity.
The configured key must be a LiteLLM virtual key with metadata.allow_client_tags: true,
otherwise LiteLLM silently drops the forwarded tags.
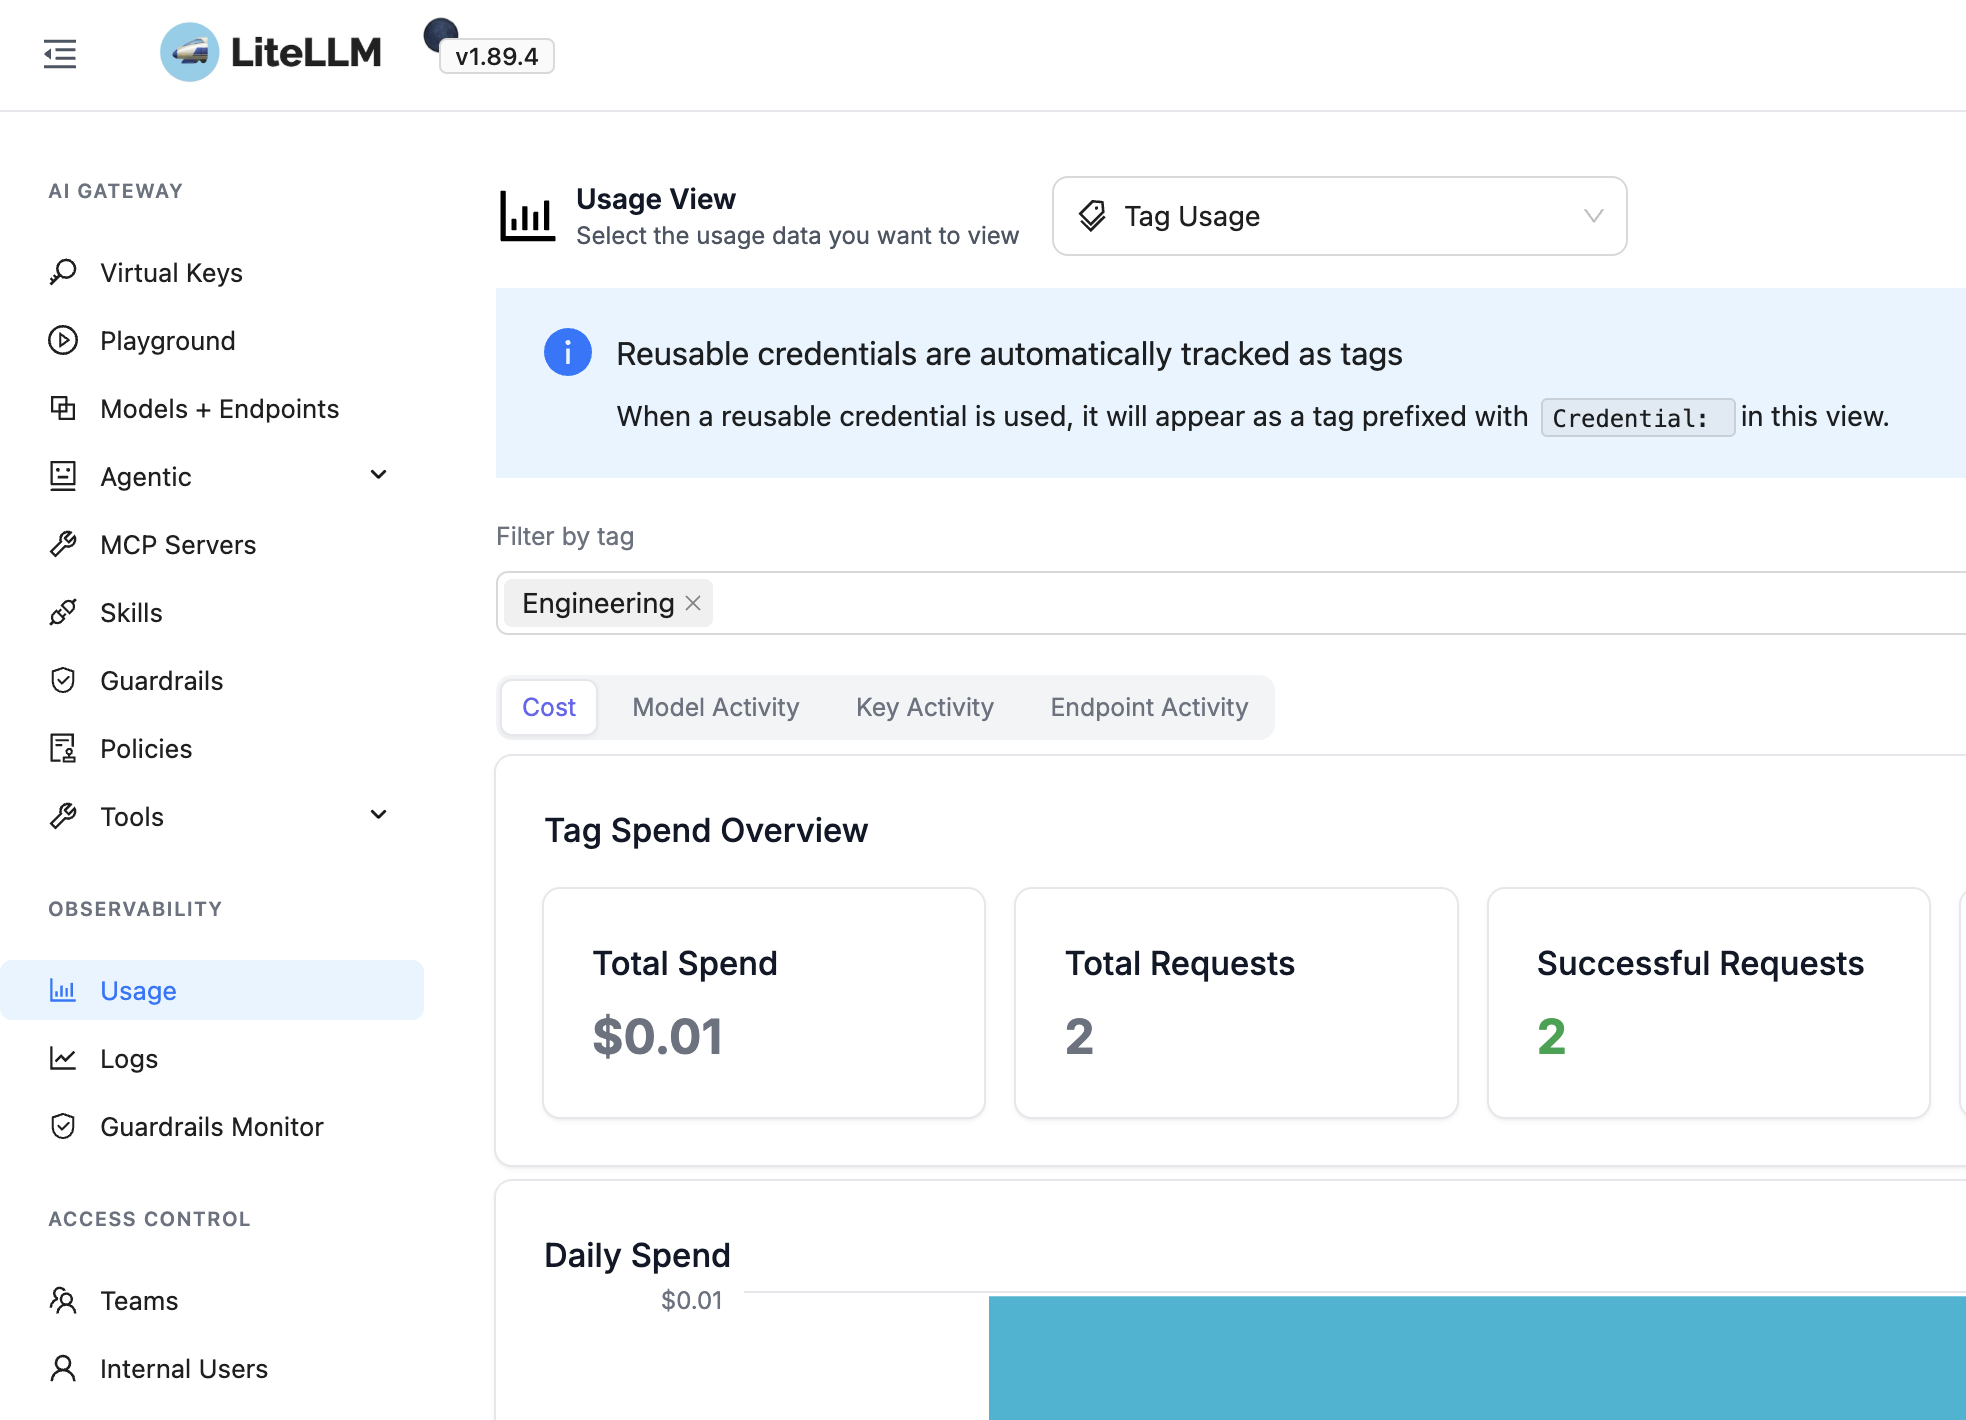
View Group Usage in LiteLLM
Because NetBird writes each caller's IdP groups into metadata.tags, those groups show up in
LiteLLM's own usage views as tags. In the LiteLLM UI, go to Usage and select the
Tag Usage view, then filter by a tag to see spend and requests for that group. In our
example, the Engineering group injected by NetBird appears here with its own
Tag Spend Overview.
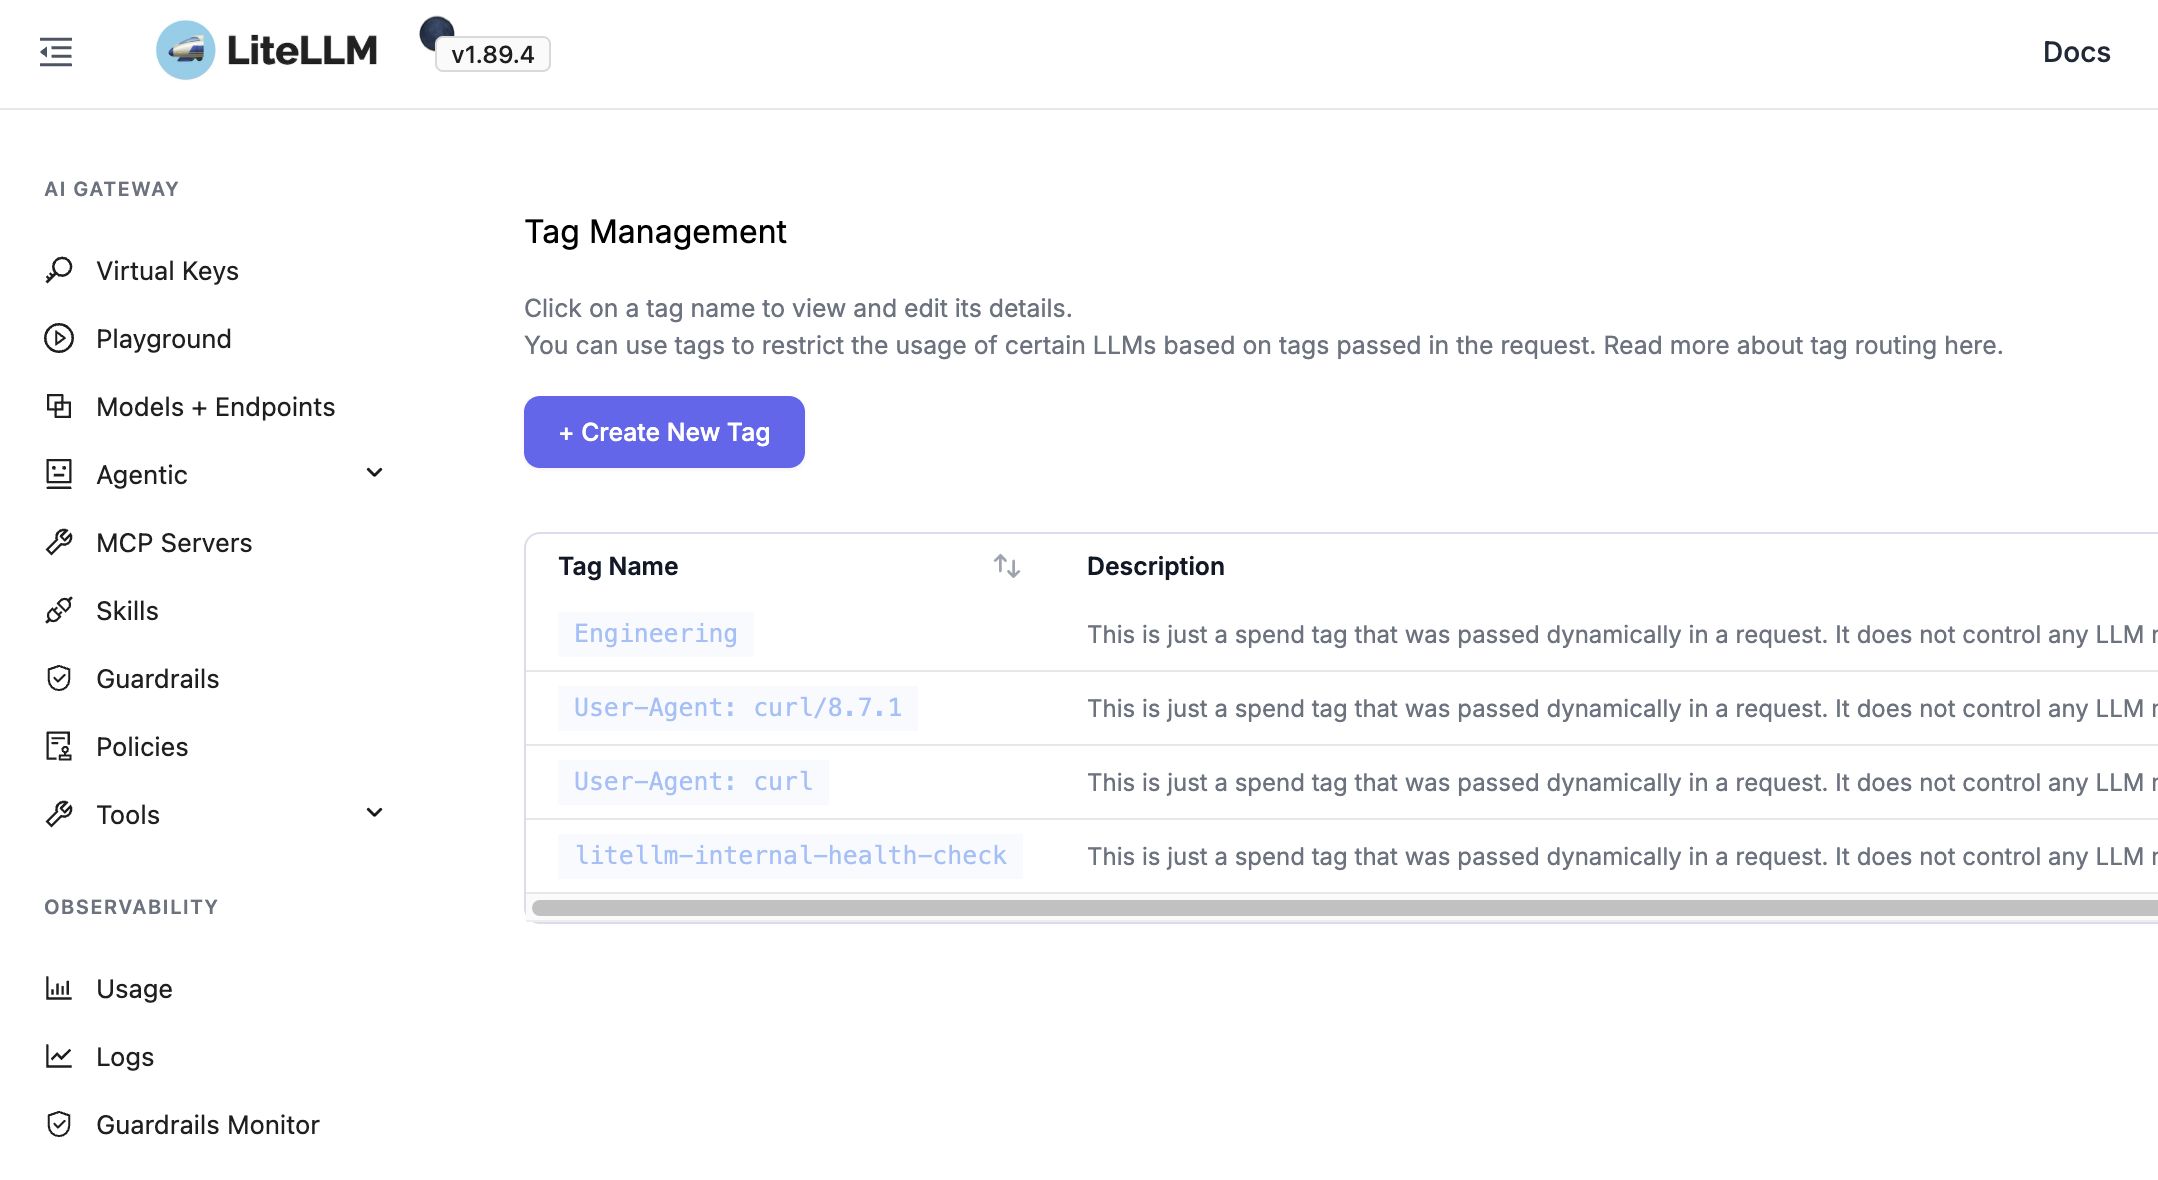
You can see every group forwarded from NetBird under Experimental → Tag Management, where each NetBird IdP group is listed as a tag passed dynamically in the request.
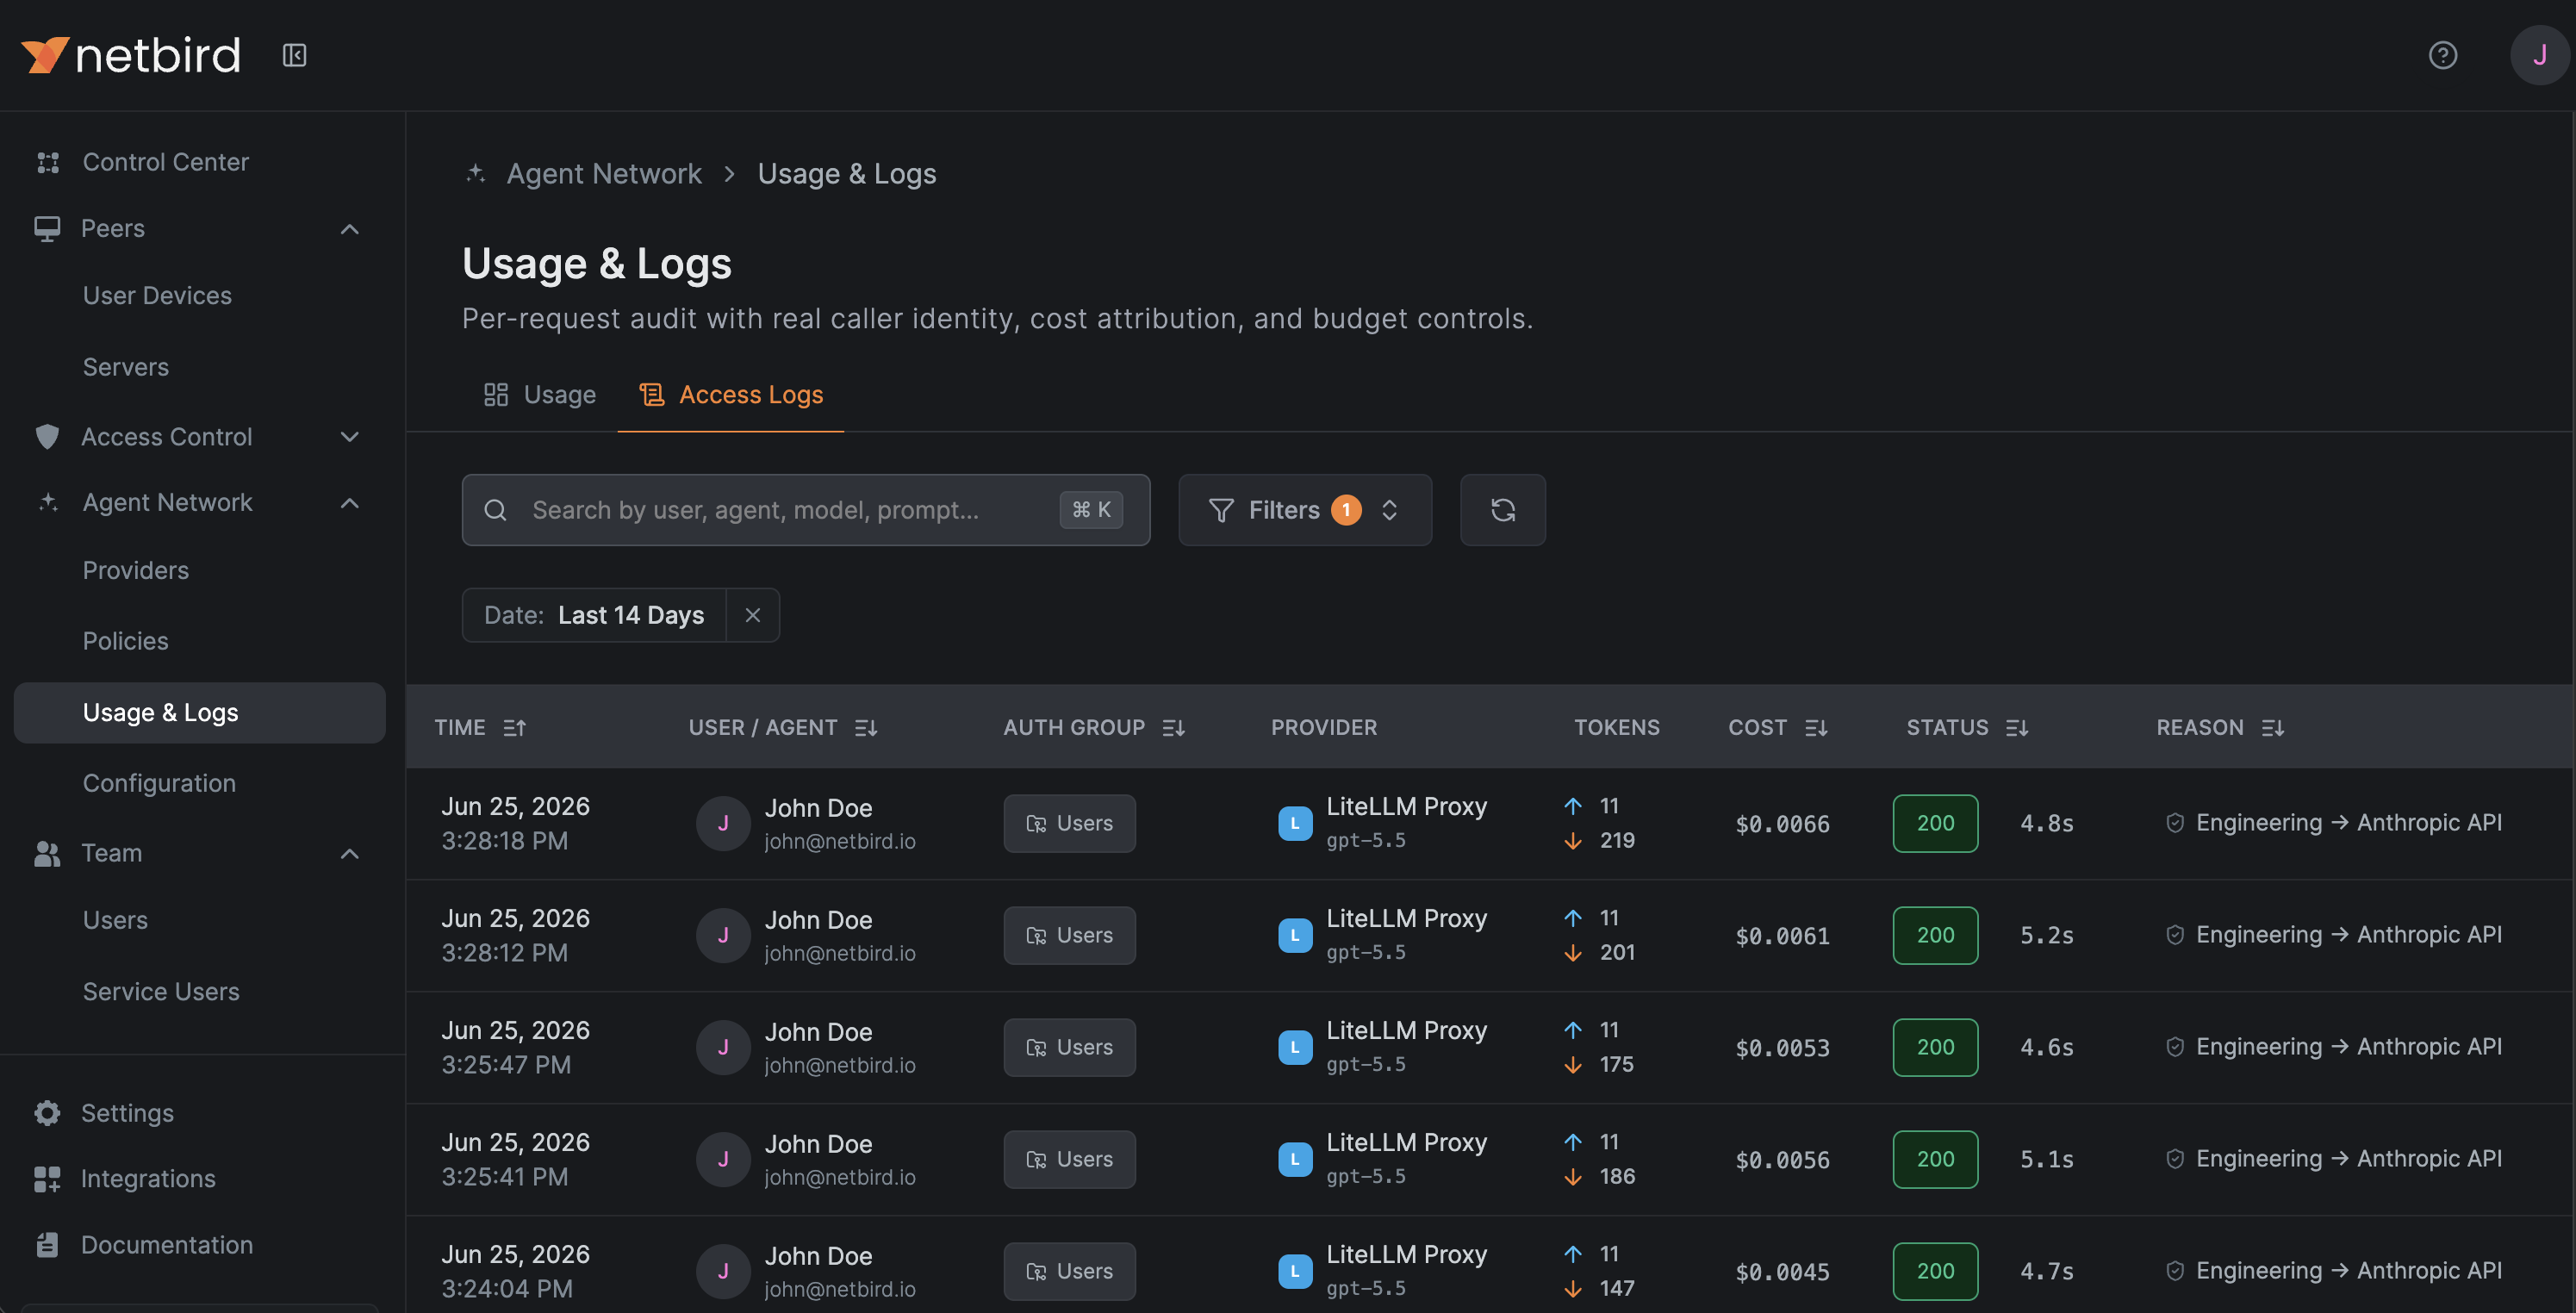
Result
Agents point at the NetBird endpoint with no key. NetBird enforces your policies, limits, and guardrails first, then LiteLLM applies its own tag and end-user budgets on top — driven by the same NetBird identity. Every call is recorded in Usage & Logs, where each LiteLLM request shows the caller's identity, auth group, model, tokens, cost, and status.