

Provision Users and Groups from Okta
Updated
Okta is a cloud-based identity and access management (IAM) platform that centralizes user and customer profiles to enhance security and streamline access. It offers features like multifactor authentication, single sign-on, and lifecycle management to help organizations manage user identities effectively.
NetBird's Okta integration enhances user management by allowing you to utilize Okta as your identity provider. This integration automates user authentication in your network, adds SSO and MFA support, and simplifies network access management to your applications and resources.
The integration process consists of two stages: first, you’ll set up OpenID Connect (OIDC) to enable Single Sign-On (SSO) from NetBird's login page using Okta credentials. Next, you’ll configure SCIM (System for Cross-domain Identity Management) to synchronize users and groups smoothly.
Get Started with NetBird-Okta Integration
To set up SSO, open Integrations in the NetBird admin console's left menu and select the Single Sign-On tab. On the Okta card, click Connect Okta. This opens the Connect NetBird with Okta SSO wizard, which walks you through the rest of the SSO setup. Its first screen lists the Okta permissions you need, covered in the prerequisites below. You set up SCIM later, from the Identity Provider Sync tab.
Prerequisites
Before you begin the integration process, ensure you have the necessary permissions in Okta. You need an Okta user account with one of the following roles:
- Super Admin
- Org Admin
- Group Admin
To check your user permissions in Okta:
- Log in to your Okta admin dashboard.
- Expand
Peoplein the left menu. - Select your user.
- Navigate to the
Admin rolestab.
Confirm that you have one of the required roles before proceeding with the integration.
Installing the NetBird Integration
Once you have the necessary permissions, you can set up the NetBird application. In the NetBird wizard, click Get Started →. The wizard shows the Install NetBird application for Okta steps.
Let's go through them one by one:
- In Okta’s admin dashboard, click
Applicationsin the left menu. - Select
Applicationsfrom the submenu. - Click the
Browse App Catalogbutton.
In the app catalog, enter "NetBird" in the search bar. Then, click the Add Integration button.
Accept the default application name and click the Done button. On the next screen, click the Assign dropdown and select Assign to People.
You will see a list of users. Find your user account, click Assign, and save the changes. Verify your user is assigned to the NetBird app and click Done. Your user now appears on the NetBird application's Assignments tab.
Configuring SSO in Okta
The next step is to collect Okta's OpenID Connect details and enter them in NetBird. SSO setup is self-service: you don't need to send these details to the NetBird team.
In NetBird, click the Continue → button. The wizard shows the Enter your Okta details form. Keep it open and switch to Okta to collect the values.
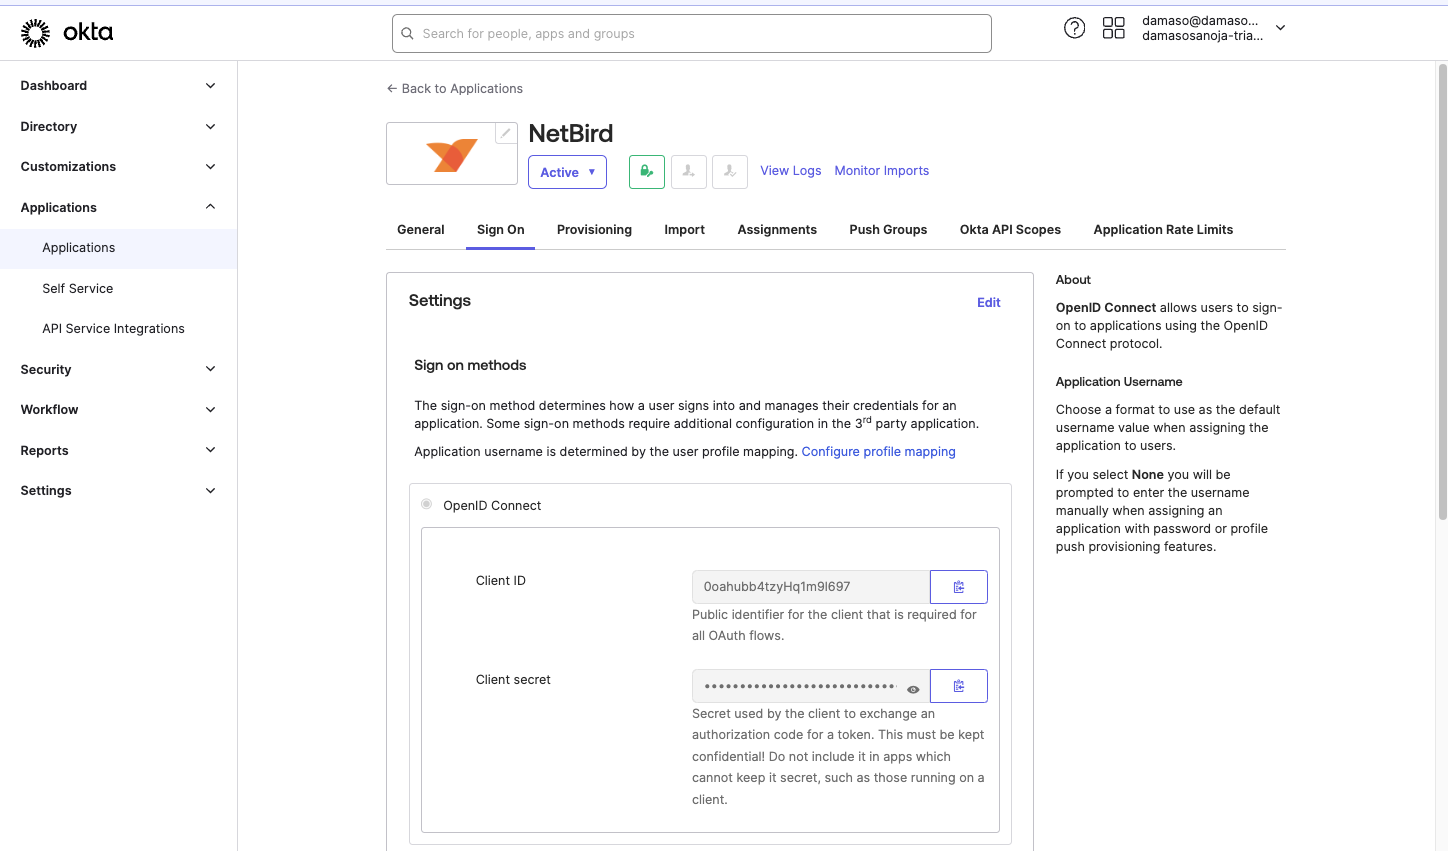
- Click on the
Sign Ontab on Okta. Look forOpenID ConnectunderSign on methodsin theSettingssection. - Copy the
Client IDvalue. - Copy the
Client Secretvalue.
Treat the Client Secret like a password. Paste it straight into the NetBird wizard, and don't share it over email or chat.
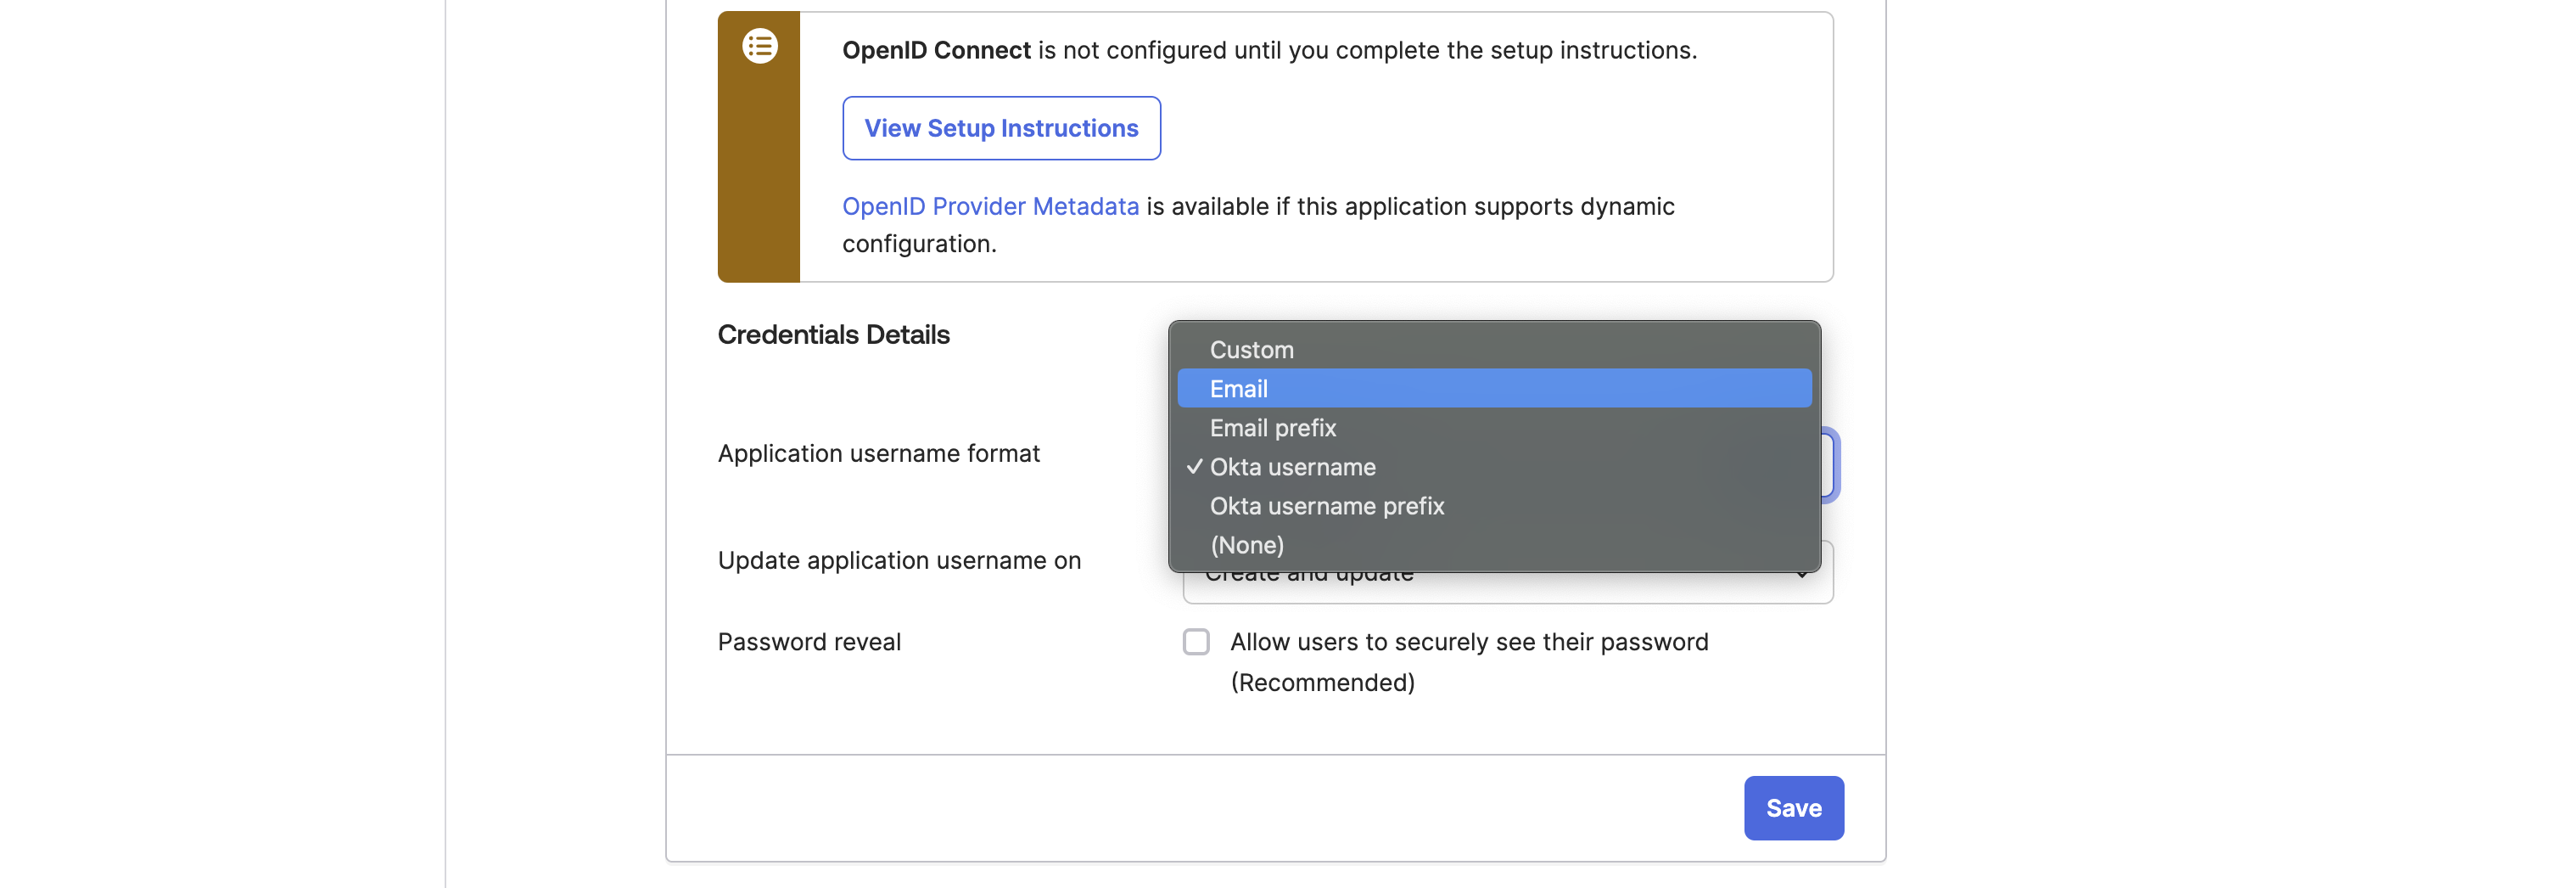
- Click
Editin theSettingssection. - In
Credential Details, change theApplication username formatfromOkta usernametoEmail. - Click the
Savebutton
- On the top right, click on your username
- Copy your Okta account domain, shown under your email address in that menu, for example
trial-1234567.okta.com.
Back in the NetBird wizard, fill in the form with the values you collected:
Client IDandClient Secret: the values from the OktaSign Ontab.Okta account domain: for exampletrial-1234567.okta.com.Primary E-Mail Domain: the domain of the email addresses your users sign in with, for examplemycompany.com.
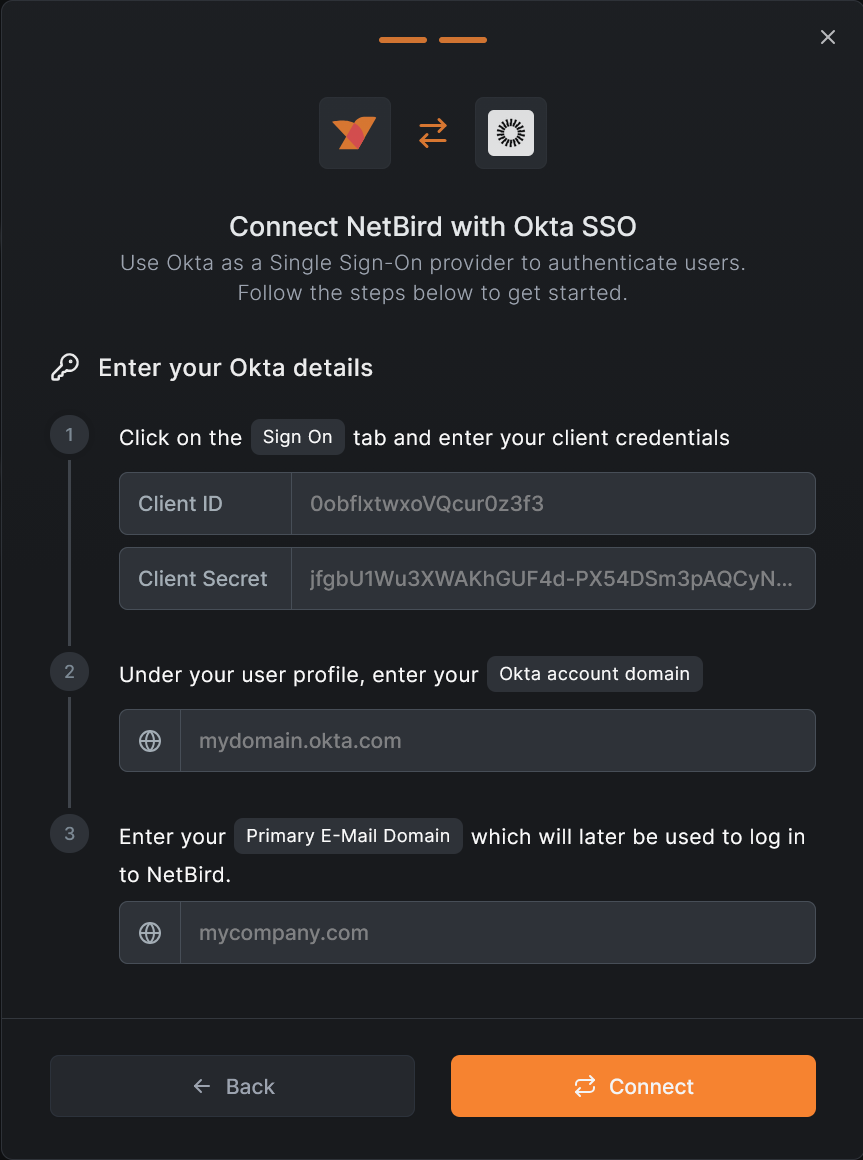
Click Connect. If your primary email domain isn't verified yet, NetBird asks you to prove you own it. The Verify Domain Ownership dialog shows a TXT record to add to your DNS:
Host: your primary email domain, for examplemycompany.com.Value:nb-verification=followed by a token unique to your account. Copy it from the dialog.
Sign in to your DNS provider, add the TXT record, then click Start Verification.
DNS changes can take a while to apply. If NetBird doesn't find the record straight away, click Verify Later and try again once the record has propagated: on the Single Sign-On tab, click Settings on the Okta card, open the Domains tab, and click Verify next to the domain. If you can't edit DNS for the domain, you can verify it by emailing support@netbird.io from an address on that domain instead.
When the domain shows Ownership Verified, the Okta card on the Single Sign-On tab shows Active.
This completes the first stage, enabling Single Sign-On (SSO) from NetBird's login page using Okta credentials. Now, you can navigate to app.netbird.io and log in with your Okta account.
Enabling Okta SCIM in NetBird
In NetBird, go to Integrations > Identity Provider Sync and click the Connect Okta button again. The first screen reminds you of the permissions your user needs in Okta. Click Get Started →. The next screen covers the SSO setup from the previous section, so click Continue → to skip it.
The next screen will show you how to enable NetBird API credentials in Okta. Copy the value of the Authorization (Bearer) token.
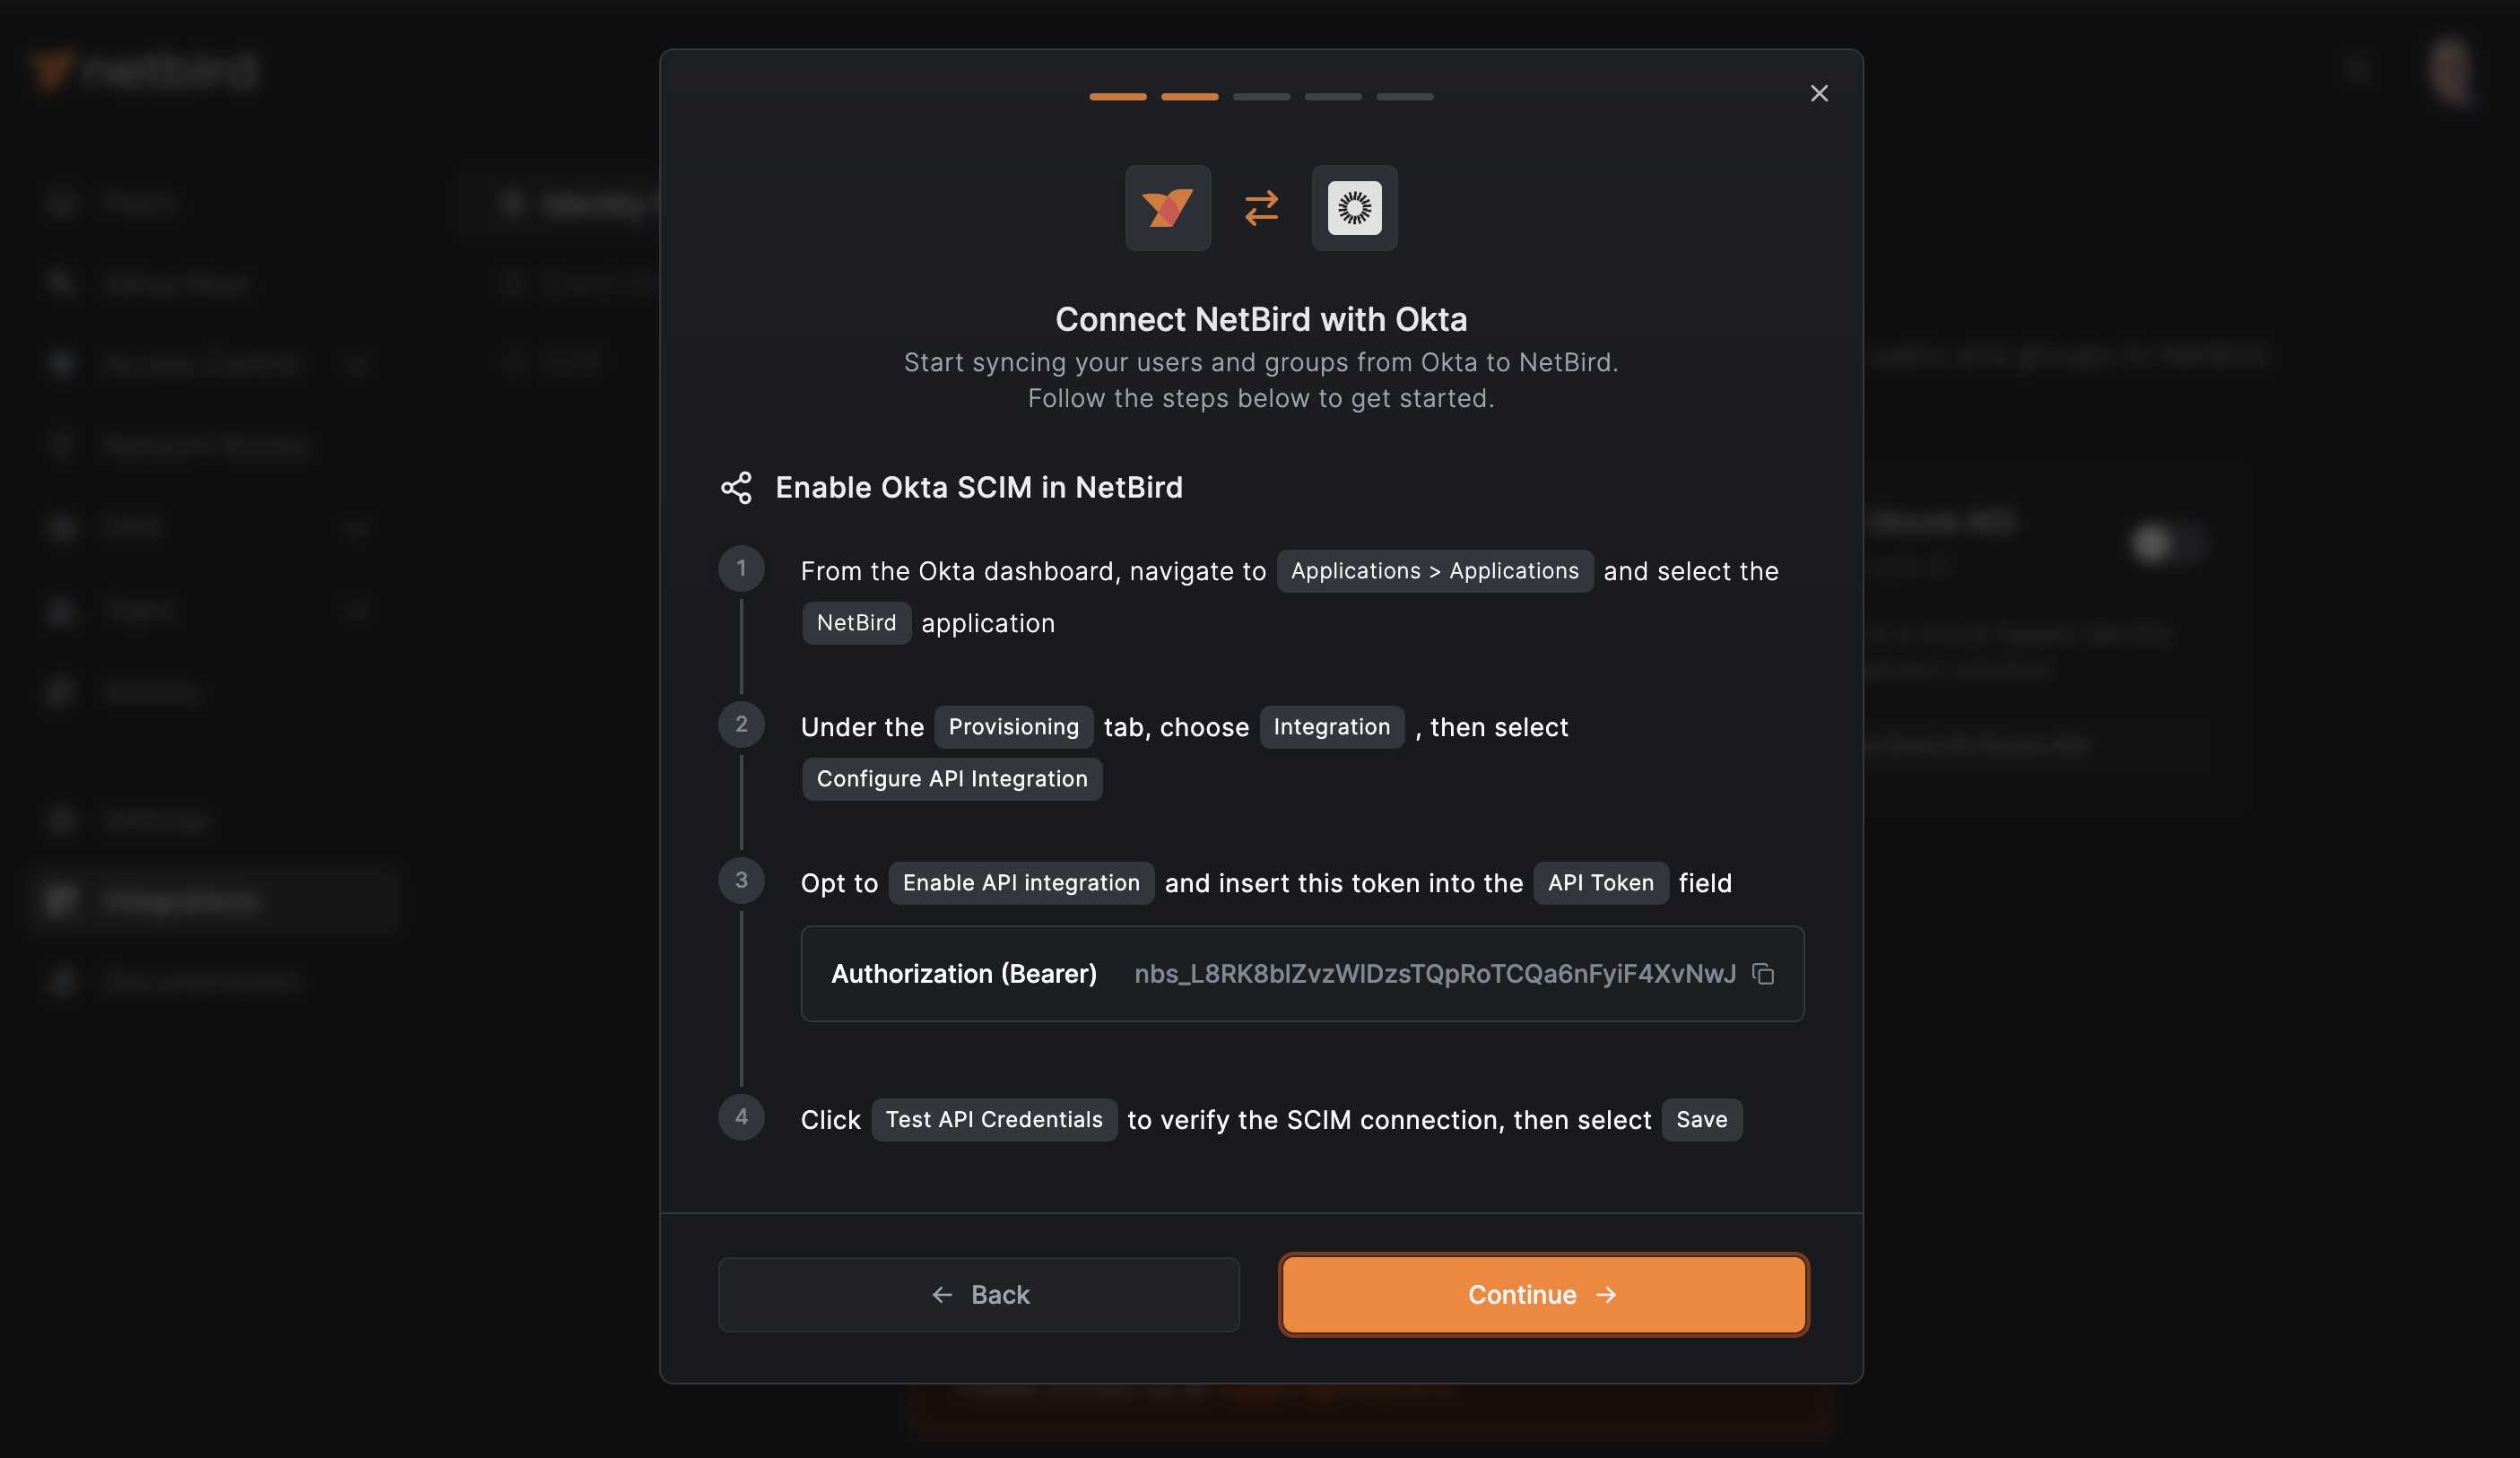
Navigate to the NetBird app in your Okta admin dashboard. Click the Provisioning tab, then select Configure API Integration.
Follow these steps:
- Check the box to enable API Integration.
- Enter your NetBird API Token.
- Click
Test API Credentialsto verify the SCIM connection.
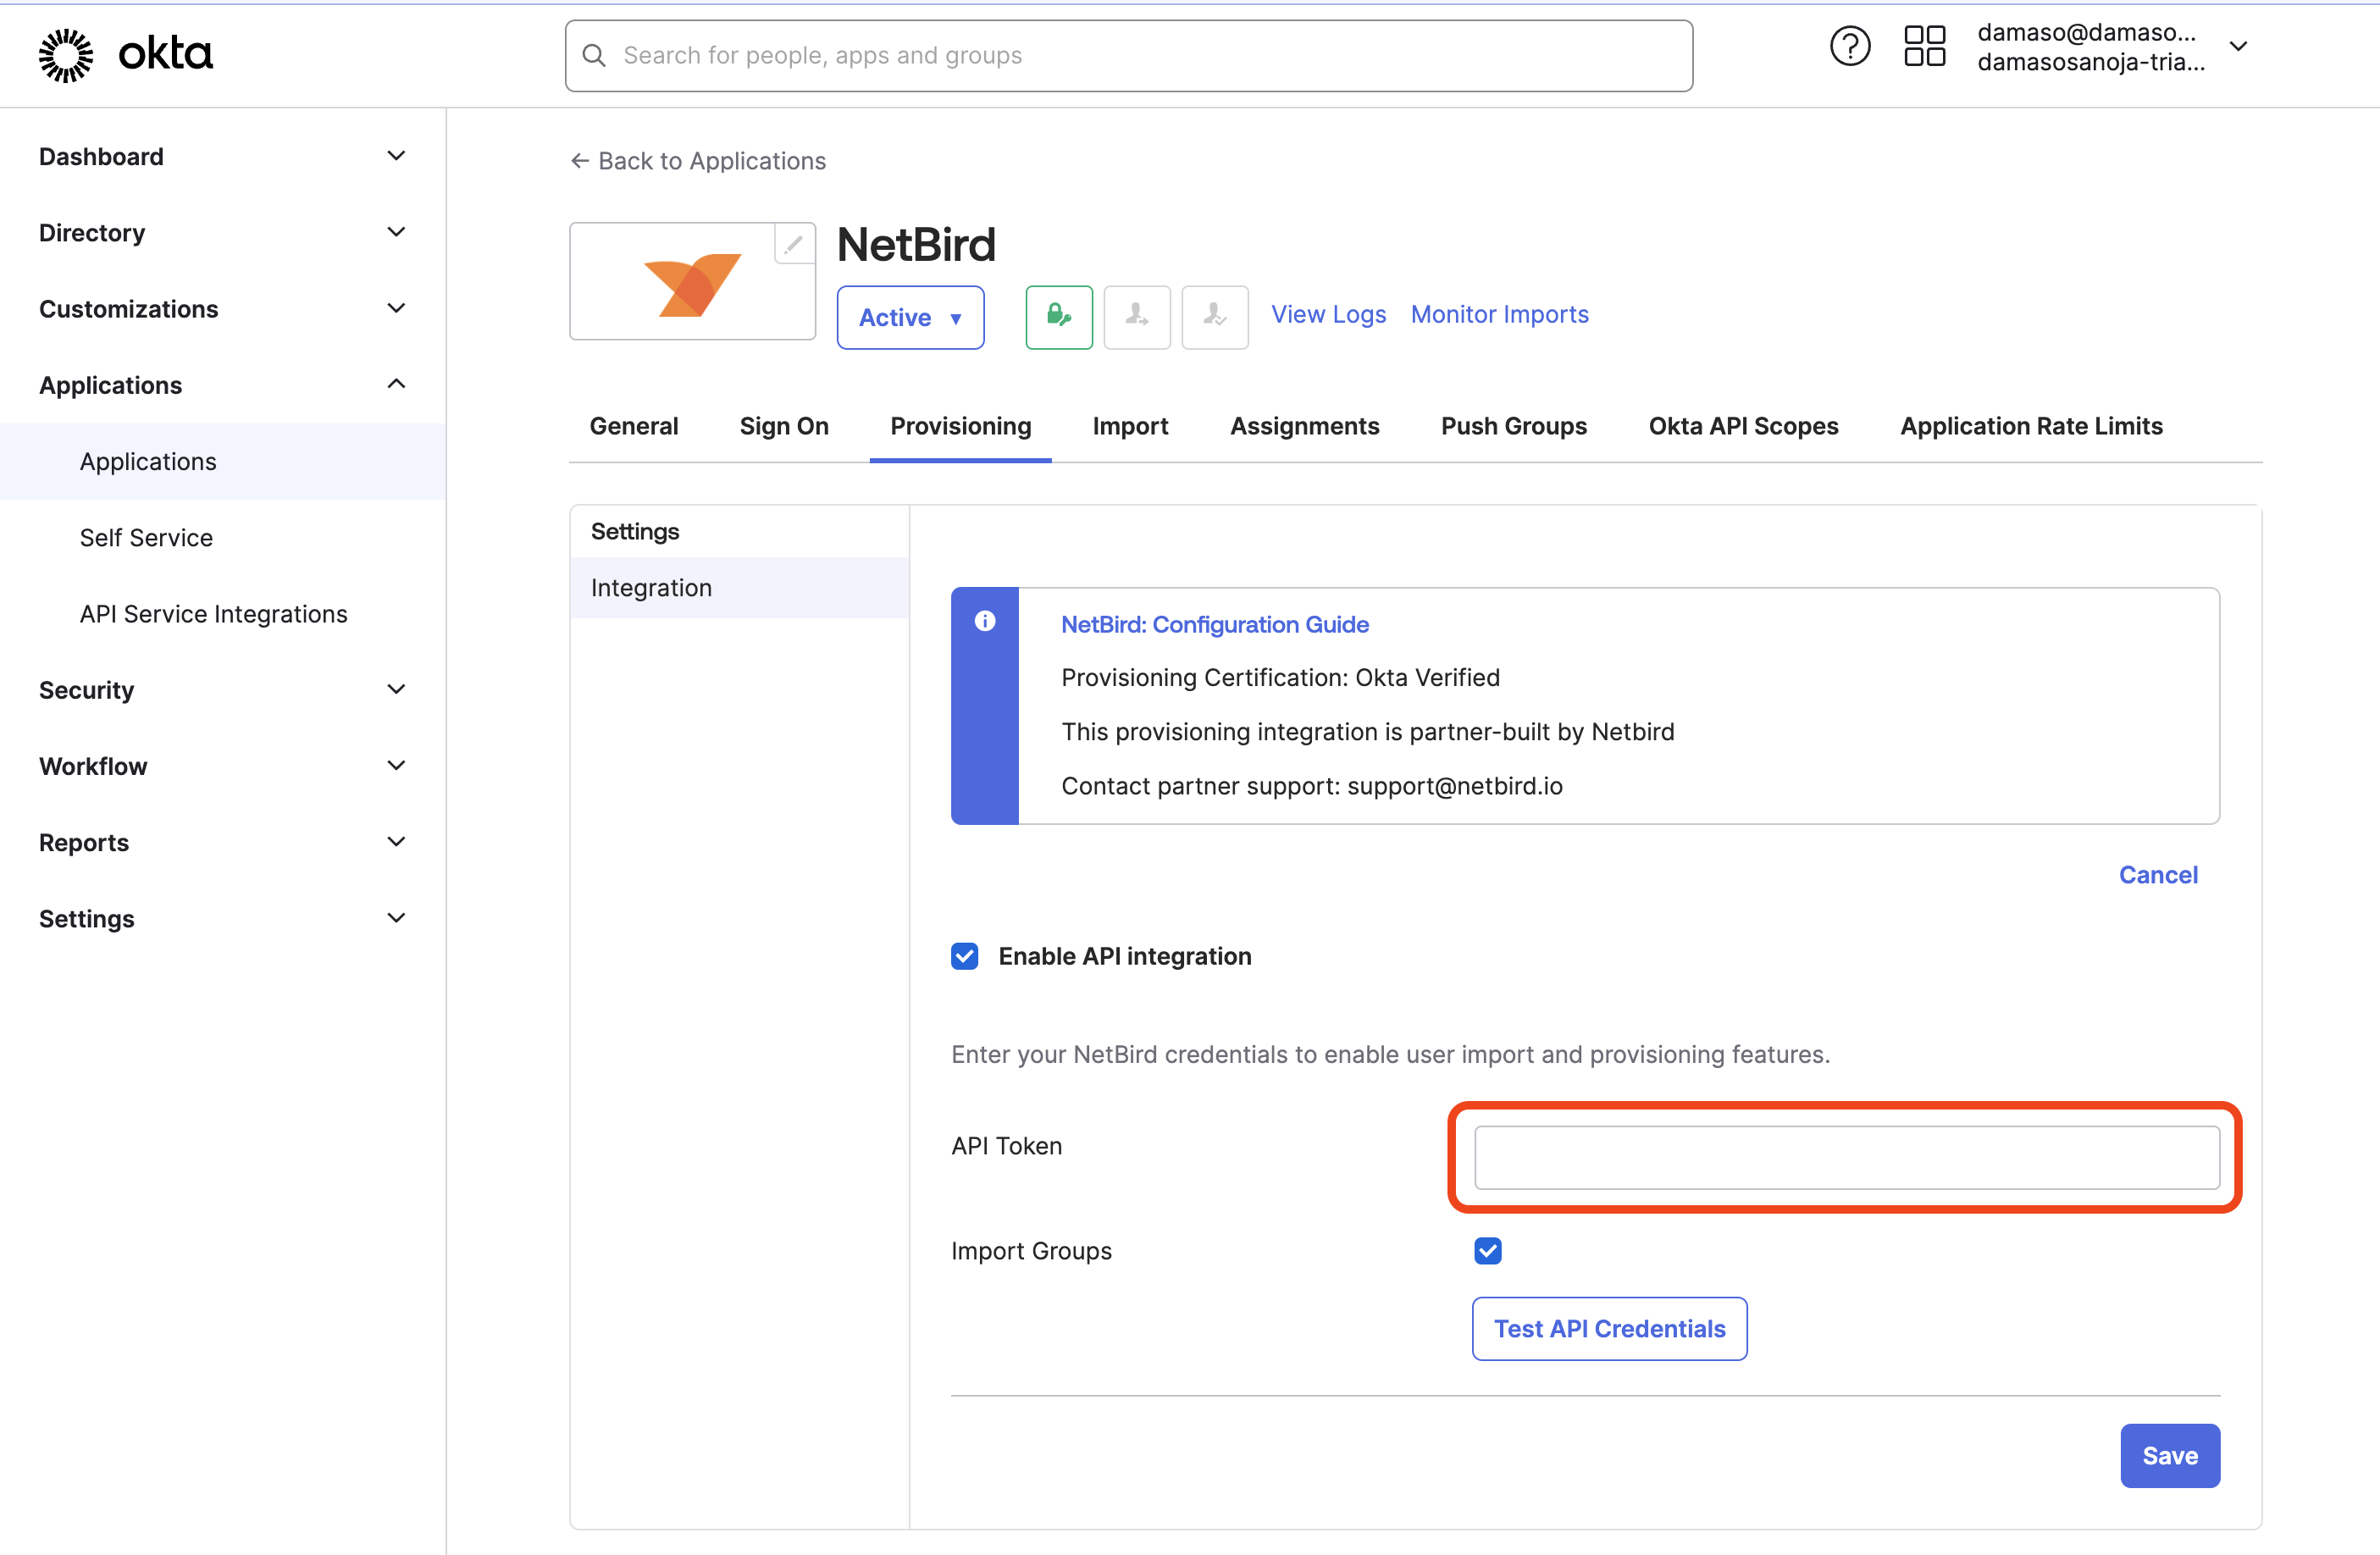
If everything works as expected, Okta shows the message "NetBird was verified successfully!". Click Save to continue.
Configuring SCIM Provisioning to NetBird
On NetBird, click Continue →. You'll see instructions for configuring SCIM provisioning to NetBird.
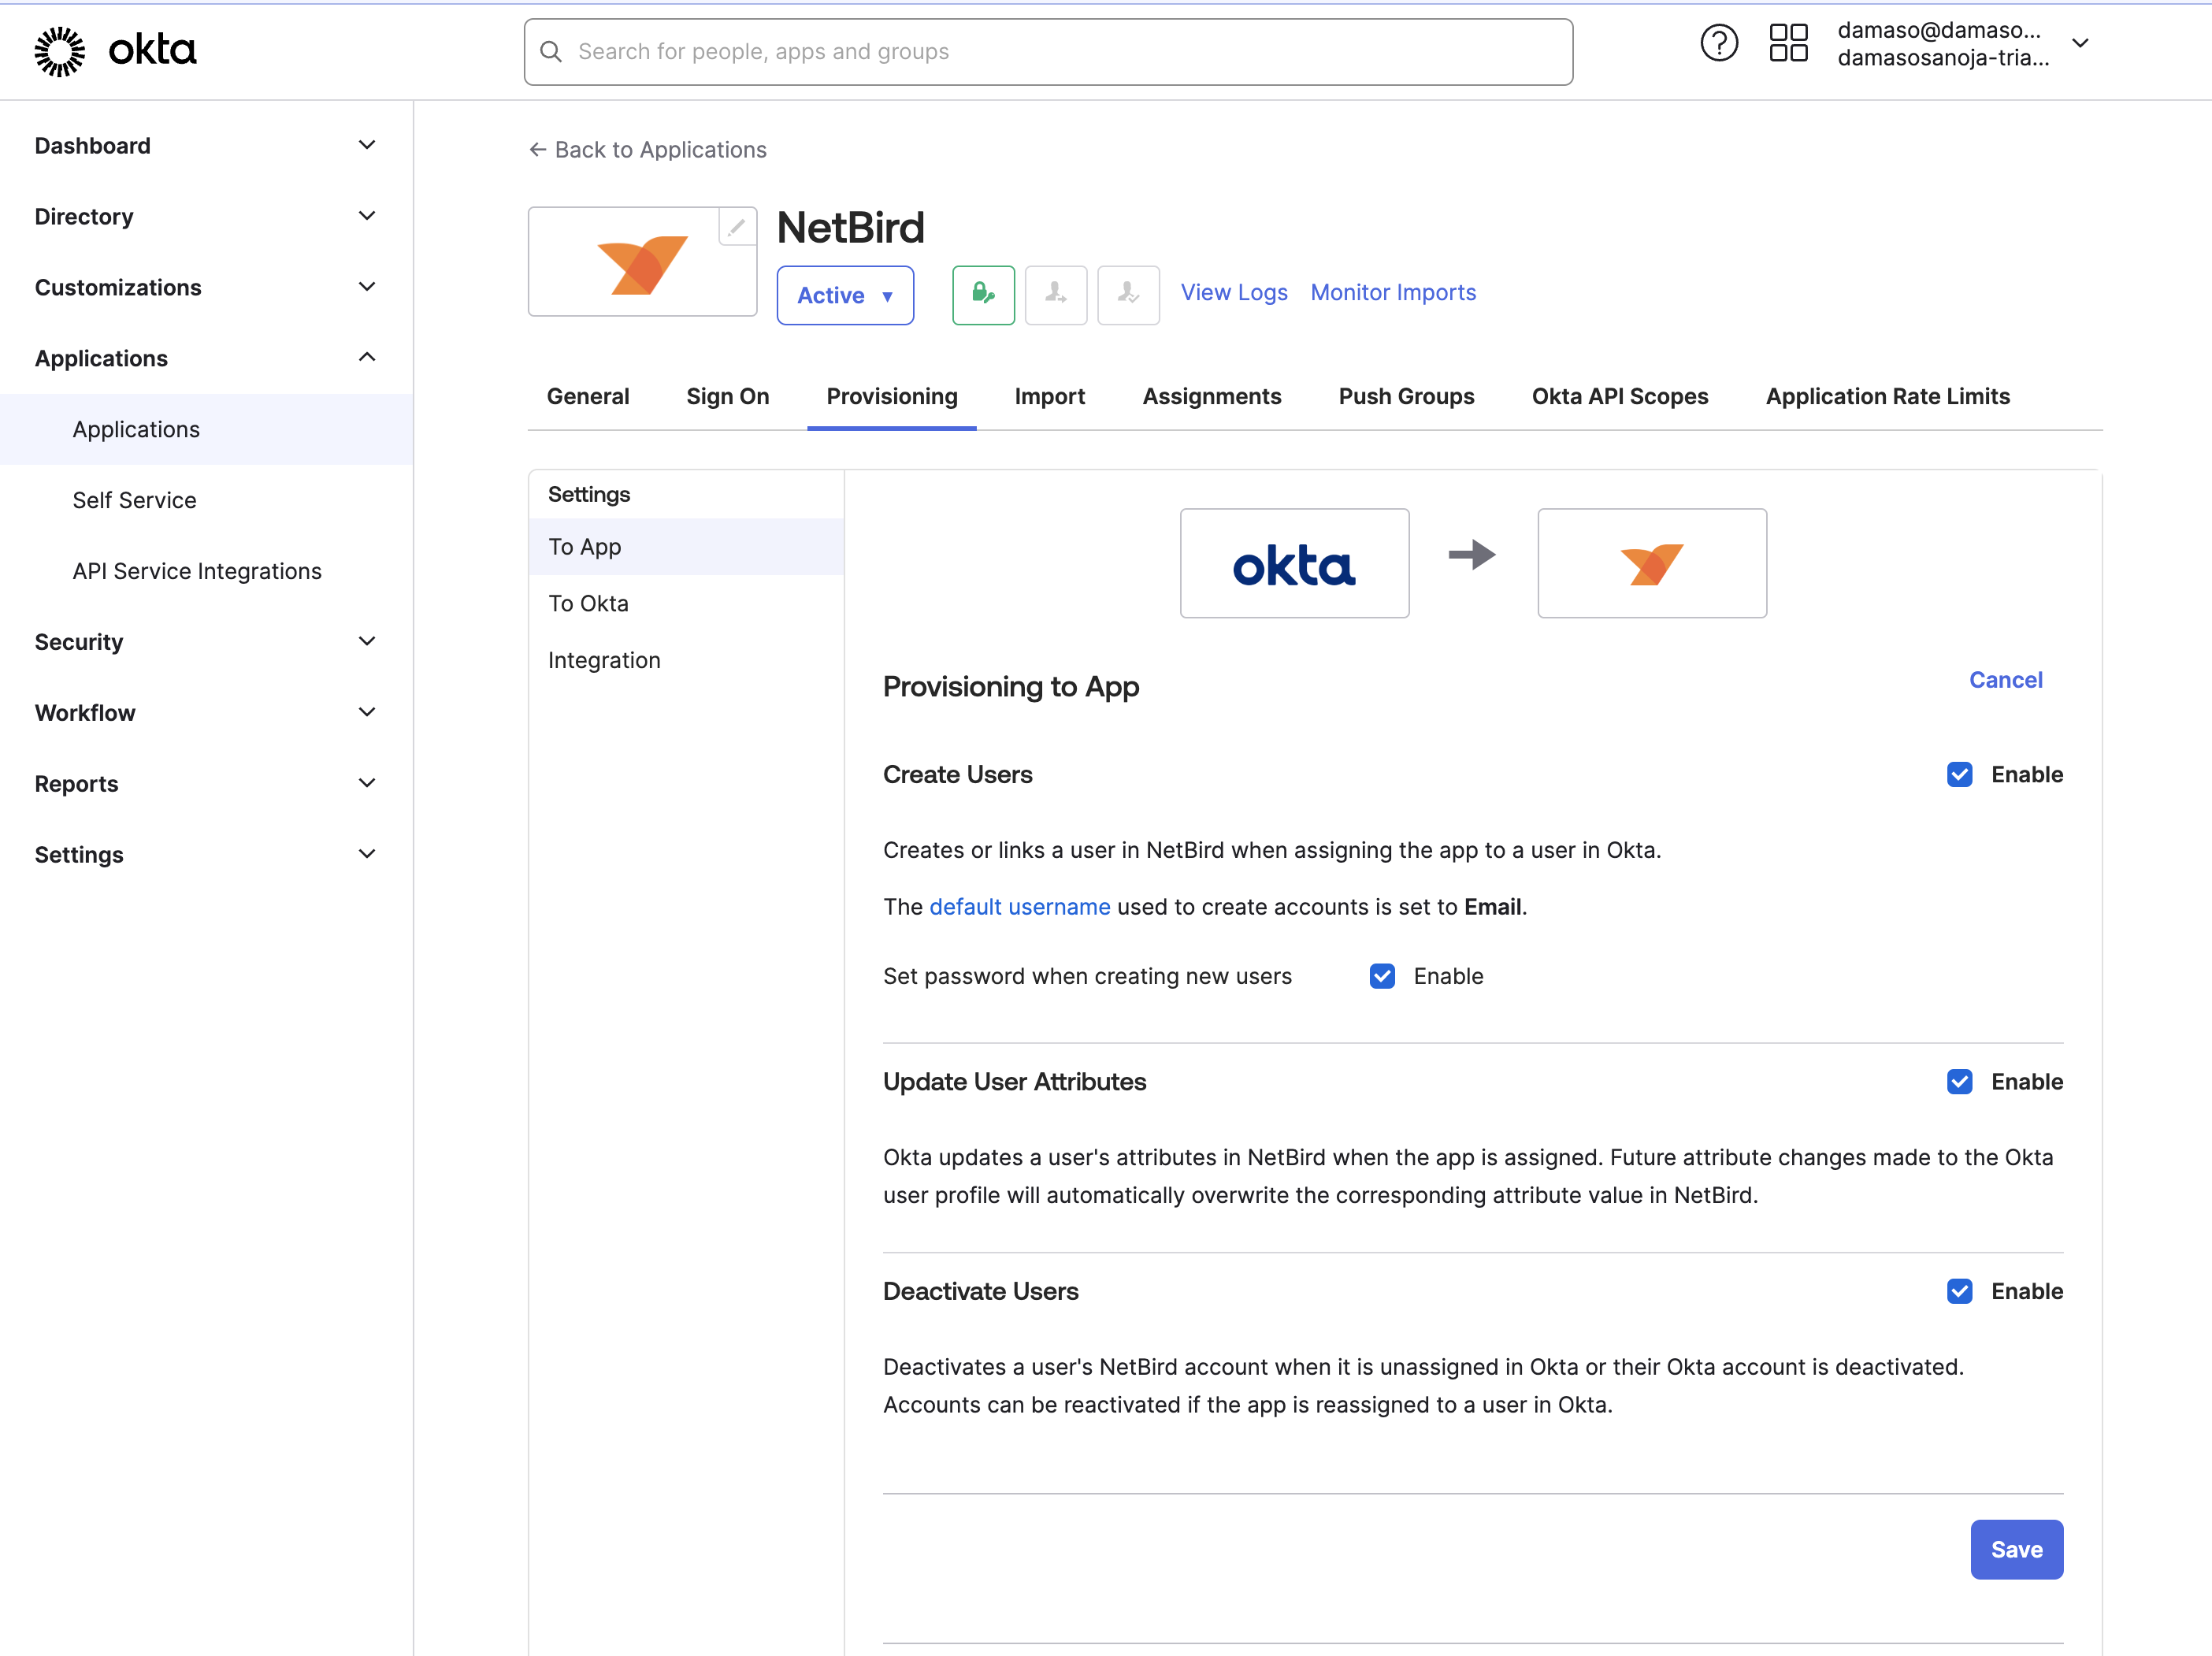
Back in Okta, stay on the Provisioning tab, select To App in the left-hand Settings list, and click Edit next to Provisioning to App.
Enable Okta to create, update, and deactivate NetBird users by checking the corresponding boxes:
- Create Users
- Update User Attributes
- Deactivate Users
When done, click Save.
Assigning NetBird Application to Okta Groups
In NetBird, click Continue →, you'll see the steps for assigning the NetBird integration to Okta groups.
- Navigate to the
Assignmentstab. - Similar than before when you assigned your user to NetBird app, click the
Assignbutton - This time, select
Assign to Groups. - Select Okta groups that you want to assign to the NetBird app.
Once you assign the desired groups, click Done. The selected groups appear on the Assignments tab.
Push Okta Groups to NetBird
One more time, go to NetBird and click Continue →. You'll see the final instructions to push Okta groups to NetBird.
- In Okta, navigate to
Push Groupstab - Click the
Push Groupsbutton - Select
Find groups by name - Search for specific groups to push to NetBird.
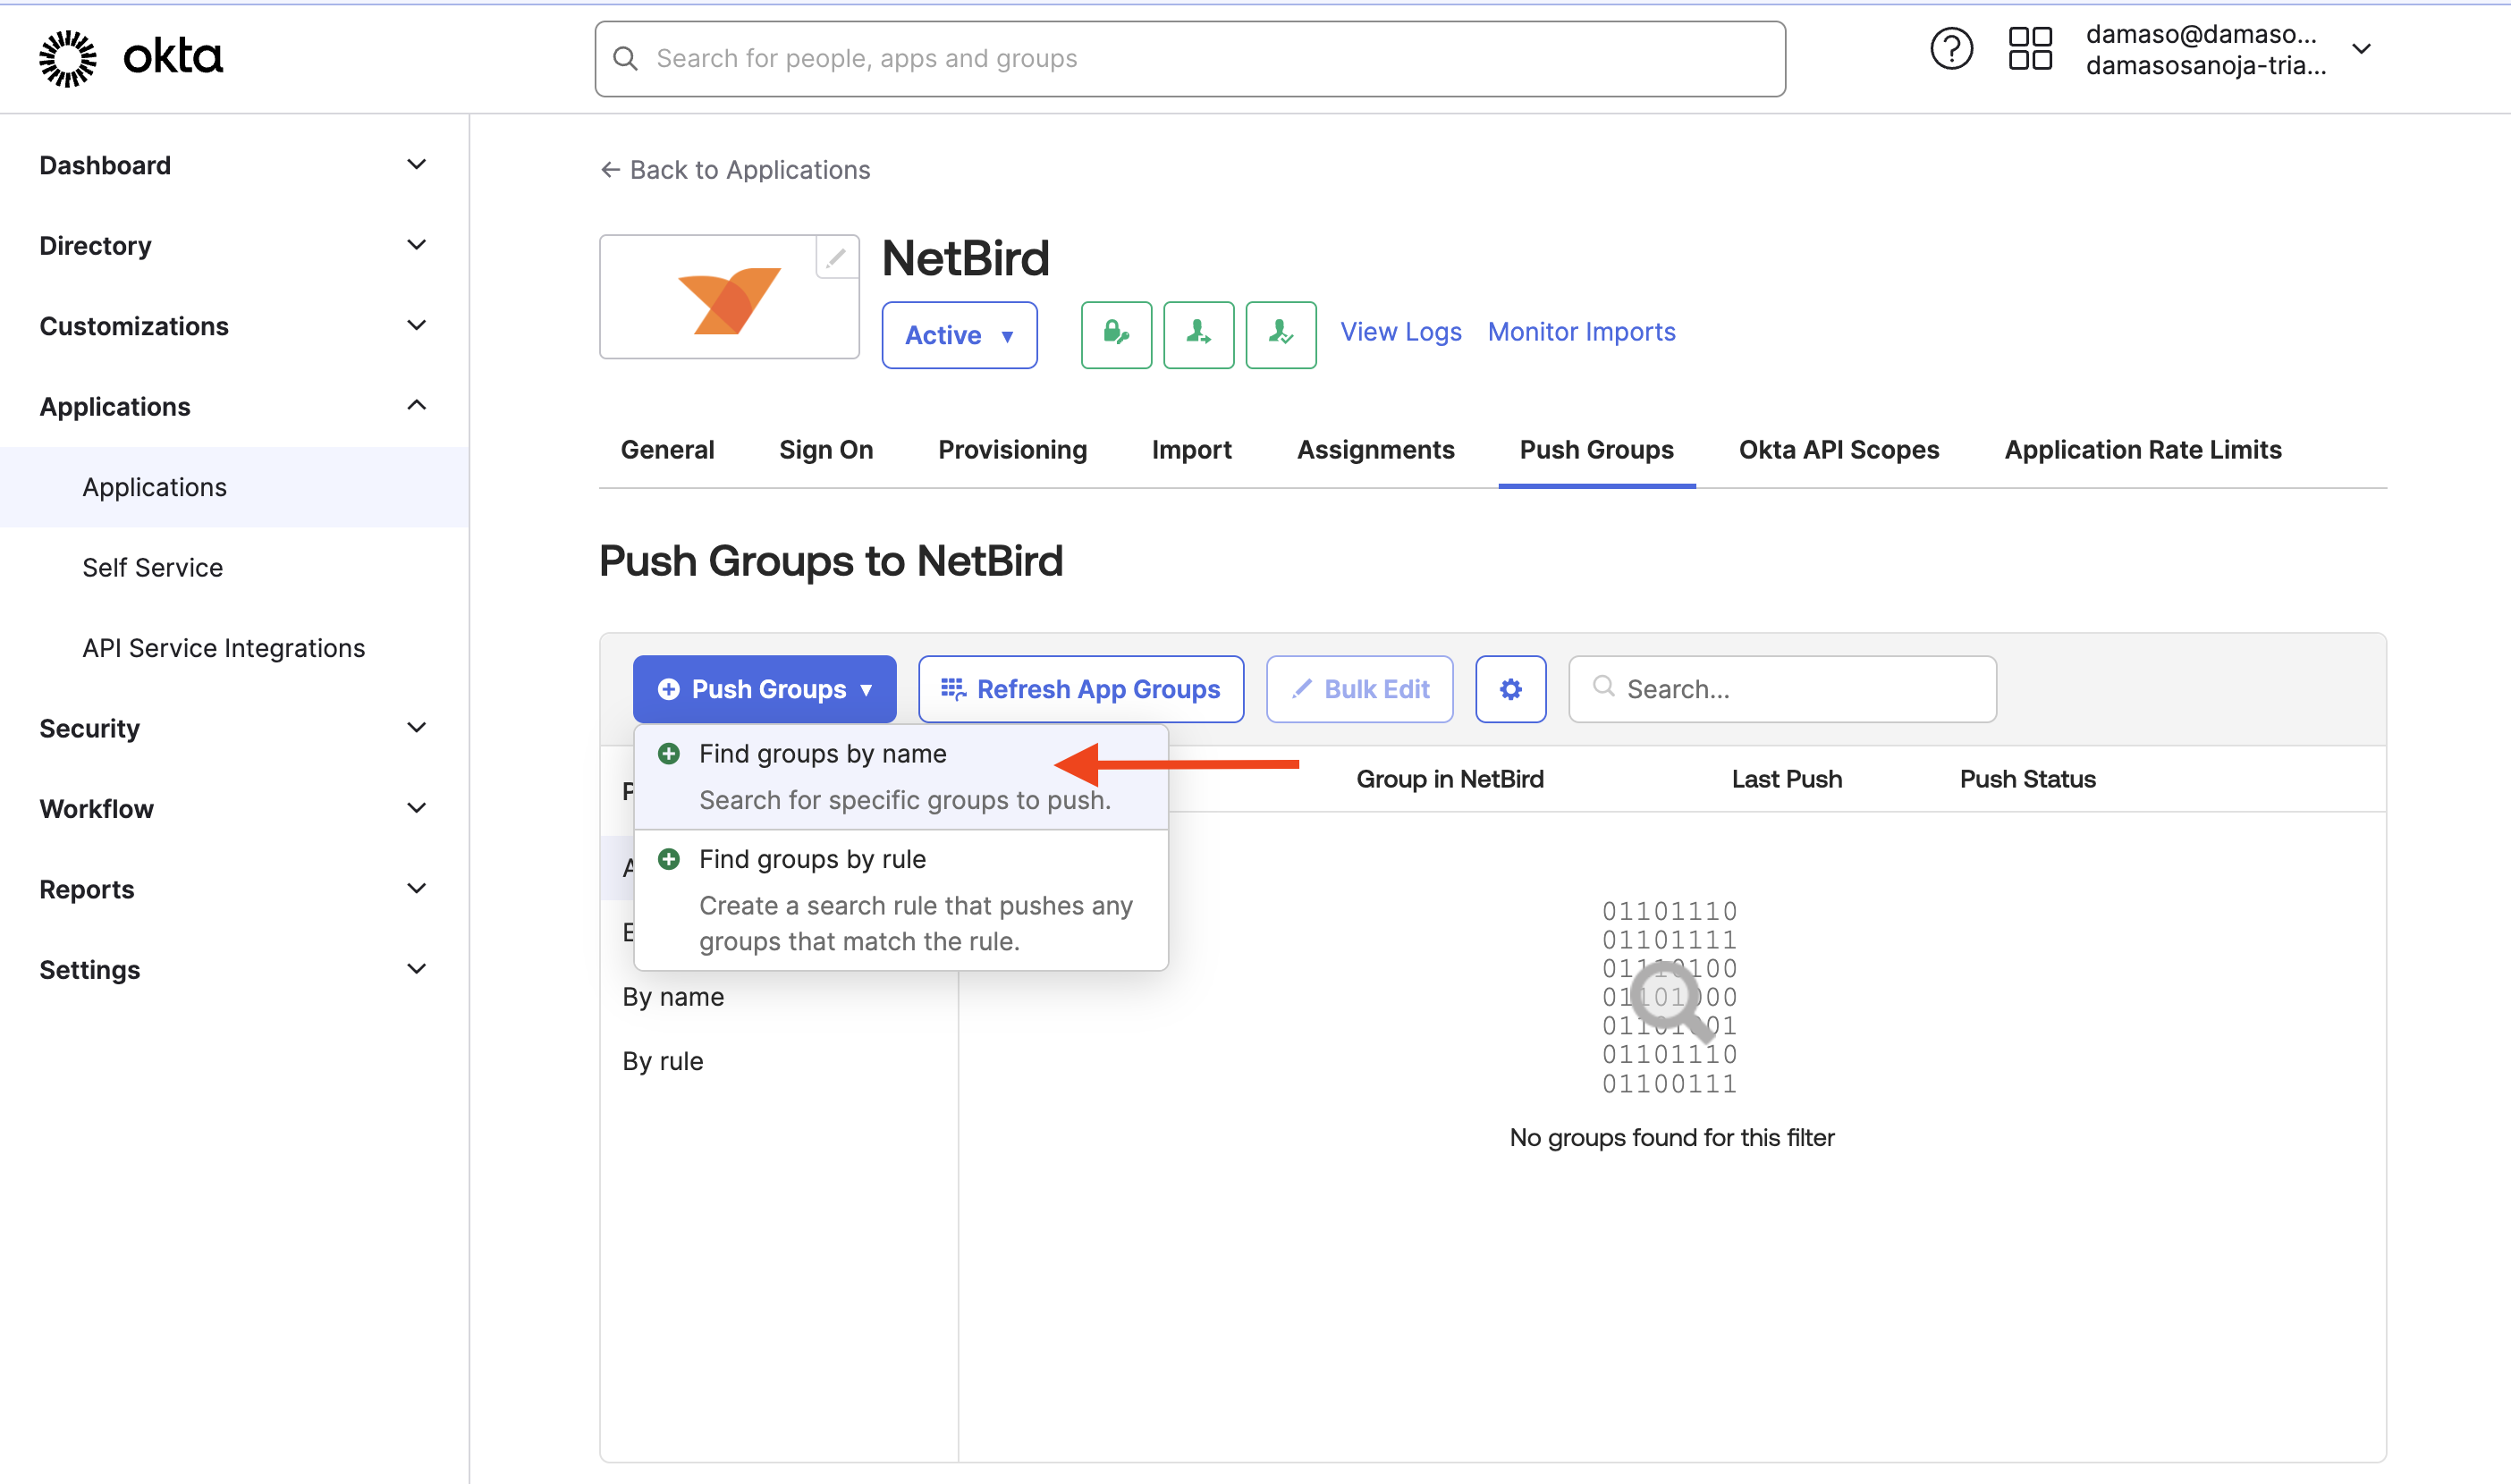
Once you finish, go back to NetBird and click Finish Setup. You can verify the synchronization by navigating to Team > Users. The users listed in NetBird should match those assigned to the app in Okta.
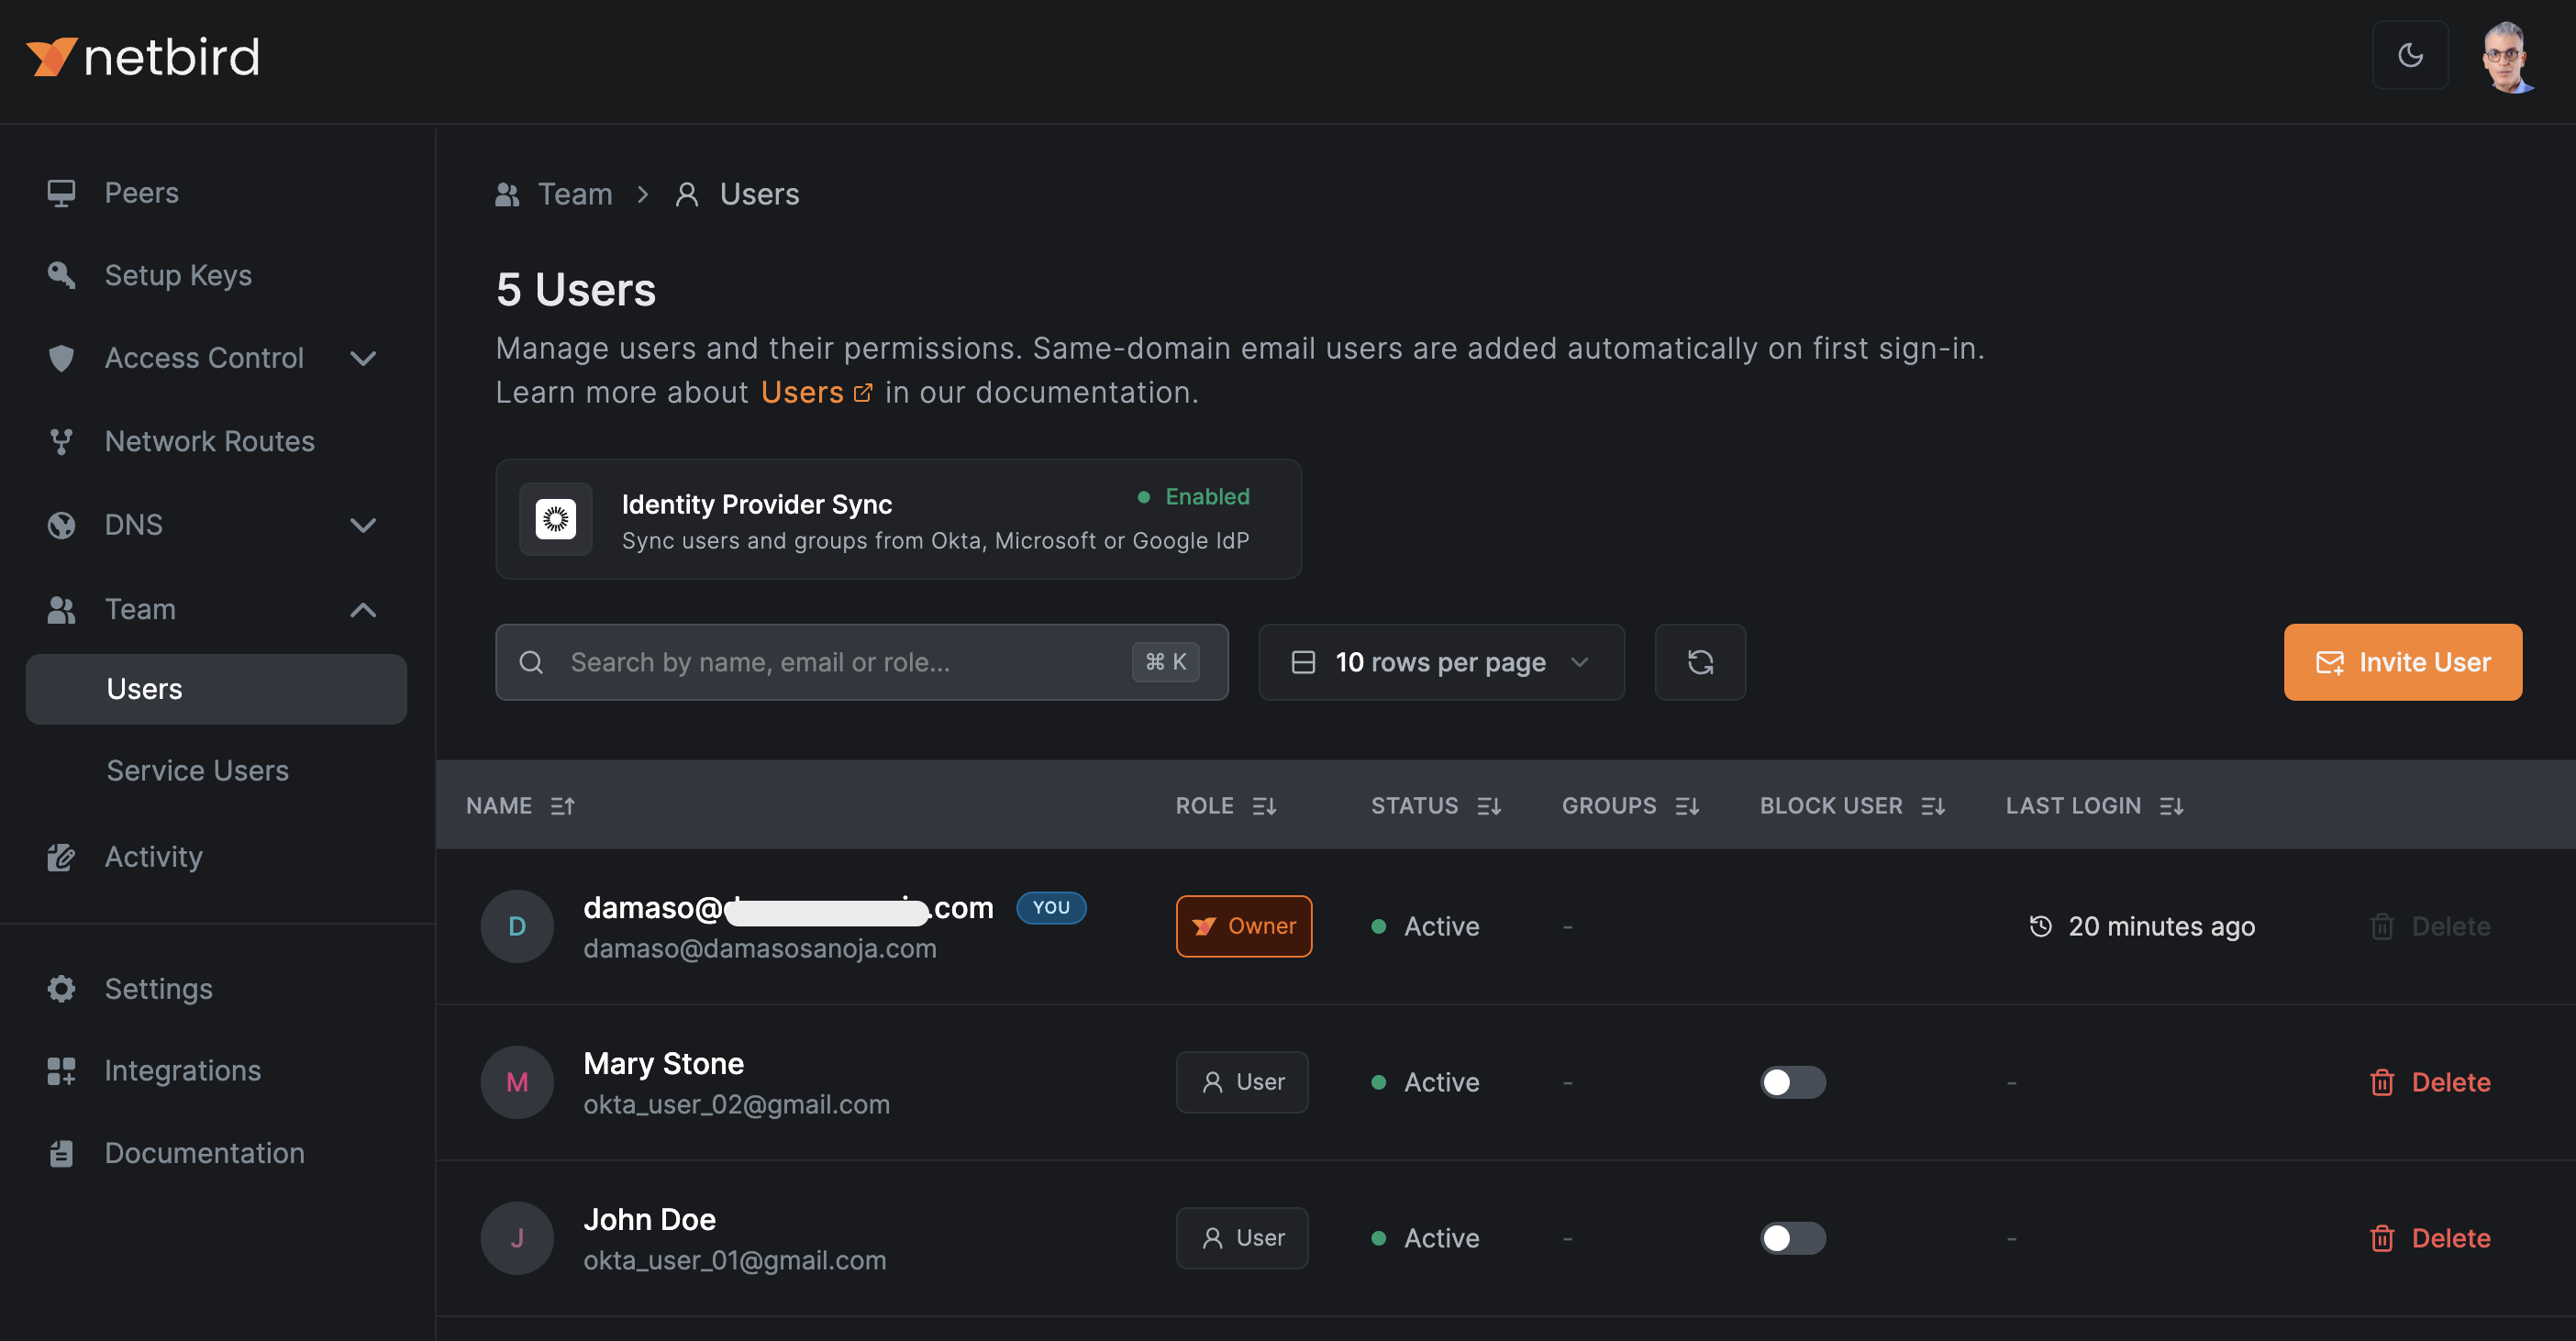
SCIM provisioning will manage only resources that are created through Okta. Any resources created directly in NetBird will not be managed by SCIM.
Synced groups will only be available for membership and will not change the role of user in NetBird