Provision Users and Groups From Microsoft Entra ID via SCIM
Microsoft Entra ID, formerly known as Azure Active Directory (Azure AD), is a cloud-based identity and access management service that provides organizations with secure authentication, single sign-on, and user management capabilities. In the context of network security, it can be effectively used to control network access based on organizational structure, such as groups and individual user accounts.
NetBird's Microsoft Entra ID SCIM integration allows you to synchronize users and groups from Entra ID to NetBird. You can then use these synchronized groups to configure your network, create network access policies, and automate onboarding and offboarding processes.
If you are running a self-hosted deployment with a Commercial License and the embedded IdP, see the Embedded IdP version of this guide instead.
The NetBird dashboard supports only one identity provider sync integration at a time. If you are migrating from the Microsoft Entra ID API integration to SCIM, plan a cutover rather than running both in parallel. A second sync integration can be configured via the NetBird API, but it must sync from a different Entra tenant to avoid identity conflicts.
Prerequisites
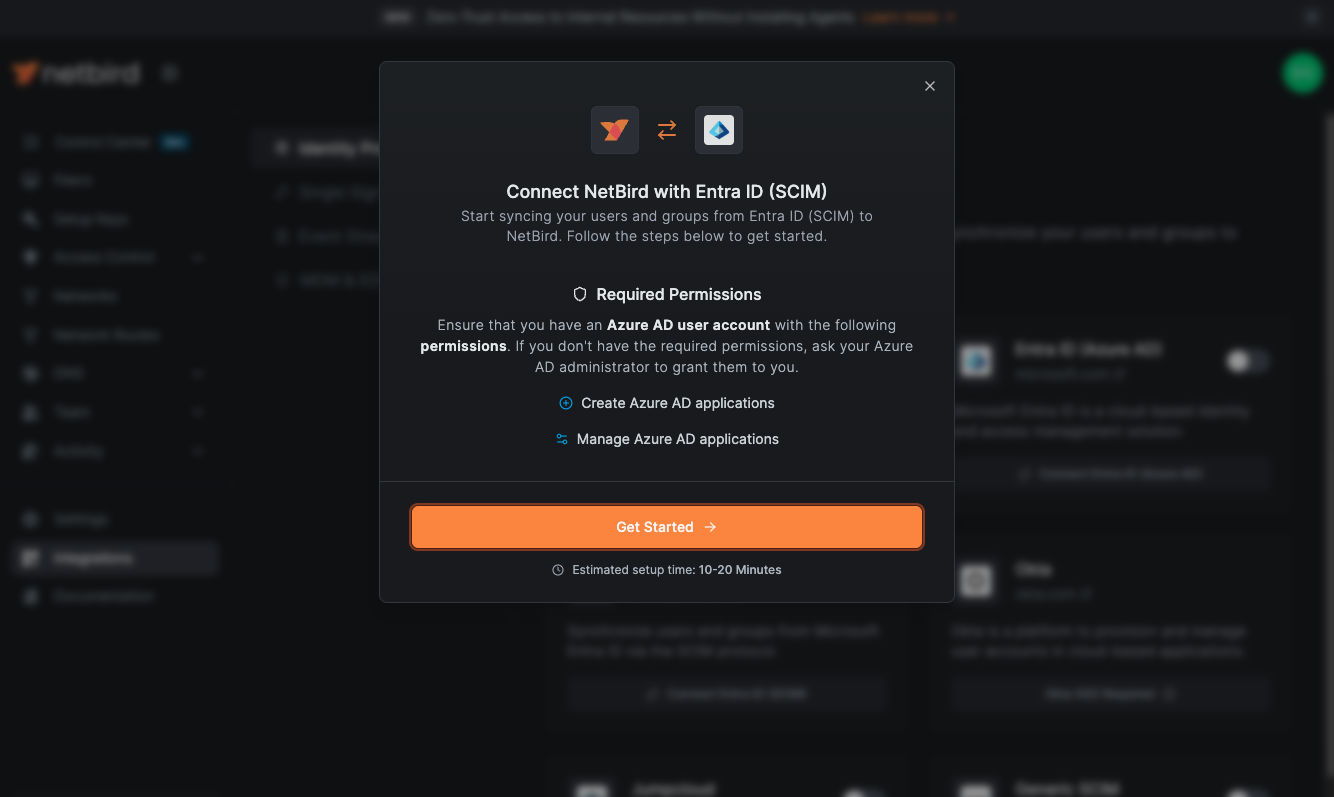
Before you begin the integration process, ensure you have the necessary admin permissions in Microsoft Entra ID. You need an Azure user account with at least one of these roles:
- Application Administrator
- Cloud Application Administrator
- Global Administrator
Enabling Microsoft Entra ID SCIM in NetBird
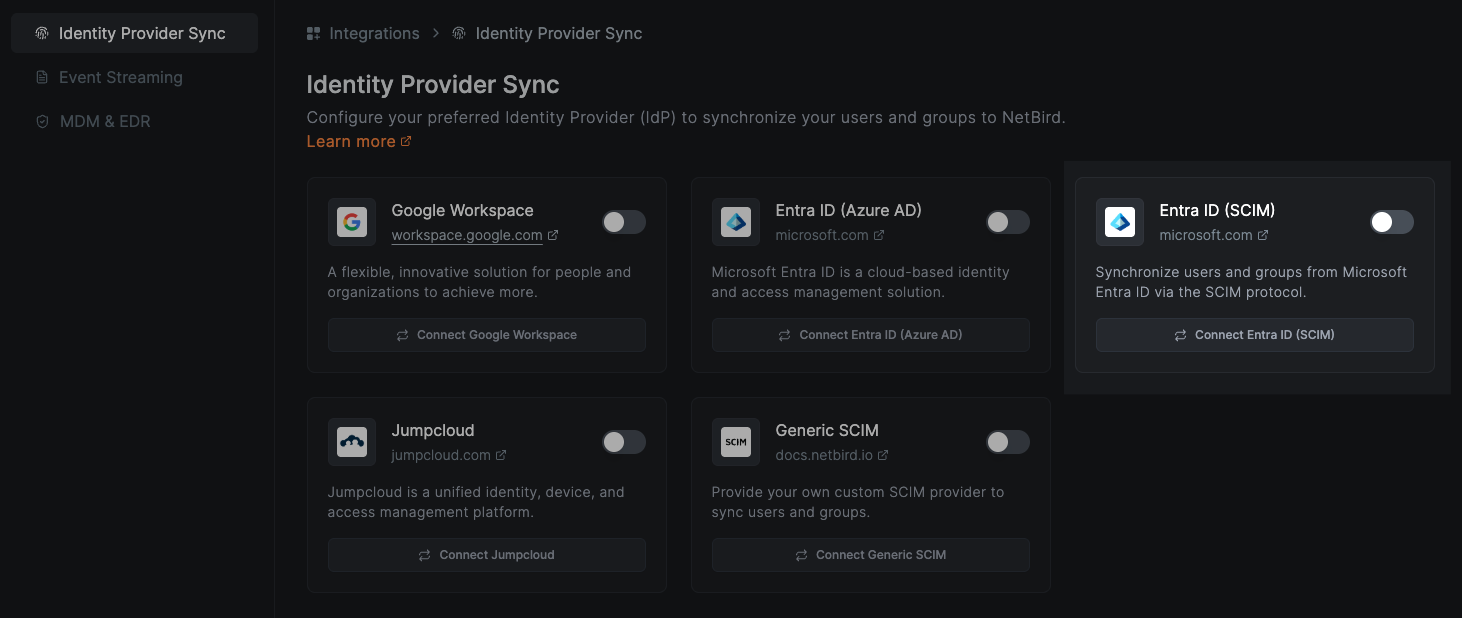
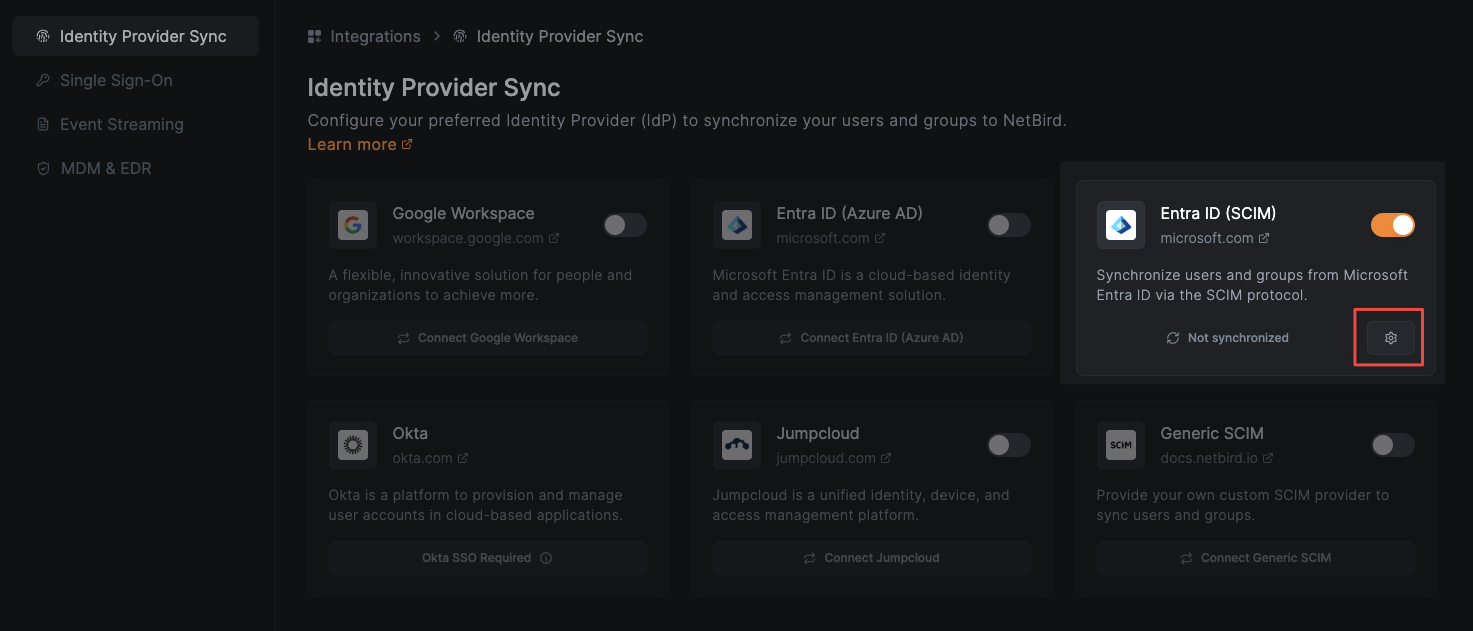
To enable SCIM synchronization in NetBird, navigate to Integrations > Identity Provider Sync in your NetBird dashboard.
Before starting the Entra ID SCIM integration you will need to be logged in via Microsoft Login.
Simply sign in with the Continue with Entra ID button on the login page.
Click the Connect Microsoft Entra ID button to begin the configuration process.
This action will trigger a pop-up window that will present you with a user-friendly wizard, guiding you through the synchronization process between NetBird and Entra ID.
Configure SCIM Provisioning in Microsoft Entra ID
Click on the Get Started button to initiate the integration process.
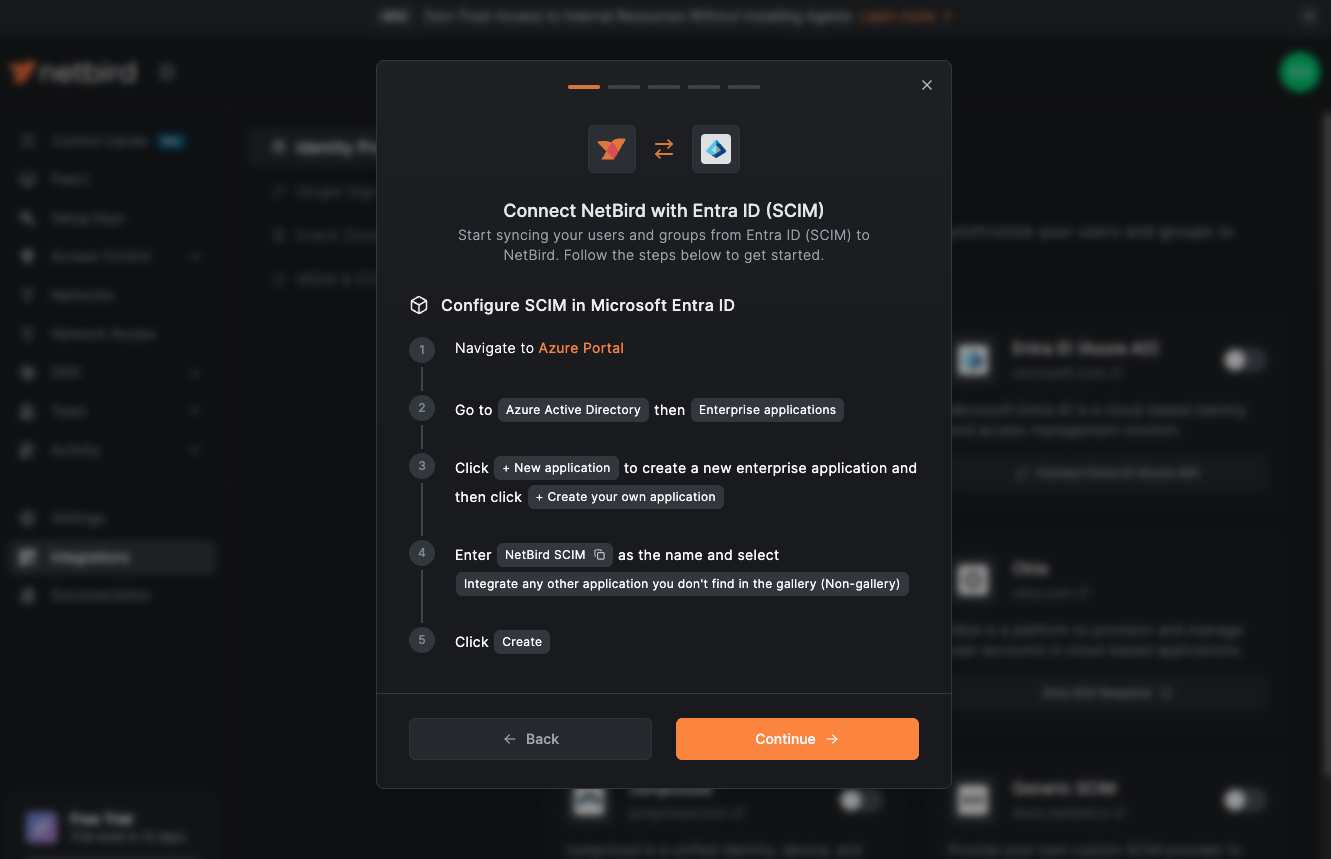
A new wizard screen will appear, offering step-by-step instructions for creating and configuring your Microsoft Entra ID application. To simplify the process, the wizard also provides quick-copy buttons for essential information:
If you already have a NetBird Enterprise Application in Entra ID with provisioning available, you can configure SCIM on it directly without creating a new one. The App Registration used by the legacy NetBird API integration is a different application type and cannot be reused for SCIM.
In the Azure portal, navigate to Azure Active Directory → Enterprise applications.
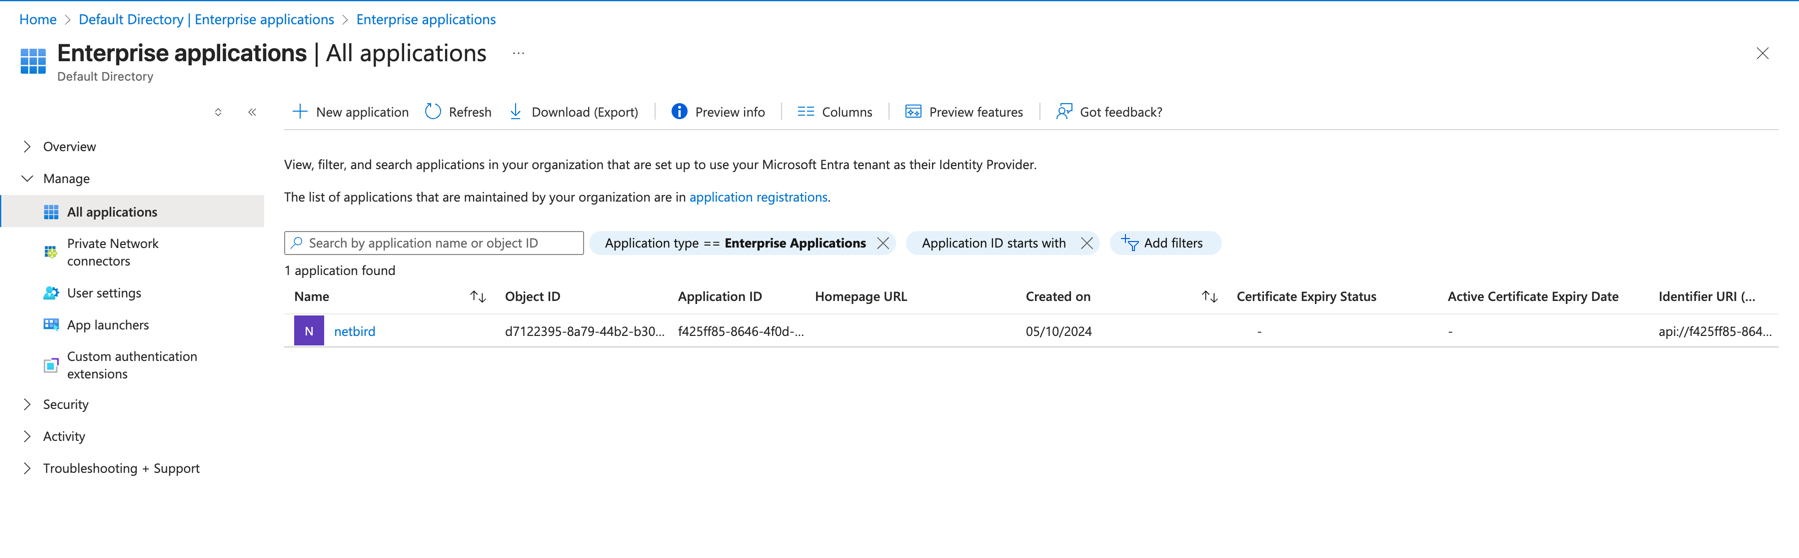
Click New application to create a new enterprise application.
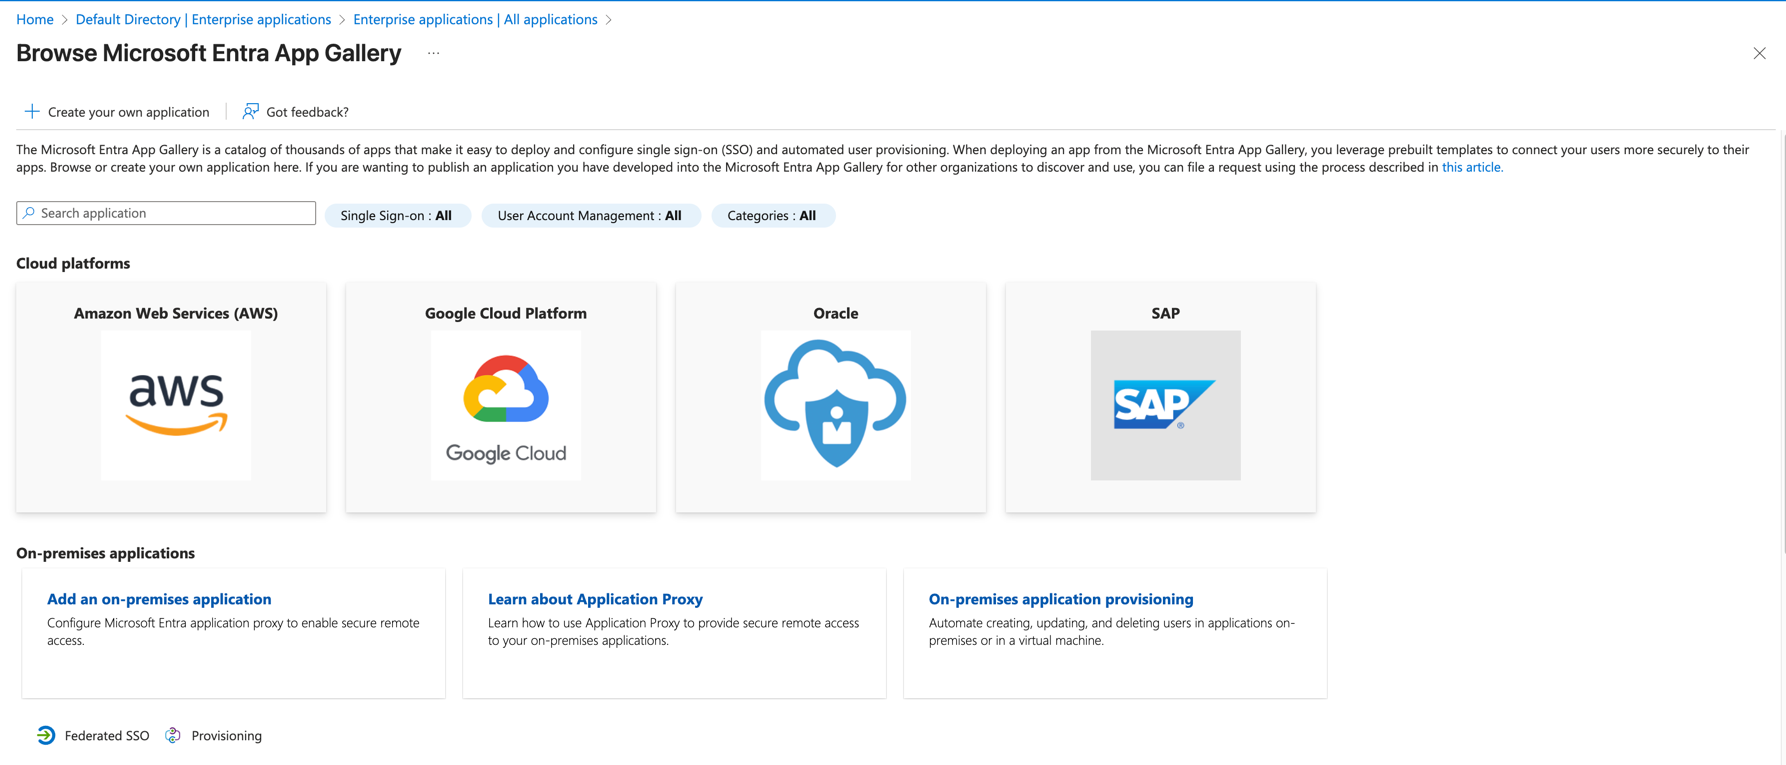
Click Create your own application.
Fill out the application form with the following details:
- What's the name of your app?:
NetBird SCIM - What are you looking to do with your application?: Select
Integrate any other application you don't find in the gallery (Non-gallery)
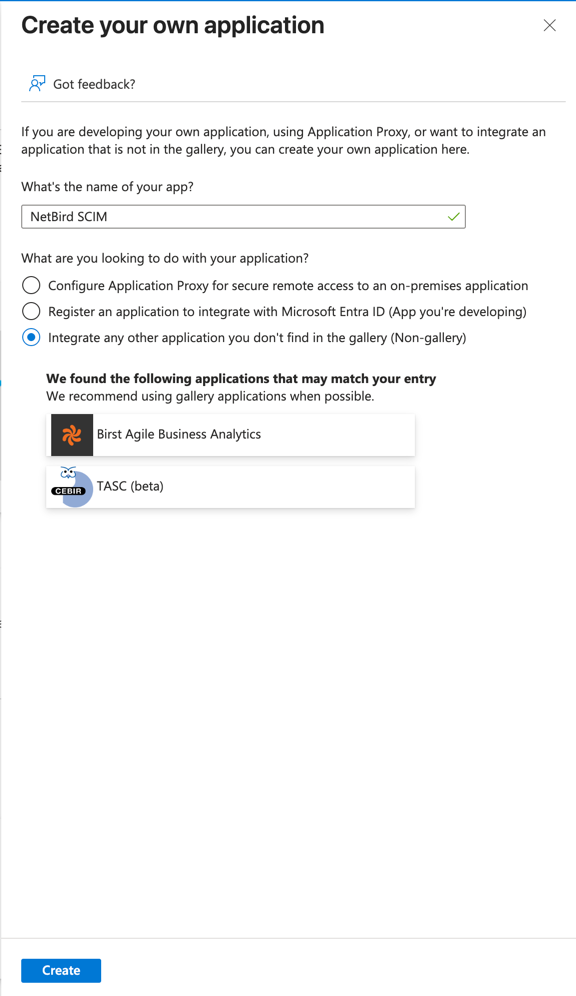
Click Create.
Enable Provisioning
On the NetBird dashboard click the Continue → button. A new wizard screen will appear, offering step-by-step instructions for enabling provisioning.
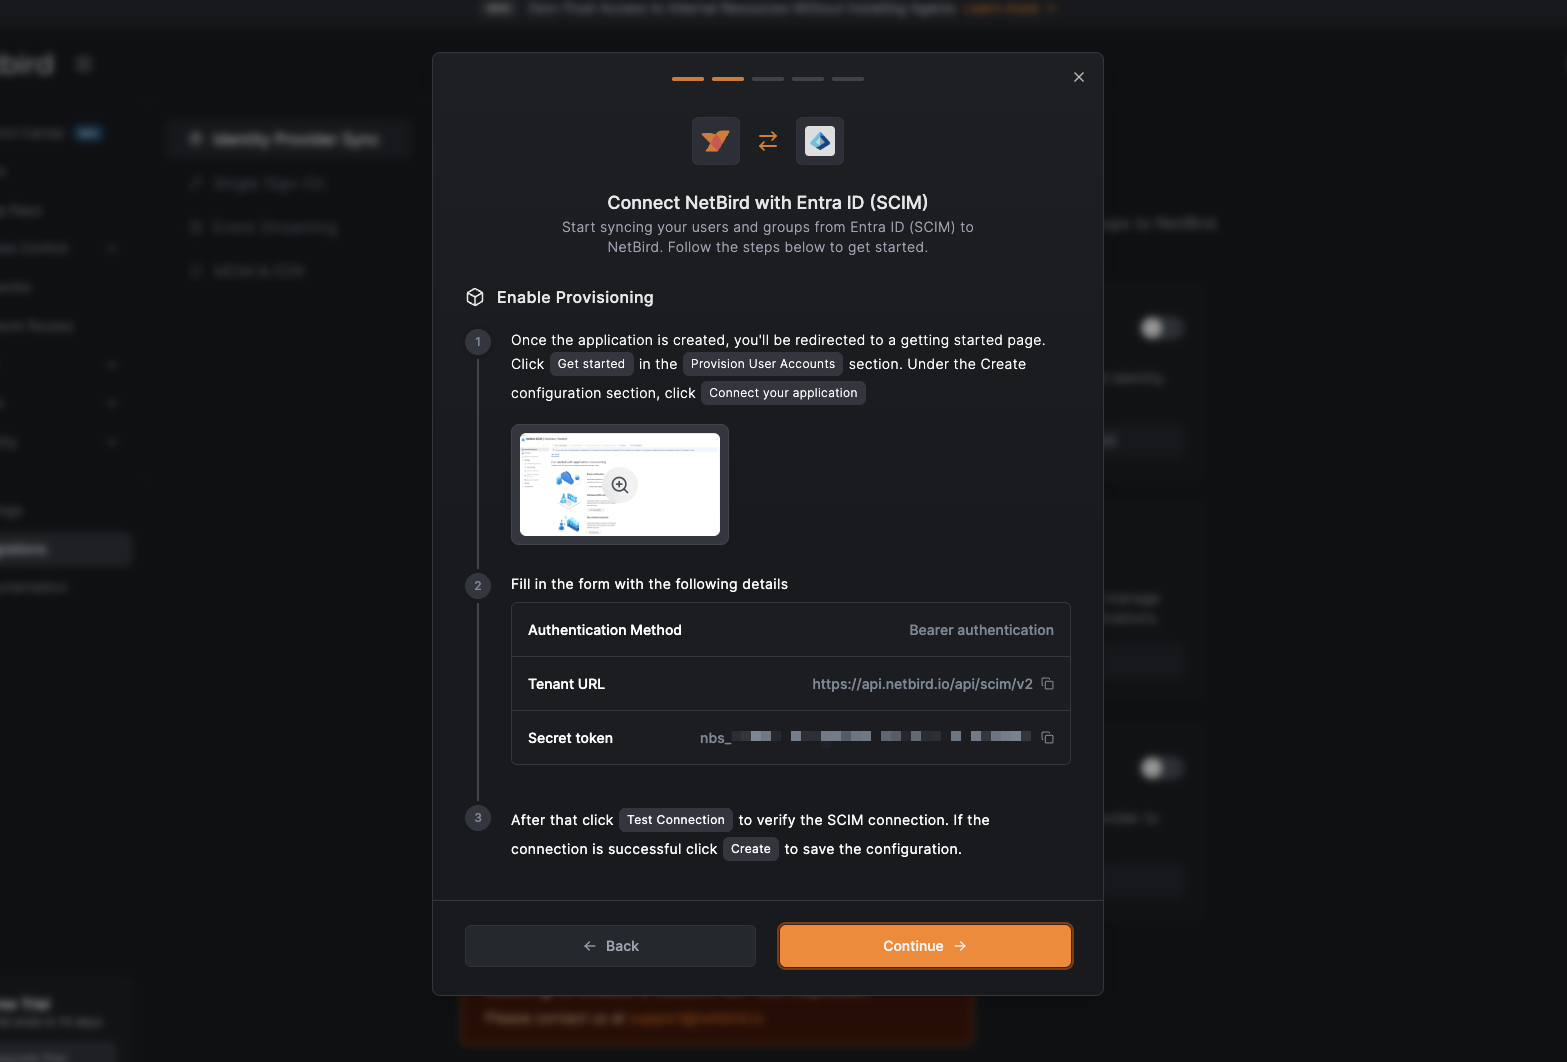
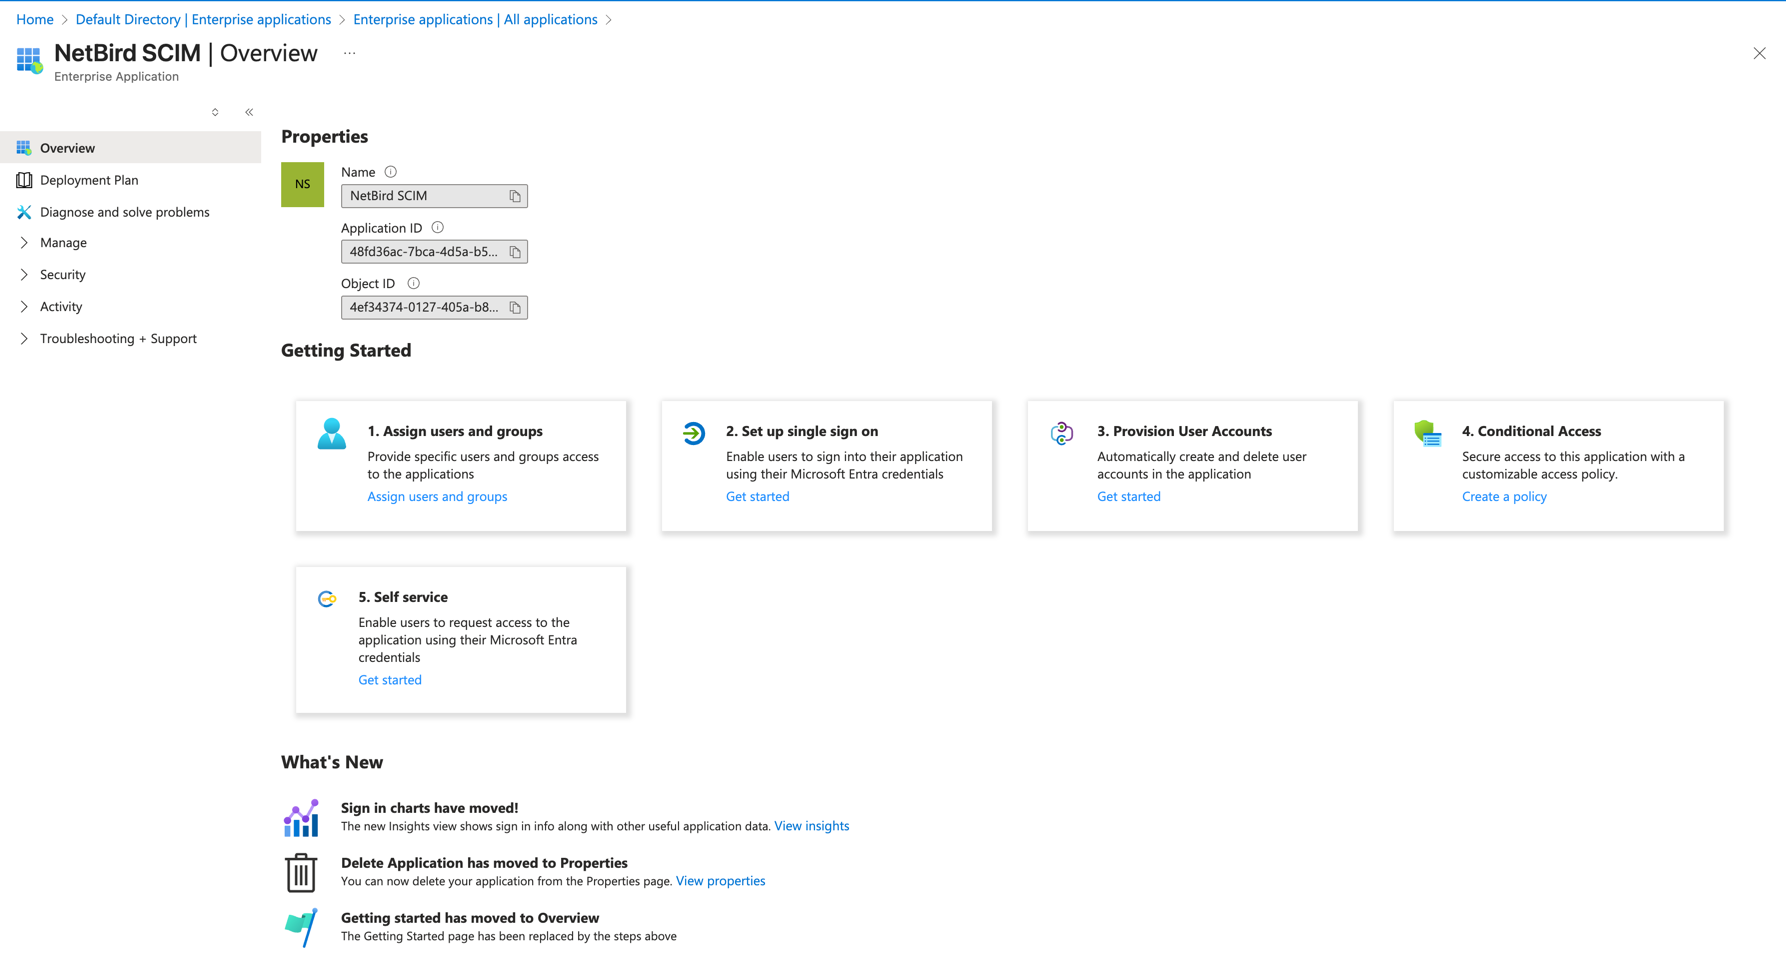
Once the application is created, you'll be redirected to a getting started page. Click Get started in the Provision User Accounts section.
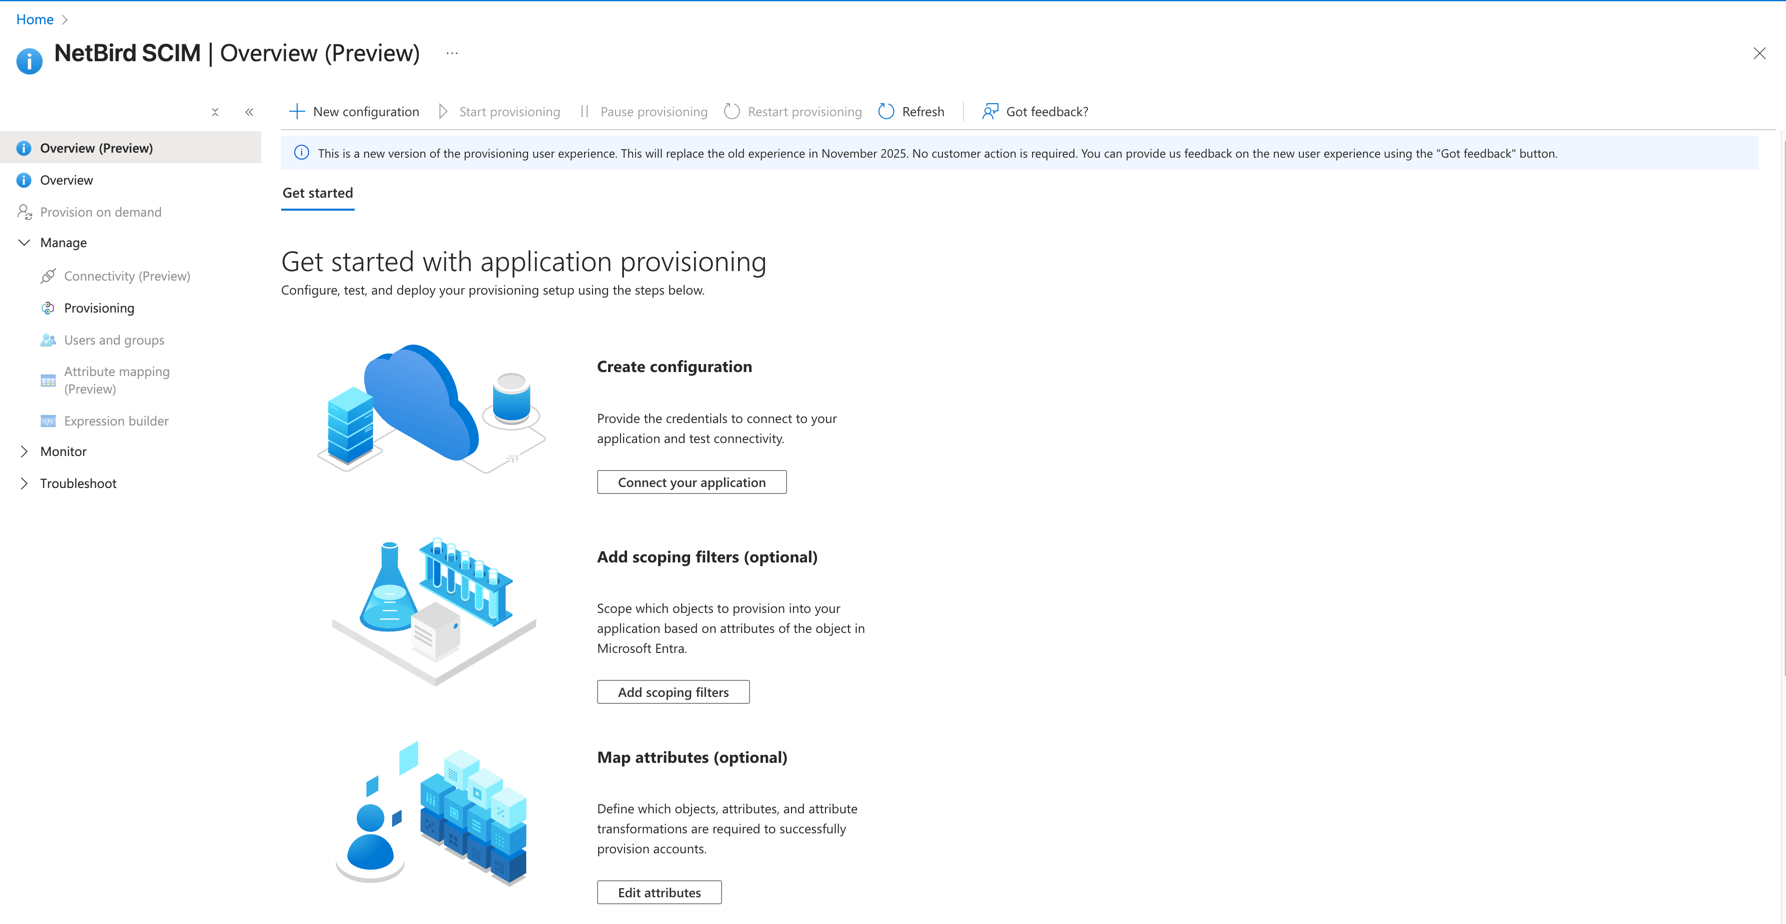
Under the Create configuration section, click connect your application.
Fill out the New provisioning configuration form with the following details:
- Select authentication method:
Bearer authentication - Tenant URL:
https://api.netbird.io/api/scim/v2?aadOptscim062020 - Secret token: Paste the Token Key you copied from the Entra ID SCIM Setup process in the NetBird integration
The ?aadOptscim062020 flag appended to the Tenant URL is required to ensure Microsoft Entra ID sends SCIM 2.0 compliant requests.
Without this flag, Entra ID uses non-standard PATCH operations that can cause provisioning issues such as incorrect boolean values and malformed group membership updates.
See Microsoft's SCIM compatibility documentation for more details.
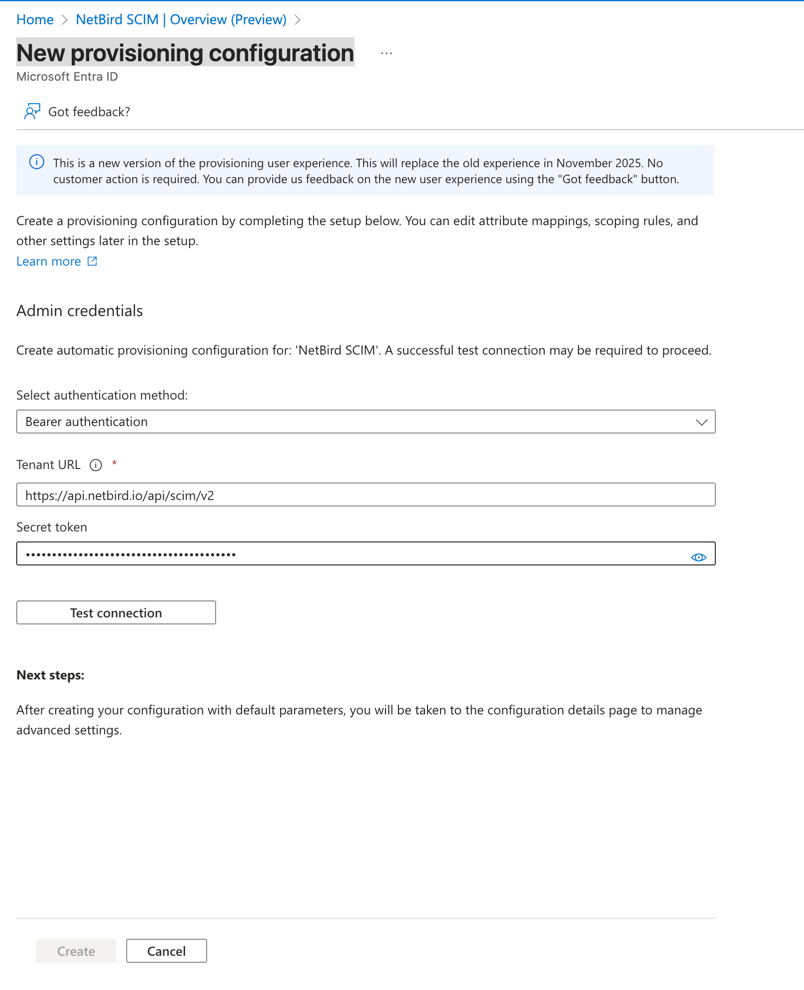
Click Test Connection to verify the SCIM connection. If the connection is successful, click Create to save the configuration.
Configure Attribute Mapping
On the NetBird dashboard click the Continue → button. A new wizard screen will appear, offering step-by-step instructions for configuring attribute mapping.
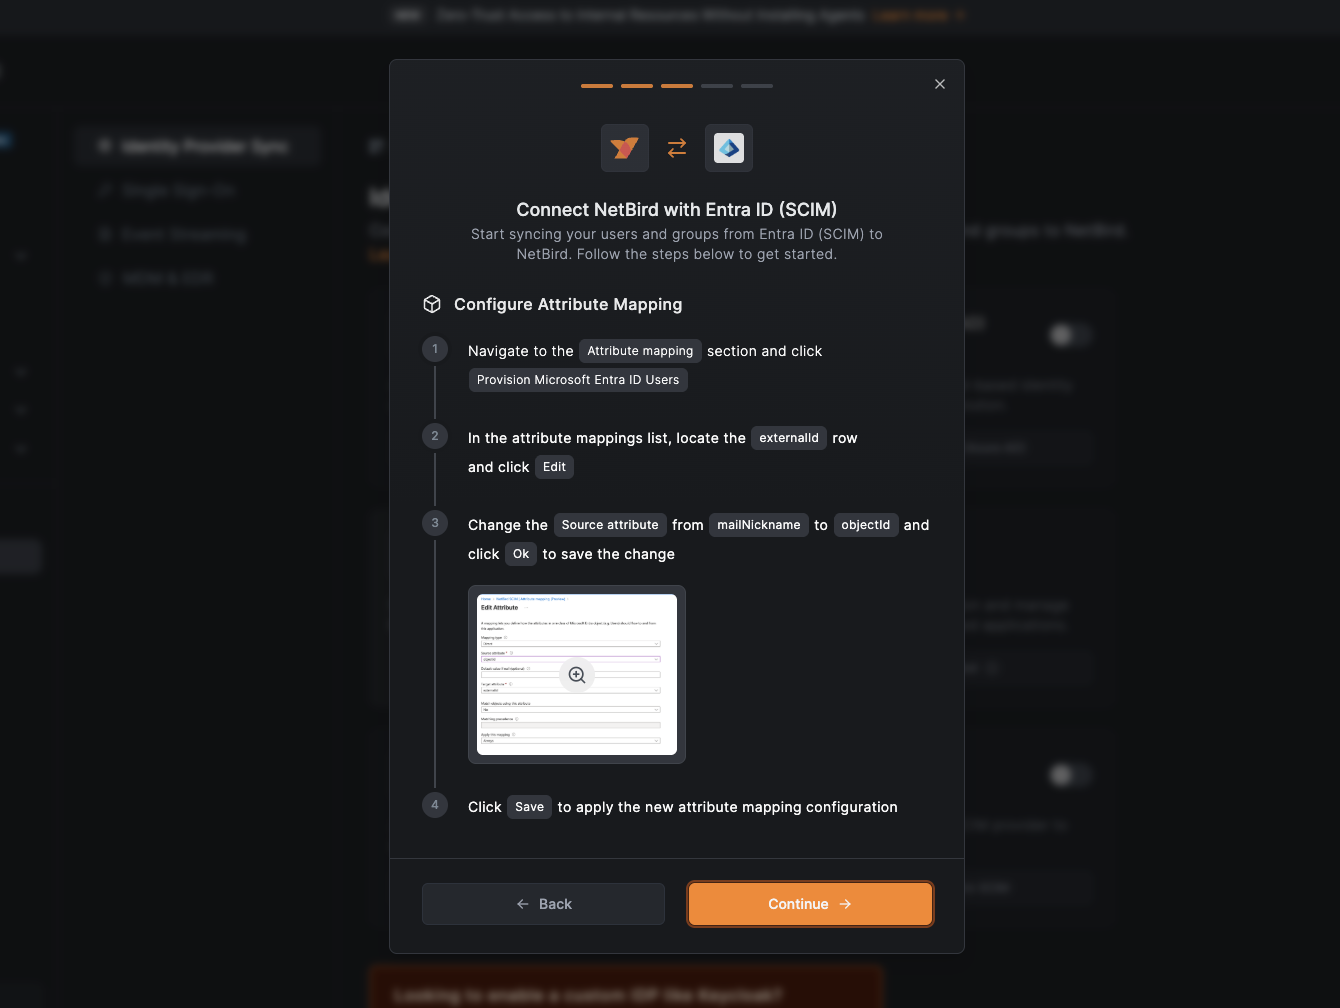
After creating the provisioning configuration, you need to configure the attribute mappings for both groups and users.
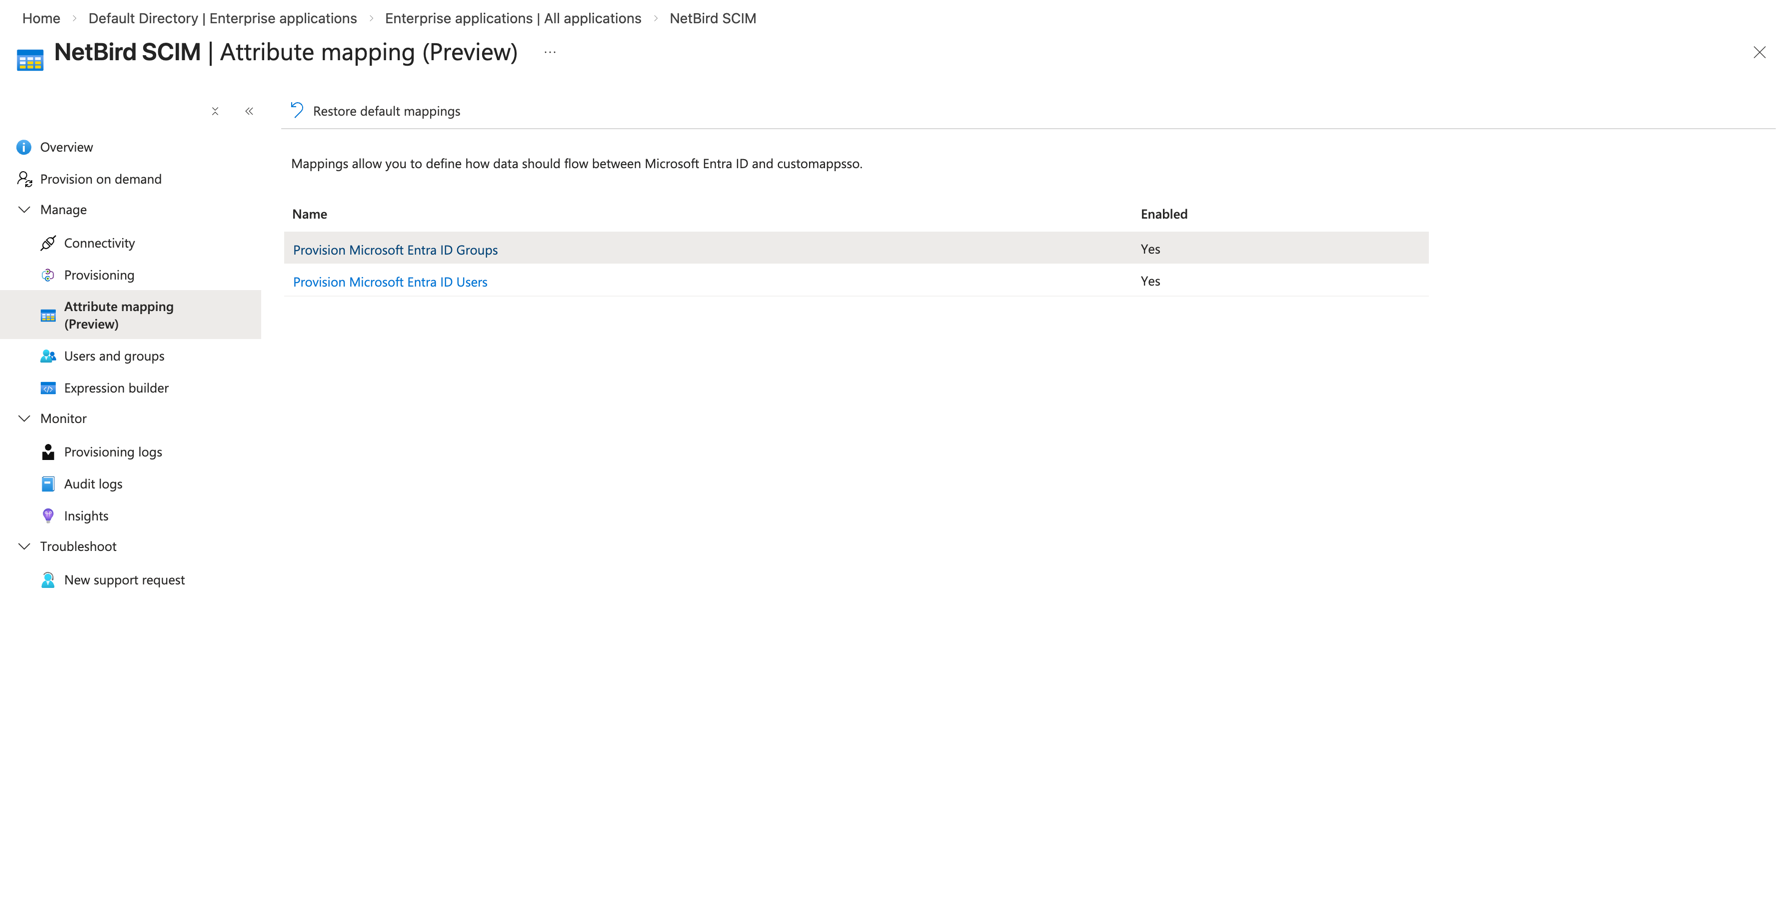
Navigate to the Attribute mapping section.
Group Attribute Mapping
Click Provision Microsoft Entra ID Groups to configure the group attribute mapping.
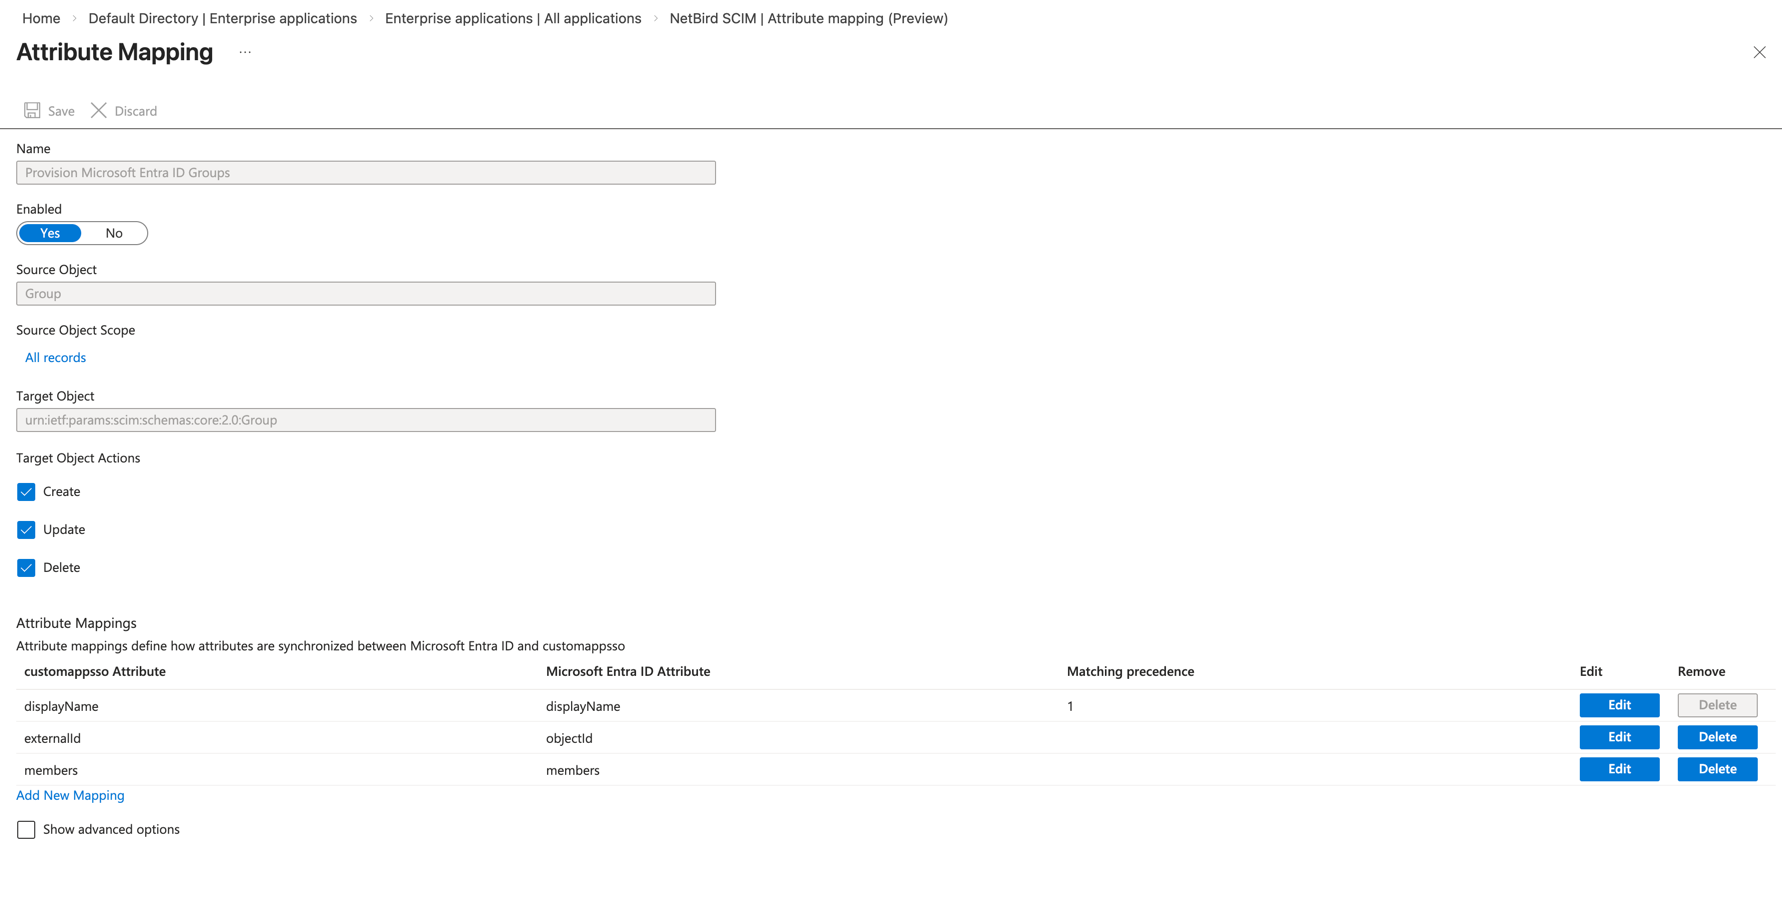
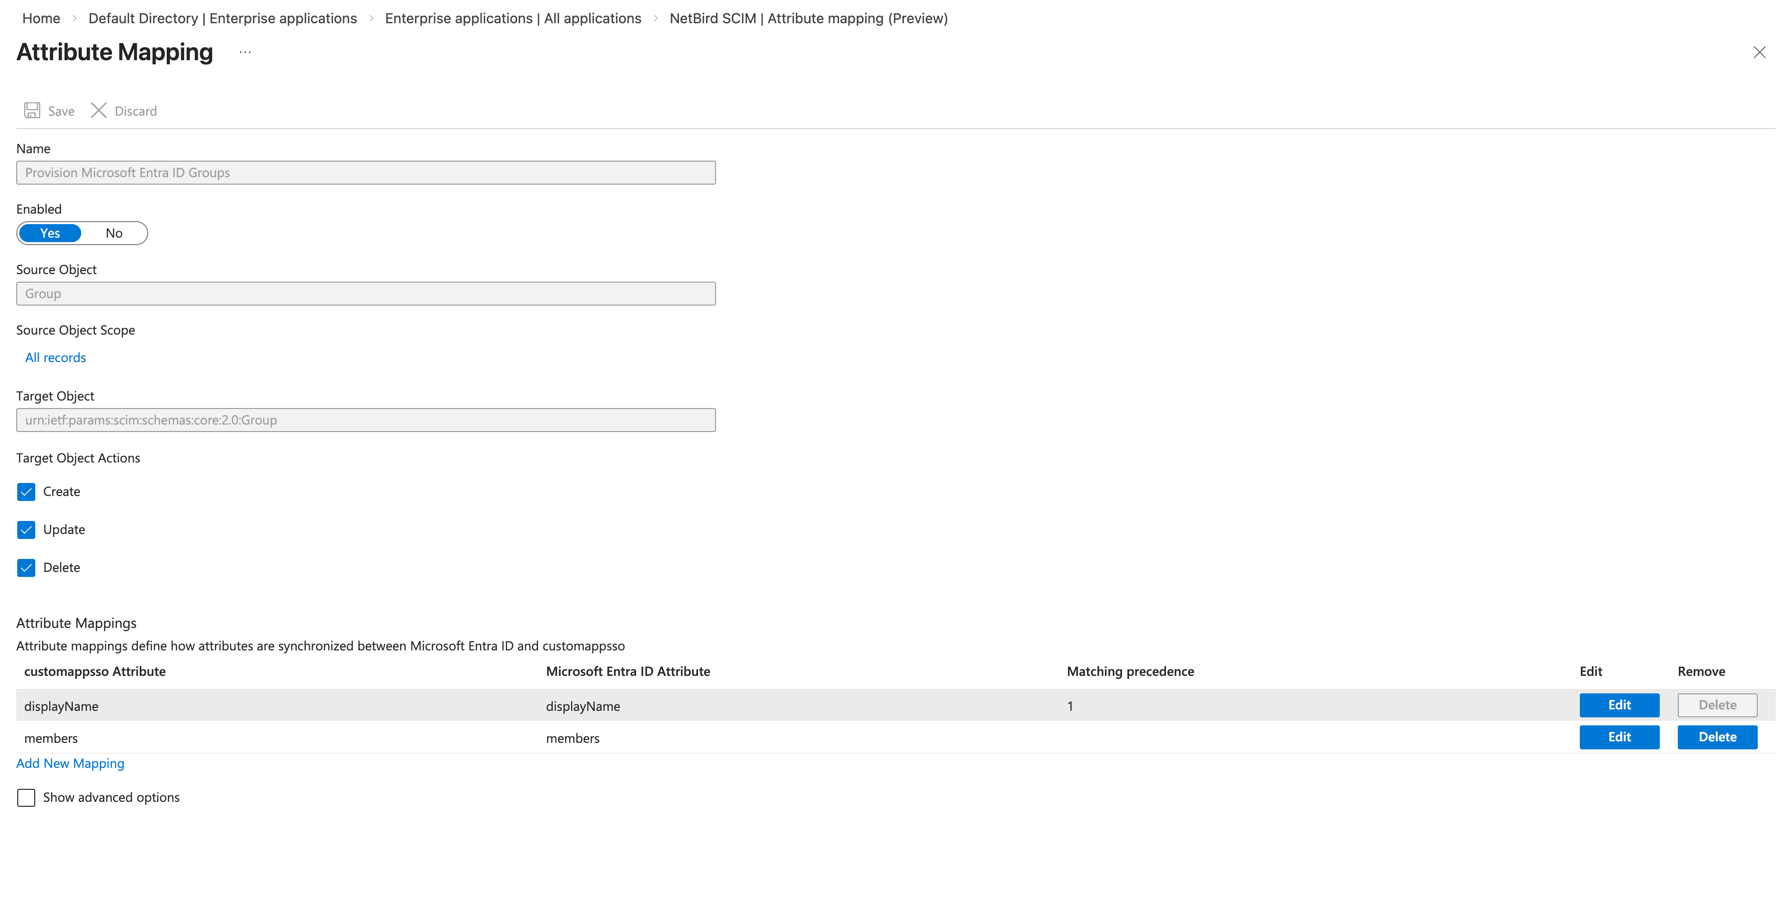
In the attribute mappings list, locate the externalId row and click Delete.
NetBird matches synchronized groups by displayName. Removing the externalId mapping ensures Entra uses displayName as the matching identifier when determining whether a group already exists in NetBird.
Click Save to apply the updated group attribute mapping configuration.
User Attribute Mapping
Navigate back to the Attribute mapping section and click Provision Microsoft Entra ID Users to configure the user attribute mapping.
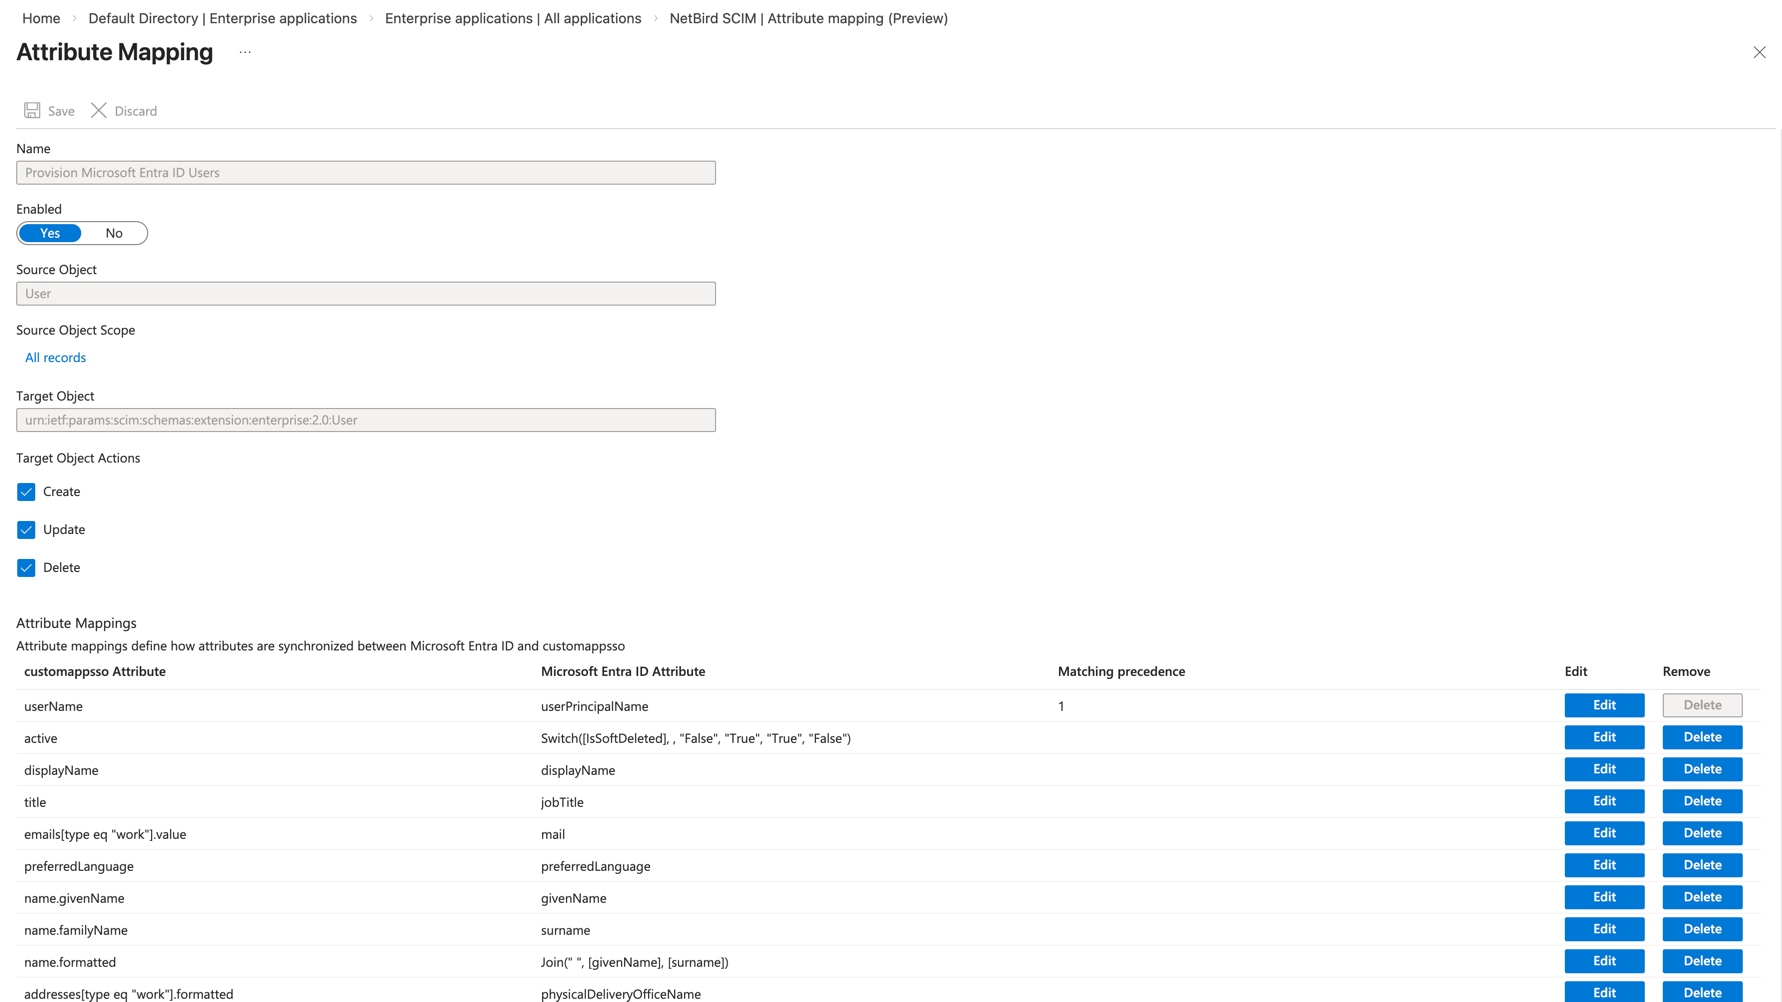
The default Entra mapping includes around 20 user attributes. NetBird only consumes the attributes listed below. Removing the unused mappings keeps the provisioning logs clean and avoids mapping errors for attributes NetBird does not accept.
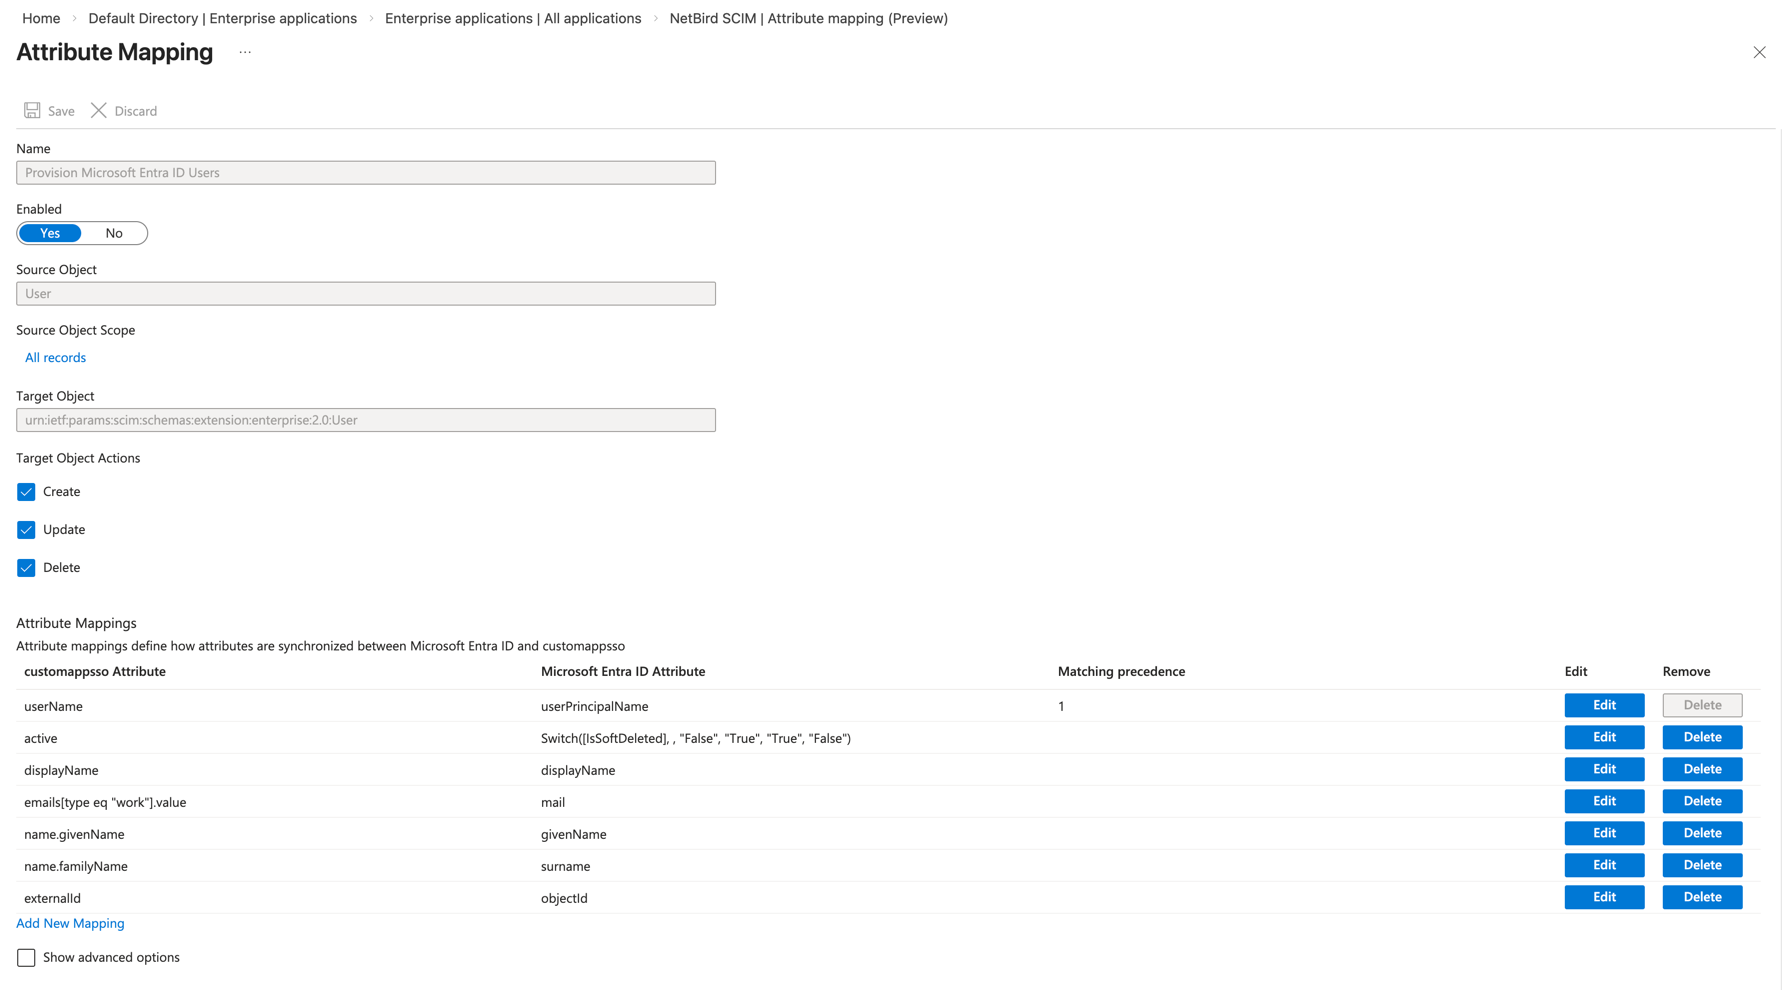
Remove all attribute mappings except for the following:
userNameactivedisplayNameemails[type eq "work"].valuename.givenNamename.familyNameexternalId
Click Save to apply the updated user attribute mapping configuration.

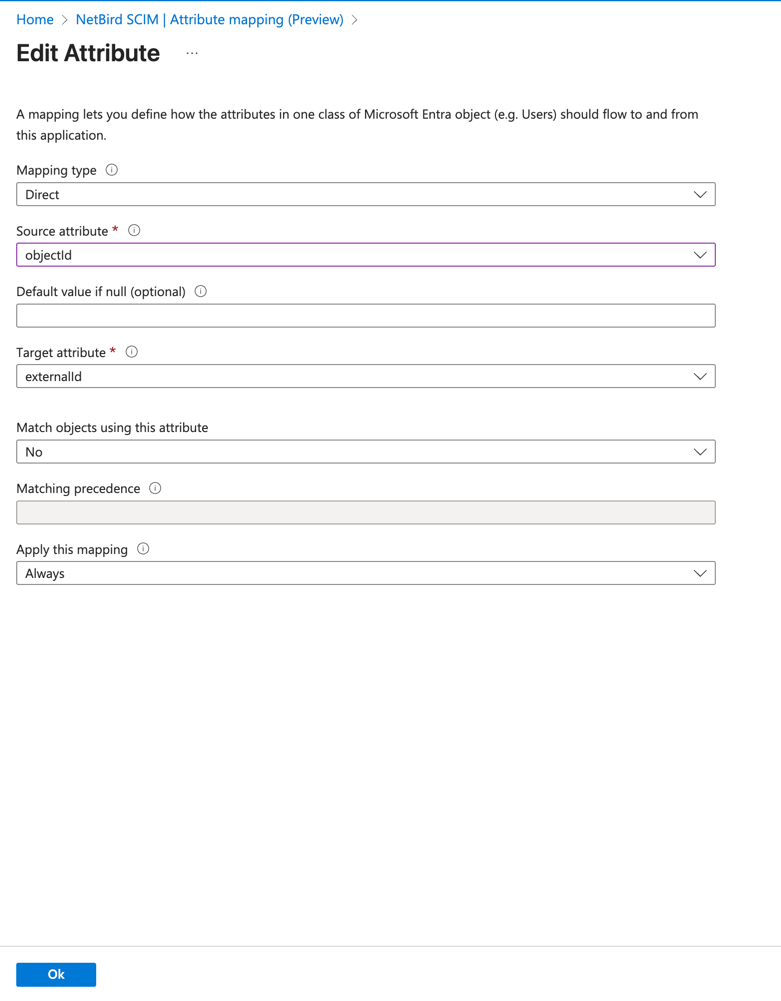
In the attribute mappings list, locate the externalId row and click Edit.
Change the Source attribute from mailNickname to objectId.
externalId is the stable identifier NetBird uses to link a SCIM user record to its Entra user. The Entra default of mailNickname is not guaranteed to be set on every user, is not guaranteed to be unique in the directory, and can change. objectId is the immutable Entra GUID and is the correct stable identifier. This ensures NetBird continues to recognize the same user across email address or display name changes.
Click Ok to save the change, then click Save to apply the final user attribute mapping configuration.
Assign Users and Groups
On the NetBird dashboard click the Continue → button. A new wizard screen will appear, offering step-by-step instructions for assigning users and groups.
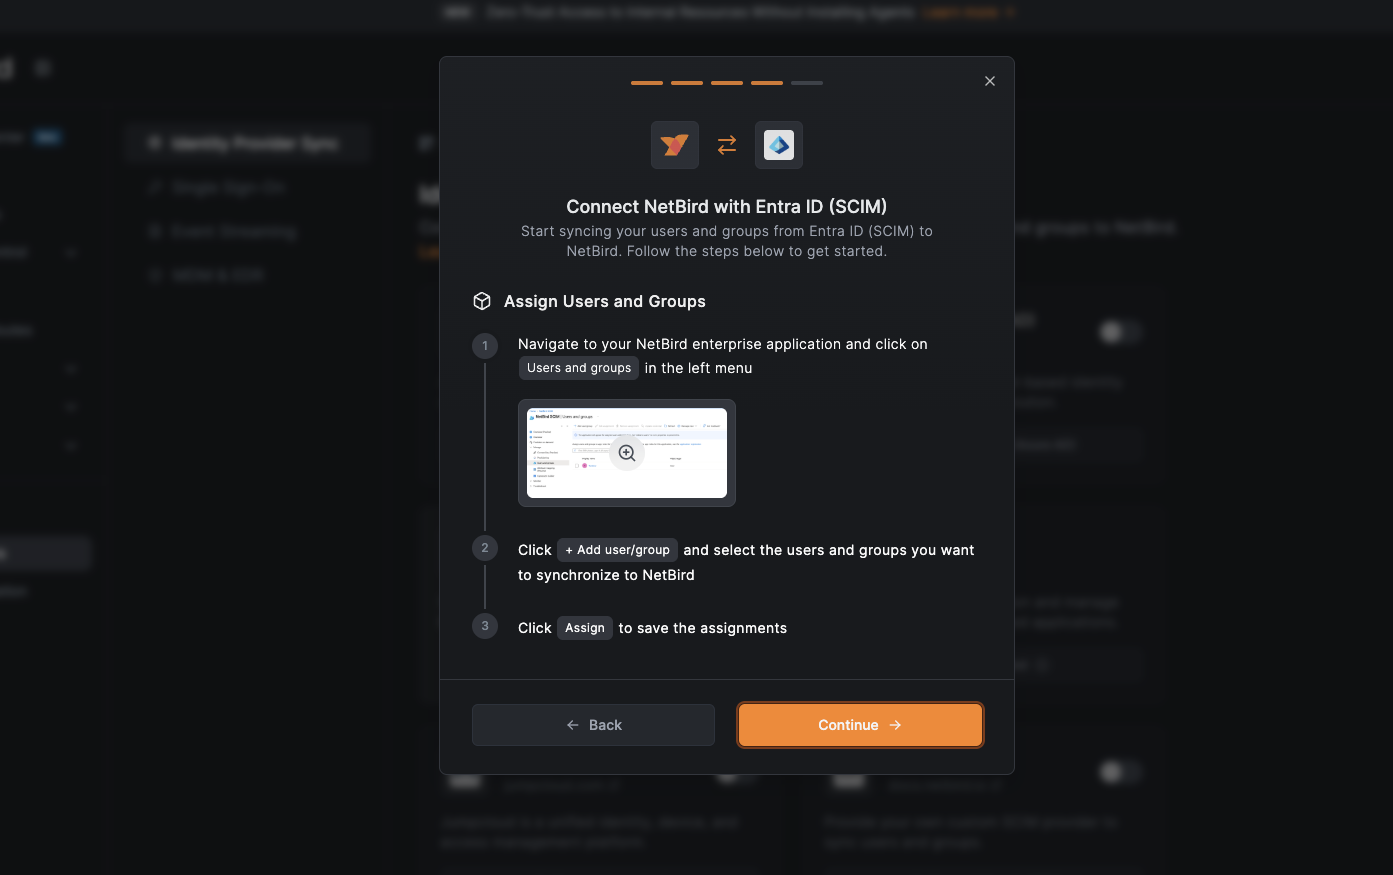
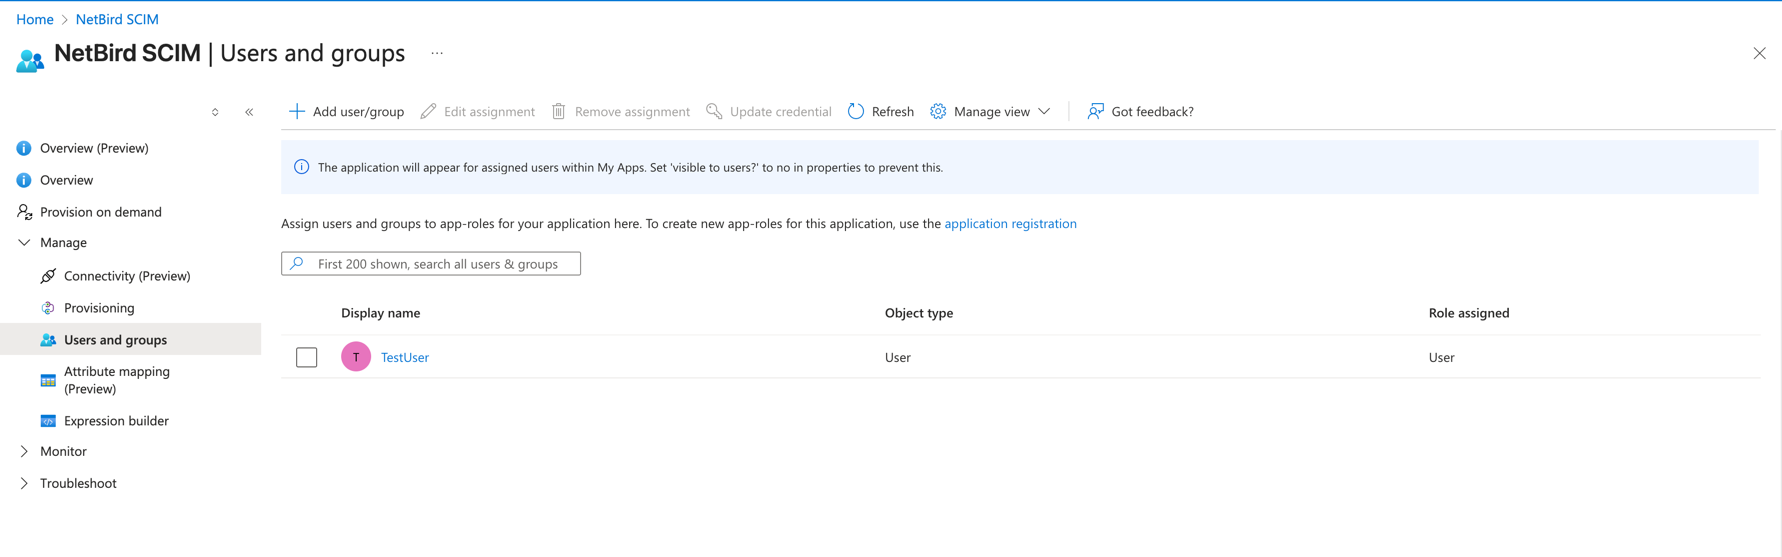
To enable SCIM synchronization of users and groups to NetBird, you need to assign them to the NetBird enterprise application.
In the Azure portal, navigate to your NetBird enterprise application:
- Click on
Users and groupsin the left menu - Click
+ Add user/group - Select the users and groups you want to synchronize to NetBird
- Click
Assignto save the assignments
Start Provisioning
On the NetBird dashboard click the Continue → button. A new wizard screen will appear, offering step-by-step instructions for starting the provisioning.
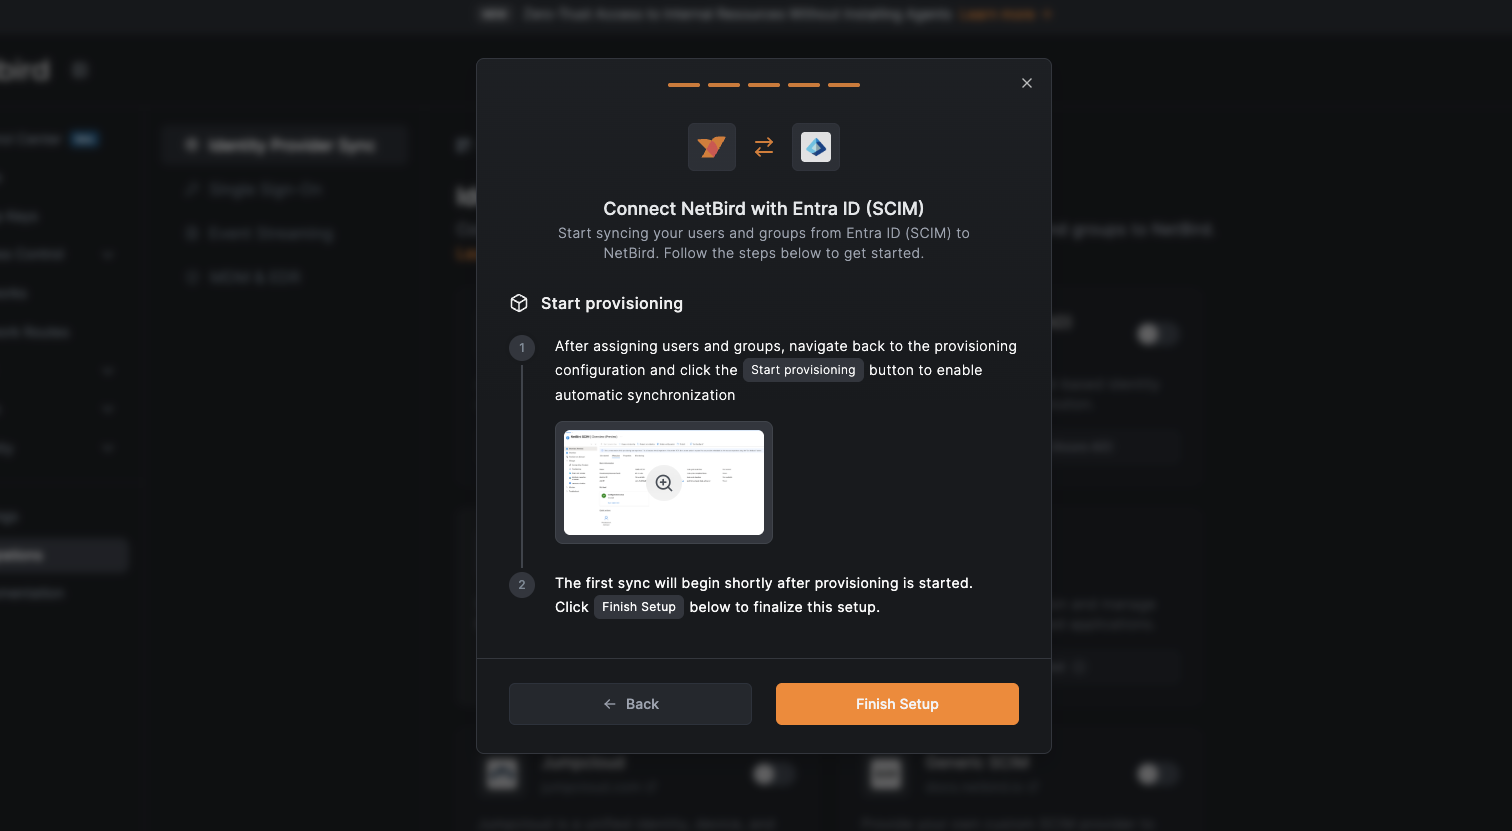
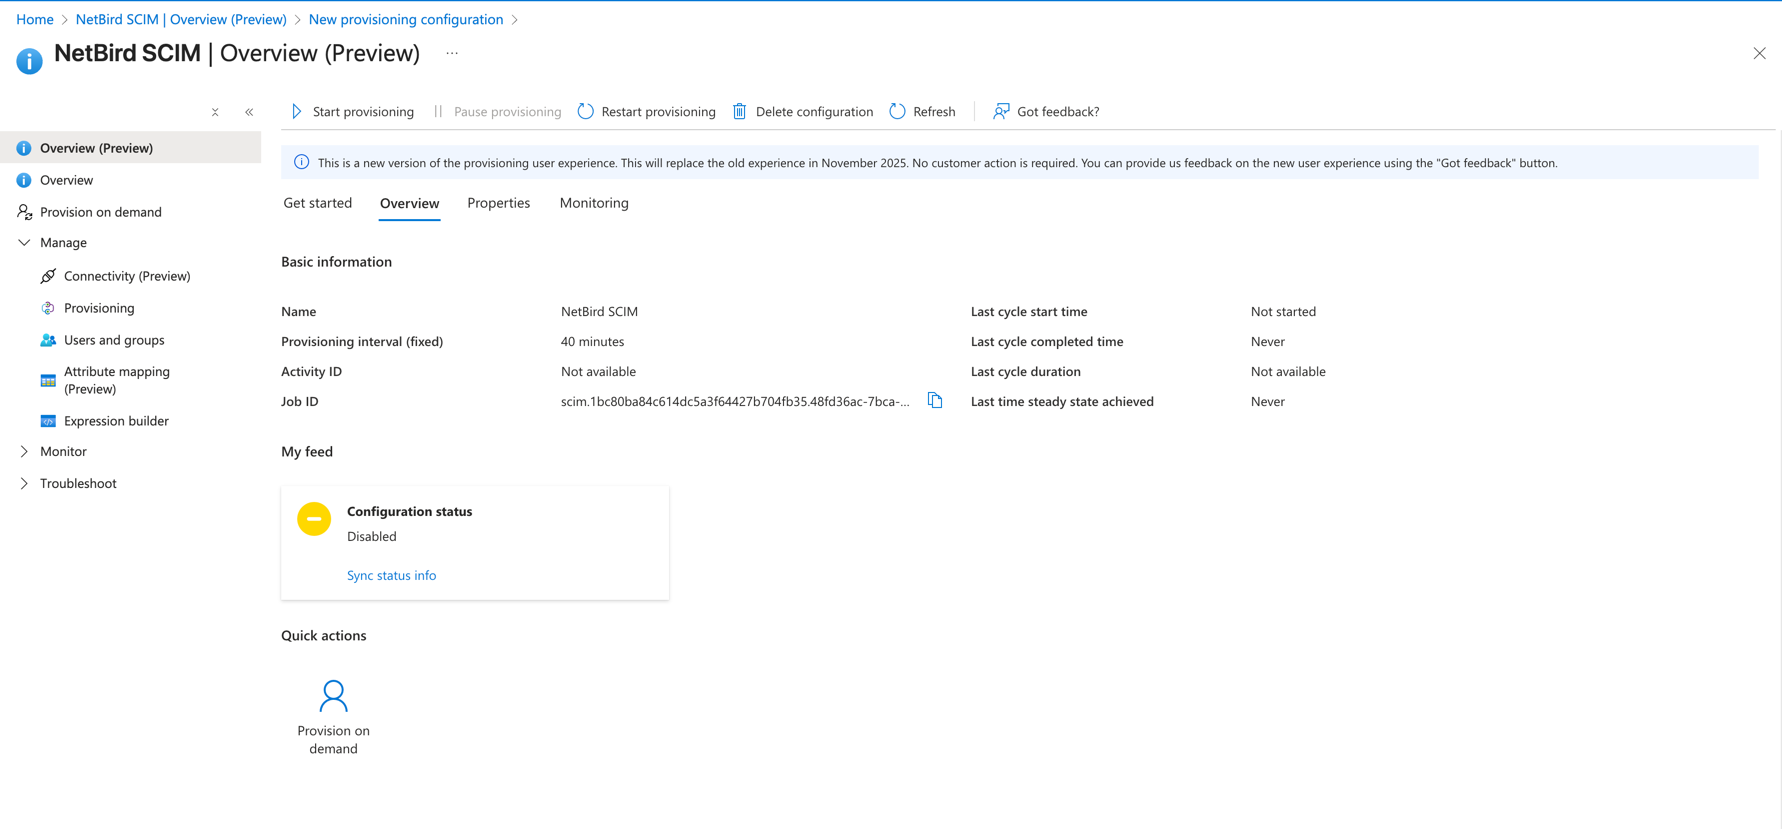
After assigning users and groups, navigate back to the provisioning configuration and click the Start provisioning button to enable automatic synchronization. The first sync will begin shortly after provisioning is started.

Once started, Microsoft Entra ID will automatically synchronize the assigned users and groups to NetBird.
After the initial sync, Microsoft Entra ID runs provisioning cycles approximately every 40 minutes by default. If you need to synchronize changes immediately, you can use Provisioning on demand to provision individual users or groups without waiting for the next cycle.
Click Finish Setup in the NetBird Dashboard to finalize the integration process.
Verify Synchronization
After starting provisioning, the synchronization will begin automatically. You can verify that users and groups
have been successfully synchronized by navigating to Team > Users in your NetBird dashboard.
SCIM provisioning will manage only resources that are created through Microsoft Entra ID. Any resources created directly in NetBird will not be managed by SCIM.
Synced groups will only be available for membership and will not change the role of user in NetBird
Configuration Settings
You can access some configuration settings inside the NetBird Dashboard. E.g. if you want to regenerate the authentication token or want to filter users and groups based on a specific prefix. Simply go to the Integrations page and click the settings icon of your integration.
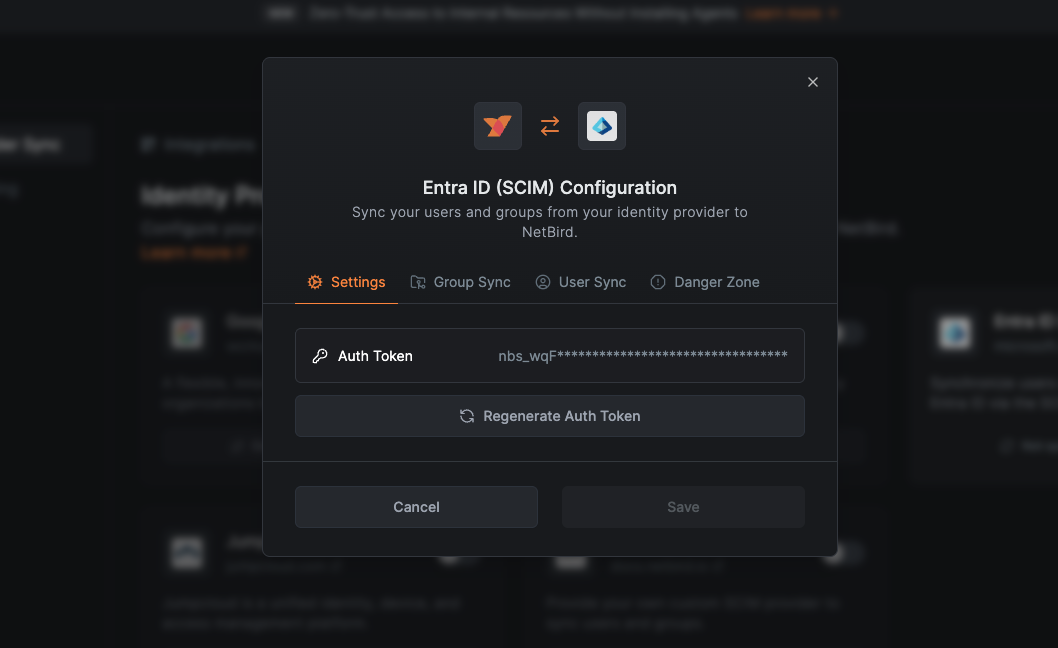
Regenerate Auth Token
If your authentication token has expired or you need to update it, click Regenerate Auth Token in the configuration window to generate a new token.
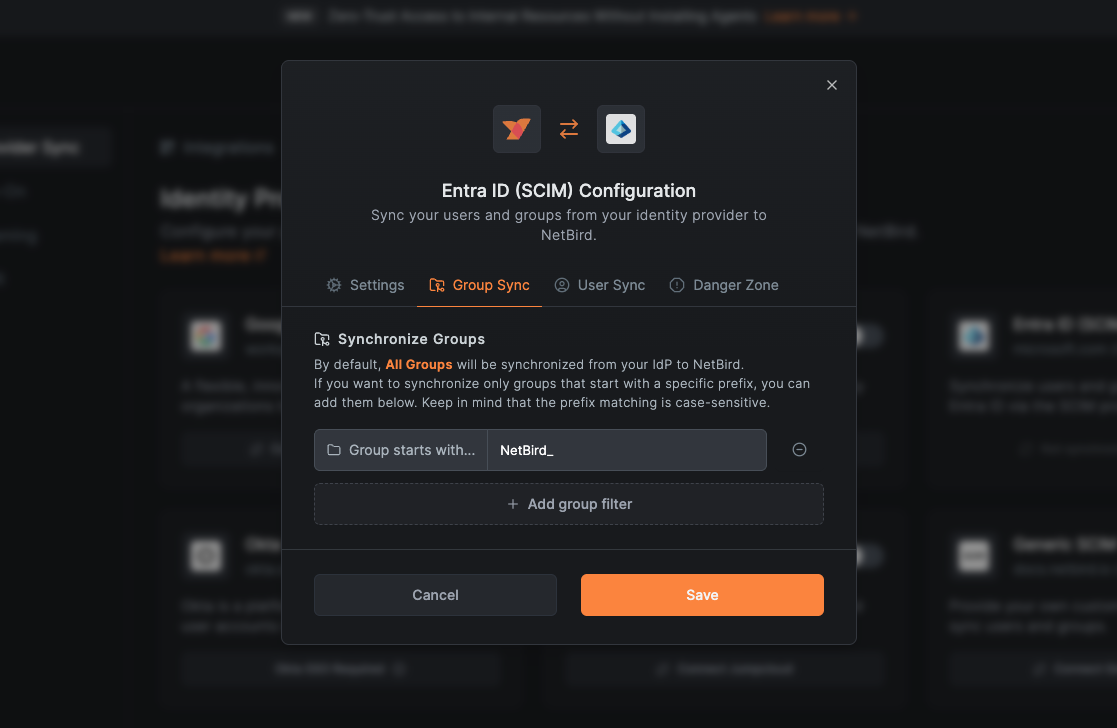
Groups to be synchronized
By default, all groups assigned to the NetBird application in Entra will be synchronized. If you want to synchronize only assigned groups that start with a specific prefix, you can specify them in the filter. Keep in mind that the prefix matching is case-sensitive.
Click Continue to proceed to the next step.
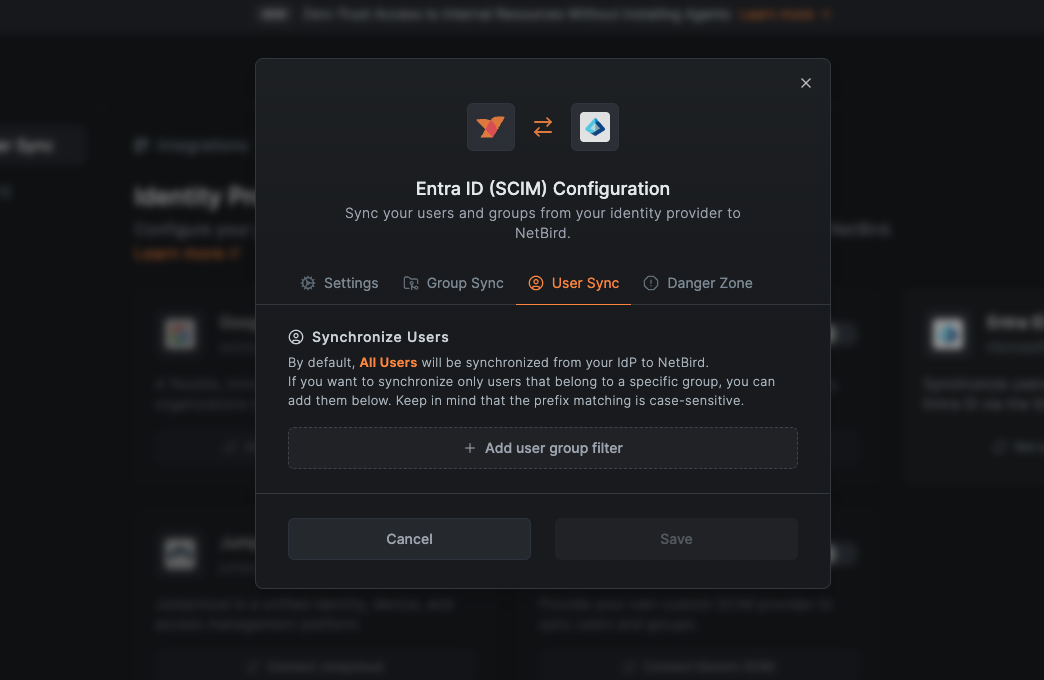
Users to be synchronized
By default, all users from the groups assigned to the NetBird application in Entra will be synchronized. If you want to further filter and synchronize only users from specific assigned groups, you can specify those group names in the filter. The group name matching is case-sensitive.