JumpCloud SSO with NetBird Self-Hosted (Legacy)
Updated
JumpCloud is a cloud-based directory platform that provides identity, access, and device management. It offers single sign-on (SSO), multi-factor authentication (MFA), and centralized user management.
Standalone Setup (Advanced)
NetBird includes built-in local user management powered by an embedded IdP, allowing you to create and manage users directly without requiring an external identity provider. You can also add multiple external identity providers alongside local users, giving users multiple login options.
We highly recommend using the simpler setup that adds JumpCloud as an external IdP directly in the NetBird Management Dashboard. This approach requires minimal configuration, works alongside local users, and doesn't require replacing your embedded IdP. See the Management Setup (Recommended) section in the main JumpCloud documentation.
The standalone setup below replaces your embedded IdP entirely and is only recommended for experienced JumpCloud administrators who need full control over authentication and user management.
Use JumpCloud as your primary identity provider instead of NetBird's embedded IdP. This option gives you full control over authentication and user management, is recommended for experienced JumpCloud administrators as it also requires additional setup and ongoing maintenance.
For most deployments, the embedded IdP is the simpler choice — it's built into NetBird, fully integrated, and requires minimal configuration to get started. For this implementation, go back up to the Management Setup (Recommended) section above.
Prerequisites
- JumpCloud account with admin permissions (sign up at https://jumpcloud.com/)
- Docker and Docker Compose for NetBird
Step 1: Create and Configure SSO Application
- Navigate to Admin Portal
- Click SSO Applications under USER AUTHENTICATION
- Click Add New Application → Custom Application
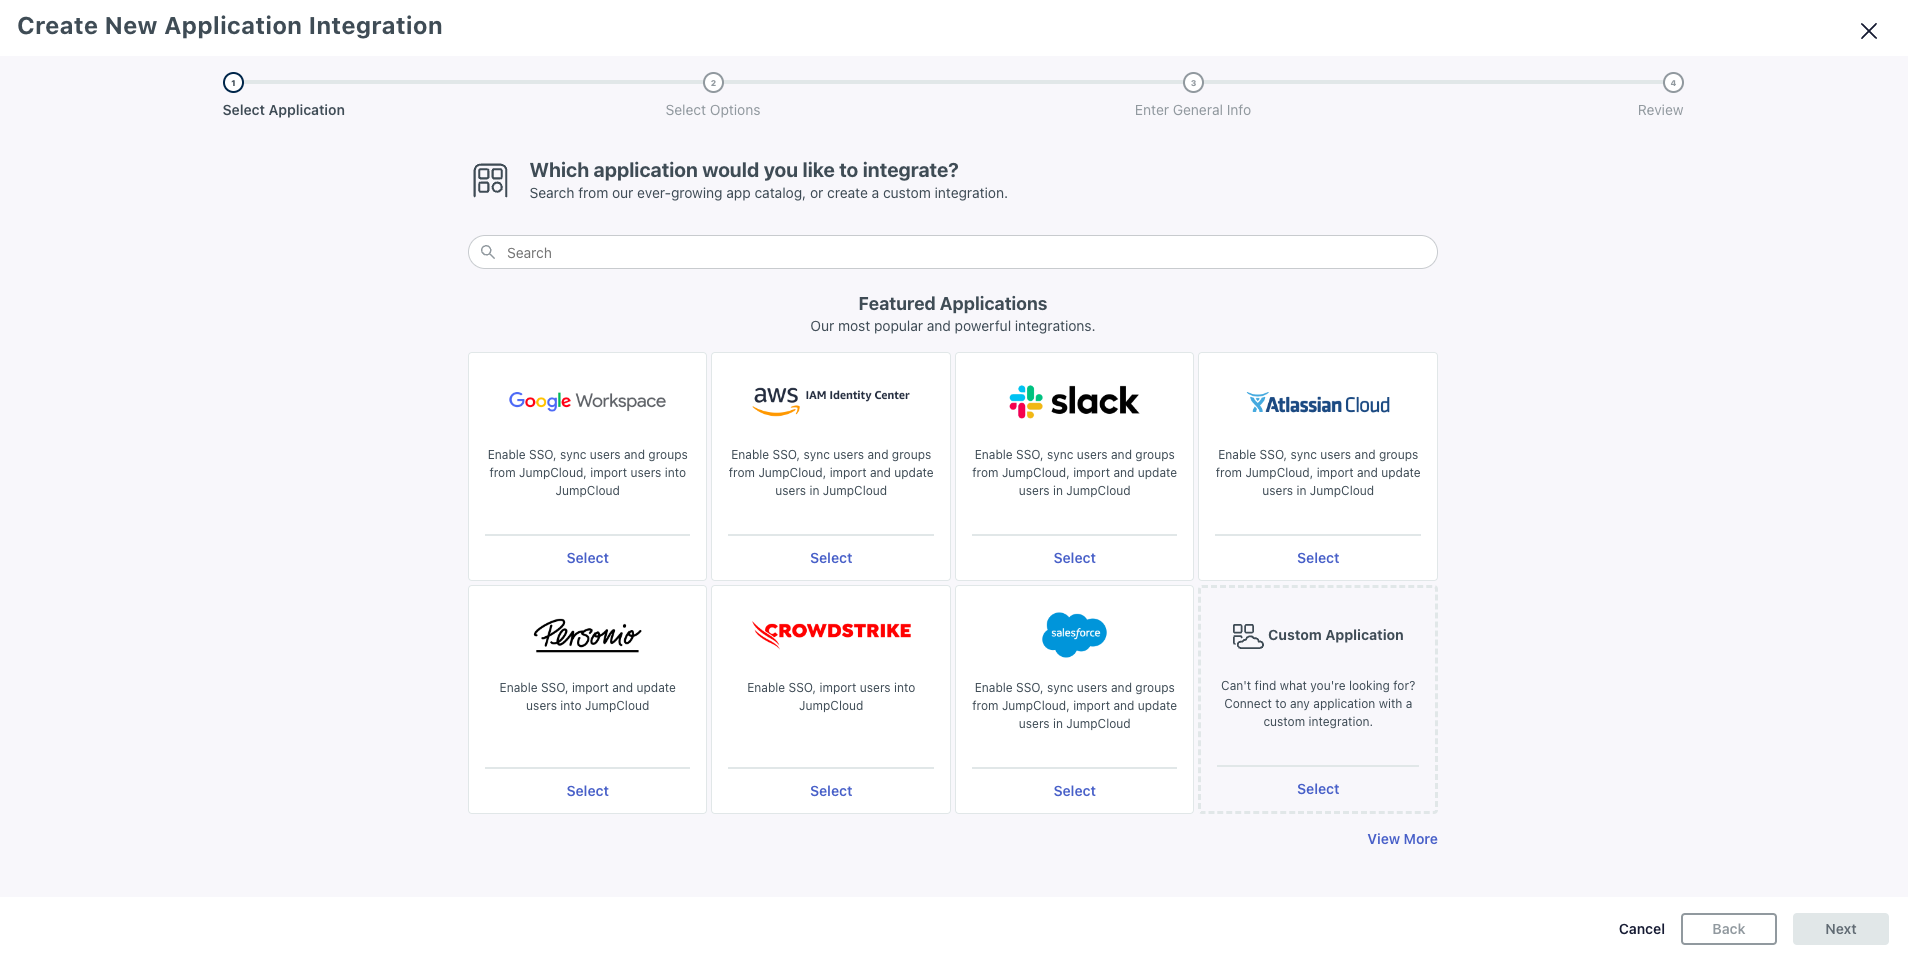
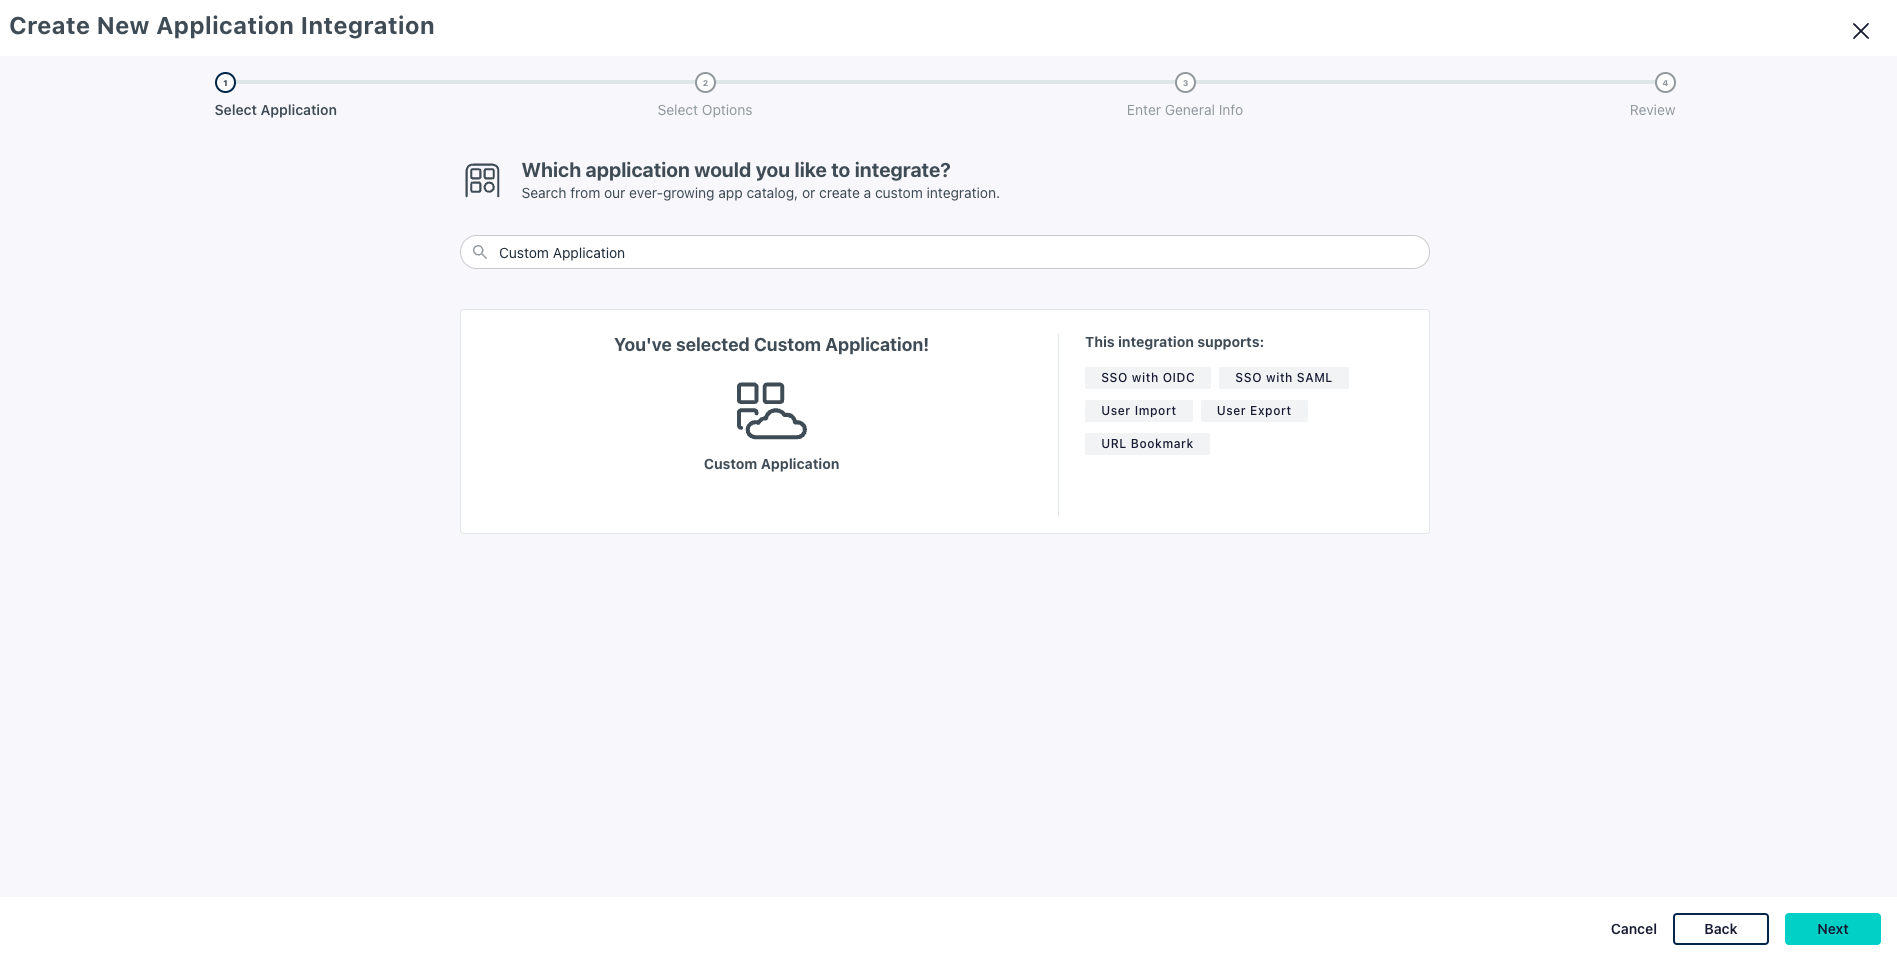
- Confirm Custom application selected and click Next
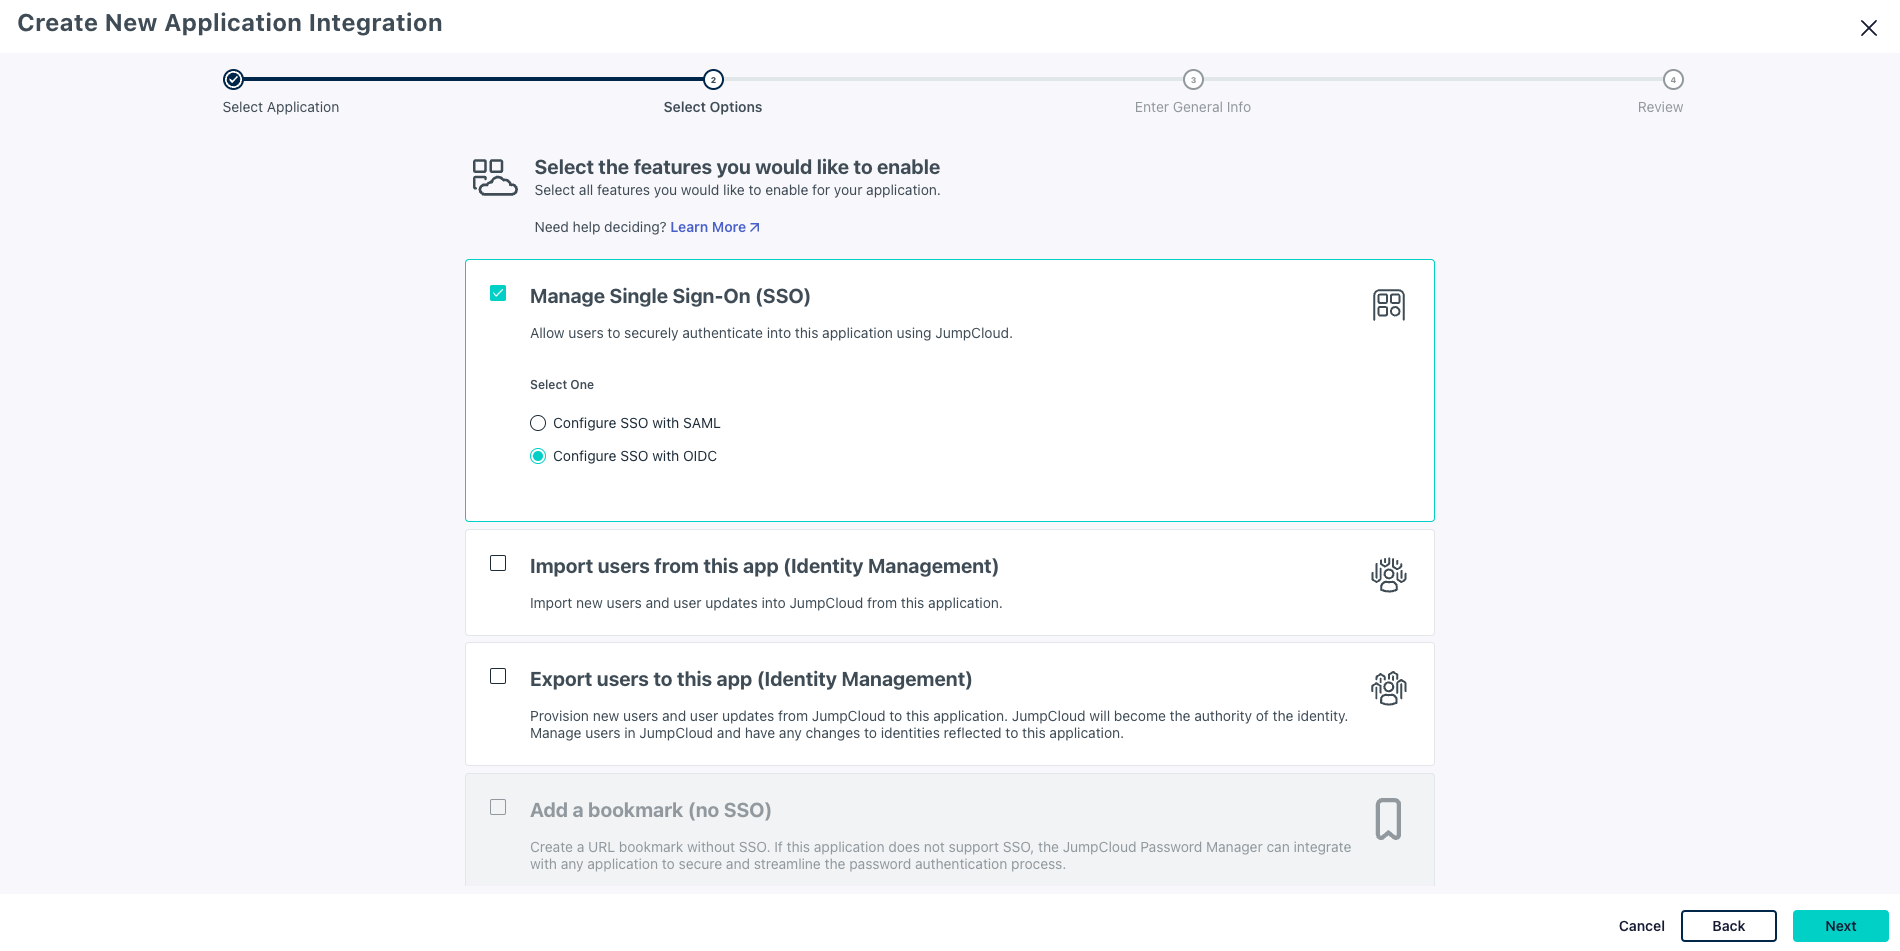
- Select Manage Single Sign-On (SSO) and check Configure SSO with OIDC
- Click Next
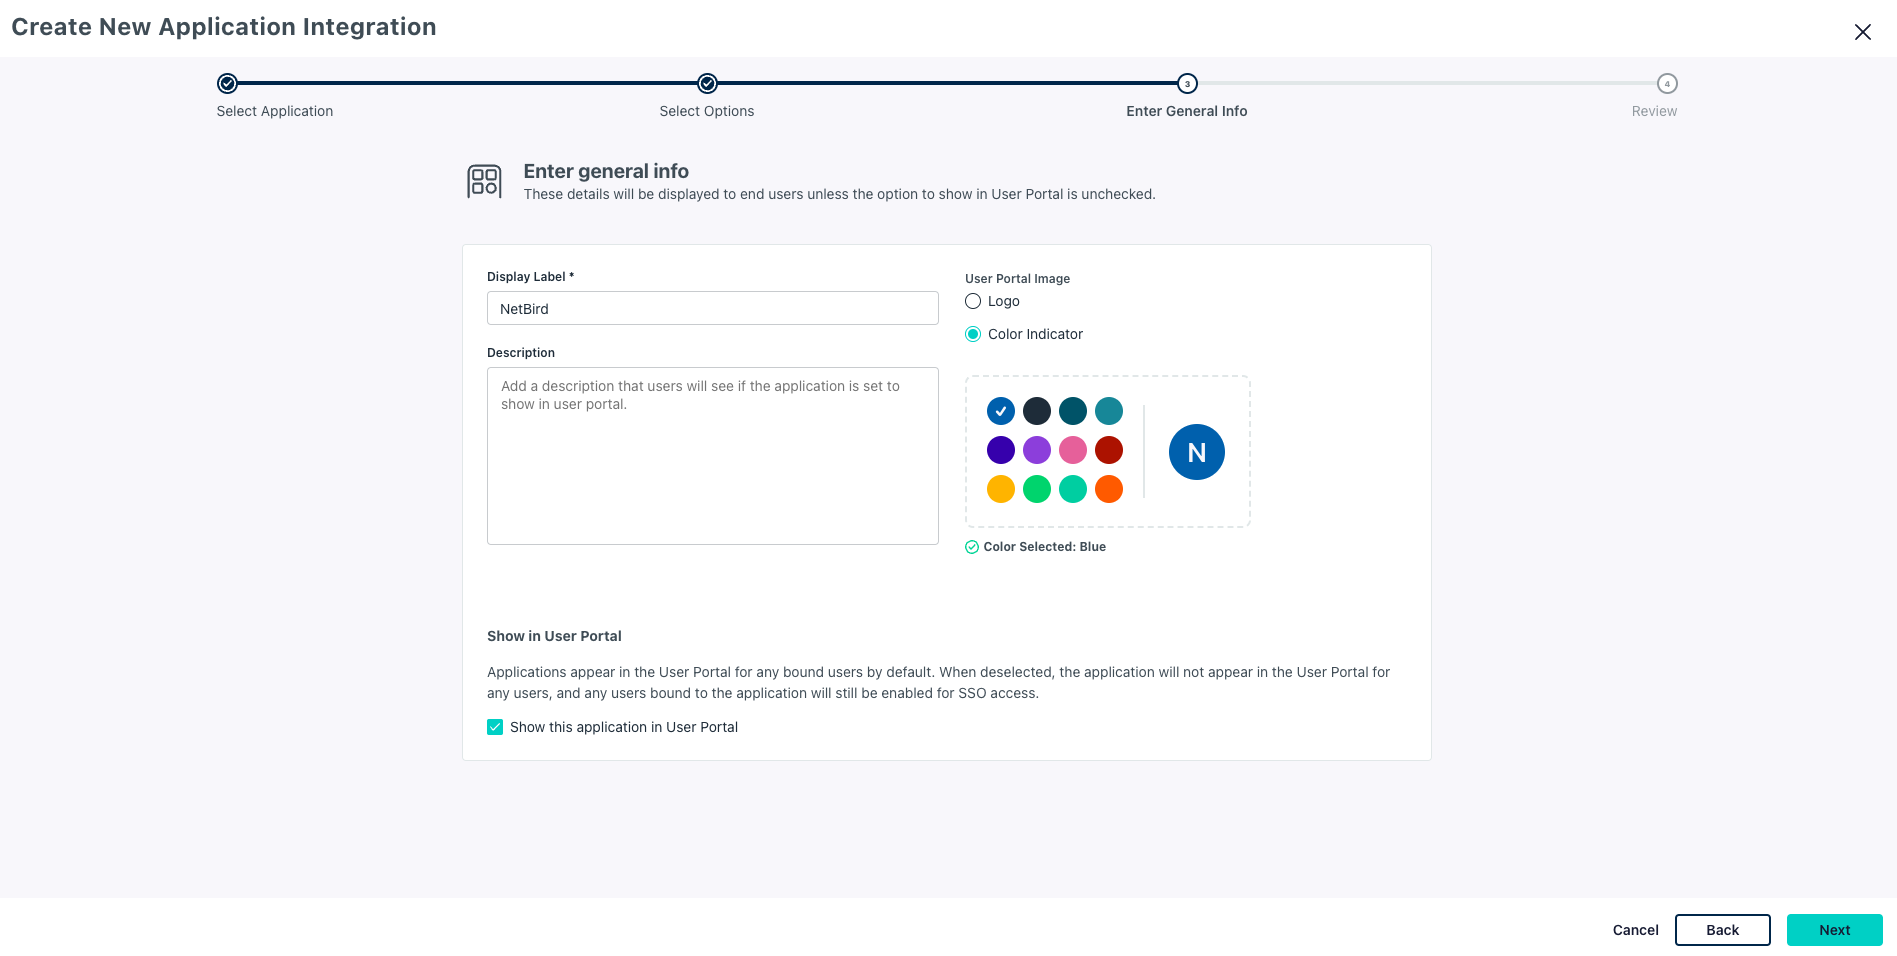
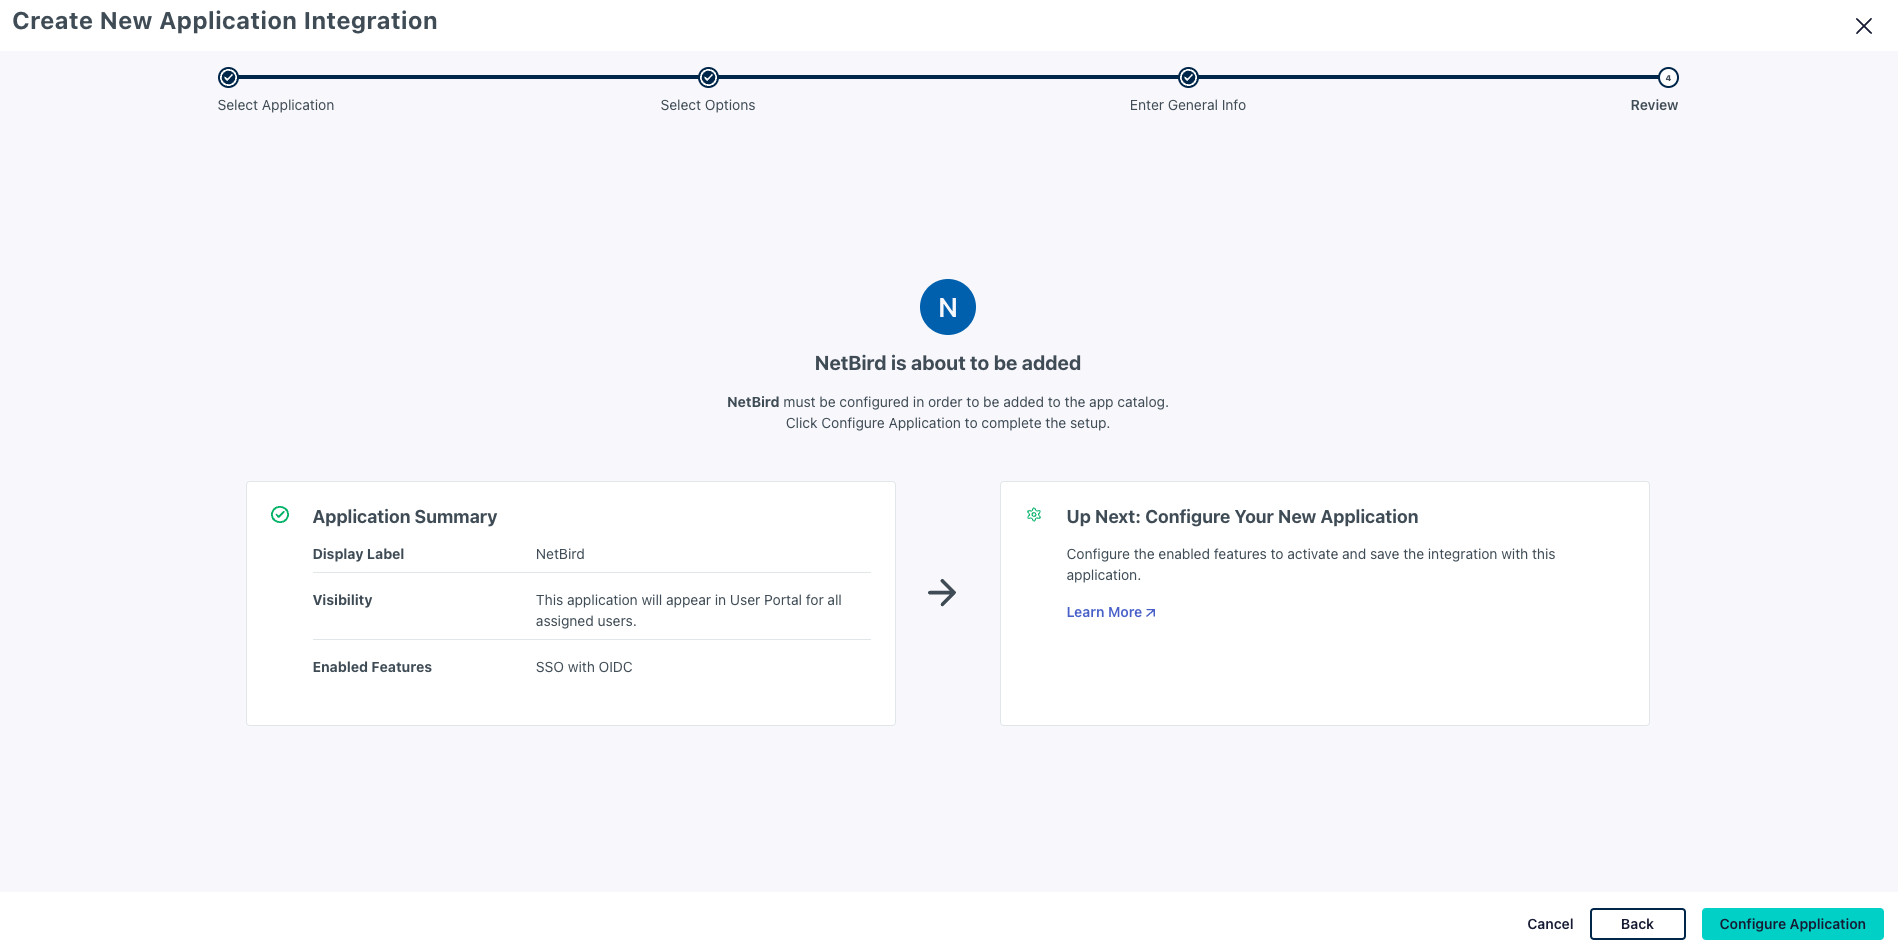
- Enter Display Label:
NetBird - Click Next
- Review and click Configure Application
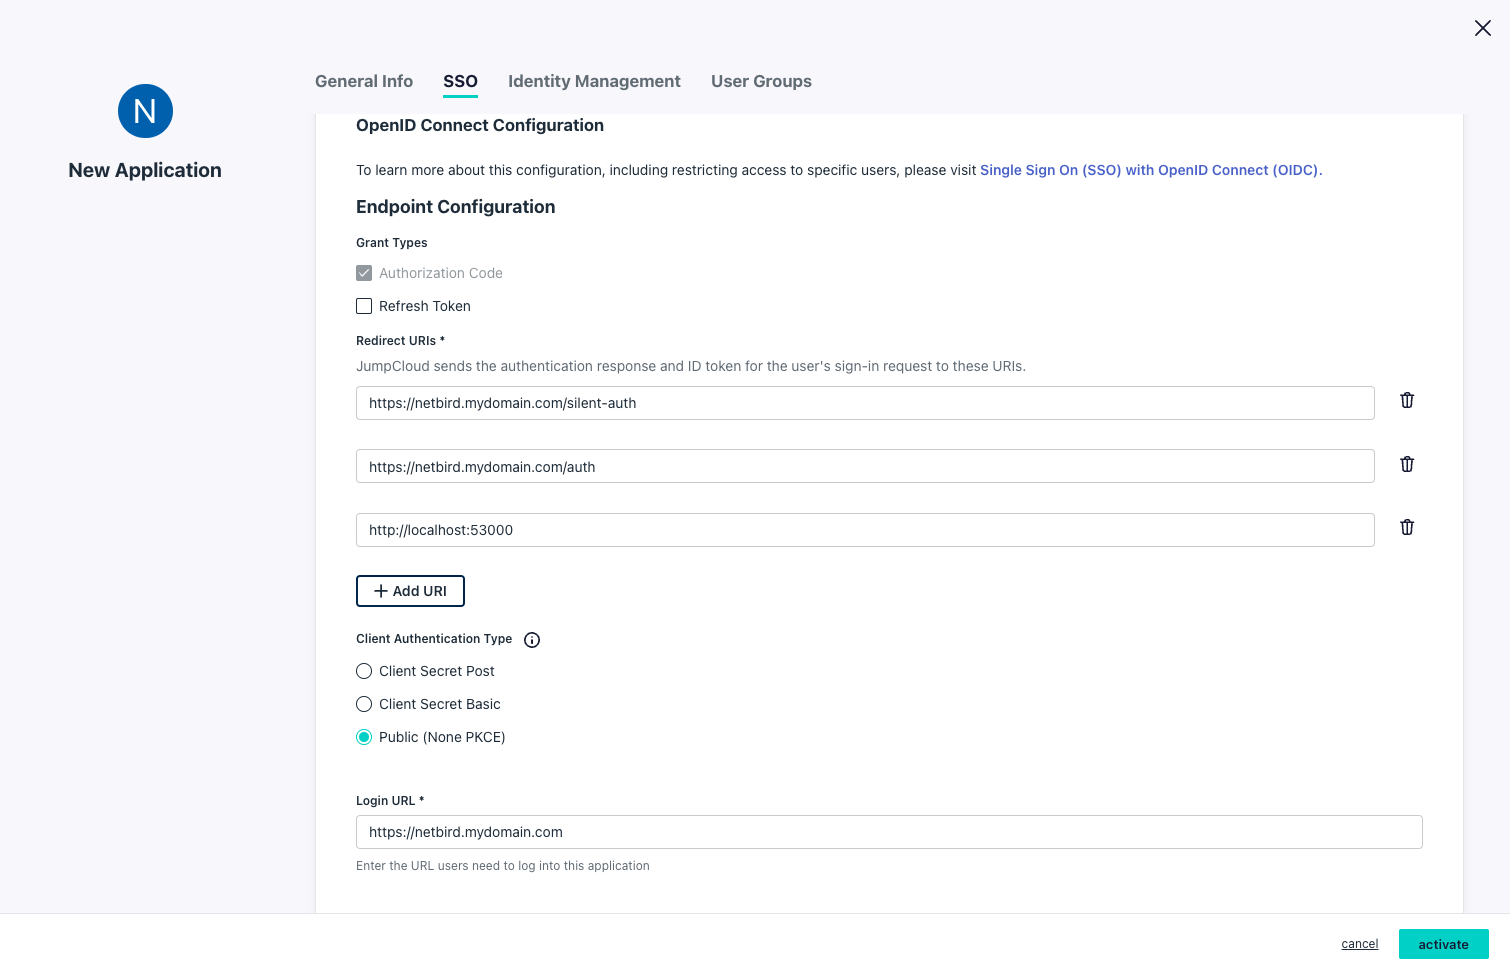
- On the SSO tab, configure:
- Redirect URIs:
https://<domain>/silent-authhttps://<domain>/authhttp://localhost:53000
- Client Authentication Type:
Public (None PKCE) - Login URL:
https://<domain>
- Redirect URIs:
- Under Attribute Mapping (optional):
- Standard Scopes:
Email,Profile
- Standard Scopes:

- Click User Groups tab and select groups that can access the application

- Click Activate
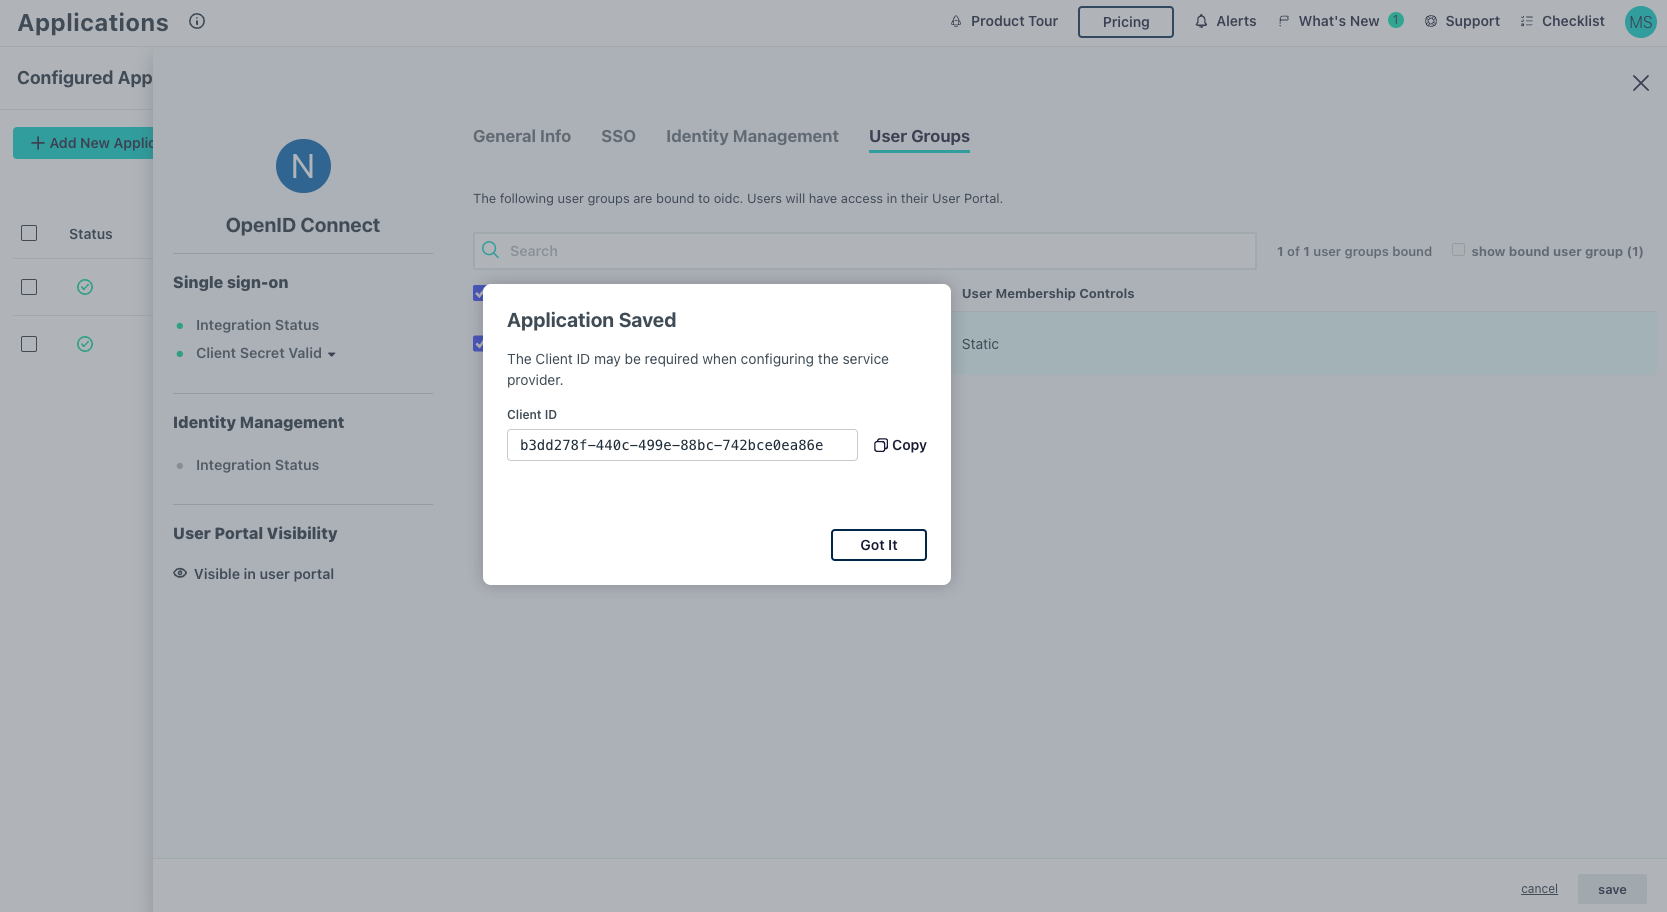
- Note the Client ID
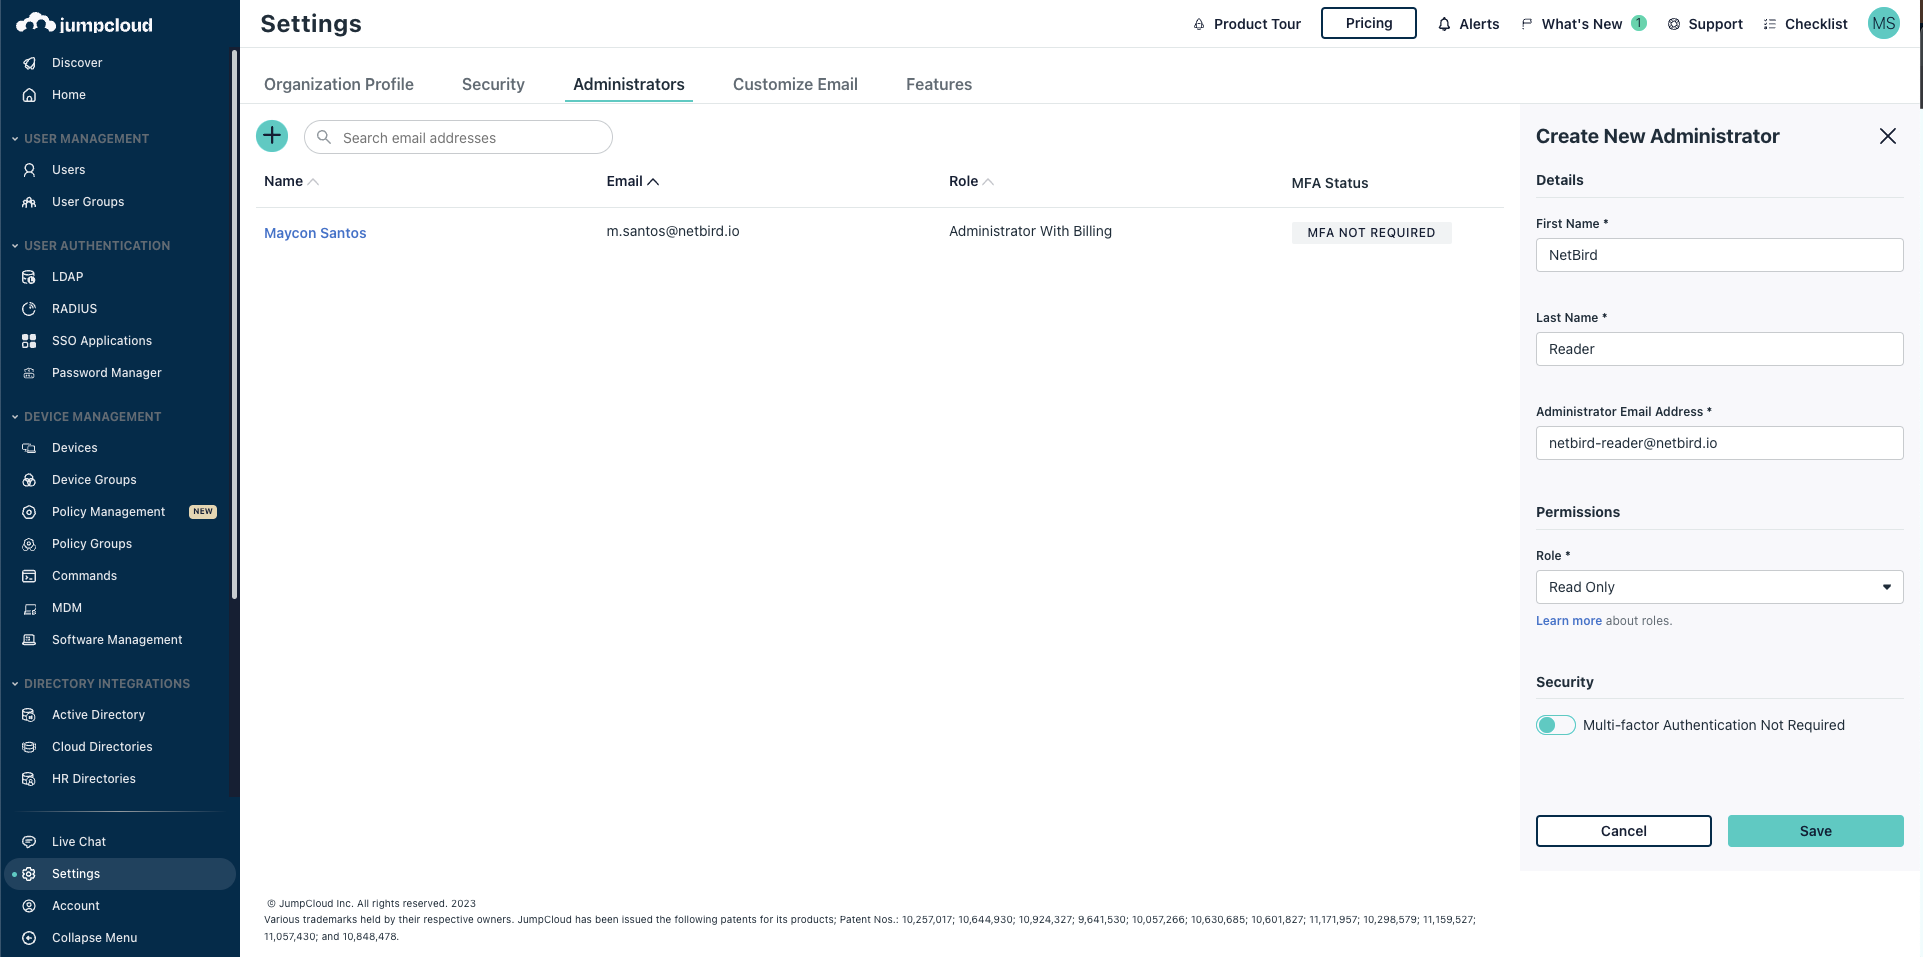
Step 2: Create Administrator for Integration
The NetBird management system requires an API token to get user information from JumpCloud.
If you already have an integration user, confirm it has the required role and skip to Step 3.
- Navigate to Admin Portal
- Go to Settings and click the add button (+)
- Fill in:
- First Name:
NetBird - Last Name:
Integration - Administrator Email:
netbird-user@<yourdomain> - Role:
Read Only
- First Name:
- Click Save
Optional: To enable automatic user deletion from JumpCloud when deleted from NetBird, add the --user-delete-from-idp flag to the management startup command and assign the Help Desk role instead.
- Check email for login instructions and set a password
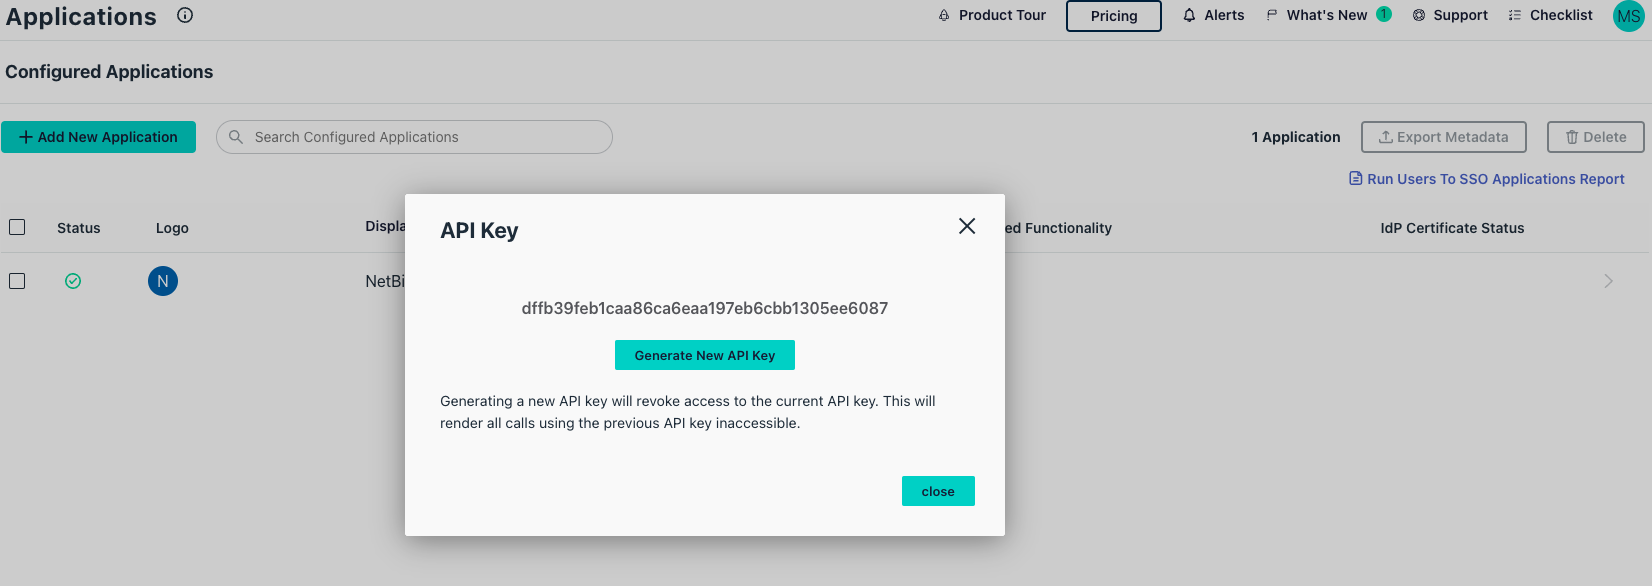
Step 3: Generate API Token
- Log in to Admin Portal with the integration user
- Click the account initials (top-right) → My API Key
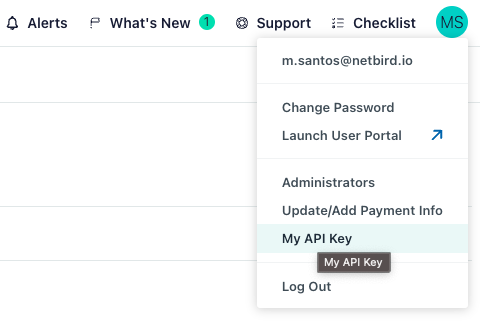
- If no key exists, click Generate New API Key
- Copy the API token
Step 4: Configure NetBird
Set properties in the setup.env file:
NETBIRD_DOMAIN="<YOUR_DOMAIN>"
NETBIRD_AUTH_OIDC_CONFIGURATION_ENDPOINT="https://oauth.id.jumpcloud.com/.well-known/openid-configuration"
NETBIRD_USE_AUTH0=false
NETBIRD_DASH_AUTH_USE_AUDIENCE=false
NETBIRD_AUTH_AUDIENCE="<CLIENT_ID>"
NETBIRD_AUTH_SUPPORTED_SCOPES="openid profile email offline_access"
NETBIRD_AUTH_CLIENT_ID="<CLIENT_ID>"
NETBIRD_AUTH_REDIRECT_URI="/auth"
NETBIRD_AUTH_SILENT_REDIRECT_URI="/silent-auth"
NETBIRD_TOKEN_SOURCE="idToken"

NETBIRD_AUTH_DEVICE_AUTH_PROVIDER="none"

NETBIRD_MGMT_IDP="jumpcloud"
NETBIRD_IDP_MGMT_EXTRA_API_TOKEN="<API_TOKEN>"
Step 5: Continue with NetBird Setup
You've configured all required resources in JumpCloud. Continue with the NetBird Self-hosting Guide.
Troubleshooting
"Issuer did not match" or "Unauthenticated" error
If you see an error like:
FATL ... oidc: issuer did not match the issuer returned by provider, expected "https://oauth.id.jumpcloud.com" got "https://oauth.id.jumpcloud.com/"
This means there's a trailing slash mismatch in the Issuer URL. OIDC validation is strictly character-for-character.
The Cause:
- Configured in NetBird:
https://oauth.id.jumpcloud.com(missing trailing slash) - Returned by JumpCloud:
https://oauth.id.jumpcloud.com/(has trailing slash)
Because the service fails to initialize the IDP manager, the Management container will often crash or restart loop, making it impossible to fix this via the Web UI.
Resolution:
If you can still access NetBird Dashboard:
- Navigate to Settings → Identity Providers
- Edit the JumpCloud identity provider
- Change the Issuer field to exactly
https://oauth.id.jumpcloud.com/(with trailing slash) - Click Save
- Restart the management container:
docker restart netbird-management
If you cannot access the dashboard (locked out), you must fix it directly in the SQLite database:
-
Locate the Volume:
docker volume inspect root_netbird_management # Look for "Mountpoint", e.g., /var/lib/docker/volumes/root_netbird_management/_data -
Access the Database:
cd /var/lib/docker/volumes/root_netbird_management/_data # Backup the database first! cp idp.db idp.db.bak # Open the database sqlite3 idp.db -
Update the Issuer URL: Inside the SQLite prompt, run the following:
-- Check current config to confirm missing slash SELECT config FROM connector; -- Update the config to add trailing slash to match JumpCloud UPDATE connector SET config = replace(config, 'jumpcloud.com"', 'jumpcloud.com/"') WHERE config LIKE '%jumpcloud.com"%'; -- Verify the change SELECT config FROM connector; -- Exit .quit -
Restart Service:
docker restart netbird-management
The service should now start successfully, and the error should be resolved.
"Connector failed to initialize" error
- Ensure Attribute Mapping has both Email and Profile scopes enabled
- Verify at least one User Group is assigned to the application before activation
- Check that Redirect URIs exactly matches the URL from NetBird (no trailing slashes)
- Ensure Client Authentication Type is set to
Client Secret POST - Verify Login URL matches your NetBird domain exactly
- Make sure the application is Activated and you have the correct Client ID and Client Secret
- Remove any duplicate attributes in Attribute Mapping (e.g.,
emailandemail_verified)
"Invalid redirect URI" error
- Ensure all redirect URIs are configured in JumpCloud
- Check for trailing slashes
- Verify URLs match exactly
Users can't access NetBird
- Verify the user belongs to an assigned user group
- Check that the user group is assigned to the NetBird application
API token not working
- Verify the integration user has appropriate permissions
- Generate a new API token if the current one is invalid
Device authorization not available
- JumpCloud has limited device auth support
- Set
NETBIRD_AUTH_DEVICE_AUTH_PROVIDER="none"
NetBird includes built-in local user management powered by an embedded IdP, allowing you to create and manage users directly without requiring an external identity provider. You can also add multiple external identity providers alongside local users, giving users multiple login options.
We highly recommend using the simpler setup that adds JumpCloud as an external IdP directly in the NetBird Management Dashboard. This approach requires minimal configuration, works alongside local users, and doesn't require replacing your embedded IdP. See the Management Setup (Recommended) section in the main JumpCloud documentation.