Access Home Devices (VPN-to-Site)
This guide shows how to access your home network devices from anywhere using the Networks feature.
For the mental model — see How Routing Peers Work — Mental model.
What You'll Achieve
After following this guide, you'll be able to access your home NAS, media server, home automation, or any device on your home network from your laptop or phone—anywhere in the world.
Your Laptop ──────► NetBird Tunnel ──────► Routing Peer ──────► Home NAS
  (peer)                                    (at home)           (no NetBird)
Prerequisites
- A NetBird cloud account or self-hosted instance
- NetBird installed on your laptop or phone (installation guide)
- An always-on device at home to serve as the routing peer (Raspberry Pi, NAS with Docker, old laptop, etc.)
Step 1: Connect Your Laptop to NetBird
If you haven't already, install NetBird on your laptop and connect:
- Download NetBird from app.netbird.io/install
- Run the application and click Connect in the system tray
- Complete the sign-up process in your browser
- Verify your device appears in the NetBird dashboard under Peers
Step 2: Add Your Laptop to a User Group
- In the Peers section of the dashboard, select your laptop peer
- Under Assigned Groups, add a new group: "Home Users"
Step 3: Find Your Home Subnet
Before configuring NetBird, identify your home network's subnet.
On your routing peer device, run:
# Linux
ip route | grep -E "^[0-9]"

# macOS
netstat -rn | grep default
Look for your local subnet, typically something like 192.168.1.0/24 or 192.168.0.0/24.
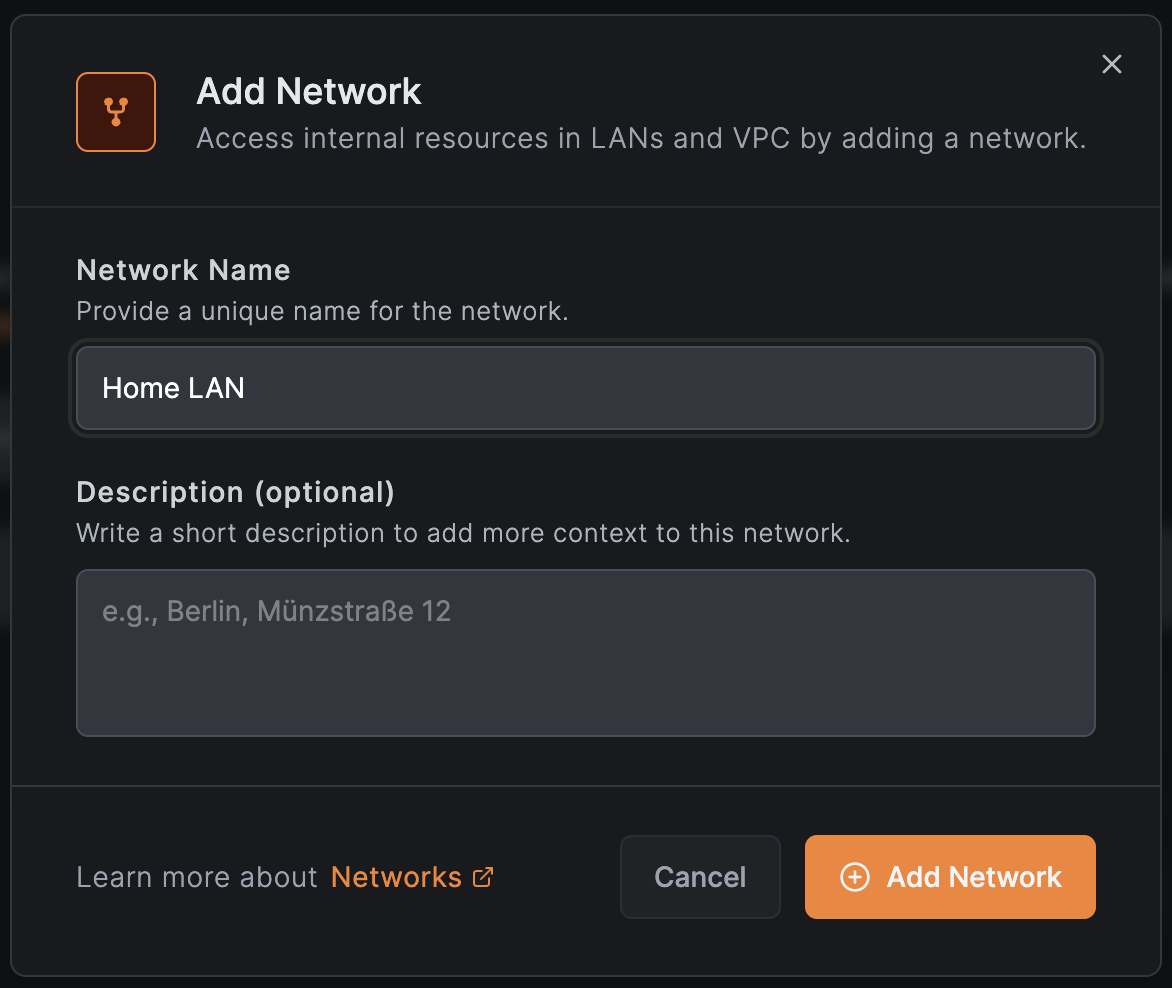
Step 4: Create a Network for Your Home LAN
- Go to Networks in the NetBird dashboard
- Click Add Network
- Name it "Home LAN" and click Save
Step 5: Add Your Home Subnet as a Resource
- In your new network, click Add Resource
- In the Resource tab, enter a name like "Home Subnet"
- Enter your home subnet (e.g.,
192.168.1.0/24) - Expand Additional Options and under Resource Groups, create a group called
home-lan - Click Continue to proceed to the Access Control tab
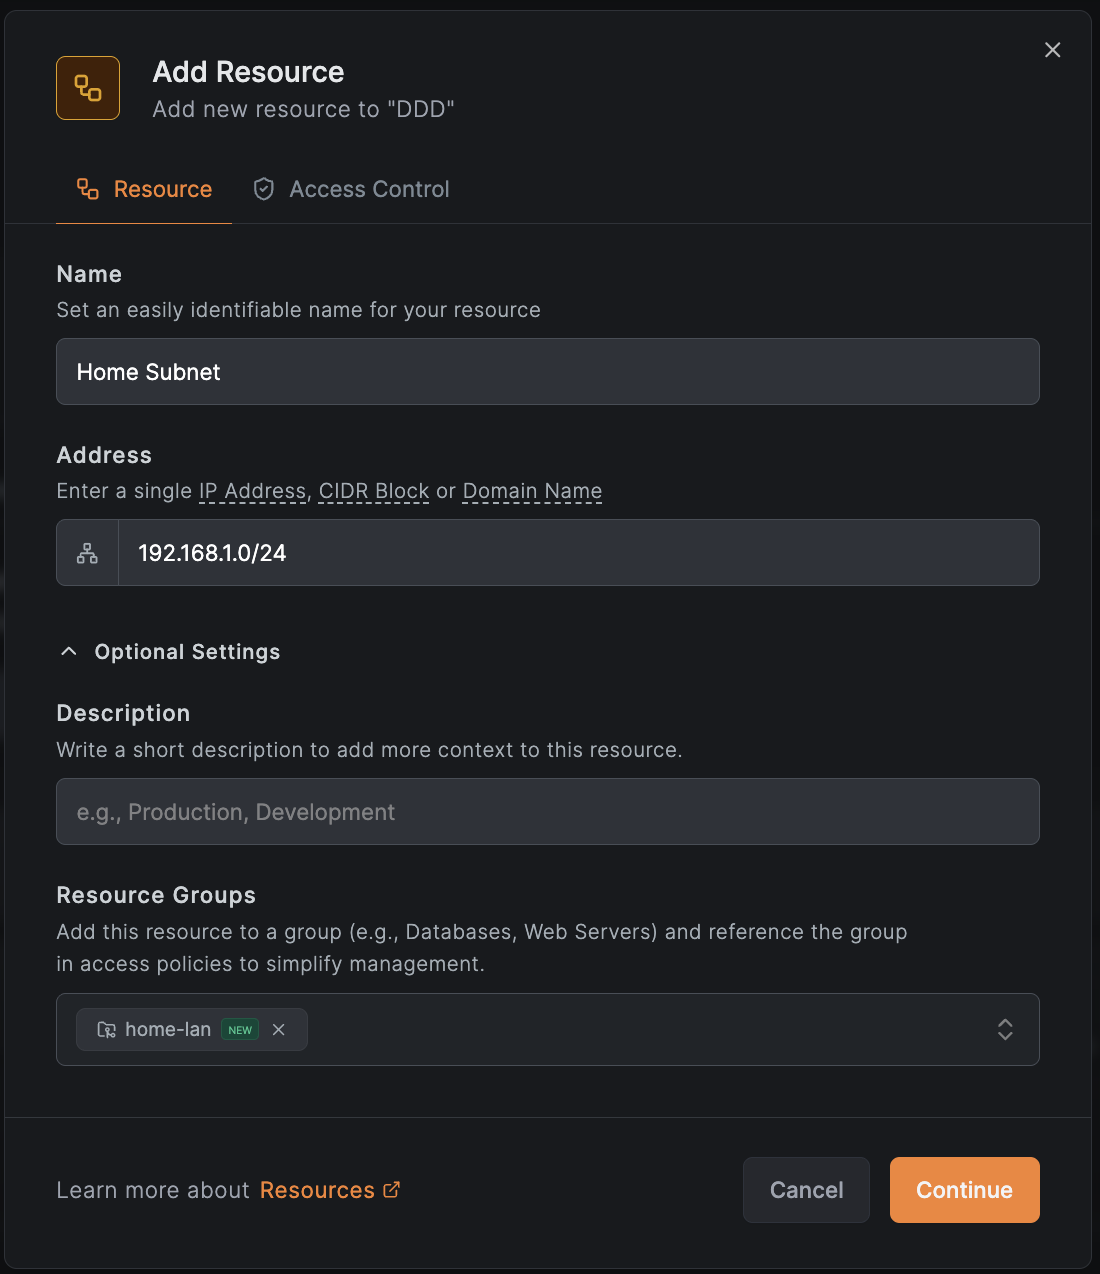
For more granular access, add specific device IPs instead of the entire subnet. For example, add 192.168.1.50/32 to only allow access to your NAS.
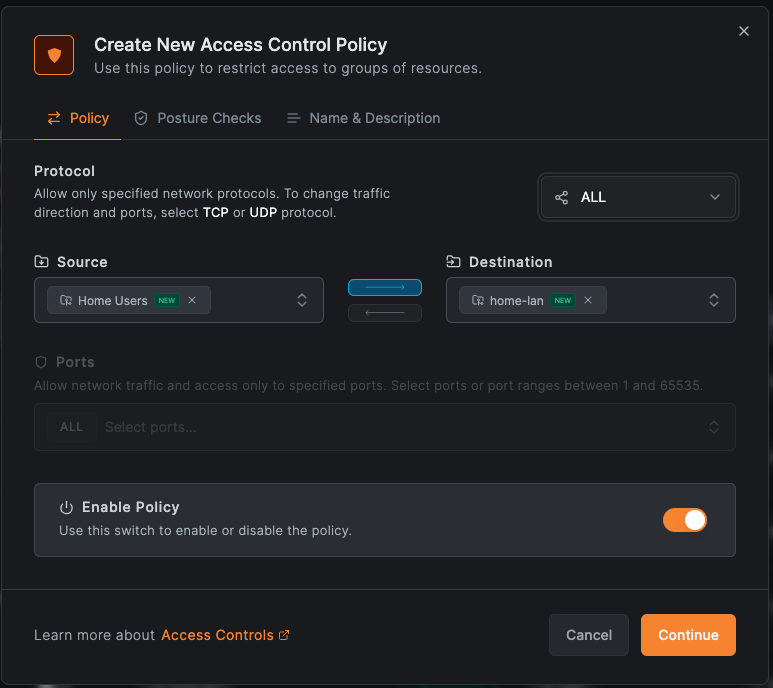
Step 6: Create an Access Policy
- In the Access Control tab, click Add Policy
- Set Source to "Home Users"
- Set Destination to
home-lan - Set Protocol to All
- Name it "Home LAN Access" and click Add Policy
- Click Add Resource to save the resource with its policy
Step 7: Set Up the Routing Peer
The routing peer forwards traffic from NetBird to your local network. Use any always-on device:
- Raspberry Pi
- Synology NAS
- Apple TV/Android TV
- Home server
Install NetBird on your routing peer:
- In the NetBird dashboard, go to Setup Keys
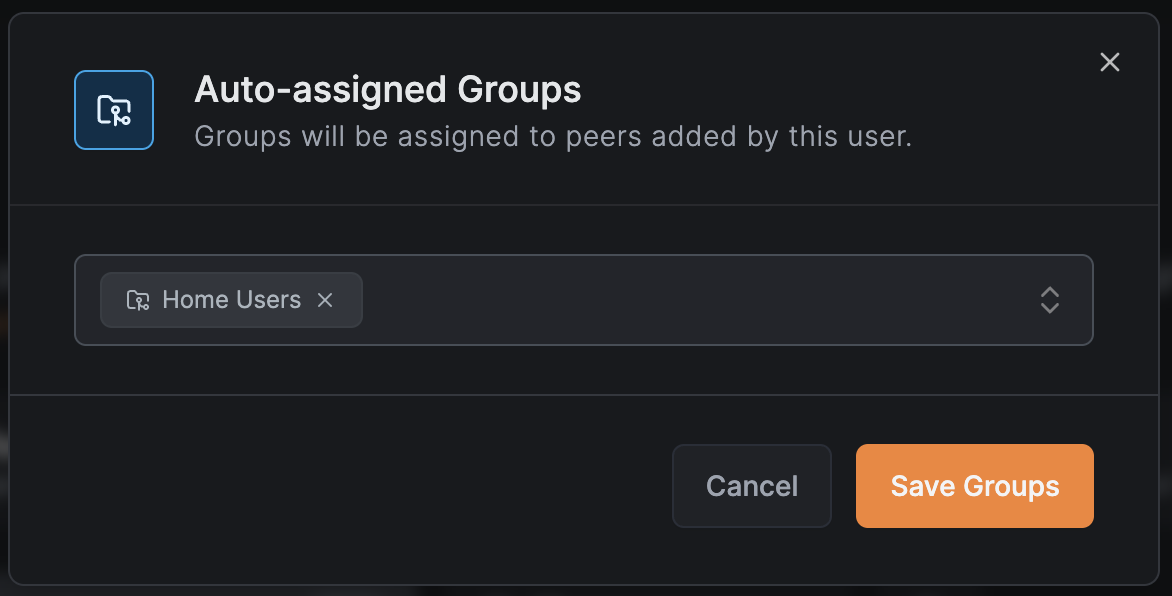
- Create a new setup key (one-time use recommended). Add
home-lanto Auto-assigned groups and click Create Setup Key.
You can also add groups to peers manually after setup. Go to Peers, select the peer, and add groups under Assigned Groups.
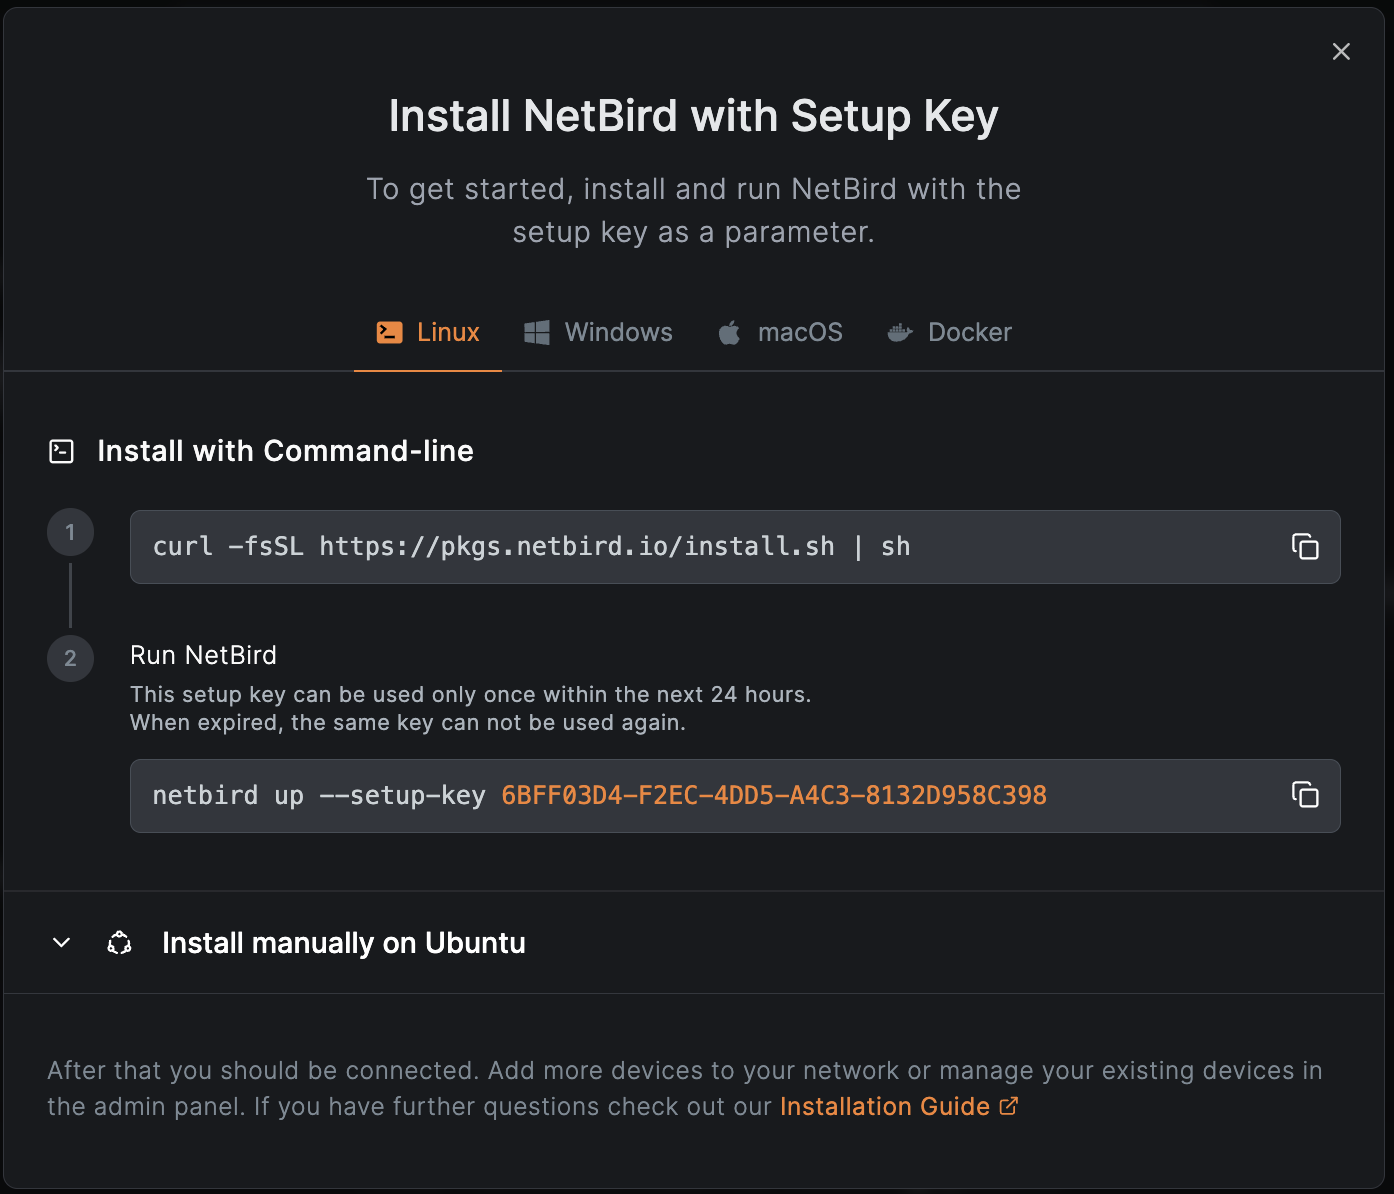
- On your routing peer, run:
curl -fsSL https://pkgs.netbird.io/install.sh | sh
sudo netbird up --setup-key YOUR_SETUP_KEY
- In the Networks view, click Add Routing Peer on your Home LAN network
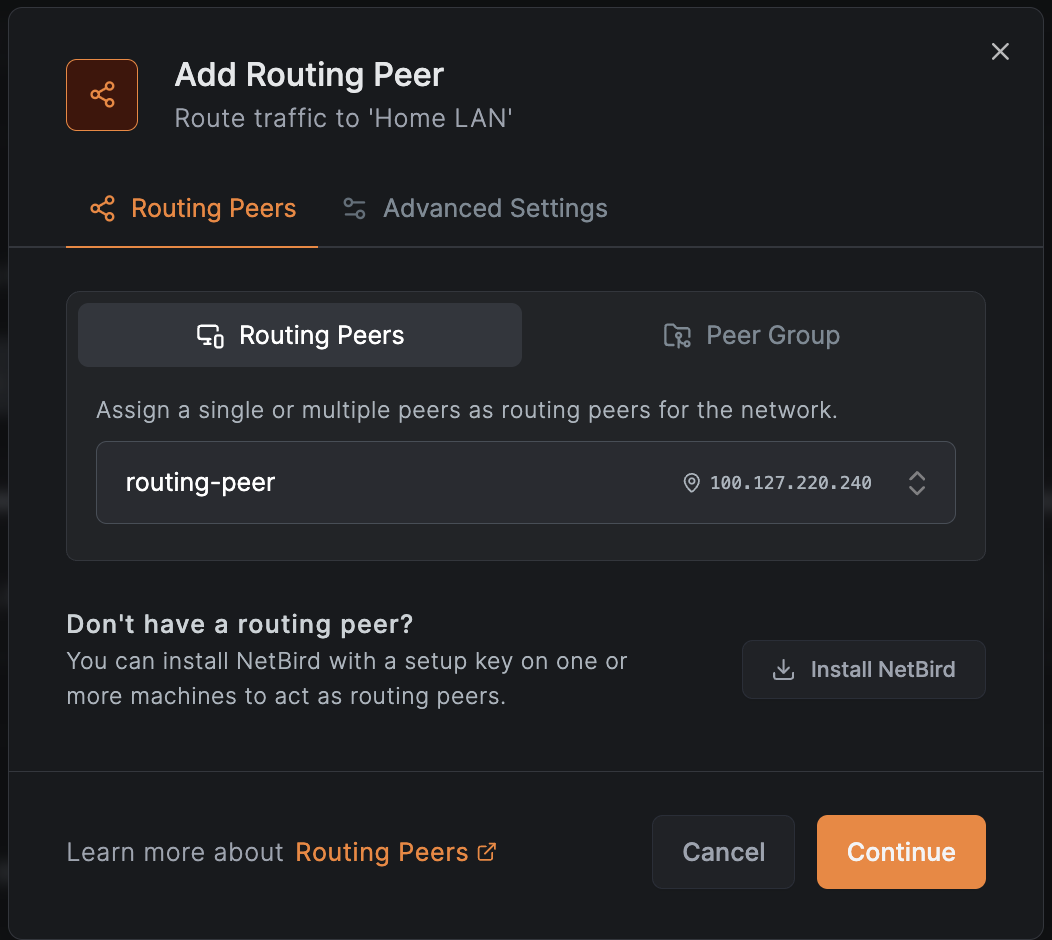
- Select your new peer and click Add Routing Peer
Step 8: Test the Connection
From your laptop (connected to a different network like mobile data or coffee shop WiFi):
ping 192.168.1.1  # Your router
ping 192.168.1.50 # Your NAS or other device
You can now access your home devices from anywhere.
Common Home Devices to Access
| Device | Typical Access Method |
|---|---|
| Synology/QNAP NAS | Web UI (port 5000/5001), SMB shares |
| Home Assistant | Web UI (port 8123) |
| Plex/Jellyfin | Web UI (port 32400/8096) |
| Pi-hole | Web UI (port 80), DNS (port 53) |
| Security cameras | RTSP streams, web interfaces |
| Printers | IPP/AirPrint, web interfaces |
Troubleshooting
Can't reach home devices:
- Verify the routing peer is online: check
netbird statuson the routing peer - Ensure the routing peer can reach local devices:
ping 192.168.1.1from the routing peer - Check that your access policy includes your user/device
Intermittent connectivity:
- Ensure the routing peer has a stable internet connection
- Check if your ISP blocks VPN traffic (try a different port or protocol)
Next Steps
- Need Site-to-Site? If you want to connect two home networks together, see Site-to-Site
- Advanced configuration: See Advanced Configuration for masquerade options and access control details