

Install NetBird on Unraid
Updated
To reach your Unraid server from another location, install the NetBird plugin and join it to your NetBird network. The plugin runs directly on the Unraid host, making the server a peer (a device connected to NetBird) with its own NetBird IP address.
Prerequisites
- Unraid 7.0.0 or later, with access to its web interface.
- A NetBird Cloud account or a self-hosted NetBird deployment.
- A setup key, which registers the server with your NetBird account. Create a one-off key under Settings → Setup Keys in the NetBird dashboard. Leave Ephemeral Peers disabled for this persistent server.
- NetBird installed on the laptop you will use to access Unraid, connected to the same account.
Install the plugin
Choose either the app catalog or the direct plugin URL.
From the app catalog
- Open Apps in the Unraid web interface and search for NetBird.
- Select the NetBird plugin and click Install.
- Wait for installation to finish, then open Settings → NetBird and select the plugin's Settings tab.
With the plugin URL
-
In the Unraid web interface, open Plugins → Install Plugin.
-
Paste the following URL into the plugin URL field:
https://raw.githubusercontent.com/netbirdio/netbird-unraid/main/plugin/netbird.plg -
Click Install and wait for installation to finish.
-
Open Settings → NetBird, then select the plugin's Settings tab.
The plugin installs the NetBird client and its service. A fresh installation stays disabled until you configure and enable it in the next step.
Connect your server
-
In the plugin's Settings tab, configure these fields:
Field Value Enable NetBird Select Yes. Management URL Leave blank for NetBird Cloud. For self-hosted NetBird, enter your management server URL, such as https://netbird.example.com.Setup Key Paste the setup key you created in the NetBird dashboard. Hostname Optional. Enter a name you recognize, or leave blank to use your Unraid server's hostname. -
Leave the other settings at their defaults and click Apply. The plugin starts NetBird and registers the server. This plugin uses setup keys for registration, so there is no browser sign-in step.
-
Select the NetBird tab to view the connection status. Confirm that Daemon status, Management, and Signal show Connected, and note the NetBird IPv4 address.
-
Open Peers in the NetBird dashboard, or your self-hosted dashboard, and confirm that your Unraid server appears as connected.
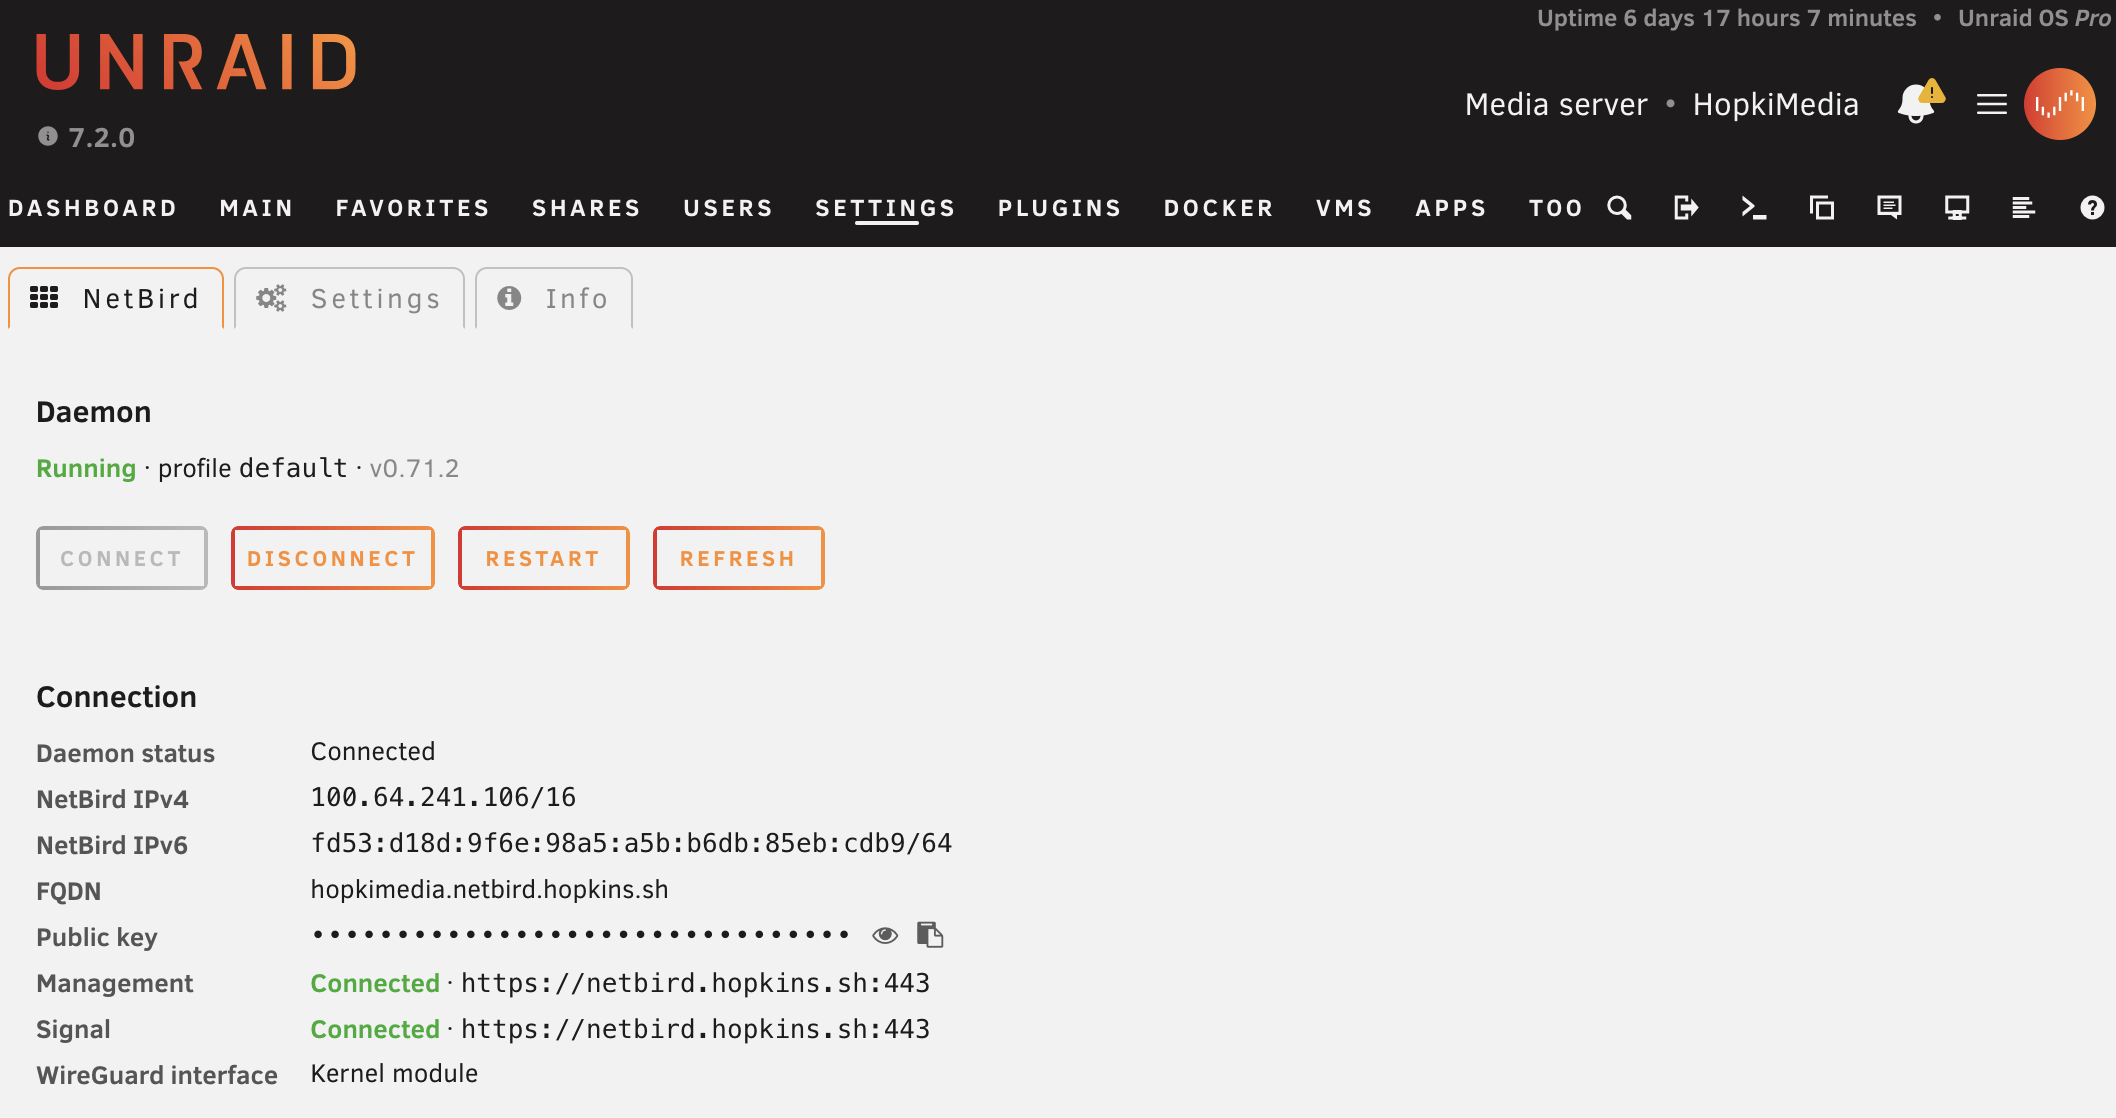
The NetBird tab shows the server's connection details. Your addresses and management URL will differ from this example.
Changing Management URL or Hostname after registration creates a new peer identity and IP address. You will need a valid setup key to register it again, and the old peer remains in the NetBird dashboard until you delete it. Choose these values before the first connection.
Access the Unraid web interface
- In the NetBird dashboard, place your Unraid peer in a dedicated peer group and configure an access control policy allowing your laptop's group to reach it on the TCP port used by the Unraid web interface. Limit the policy to the devices and ports that need access.
- On your connected laptop, open the server's NetBird IP address in a browser, using the protocol and port configured for your Unraid web interface. Use the address without the subnet suffix: for example,
100.64.0.10if the plugin displays100.64.0.10/16. - Sign in with your normal Unraid credentials. NetBird provides the network connection; Unraid still handles web interface authentication.
The plugin makes the web interface listen on the NetBird interface. You do not need a network route to reach the Unraid host through its NetBird IP.
To access other devices on your home network through this server, follow Access Home Devices and use the Unraid peer as the routing peer, the device that forwards traffic to those resources.
Plugin options and functionality
Settings
Beyond the registration fields, the Settings tab provides these options. Click Apply after making changes.
| Option | Default | What it does |
|---|---|---|
| Enable NetBird | No on a fresh installation | Enables the service and automatic startup. Set it to No and apply to stop NetBird and keep it disabled. |
| Manage DNS | Yes | Lets NetBird configure the host's DNS resolver for peer names and nameservers defined in your NetBird account. Set it to No to use Unraid's existing DNS configuration. |
| Enable NetBird SSH | No | Enables NetBird's built-in SSH server, including root login on Unraid. You must also enable SSH for the peer and configure access policies in the NetBird dashboard. Follow the SSH access guide and limit access to the users who need it. |
| Enable Rosenpass | No | Adds post-quantum key exchange to WireGuard connections. Yes requires the other peer to use Rosenpass. Yes (permissive) uses it where supported and allows standard WireGuard connections to other peers. |
| Pre-shared Key | Empty | Sets an optional additional WireGuard key for the selected profile. Leave blank unless your peers are configured to use one. |
| Log Level | Info | Controls how much detail NetBird writes to /var/log/netbird.log. Use Debug or Trace when investigating a problem, then return to Info. |
DNS, SSH, Rosenpass, log level, and service enablement apply across profiles. Changing DNS, SSH, or Rosenpass settings reconnects NetBird to apply them.
A pre-shared key can be set or changed, but clearing the field does not remove an existing key. Removing it requires erasing the profile and setting it up again.
Profiles
A profile keeps a separate NetBird identity and registration settings. You can use profiles to switch between accounts, such as NetBird Cloud and a self-hosted deployment. Only one profile is active at a time.
Profile controls are available while NetBird is running:
- Enter a unique profile name in the Settings tab and click + Add.
- Fill in that profile's Management URL, Setup Key, and optional Hostname. Click Apply to save, activate, and connect it.
- To return to a configured profile, choose it from the Profile list and click Switch.
Choosing a profile from the list only changes which settings you are viewing. Switch activates it; Apply saves the selected profile's settings and activates it. Switching disconnects the previous profile. Delete removes the selected profile and its stored credentials from this host.
Status and service controls
The NetBird tab shows the connection state, assigned addresses, and peer connections. Its buttons let you manage the active connection:
- Connect reconnects an already configured profile.
- Disconnect takes the profile offline while leaving the service running.
- Restart restarts the NetBird service.
- Refresh reloads the status page.
To keep NetBird stopped across reboots, use Enable NetBird: No and Apply in Settings. Disconnecting alone does not disable automatic startup.
The Unraid Dashboard also includes a NetBird tile for a quick status check. The plugin's Info tab lists the plugin and client versions, configuration paths, and log location.
Reboots and updates
Once enabled, the plugin starts NetBird automatically when the Unraid array starts. It stores configuration and peer identity on the USB flash drive, so the server stays registered across reboots:
- Configuration:
/boot/config/plugins/netbird/etc - State:
/boot/config/plugins/netbird/lib
Install updates from Unraid's Plugins page. The plugin manages both its web interface and the bundled NetBird client.
Troubleshooting
The server does not connect
Confirm that Enable NetBird is set to Yes and that you clicked Apply. For a new registration, check that the setup key is valid and that Management URL points to the account that issued it. A used one-off key cannot register a new identity.
Open the Unraid terminal to inspect the connection and recent logs:
netbird status -d
tail -n 100 /var/log/netbird.log
After correcting the settings, click Apply and check the NetBird tab again.
Internet names stop resolving on Unraid
The plugin enables Manage DNS by default. If Unraid cannot resolve internet names after connecting, check your NetBird DNS configuration and configure a nameserver group that can resolve those names for the Unraid peer.
If you want Unraid to keep using its existing DNS configuration, set Manage DNS to No in the plugin's Settings tab and click Apply. This disables NetBird's DNS management on the host, so NetBird peer names will need another DNS configuration to resolve. You can still connect using NetBird IP addresses.