Provision Users and Groups From JumpCloud
JumpCloud is a comprehensive cloud-based directory platform that provides identity, access, and device management capabilities. It offers features like single sign-on (SSO), multi-factor authentication (MFA), and centralized user management to help organizations secure and manage access to their resources.
NetBird's JumpCloud integration enhances user management by allowing you to utilize JumpCloud as your identity provider. This integration automates user authentication in your network, adds SSO and MFA support, and simplifies network access management to your applications and resources.
Prerequisites
Before you begin the integration process, ensure you have the necessary admin permissions in JumpCloud. You need a JumpCloud user account with one of the following roles:
- Administrator (minimum required)
- Administrator with Billing
These roles have the required permissions to configure SSO applications and manage SCIM provisioning.
Setting Up SSO with JumpCloud
Before configuring SCIM provisioning, you must first set up Single Sign-On (SSO) with JumpCloud. Please follow the detailed setup instructions in our Single Sign-On guide for JumpCloud.
Once SSO is configured, and you can successfully log in to NetBird using your JumpCloud credentials, you can proceed with the SCIM setup below.
Enabling JumpCloud SCIM in NetBird
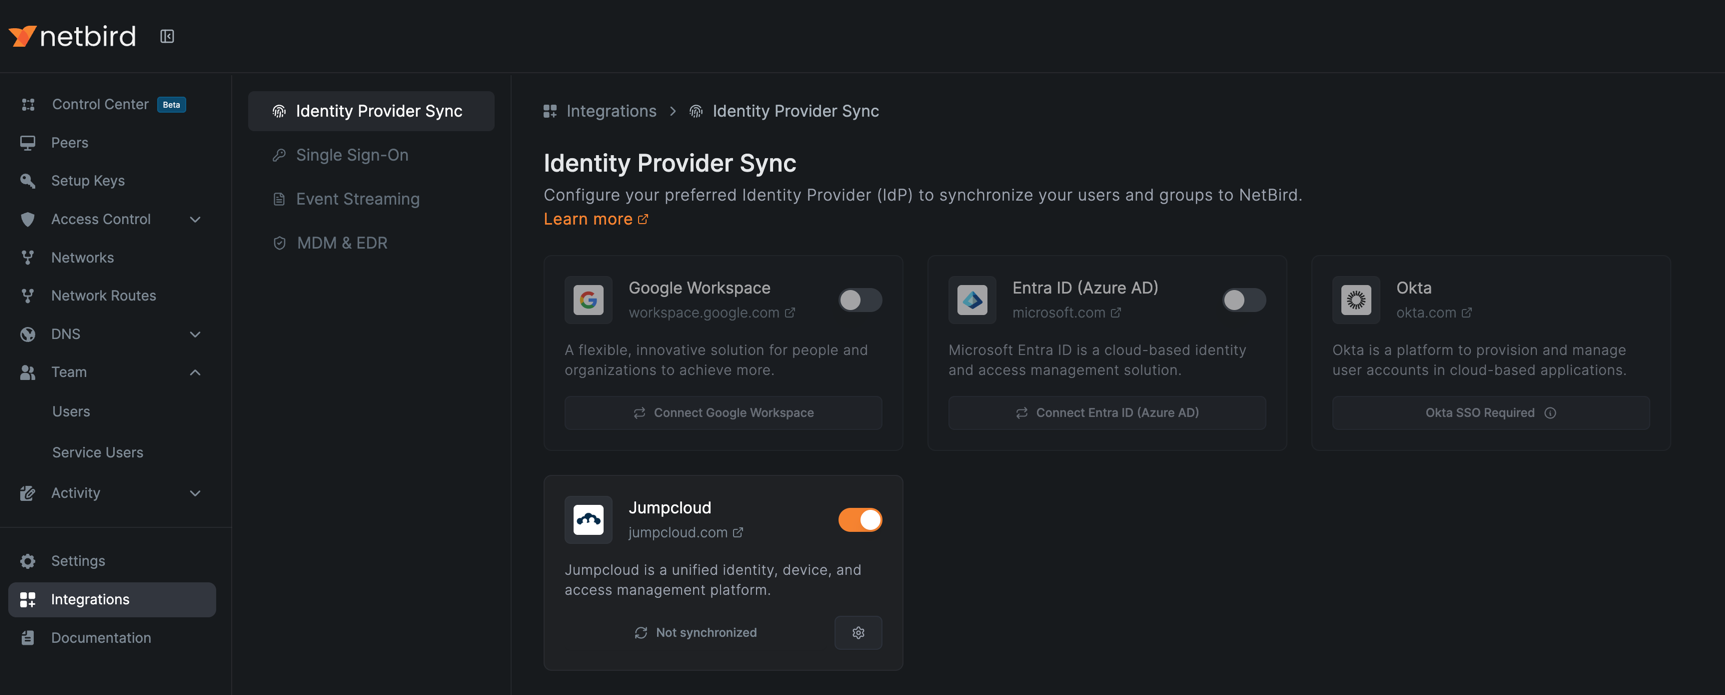
To enable SCIM synchronization in NetBird, navigate to Integrations > Identity Provider Sync in your NetBird dashboard.
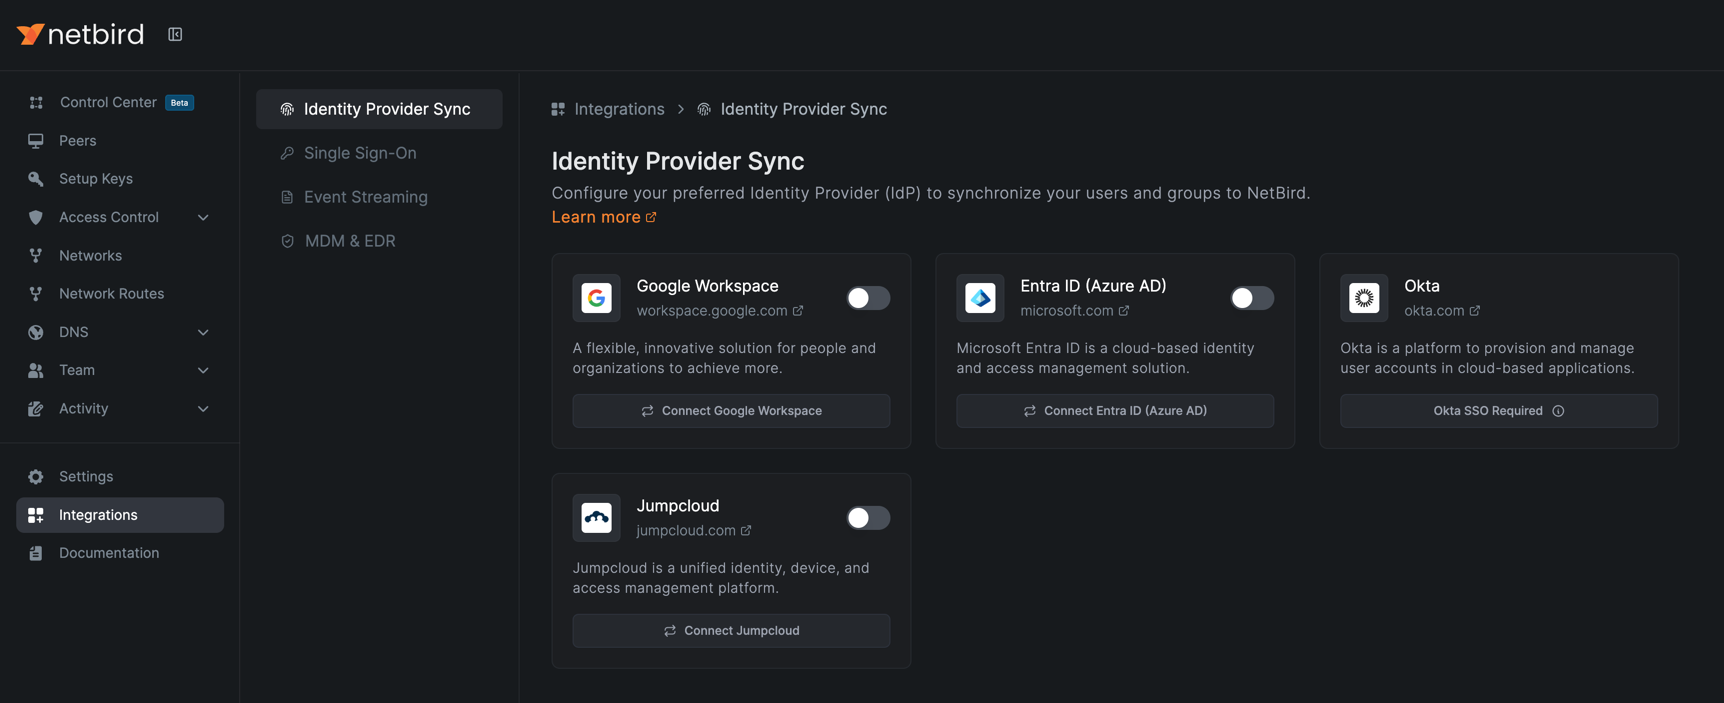
Click the Connect Jumpcloud button to begin the configuration process.
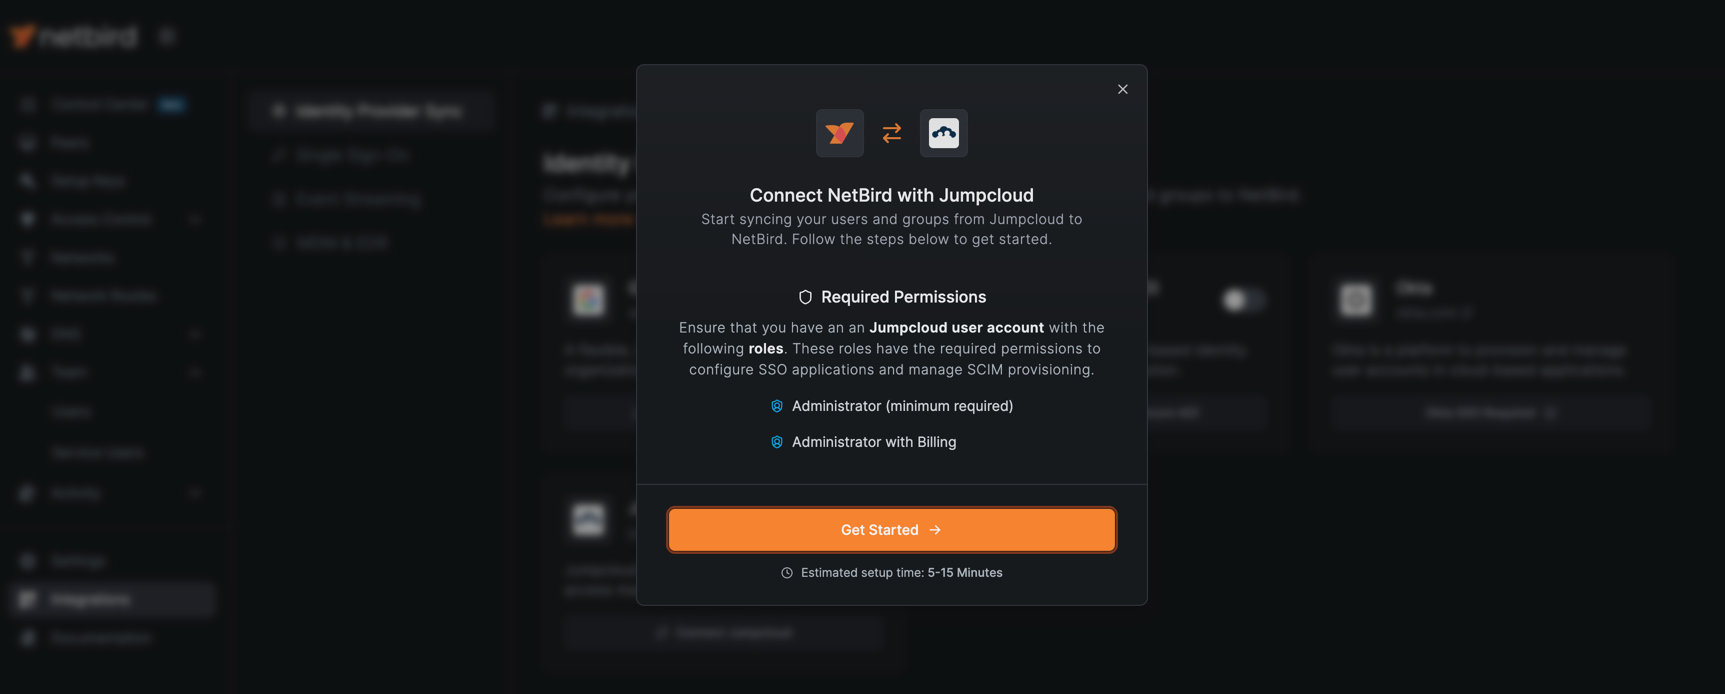
Click Get Started to launch the configuration wizard. You will be guided through several configuration options:
Groups to be synchronized
By default, all groups assigned to the NetBird application in JumpCloud will be synchronized. If you want to synchronize only assigned groups that start with a specific prefix, you can specify them in the filter. Keep in mind that the prefix matching is case-sensitive.
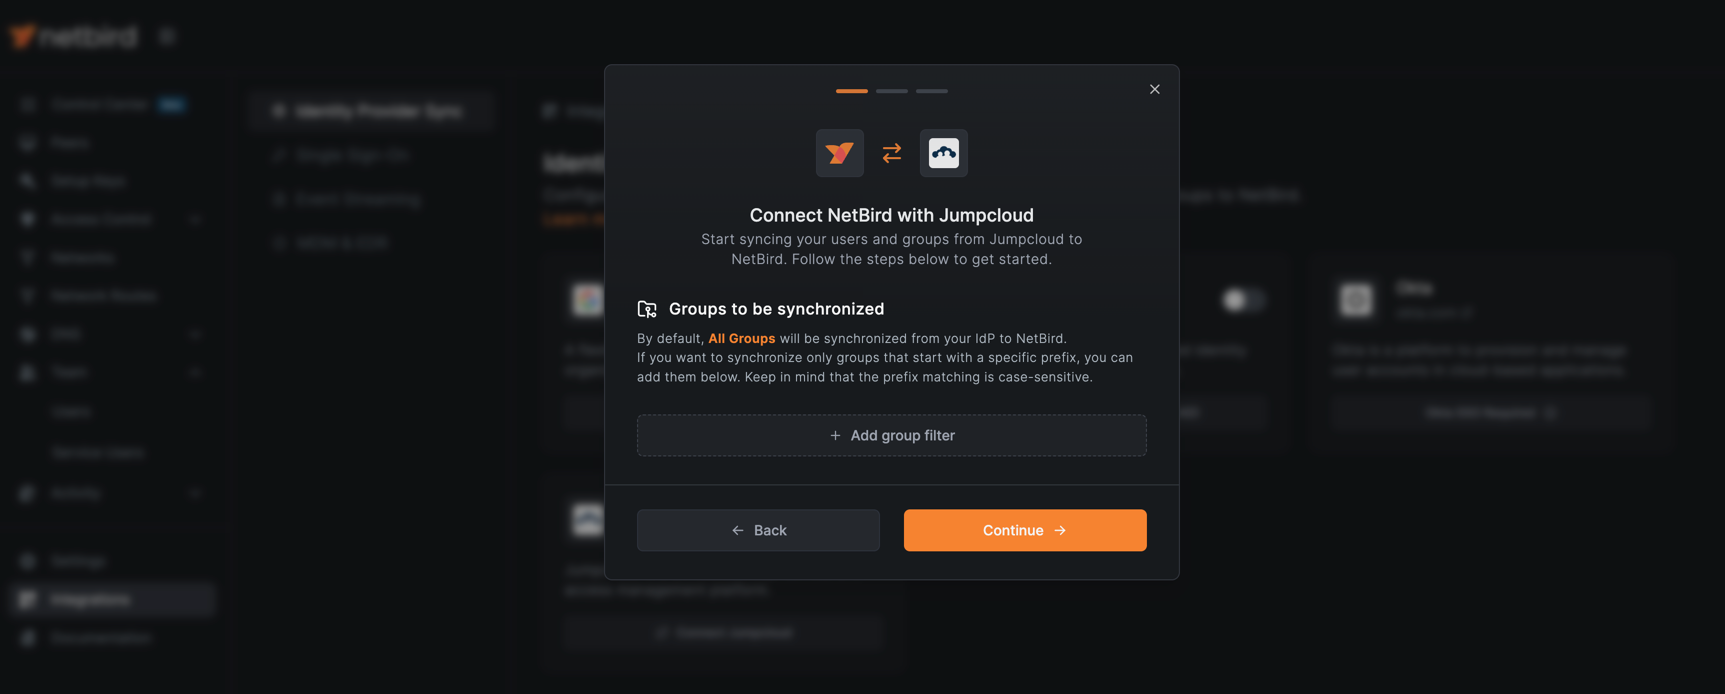
Click Continue to proceed to the next step.
Users to be synchronized
By default, all users from the groups assigned to the NetBird application will be synchronized. If you want to further filter and synchronize only users from specific assigned groups, you can specify those group names in the filter. The group name matching is case-sensitive.

Click Continue to generate your SCIM credentials.
SCIM Credentials
NetBird will generate the SCIM credentials required to configure JumpCloud. Make note of both the Base URL and Token Key as you will need them in the next section to complete the JumpCloud configuration.
Click Finish Setup to complete the NetBird SCIM configuration.
You can now proceed to configure the SCIM application in JumpCloud using the credentials generated above.
Configure SCIM Application in JumpCloud
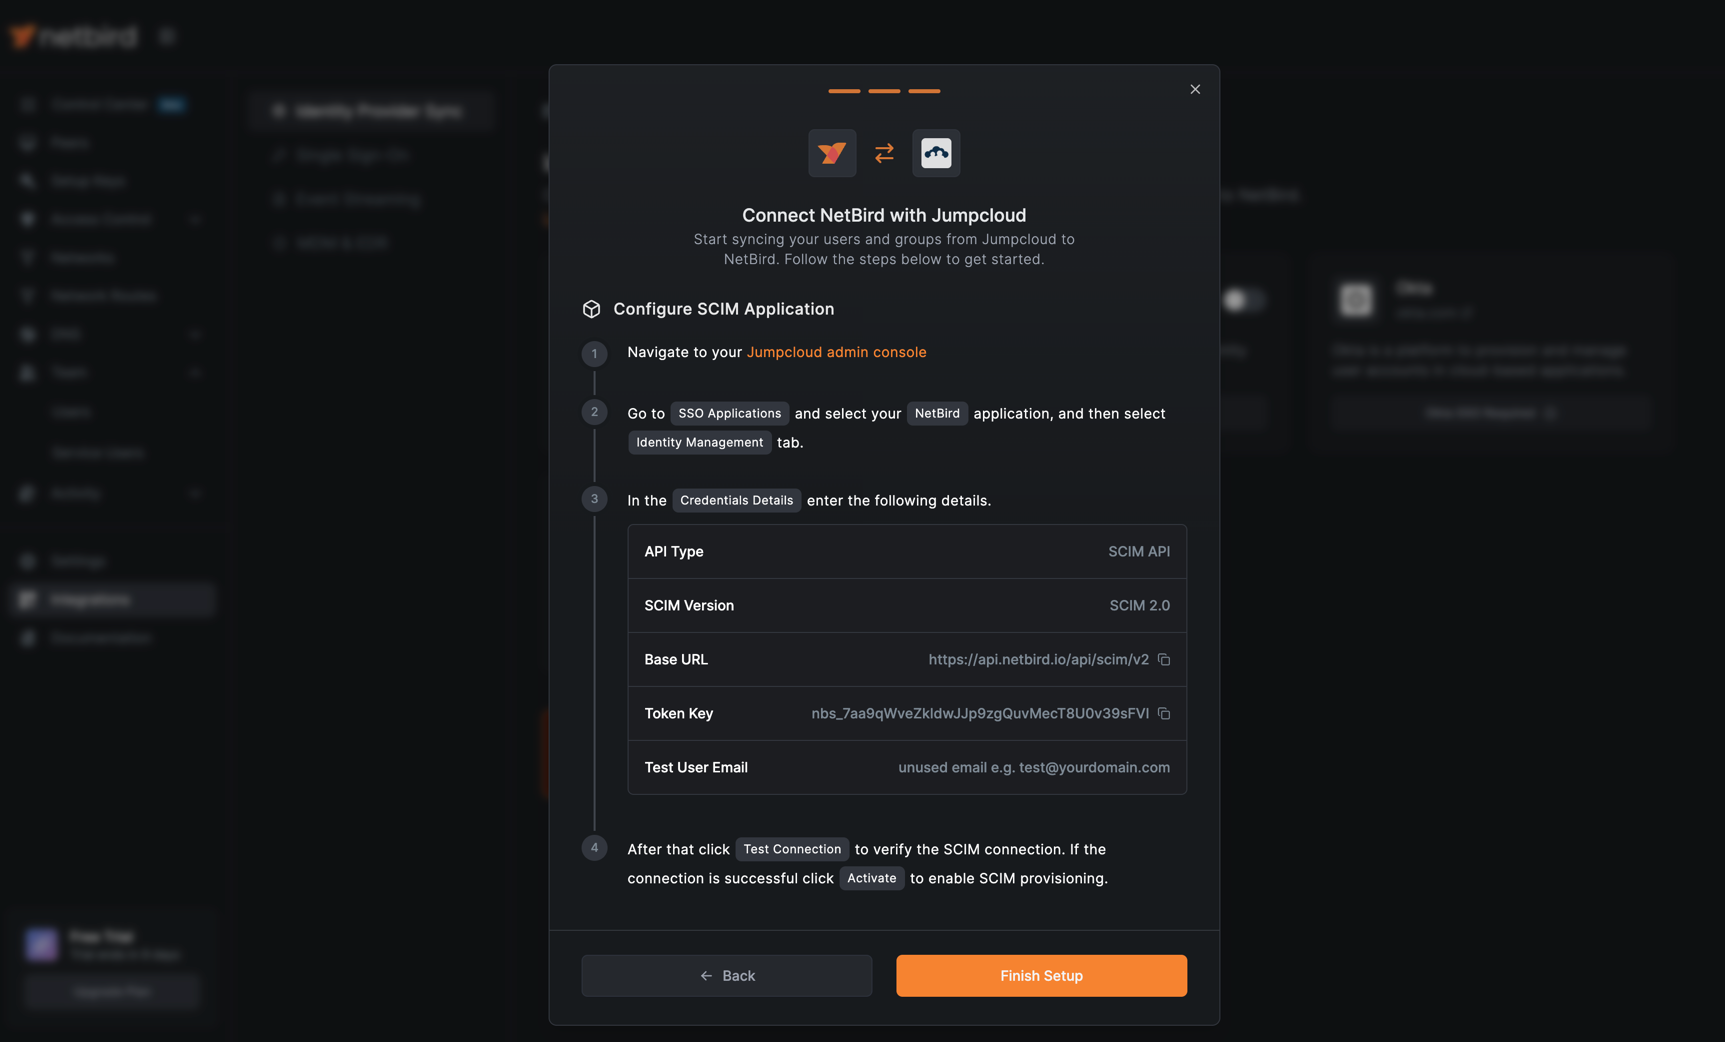
In your JumpCloud admin console, go to SSO Applications, select your NetBird
application, and then select the Identity Management tab.
In the Configuration Settings section, enter the following SCIM Service Provider details:
- API Type:
SCIM API(default) - SCIM Version:
SCIM 2.0(default) - Base URL:
https://api.netbird.io/api/scim/v2 - Token Key: Paste the Bearer token you copied from NetBird
- Test User Email: Provide a new, unused email address for testing (e.g.,
test@yourdomain.com)
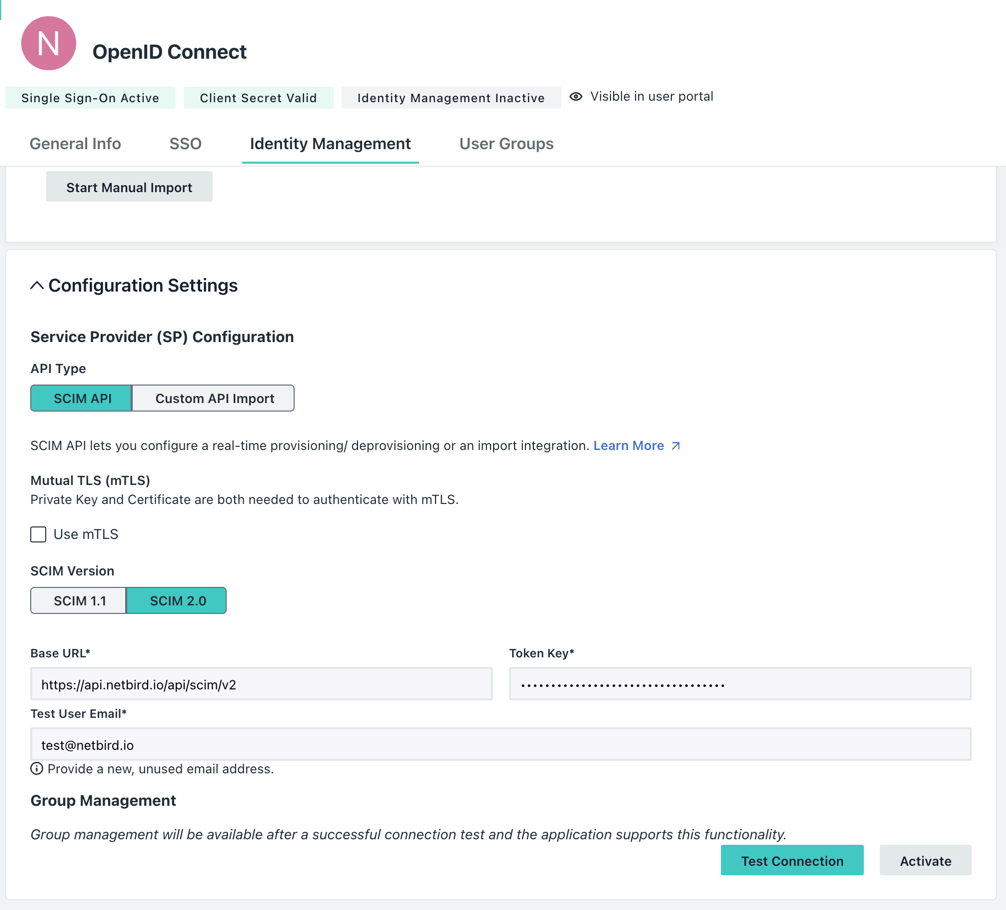
- Click
Test Connectionto verify the SCIM connection
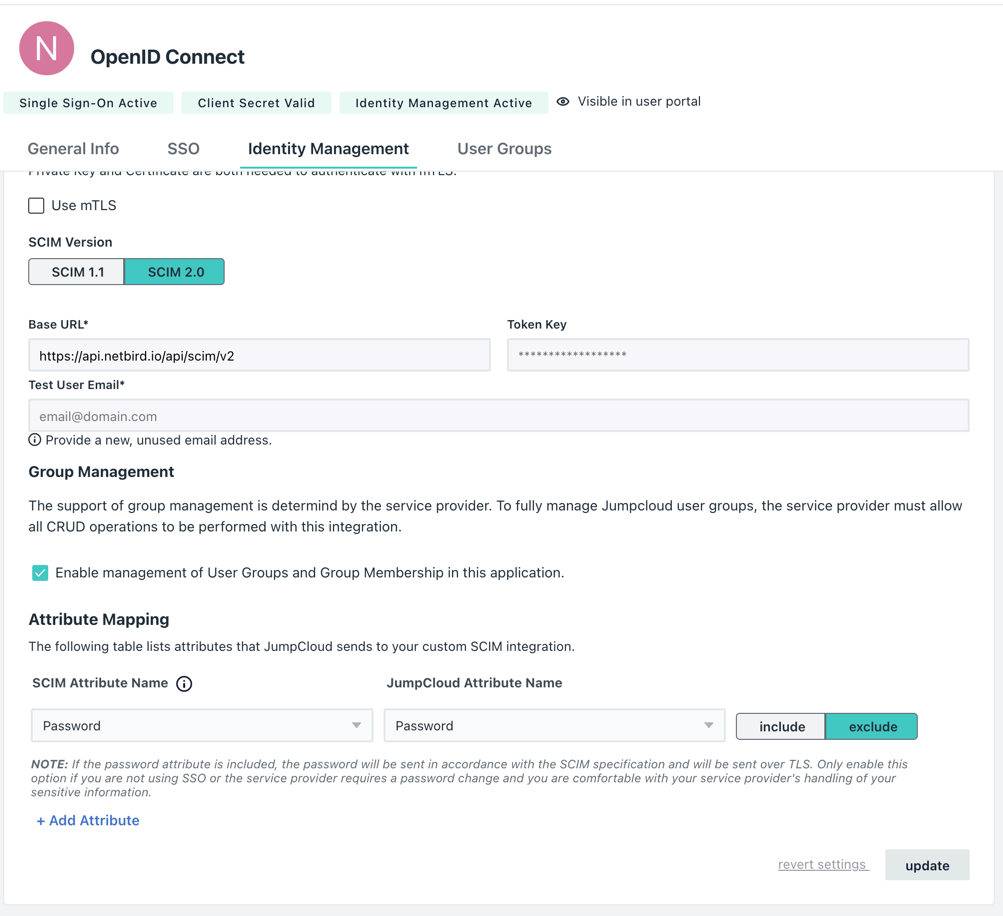
If the connection is successful, you'll see a success message. Click Activate to enable SCIM provisioning.
Assigning Groups for SCIM Synchronization
To enable SCIM synchronization of groups and their memberships to NetBird, you need to assign user groups to the NetBird SCIM application.
In your JumpCloud admin console:
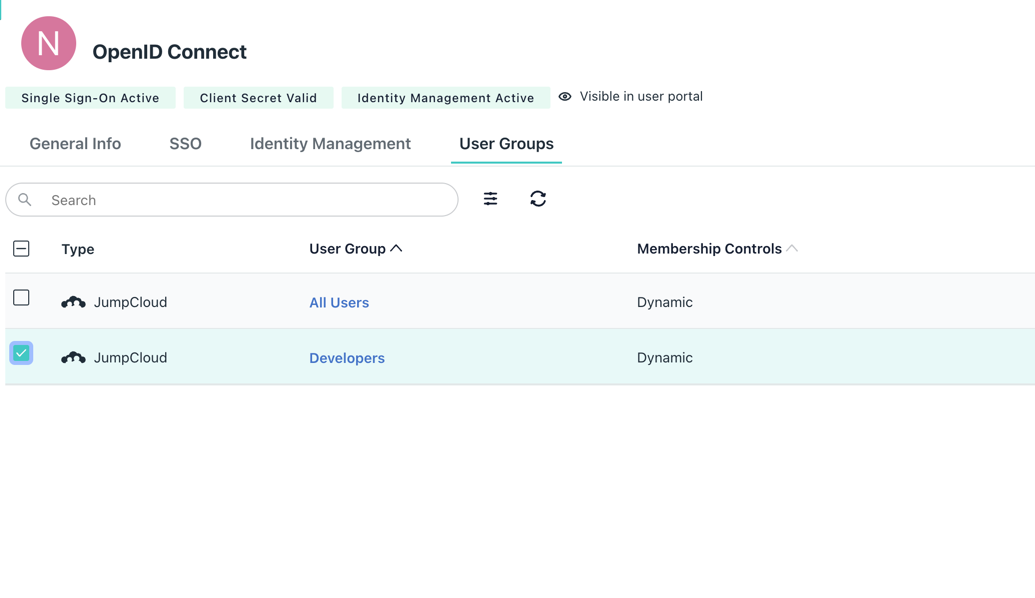
- Navigate to your
NetBirdSSO application - Click on the
User Groupstab - Select the groups whose members you want to synchronize to NetBird
- Click
Saveto apply the changes
Once saved, JumpCloud will automatically synchronize the selected groups and their user memberships to NetBird.
Verify Synchronization
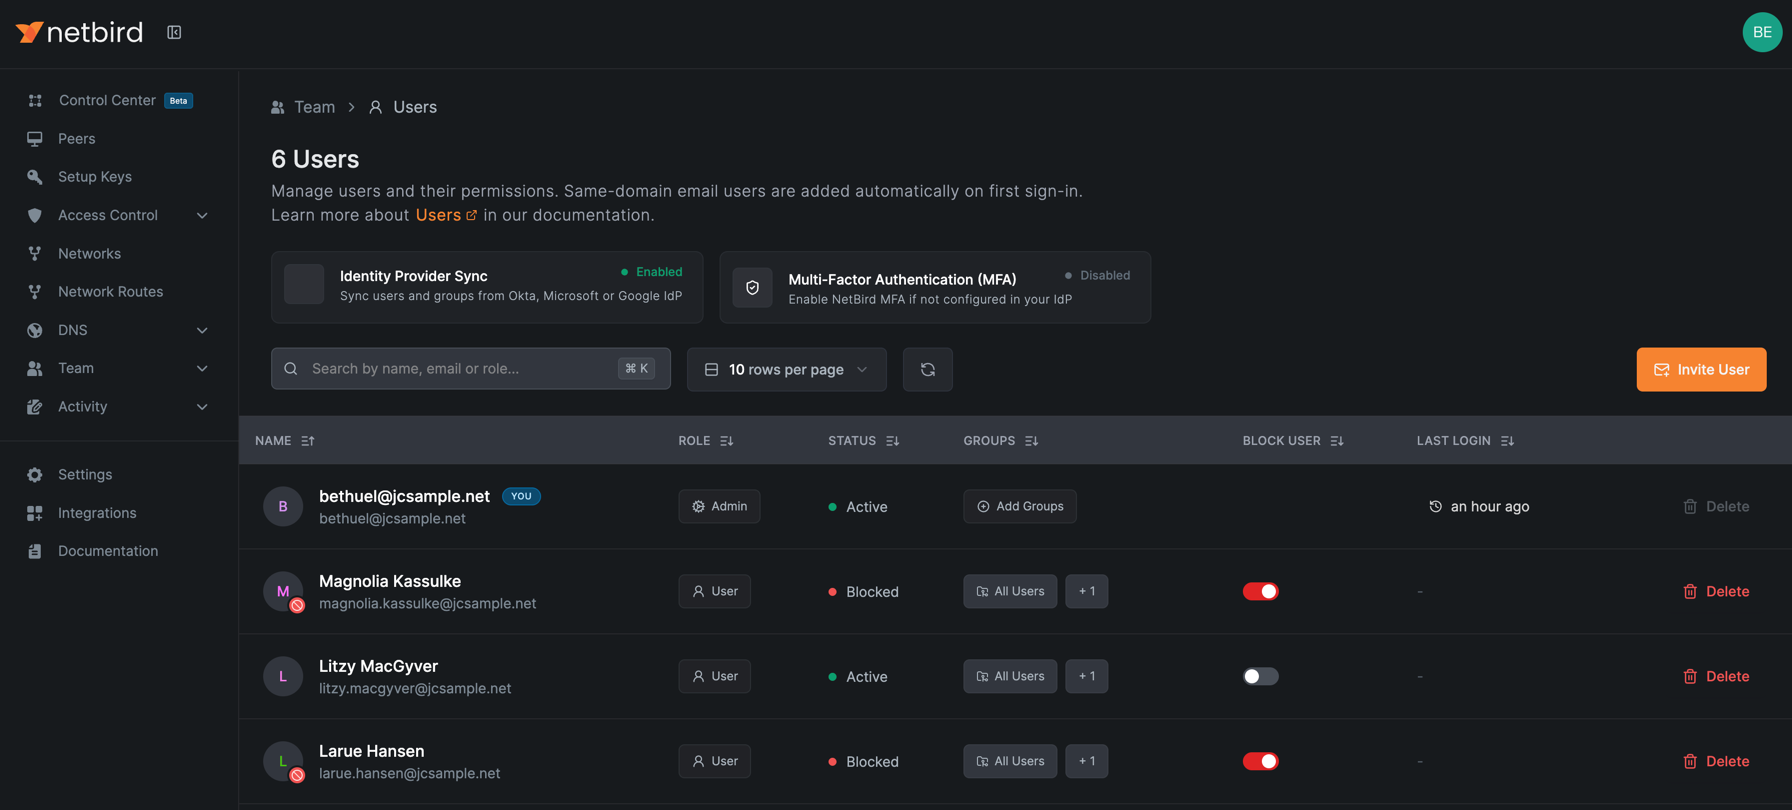
After assigning groups in JumpCloud, the synchronization will begin automatically. You can verify that users and groups
have been successfully synchronized by navigating to Team > Users in your NetBird dashboard.
SCIM provisioning will manage only resources that are created through Jumpcloud. Any resources created directly in NetBird will not be managed by SCIM.
Synced groups will only be available for membership and will not change the role of user in NetBird