NetBird Agent Network Quickstart
Updated
This guide takes you to a working, keyless LLM call through Agent Network, either on NetBird Cloud or on a server of your own.
NetBird Agent Network is currently in beta. It is open source, and you can run it on NetBird Cloud or self-host it.
Choose Where to Run Agent Network
Agent Network needs two things: a NetBird account, and a private proxy that serves your agent network endpoint. The proxy is reachable only by devices connected to your NetBird network, so the endpoint never faces the public internet.
- NetBird Cloud is the fastest path. There is no server to install, and NetBird can run a dedicated private proxy for your account. Follow Set Up on NetBird Cloud.
- Self-hosted runs the whole platform, proxy included, on a Linux VM you control. Follow Set Up Self-Hosted.
With a managed proxy, your LLM requests pass through a proxy that NetBird operates. If those requests must stay on your own infrastructure, choose Deploy a new proxy during the Cloud setup instead, or self-host.
Before You Begin
Whichever path you choose, you need:
- A device for your agent that can run the NetBird client, such as your laptop. Agent network endpoints are reachable only over NetBird, so the agent must run on a connected device. See Get Started to install the client.
- Access to an LLM provider: the API key for a hosted provider such as Anthropic or OpenAI, or the URL of an AI gateway or a self-hosted model. You enter it once in the dashboard, and it never goes on the agent's device. See Providers.
- An agent or client to test with, such as Claude Code, Codex, the OpenAI SDK, or cURL.
Set Up on NetBird Cloud
Cloud Requirements
- A NetBird Cloud account, or an email address to create one. You create it during the setup below.
- The owner or admin role, if you add Agent Network to an existing account. The guided setup only opens for those roles.
- Your own server, only if you choose Deploy a new proxy instead of the managed proxy. See Clusters.
Activate Agent Network
- Activate Agent Network on NetBird Cloud:
sign up, or sign in to your existing account.
- A new account opens in the focused Agent Network view, which hides the rest of the dashboard. You can turn it off later in Settings; see Focused Dashboard View.
- An existing account keeps its dashboard and gains the Agent Network menu.
- Follow the guided setup. It walks you through the same steps this guide describes:
- Connect your device: install the NetBird client and connect it. See Add Your Device to the Network.
- Set up your proxy: choose where your agent network endpoint is served from.
- Managed proxy: NetBird deploys a dedicated, private proxy for your account and reserves your endpoint. This usually takes under a minute.
- Your own proxy, to keep LLM requests on your own infrastructure: click Or use your own proxy instead, then select a private proxy you already run or Deploy a new proxy. For a new proxy, enter a domain and run the generated Docker command or cloud deployment on your server; it starts the proxy in private mode. The setup continues once the proxy connects and your endpoint is reserved. See Clusters.
- Connect a provider: see Connect a Provider.
- Create a policy (existing accounts only): see Create a Policy.
- Configure your agent: see Configure Your Agent, then send a first request.
On a new account, the setup also prepares the account for Agent Network's deny-by-default model: it creates a Users group with you in it, creates a starter policy that lets Users reach your first provider, and removes the permissive Default access control policy. An existing account keeps its groups and policies, so you create the Agent Network policy yourself.
Once your first request goes through, continue at Verify in Usage & Logs.
Set Up Self-Hosted
This setup installs a minimal deployment with core functionality, using release candidate versions of the platform. You can enable the full platform later.
Self-Hosted Requirements
Infrastructure
- A Linux VM with at least 1 CPU and 2 GB of memory.
- The VM must be publicly accessible on TCP ports 80 and 443, and UDP port 3478.
- A public domain that resolves to the VM's public IP (e.g.
netbird.example.com), plus a wildcard record (e.g.*.netbird.example.com) so agent-network endpoints resolve.
The public domain is not used for the Agent Network itself. It is only used to establish network connectivity and manage the platform.
Software
- Docker with the docker-compose plugin v2 or higher (Docker installation guide)
- jq: install with
sudo apt install jqorsudo yum install jq - curl: install with
sudo apt install curlorsudo yum install curl
Installation script
Download and run the installation script:
curl -fsSL https://pkgs.netbird.io/getting-started.sh | NETBIRD_AGENT_NETWORK=true bash
The script deploys the NetBird server together with a private proxy, so your deployment already has the proxy Agent Network needs.
Once the script finishes, open https://netbird.example.com, create your admin
account on the setup page, create an admin user, and log in. Then continue with the steps below.
Add Your Device to the Network
Agent network endpoints are private and reachable only over the NetBird overlay network. To access one, your agent’s device must run the NetBird client and be authenticated, keeping access keyless, authorized, and protected by a peer-to-peer encrypted WireGuard tunnel.
- In the NetBird dashboard go to Peers > User Devices.
- Click Add Peer and download the NetBird client app for your device.
- Run the client app, click "Connect", and log in with your NetBird account when prompted
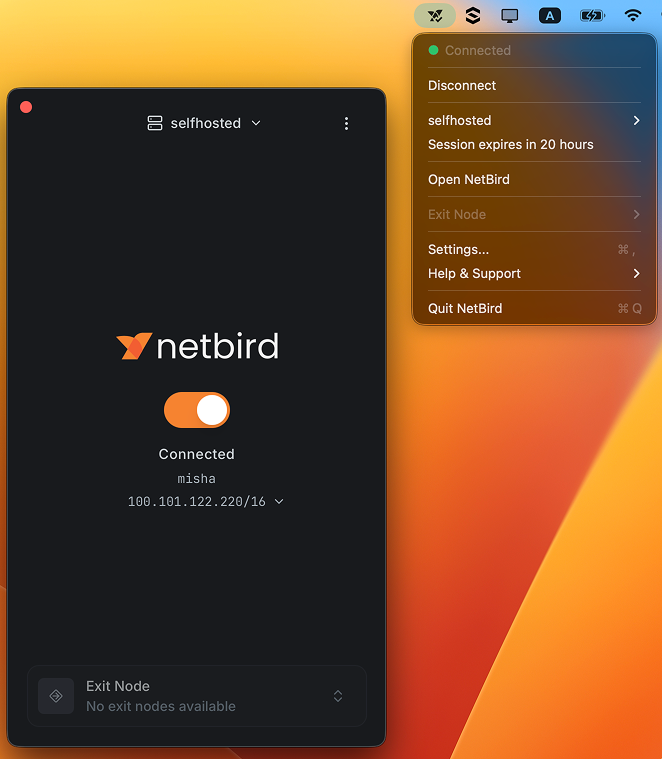
You should now see your device in the peers list in the NetBird dashboard.
To access a provider via NetBird, you need to use an agent network endpoint. On a self-hosted deployment it is generated when you connect your first provider. On NetBird Cloud it is reserved when you set up your proxy.
Connect a Provider
A provider is an upstream LLM service that NetBird routes requests to, such as OpenAI, Anthropic, any AI gateway, or a local model served by Ollama or vLLM.
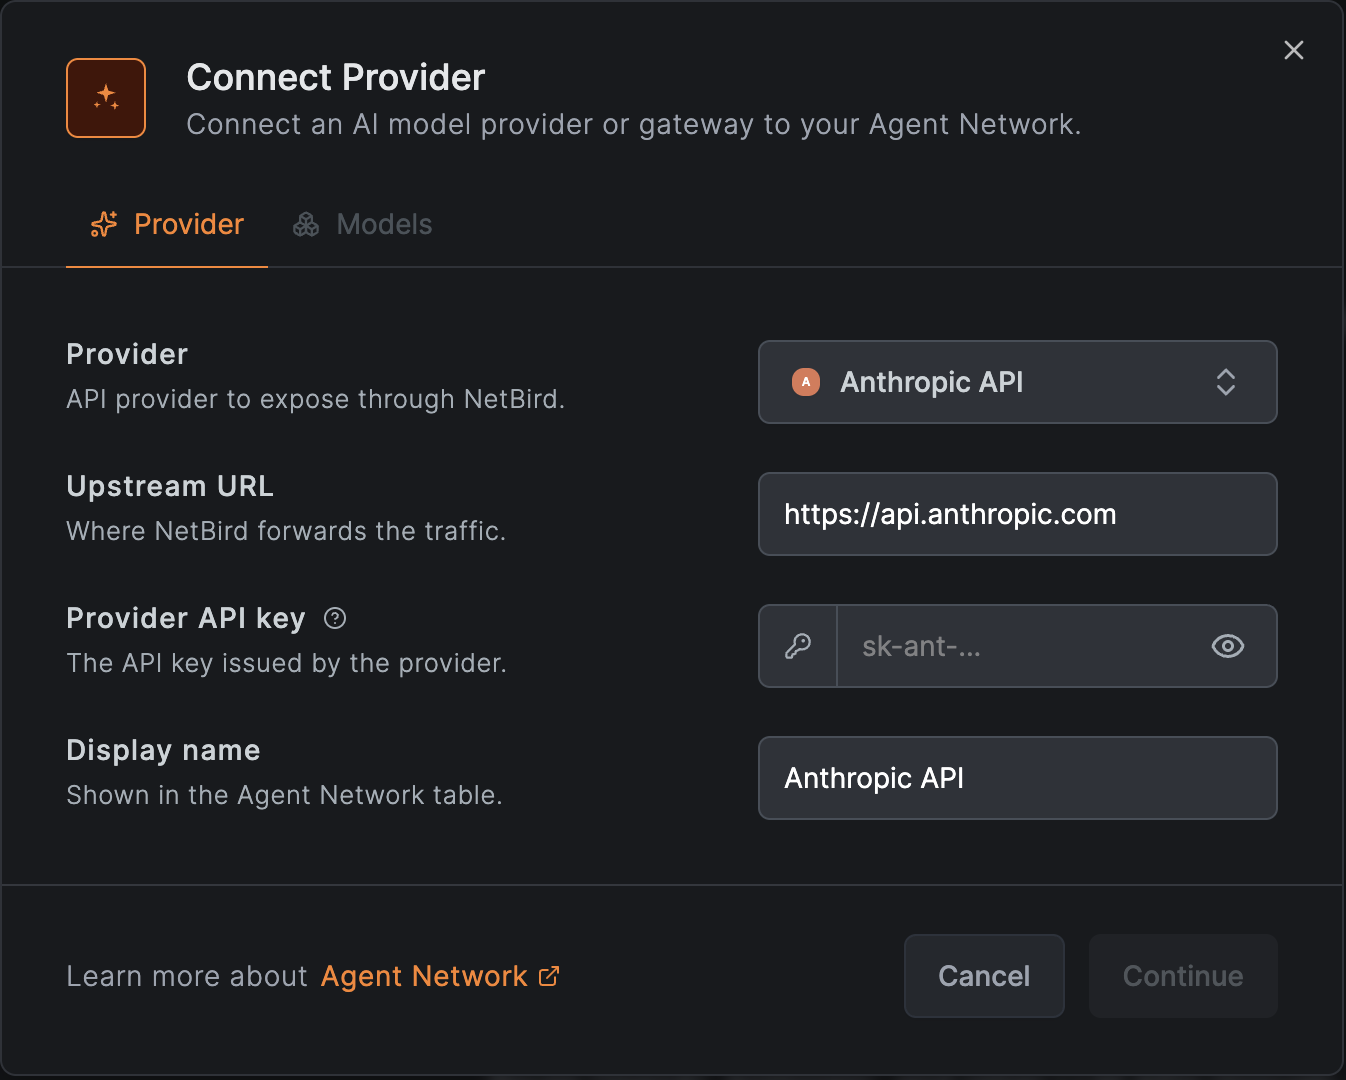
- Go to Agent Network > Providers and click Connect Provider.
- Select the provider, such as Anthropic if you use Claude Code.
- Paste the provider’s API key.
- (Optional) Set a list of allowed models and a custom token price.
- Save the provider.
NetBird stores the provider API key server-side and returns a tunnel-only endpoint that agents use to reach it. The key never lives on the client.
See Providers for more details.
If Connect Provider says you need a reverse proxy cluster with private capabilities, your account has no private proxy yet. The shared NetBird Cloud proxy cluster can't serve an agent network endpoint. Set up a proxy first, either through the guided setup or under Agent Network > Configuration > Clusters. See Clusters.
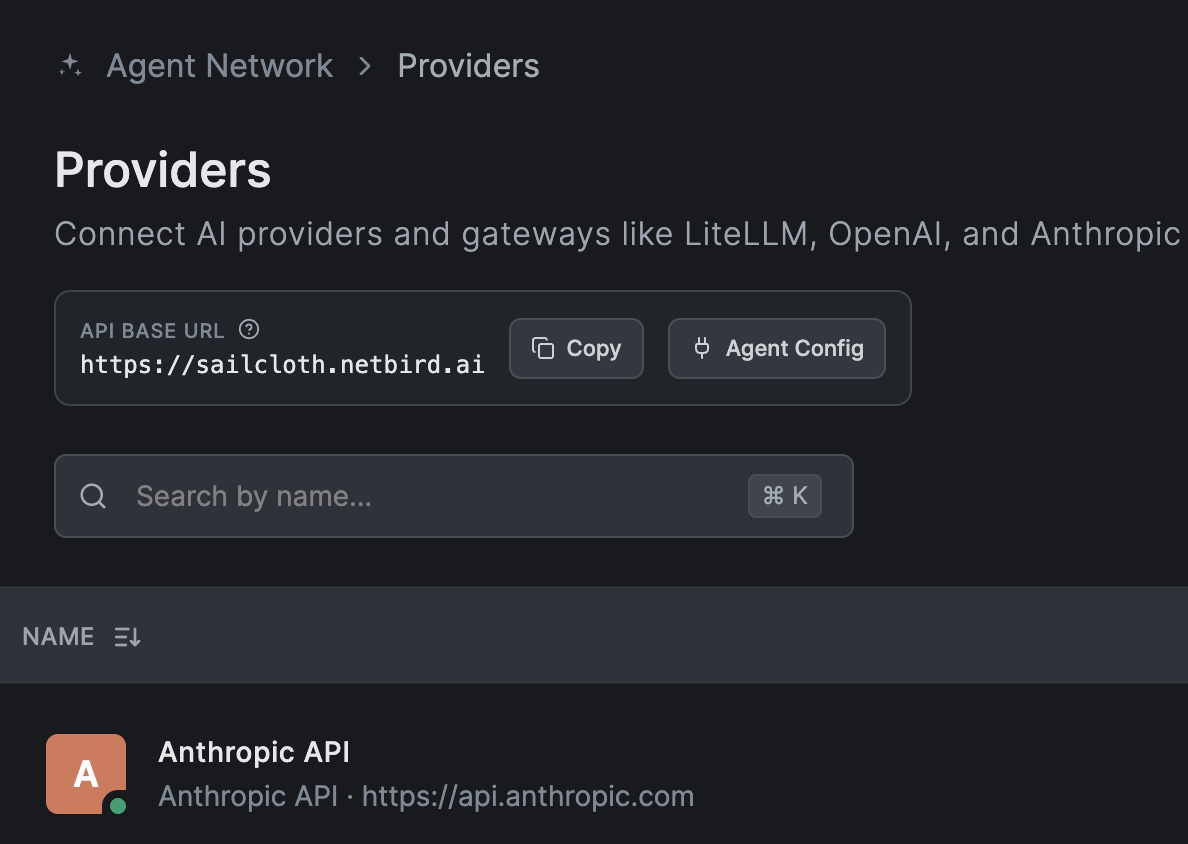
You should now see your agent network endpoint above the Providers table.
Configure Your Agent
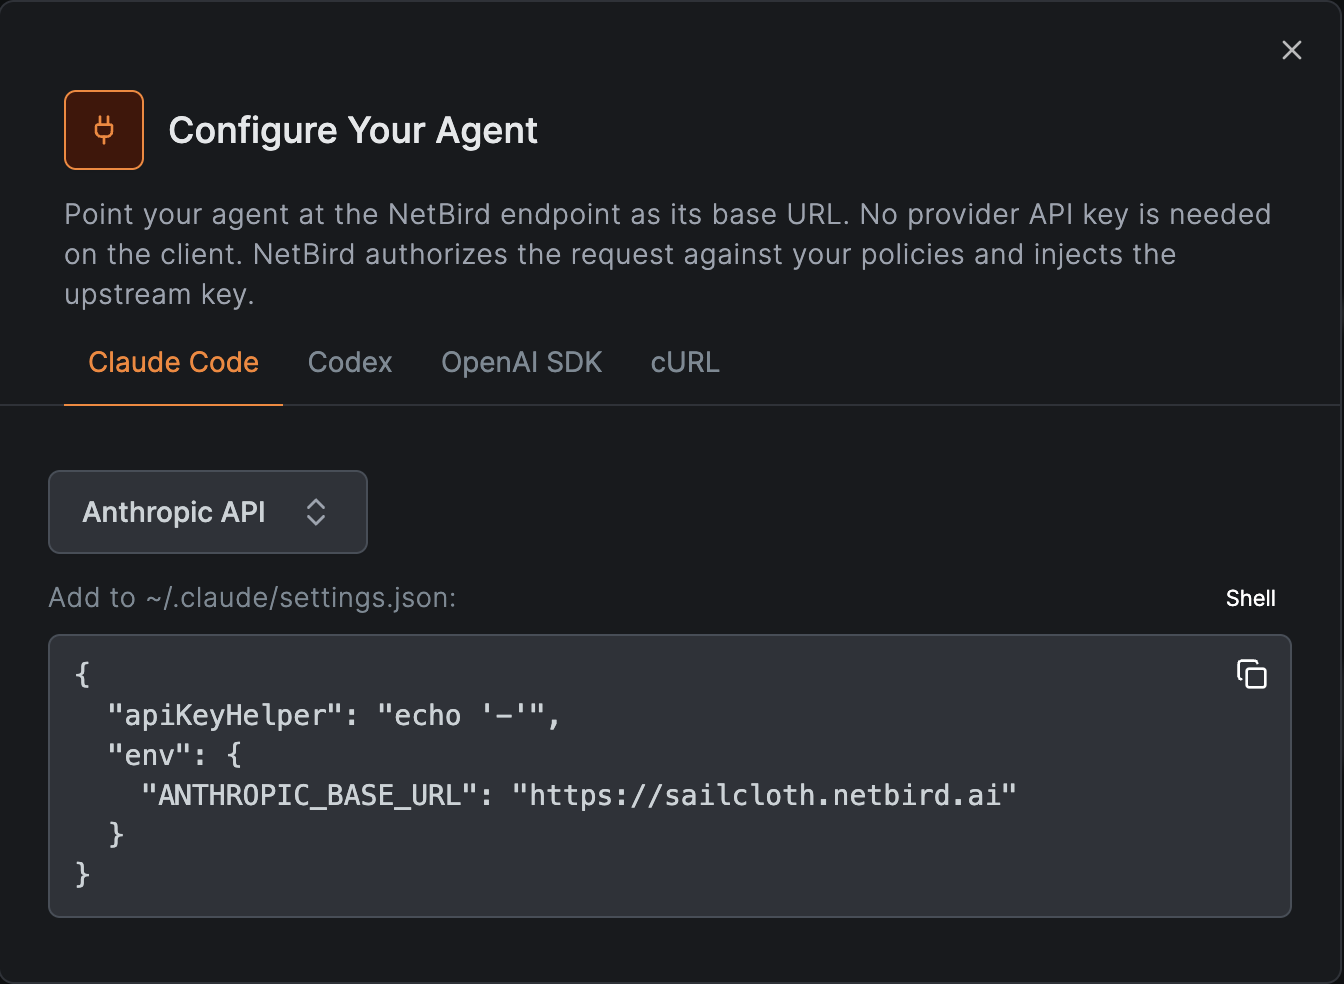
Point your agent at the NetBird endpoint as its base URL. No provider API key is needed on the client. NetBird authorizes each request against your policies and injects the upstream provider key server-side.
- Next to your agent network endpoint, click Agent Config.
- Pick the tab that matches your tool, Claude Code, Codex, OpenAI SDK, or cURL. The dashboard pre-fills your endpoint for you.
- Copy the snippet and apply it. Claude Code reads
~/.claude/settings.jsonand Codex reads~/.codex/config.toml.
Create a Policy
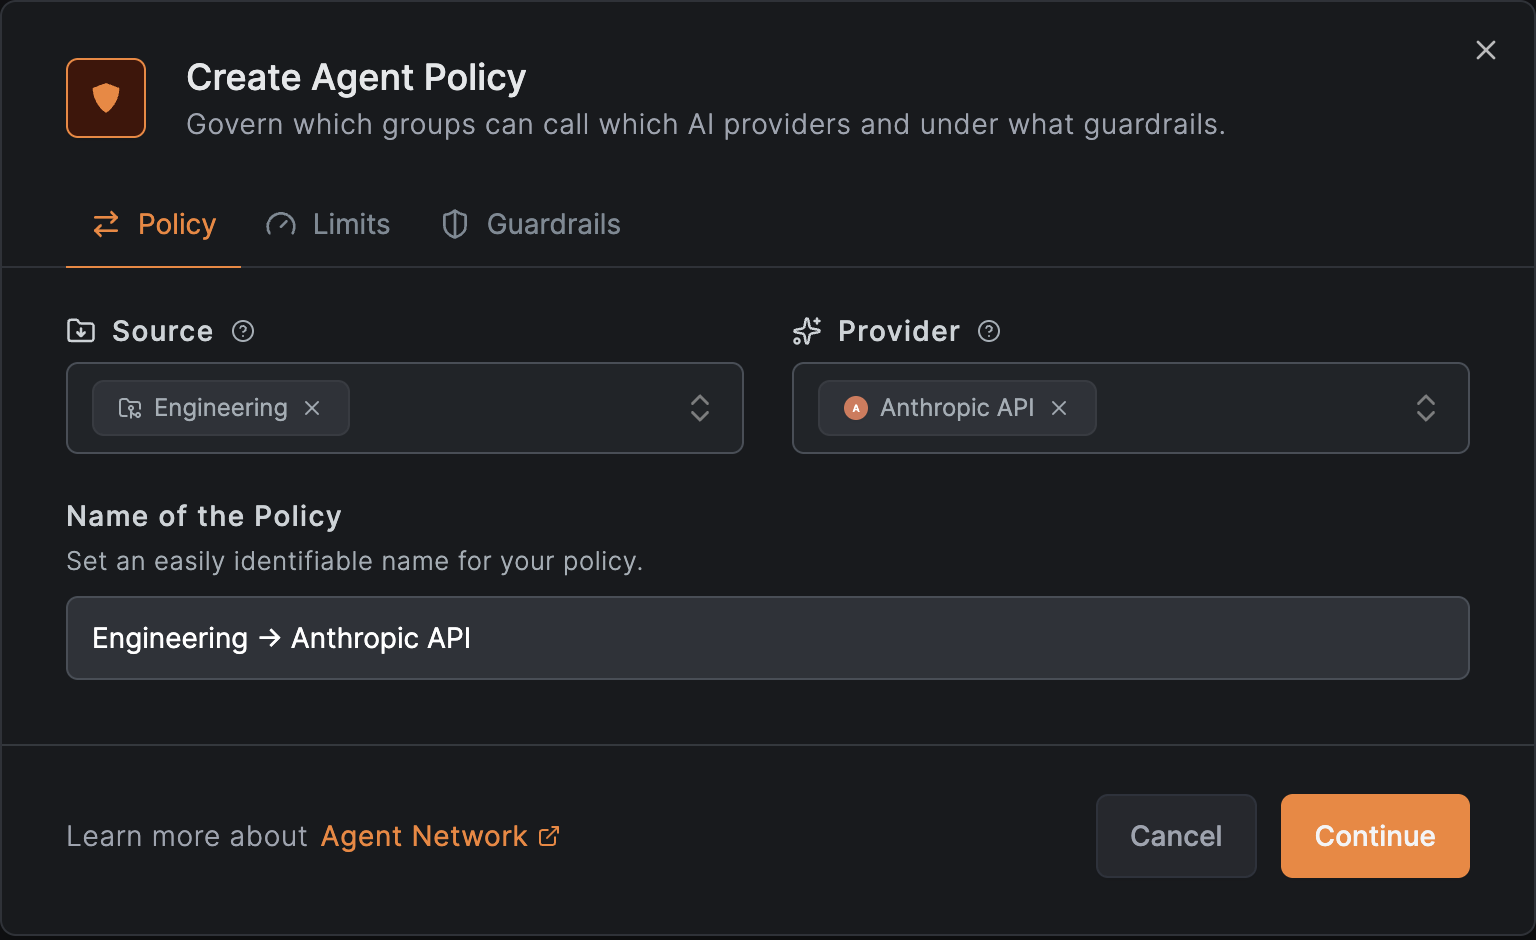
By default, Agent Network denies every request. Nothing reaches a provider until a policy explicitly allows it. A policy connects a Source Group (your users or agent devices) to one or more Providers, and is where you attach optional token and budget limits and guardrails.
If you set up a new NetBird Cloud account through the guided setup, it already created a starter policy for the Users group. Skip to the test request below.
- Go to Team > Users and add your user to a group, such as Engineering.
- Go to Agent Network > Policies and click Add Policy.
- Select the Source Group you want to authorize.
- Choose the Provider that members of the group can access.
- (Optional) Set token / budget limits and attach guardrails.
- Save the policy.
With the policy in place, the agent you configured above can now reach the provider. Run it as usual, or send a quick test request, using a model your provider allows:
curl https://<your-endpoint>/v1/messages \
  --header "Content-Type: application/json" \
  --header "anthropic-version: 2023-06-01" \
  --data '{"model":"claude-opus-4-8","max_tokens":1024,"messages":[{"role":"user","content":"What is NetBird?"}]}'
Verify in Usage & Logs
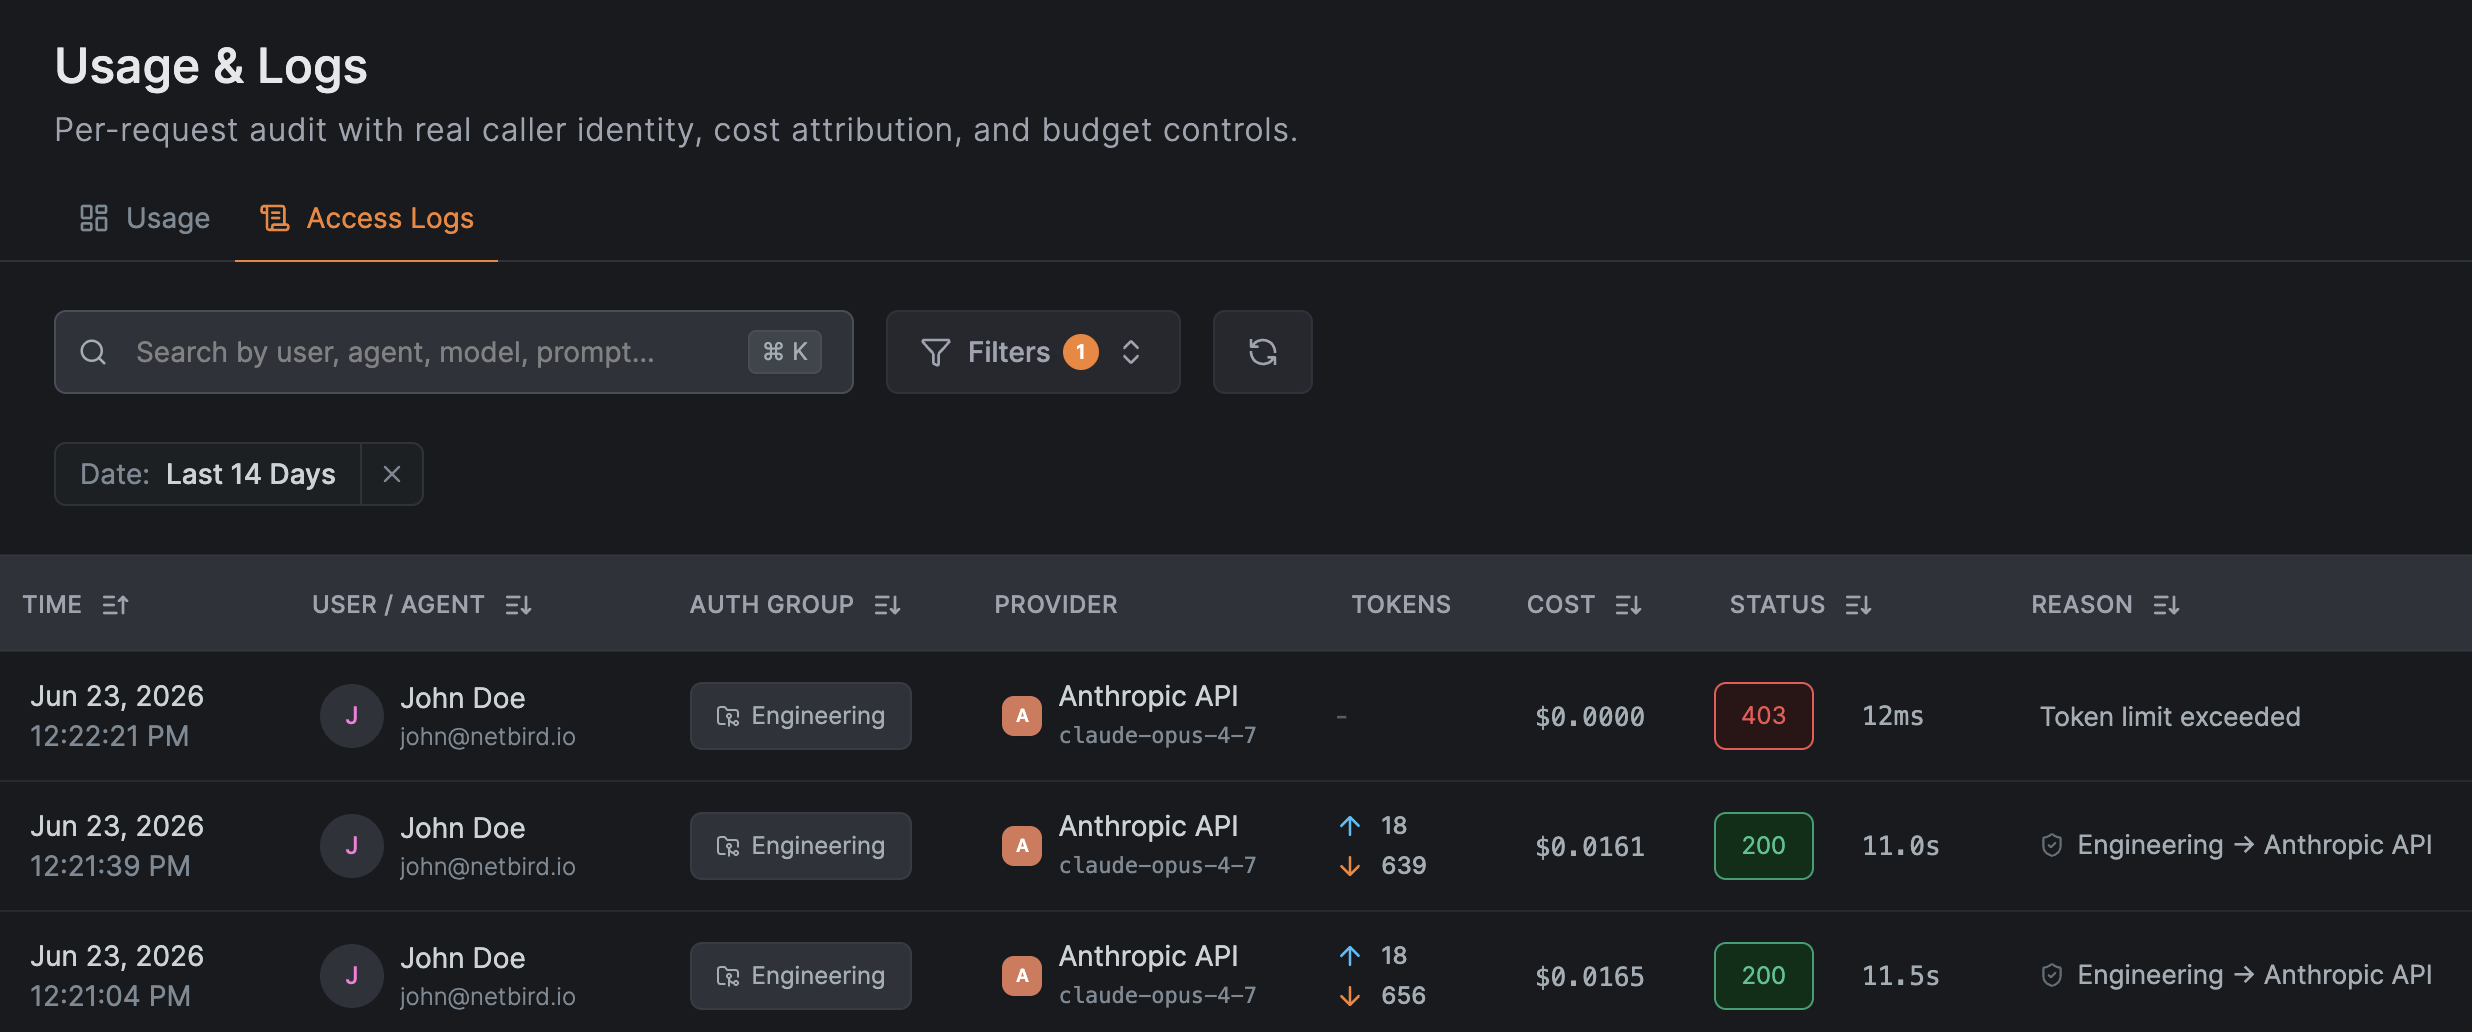
Open Usage & Logs to confirm the request was recorded with the caller identity, model, tokens, and cost.