Zoho on NetBird Cloud
Updated
You can use Zoho as your Identity Provider with NetBird, but it will require some additional configuration steps. Zoho Directory is a cloud-based identity and access management platform that provides single sign-on, multi-factor authentication, and user lifecycle management, with support for OpenID Connect, OAuth 2.0, and SAML.
NetBird integrates with Zoho as a custom OIDC application.
Support for OIDC-compliant IdPs is available on the Team plan and higher. The Free plan supports Google, Microsoft, and social logins.
Step 1: Create a Custom OIDC Application
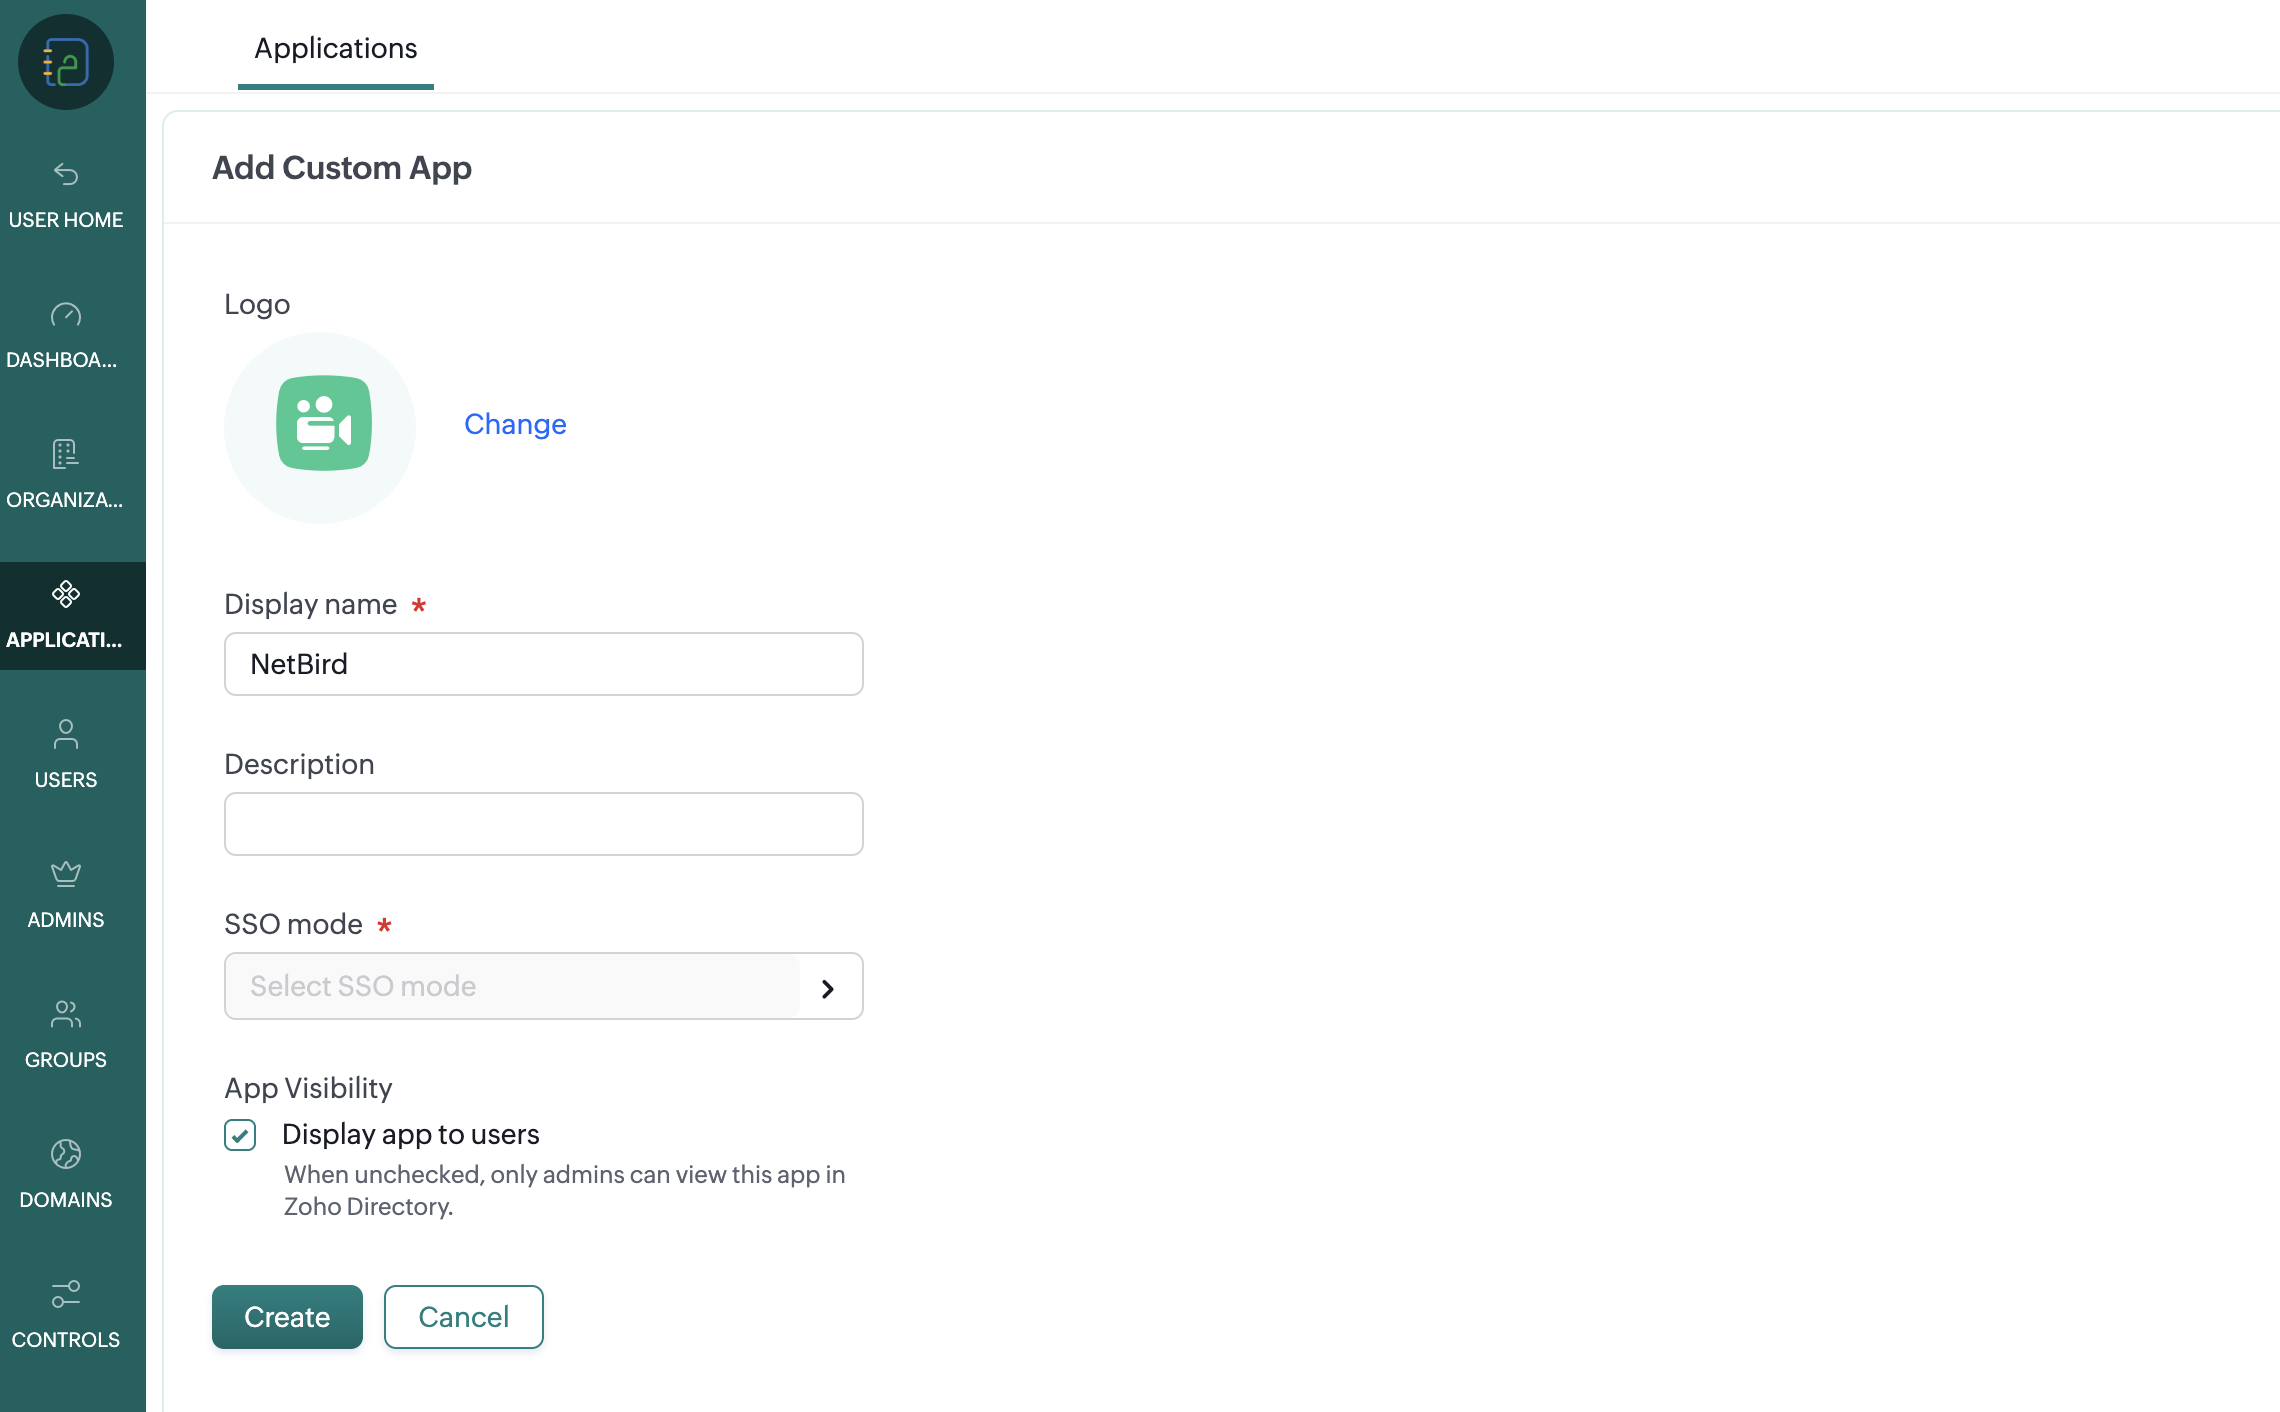
Log in to Zoho Directory and open the Admin Panel from the left sidebar. Navigate to Applications, click Add Application, and then choose Create Custom App.
Enter NetBird as the application name and an optional description.
Step 2: Configure the OIDC Application
Click Select SSO mode and choose OIDC as the Sign-In Type. On the same form, set the following:
- Application Type:
Regular Web Application
Under Relying Party Details, enter the NetBird endpoints:
- Sign-in URL:
https://app.netbird.io - Sign-out URL:
https://app.netbird.io - Redirect URL:
https://login.netbird.io/login/callback
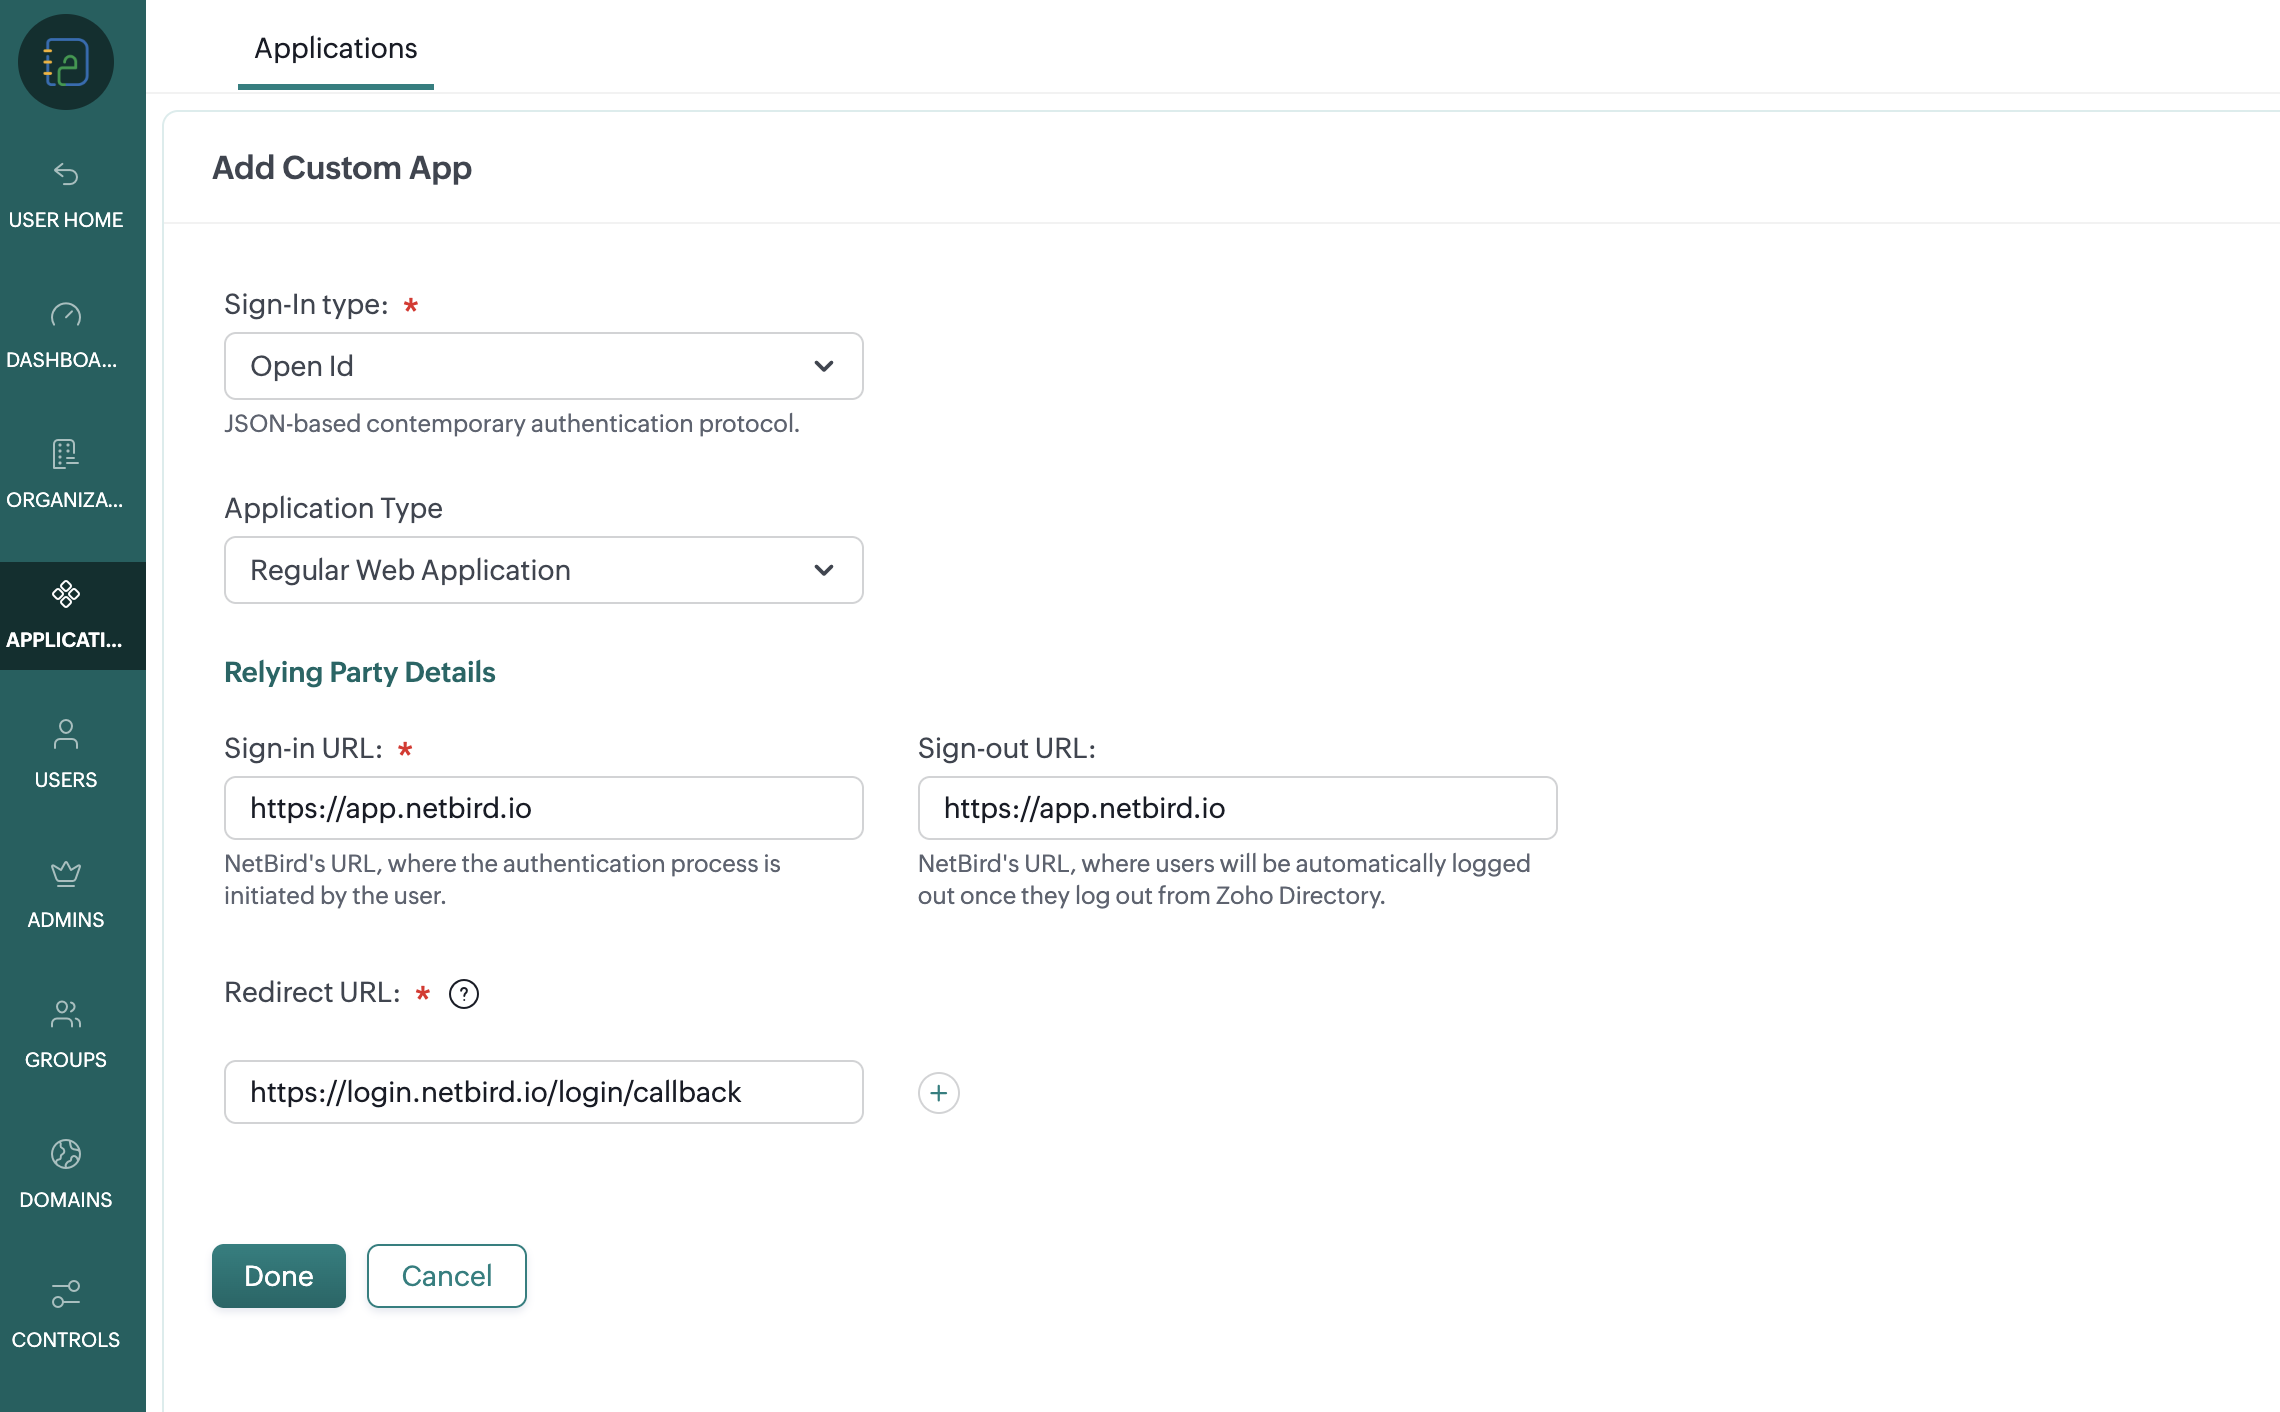
Click Done, then Create.
Step 3: Retrieve the Client Credentials
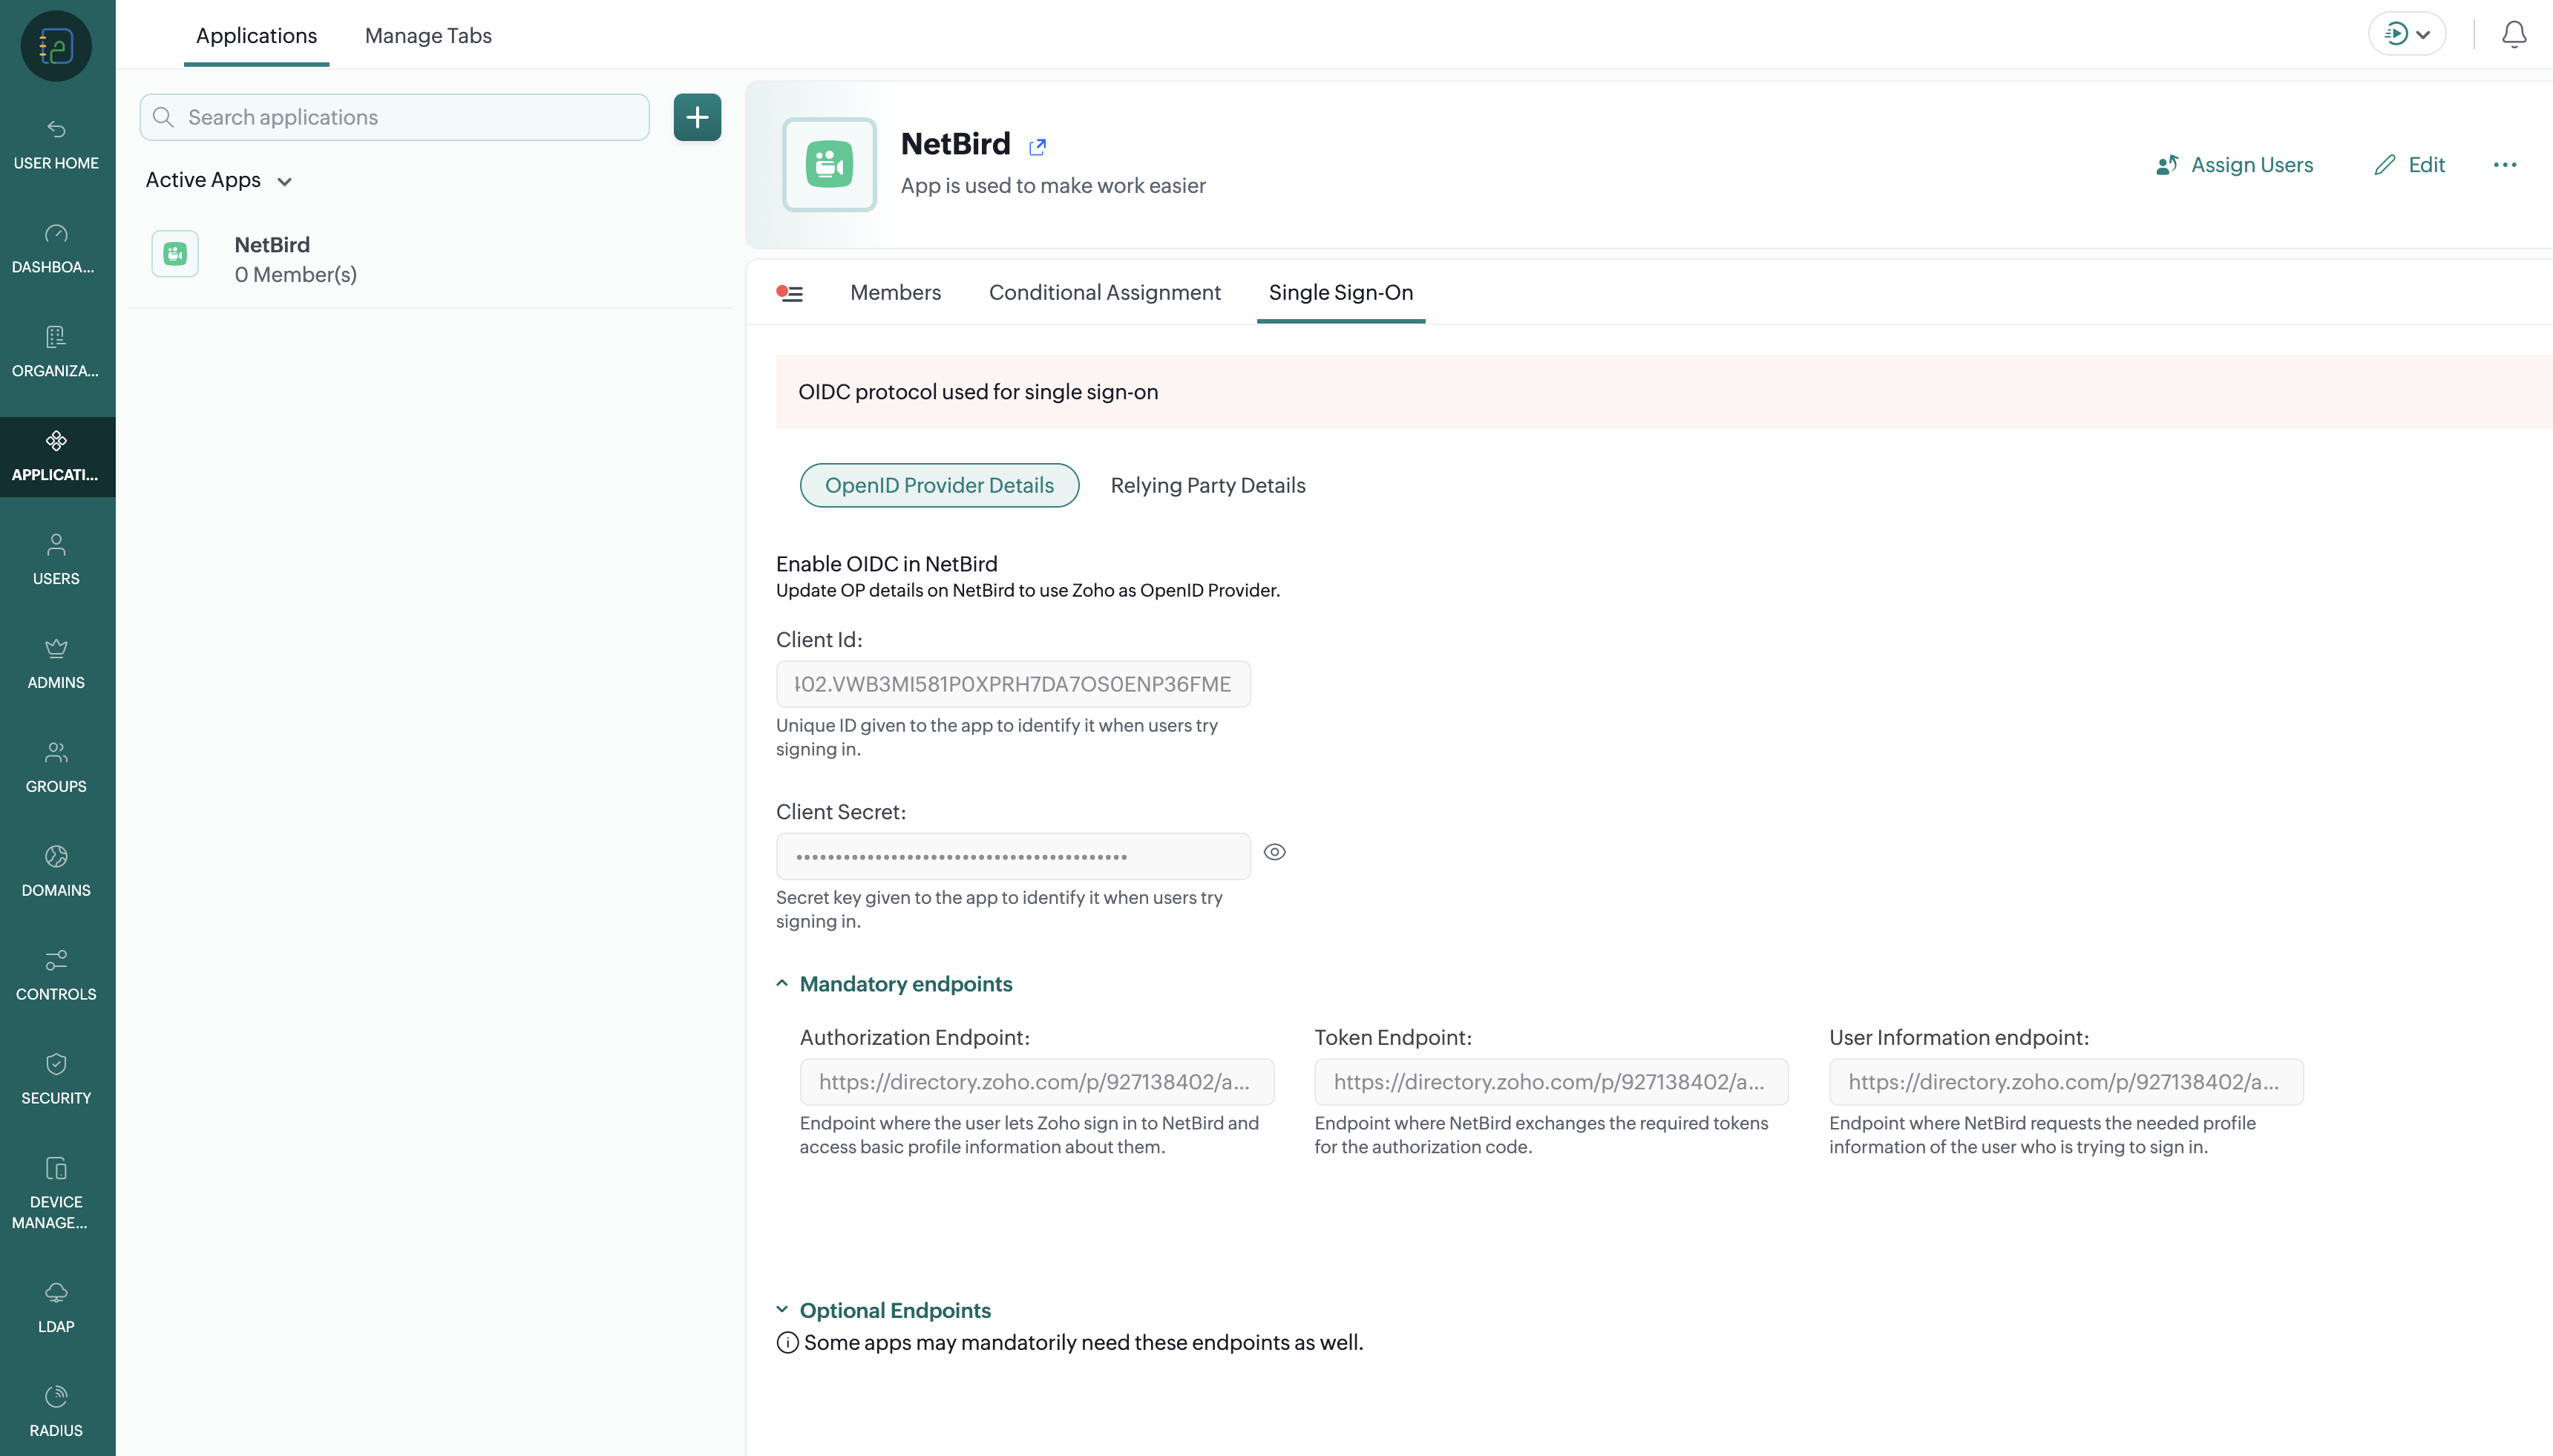
Open the newly created application and select the Single Sign-on tab. Copy and store the following securely:
- Client ID
- Client Secret
Under Optional Endpoints, copy the Discovery Endpoint as well. NetBird uses this single URL to automatically discover the Authorization, Token, and User Info endpoints for your Zoho data center.
Step 4: Assign Users
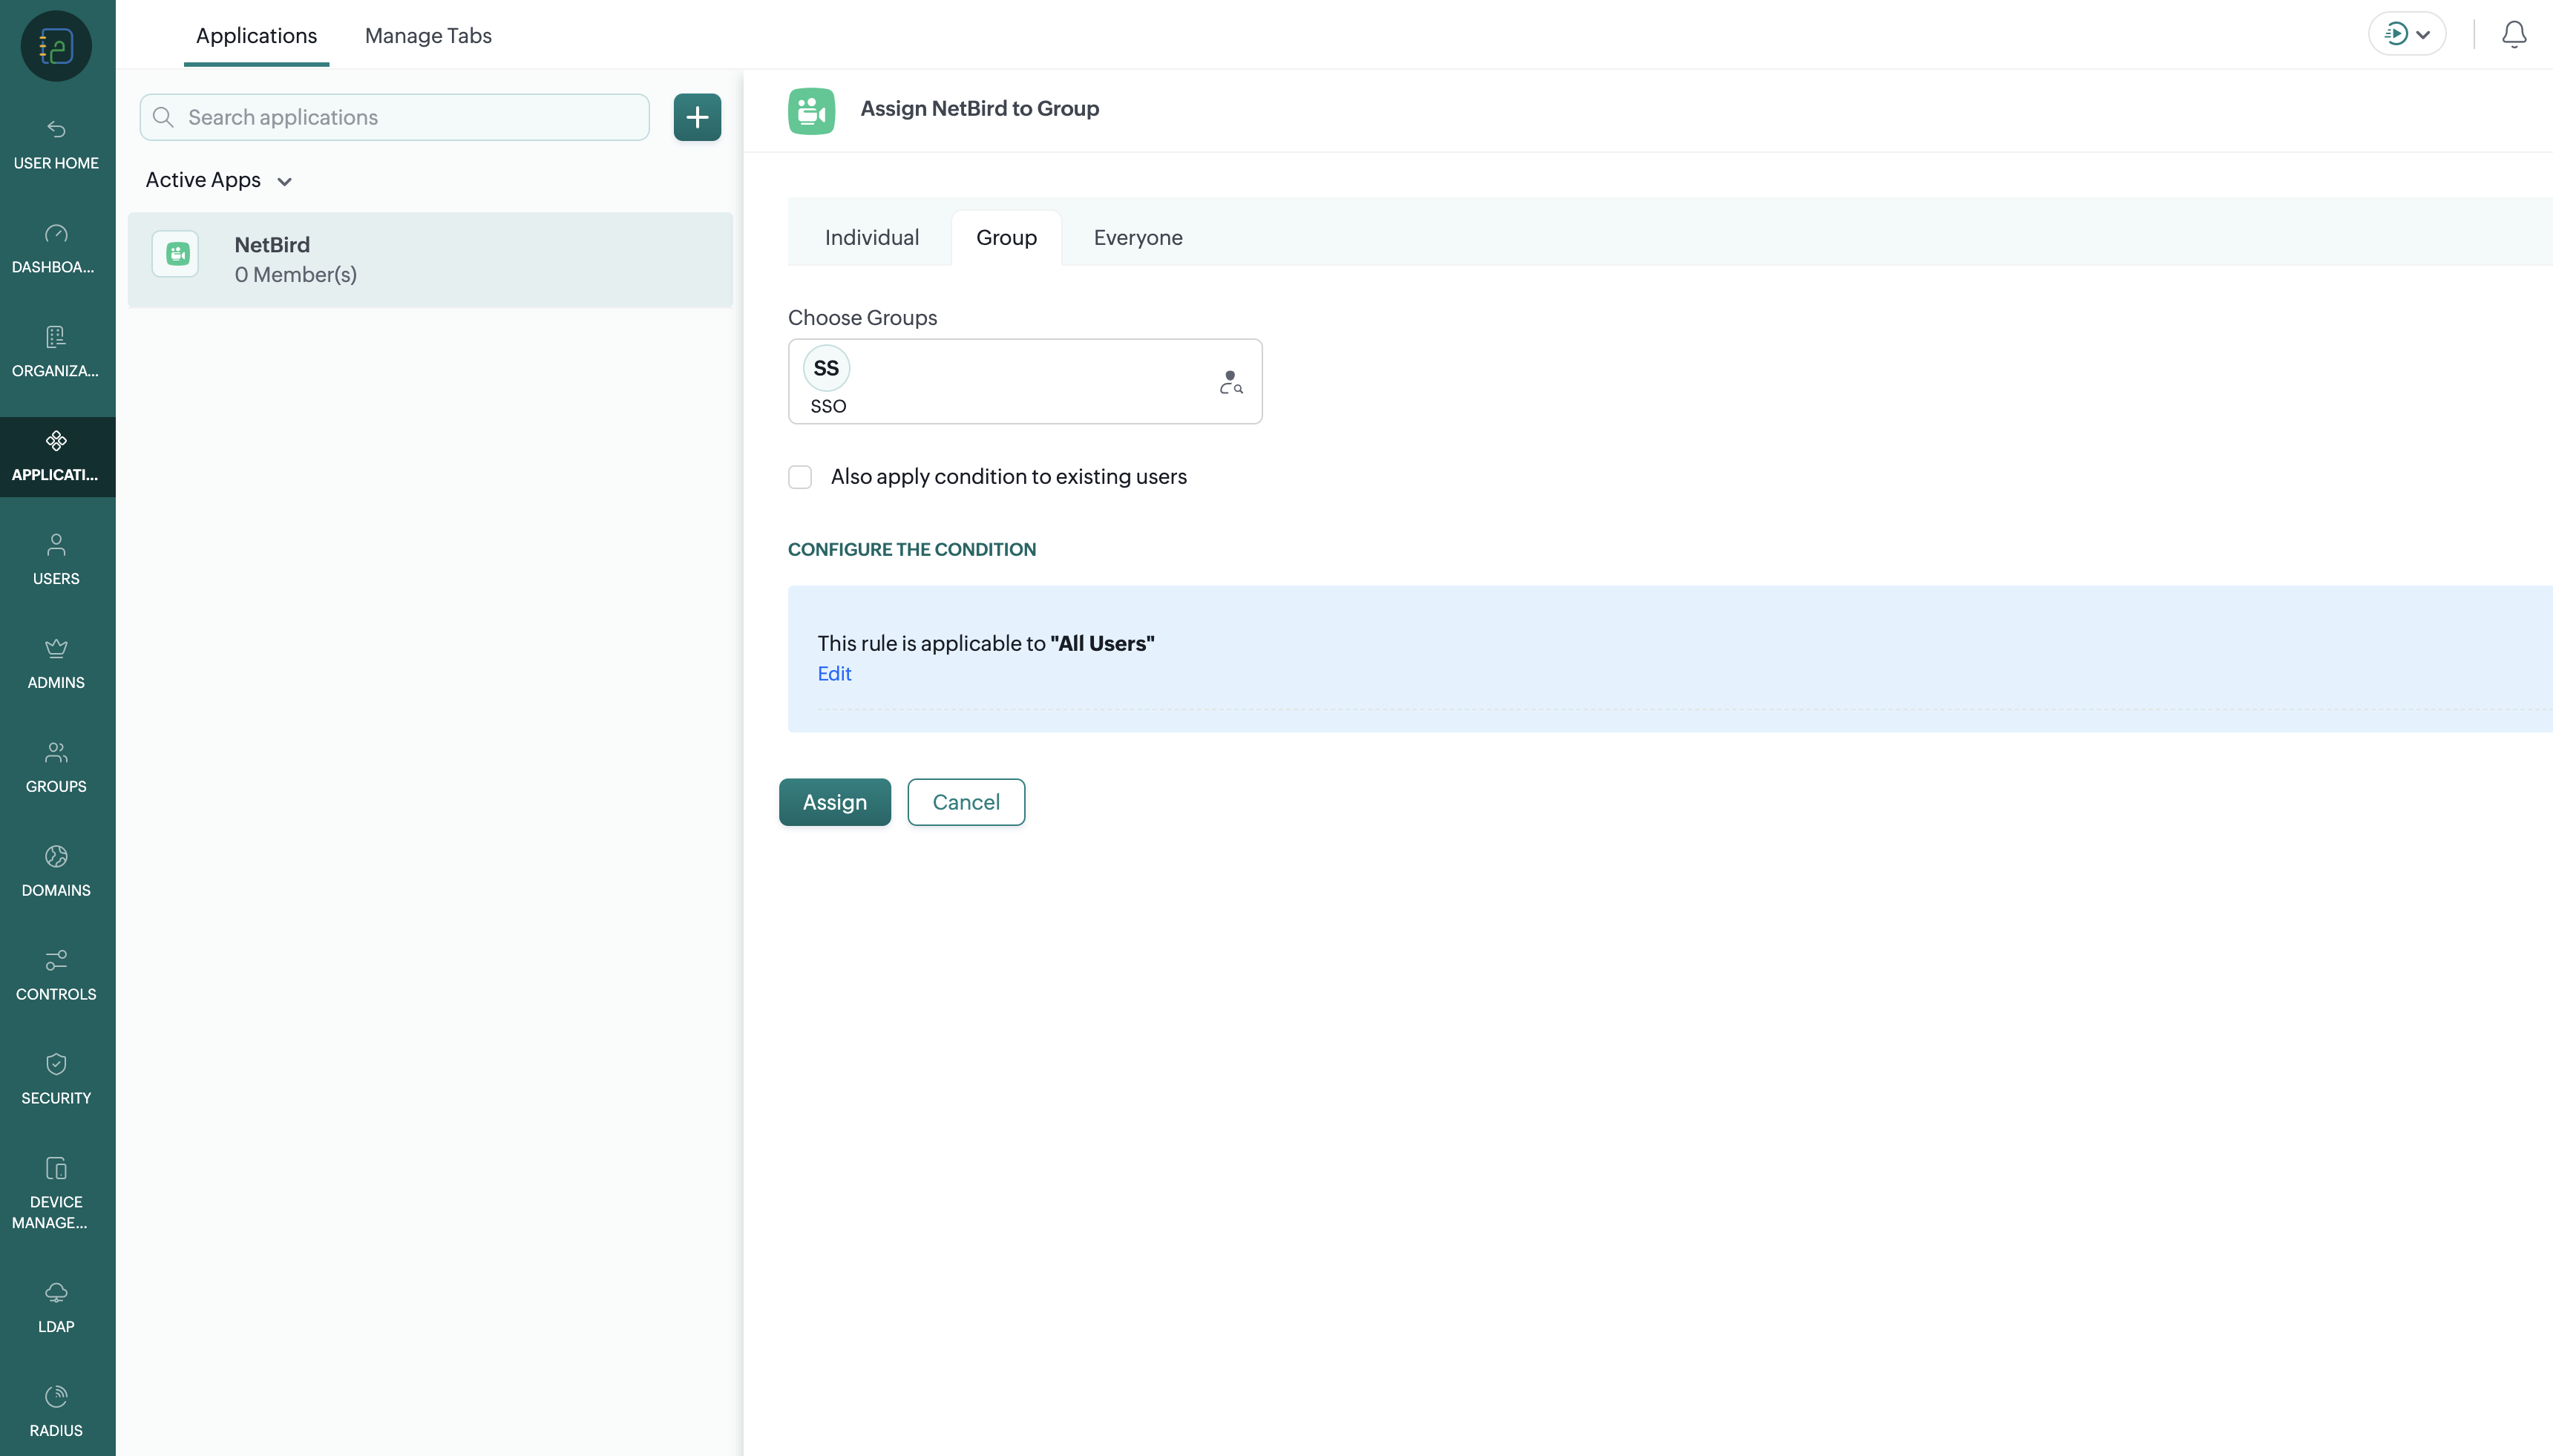
Assign access to the NetBird application so users can sign in to NetBird with Zoho. You can assign individual users with Add User, or assign entire groups with Add Group.
Step 5: Share Configuration with NetBird
Send the following information to the NetBird support team at support@netbird.io:
- Client ID
- Client Secret
- Discovery Endpoint (the OpenID configuration URL you copied in Step 3)
- Email domains for your users
We recommend using a secure channel to share the Client Secret. You can send a separate email and use a secret sharing service like: